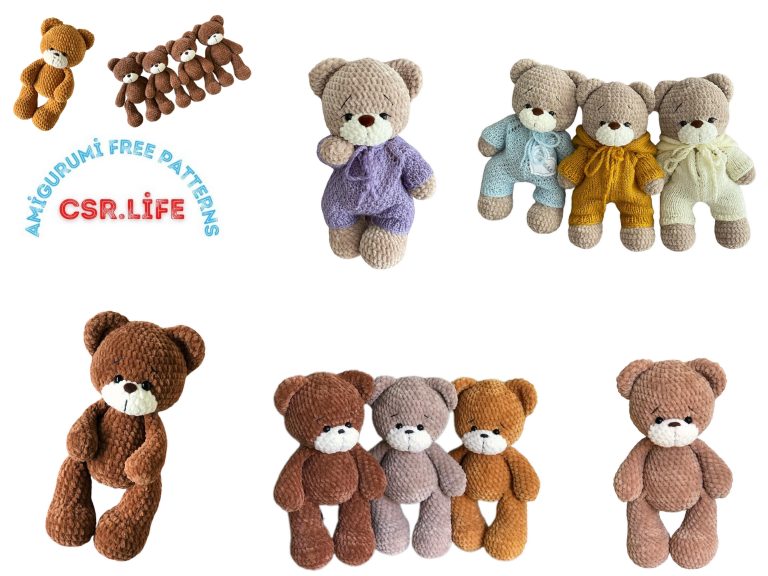
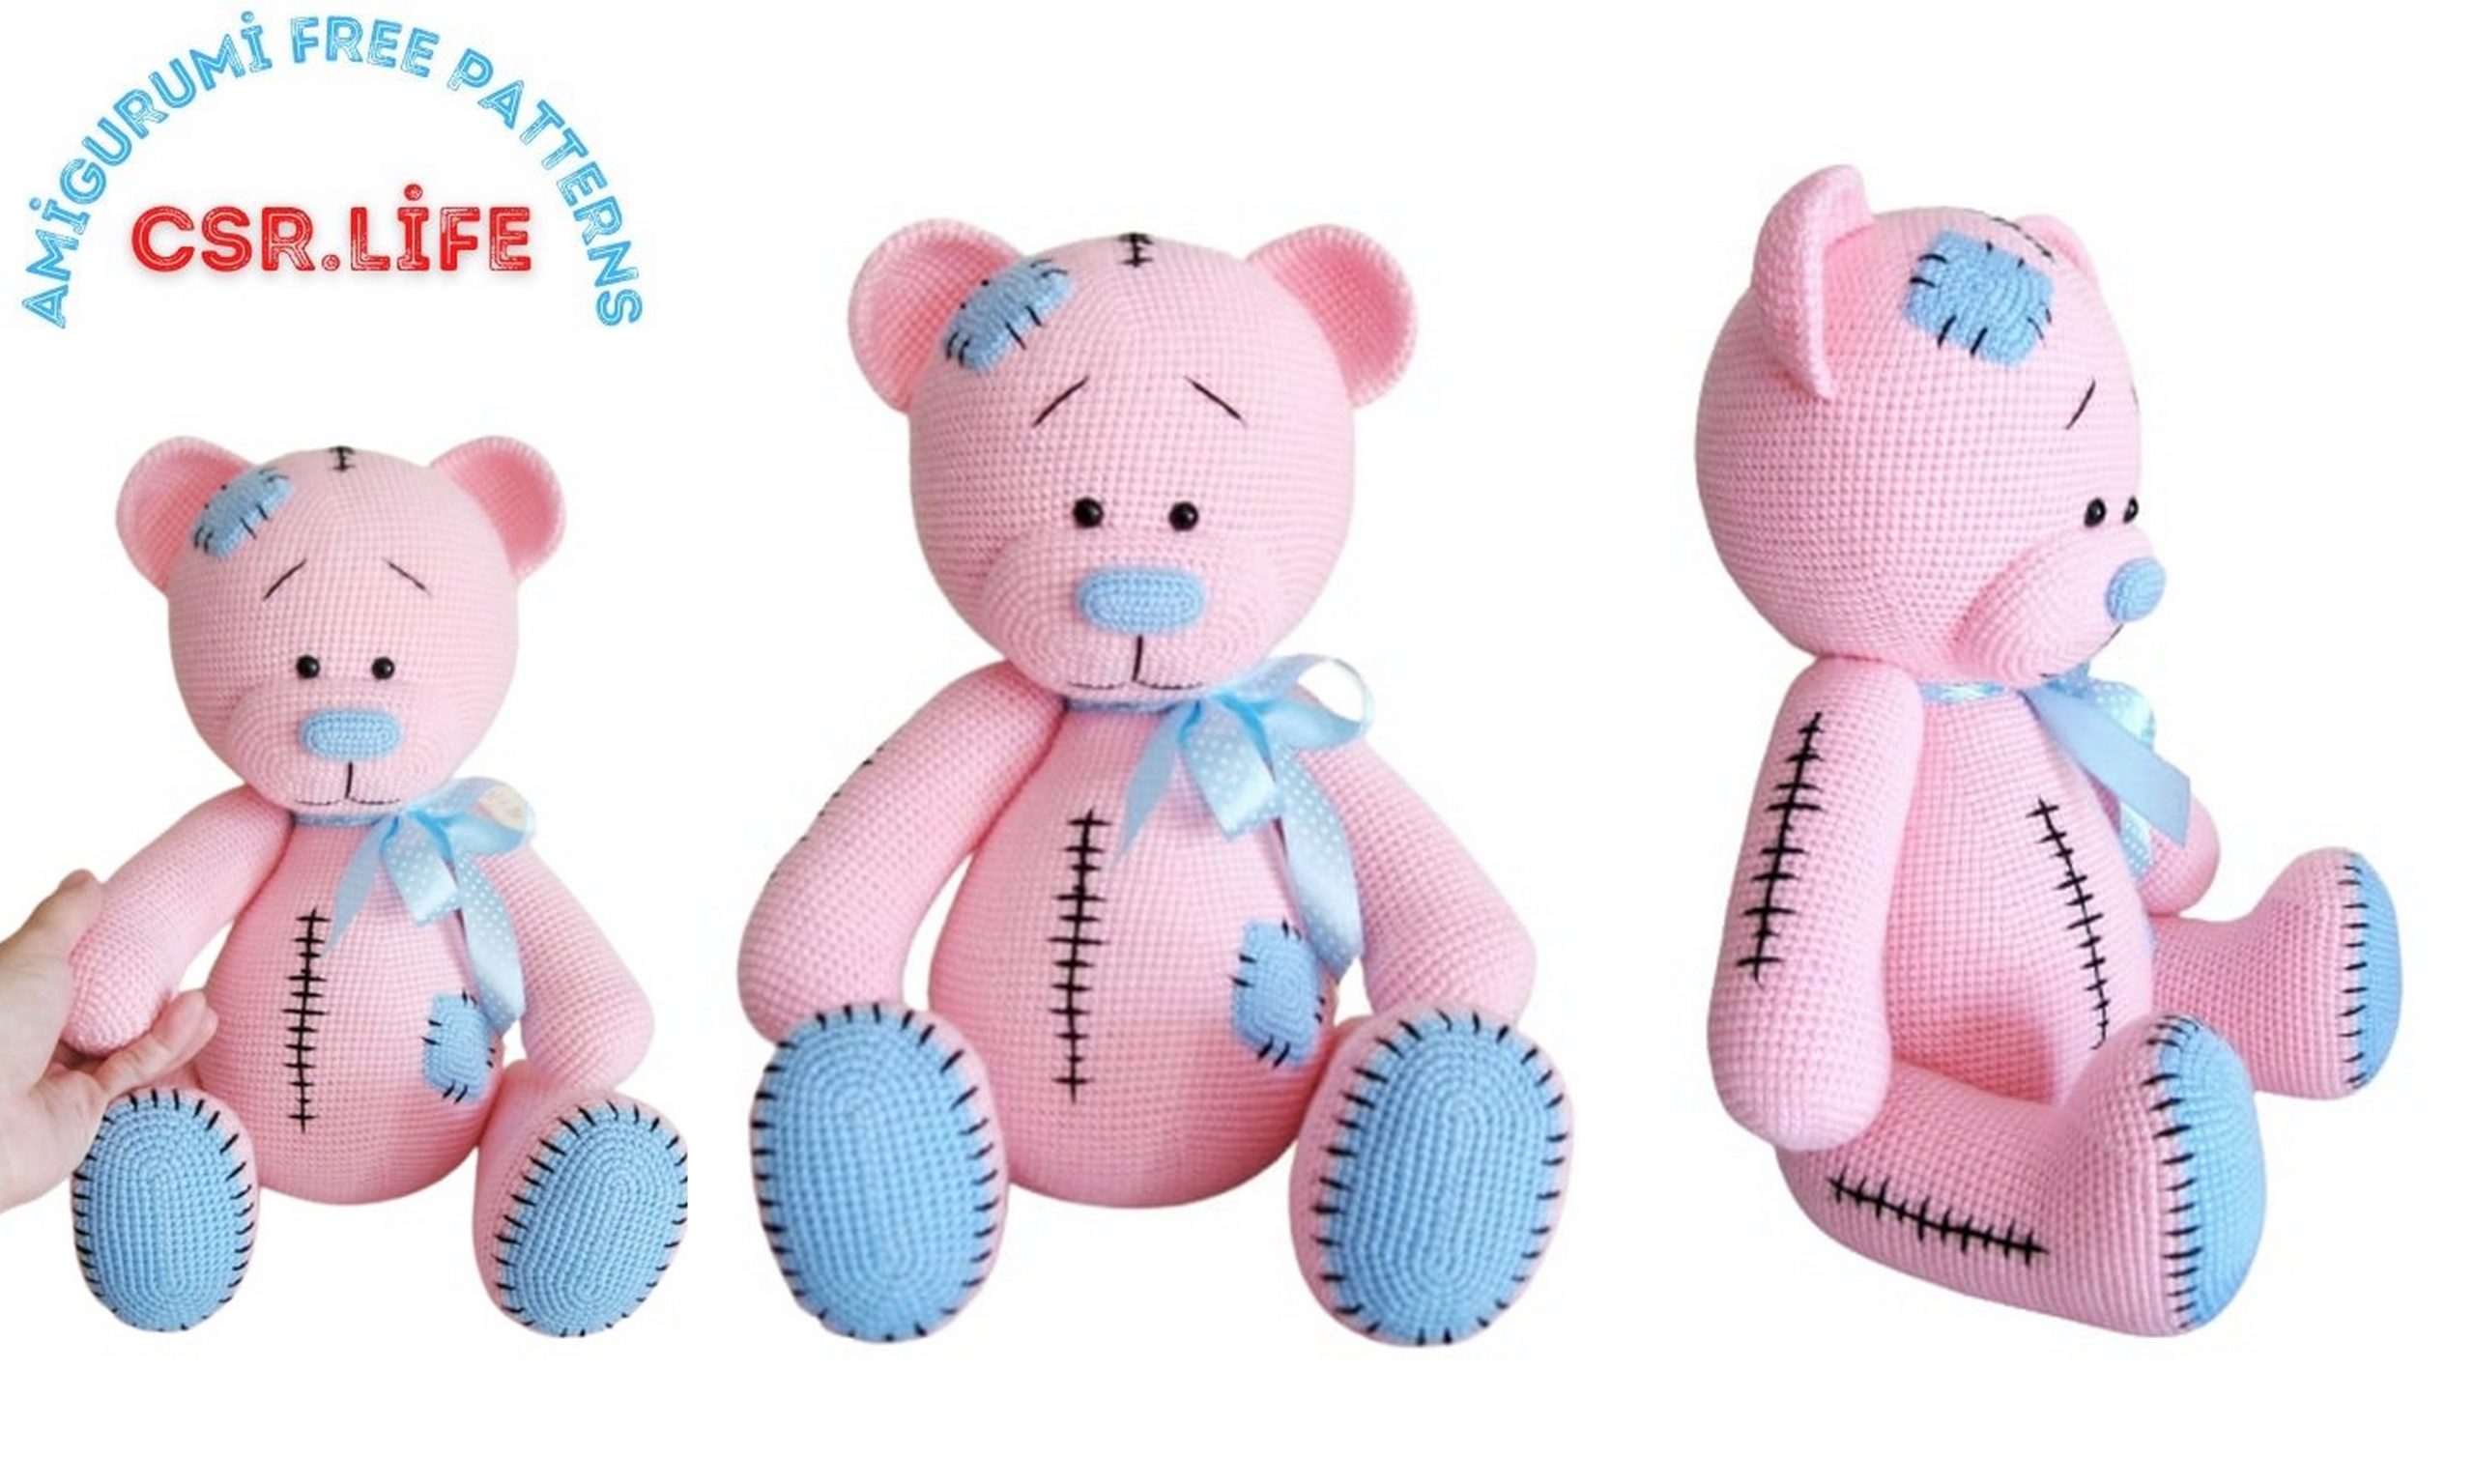
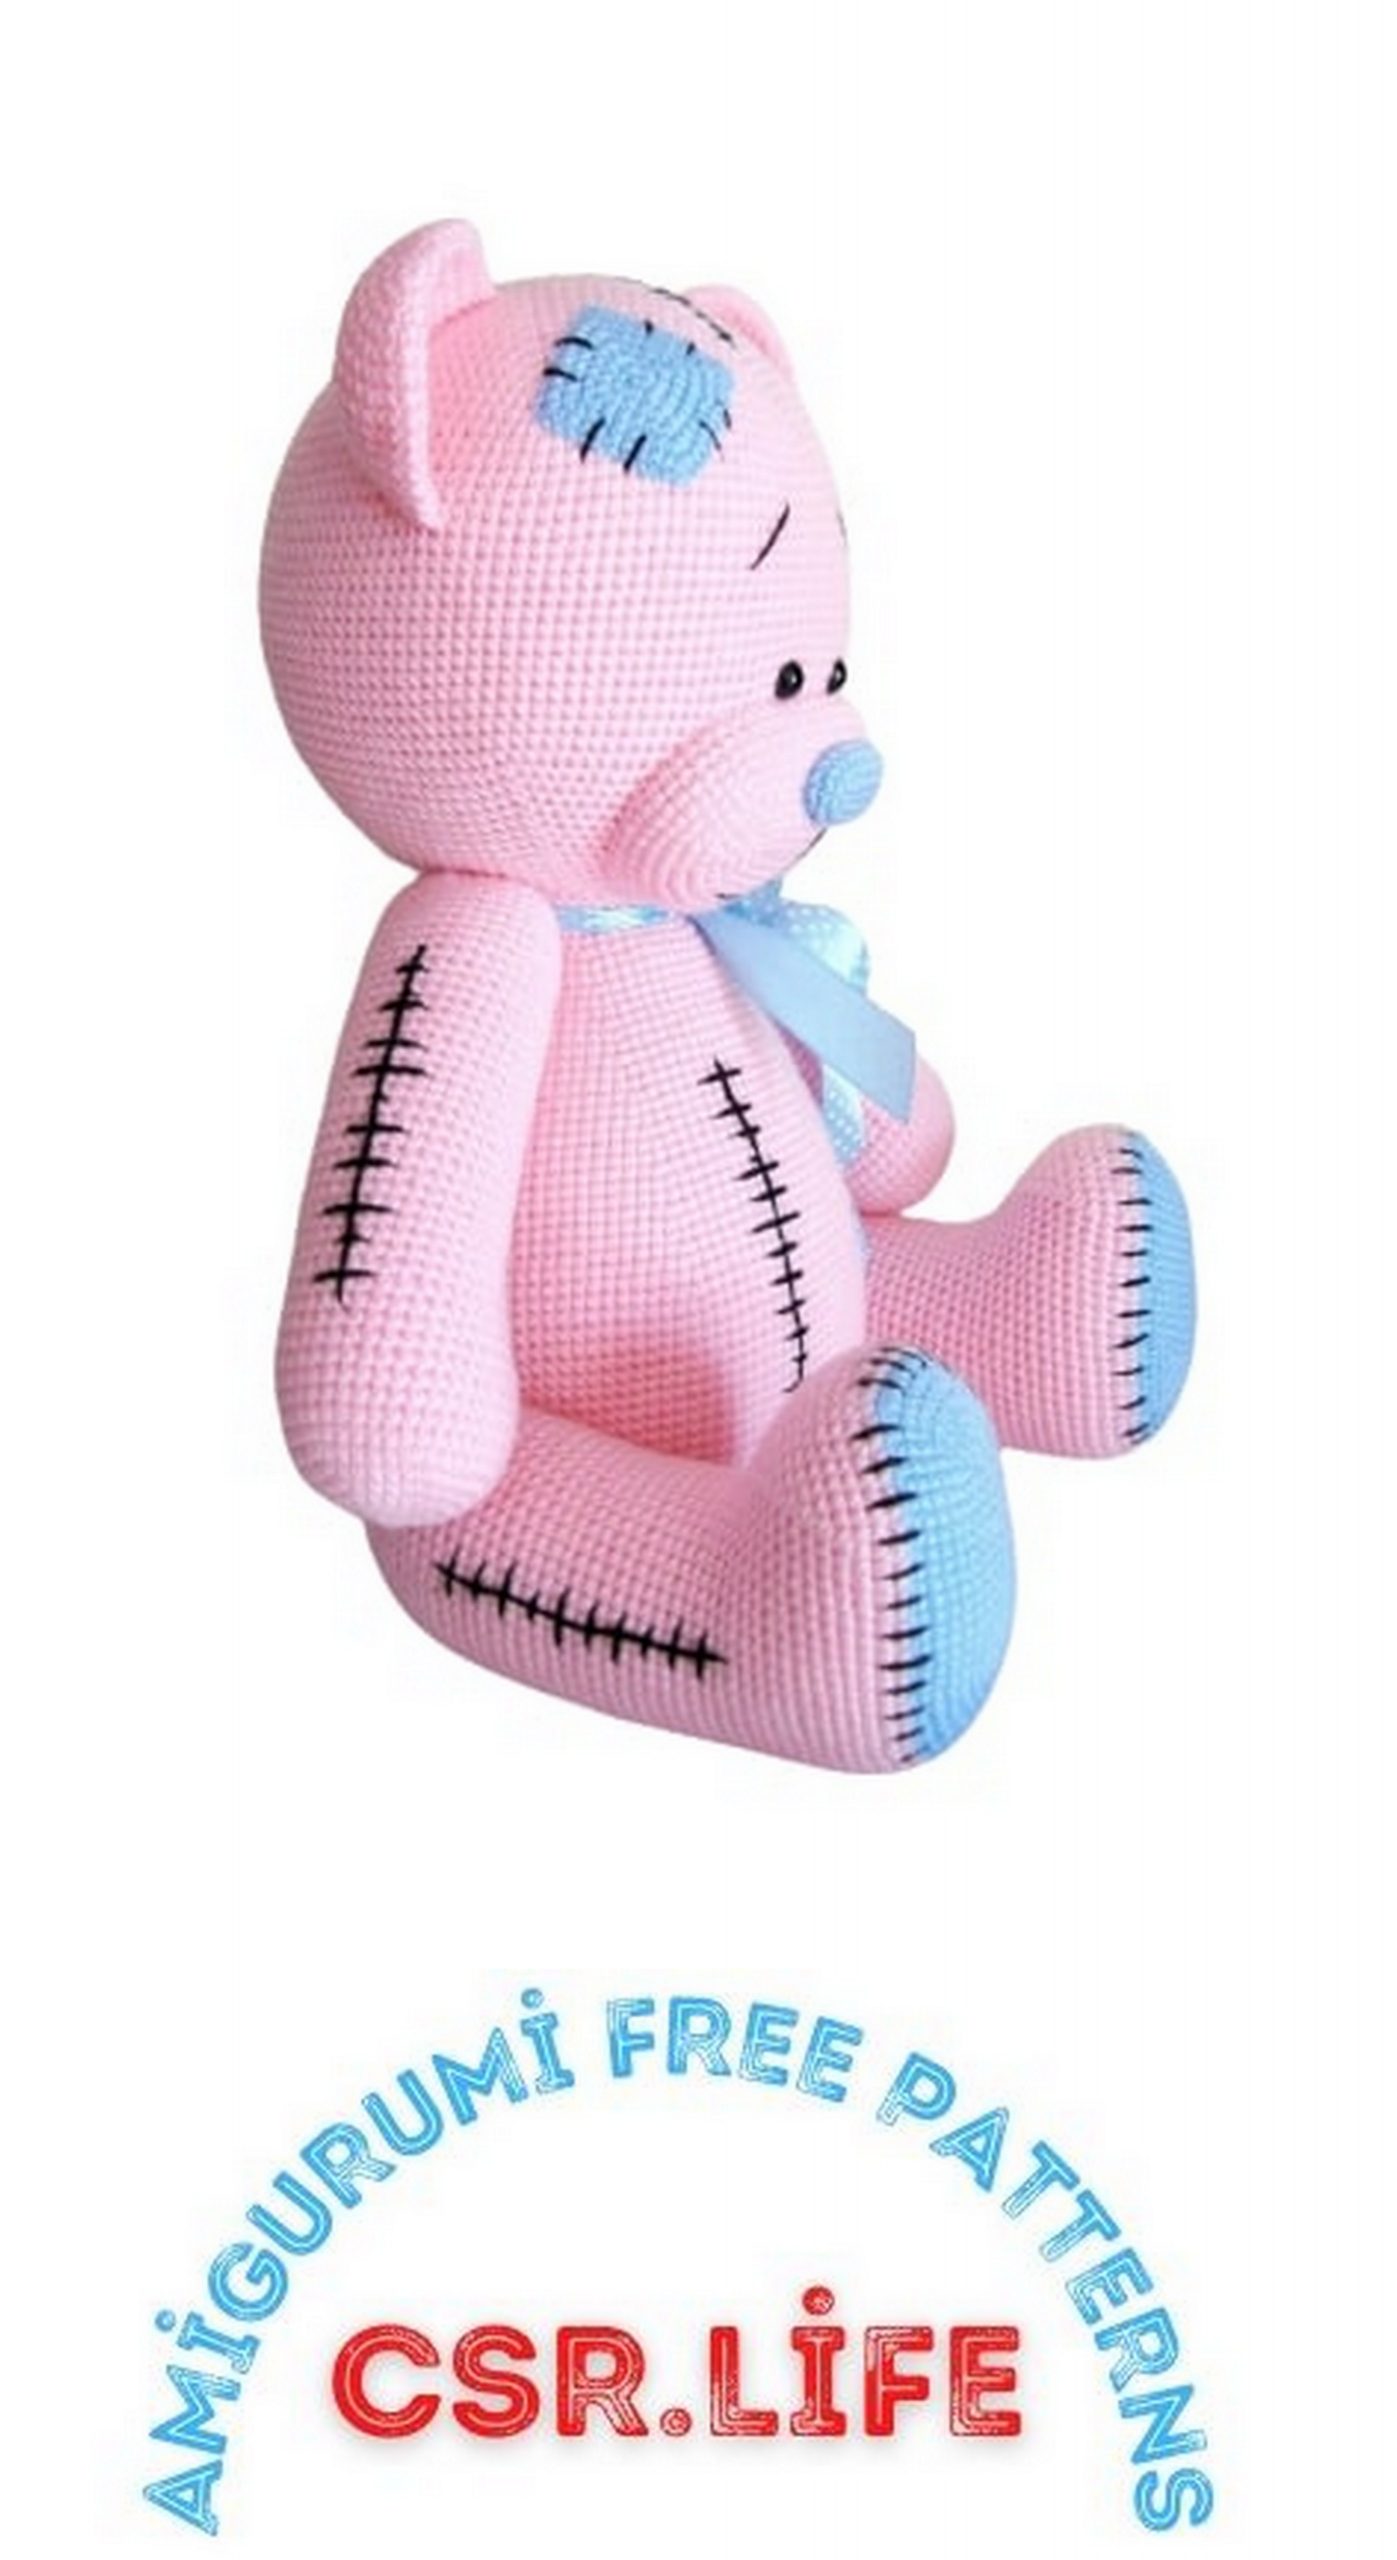
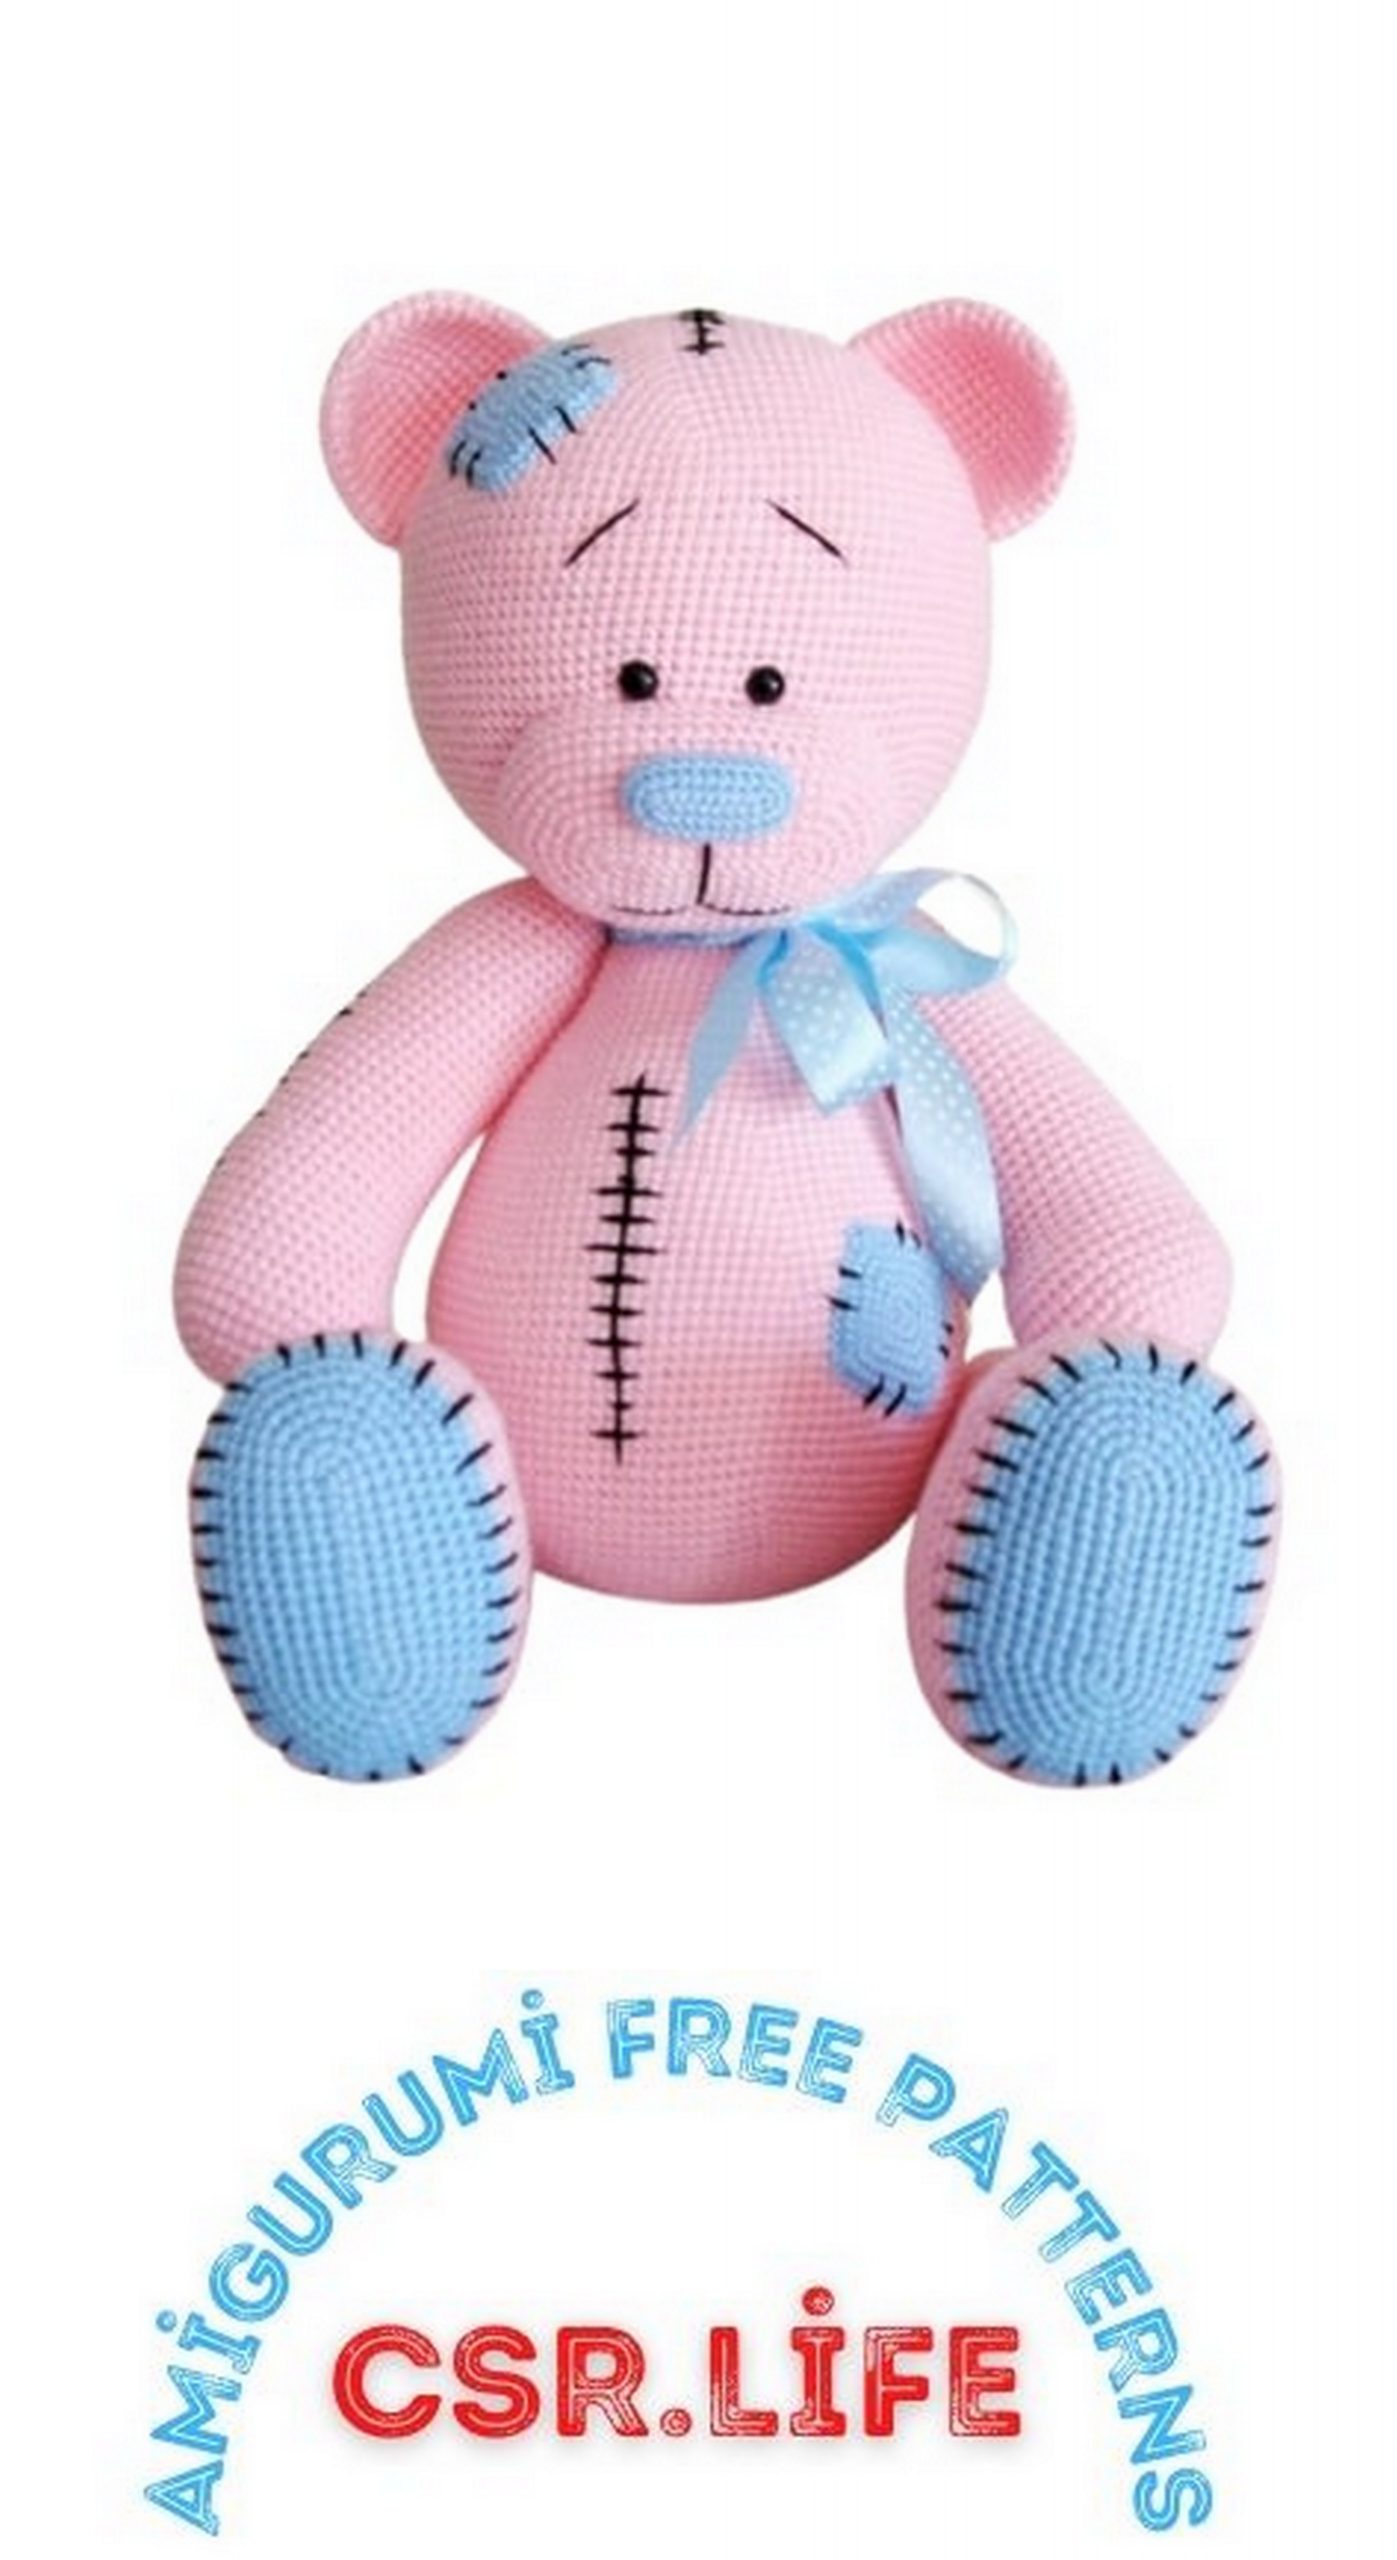
Amigurumi Pink Teddy Bear Free Pattern
We share the best quality amigurumi bear patterns for you free of charge. A wonderful amigurumi bear free pattern is with you in this article.
Teddy bear
(42 cm)
Content
Preparation of materials and tools for work
Legends and recommendations for knitting
Toy creation process
Head and torso
Front legs
Hind legs
Ears
Tail
Muzzle and nose
Patches
Making and assembling toys
Making paws with seams
Sew on the hind legs
Front legs
Ears and muzzle
Final design
Photo of the finished toy
Preparation of materials and tools for work
This master class does not contain knitting lessons.
Basic crochet skills are assumed.
Difficulty level of work – below average
When using the specified materials, the bear will be about 42 cm in
full height and 30 cm when seated
For the bear in this example, the following yarn was used:
Pekhorka “Children’s novelty” light begonia 180 (100% acrylic, 200m / 50 g) –
the main color of the toy. Knitting in one thread. Consumption of about 200 g (you will need about 4 skeins per bear).
You will also need some yarn in the following colors:
Pekhorka “Children’s novelty” Venus shoe 519 (100% acrylic, 280m / 50g).
It will be needed for knitting a spout, patches and soles. Consumption approx. 25 g (half skein)
Pekhorka “Children’s novelty” black 02 (100% acrylic, 200m / 50 g) – for seams, eyebrow and nose embroidery. Any other black yarn of the same thickness will do.
The indicated yarn colors and grades are for guidance only. The color of the bear can be different, according to your wishes.
In addition to yarn, you will need the following materials and tools:
• The hook is one to two sizes smaller than indicated on the skein (in this work, a 1.6 mm hook was used.
• Filler – synthetic winterizer, synthetic fluff or holofiber. This bear took about 400-500 g of synthetic fluff.
• Safety screw eyes – one pair, 9 mm.
Buttons 2 pcs. – about 2 cm in diameter, preferably with four holes for attaching the paws. It can be used, as they will be sewn from the inside.
Satin ribbon around the neck – optional.
Tailor’s pins – for preliminary fastening of parts.
• Needle – for stitching parts.
Long needle – for attaching the bear’s paws
• Threads – for assembling the parts, you will need strong threads to sew in the right colors. However, you can sew parts with yarn that is used to knit a toy. In this case, you will need a large eye or darning needle.
Abbrevations:
vp – chain
SC – single crochet
DEC – (decrease) knit 2 SC together
INC – (increase) knit 2 SC in one loop
Important nuances:
All parts are knitted in a spiral, that is, you do not need to make air loops for lifting. In order not to lose the beginning of each row, with such knitting, a marker should be used.
You can use a handy tool, such as a small pin, paper clip, or contrasting color thread, to mark the start of a row.
Knitting in the amigurumi style should be tight, so a hook is taken one or two sizes less than the thickness of the yarn.
Knitting is done on both sides, unless otherwise specified.
When decreasing, you need not just skip the loop by knitting the next one.
You need to thread both loops and knit them together (as in the diagram below).
Thus, unaesthetic holes can be avoided.
Toy creation process
PATTERN
Head and torso
The head and torso are knitted together starting from the head. The main
pink yarn (or other color of your choice), hook 1.6 mm:
1st row: 6 SC in amigurumi ring (6)
2 row: in each loop 2 SC (12)
3rd row: 1 SC, INC – repeat 6 times (18)
4th row: 2 SC, INC – repeat 6 times (24)
5 row: 3 SC, INC – repeat 6 times (30)
6 row: 4 SC, INC – repeat 6 times (36)
7 row: 5 SC, INC – repeat 6 times (42)
8 row: 6 SC, INC – repeat 6 times (48)
9 row: 7 SC, INC – repeat 6 times (54)
10 row: 8 SC, INC – repeat 6 times (60)
11 row: 9 SC, INC – repeat 6 times (66)
12 row: 10 SC, INC – repeat 6 times (72)
13 row: 11 SC, INC – repeat 6 times (78)
14 row: 12 SC, INC – repeat 6 times (84)
15 row: 13 SC, INC – repeat 6 times (90)
16 row: 14 SC, INC – repeat 6 times (96)
17 row: 15 SC, INC – repeat 6 times (102)
18 row: 16 SC, INC – repeat 6 times (108)
19 row: 17 SC, INC – repeat 6 times (114)
20 row: 18 SC, INC – repeat 6 times (120)
21 row: 19 SC, INC – repeat 6 times (126)
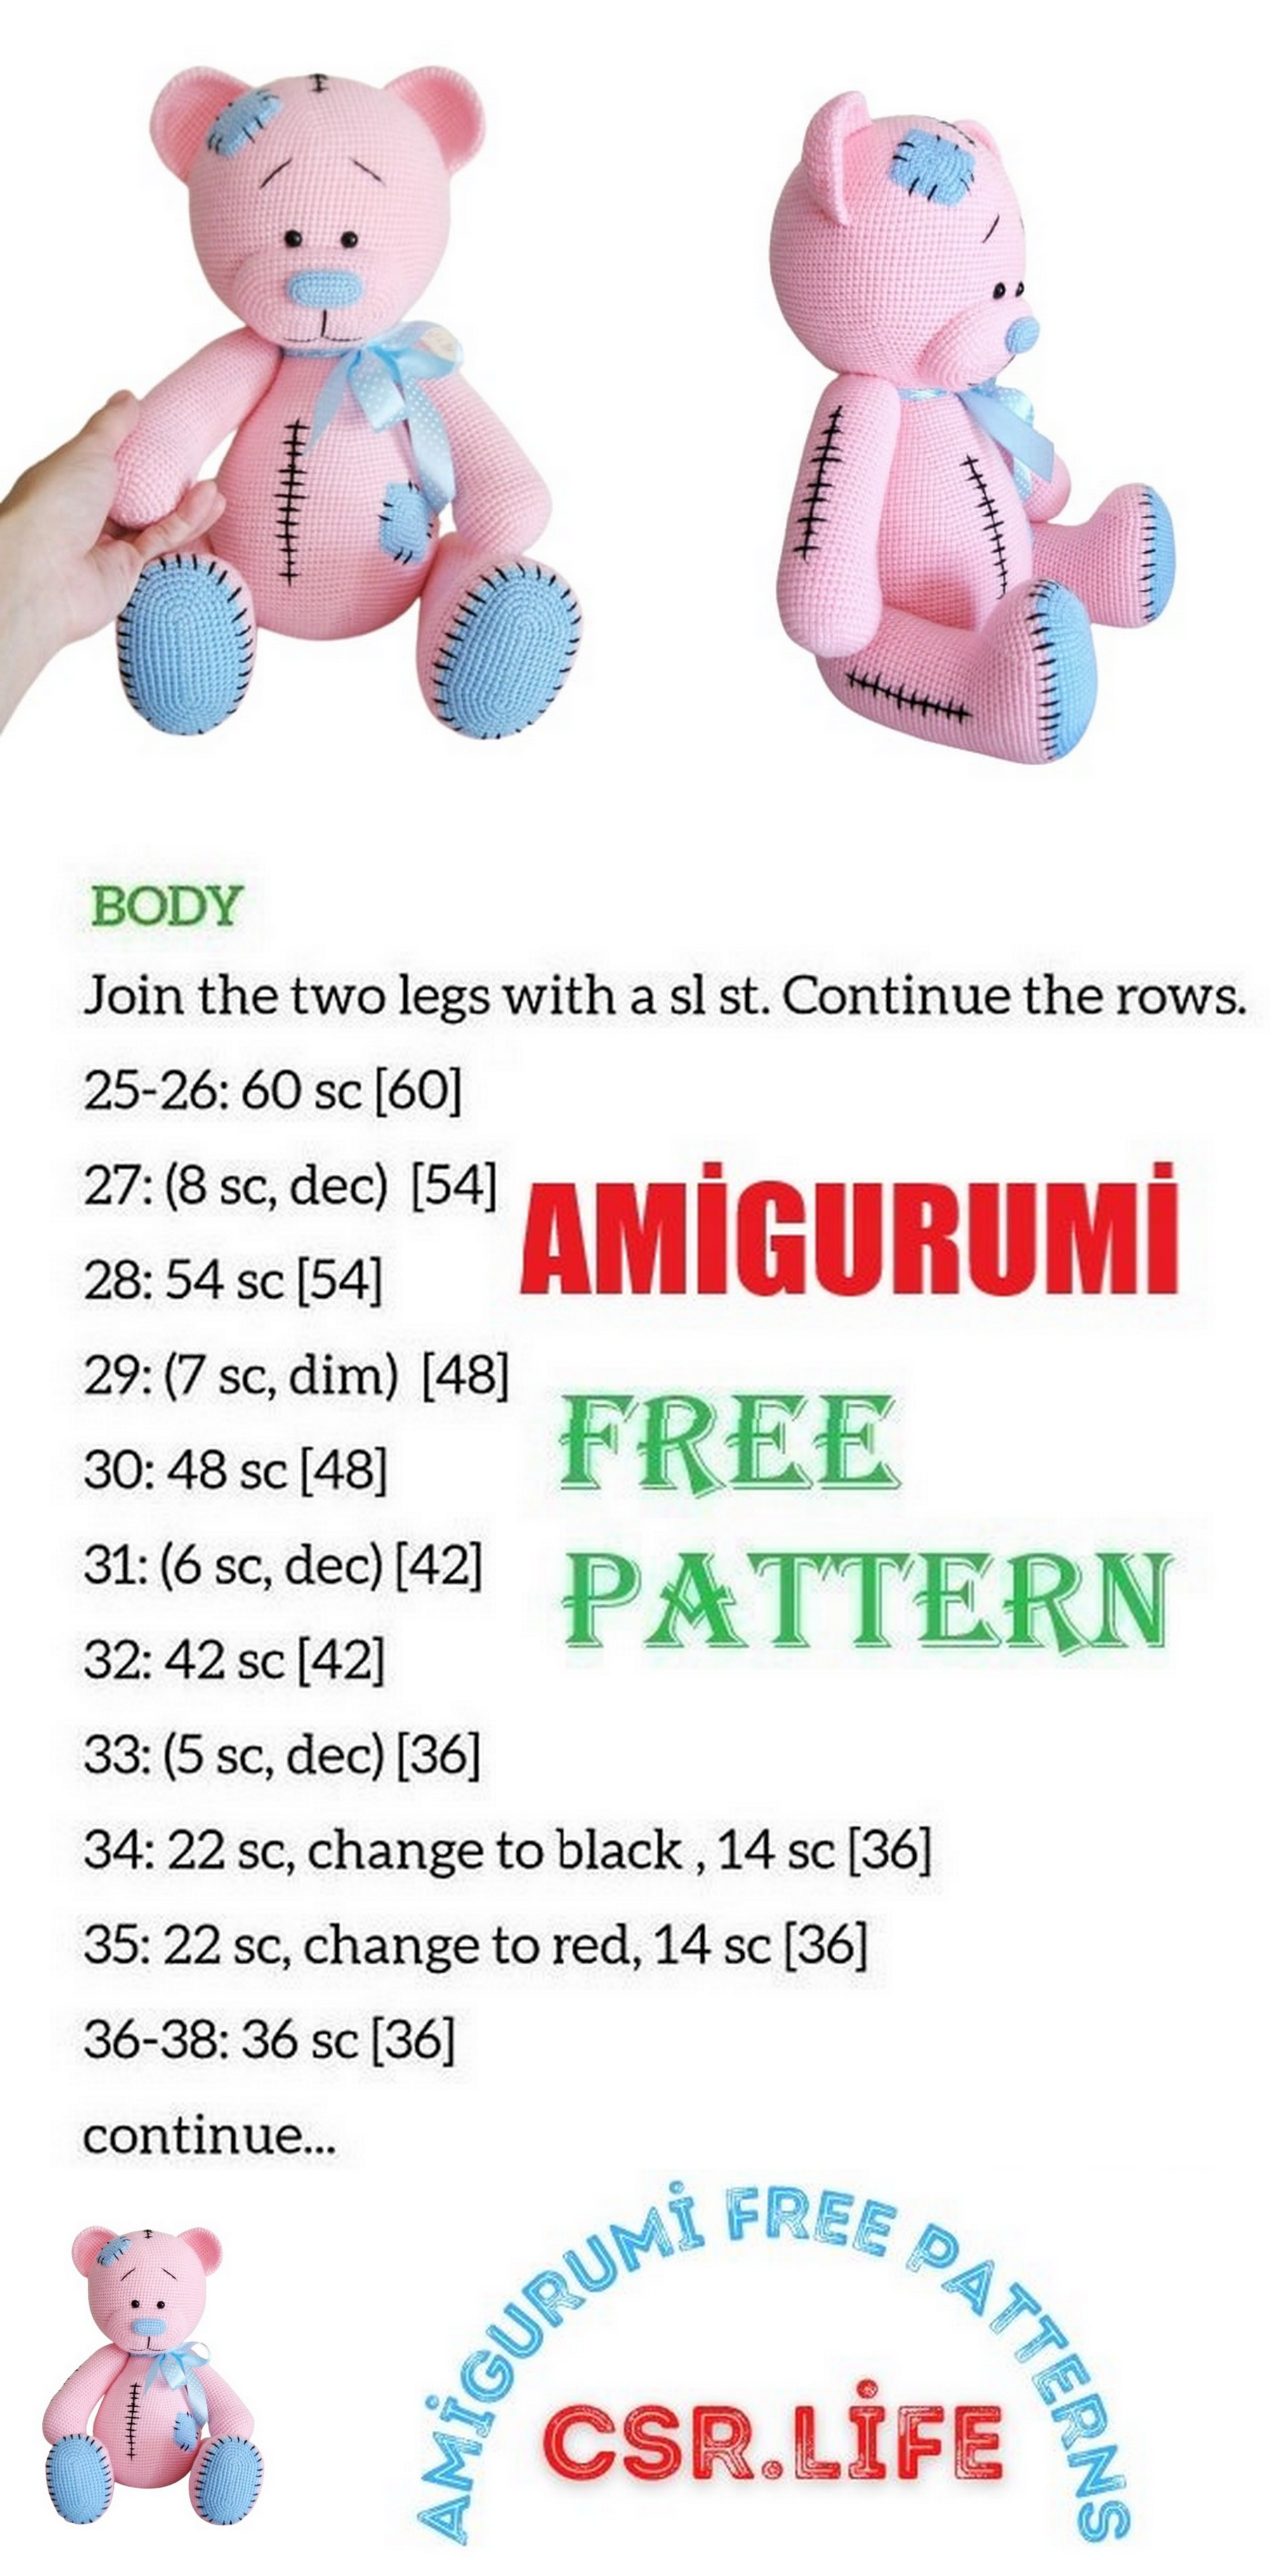
22-42 row: knit in a circle 126 loops (126)
Decreases begin here. It’s time to install the safety eyes (this bear has 9 mm screw eyes). We place the eyes approximately between 37 and 38 rows, the distance between the eyes is about 4-5 loops.
We continue knitting:
43 row: 19 SC, DEC – repeat 6 times (120)
44 row: 18 SC, DEC – repeat 6 times (114)
45 row: 17 SC, DEC – repeat 6 times (108)
46 row: 16 SC, DEC – repeat 6 times (102)
47 row: 15 SC, DEC – repeat 6 times (96)
48 row: 14 SC, DEC – repeat 6 times (90)
49 row: 13 SC, DEC – repeat 6 times (84)
50 row: 12 SC, DEC – repeat 6 times (78)
Row 51: SC 11, DEC – repeat 6 times (72)
Row 52: 10 SC, DEC – repeat 6 times (66)
Row 53: 9 SC, DEC – repeat 6 times (60)
54 row: 8 SC, DEC – repeat 6 times (54)
55 row: 7 SC, DEC – repeat 6 times (48)
56 row: knit in a circle (48)
Here the head passes into the body, the gains begin. You can lightly fill your head with filler.
We continue to knit the torso. Amigurumi additions through two rows:
57 row: 7 SC, INC – repeat 6 times (54)
58-59 row knit in a circle 54 loops (54)
60 row: 8 SC, INC – repeat 6 times (60)
61-62 row: knit in a circle 60 loops (60)
63 row: 9 SC, INC – repeat 6 times (66)
64-65 row: knit in a circle 66 loops (66)
66 row: 10 SC, INC – repeat 6 times (72)
67-68 row: knit in a circle 72 loops (72)
69 row: 11 SC, INC – repeat 6 times (78)
70-71 row: knit in a circle 78 loops (78)
72 row: 12 SC, INC – repeat 6 times (84)
73-74 row: knit in a circle 84 loops (84)
75 row: 13 SC, INC – repeat 6 times (90)
76-77 row: knit in a circle 90 loops (90)
78 row: 14 SC, INC – repeat 6 times (96)
79-80 row: knit in a circle 96 loops (96)
Row 81: 15 SC, INC – repeat 6 times (102)
82-83 row: knit in a circle 102 loops (102)
84 row: 16 SC, INC – repeat 6 times (108)
85-86 row: knit in a circle 108 loops (108)
87 row: 17 SC, INC – repeat 6 times (114)
88-89 row: knit in a circle 114 loops (114)
Row 90: 18 SC, INC – repeat 6 times (120)
91-103 row: knit in a circle 120 loops (120)
104 row: 18 SC, DEC – repeat 6 times (114)
105 row: 17 SC, DEC – repeat 6 times (108)
106 row: 16 SC, DEC – repeat 6 times (102)
107 row: 15 SC, DEC – repeat 6 times (96)
108 row: 14 SC, DEC – repeat 6 times (90)
Row 109: SC 13, DEC – repeat 6 times (84)
110 row: 12 SC, DEC – repeat 6 times (78)
Row 111: SC 11, DEC – repeat 6 times (72)
Row 112: 10 SC, DEC – repeat 6 times (66)
We pause the decrease, leave the hole for attaching the hind legs.
Since the toy is large, and I do not have a needle of sufficient length (more than 20 cm) to sew through the body, we leave a hole and do not close all the loops.
The hole will be needed to secure the hind legs from the inside.
For the front legs, the usual thread fastening is provided, since they are located in a narrower part of the body.
Let’s go back to the decreases and body padding when the hind legs are tied and secured. The attachment of the rear legs is described in the corresponding section on page 17.
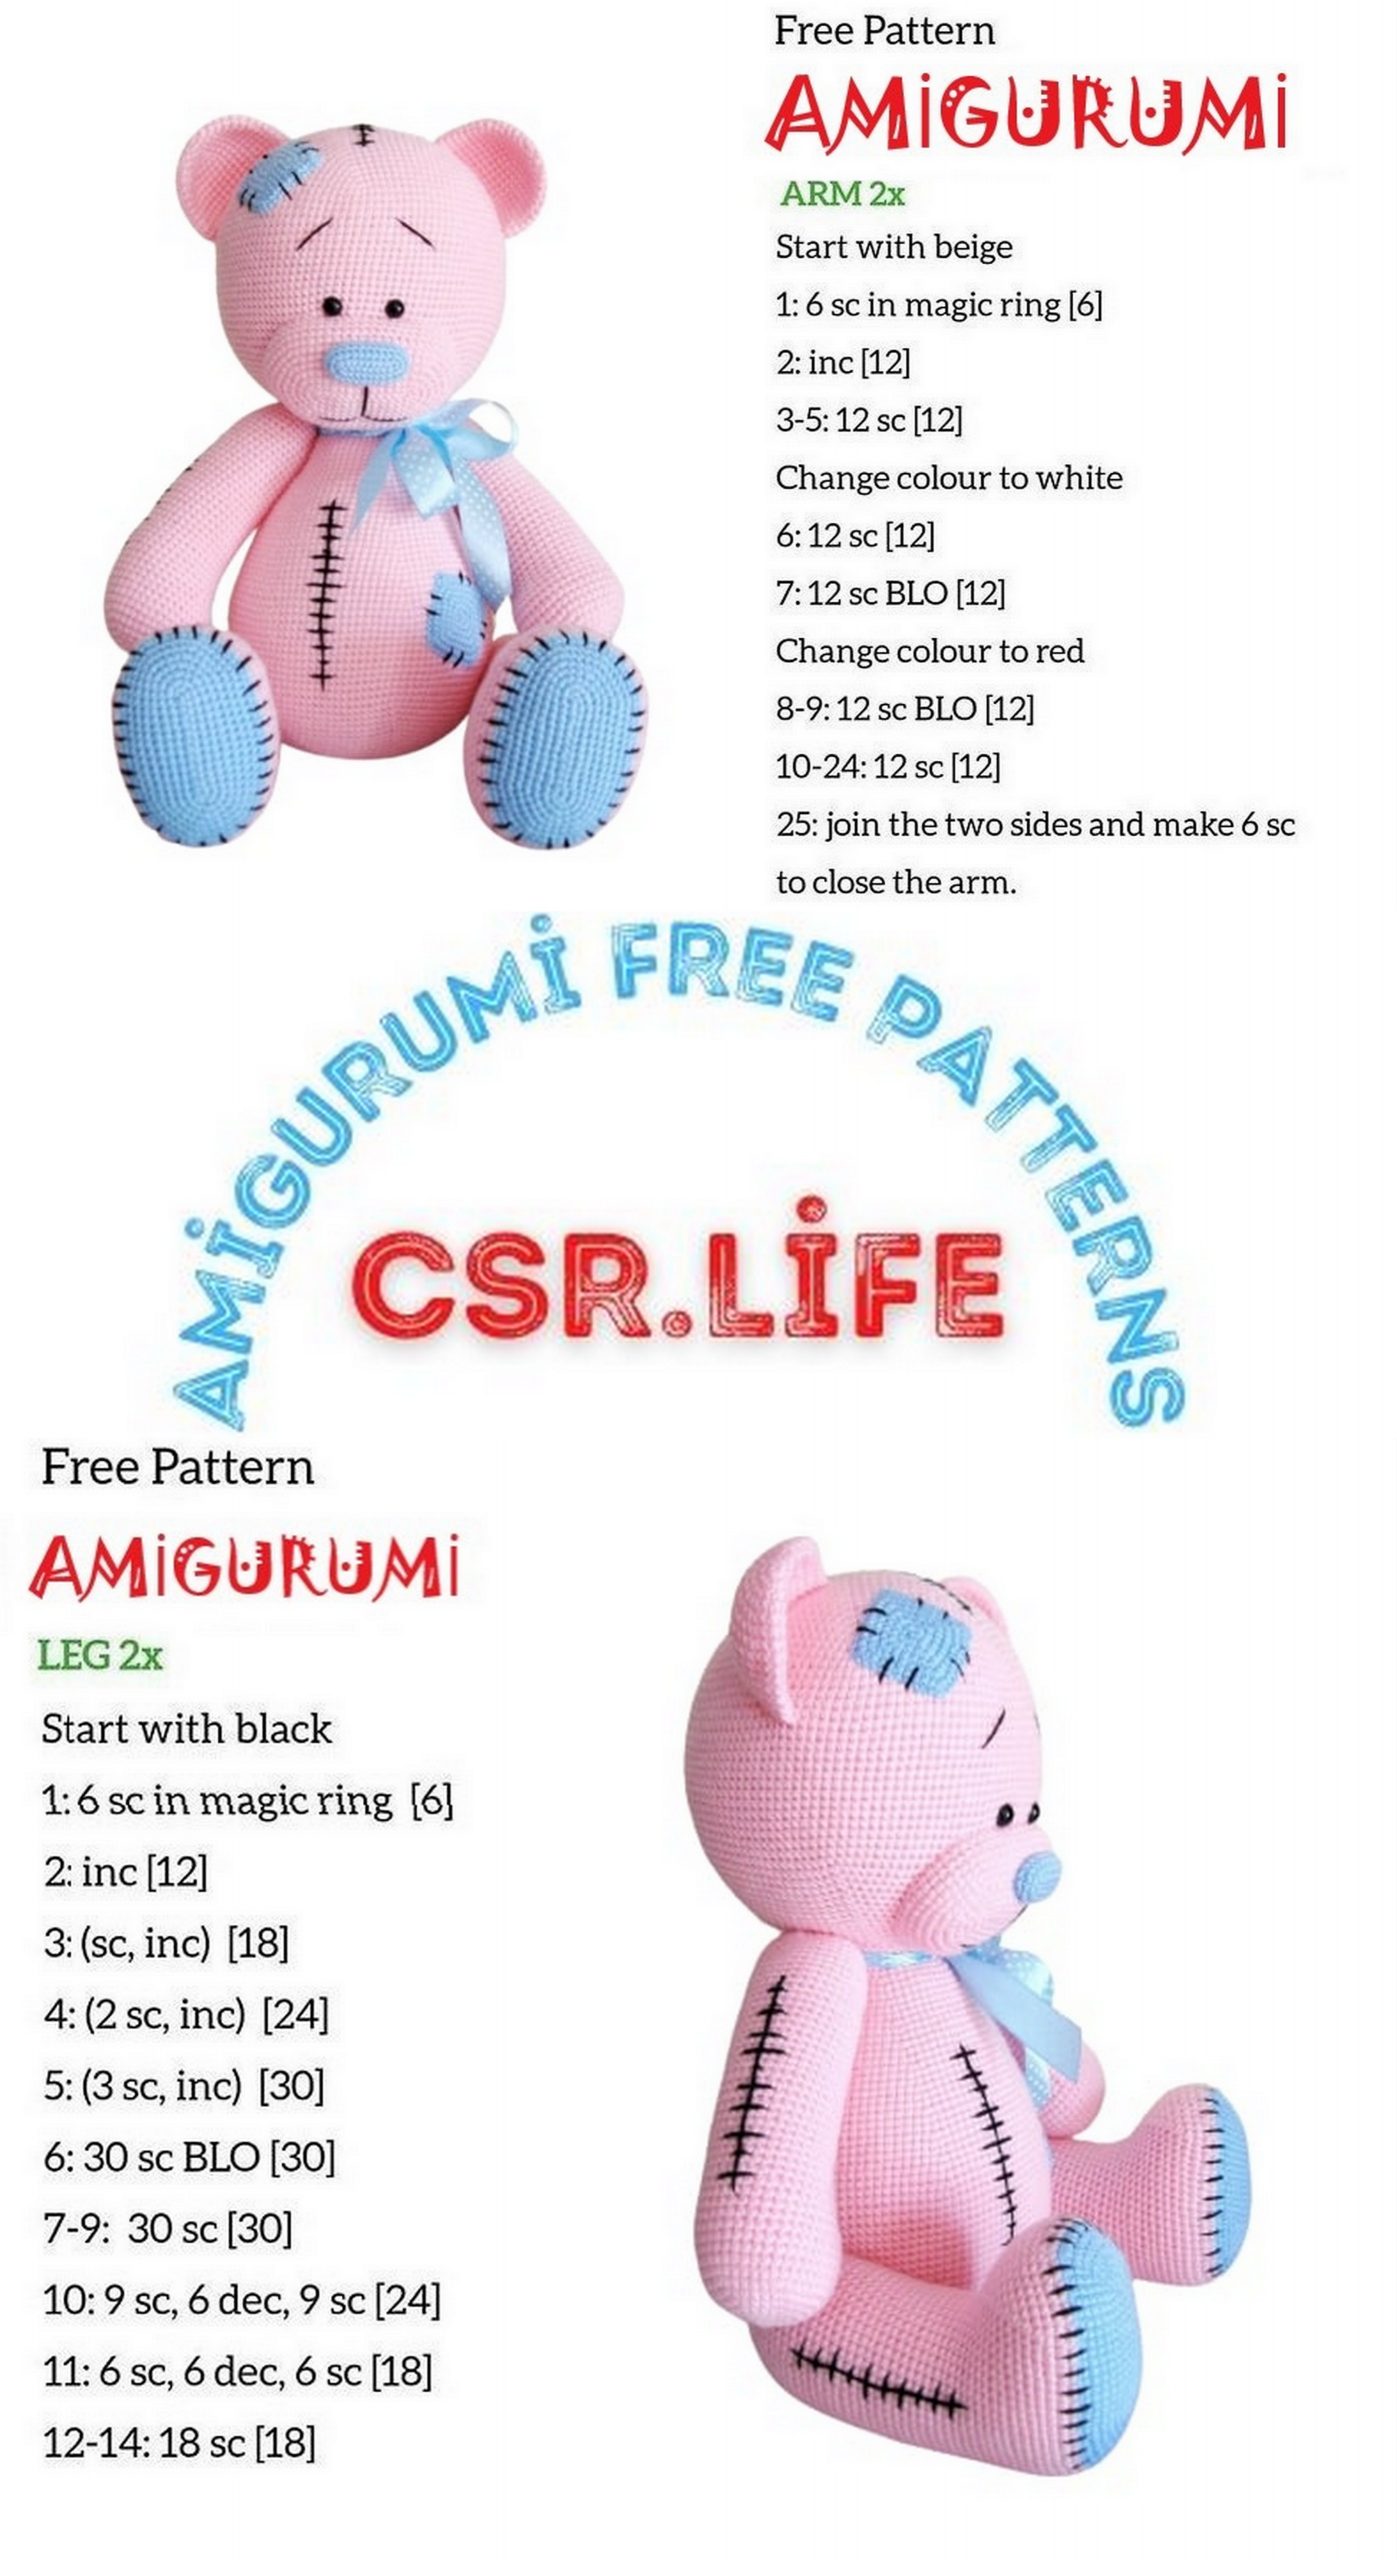
Front legs
We knit the front paws with a thread of the main color, we stuff in the process of knitting:
1st row: 6 SC in amigurumi ring (6)
2 row: in each loop 2 SC (12)
3rd row: 1 SC, INC – repeat 6 times (18)
4th row: 2 SC, INC – repeat 6 times (24)
5 row: 3 SC, INC – repeat 6 times (30)
6 row: 4 SC, INC – repeat 6 times (36)
7 row: 5 SC, INC – repeat 6 times (42)
8-13 row: knit in a circle 42 loops (42)
Row 14: DEC – repeat 6 times; 30 SC (36)
15 – 46 row: knit in a circle 36 loops (36)
47 row: 4 SC, DEC – repeat 6 times (30)
48 row: 3 SC, DEC – repeat 6 times (24)
49 row: 2 SC, DEC – repeat 6 times (18)
50 row: 1 SC, DEC – repeat 6 times (12)
Row 51: DEC – repeat 6 times (6)
Cut off the thread, tighten the hole. We knit the second paw in the same way.
Hind legs
We start with an oval sole, using a blue yarn or another contrasting color:
1-8 row we knit according to the amigurumi oval scheme given below
Change the thread to the main color. The place where the thread is changed will be considered the “heel” of the future paw. We fill the part while knitting.
9 row: 72 SC with light gray thread for the back wall (72)
10-11 row: knit in a circle 72 SC for both walls (72)
Note: When knitting in the amigurumi style, the loops are constantly shifting, therefore, I choose the beginning of the row visually, by finding the center of the “heel”. Draw a visual line along the oval and find the middle, as in the photo on the right. The resulting point will be the beginning of knitting, here you need to fix a special knitting marker or thread of a contrasting color. Further counting of loops from the 12th row will be carried out from this place.
12 row: 23 SC, DEC, 22 SC, DEC, 23 SC (70)
13 row: 23 SC, DEC, 20 SC, DEC, 23 SC (68)
14 row: 23 SC, DEC, 18 SC, DEC, 23 SC (66)
15 row: 23 SC, DEC, 16 SC, DEC, 23 SC (64)
16 row: 23 SC, DEC, 14 SC, DEC, 23 SC (62)
17 row: 23 SC, DEC, 12 SC, DEC, 23 SC (60)
18 row: 23 SC, DEC, 10 SC, DEC, 23 SC (58)
19 row: 23 SC, DEC, 8 SC, DEC, 23 SC (56)
20 row: 23 SC, DEC, 6 SC, DEC, 23 SC (54)
21 row: 23 SC, DEC, 4 SC, DEC, 23 SC (52)
22 row: 23 SC, DEC, 2 SC, DEC, 23 SC (50)
23 row: 23 SC, 2DEC, 23SC (48)
24-47 row: knit in a circle 48 SC (48)
48 row: 6 SC, DEC – repeat 6 times (42)
49 row: 5 SC, DEC – repeat 6 times (36)
50 row: 4 SC, DEC – repeat 6 times (30)
51 row: 3 SC, DEC – repeat 6 times (24)
Row 52: 2 SC, DEC – repeat 6 times (18)
53 row: 1 SC, DEC – repeat 6 times (12)
Row 54: DEC – repeat 6 times (6)
Cut off the thread, tighten the hole. We knit the second paw in the same way.
Ears
We knit ears with basic yarn
(2 parts):
1st row: 6 SC in amigurumi ring (6)
2 row: in each loop 2 SC (12)
3rd row: 1 SC, INC – repeat 6 times (18)
4th row: 2 SC, INC – repeat 6 times (24)
5 row: 3 SC, INC – repeat 6 times (30)
6 row: 4 SC, INC – repeat 6 times (36)
7 row: 5 SC, INC – repeat 6 times (42)
8-14 row: knit in a circle 42 SC (42)
Cut the thread to a sufficient length.
Fold the ears into a flat shape and sew the edges.
Tail
1st row: 6 SC in amigurumi ring (6)
2 row: in each loop 2 SC (12)
3rd row: 1 SC, INC – repeat 6 times (18)
4th row: 2 SC, INC – repeat 6 times (24)
5 row: 3 SC, INC – repeat 6 times (30)
6-9 row: knit in a circle 30 SC (30)
Cut off the thread, leaving enough margin for sewing on the tail.
Muzzle and nose
We knit an oval muzzle according to the scheme.
We start with a set of 13 chain loops.
From 1 to 7 rows we knit in a spiral with single crochets, adding three loops at the edges of the oval. From 8 to 11 row we do not make an increase, we knit 62 resulting loops in a circle with single crochet.
Blue yarn is used for the knitted nose. In this example Pekhorka “Children’s novelty” color is a lady’s slipper.
The nose is knitted according to the following pattern:
Patches
Patch squares can be cut out of felt, or crocheted with a square motif. I used the same yarn as for knitting the sole. We knit two identical parts.
Knitting a square motif is performed according to the scheme:
Making and assembling toys
Making paws with seams
All the details are connected, you can start assembling and decorating the toy.
While the bear is disassembled, it is convenient to arrange the details with stitches. Using black yarn, we embroider “scars” on the legs, make stitches on the soles.
Sew on the hind legs Sew on the hind legs from the inside. For strength on the inside of the body, the seam is reinforced with a button. Finished, well-padded hind legs are sewn through. For the work, we used a yarn of the main color in two folds and a long darning needle. We evenly place the legs approximately on the line of the beginning of the decrease in the body.
To prevent the paw from feeling tight and for greater aesthetics, the needle is pulled out between the loops and carefully inserted into the same hole. This will place the stitches inside the paw.
We make enough movement with the needle for a firm connection. We pull the thread tightly to press the paw to the body.
Helping with pliers
Fixing and cutting the thread
Similarly, we fix the second paw
The paws are sewn on, you can fill the body and close the loops of the body as described.
Body decreases (continued). We fill with filler in the process
113 row: 9 SC, DEC – repeat 6 times (60)
114 row: 8 SC, DEC – repeat 6 times (54)
115 row: 7 SC, DEC – repeat 6 times (48)
Row 116: SC 6, DEC – repeat 6 times (42)
117 row: 5 SC, DEC – repeat 6 times (36)
118 row: 4 SC, DEC – repeat 6 times (30)
119 row: 3 SC, DEC – repeat 6 times (24)
120 row: 2 SC, DEC – repeat 6 times (18)
Row 121: 1 SC, DEC – repeat 6 times (12)
Row 122: DEC – repeat 6 times (6)
Cut off the thread, tighten the hole. The body of the bear is ready.
Front legs
The front legs are sewn through the body. Here you will need a long needle and the same yarn that was used to knit the bear.
The main thing here is to evenly position the legs and not pull the body too tightly.
To avoid tightness in the shoulder area, the needle is also inserted and withdrawn in the same place between the loops so that the stitches remain inside.
We sew the paws as accurately and firmly as possible, making a sufficient number of movements with the needle.
Ears and muzzle
The finished nose is sewn to the muzzle.
It is more convenient to use sewing thread of a suitable blue color, but you can sew the parts with blue yarn from which the nose is tied.
Sew the muzzle neatly and symmetrically to the head, close to the eyes. Do not forget to fill the face with synthetic fluff.
After sewing, embroider a vertical strip in the center of the muzzle and mouth.
We hide the knots in an inconspicuous place, for example, at the sewing joint of the muzzle.
Final design
Sew on the patches to the head and abdomen with threads of a suitable color, decorate the edges of the patches with black yarn. We embroider the stitches on the stomach and head.
Shaping the eyebrows
Sew on the ears and tail