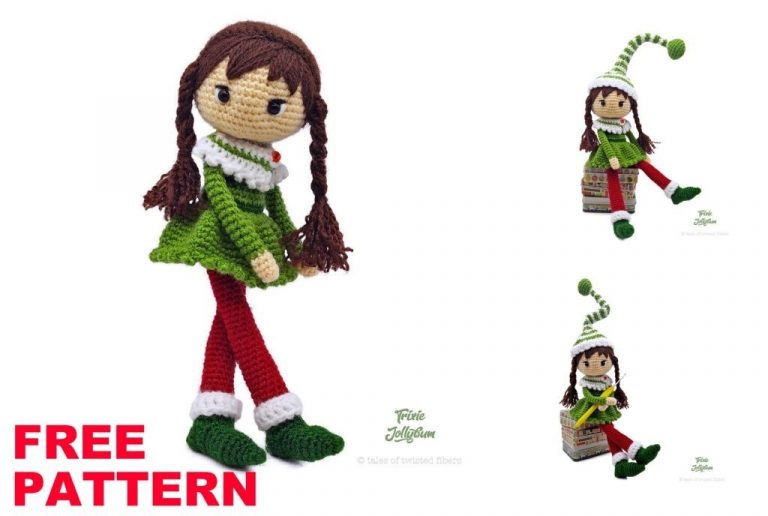
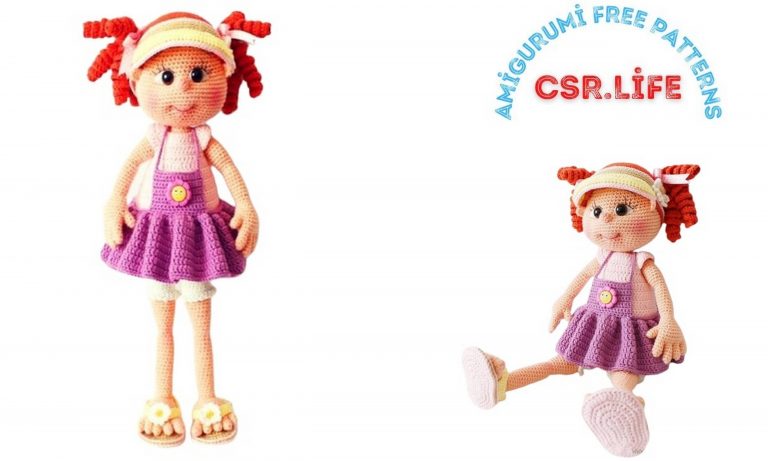
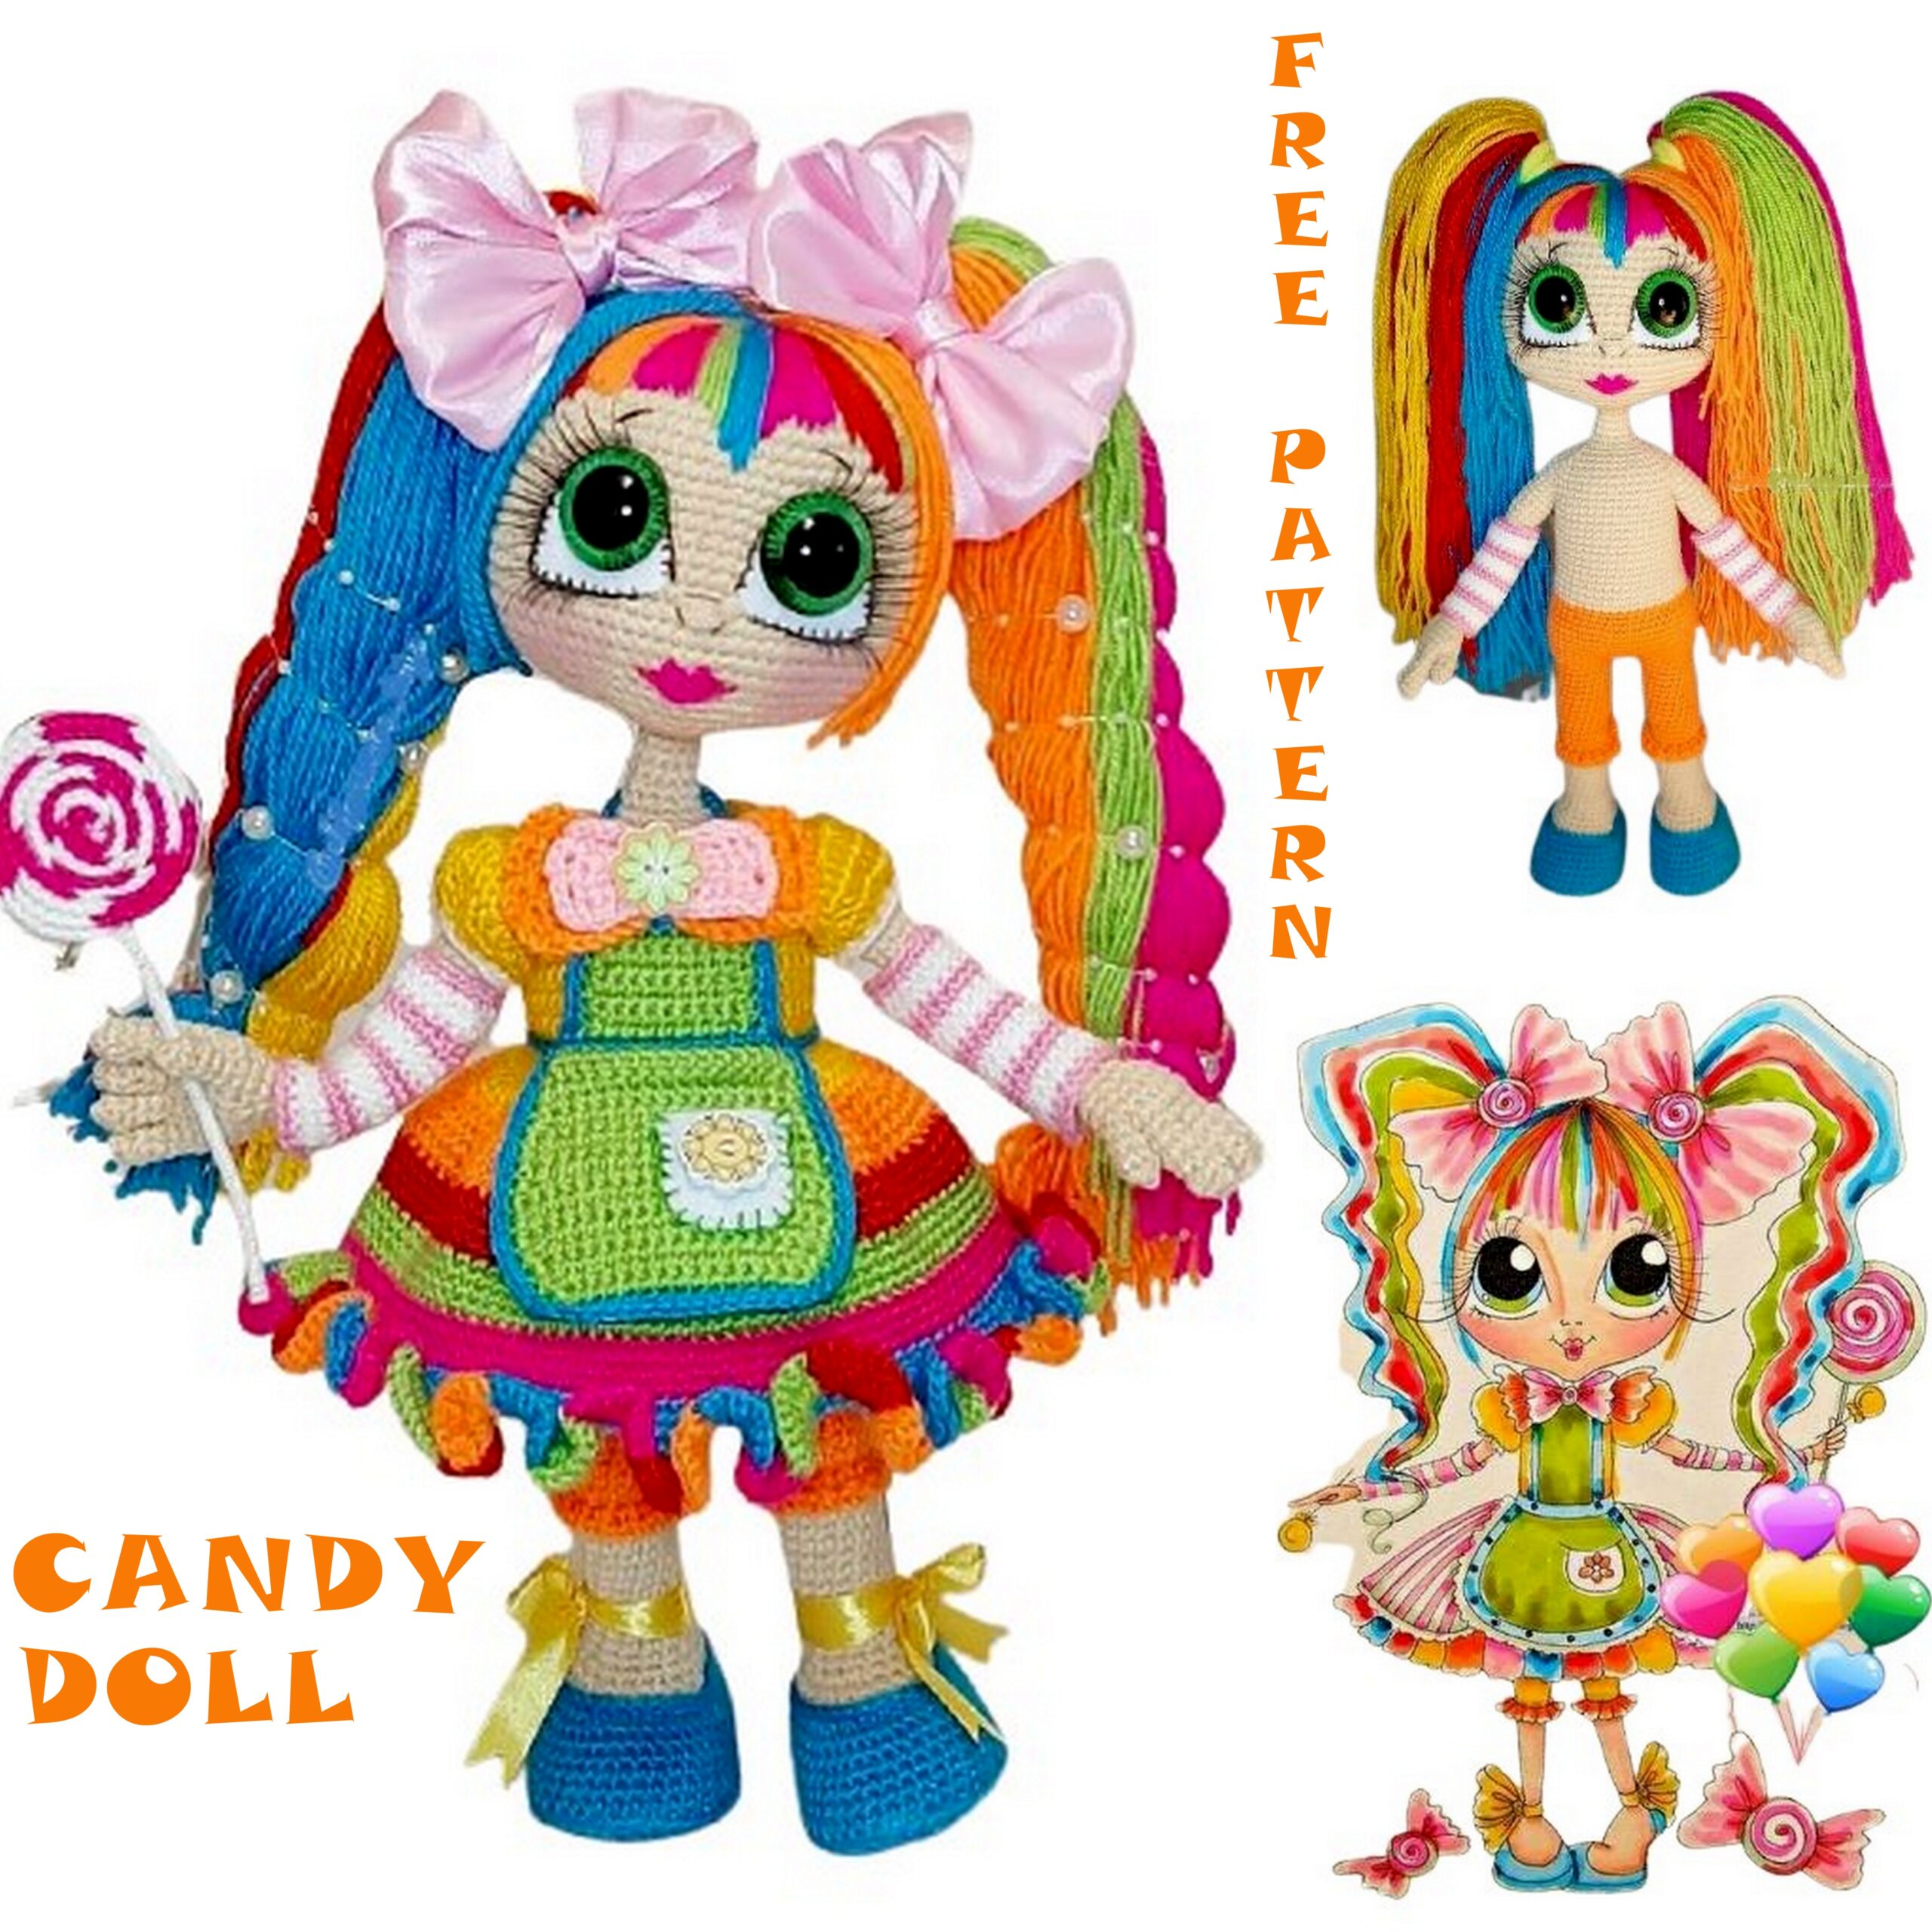
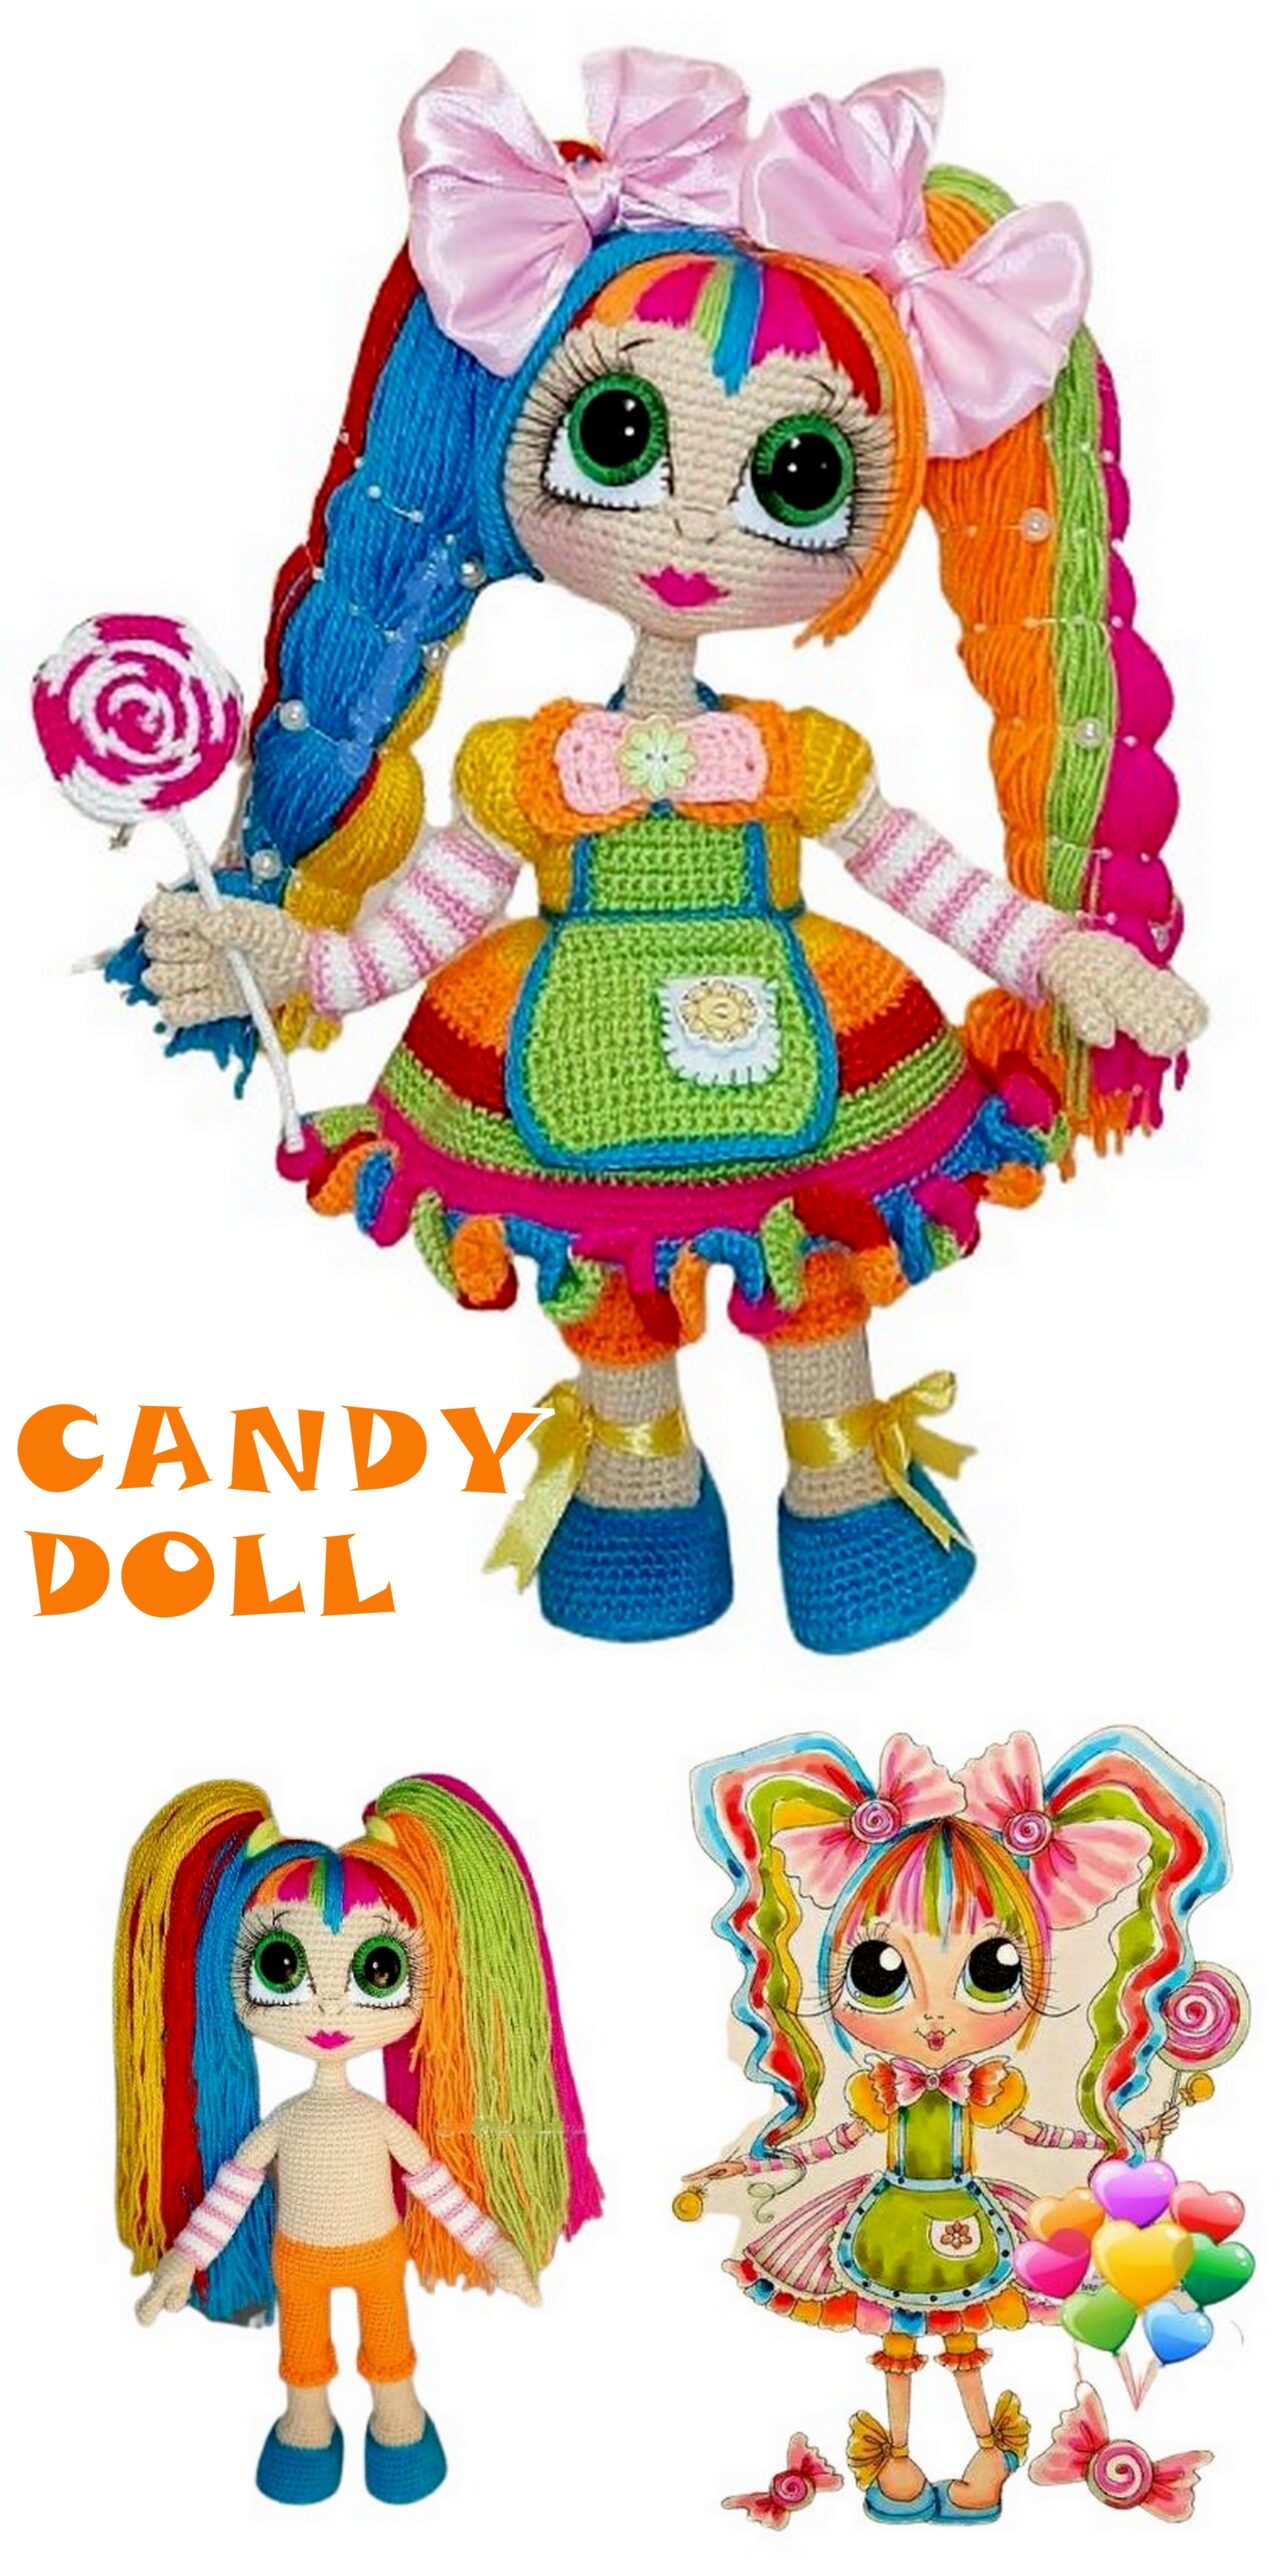
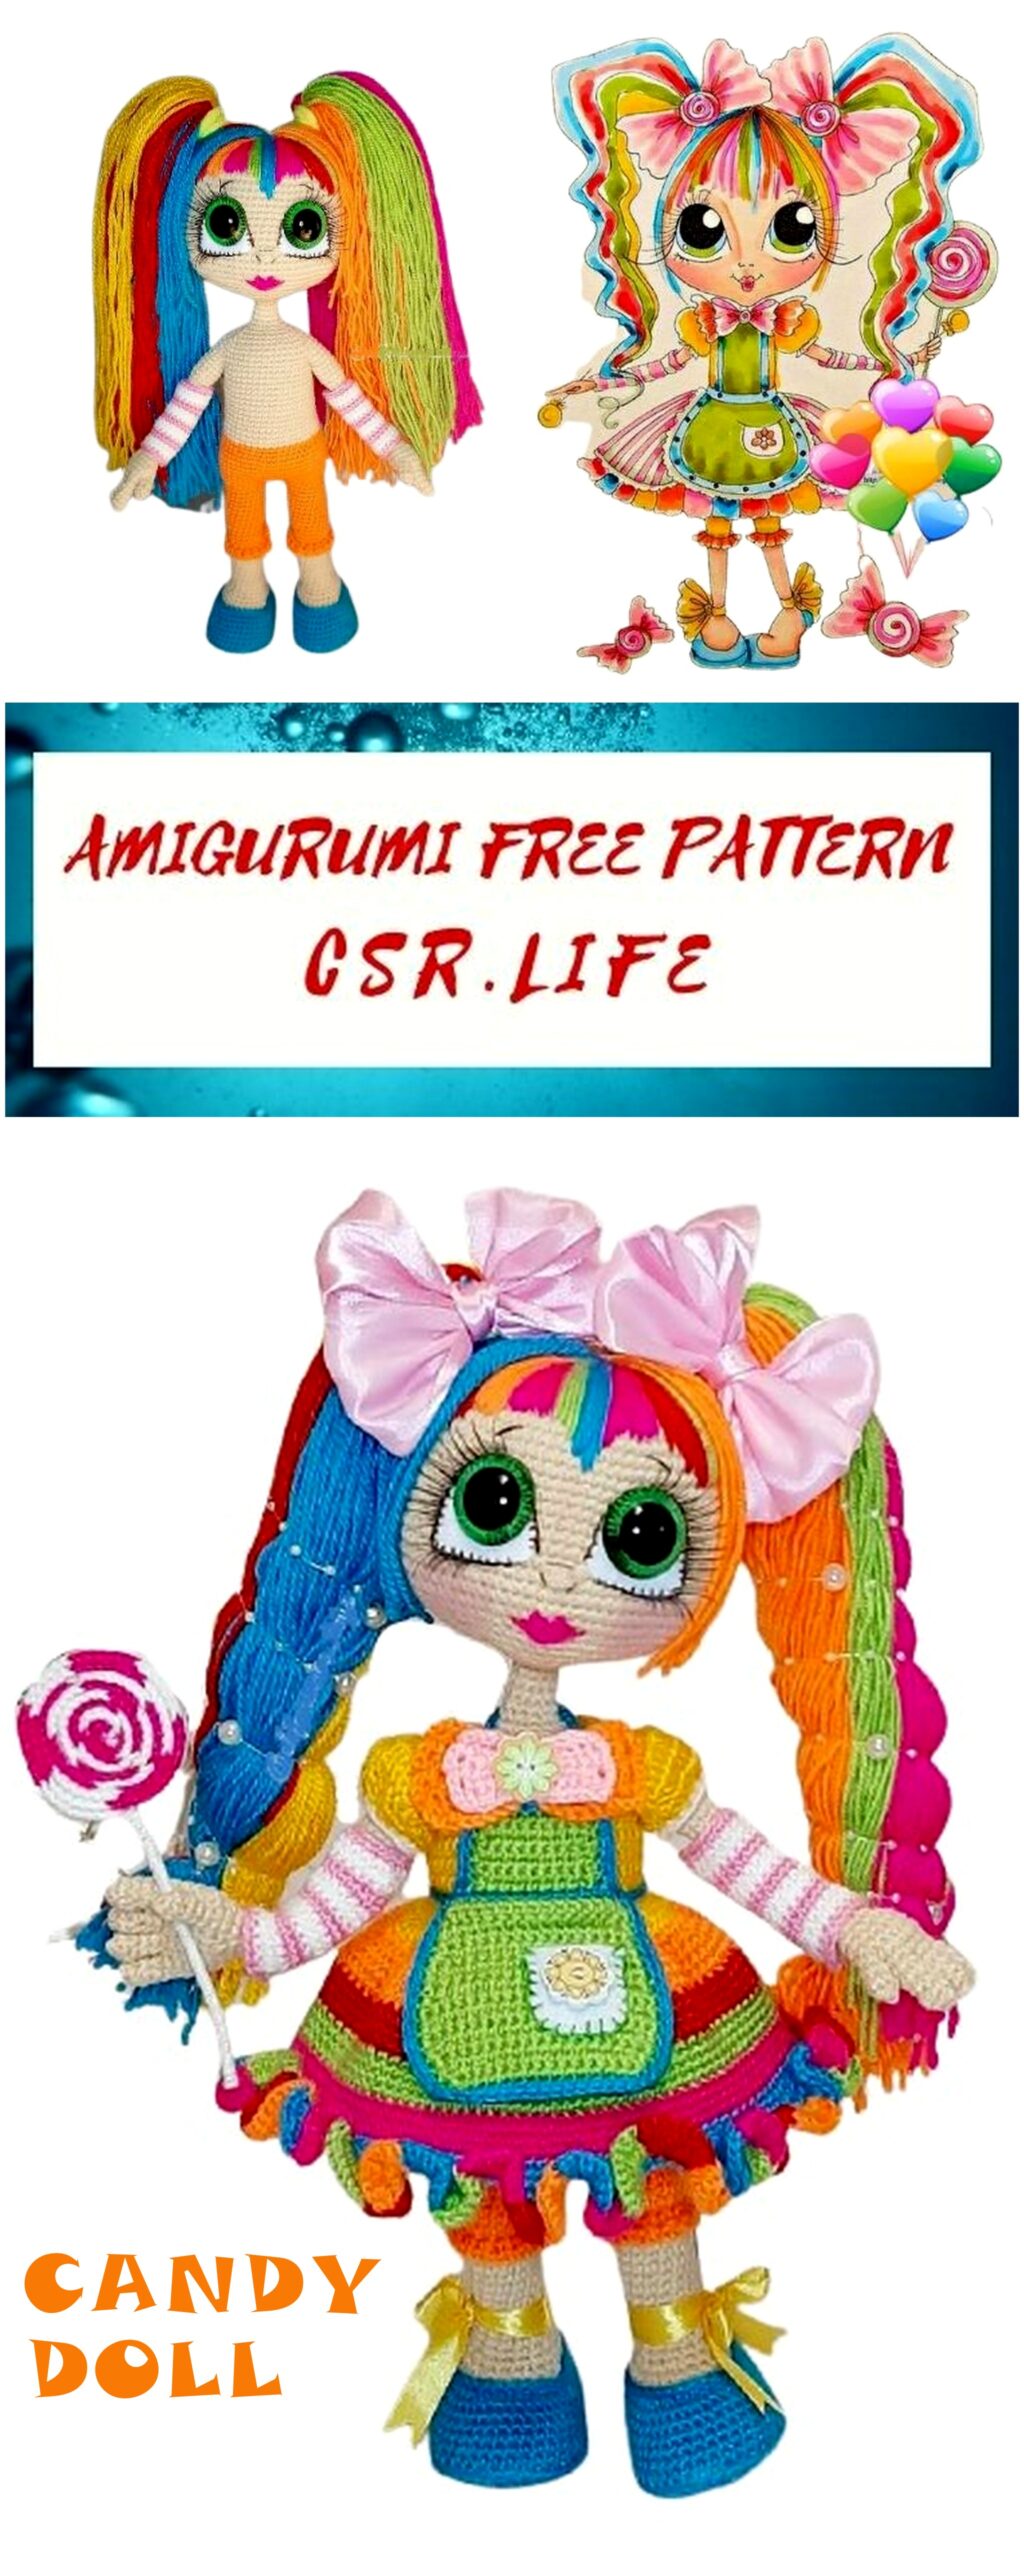
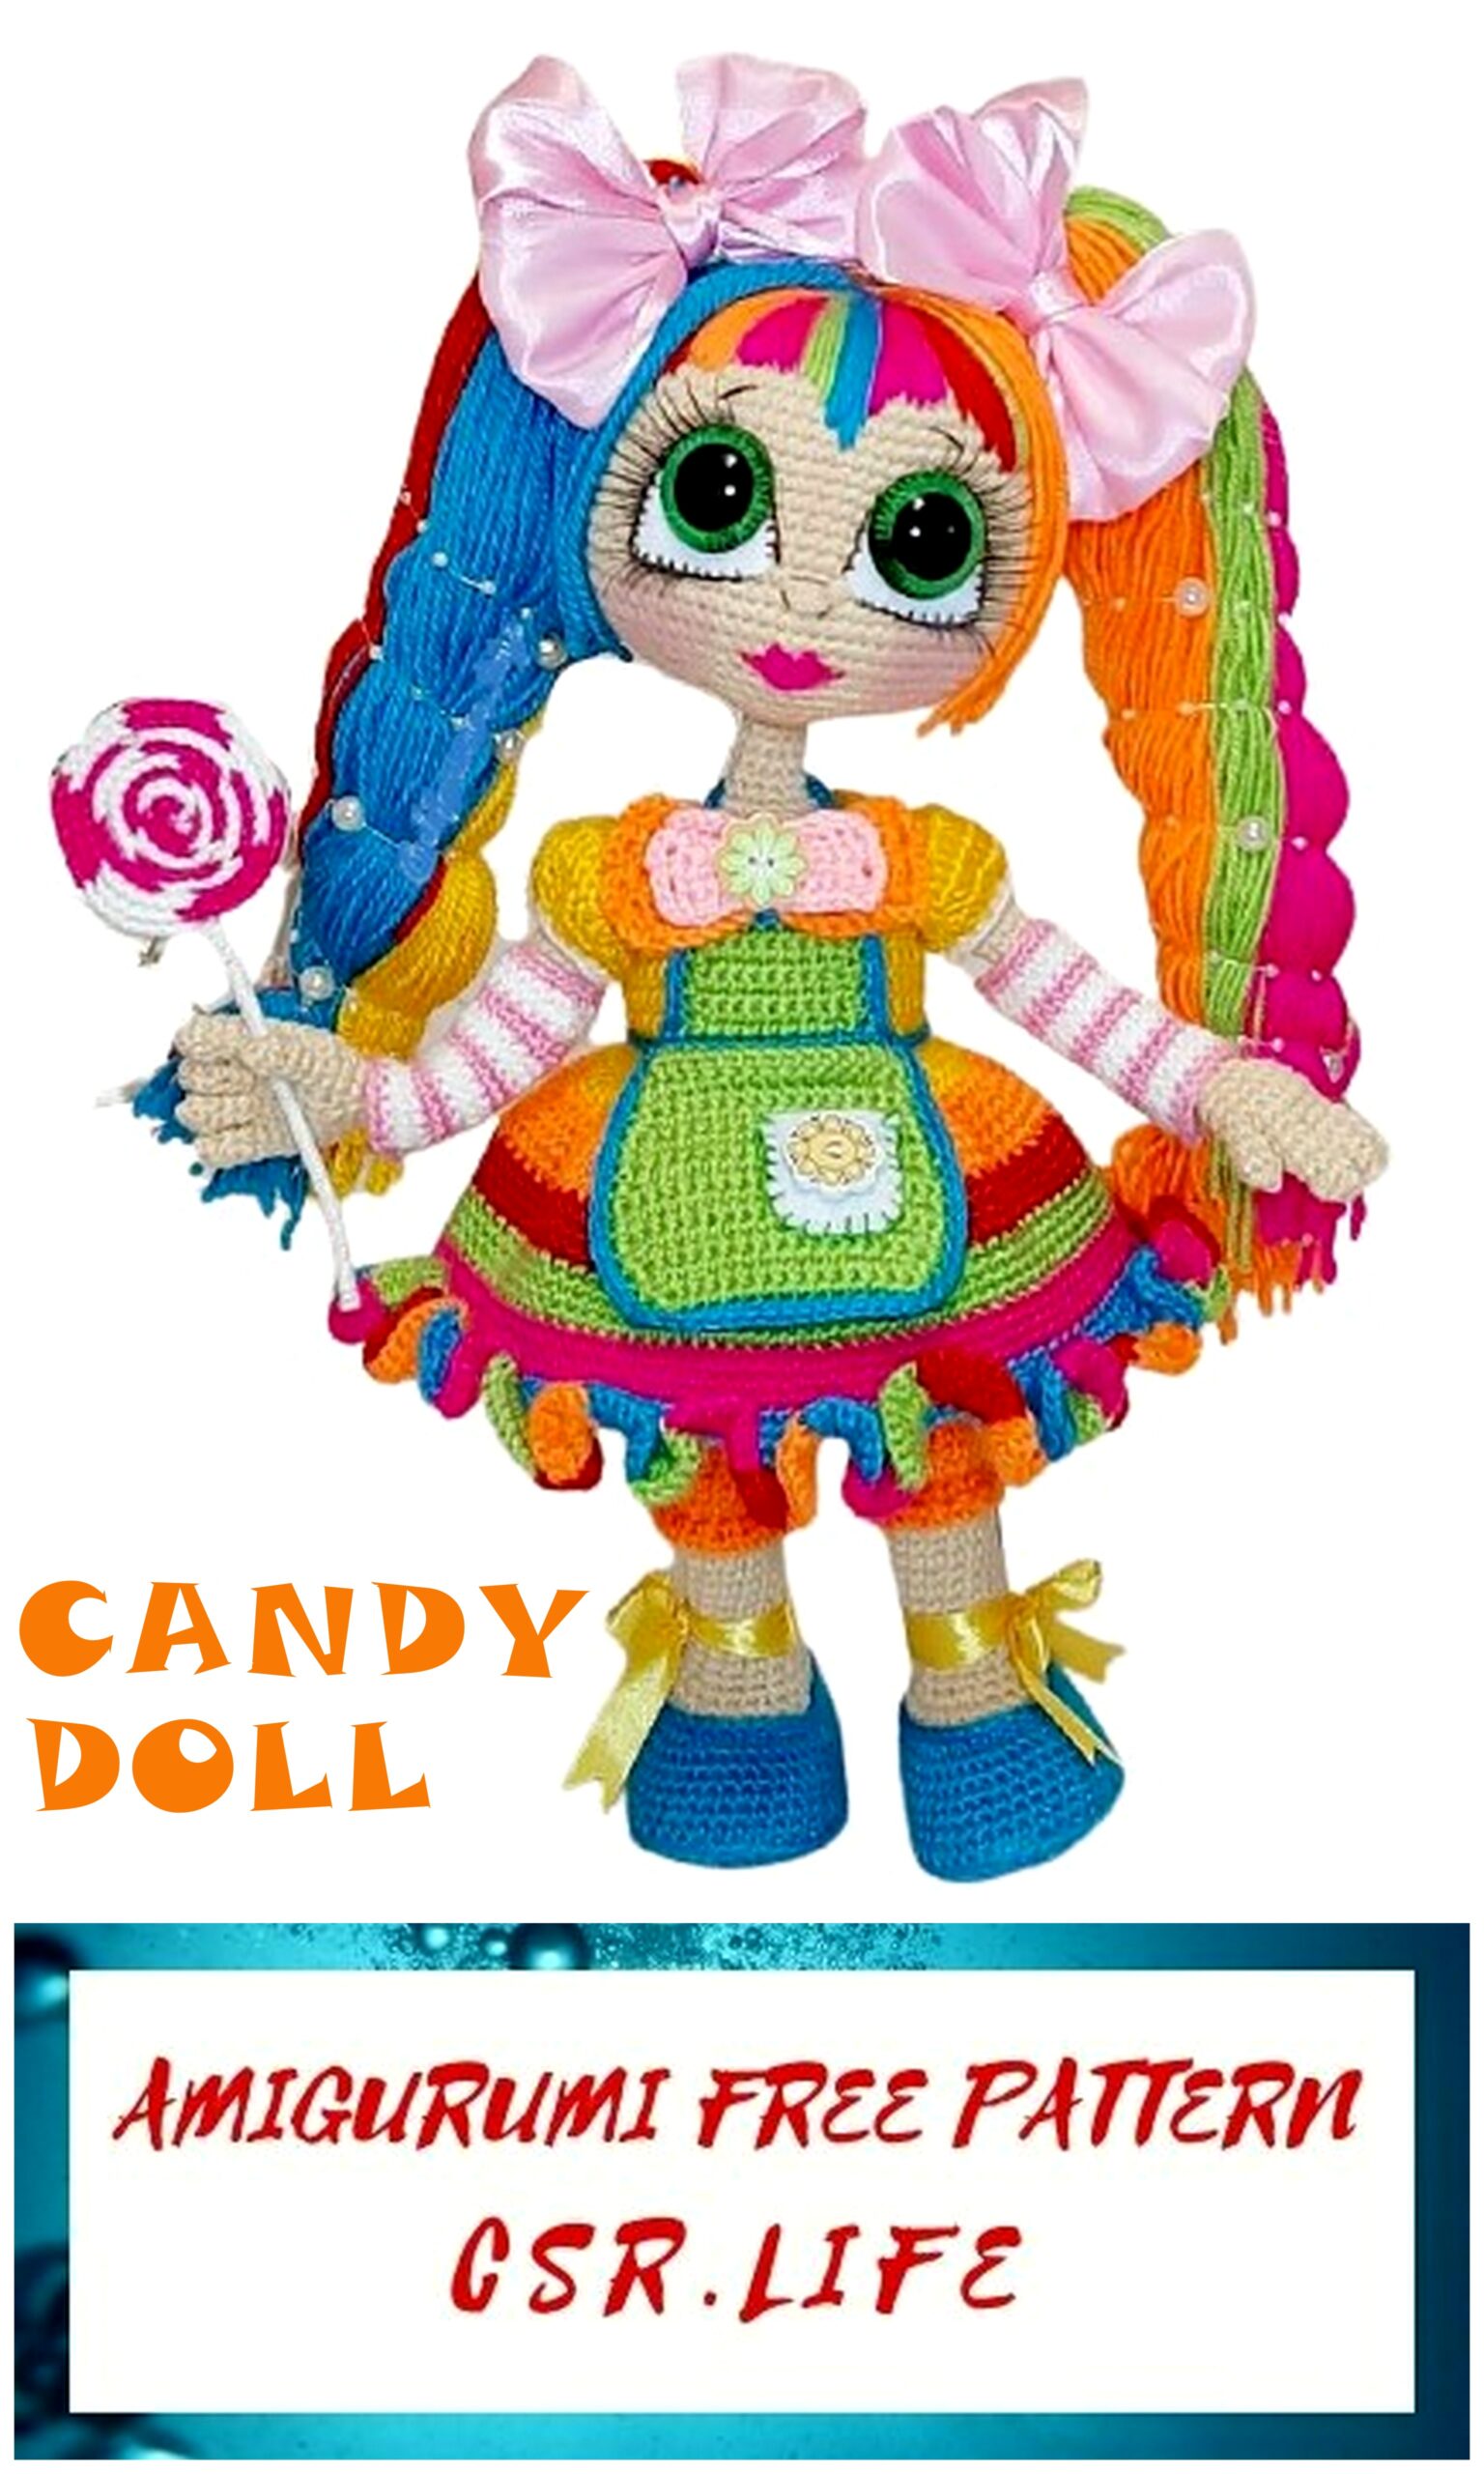
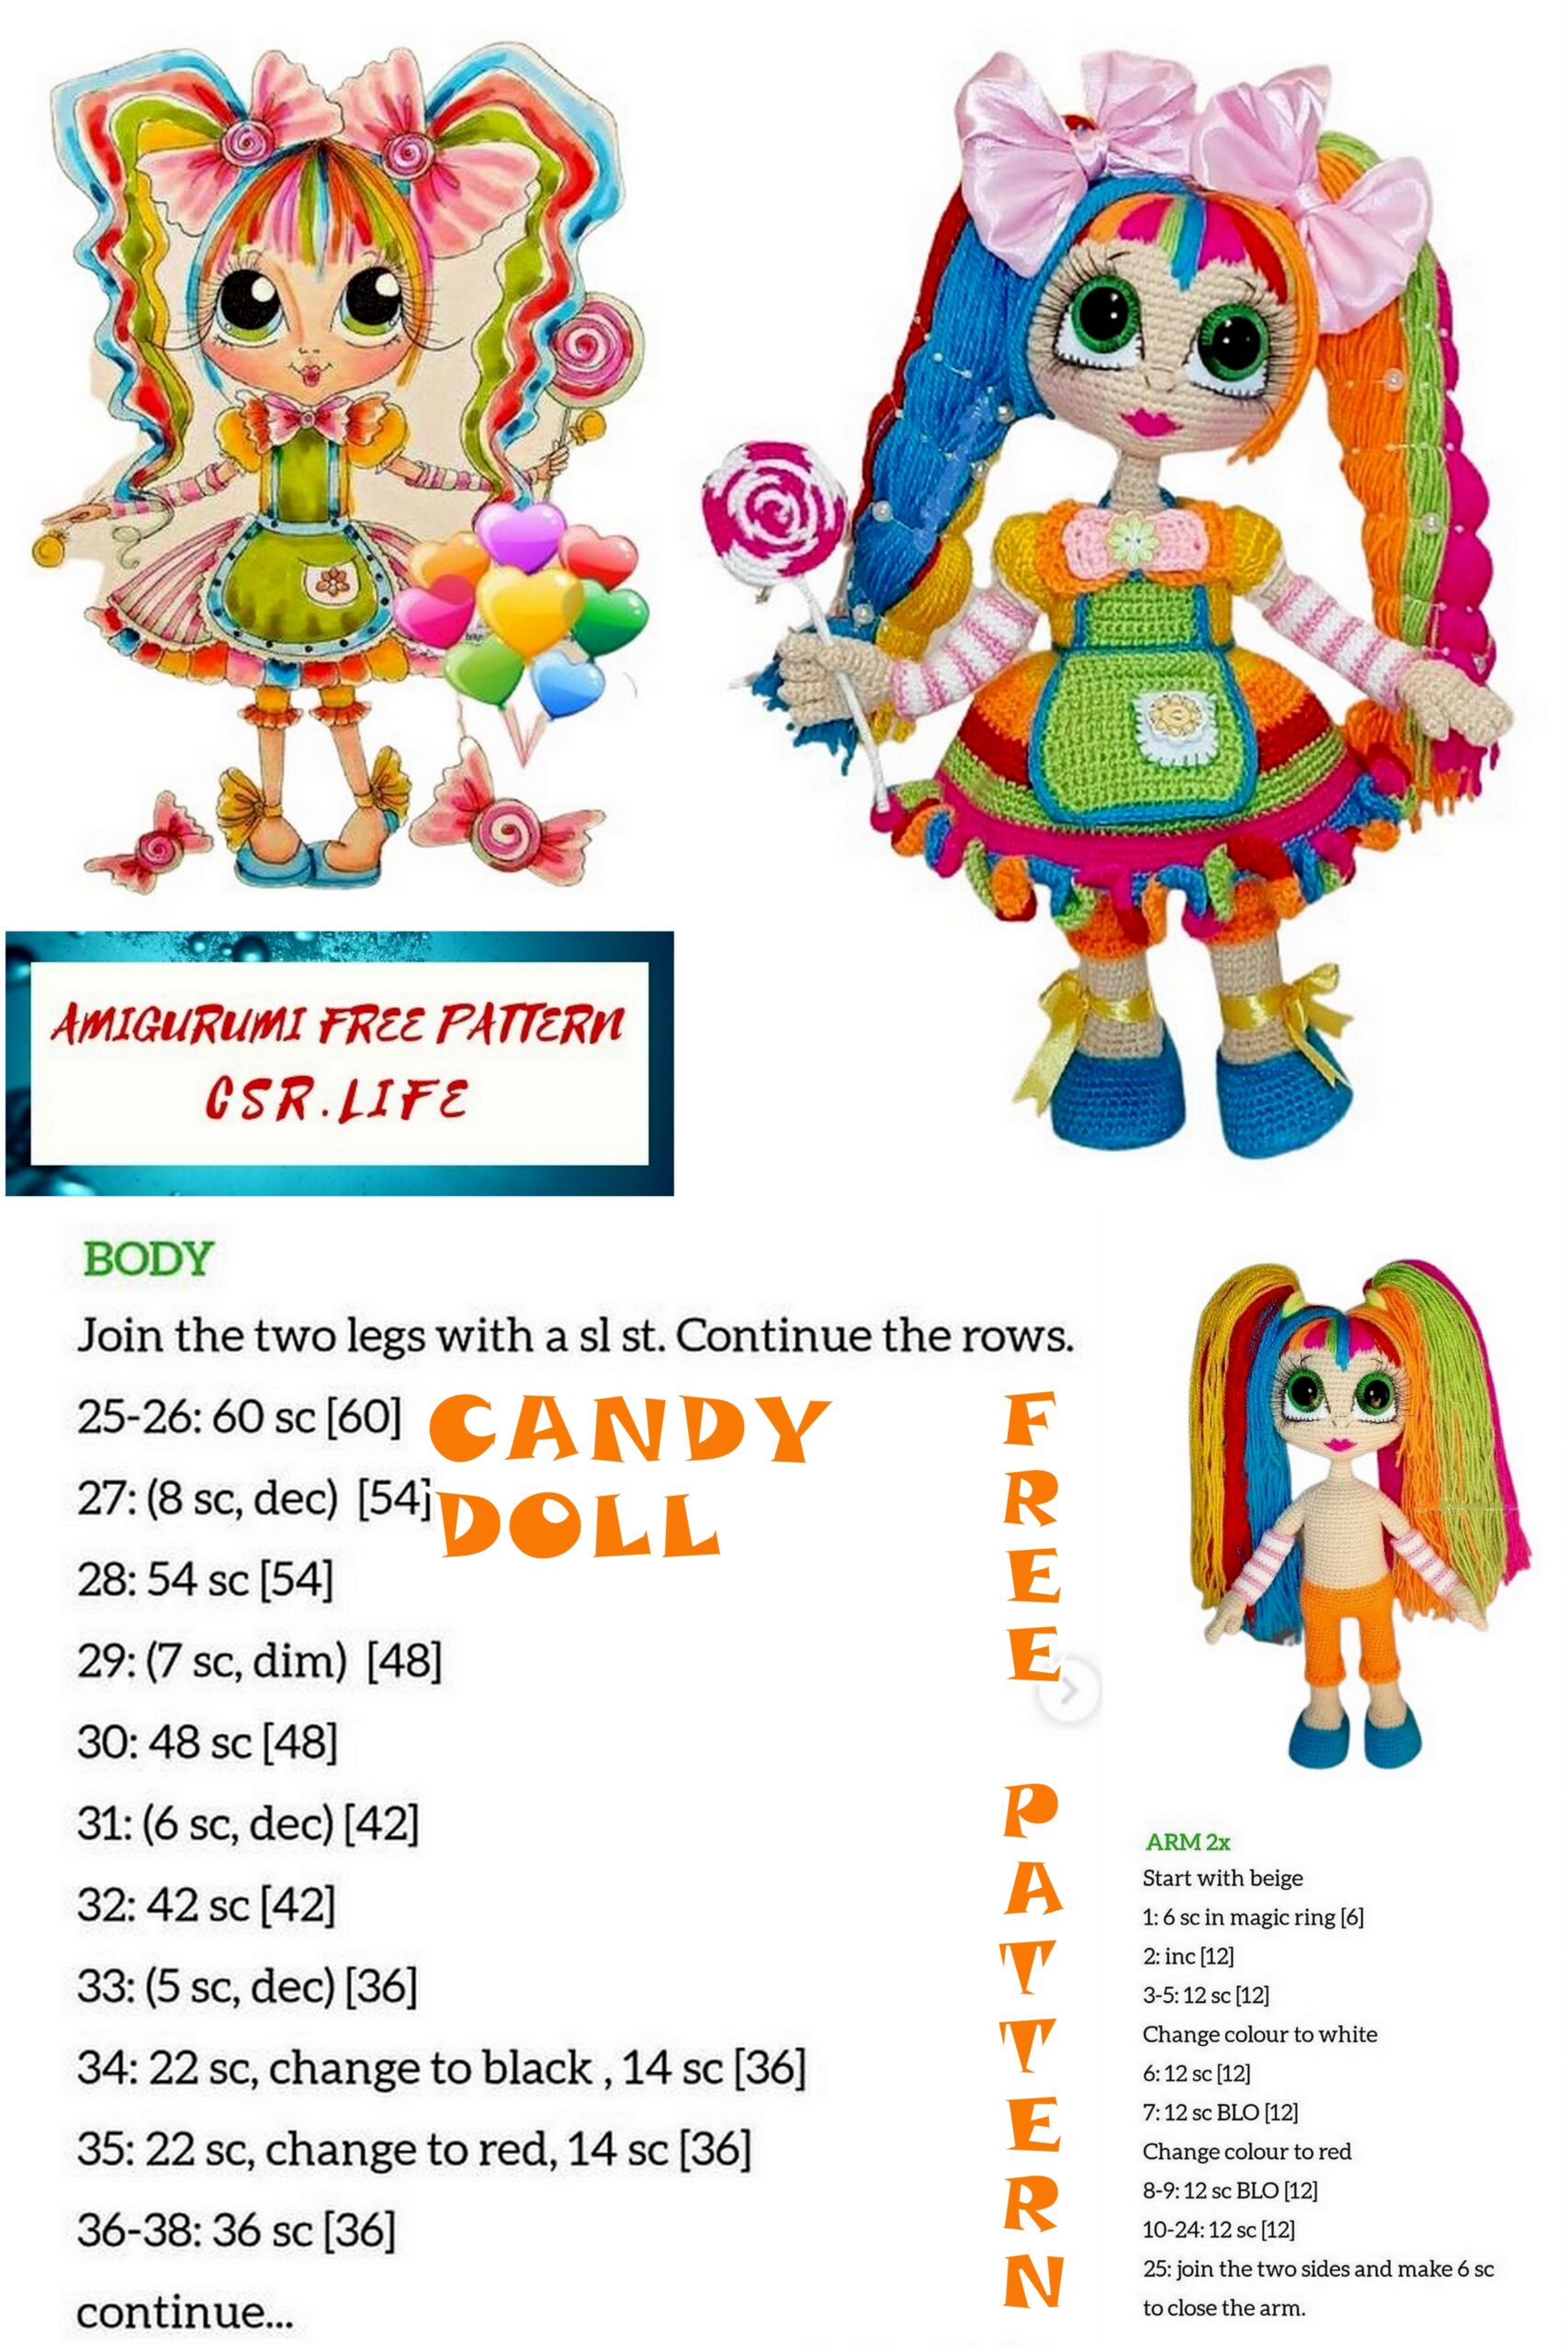
Candy Doll Amigurumi Free Crochet Pattern
Amigurumi doll patterns are free with you with the best quality models. I shared the amigurumi candy doll pattern in this article.
Explanation of the conventions that I use:
CH – chain
CHH – chain lifting loop;
SC – single crochet;
INC – increase
DEC – single crochet decrease;
Dc – double crochet;
INCDC – Increase the double crochet
DECDC – double crochet decrease;
HDC – half double crochet;
INCHDC – half double crochet increase;
Dechdc – half double crochet;
sl-st – slip stitch;
BLO – back half loop;
FLO – front half loop.
Stage 1. Head.
We knit with flesh-colored threads in a spiral, crochet number 3 (or whatever you chose for the main knitting).
1st row: 6 SC into magic ring (6)
2nd row: 6 INC (12)
3 row: (SC, INC) * 6 (18)
4th row: SC, INC, (2 SC, INC) * 5, SC (24)
5 row: (3 SC, INC) * 6 (30)
6 row: 2 SC, INC, (4 SC, INC) * 5, 2 SC (36)
7 row: (5 SC, INC) * 6 (42)
8 row: 3 SC, INC, (6 SC, INC) * 5, 3 SC (48)
9 row: (7 SC, INC) * 6 (54)
10 row: 4 SC, INC, (8 SC, INC) * 5, 4 SC (60)
11 row: (9 SC, INC) * 6 (66)
12th row: 5 SC, INC, (10 SC, INC) * 5, 5 SC (72)
13-20 row (8 rows): 72 SC (72)
21 row: 36 SC, (INC, 6 SC) * 5, INC (78)
22 – 26 row (5 rows): 78 SC (78)
27 row: 36 SC, DEC, (6 SC, DEC) * 5 (72)
28 row: 5 SC, DEC, (10 SC, DEC) * 5, 5 SC (66)
29 row: (9 SC, DEC) * 6 (60)
30 row: 4 SC, DEC, (8 SC, DEC) * 5, 4 SC (54)
31 row: (7 SC, DEC) * 6 (48)
32 row: 3 SC, DEC, (6 SC, DEC) * 5, 3 SC (42)
33 row: (5 SC, DEC) * 6 (36)
34 row: 2 SC, DEC, (4 SC, DEC) * 5, 2 SC (30)
35 row: (3 SC, DEC) * 6 (24)
36 row: SC, DEC, (2 SC, DEC) * 5, SC (18)
37 row: (SC, DEC) * 6 (12)
We fix the thread, cut it off. We fill our head with filler (see photo).
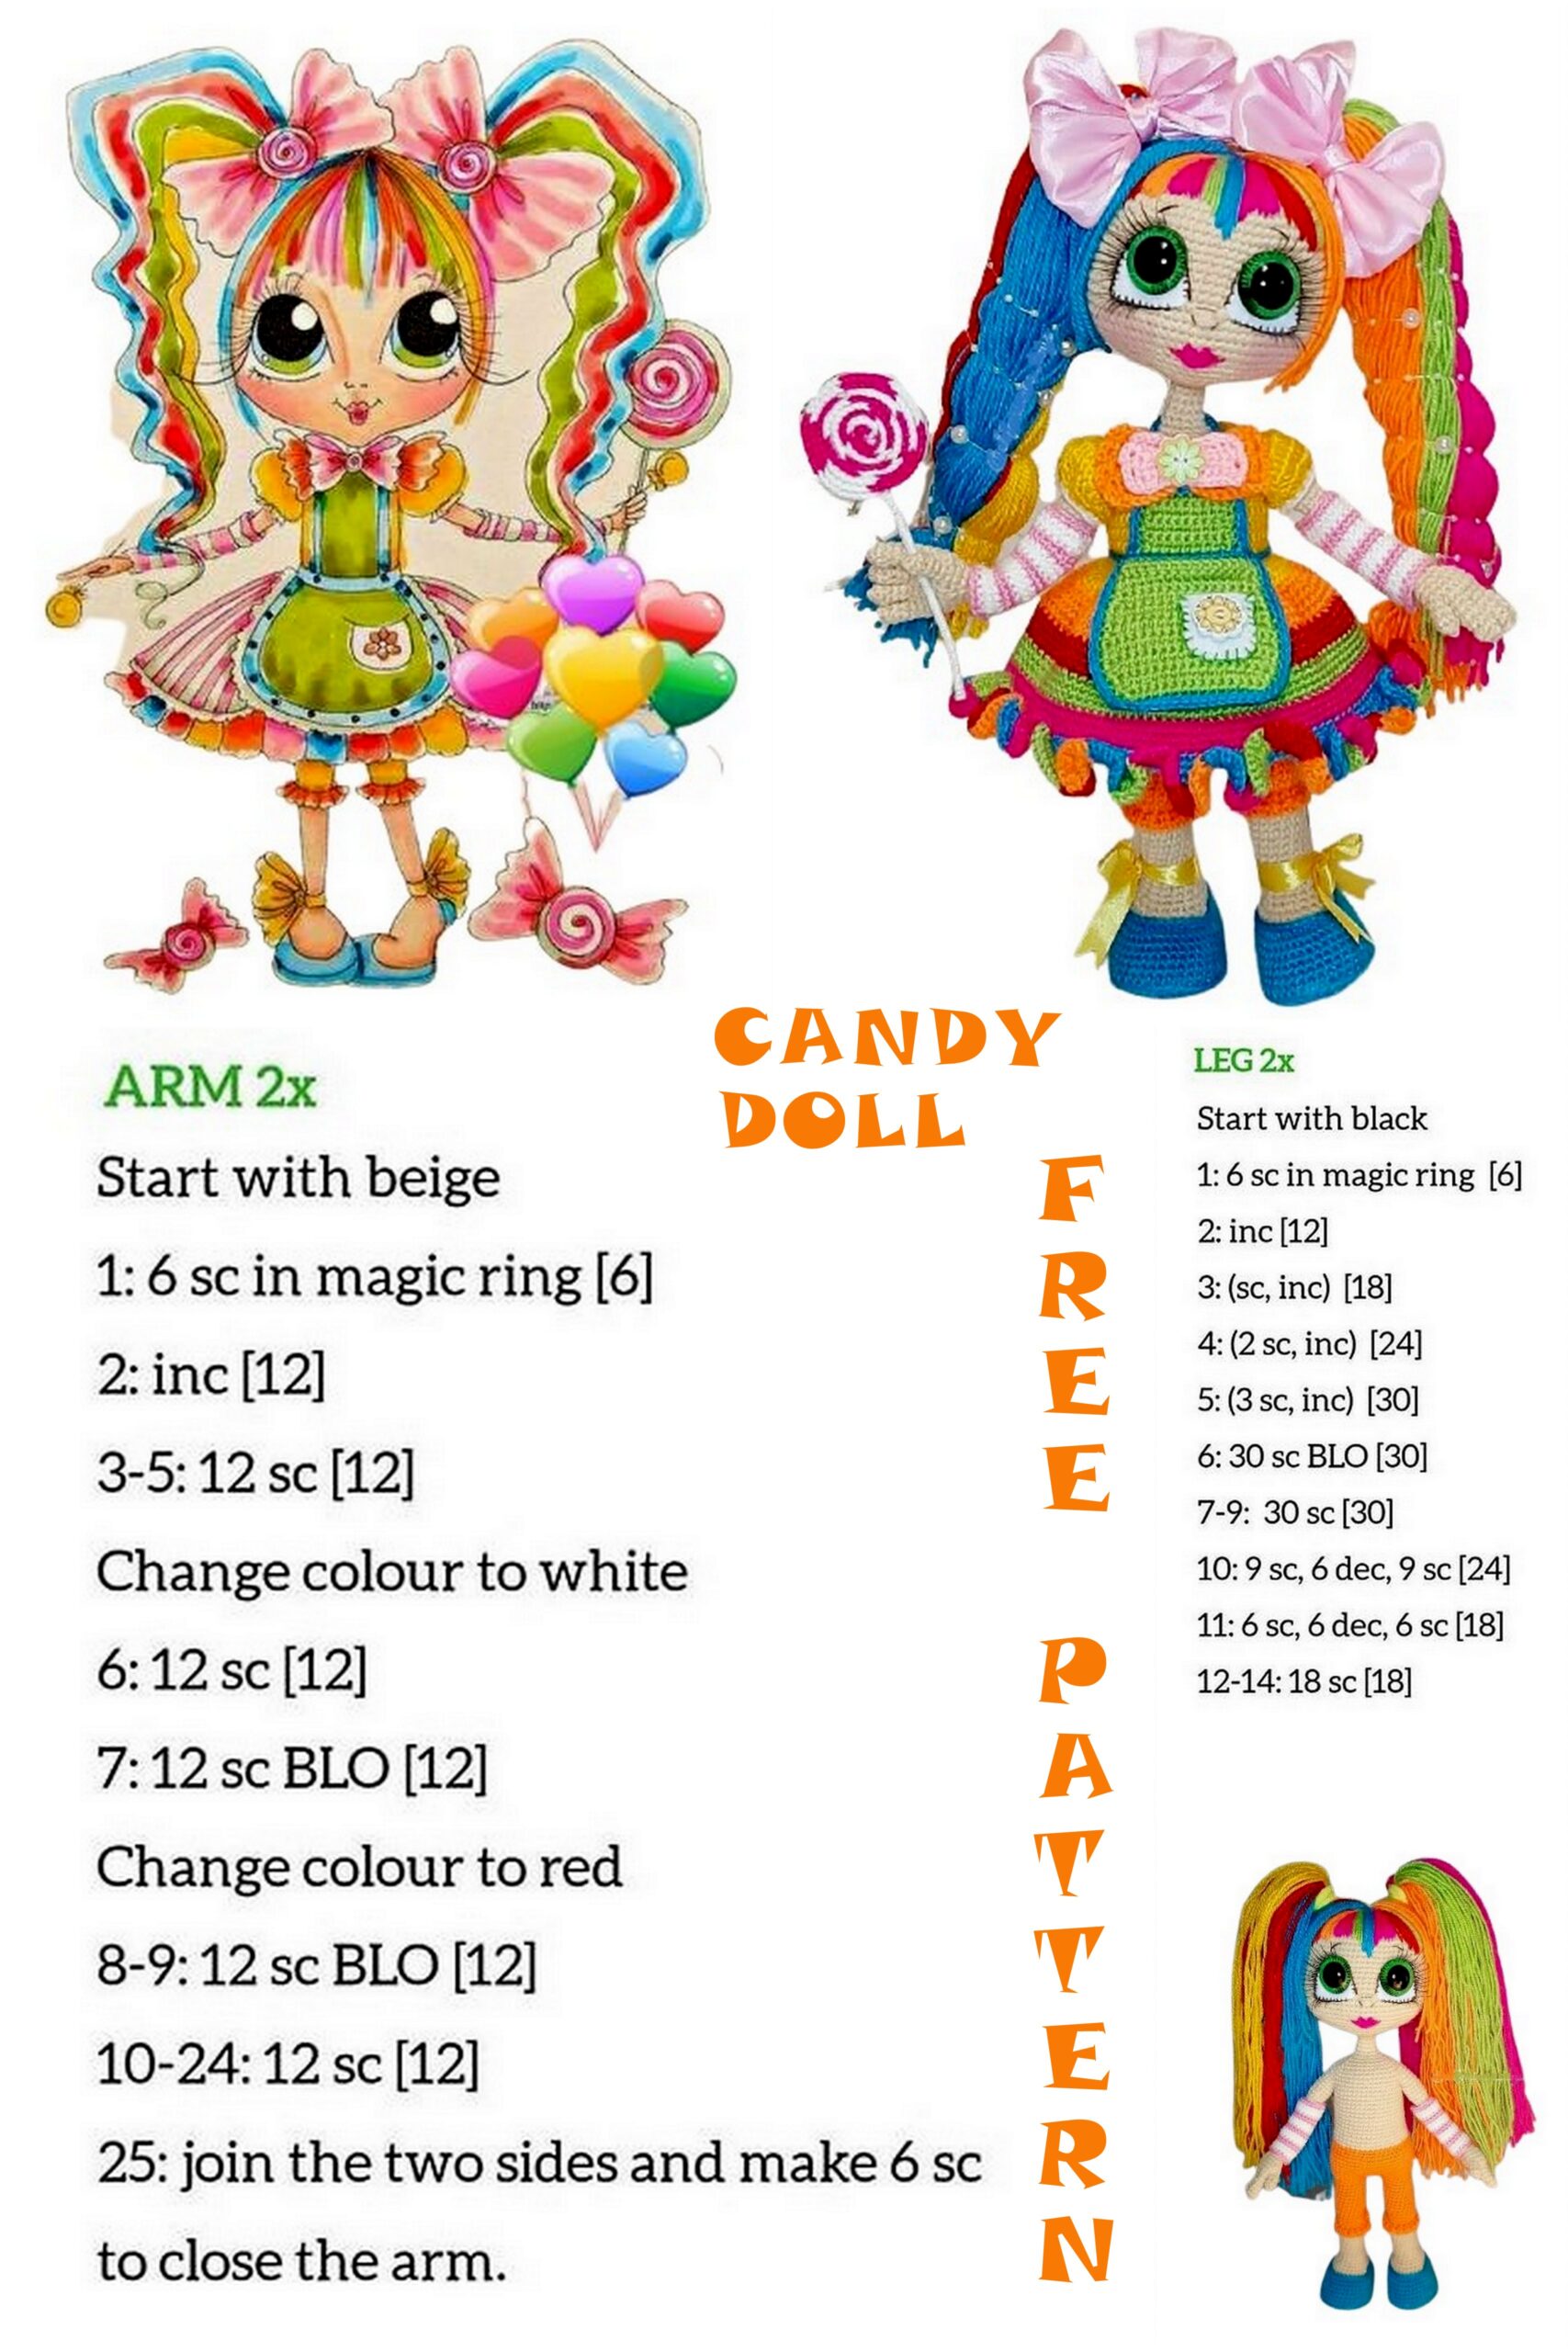
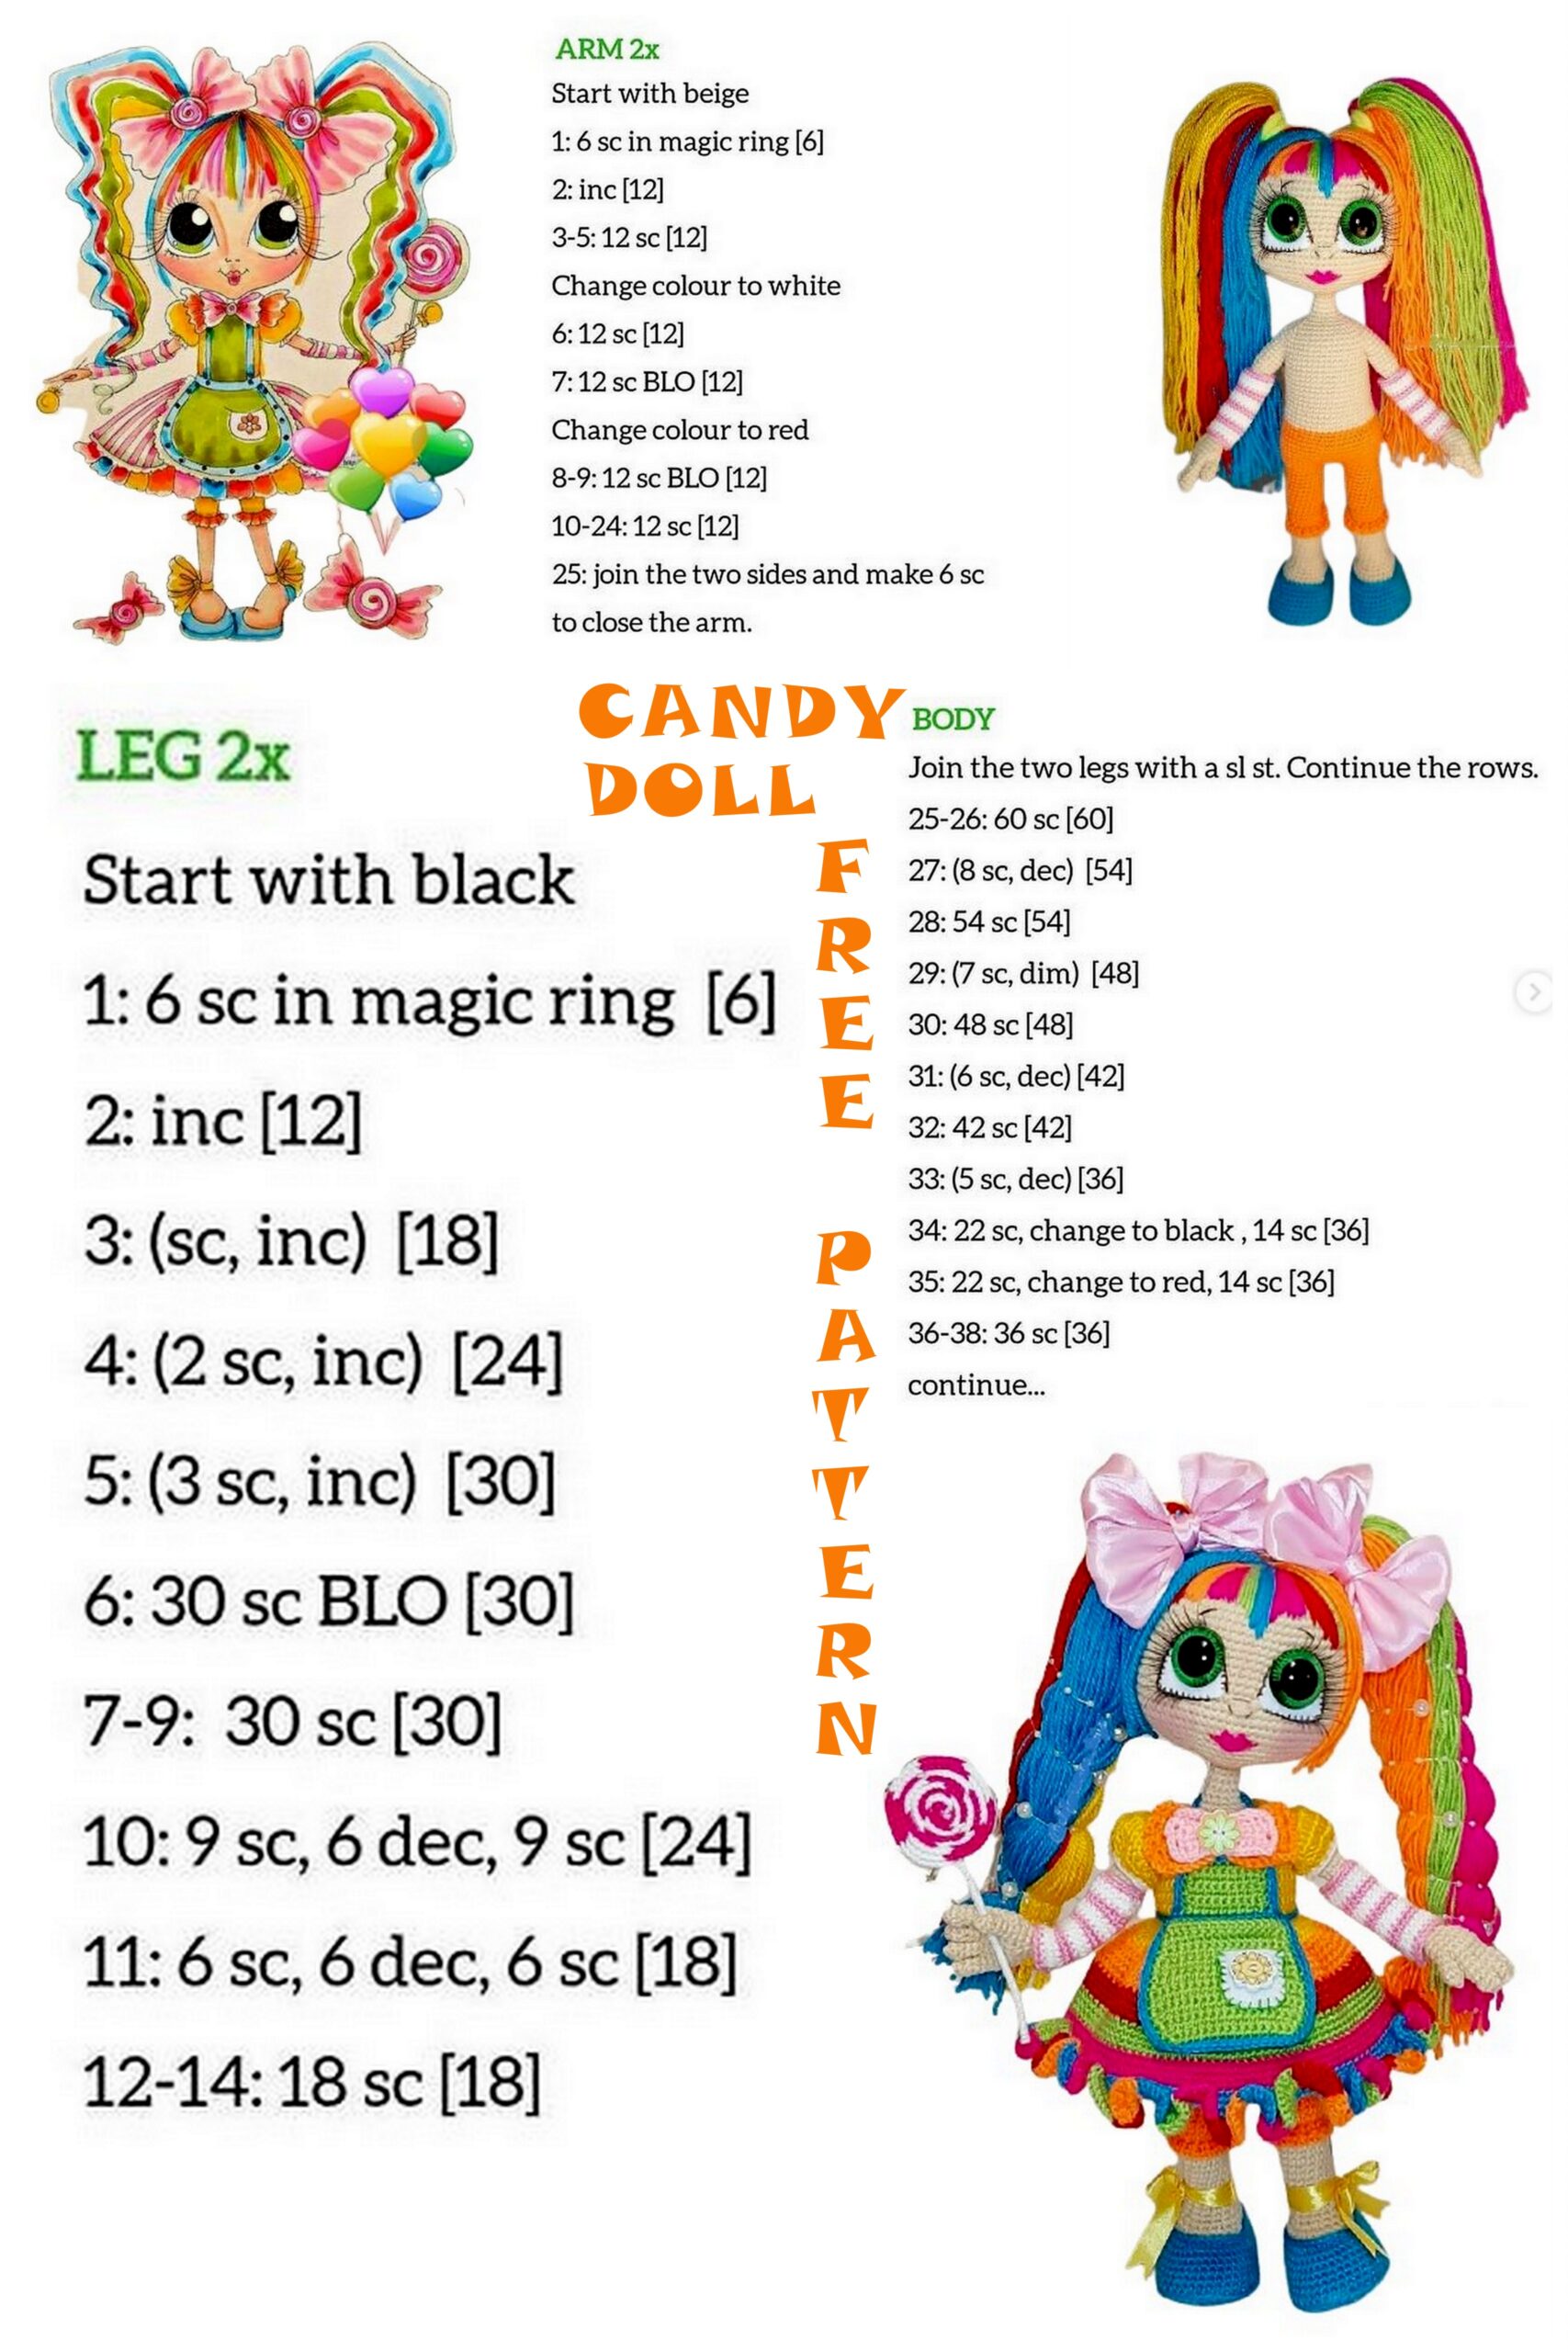
STEP 2. HANDLES.
We knit the handles with flesh-colored threads, crochet number 2 (or smaller than you chose for the main knitting).
First we knit the fingers. For the left and right hands, they fit the same way.
Middle, index and ring fingers.
1st row: 5 SC into magic ring (5)
2 – 5 row (4 rows): 5 SC (5)
We fix the thread, cut it off.
Thumb and pinky.
1st row: 5 SC into magic ring (5)
2-4 row (3 rows): 5 SC (5)
We do not cut the thread on the little finger, we continue to knit, connecting the fingers into the palm.
Right hand.
Row 1: 2 SC on the little finger, 2 SC on the ring finger, 2 SC on the middle finger, 5 SC on the index finger, 3 SC on the middle finger, 3 SC on the ring finger, 3 SC on the little finger (20)
2nd row: 20 SC (20)
Note! The marker for the beginning of the row should be located in the middle of the edge of the palm underneath. If necessary, knit offset loops.
In the next row we tie a thumb.
3rd row: 7 SC in the palm, 1 SC together with the thumb (grab SC of the palm and SC of the thumb at the same time), 12 SC in the palm (20)
4th row: 7 SC in the palm, 3 SC in the thumb, grab the SC of the thumb and SC of the palm and knit them together UB, 11 SC in the palm (22)
5 row: 8 SC, DEC, 10 SC, DEC (20)
6 row: (3 SC, DEC) * 4 (16)
7 row: (2 SC, DEC) * 4 (12)
We fill the palm lightly with filler.
8 row: (SC, DEC) * 4 (8)
Cut off about 35 cm of wire. We make a small loop at one end so that you can insert it into your palm. We twist the ends of the wire together, insulate with tissue adhesive tape or electrical tape. We make 2 such blanks.
We insert the wire blank into the handle.
9-19 row (11 rows): 8 SC (8)
20 row: (3 SC, INC) * 2 (10)
21 – 23 rows (3 rows): 10 SC (10)
24 row: (4 SC, INC) * 2 (12)
25 – 30 row (6 rows): 12 SC (12)
We fix the thread, cut it off. We fill the handle with filler.
Left hand.
Row 1: 3 SC on the little finger, 3 SC on the ring finger, 3 SC on the middle finger, 5 SC on the index finger, 2 SC on the middle finger, 2 SC on the ring finger, 2 SC on the little finger (20)
2nd row: 20 SC (20)
Note! The marker for the beginning of the row should be located in the middle of the edge of the palm underneath. If necessary, knit offset loops.
In the next row we tie a thumb.
3rd row: 12 SC in the palm, 1 SC together with the thumb (grab SC of the palm and SC of the thumb at the same time), 7 SC in the palm (20)
4th row: 11 SC in palm, grab SC of thumb and SC of palm and knit them together dec, 3 SC in thumb, 7 SC in palm (22)
5 row: DEC, 10 SC, DEC, 8 SC (20)
6 row: (3 SC, DEC) * 4 (16)
7 row: (2 SC, DEC) * 4 (12)
We fill the palm lightly with filler.
8 row: (SC, DEC) * 4 (8)
We insert the wire blank into the handle.
9-19 row (11 rows): 8 SC (8)
20 row: (INC, 3 SC) * 2 (10)
21 – 23 rows (3 rows): 10 SC (10)
24 row: (INC, 4 SC) * 2 (12)
25 – 30 row (6 rows): 12 SC (12)
We fix the thread, cut it off. We fill the handle with filler.
Mitts.
We knit mitts with the same crochet as knitted handles. Mitts will be fixed. For the left and right hands, mitts are knitted in the same way.
1 row: with raspberry (or pink) threads, we collect a chain of 17 CH and close it in a ring (17)
2nd row: 17 SC (17)
Change the thread to white.
3 – 4 row: 17 SC (17)
Change the thread to raspberry (pink).
5 – 6 row: 17 SC (17)
Change the thread to white.
7-8 row: 17 SC (17)
Change the thread to raspberry (pink).
9-10 row: 17 SC (17)
Change the thread to white.
11 – 12 row: 17 SC (17)
Change the thread to raspberry (pink).
13-14 row: 17 SC (17)
Change the thread to white.
15-16 row: 17 SC (17)
Change the thread to raspberry (pink).
17 row: 17 SC (17)
We fix the thread, cut it off.
We put mitts on the handles through the upper part of the hand.
Stage 3. Legs.
We begin to knit with turquoise threads, hook number 3 (or the hook that you chose for the main knitting).
Right leg.
1st row: we cast on 10 CH + 2 CHH, in the third loop from the hook we knit 4 DC, then 8 DC along the chain from CH, 5 DC into the last loop, 8 DC on the other side of the chain from CH, SL-ST (26)
2nd row: 2 CHH, DC in the same loop, 4 INCDC, 2 DC, 2 HDC, 4 SC, 5 INC, 4 SC, 2 HDC, 2 DC, SL-ST (36)
3rd row: 2 CHH, DC in the same loop, DC, (INCDC, DC) * 4, 2 DC, 2 HDC, 4 SC, (INC, SC) * 5, 4 SC, 2 HDC, 2 DC, SL- ST (46)
According to the resulting trace, we cut out the insoles from plastic (2 pcs.)
4th row: 46 SC for BLO (46)
5 – 9 (5 rows): 46 SC (46)
10 row: 9 DEC, (4 SC, DEC) * 4, 4 SC (33)
Note! 9 DECs are located in the center of the toe, if necessary, knit offset loops.
We insert the plastic insole into the shoe.
We change the thread to the bodily one.
11 row: for BLO {DEC, 6 SC, DEC, (2 SC, DEC) * 5, 3 SC} (26)
12 row: DEC, 4 SC, DEC, 18 SC (24)
Hereinafter, the marker for the beginning of the row is located in the middle of the inner side of the leg, if necessary, we knit offset loops.
Cut off about 80 cm of wire. Fold the wire in half, make a small loop at the end a little smaller than the tied foot. We twist the ends of the wire together. We make 2 such blanks (see photo).
We insert the wire blank into the leg. We fill the leg with filler.
13 row: (2 SC, DEC) * 6 (18)
14 row: (4 SC, DEC) * 3 (15)
15 – 25 (11 rows): 15 SC (15)
Change the thread to orange.
26 row: 15 SC (15)
27 row: for BLO 15 SC (15)
28 row: SC, 3 INC, 4 SC, 2 DEC, 3 SC (16)
3 INC form a knee; if necessary, knit offset loops.
29 row: 16 SC (16)
30 row: SC, DEC, 4 SC, DEC, SC, INC, 3 SC, INC, SC (16)
31 row: (7 SC, INC) * 2 (18)
32 – 40 (9 rows): 18 SC (18)
We fix the thread, cut it off.
We fill the leg with filler to the end.
We attach the turquoise thread to the first left half loop of the 11th row, where they knitted for the BLO, and we make a strapping along the top of the shoe: 26 SL-ST (26).
We fix the turquoise thread, cut it off, hide the ends.
We unfold the leg with the foot away from ourselves, attach the orange thread to the first half-loop of the 27th row, where they knitted for the BLO, and make a strapping along the bottom of the trousers: (3 CH, SC) * 15.
We fix the orange thread, cut it off, hide the ends.
Left leg.
1 row: we cast on 10 CH + 2 CHH, in the third loop from the hook we knit 4 DC, then 8 DC along the chain from CH, 5 DC into the last loop, 8 DC on the other side of the chain from CH, SL-ST (26)
2nd row: 2 CHH, DC in the same loop, 4 INCDC, 2 DC, 2 HDC, 4 SC, 5 INC, 4 SC, 2 HDC, 2 DC, SL-ST (36)
3rd row: 2 CHH, DC in the same loop, DC, (INCDC, DC) * 4, 2 DC, 2 HDC, 4 SC, (INC, SC) * 5, 4 SC, 2 HDC, 2 DC, SL- ST (46)
4th row: 46 SC for BLO (46)
5 – 9 (5 rows): 46 SC (46)
10 row: 9 DEC, (4 SC, DEC) * 4, 4 SC (33)
Note! 9 DECs are located in the center of the toe, if necessary, knit offset loops.
We insert the plastic insole into the shoe.
We change the thread to the bodily one.
11 row: for BLO {DEC, 6 SC, DEC, (2 SC, DEC) * 5, 3 SC} (26)
12 row: DEC, 4 SC, DEC, 18 SC (24)
Hereinafter, the marker for the beginning of the row is located in the middle of the inner side of the leg, if necessary, we knit offset loops.
We insert the wire blank into the leg. We fill the leg with filler.
13 row: (2 SC, DEC) * 6 (18)
14 row: (4 SC, DEC) * 3 (15)
15 – 25 (11 rows): 15 SC (15)
Change the thread to orange.
26 row: 15 SC (15)
27 row: for BLO 15 SC (15)
28 row: 3 SC, 2 DEC, 4 SC, 3 INC, SC (16)
3 INC form a knee; if necessary, knit offset loops.
29 row: 16 SC (16)
30 row: SC, INC, 3 SC, INC, SC, DEC, 4 SC, DEC, SC (16)
31 row: (INC, 7 SC) * 2 (18)
32 – 40 (9 rows): 18 SC (18)
We do not cut the orange thread, then we will connect the legs and knit the body.
We fill the leg with filler to the end.
We attach the turquoise thread to the first left half loop of the 11th row, where they knitted for the BLO, and we make a strapping along the top of the shoe: 26 SL-ST (26).
We fix the turquoise thread, cut it off, hide the ends.
We unfold the leg with the foot away from ourselves, attach the orange thread to the first left half loop of the 27th row, where they knitted for the BLO, and make a strapping along the bottom of the trousers: (3 CH, SC) * 15 (15).
We fix the orange thread, cut it off, hide the ends.
Stage 4. Taurus.
On the leg, where the loop was left untightened in the last row of knitting (I have it the left leg), dial 3 CH and connect it to the second leg:
1 row: 18 SC on the leg, 3 SC on the CH chain, 18 SC on the second leg, 3 SC on the other side of the CH chain (42)
☝🏻Note! The body is knitted symmetrically, so it doesn’t matter which leg you start with.
2nd row: (6 SC, INC) * 6 (48)
We twist the wire coming from the legs together, isolate it with fabric adhesive tape or tape.
3 – 5 row (3 rows): 48 SC (48)
6 row: (7 SC, INC) * 6 (54)
7-9 row (3 rows): 54 SC (54)
10 row: (7 SC, DEC) * 6 (48)
11 row: (6 SC, DEC) * 6 (42)
12 row: 42 SC (42)
We tie it up to the middle of the side, transfer the marker here.
We change the thread to bodily.
13 – 25 row (13 rows): 42 SC (42)
We do not tie the 25th row to the middle of the side (beginning of the row) 2 SC, then we will attach the handles.
We fill the body with filler.
26 row: 4 SC together with the handle (simultaneously grab the SC of the body and the SC of the handle), 17 SC on the body, 4 SC together with the second handle, 17 SC on the body (42)
27 row: 8 SC on the handle, 17 SC on the body, 8 SC on the second handle, 17 SC on the body (50)
We fasten the wire from the handles to the general winding coming from the legs, well insulate with fabric adhesive tape or electrical tape.
28 row: (6 SC, DEC, 15 SC, DEC) * 2 (46)
29 row: (6 SC, DEC, 13 SC, DEC) * 2 (42)
30 row: (6 SC, DEC, 11 SC, DEC) * 2 (38)
31 row: (6 SC, DEC, 9 SC, DEC) * 2 (34)
32 row: (6 SC, DEC, 7 SC, DEC) * 2 (30)
33 row: (3 SC, DEC) * 6 (24)
We fill the body and shoulders with filler.
34 row: SC, DEC, (2 SC, DEC) * 5, SC (18)
35 row: (SC, DEC) * 6 (12)
36 – 40 row (5 rows): 12 SC (12)
We fix the thread, leave the long end for sewing on the head, cut it off.
Stage 5. Face shaping.
Part 1. Eye shaping.
First, using colored pins, we make markings for eye tightening.
1) We count 18 rows of SC down from the crown and put a blue pin in the center of the protruding part of the head (see photo).
2) We count from the blue pin 5 SC to the left and 2 SC up, put a green pin (point).
3) We count from the green pin (point) 1 SC up and put the purple pin (point).
4) We count from the blue pin (point) 5 SC to the right and 2 SC up, put a red pin (point).
5) We count from the red pin (point) 1 SC up and put the pink pin (point).
6) In the last row of knitting of the head, perpendicular to the blue pin, put a yellow pin (point)
We make an eye tightening using a long needle and a nylon thread (or fishing line) as follows:
we insert the needle at the yellow point, draw it out at the green point, again insert the needle at the purple point and draw it out at the pink point, then insert the needle at the red point and draw it out into the open hole of the head. Tighten the thread slightly, tie the ends into several knots and hide them in the open hole of the head.
Stage 5. Face shaping.
Part 2. Chin tightening.
First, we make the markings for tightening the chin using colored pins.
1) The yellow pin (dot) remains in the last row of knitting in the same place where we put it when marking to tighten the eyes.
2) We count from the yellow pin (point) 3 rows SC up and 3 SC to the left, put a blue pin (point).
3) We count from the blue pin (point) 1 SC to the left and 2 SC up, put a pink pin (point).
4) We count from the yellow pin (point) 3 rows SC up and 3 SC to the right, put a green pin (point).
5) We count from the green pin (point) 1 SC to the right and 2 SC up, put a purple pin (point) (see photo).
Using a long needle and a nylon thread (or fishing line), we tighten the chin as follows:
we insert the needle at the yellow point, draw it out in the blue one, again insert the needle at the pink point and draw it out in the purple one, then insert the needle at the green point and draw it out into the open hole of the head. We tighten the thread, tie the ends into several knots, hide them in the open hole of the head.
5 stages, as promised! 😊
Stage 5. Face shaping.
🌈 Part 3. Shaping the eyes, nose, brows, mouth and ears.
👀 We decorate the eyes.
1) Cut out two blanks for the eyes from white felt, look at the shape in the photo.
☝Note! For those who crocheted No. 3 from threads similar in density to those indicated by me, the size of the felt details is approximately 30 * 30 mm. The rest adjust the size of the eyes visually to the size of the resulting head.
2) We make small cuts in the center of the resulting blanks.
3) Insert green eyes-pupils with a diameter of 25 mm into the incisions.
4) We try on the resulting eyes on the head.
5) Sew on the felt details of the eyes with brown “Iris” or “Mouline” threads with small stitches with an overcast seam.
6) We smear the pupils of the eyes on the back with transparent super glue and glue.
☝Note! If you have eyes with a foot or a screw in the back, you don’t need to file them! Stretch the loop on the head where the pupils should be, and insert the leg or screw into the head, then glue the pupil. So the eye will hold more securely!
7) On the edge of the eye, glue false eyelashes with transparent super-glue (see photo).
👃 We make the nose.
We step back from the inner corners of the eyes 1 row SC down and embroider a nose 2 SC wide with three or four stitches with flesh-colored threads. Then we embroider the contour of the nose with brown threads “Iris” or “Mouline” (see photo).
Go up 1 – 2 rows SC up above the eyes and embroider small eyebrows with brown “Iris” or “Mouline” threads (see photo).
💋 We make sponges.
We step back from the nose 2 rows of SC down and embroider the sponges with dense raspberry threads. First we embroider the contour of the lips, then fill the space inside the embroidered contour with horizontal stitches, apply the satin stitch technique.
👂 We make the ears.
We count from the top of the head 15 – 16 rows of SC down and in the middle of the head on the sides with a chain stitch we embroider the contour of the ear (see photo). We do not cut the thread, but for the obtained loops we knit SC, thus we get ears.
Stage 6. Hair.
Part 1. Marking and preparation of hair.
🌈 For convenience, first we make markings on the head, designate the future “hairline”. To do this, take brown threads “Iris” or “Mouline thread” and embroider “hair growth lines” with large stitches (see photo 1 – 4).
🌈 Since our doll is “rainbow”, we make the hair in strands of different colors: turquoise, orange, red, green, yellow and crimson.
🌈 We make a hair blank from the yarn of the above colors. We take any book 35 cm high, wrap it in height with threads, then cut the threads from one edge with scissors (see photo 5 – 6).
The resulting hairs are approximately 70 cm long.
☝Note! We harvest the hair as needed so as not to spoil the extra strings.
Stage 6. Hair.
Part 2. Hair attachment.
🌈 Before fixing the strands of hair, we embroider the bangs with satin stitch (see photo 1 – 2). We embroider the bangs from the crown of the head down to the eyebrows with multi-colored strands: turquoise, orange, green, red, crimson (see photo 1 – 2). To secure the first hair of each color, leave the long end of the thread (about 35 cm), which will then go into the rest of the hair on the head.
🌈 After embroidering the bangs, we fasten the rest of the hair all over the head. We attach the hair to the head like a fringe: holding the hook in the direction “from the top of the head”, insert it under the SC, grab the hair folded in half, pull out the loop, thread the ends of the hair into the pulled loop, tighten (see photo 3 – 6).
🌈 We begin to fasten the hair from the lower indicated border of the conditional hairline. We attach about 6 hairs of each color in a row of SC: turquoise, green, crimson, orange, yellow and red (see photo 7).
🌈 Attach hair to each SC, but through the SC row (see photo 8).
We fill in this way with multi-colored strands all the space on the head, which we initially designated with conditional hair growth lines (see photo 9).
☝🏻Note! In each top row, hairs are arranged on top of each other in color, that is, turquoise over turquoise, green over green, and so on.
🌈 After fixing all the hairs, on the sides in front we separate about 6 hairs on each side and cut it so that the edges of the hair are just below the chin (see photo 10).
🌈 Sew the finished head to the body.
🌈 We collect hair in tails upward under an elastic band.
🌈 Step 8. Apron.
🌈 First we knit the bottom of the apron.
We knit with green (or light green) threads, use a crochet hook for the main knitting.
1 row: we cast on 15 CH + 1 CHH, from the second from the hook of the loop we knit 15 SC along a chain of CH, CH, turn (15)
2 – 4 (3 rows): 15 SC, CH, turn (15)
5 row: INC, 13 SC, INC, CH, turn (17)
6-7 row: 17 SC, CH, turn (17)
8 row: INC, 15 SC, INC, CH, turn (19)
9-10 row: 19 SC, CH, turn (19)
11 row: DEC, 15 SC, DEC, CH, turn (17)
12 row: 17 SC, CH, turn (17)
13 row: DEC, 13 SC, DEC, CH, turn (15)
14 row: 15 SC (15)
We do not cut the thread, we make a strapping along the contour of the SC apron.
We fix the green thread, cut it off.
🌈 Attach the turquoise thread and again tie the apron along the SC contour.
We fix the turquoise thread, cut it off.
🌈 Along the top of the lower part of the apron, we retreat 3 loops from the right corner, attach the green thread to the 4th loop and knit the upper part of the apron.
1st row: 9 SC, CH, turn (9)
2 – 6 (5 rows): 9 SC, CH, turn (9)
We fix the green thread, cut it off.
🌈 Attach the green thread to the 3rd loop in the upper right corner of the lower part of the apron and tie the upper part of the apron on three sides SC, SL-ST in the 13th loop in the upper left corner of the lower part of the apron.
🌈 Attach the turquoise thread to the 2nd loop in the upper right corner of the lower part of the apron and tie the upper part of the apron on three sides SC, SL-ST in the 14th loop in the upper left corner of the lower part of the apron.
🌈 Attach the turquoise thread to the 1st loop in the upper right corner of the lower part of the apron and knit the right tie: 35 CH, fasten the thread, cut it off. At the end of the string we put on a bead (optional).
We knit the tie on the left in the same way.
🌈 Attach the turquoise thread to the 1st loop in the upper right corner of the upper part of the apron and knit the right tie: 30 CH, fasten the thread, cut it off. At the end of the string we put on a bead (optional).
We knit the tie on the left in the same way.
🌈 Cut out a pocket of arbitrary shape with a size of about 25 * 20 mm from white felt and sew the pocket with small stitches with small stitches to the bottom of the apron
Sew a decorative button on the pocket (optional).
We put on a dress and an apron on the doll, tie yellow satin bows on the legs (optional).
We decorate the hairstyle, tie pink satin bows on the ponytails (optional).
Blush the cheeks with pink dry pastels (optional).
Bow on the dress.
The bow consists of two parts: a large bow and a small bow.
We knit a large bow with orange threads, use a crochet hook for the main knitting.
1 row: we collect a chain of 13 CH + 1 CHH, from the second from the hook of the loop we knit along the chain 13 SC, CH, turn (13)
2 – 8 (7 rows): 13 SC, CH, turn (13)
We do not cut the orange thread, we make the binding of the bow: on the side (3 CH, SC) * 4, along the long side of the bow 13 SC, from the other side again (3 CH, SC) * 4, fasten the thread, cut it off.
We knit a small bow with pink threads, use a crochet hook for the main knitting.
1 row: we collect a chain of 9 CH + 1 CHH, from the second from the loop hook we knit along the chain 9 SC, CH, turn (9)
2 – 6 (5 rows): 9 SC, CH, turn (9)
We do not cut the pink thread, we make a bow tie: on the side (3 CH, SC) * 3, along the long side of the bow 9 SC, on the other side again (3 CH, SC) * 3, fasten the thread, cut it off.
We put a small bow over the large one in the center and pull the center of the bow with a pink thread, fasten the thread, leaving the long end for sewing the bow to the dress.
Sew a bow to the dress on top (see photo).
You can sew a decorative button in the center of the bow (optional).
🌈 Lollipop.
We collect a chain of 200 CH + 1 CHH with a white thread, from the second from the hook of the loop we knit along the SC chain to the end, alternating between white and crimson threads (about 6 – 7 SC of each color, more is possible).
We fix the thread, cut it off.
We twist the tied strip, gluing it with hot glue.
For the stick, take a piece of wire with a diameter of 2 mm and a length of about 10 cm, insert it 0.5 cm into the lollipop, glue it, wrap it along the entire length with a white thread, and glue the end of the white thread with hot glue.