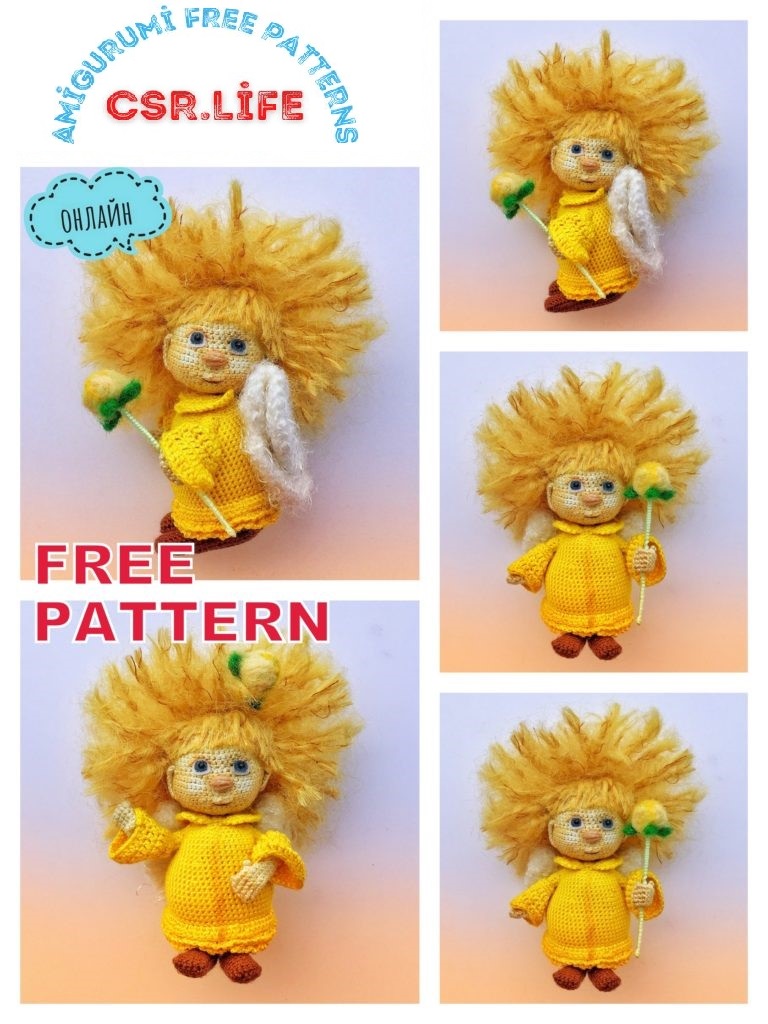
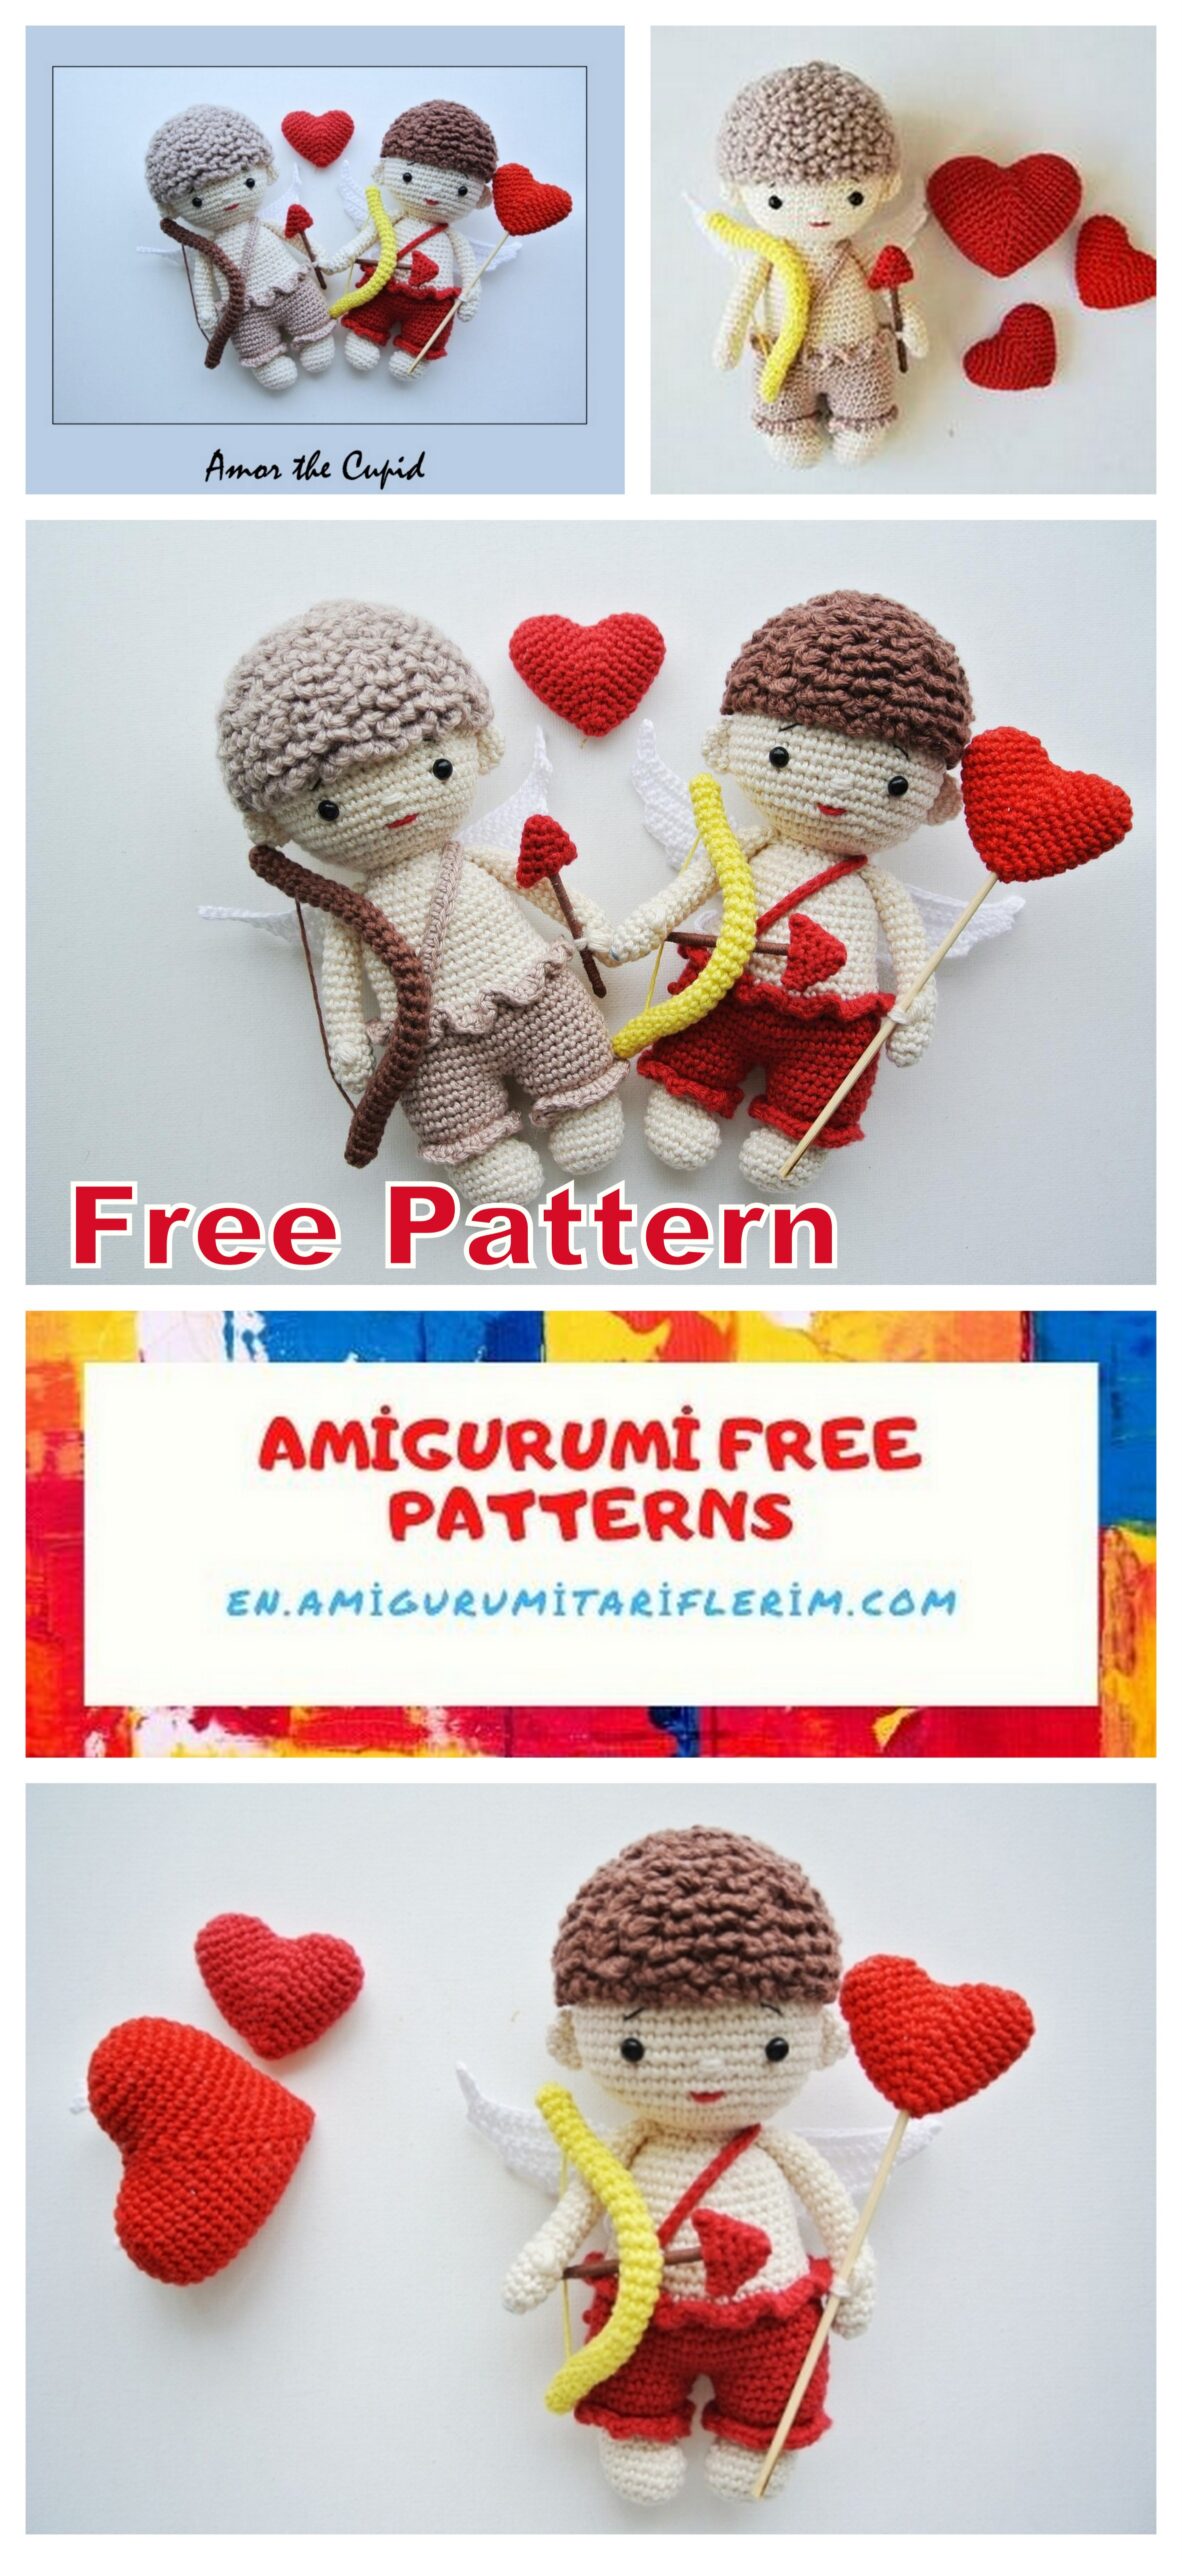
Cupid Amigurumi Free Pattern
We share with you everything you need to know about Amigurumi crochet toys. In this article, amigurumi cupid free pattern is waiting.
Materials and Tools
Yarn: 1 or more colors.
I used Schachenmayr ORIGINAL Catania (100% cotton) in milk, light brown, white,
yellow, red and Scheepjes DONNA (50% merinowol and 50% acryl) in light brown (hair).
Change of colors are only suggestions, you can choose your own color patterns.
Crochet hook in accordance with the yarn you use.
I used a 2.5mm hook.
Stuffing: I use polyester wool and a chopstick to stuff the doll.
Tapestry needle, scissors.
Safety eyes 6.00 mm.
Stitch marker.
I used thin black thread.
Black embroidery thread.
Wire and tape (bow)
Toothpick (arrow)
Abbreviations
mr = Magic ring
ch = Chain
dc=Double crochet
st = Stitch
slst = Slip stitch
sc = Single crochet
() = Parentheses are used for repeated patterns of stitches, example: (2 sc, inc) x3 means repeat
3 times (2 single crochet and one increase).
inc = 2 sc in the same stitch
dec = 2 sc together, but working in the front loops only
BLO=use only back loop
FO=fasten off
Bobble stitch=3 dc in one stitch

PATTERN

Legs (make 2)
Round Pattern #st
1- 6 sc in magic ring 6
2- (1 inc) x6 12
3- (1 inc, 1 sc) x6 18
4-6- 18 sc around, 3 rounds 18
7- 1 sc, 2 dec, 13 sc 16
Note: I used invisible decrease for the next rounds. See the photo tutorial provided on the last page.
8- 2 dec, 12 sc 14
9-10- 14 sc around, 2 rounds 14
Change the color of yarn to white in the last stitch of round 10
How to change the color of yarn:
With the two loops from the previous yarn on the hook (fig 1), wrap the new yarn around the
hook, then pull the new yarn through the two loops of the stitch (fig 2).
11- White yarn, BLO: (1 sc, 1 inc) x7 21
12-14- 21 sc around, 3 rounds 21
Fasten off the first leg.
Stuff the legs firmly.
Make the second leg, but don’t cut the brown yarn.
BODY
Round Pattern #st
Crochet 4 sc in the second leg, after round 14 (fig 3).
Insert your hook in the 4th stitch from where the first leg was finished off (fig 4) and make the
first stitch of the body (fig 5). This will be the new round (round 15). Now our legs are
connected. See photos below for reference.
3 • • • • 4 sc, in the second leg, 4 in the 4th stitch, after FO after round 14
15- Two legs together: 21 sc around first leg and 21 sc around 42
second (fig 6).
16-20- 42 sc around, 5 rounds 42
21- (1 dec, 5 sc) x6, (fig 7) 36
Change the color of yarn to milk in the last stitch.
Lay the previous yarn in front of you (fig 8).
22- BLO: 36 sc around 36
23- 36 sc around 36
24- (1 dec, 7 sc) x4 32
We are going to make ruffles.
Find the first front loop of round 22 (fig 9).
Ruffles: pick up the brown yarn and make a start chain. Insert
your hook again in the same loop and crochet 3 sc (fig 10).
Make 3 sc in each front loop (fig 11).
On the same way, make the ruffles on legs.
See the photo tutorials below.
25-30- 32 sc around, 6 rounds 32
31- (1 dec, 6 sc) x4 28
32- 28 sc around 28
33- (1 dec, 5 sc) x4 24
34- 24 sc around 24
35- (1 dec, 2 sc) x6 18
36-37- 18 sc around, 2 rounds
Stuff the body firmly (fig 15).
Don’t cut the yarn, we are going to crochet head.
HEAD
Round Pattern #st
38- (1 inc) x18 36
39- 36 sc around 36
40- (1 inc, 5 sc) x6 42
41- 3 sc, (1 inc, 6 sc) x5, 1 inc, 3 sc 48
42-45- 48 sc around, 4 rounds
Attach the eyes to the head between rounds 44 and 45 with 8
stitches in-between (fig 16).
46-47- 48 sc around, 2 rounds 48
48-53- BLO: 48 sc around, 6 rounds 48
54- BLO: (1 dec, 6 sc) x6 42
55- BLO: (1 dec, 5 sc) x6 36
56- BLO: (1 dec, 4 sc) x6 30
57- BLO: (1 dec, 3 sc) x6 24
58 BLO: (1 dec, 2 sc) x6 18
59- BLO: (1 dec, 1 sc) x6 12
60- BLO: (1 dec) x6 6
Stuff the head firmly.
How to close the end of the round: with a darning needle, insert the remaining yarn through all
the back loops of the stitches on the last round (fig 17). Pull all together at once and sew to hide
the yarn inside the part you are working on (fig 18).
HAIR
I recommend using a soft wool yarn, baby wool, merino wool. It’s possible to use acrylic yarn.
Lay your toy with the back side facing you. Work on the remaining front loops from round 48 to
60. Insert your hook in the first loop of round 48 (fig 20) and pick up the yarn (fig 21). Crochet 3
chains and slip stich in the next loop.
Make the combination of (3 ch + slst) in each front loop going from bottom to top (fig 23, 24 25)
EARS (make 2)
Round Pattern #st
1- 5 sc in magic ring 5
2- (1 inc) x5 10
3- 10 sc around 15
Cut the yarn leaving a tail for sewing.
ARMS (make 2)
Round Pattern #st
1- 5 sc in magic ring 5
2- (1 inc) x5 10
3-4- 10 sc around, 2 rounds 10
5- Bobble stitch, 9 sc around 10
How to make 3-dc bobble stitch:
– Make 3 dc in the same stitch keeping the last loops of each dc on the hook (fig 26).
– Then a sl st into all 4 loops (fig 27).
6- 10 sc around 10
7- (3 sc, 1 dec) x2 8
8-17- 8 sc around, 10 rounds 8
Stuff the arms lightly, cut the yarn leaving a tail for sewing.
Right arm: crochet 1 sc more after round 17, then close the arm with 3 sc across both sides.
Left arm: crochet 5 sc more after round 17, then close the arm with 3 sc across both sides.
ASSEMBLING:
– Sew the ears to the head.
– Sew the arms to the body.
– Embroider the nose, mouth and eyebrows.
BOW
Round Pattern #st
1- 6 sc in magic ring 6
2-34- 6 sc around, 32 rounds 6
Use a wire about 12cm long and wrap tape around the ends. Insert the wire into the bow and
close the gap. Join the two sides with the remaining tail as shown in figure 34.
ARROW
Round Pattern #st
1- 4 sc in magic ring 4
2- (1 sc, 1 inc) x2 6
3- (2 sc, 1 inc) x2 8
4- (3 sc, 1 inc) x2 10
Cut the yarn leaving a tail for closing.
Wrap the yarn around a toothpick (fig 35). Apply glue to the end of the toothpick and secure it
to the arrow. Finish off the arrow with the remaining yarn by going through the front loops.
WINGS
Round Pattern #st
1- Crochet 5 chains 5
2- Turn your crocheting: 1 starting chain, 3 sc, 1 inc, 1 sc, (fig 37) 6
3- Turn your crocheting: 1 starting chain, 6 sc, 4 chains, (fig 38) 10
4- Turn your crocheting, in second chain from the hook: 6 sc, 1 inc, 2 sc, (fig 39)
5- Turn your crocheting: 1 starting chain, 10 sc, 4 chains 14
6- Turn your crocheting, in second chain from the hook: 9 sc, 1 inc, 3 sc, 14
7- Turn your crocheting: 1 starting chain, 14 sc, 4 chains 18
8- Turn your crocheting, in second chain from the hook: 12 sc, 1 inc, 4 sc, (fig 40). 18
9- Turn your crocheting: 1 starting chain, 18 sc, 4 chains 22
10- Turn your crocheting, in second chain from the hook: 15 sc, 1
inc, 5 sc, (fig 41) 22
Fold the wing and sew it (fig 42, 43).
SASH
Crochet 33 chains. In the second chain from the hook: 32 sc.
Sew the sash to body.
Sew the wings to body.
HEART
ROUND PATTERN #st
1- 5 sc in magic ring 5
2- (1 inc) x5 10
3- (1 sc, 1 inc) x5 15
4-6- 15 sc around, 3 rounds 15
Finish the first piece of heart.
Don’t cut the yarn from second piece (fig 1).
Lay your two pieces together.
Then insert your hook in the next stitch (after finished) of first piece from inside to outside. Pick
up the loop of second piece (fig 2) and pull it through (fig 3). Now our two pieces are connected.
Make a starting chain, then insert your hook in next stitch of first piece and make a first stitch of
new round (round 7). Put your marker here.
Follow the pattern below to make a heart farther.
7- Two pieces together, 15 sc of first piece and 15 sc of second, (fig 5) 30
8-9- 30 sc around 30
10- 1 dec, 11 sc, 2 dec, 11 sc, 1 dec 26
11- 1 dec, 9 sc, 2 dec, 9 sc, 1 dec 22
12- 1 dec, 7 sc, 2 dec, 7 sc, 1 dec 18
13- 1 dec, 5 sc, 2 dec, 5 sc, 1 dec 14
Start to stuff the heart. Do it lightly
14- 1 dec, 3 sc, 2 dec, 3 sc, 1 dec 10
15- 1 dec, 1 sc, 2 dec, 1 sc, 1 dec 6
How to make invisible decrease:
Insert your hook in the front loops (a) and then (b) (fig 1), go in the front loop (a) and in (b) (fig 2, 3). Yarn over and pull through the front loops (a) and (b) (fig 4). Yarn over and pull through the 2 remaining loops (fig 5).