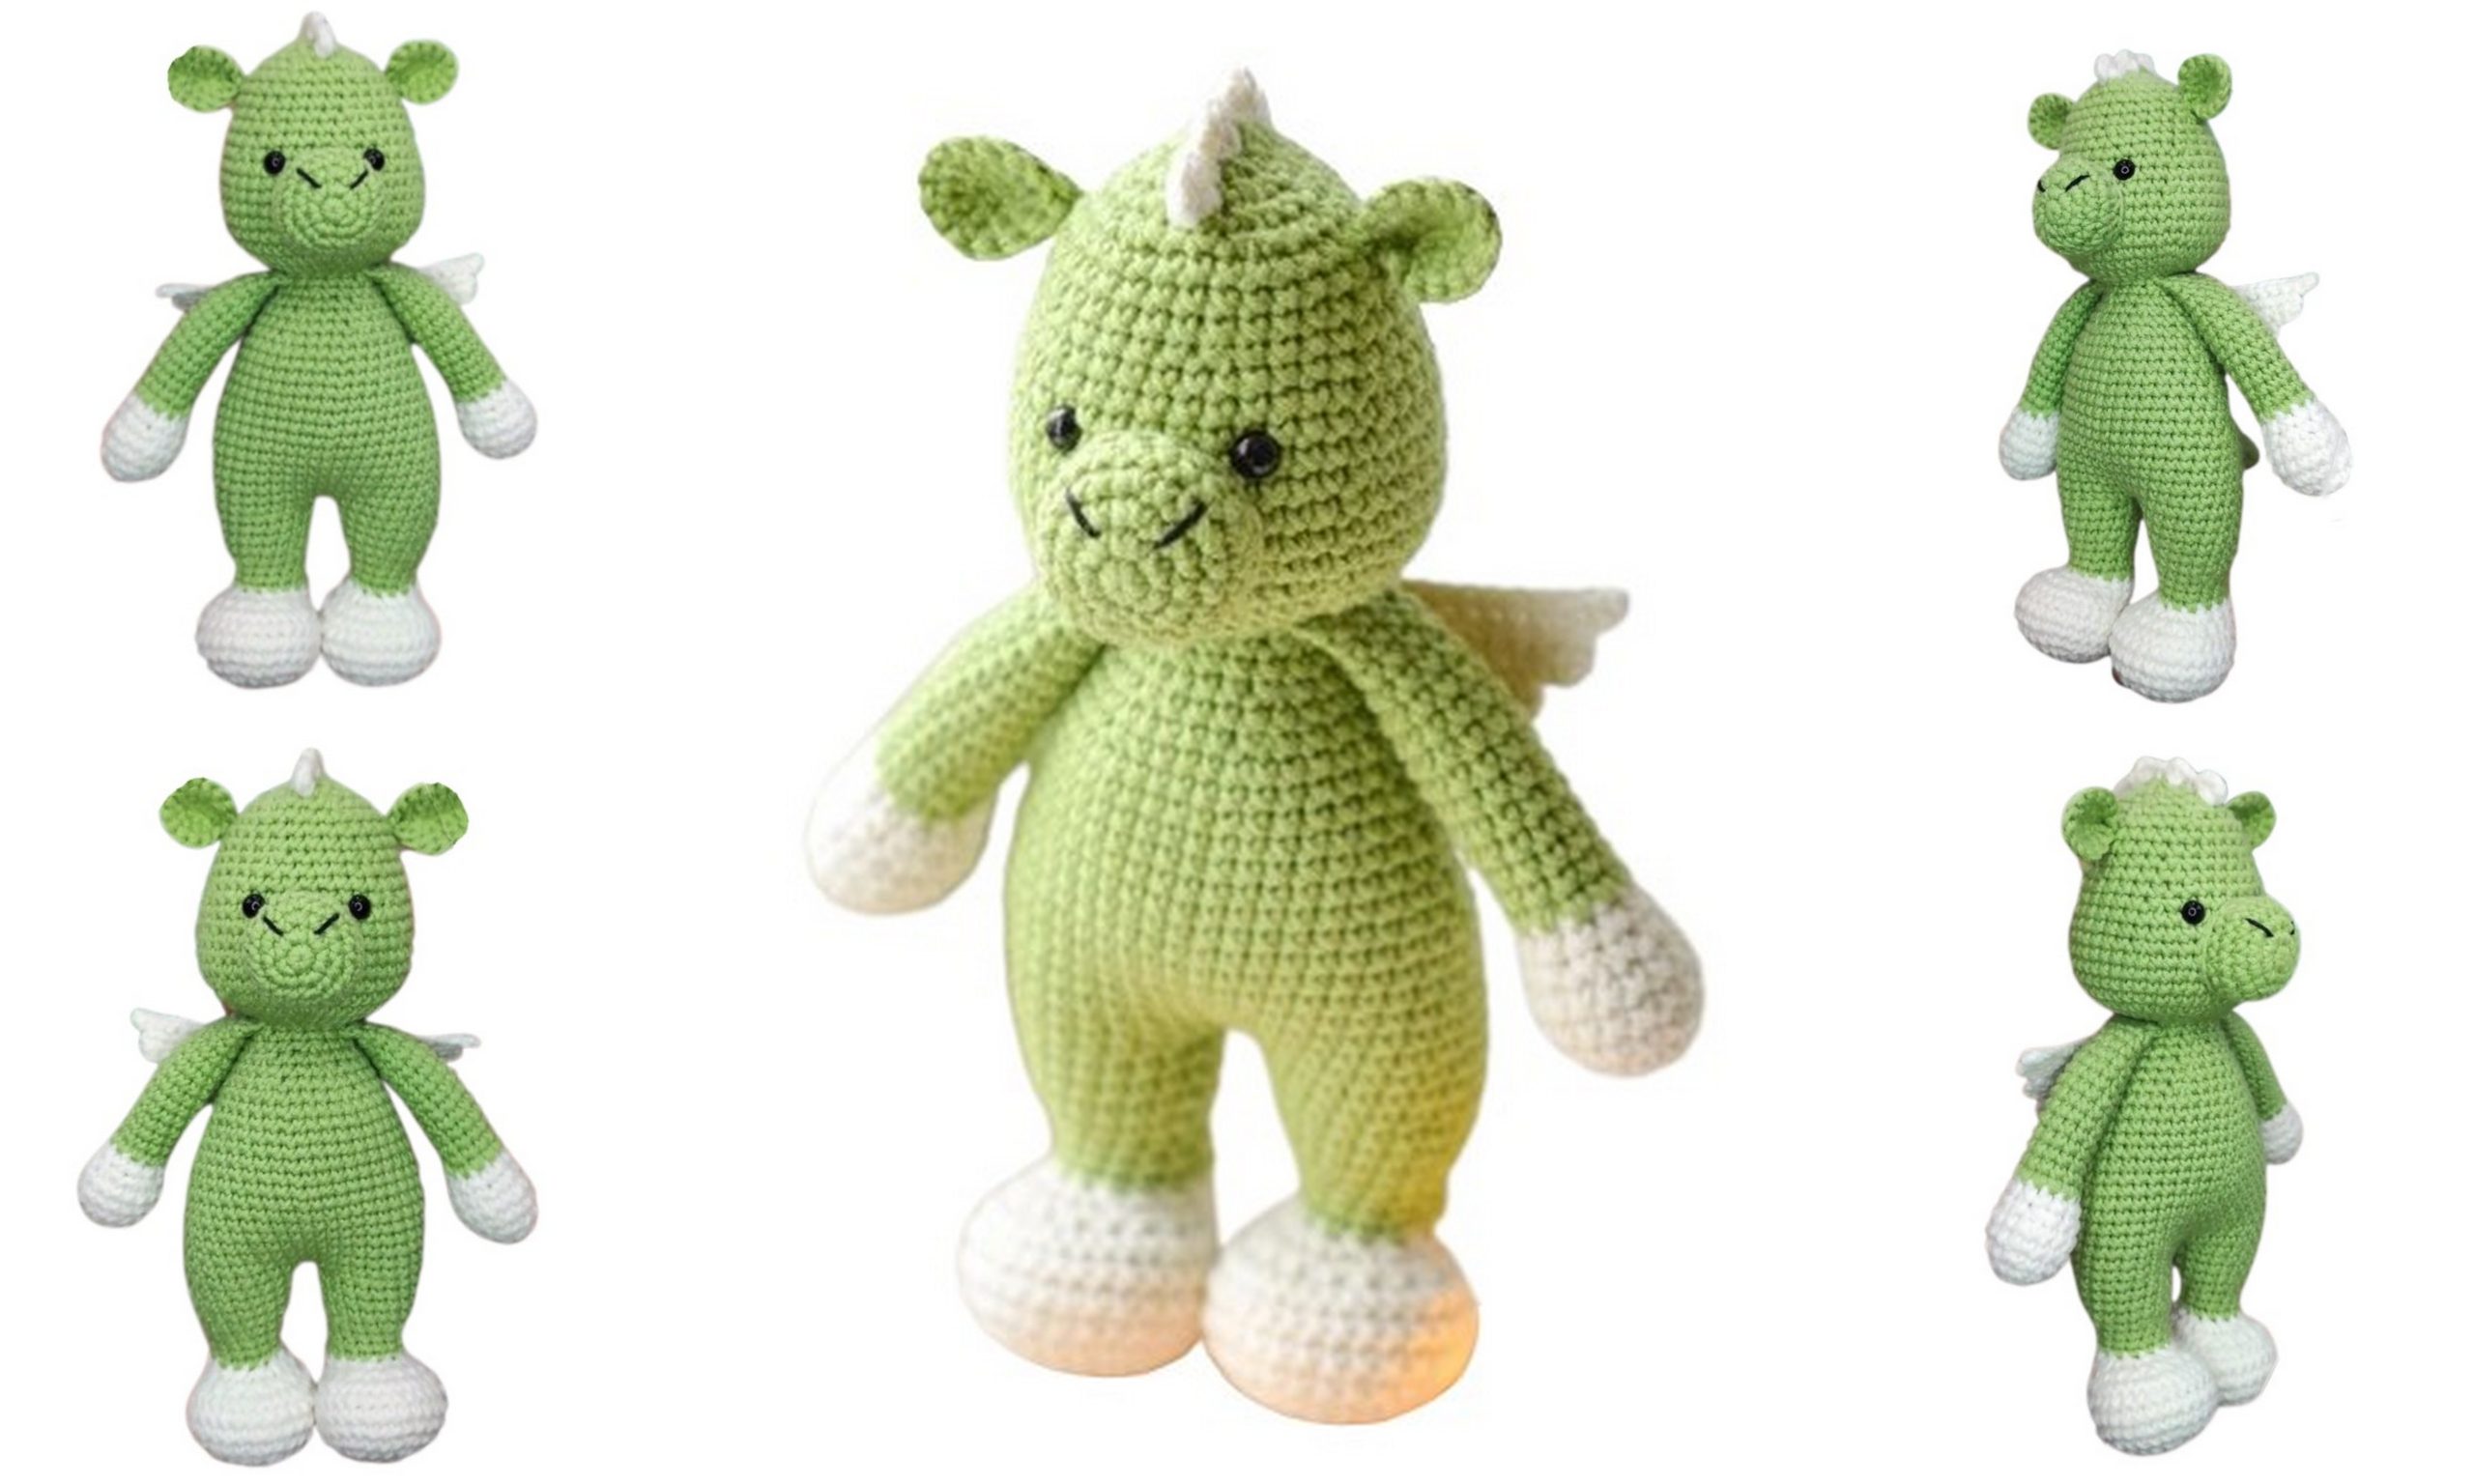
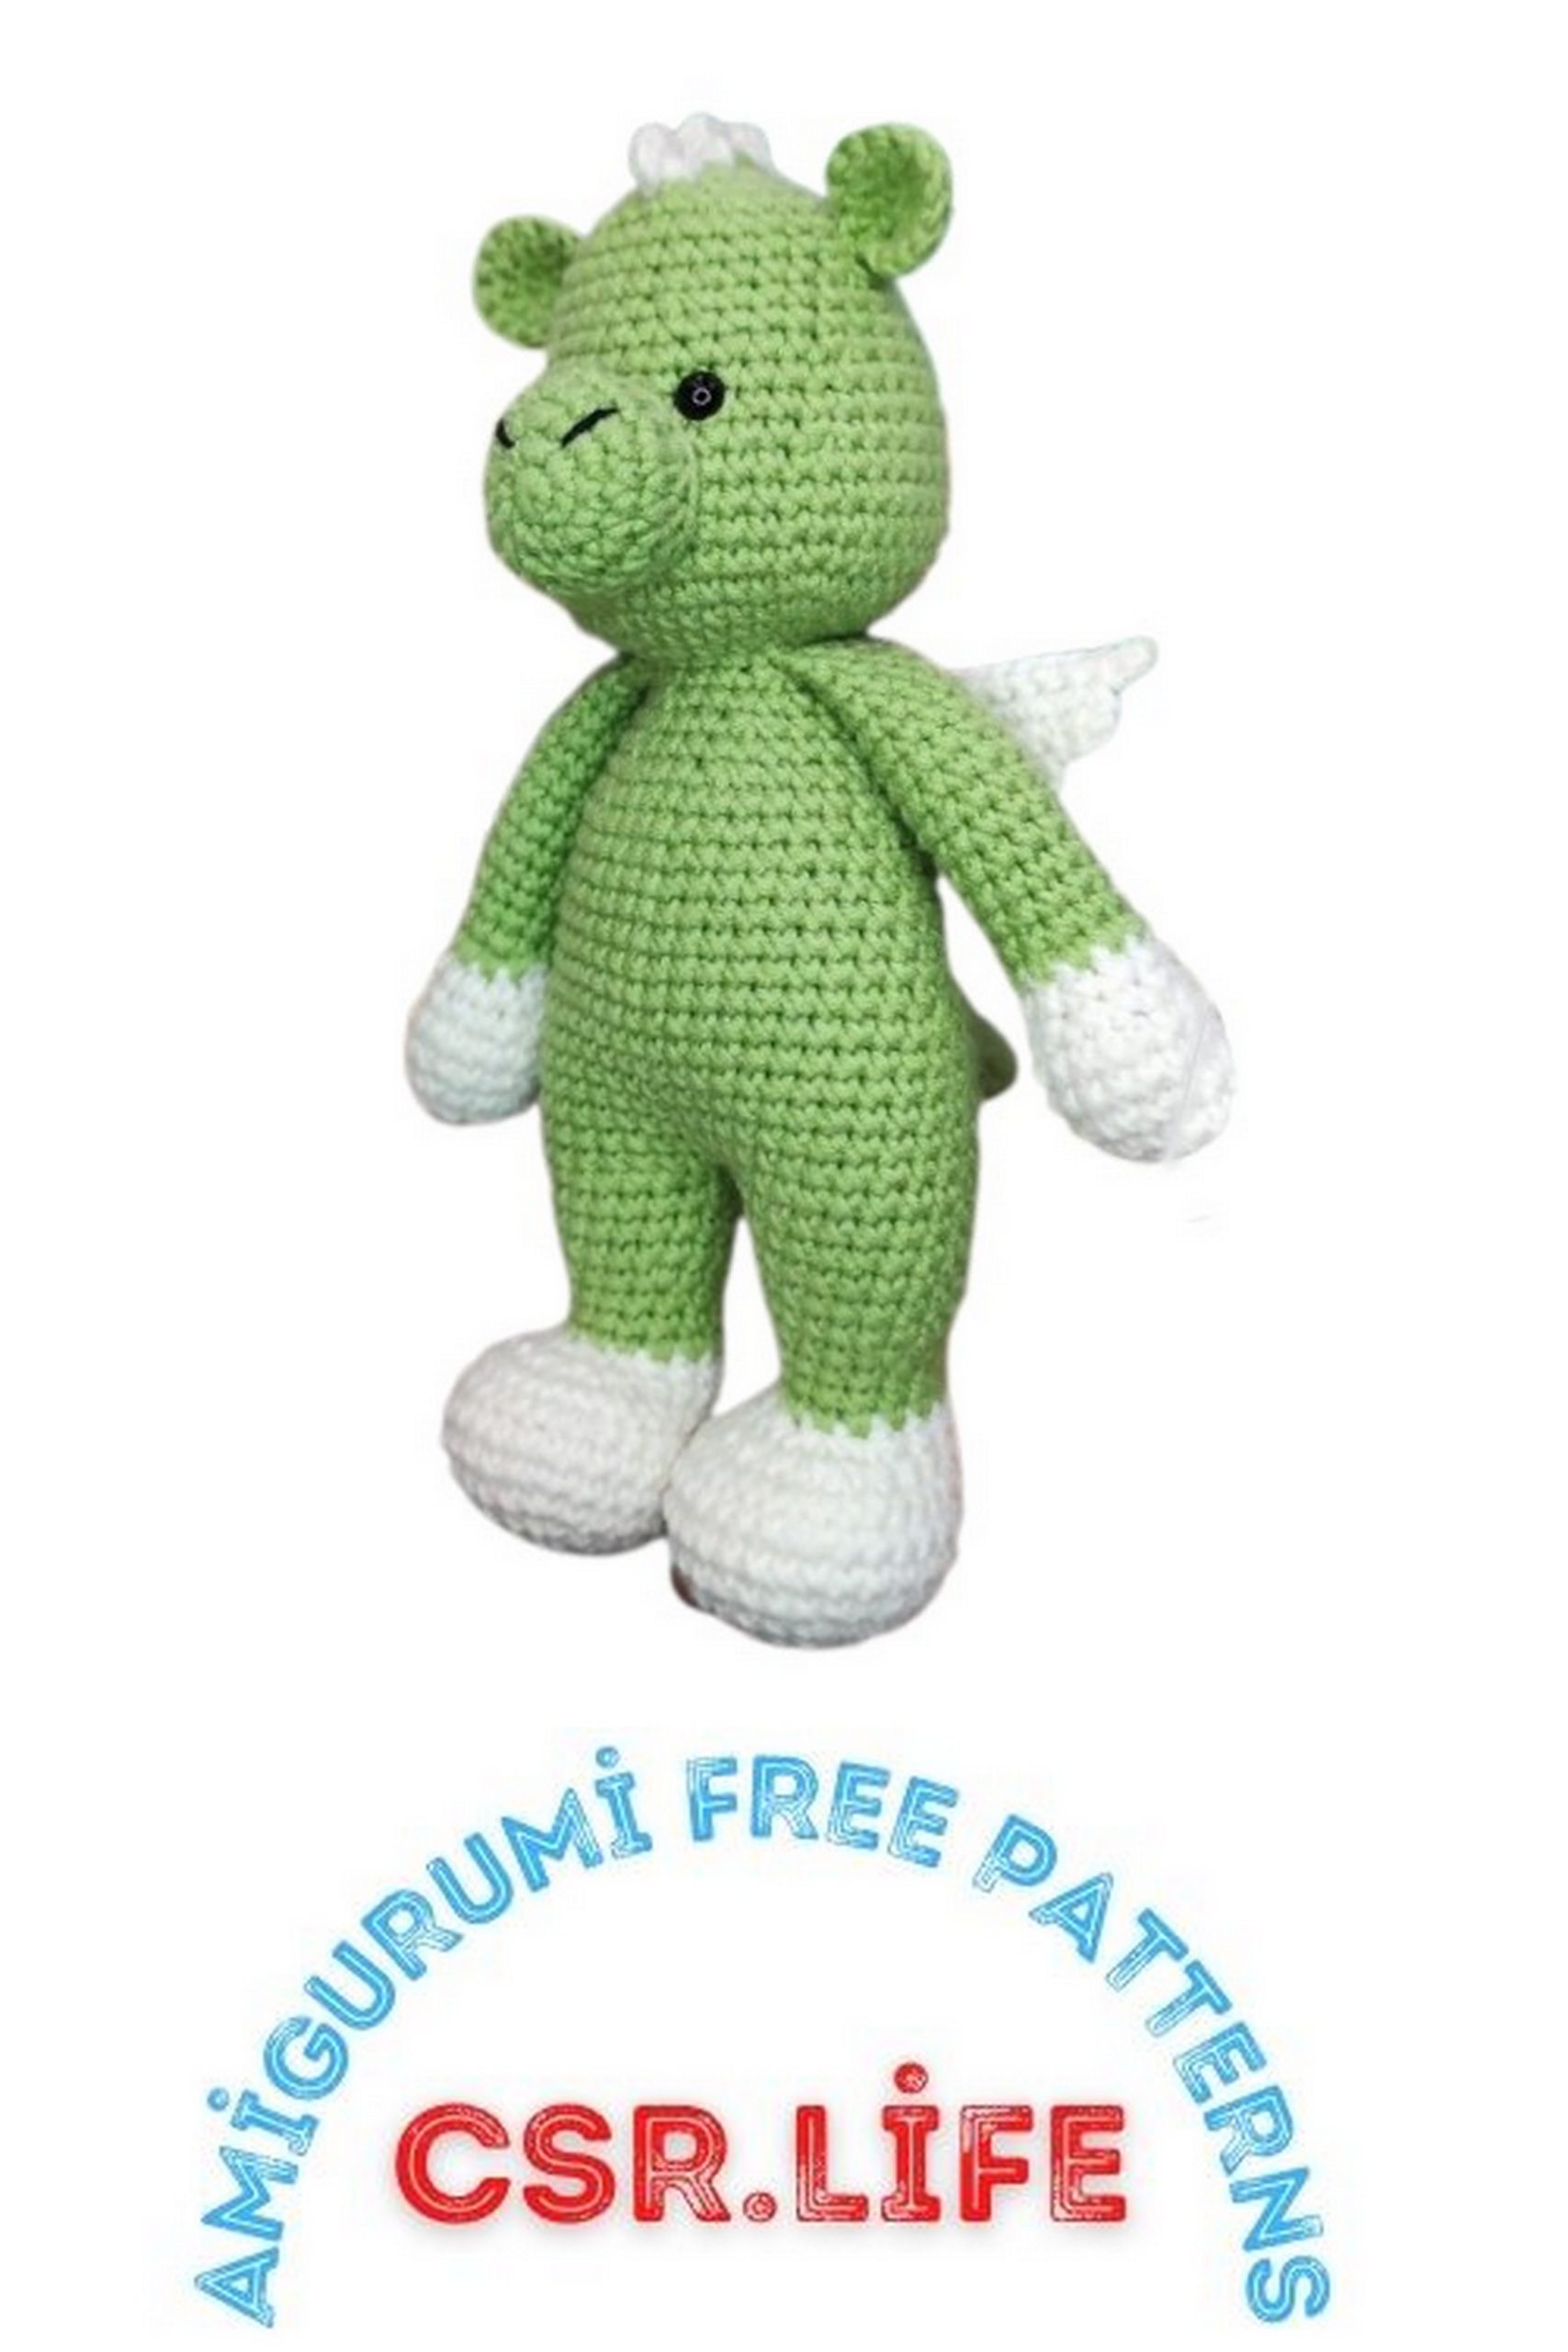
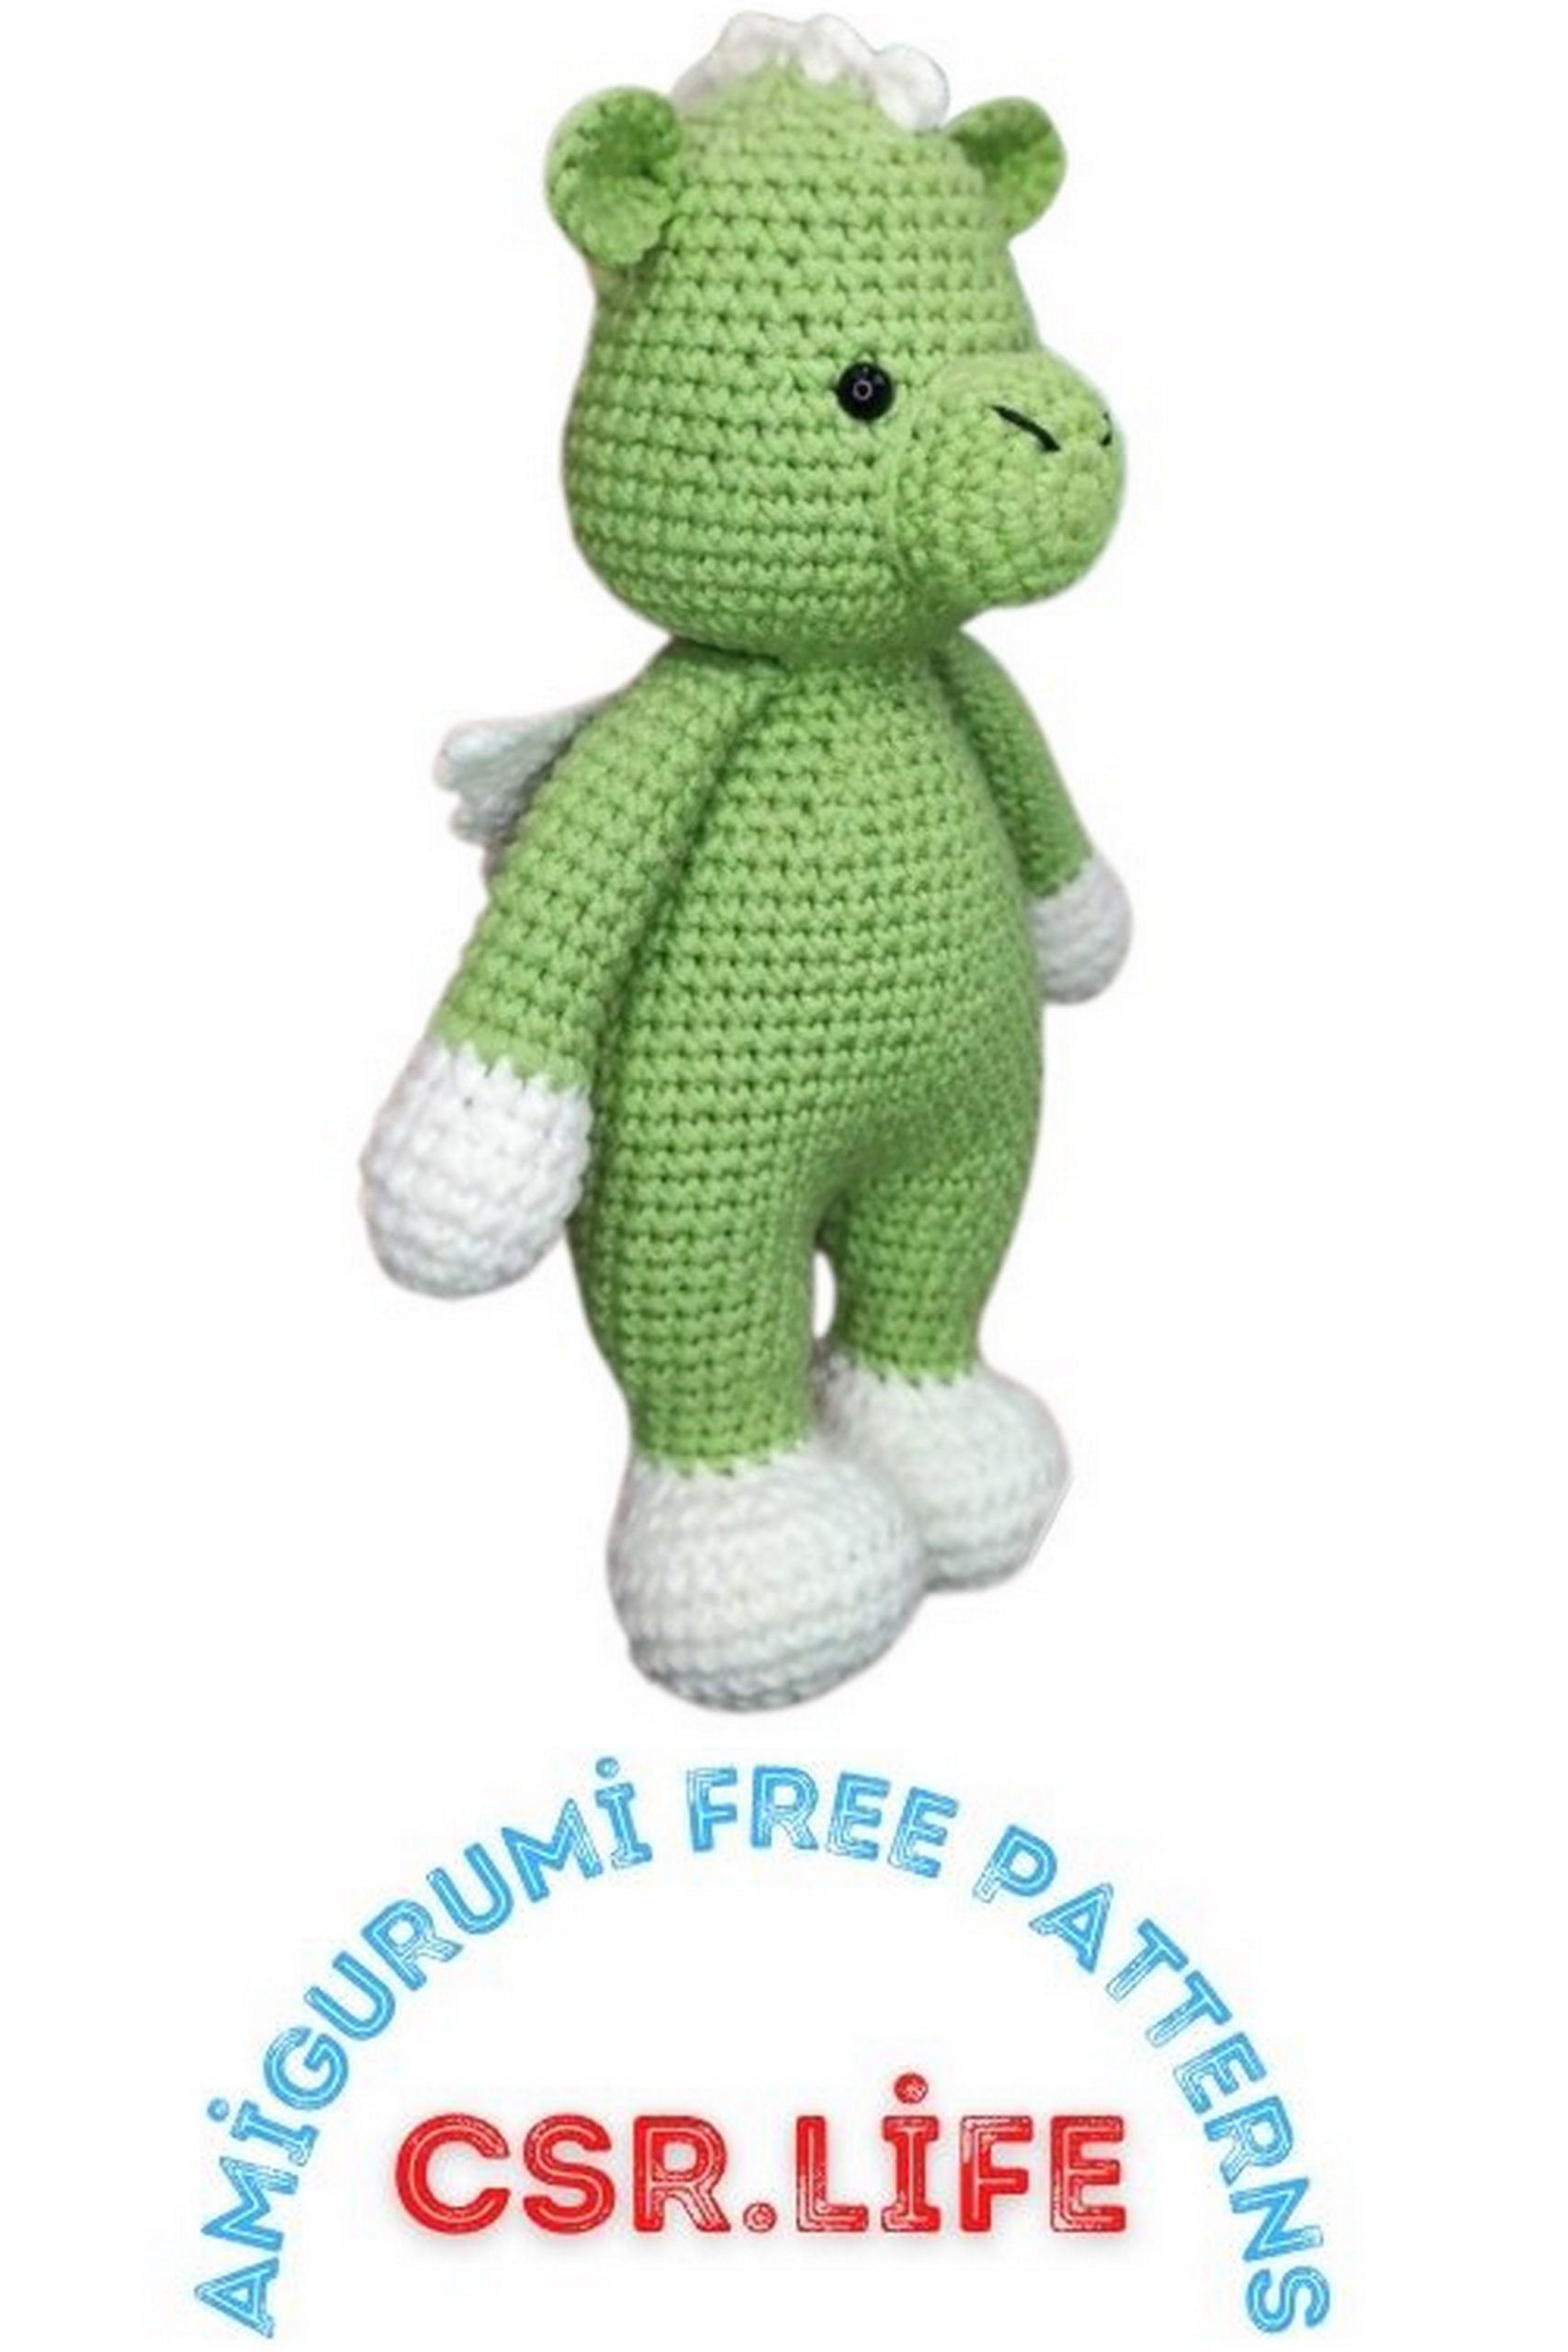
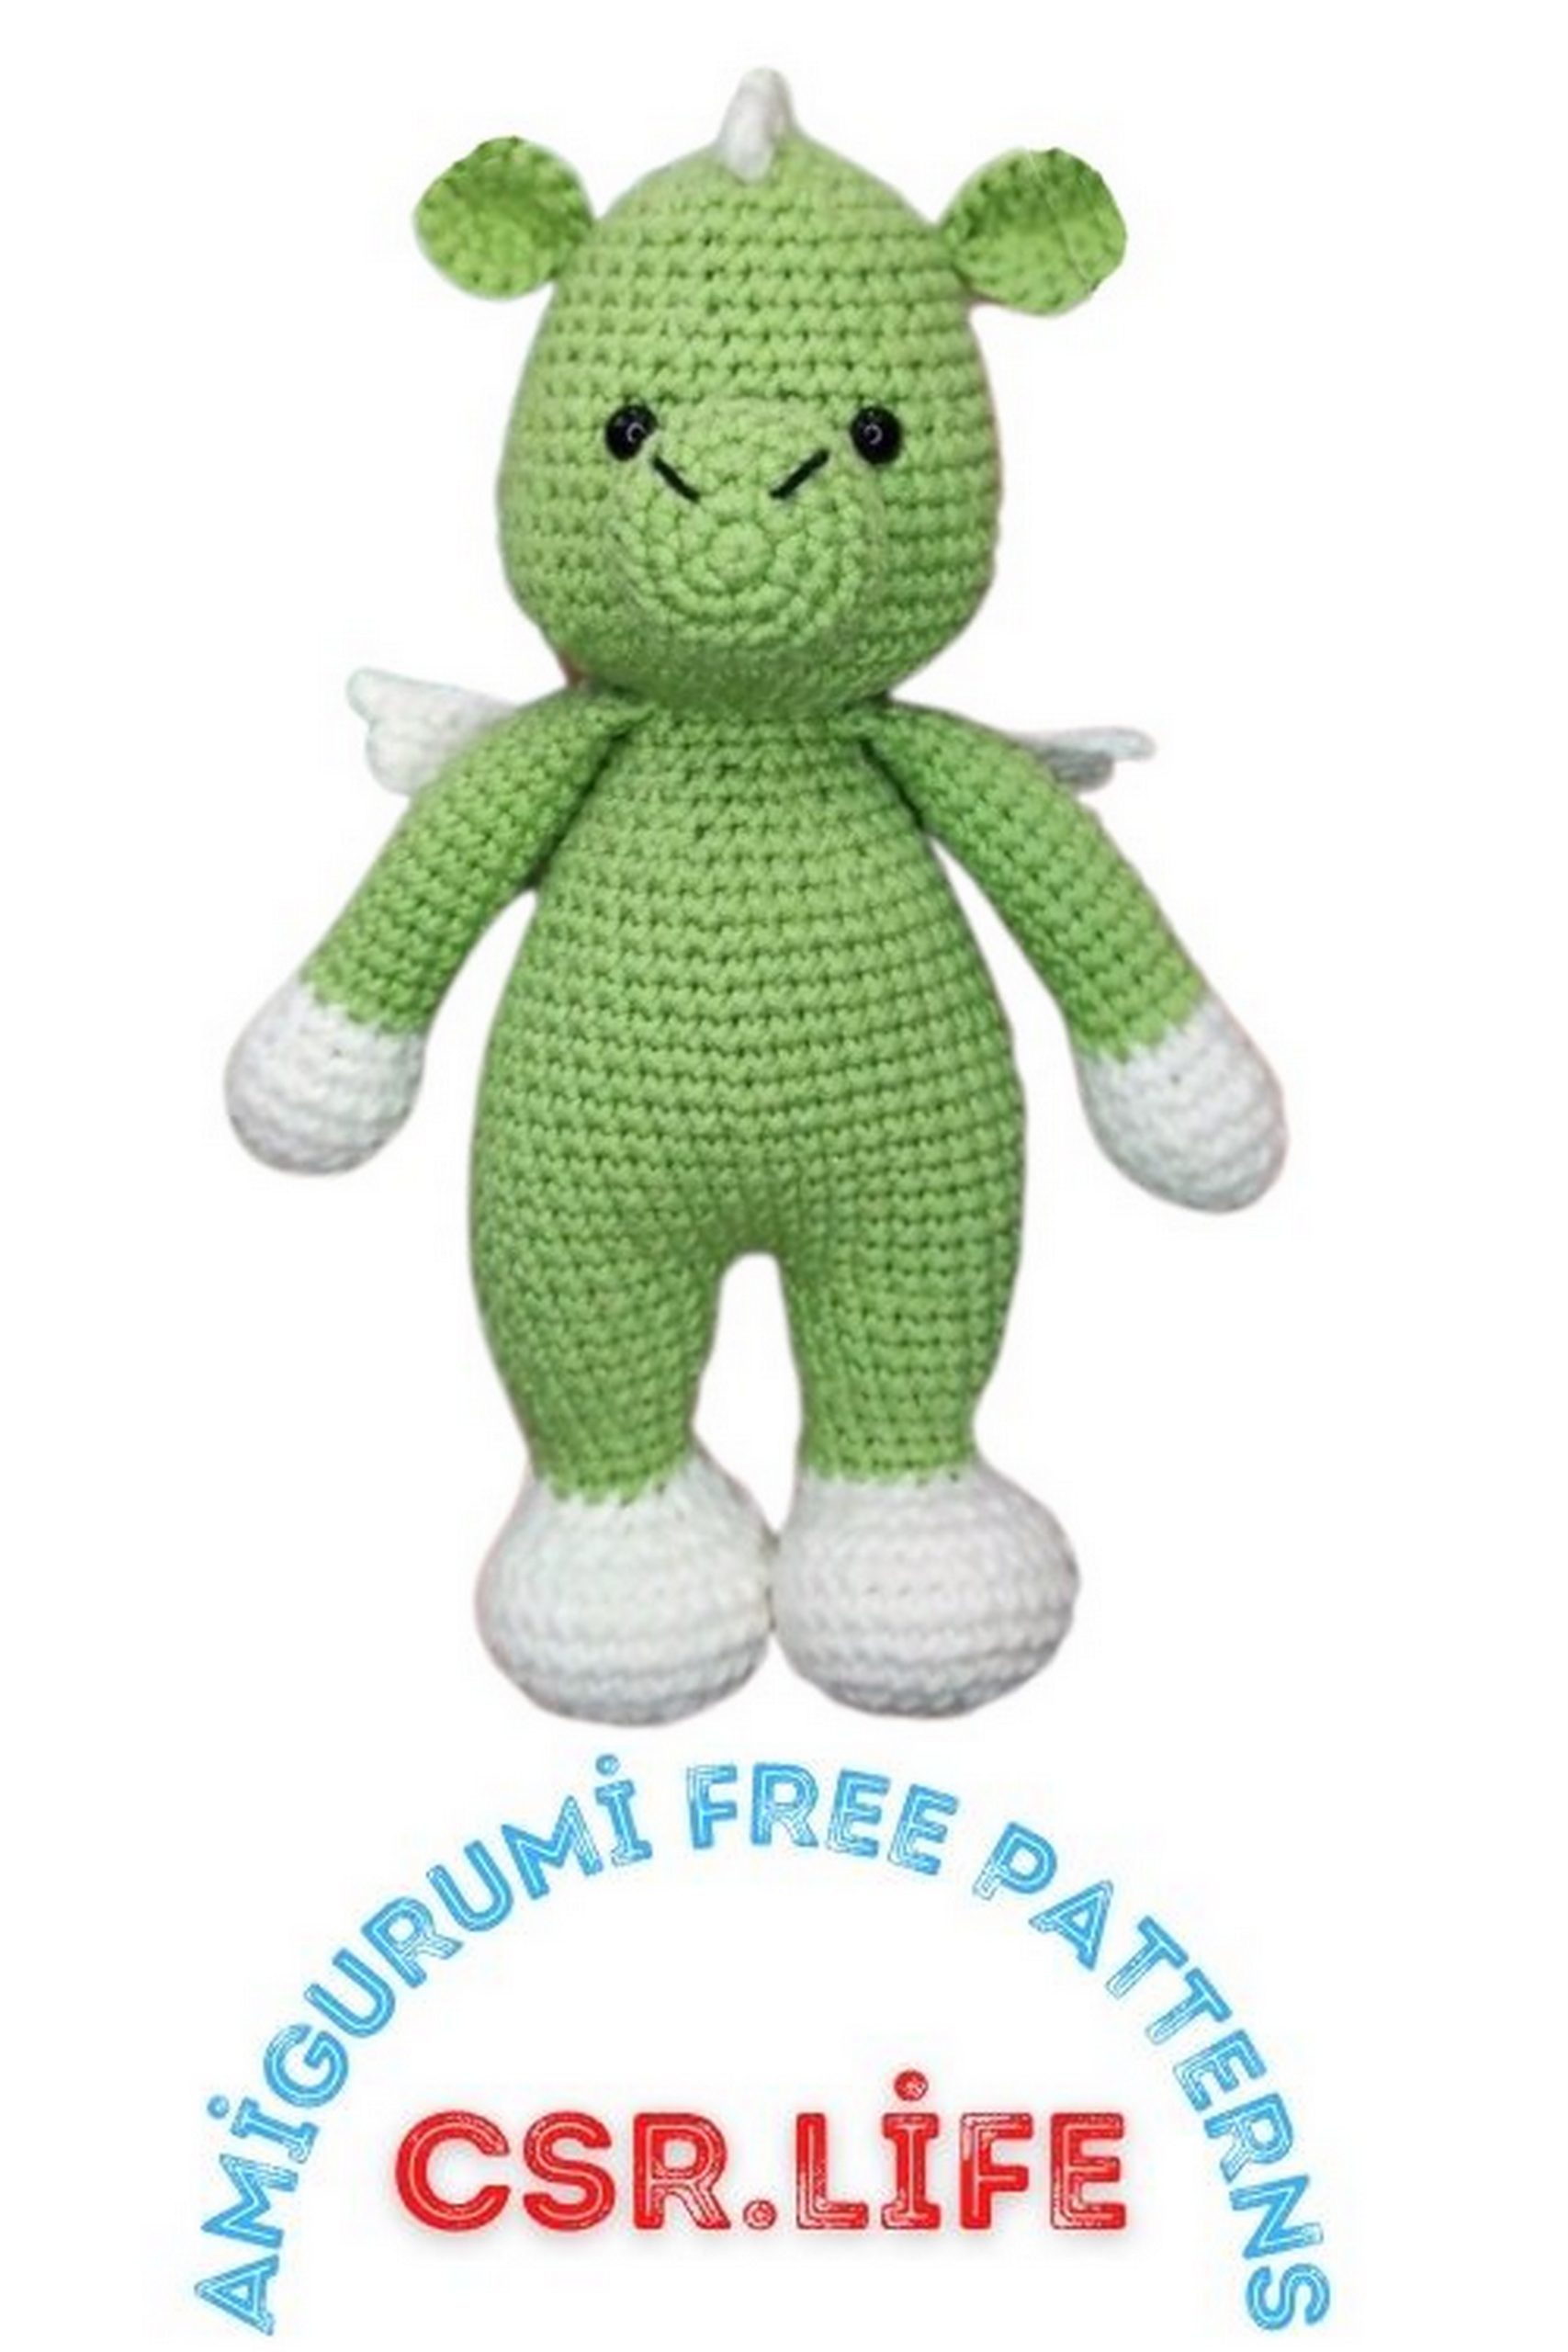
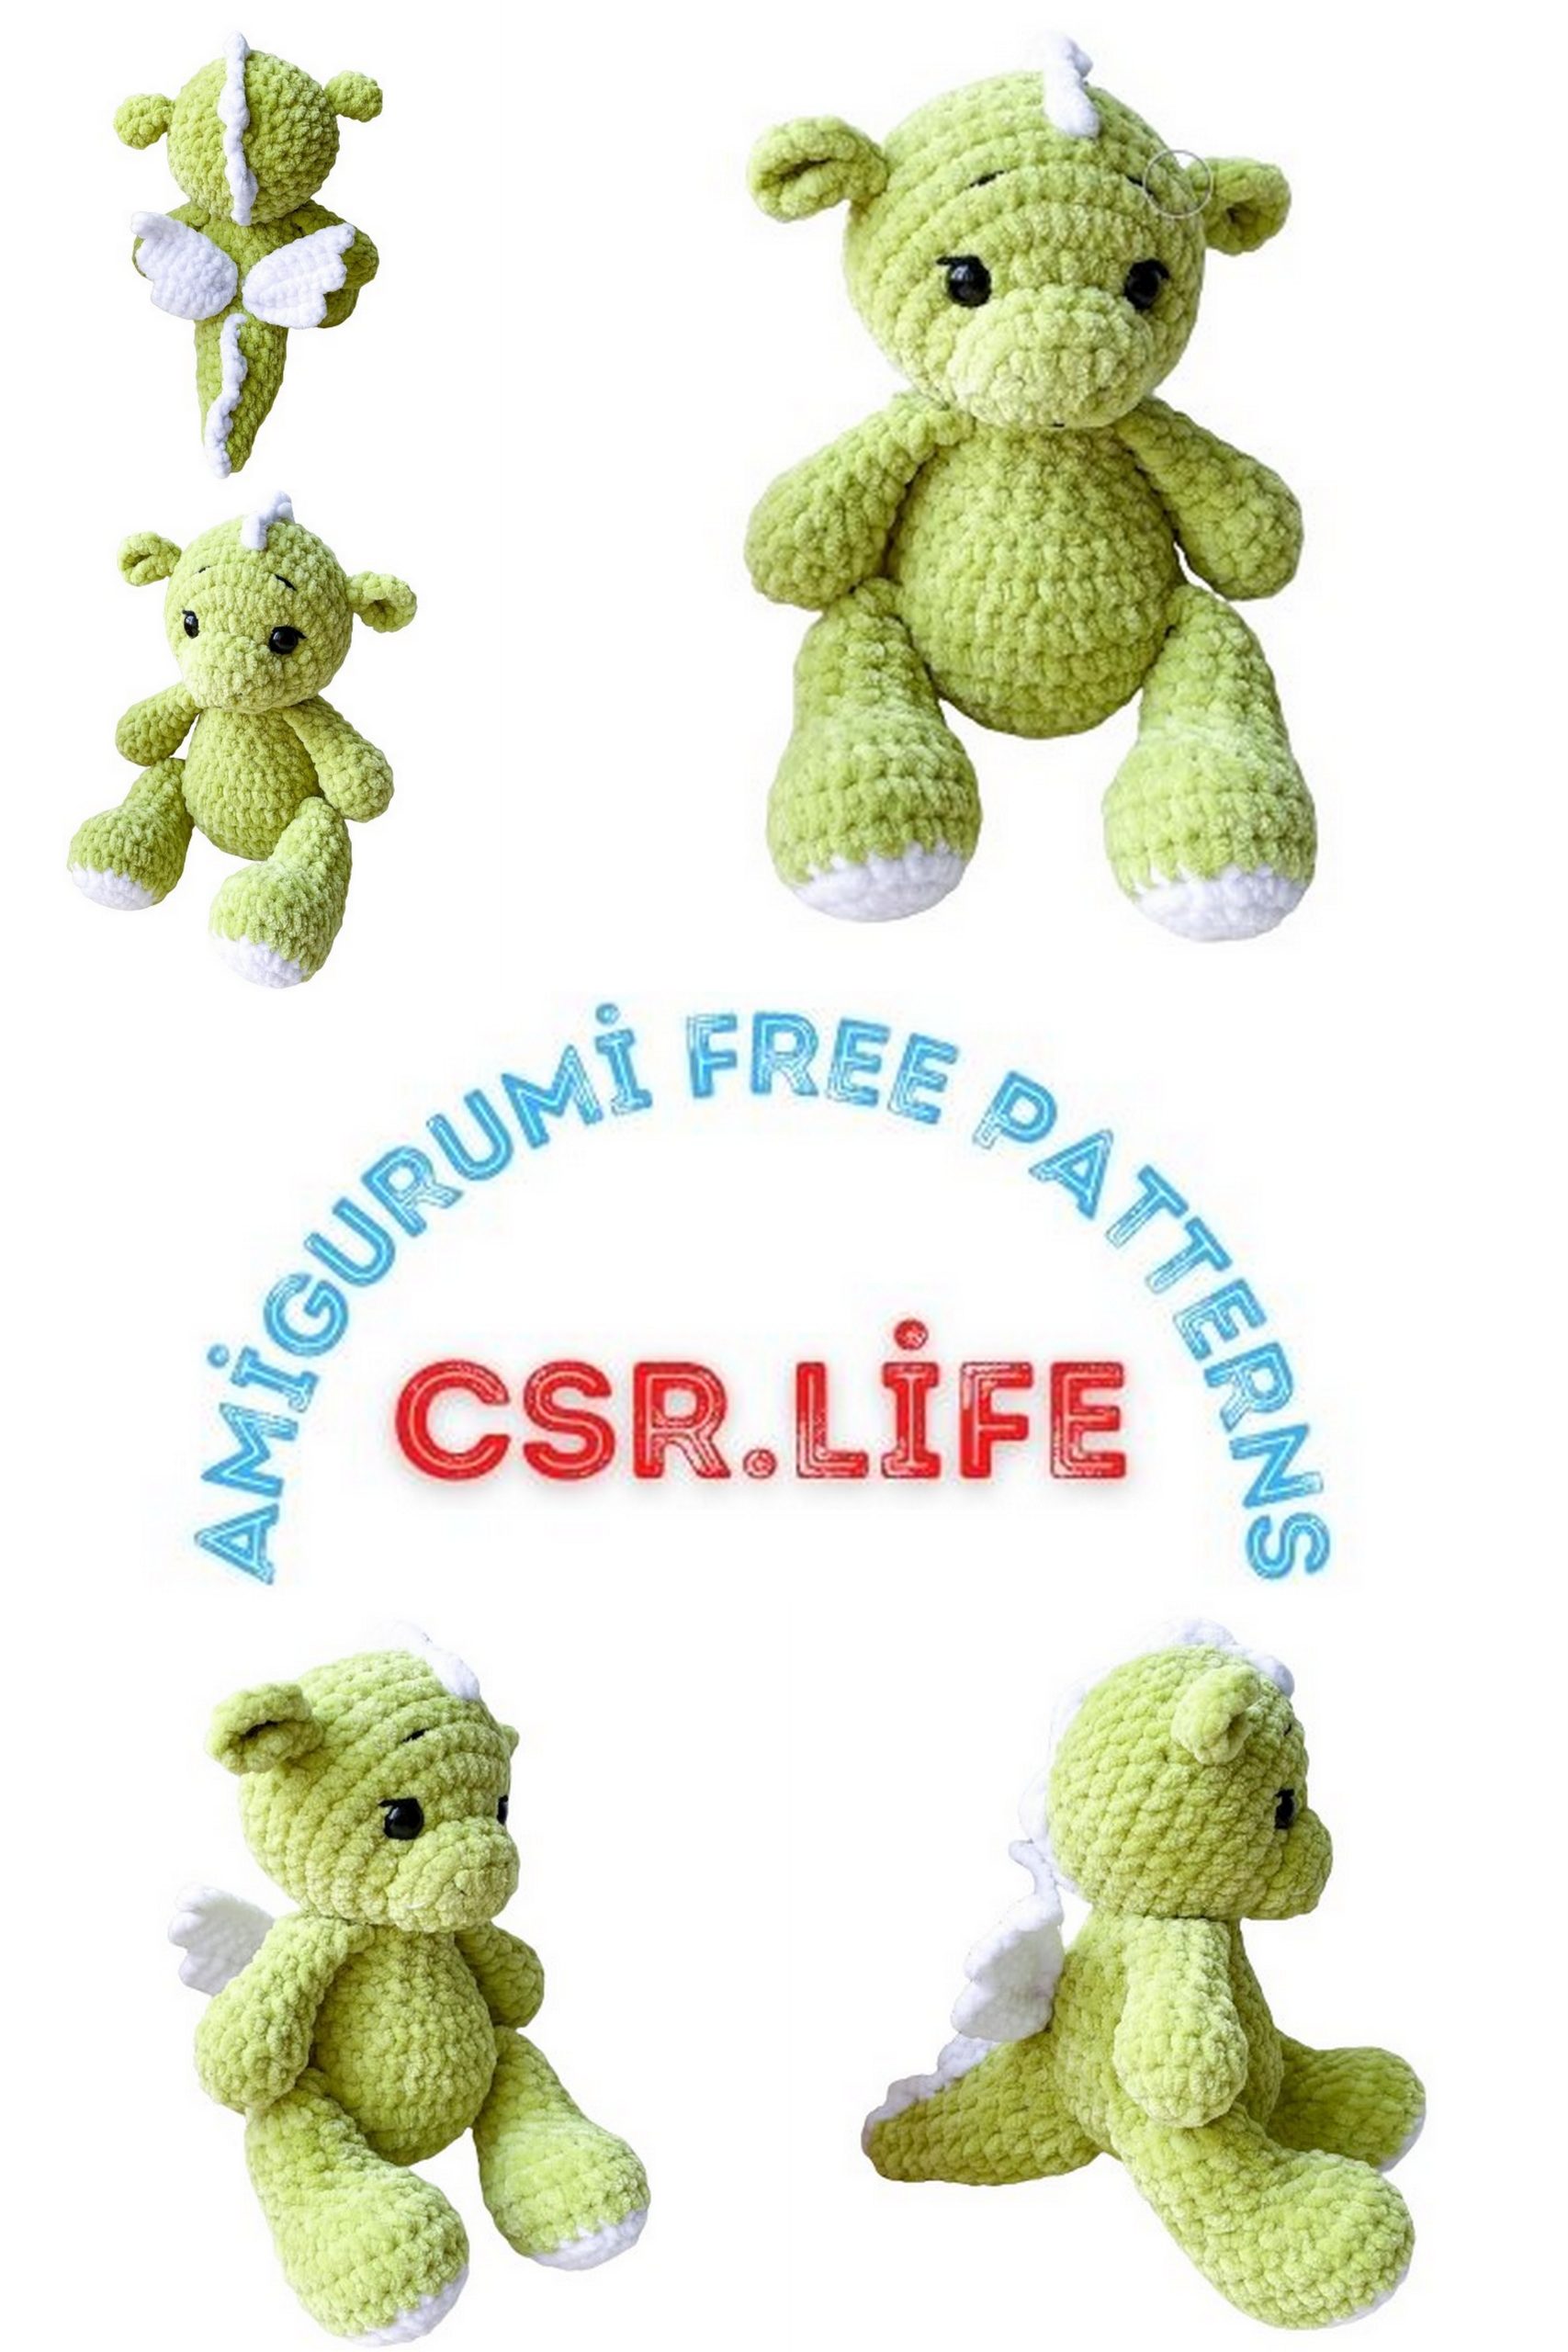
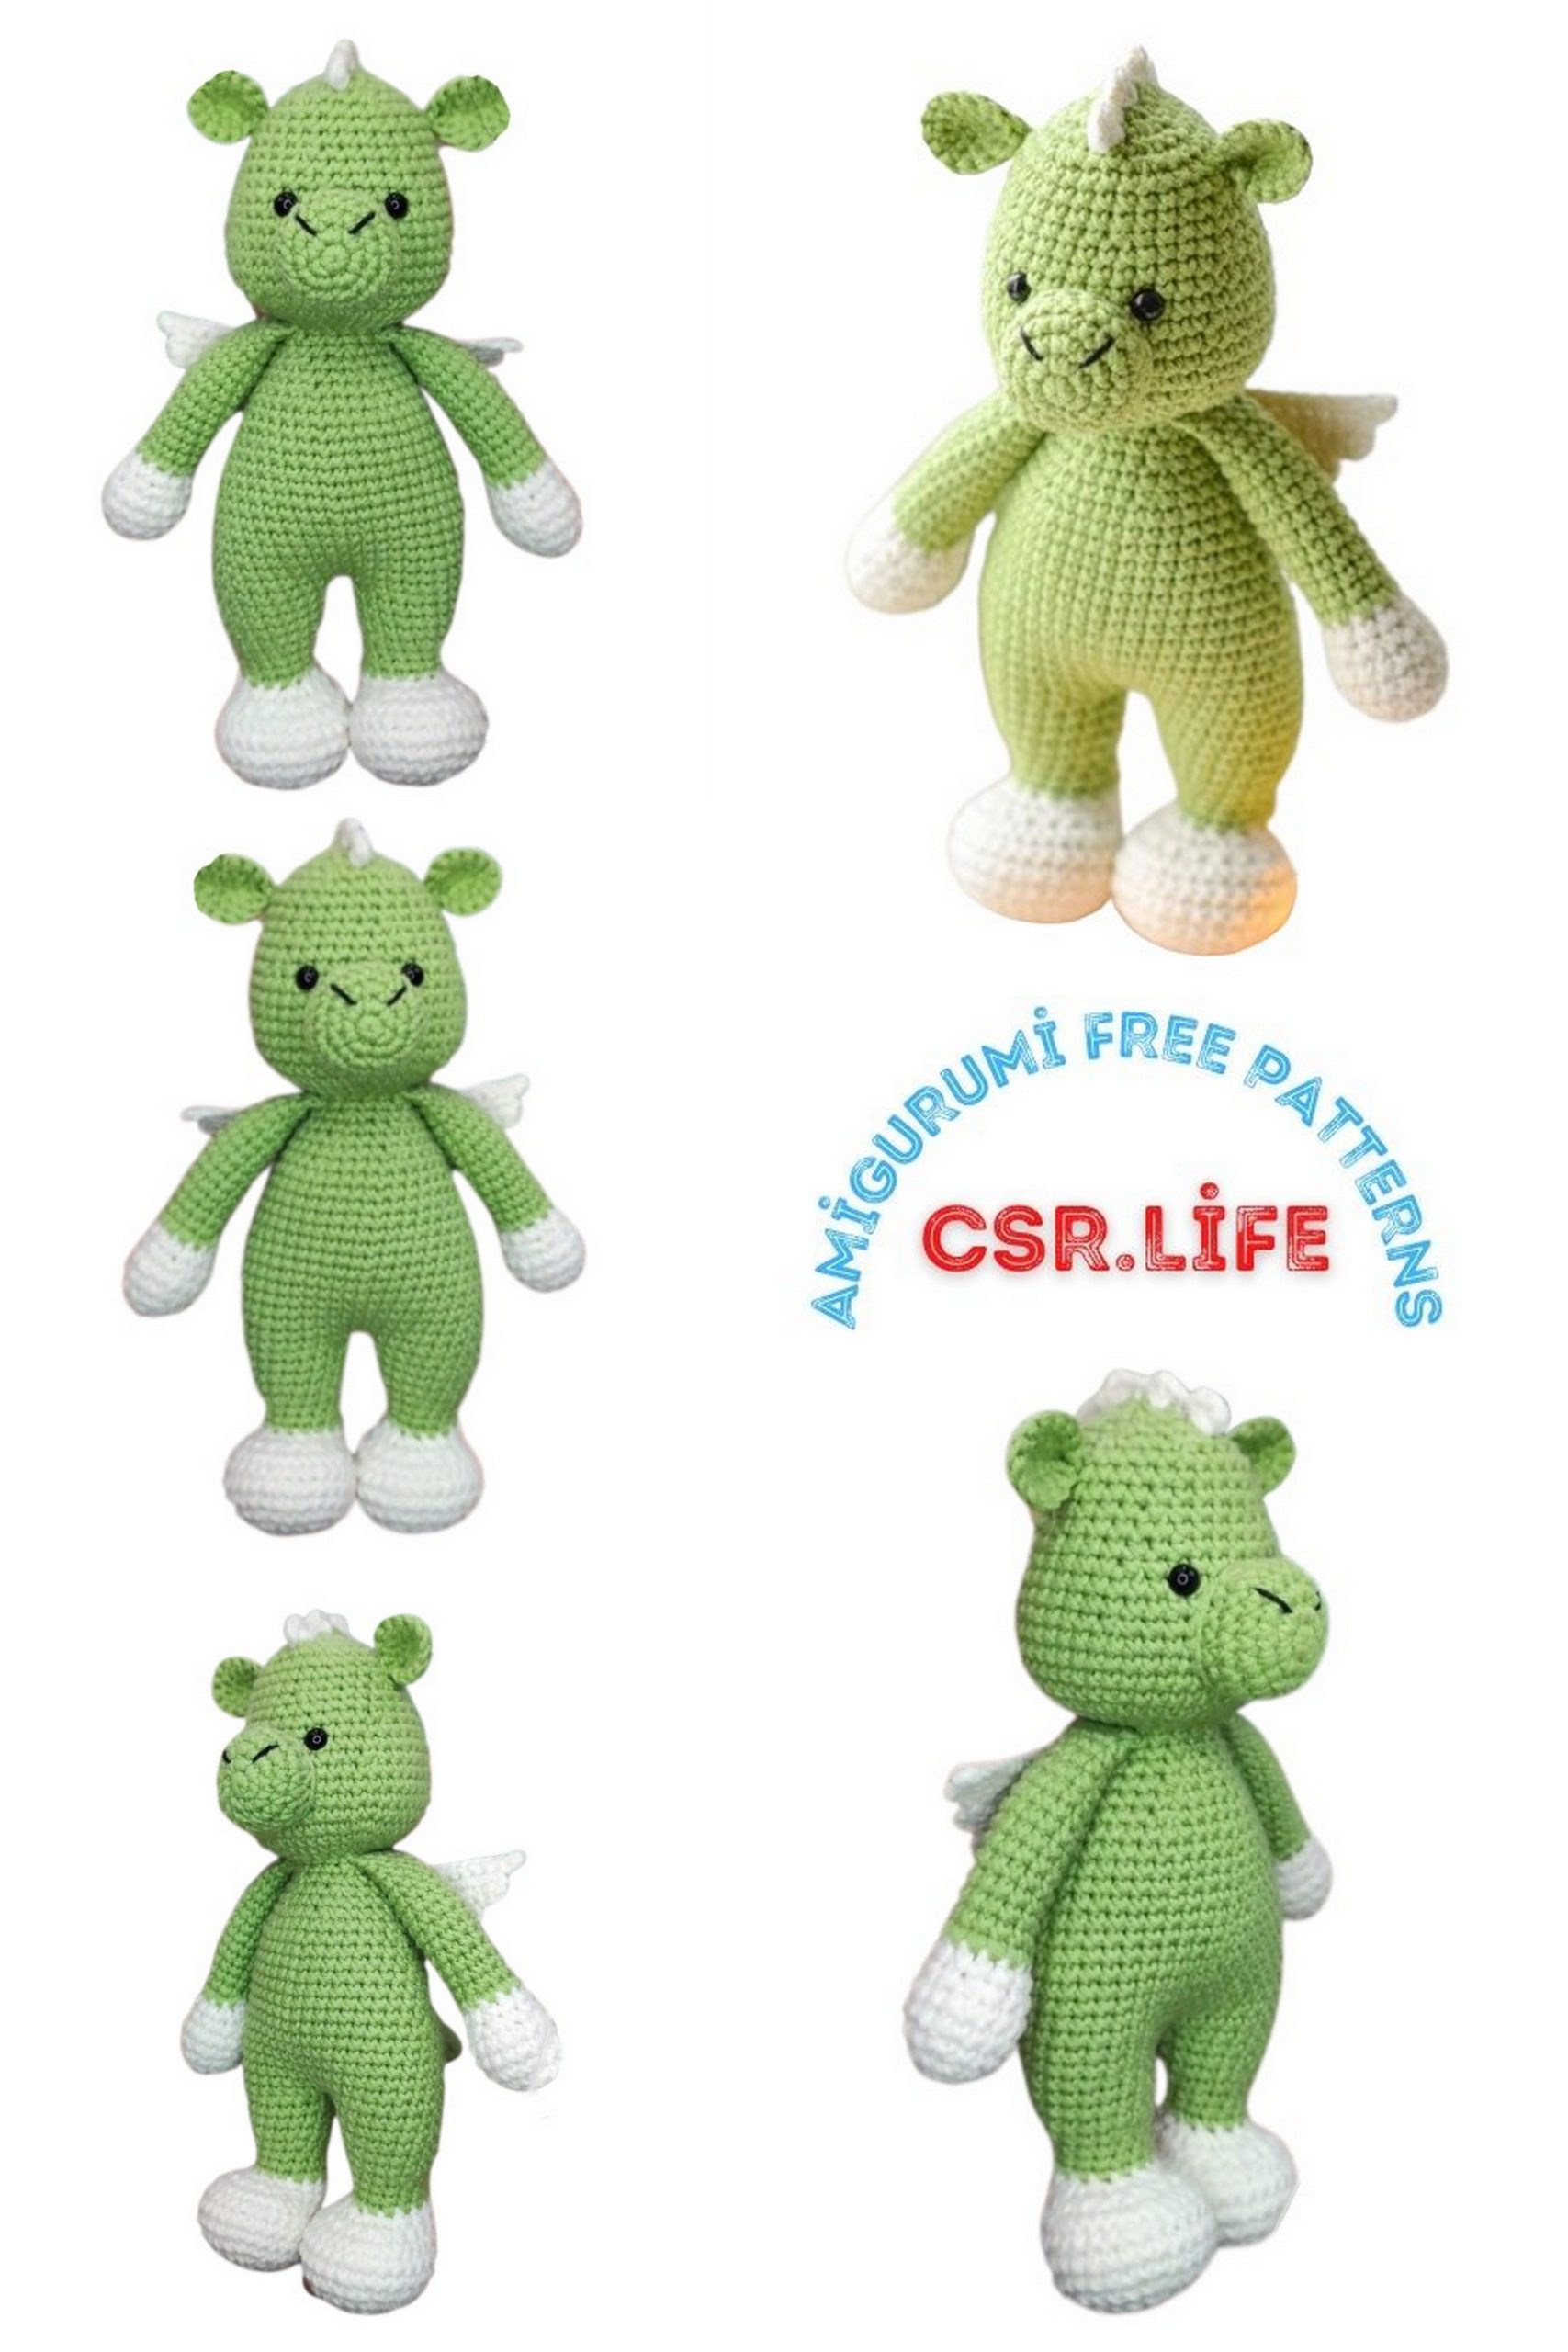
Adorable Little Dragon Amigurumi Free Pattern: Crochet Your Magical Companion!
Discover the enchanting world of amigurumi with our free pattern for a Little Cute Dragon! This whimsical crochet project is perfect for crafters of all skill levels, bringing a touch of magic to your creations. Whether you’re a seasoned amigurumi artist or a beginner looking for a delightful challenge, our step-by-step instructions and charming design will guide you through the process of crafting your own lovable dragon companion. Get ready to embark on a magical journey of creativity and crochet!
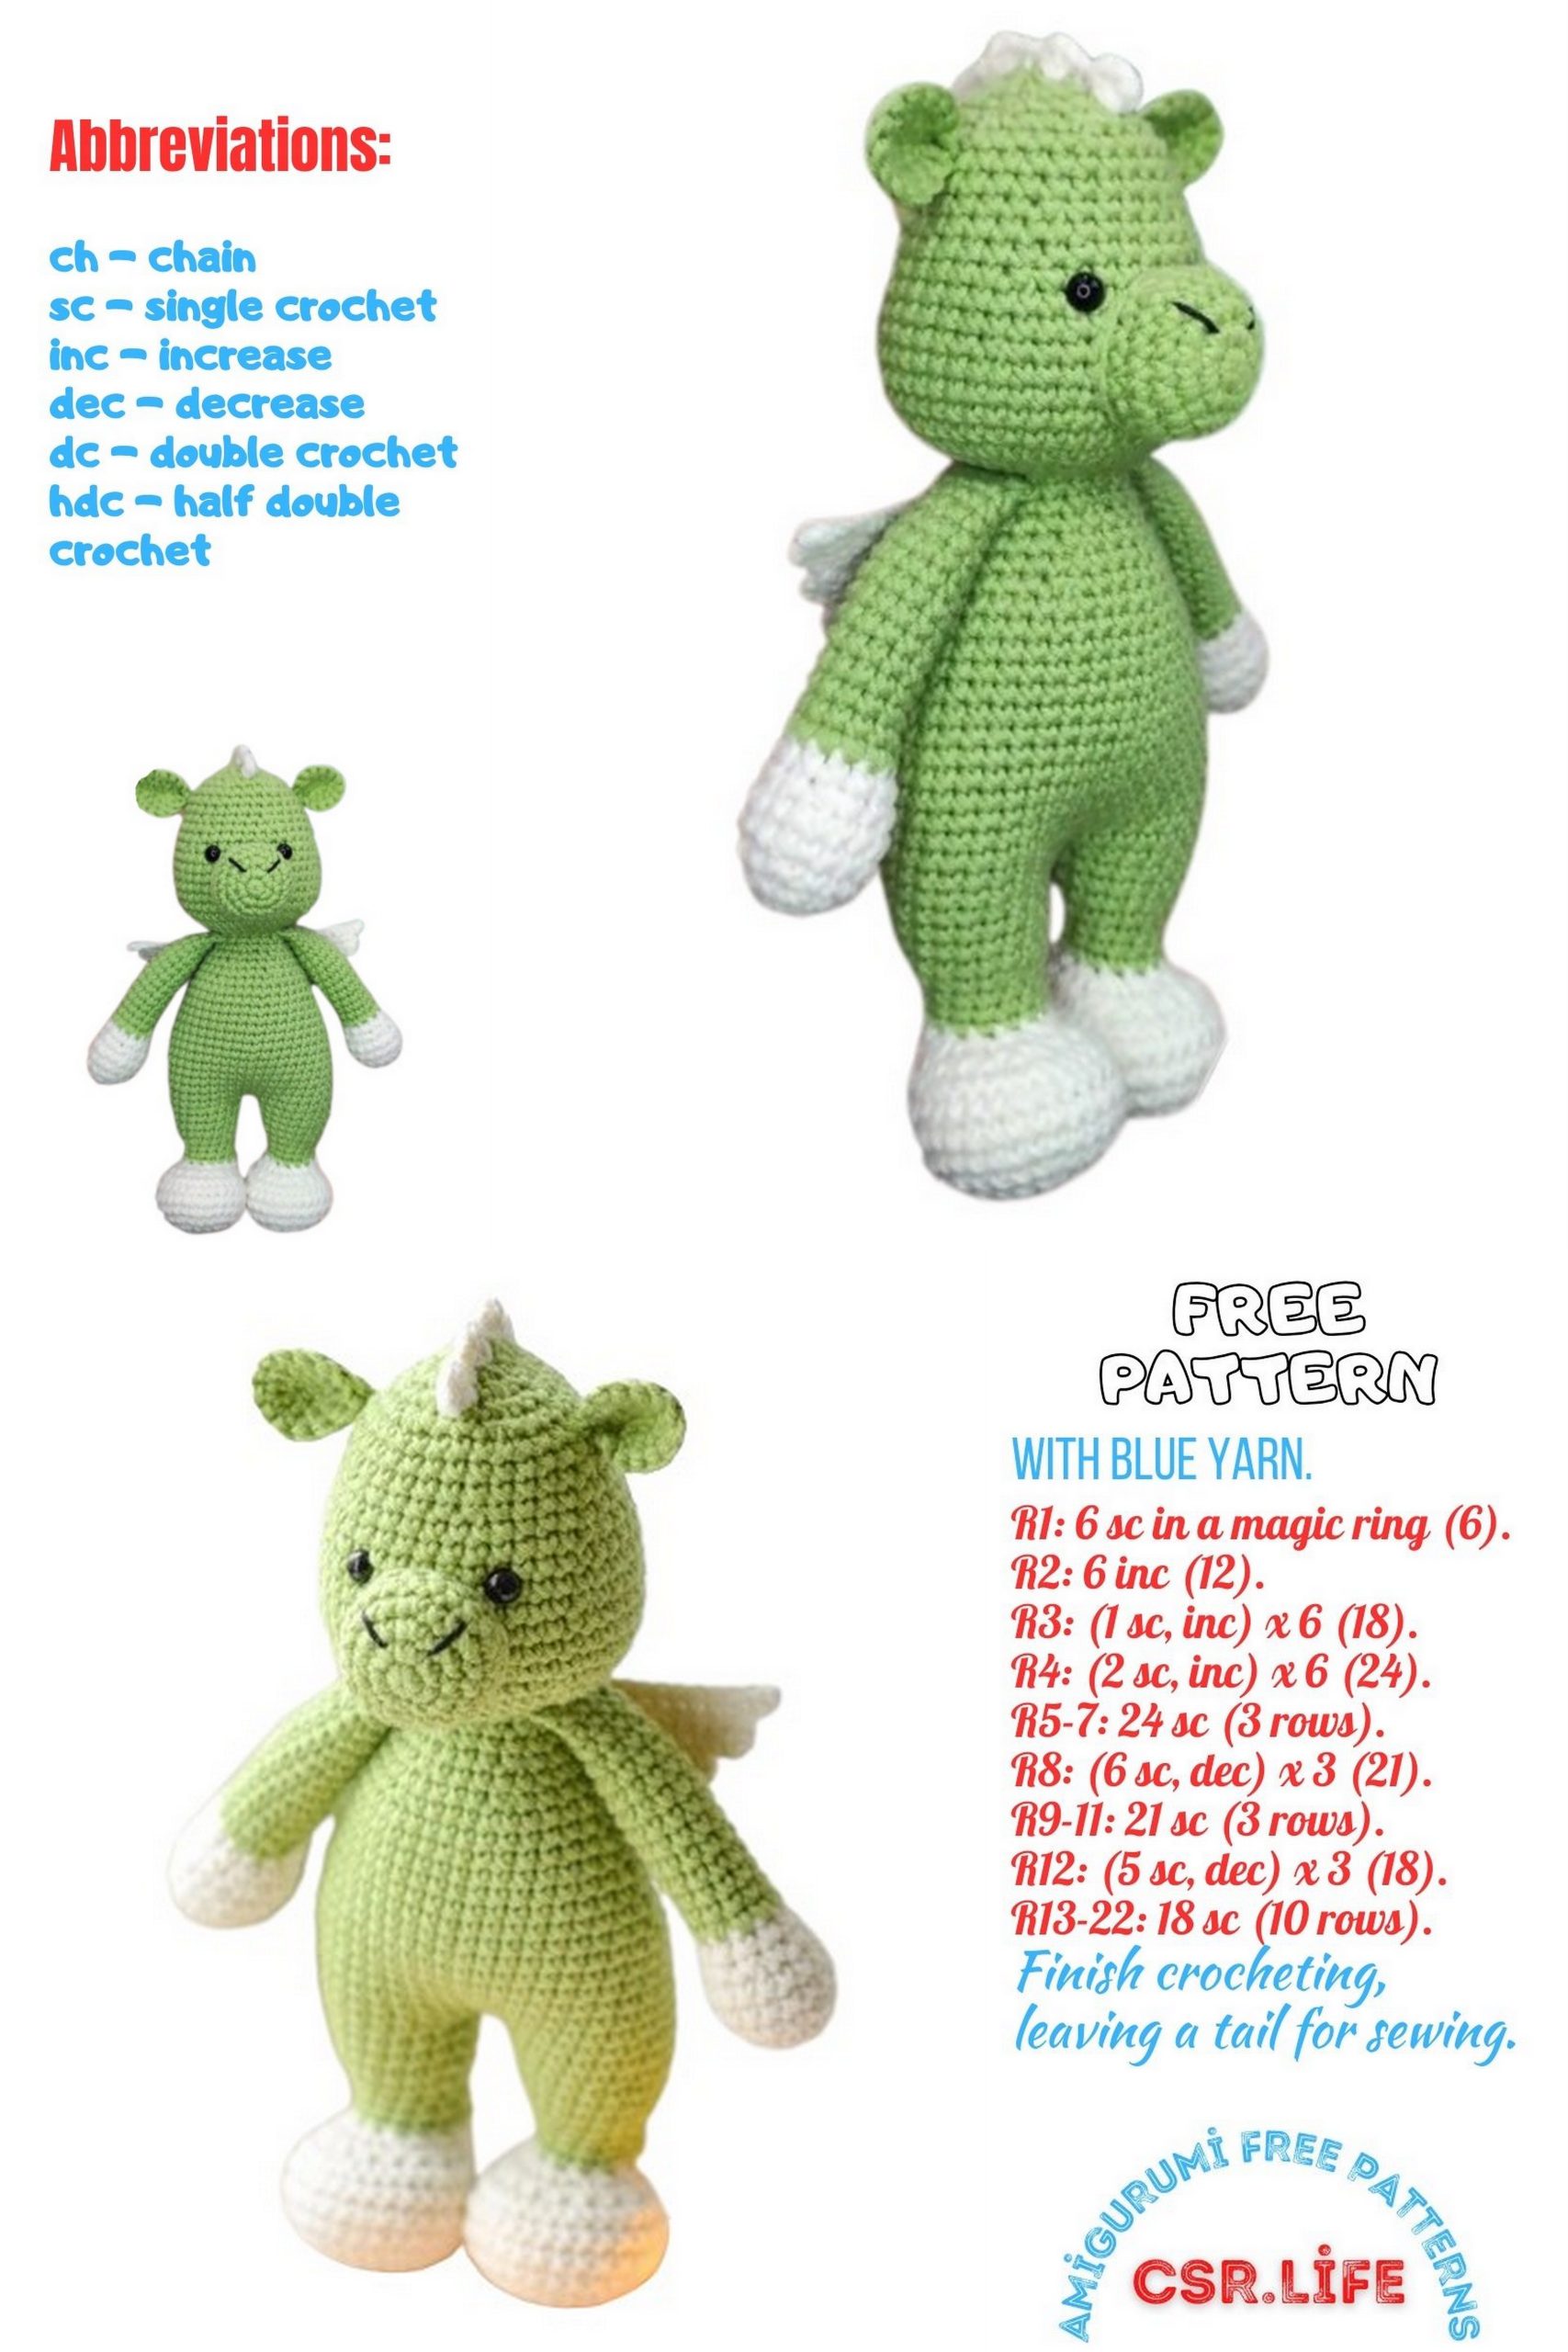
Toy height – 19 cm when using the specified materials.
Materials:
Yarn “YarnArt Jeans” – two colors: main and additional
Crochet hook No. 2
Filling (holofiber)
Safety eyes 6 mm
Black thread for embroidering nostrils
Needle
Scissors
Abbreviations:
MC – amigurumi ring
sc – single crochet
hdc – half double crochet
dc – double crochet
inc – increase
dec – decrease
(6 Row: – number of sc in the row
*5 – number of repeats
ch – chain
sl st – slip stitch
PATTERN
Handles (2 parts)
Using the additional color:
1 Row: 6 sc in MC
2 Row: 6 inc (12)
3 Row: 12 sc
4 Row: (1 sc + inc) *6 (18)
5-6 Row: 18 sc
7 Row: (1 sc + dec) *6 (12)
8 Row: 12 sc
Fill the handle
Change the yarn
9-19 Row: 12 sc
20 Row: dec, 4 sc, dec, 4 sc (10)
21-22 Row: 10 sc
Fold the handle in half and crochet 5 sc through both sides.
Legs (2 parts)
Using the additional color:
1 Row: 6 sc in MC
2 Row: 6 inc (12)
3 Row: (1 sc + inc) *6 (18)
4 Row: (2 sc + inc) *6 (24)
5 Row: (3 sc + inc) *6 (30)
6-9 Row: 30 sc
10 Row: 5 sc, 10 dec, 5 sc (20)
11 Row: 5 sc, 5 dec, 5 sc (15)
Fill the leg as you go
Change the yarn
12-14 Row: 15 sc
15 Row: (2 sc + inc) *5 (20)
16-17 Row: 20 sc
18 Row: 20 sc + 6 sc for offsetting the row at the first leg
16 sc for offsetting the row at the second leg
Cut the thread and fasten off. Fill the leg completely.
Make the second leg following the same pattern, but do not cut the thread at the end.
Chain 2 and join to the first leg.

Body
1 Row: 20 sc along the right leg, 2 sc in chain, 20 sc
along the left leg, 2 sc in chain (44)
2-8 Row: 44 sc
Fill the body
9 Row: 10 sc, dec, 21 sc, dec, 9 sc (42)
10 Row: 42 sc
11 Row: 10 sc, dec, 20 sc, dec, 8 sc (40)
12 Row: 40 sc
13 Row: 10 sc, dec, 19 sc, dec, 7 sc (38)
14 Row: 38 sc
15 Row: 10 sc, dec, 18 sc, dec, 6 sc (36)
16 Row: 36 sc
17 Row: (4 sc + dec) *6 (30)
18 Row: 30 sc
19 Row: (3 sc + dec) *6 (24)
20 Row: 24 sc
21 Row: (2 sc + dec) *6 (18)
22 Row: 4 sc, attach the handle with 5 sc, 4 sc, attach
the handle with 5 sc (18)
Head
Continue crocheting
1 Row: 18 sc
2 Row: 18 inc (36)
3 Row: (5 sc + inc) *6 (42)
4 Row: (6 sc + inc) *6 (48)
5-8 Row: 48 sc
9 Row: (6 sc + dec) *6 (42)
10-11 Row: 42 sc
12 Row: (5 sc + dec) *6 (36)
13-14 Row: 36 sc
15 Row: (4 sc + dec) *6 (30)
16-18 Row: 30 sc
Insert the eyes between rows 11 and 12 from the beginning of
the head. The distance between the eyes is 5 sc.
Fill the head
19 Row: (3 sc + dec) *6 (24)
20 Row: (2 sc + dec) *6 (18)
21 Row: (1 sc + dec) *6 (12)
22 Row: 6 dec
Cut the thread, pull through the opening.
Nose
1 Row: 6 sc in MC
2 Row: 6 inc (12)
3 Row: (1 sc + inc) *6 (18)
4 Row: (2 sc + inc) *6 (24)
5 Row: 24 sc
6 Row: (2 sc + dec) *6 (18)
Sew the nose in the center. Embroider nostrils.
Ears (2 parts)
1 Row: 6 sc in MC
2 Row: 6 inc (12)
3 Row: (3 sc + inc) *3 (15)
Fold the bottom part of the ear in half, sew it to the head in
the 7th row from the tightened top opening.
Comb
Insert the hook in the center of the forehead. Then crochet
according to the scheme until the end of the head. Cut the
thread and fasten off.
Tail
1 Row: 6 sc in MC
2 Row: 6 sc
3 Row: (1 sc + inc) *3 (9)
4 Row: 9 sc
5 Row: (2 sc + inc) *3 (12)
6 Row: 12 sc
7 Row: (3 sc + inc) *3 (15)
8 Row: 15 sc
Fill the tail as you go
9 Row: (4 sc + inc) *3 (18)
10 Row: 18 sc
11 Row: (5 sc + inc) *3 (21)
12 Row: 21 sc
Sew the tail to the back, centered at the bottom.
Wings
1 Row: Chain 14 + 1 sl st
2 Row: 14 sc from the second chain from the hook + 1 sl st
Crochet with turning rows
3 Row: 12 sc + 1 sl st (12)
4 Row: 12 sc + 1 sl st (12)
5 Row: 10 sc + 1 sl st (10)
6 Row: 10 sc + 1 sl st (10)
7 Row: 8 sc + 1 sl st (8)
8 Row: 8 sc, continue edging all rows on the side – 6 sc. Do not
cut the thread.
Chain 14 + 1 sl st
Unfold the crochet so that the rows can be joined together.
Crochet following the same pattern as the first wing.
Instead of a chain, make a slip stitch in the next row, connecting
the first wing and the second.
Fasten off the thread, leaving an end for sewing.
Sew the wings in the center of the back.
The toy is ready!