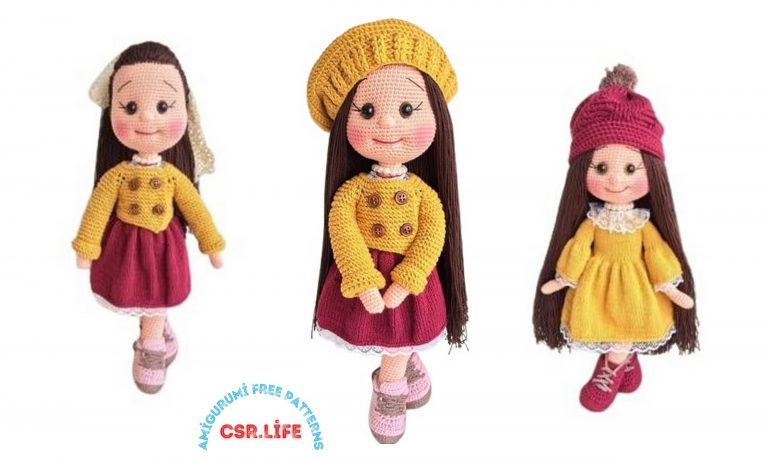
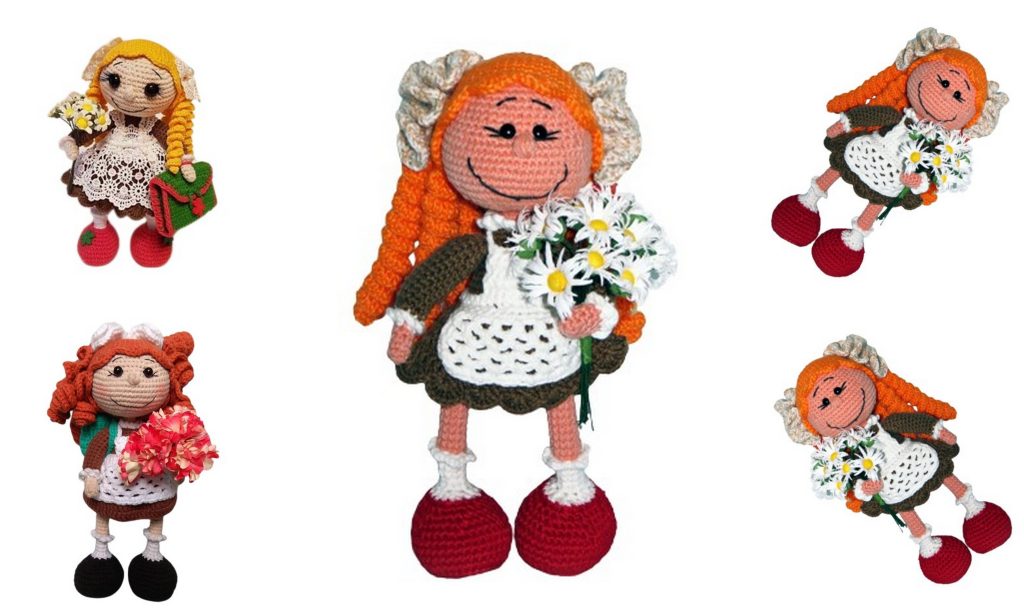
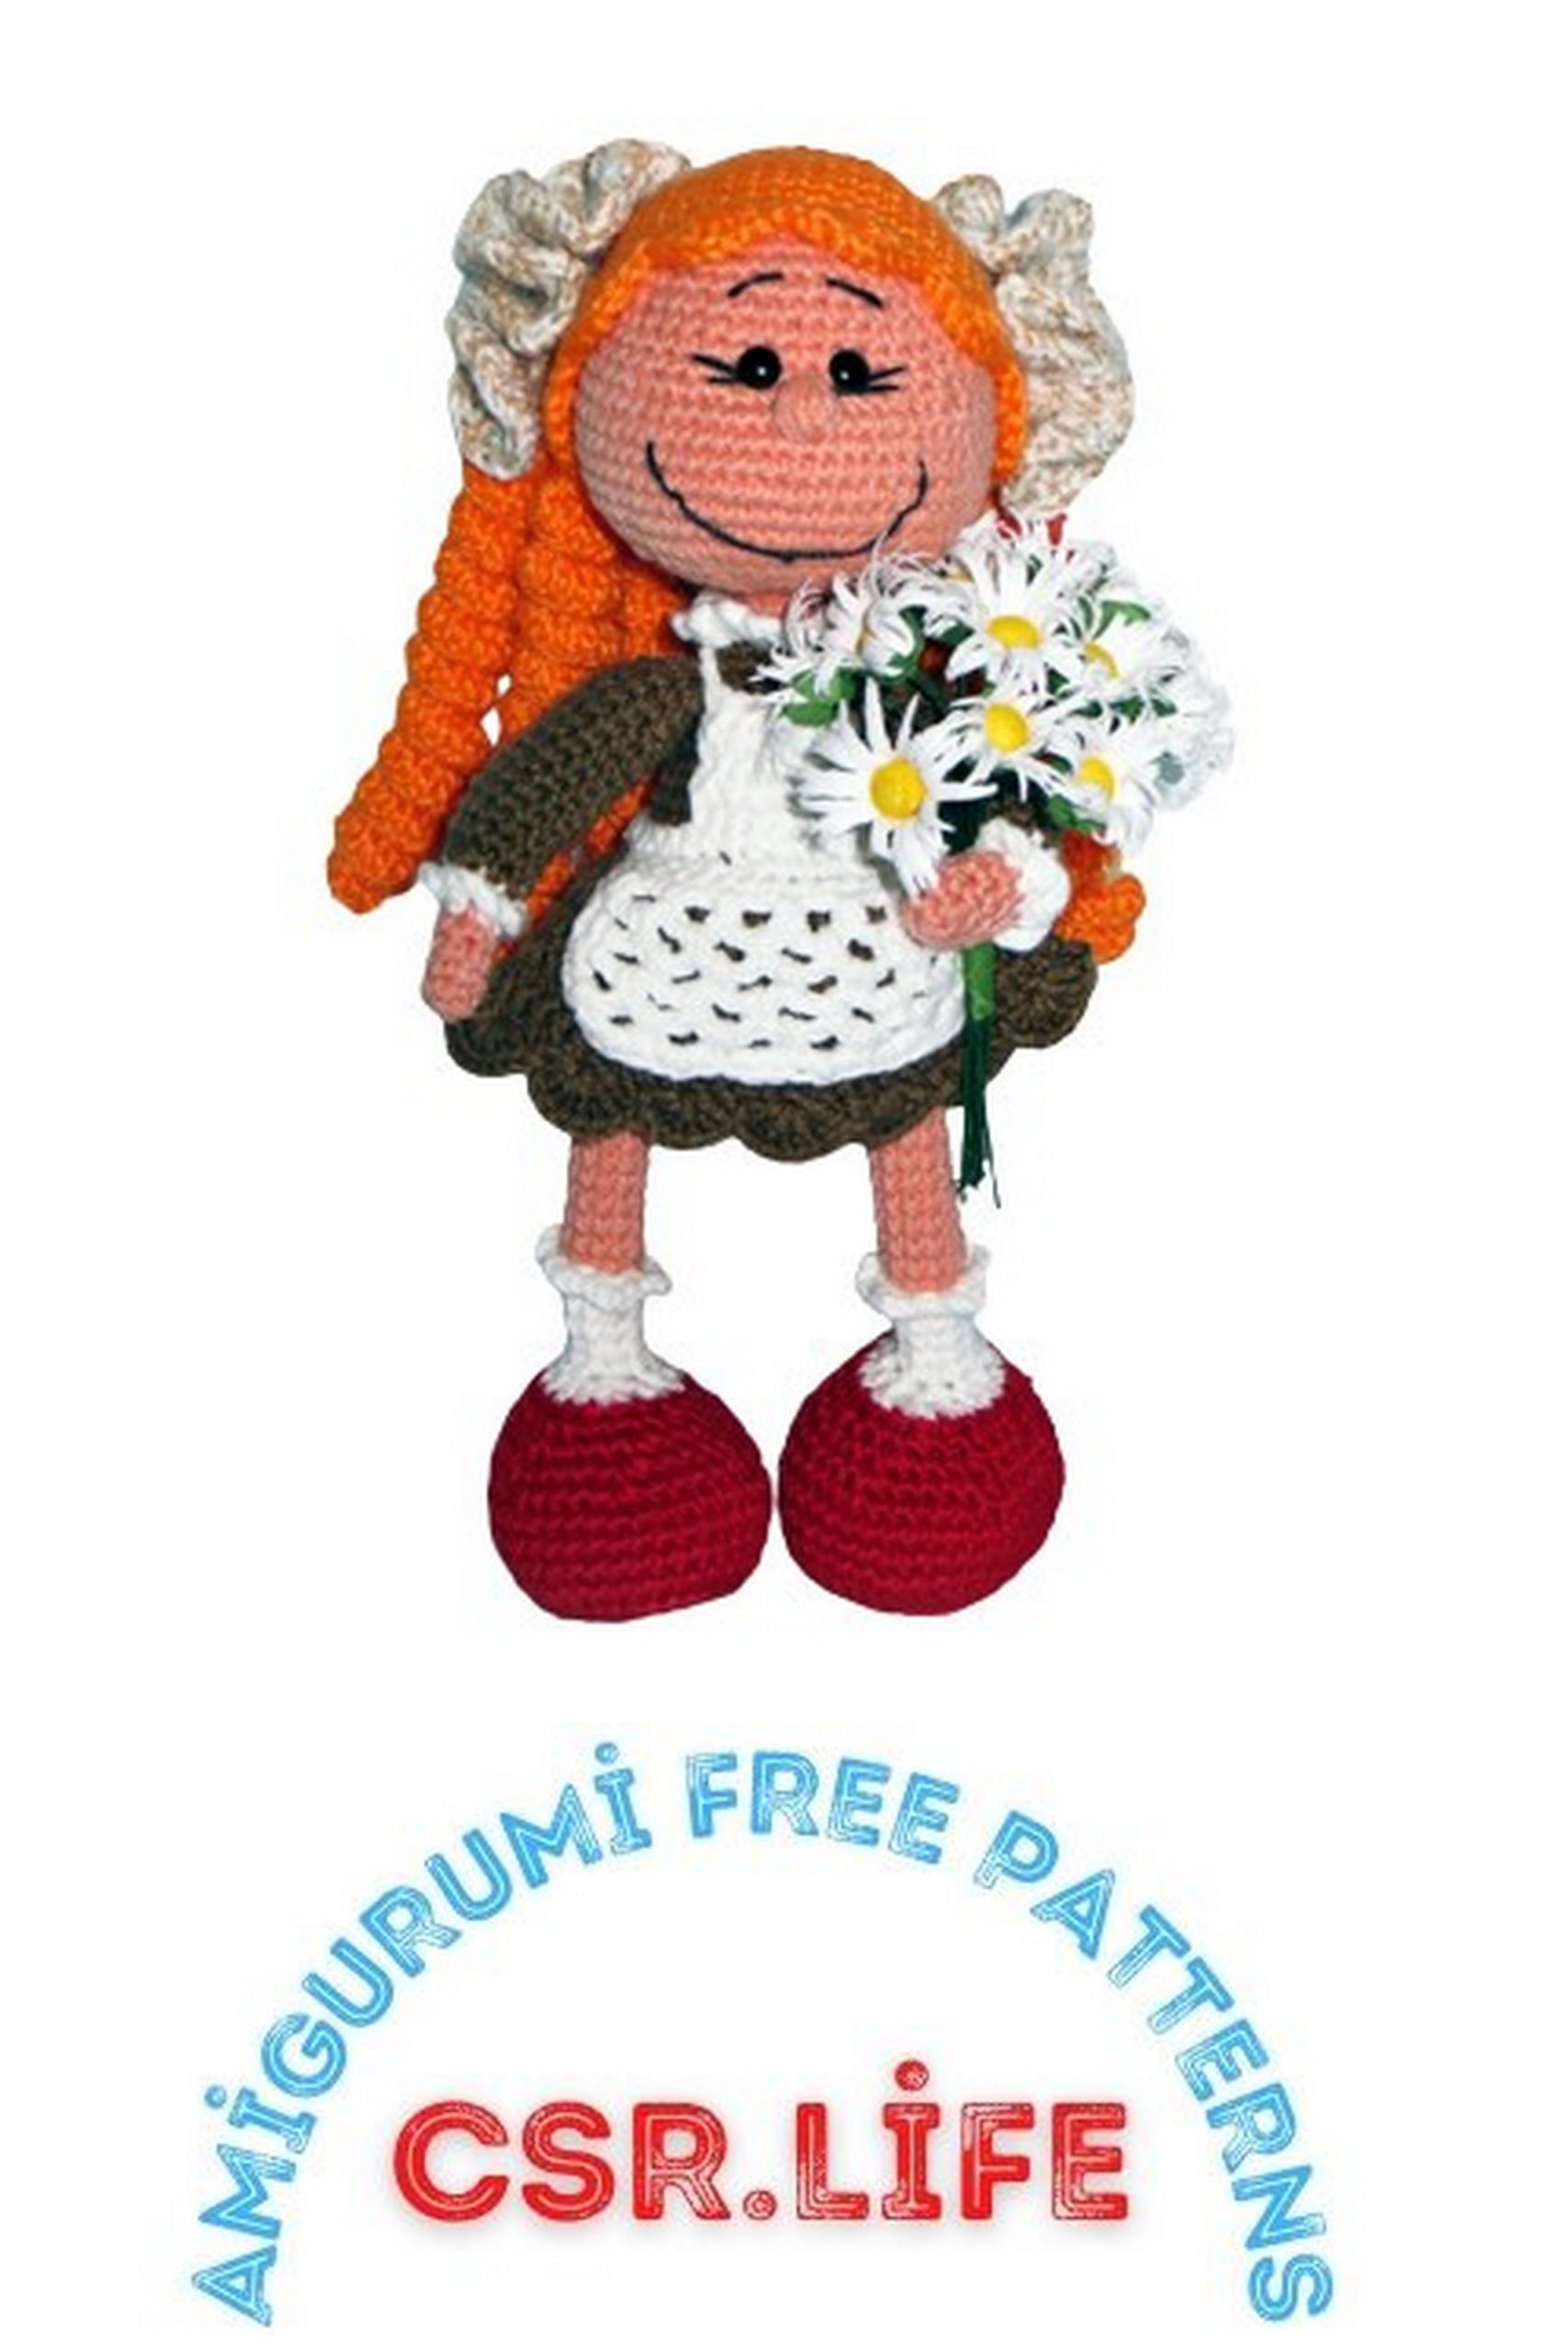
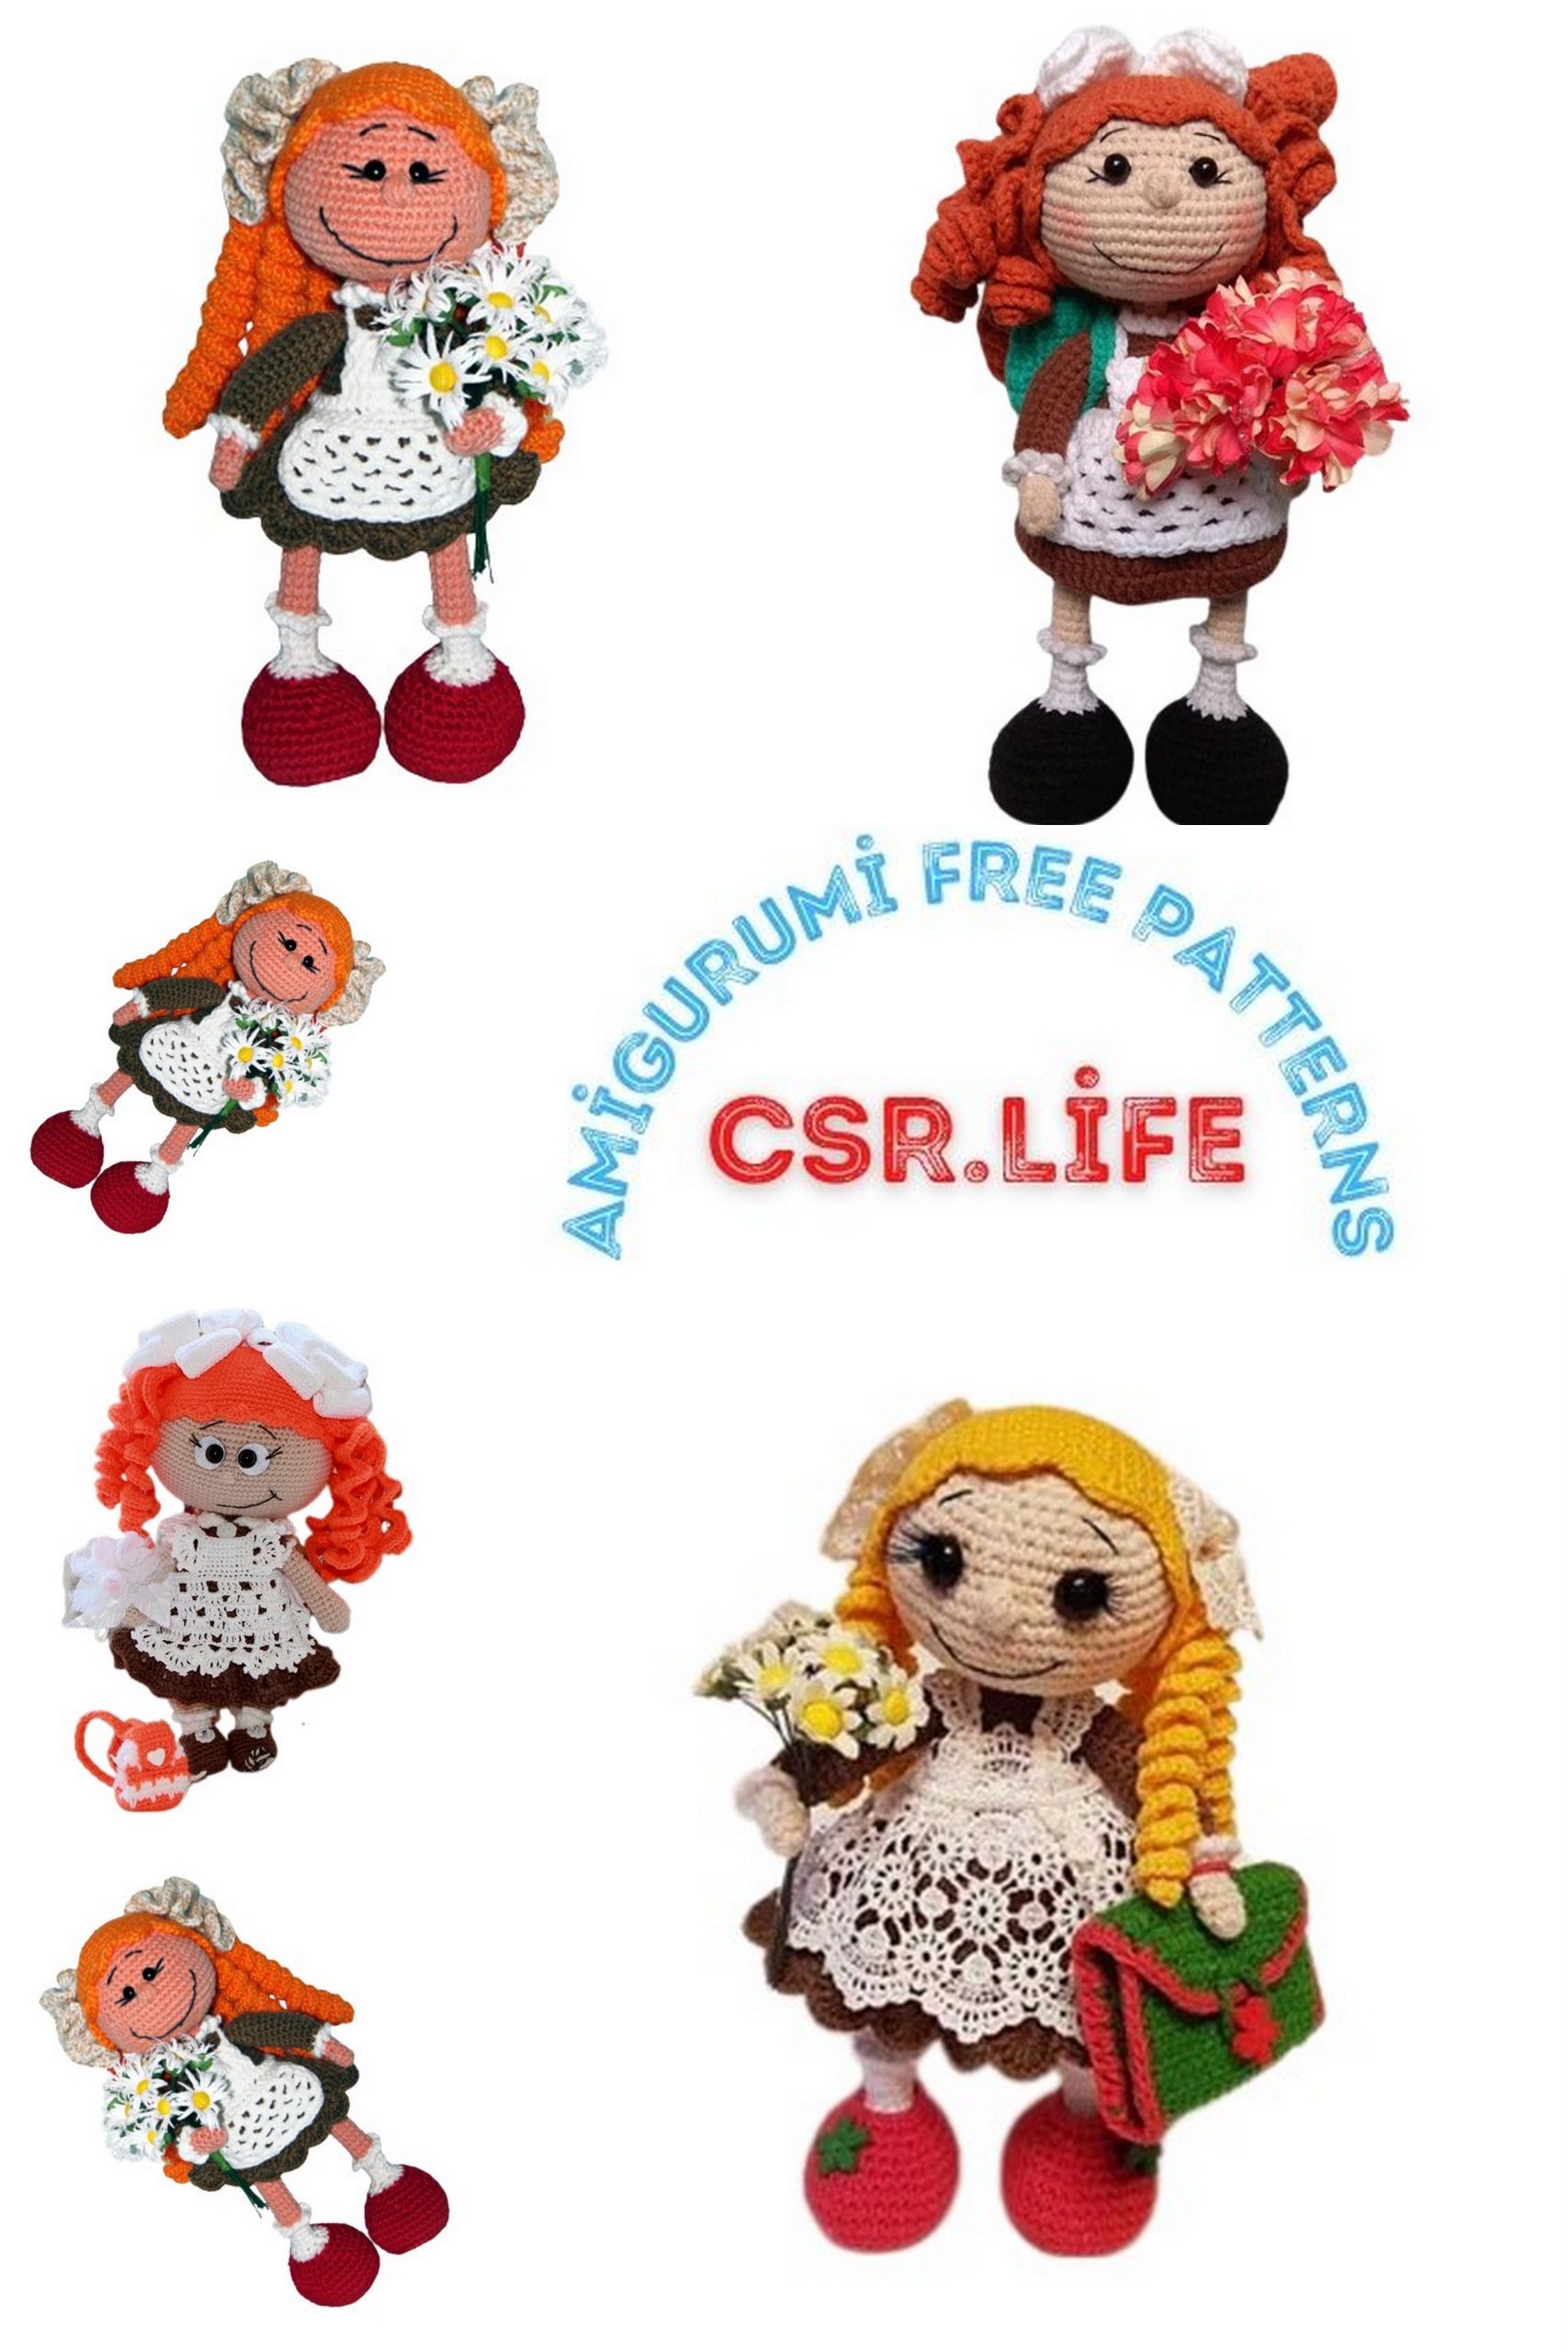
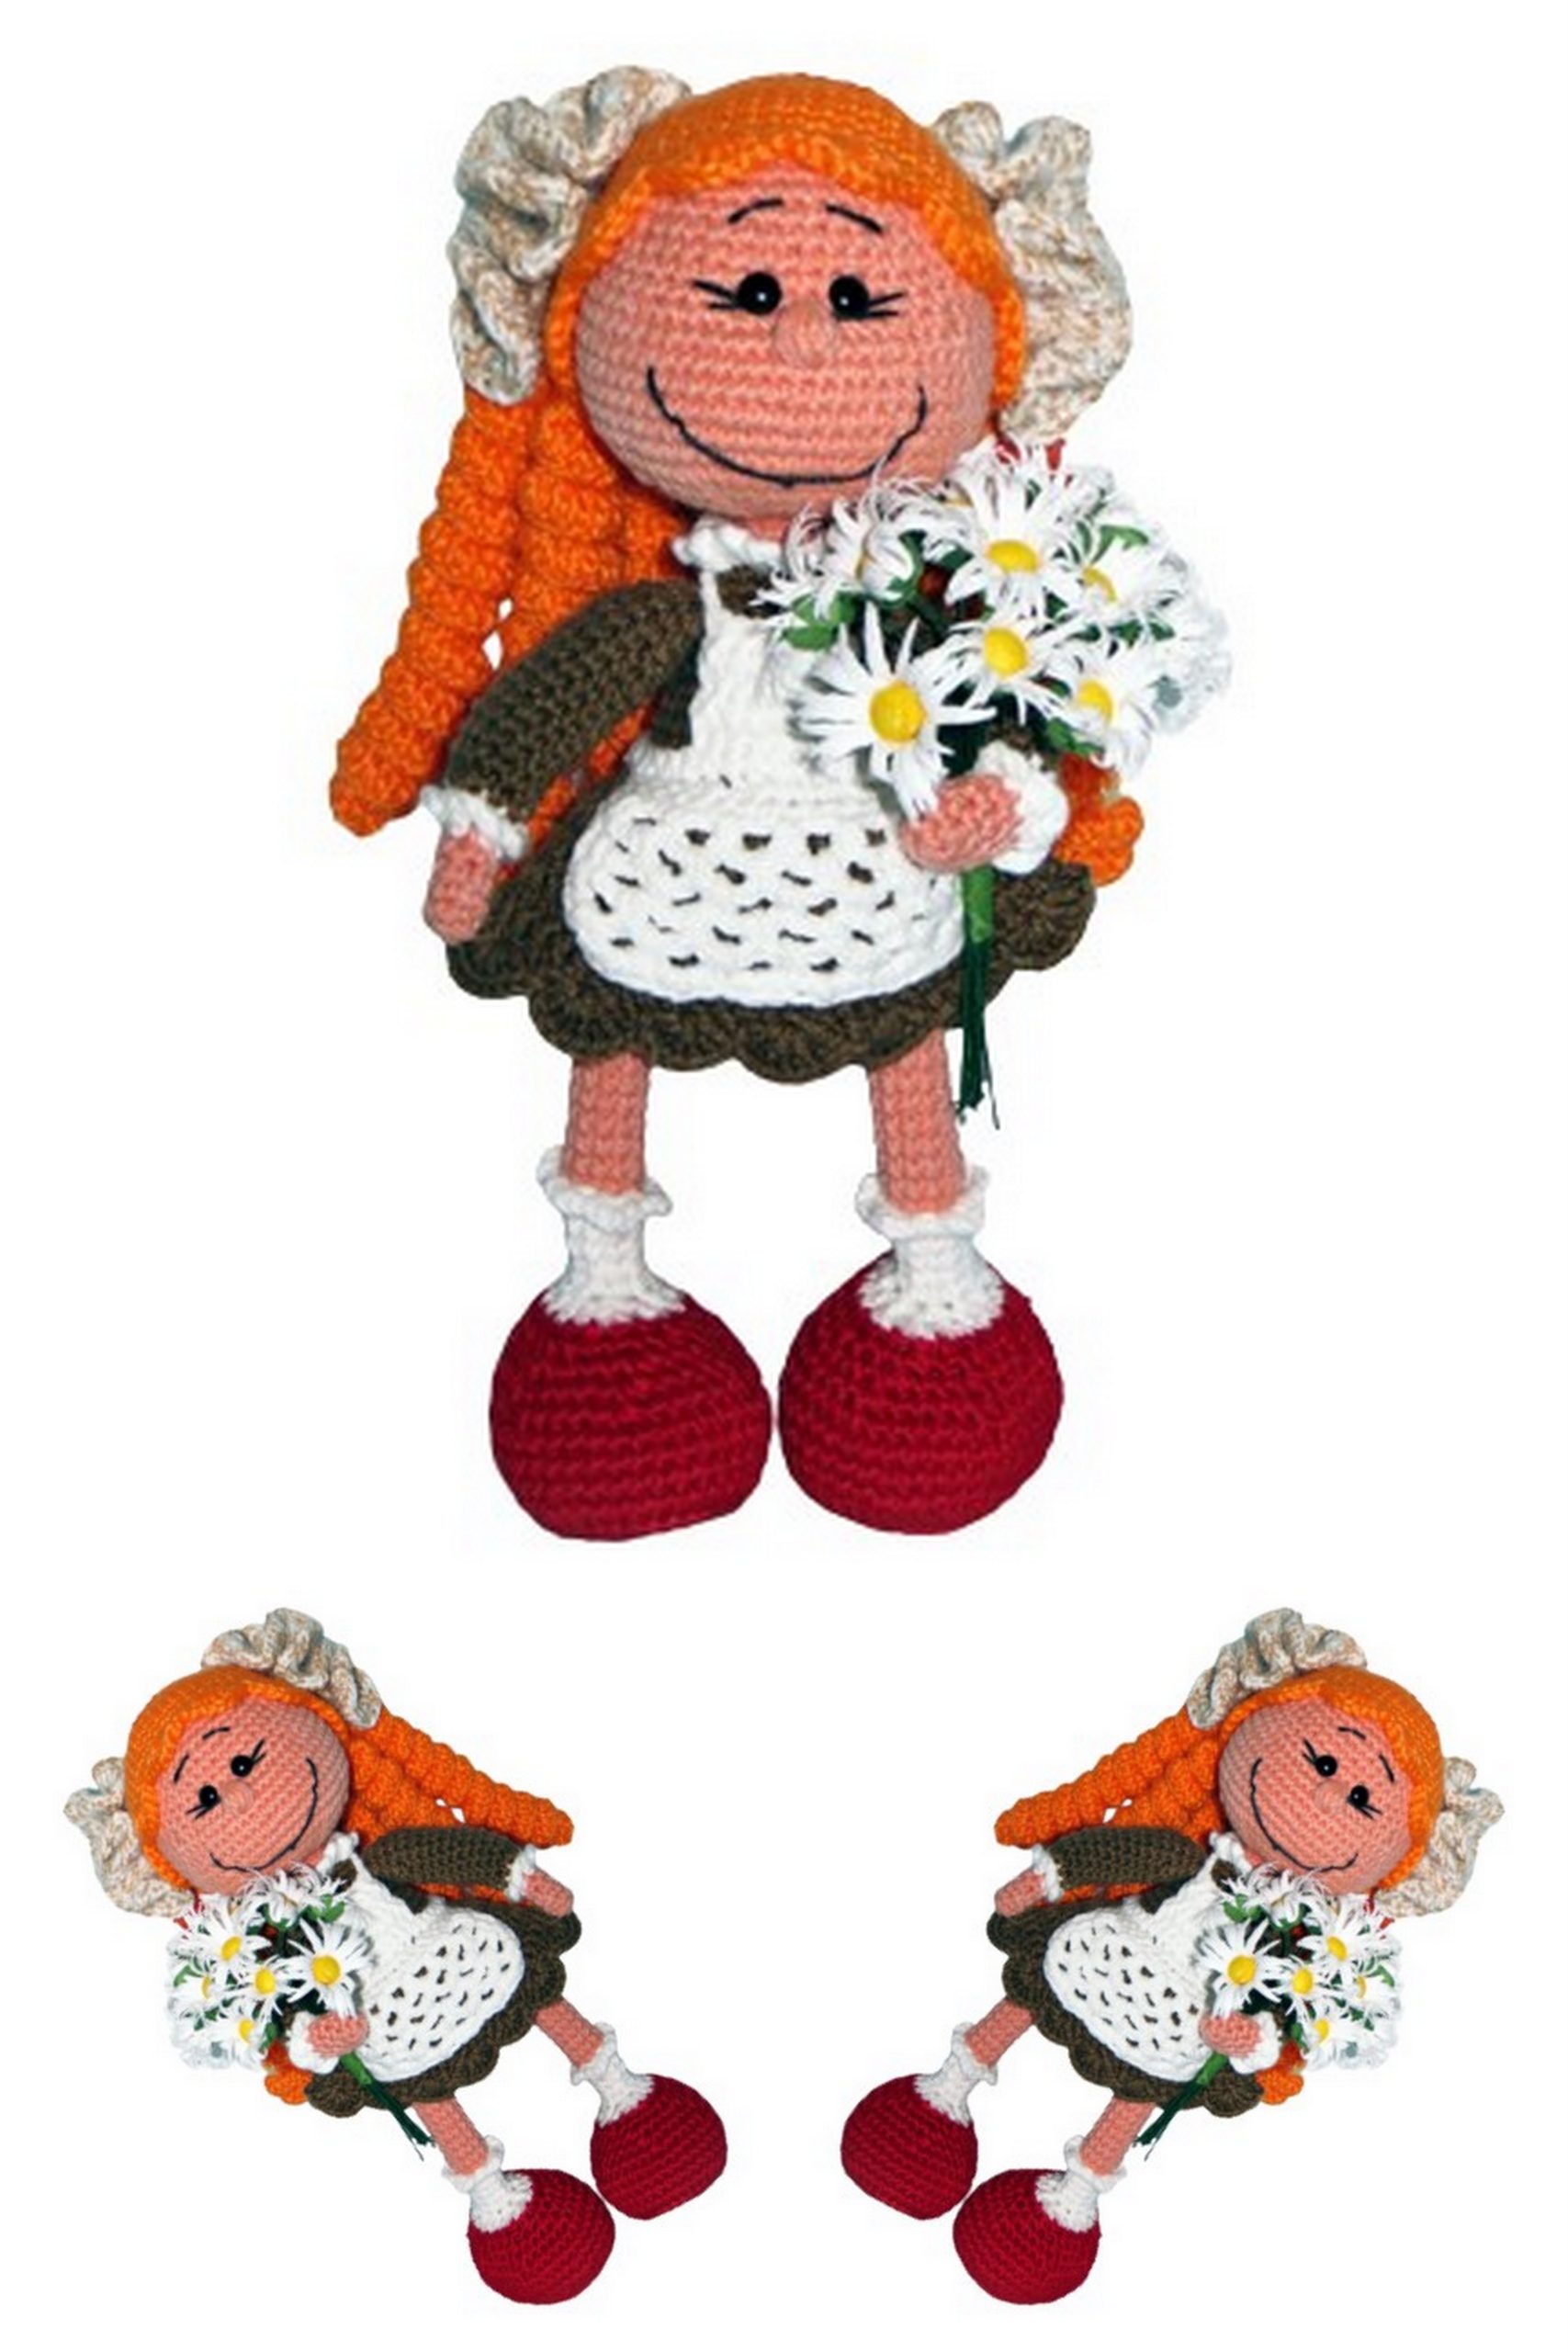
Amigurumi Doll Schoolgirl Free Pattern – Crochet Toy Instructions
The world of Amigurumi offers a fantastic avenue for knitting enthusiasts to unleash their creativity. If you have an interest in crafting handmade toy amigurumi dolls, our Amigurumi Schoolgirl Doll free crochet pattern is perfect for you! This free knitting pattern includes step-by-step instructions and visuals, making it an excellent choice for beginners in the knitting world.
Materials Needed:
Main yarn – “Denim” by Yan Art, in white, brown, blue, and flesh colors.
For hair – “Children’s Whim” yarn, but you can also use “Denim” yarn.
Wire for the frame: PUNP 2×2.5, or any other suitable wire, two pieces measuring 35-40 cm each.
Leftover wire with a thickness of 1.5 for the arms, 20 cm (I twisted it in half).
A bit of cardboard for insoles, two half beads for eyes, and of course, some decorations (it’s a girl, after all).
Hook size 1.5.
Abbreviations:
MR – magic ring
sc – single crochet
inc – increase, dec – decrease
ch – chain, sl st – slip stitch
BLO – back loop only
In parentheses, the total number of stitches or rows is indicated.
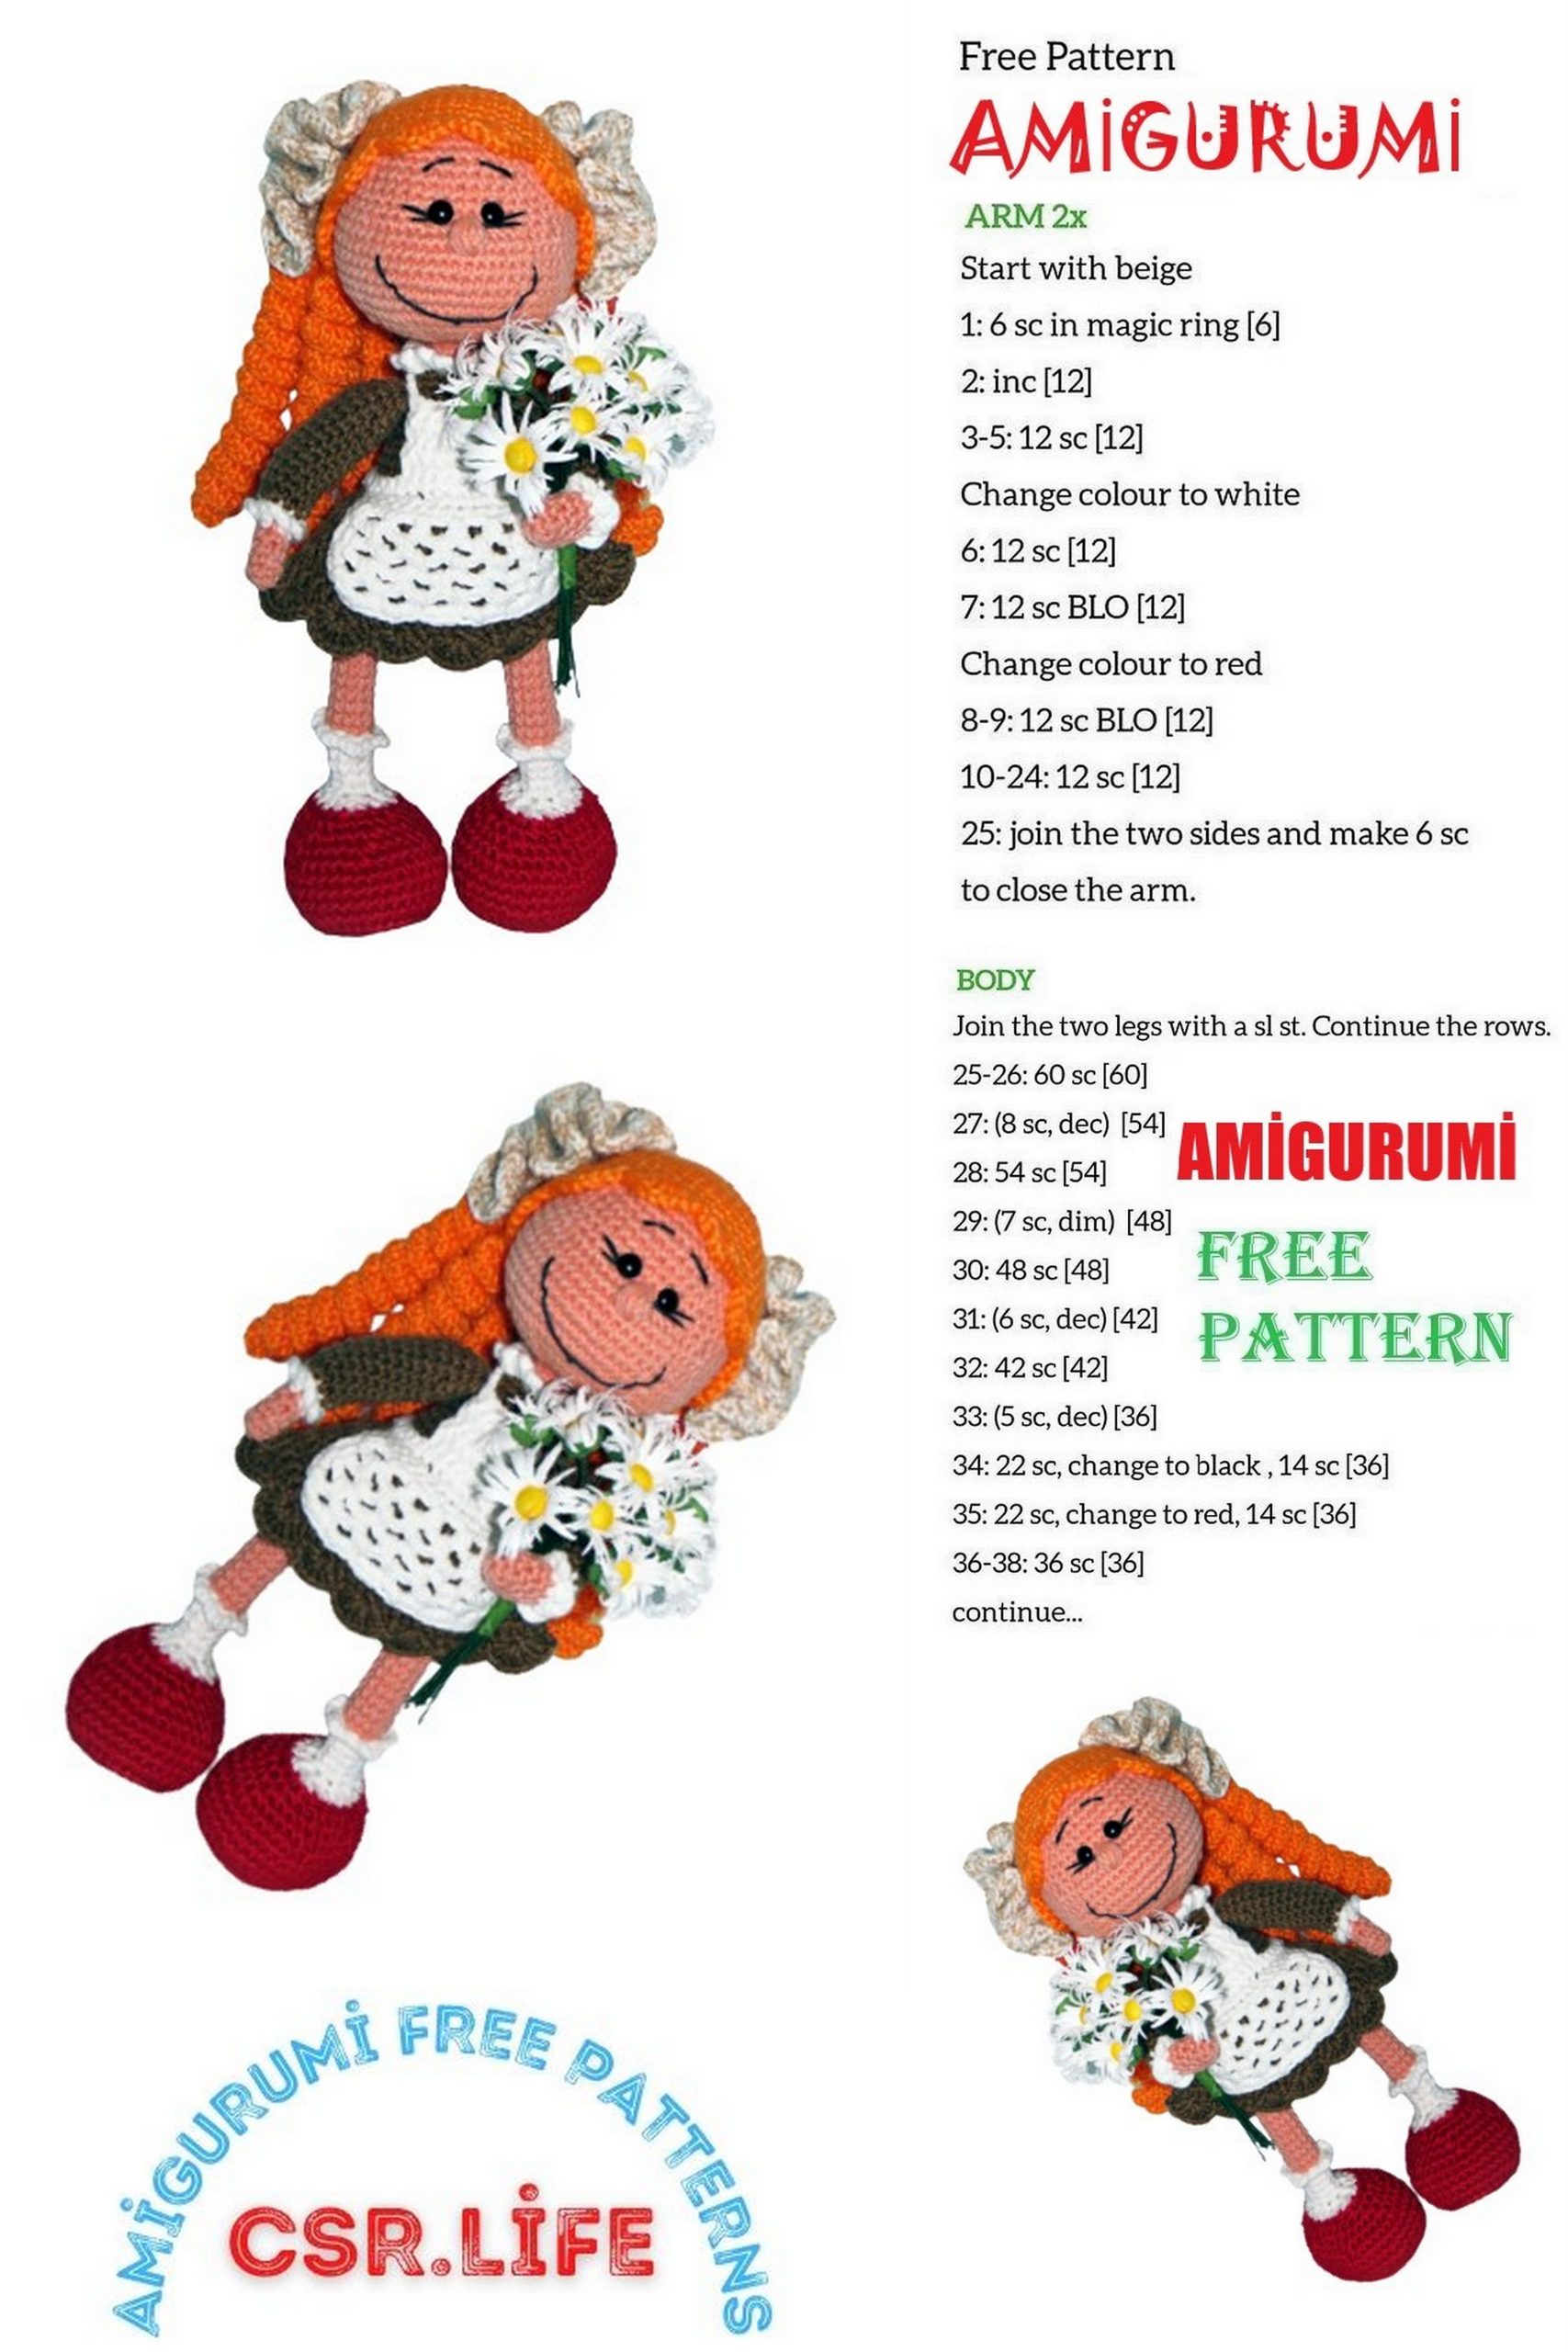
PATTERN
Arms (2 parts)
(1.5 mm wire with a cross-section of 1.5 – two pieces of 15 cm each)
Using flesh-colored yarn:
Row 1: 6 in MR (6)
Row 2: (1 sc, inc, 1 sc) x 2 (8)
Row 3 – 5: 8 (3 rows)
Switch to white yarn:
Row 6: 8 (8)
Continue increasing on the sides:
Row 7: Work in BLO: 1 sc, inc, 3 sc, inc, 2 sc (10)
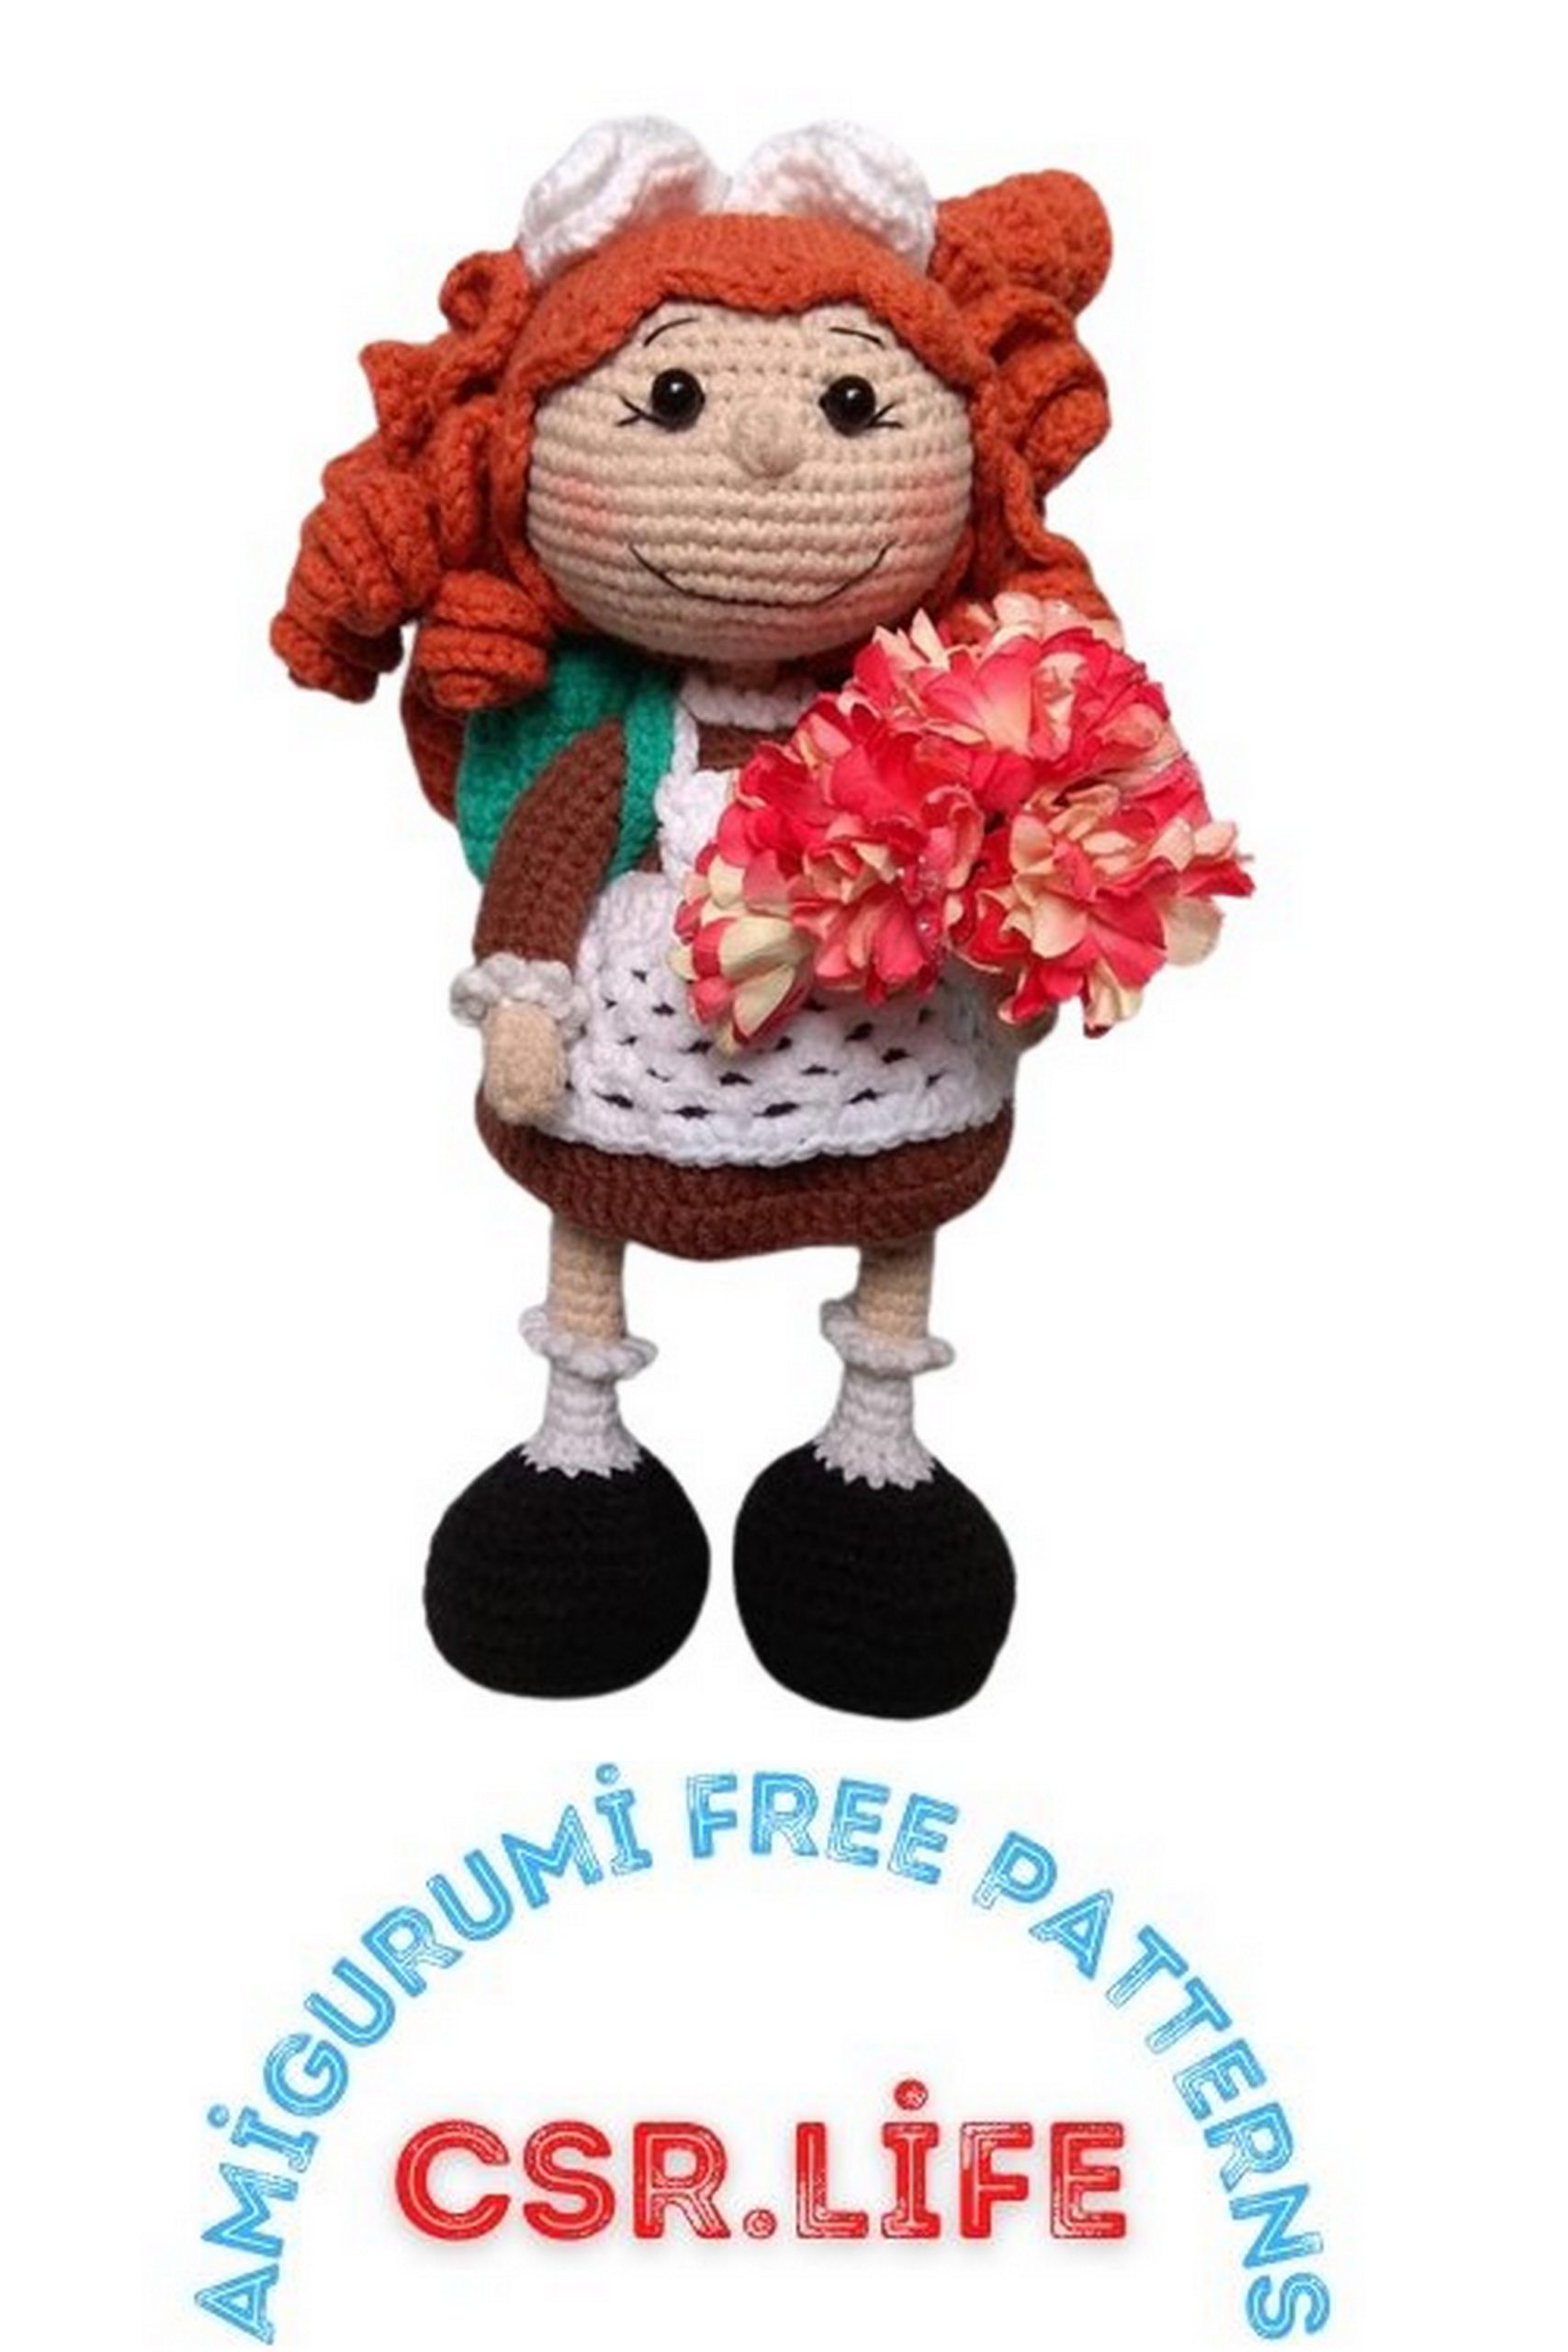
If you’re making a schoolgirl, continue crocheting with white yarn. If you’re making a first-grader, switch to brown.
Row 8: 2 sc, inc, 4 sc, inc, 2 sc (12)
Row 9 – 21: 12 (13 rows for the schoolgirl, 11 for the first-grader)
Insert the wire and stuff the arm lightly, just enough to maintain its shape.
Row 22: dec x 6 (6)
Cut the yarn.
Switch to the front loops of Row 7. Use white yarn to crochet (3 ch, sl st) into each loop.

Legs (2 parts)
Using shoe color yarn:
Chain 7
Row 1: 5 sc, 5 inc, 4 sc, inc (16)
Row 2: inc, 4 sc, (inc, 2 sc) x 5, 4 sc, (inc, sc) x 2 (24)
Row 3: (2 sc, 4 inc), (inc, sc) x 5, 5 sc, inc, sc (33)
Row 4: sc, inc, 4 sc, (inc, 2 sc) x 5, 4 sc, inc, 3 sc, inc, sc (41)
Row 5: 41 in BLO
Row 6 – 8: 41 sc (3 rows)
Insert cardboard insoles.
Row 9: (5 sc, dec) x 5, 6 sc (36)
Row 10: (4 sc, dec) x 6 (30)
Row 11: 5 sc, (dec, 2 sc) x 5, 3 sc, dec (24)
Row 12: 3 sc, (dec, sc) x 3, (sc, dec) x 3, 3 sc (18)
Take a 35-40 cm wire segment, bend a small loop at the bottom, and insert it into the leg. Stuff the leg.
Switch to sock color (white) yarn:
Row 13: 5 sc, dec x 3, 7 sc (15)
Row 14: 3 sc, dec x 4, 2 sc, dec (10)
Row 15 – 19: 10 (5 rows)
Switch to flesh-colored yarn:
Row 20: 10 in BLO
Row 21 – 30: 10 (10 rows)
Do not stuff the legs!
For the second leg, do not cut the yarn. Place a marker in the middle of the back of the leg.
Move on to Row 20 and crochet a ruffle with white yarn in the front loops: (3 ch, sl st) into each loop.
Torso + Skirt
For the first-grader, crochet a few rows shorter, but you can make it as a schoolgirl as well. Stuff as you crochet!
If you’re making it without panties, use flesh-colored yarn to crochet: 3 sc, 10 ch, attach the second leg. If you’re making it with panties, crochet 2 sc with flesh-colored yarn, attach white yarn (1 sc), then crochet 10 ch, and attach the second leg. Check the position of the legs.
Row 1: 10 on the first leg, 10 on the ch, 10 on the second leg, 10 on the ch on the other side (40)
Row 2: 5 sc, inc, 4 sc, 10 PSSO, 4 sc, inc, 5 sc, 10 PSSO (42)
Increases are made on the sides, PSSO in front and back between the legs, where the ch were crocheted.
Move the start of the row to the side (6 sc).
If you’re making it without panties:
Row 3 – 7: 42 sc (5 rows) with flesh-colored yarn
If you’re making it with panties:
Row 3 – 5: 42 sc (3 rows) with white yarn
Row 6: 42 sc in BLO with flesh-colored yarn
Row 7: 42 sc (do not crochet this row for the first-grader)
Row 8: 24 sc, (dec, 1 sc) x 6 (36). Decreases are made at the back to shape the buttocks.
Row 9: 17 sc, dec x 3, 7 sc, dec x 3 (30). Decreases are made on the sides.
For the first-grader:
Switch to brown yarn:
Row 10: 30 sc (30)
Move the marker to the middle of the back, create turning loops.
Row 11: 30 sc in BLO
Row 12 – 14: 30 sc (3 rows)
Row 15: (3 sc, dec) x 6 (24)
Row 16 – 17: 24 sc (2 rows)
Row 18: Decrease by 3 on each side: 3 sc, dec x 3, 6 sc, dec x 3, 3 sc (18)
Attach the arms:
Row 19: 3 sc, 3 sc on the arm and the body, 6 sc, 3 sc on the arm and the body, 3 sc (18)
Row 20: 3 sc, 3 sc on the remaining stitches of the arm, 6 sc, 3 sc on the stitches of the arm, 3 sc (18)
Row 21: Decrease by 3 on each side: 2 sc, dec x 3, 3 sc, dec x 3, 1 sc (12)
Switch to flesh-colored yarn for the neck:
Row 22: (dec, 1 sc) x 4 (8) in BLO
Row 23 – 25: 8 sc
Do not cut the yarn.
Move on to the front loops of Row 22 and crochet 3 ch, sl st into each loop with white yarn.
For the schoolgirl:
Switch to white yarn:
Row 10: 30 sc (30)
Move the marker to the middle of the back, create turning loops.
Row 11: 30 sc in BLO
Row 12 – 15: 30 sc (4 rows)
Row 16: (3 sc, dec) x 6 (24)
Row 17 – 18: 24 sc (2 rows)
Row 19: Decrease by 3 on each side: 3 sc, dec x 3, 6 sc, dec x 3, 3 sc (18)

Attach the arms:
Row 20: 3 sc, 3 sc on the arm and the body, 6 sc, 3 sc on the arm and the body, 3 sc (18)
Row 21: 3 sc, 3 sc on the remaining stitches of the arm, 6 sc, 3 sc on the stitches of the arm, 3 sc (18)
Row 22: Decrease by 3 on each side: 2 sc, dec x 3, 3 sc, dec x 3, 1 sc (12)
Switch to flesh-colored yarn for the neck:
Row 23: (dec, 1 sc) x 4 (8) in BLO
Row 24 – 26: 8 sc (3 rows)
Skirt:
For the schoolgirl:
Attach blue yarn to the front loops of the 11th row and crochet (1 sc, ch) to the end of the row. You should have 45 loops.
Continue crocheting in the round without increases for as many rows as you want the skirt to be long.
Finish with a ruffle: (3 DC in each stitch).
For the first-grader:
Attach brown yarn to the front loops of the 11th row and crochet (1 DC, DC increase) to the end of the row.
Crochet 2 more rounds in DC.
In the next round, (2 DC, DC increase) around.
Crochet 2 more rounds in DC.
In the following round, make increases every 3rd DC.
Adjust the length of the skirt to your liking, just make sure it covers the panties.
Finish with a ruffle: (8 DC in one stitch, skip 1 stitch, slip stitch, skip 1 stitch, 8 DC in the next stitch) and continue to the end of the row.
Head:
Continue crocheting:
Row 26: (SC)*8 (16)
Row 27: (SC, 1 sc inc)*8 (24)
Row 28: (SC, 2 sc inc)*8 (32)
Row 29: (SC, 3 sc inc)*8 (40)
Row 30: (SC, 4 sc inc)*8 (48)
Row 31: (SC, 7 sc inc)*6 (54)
Row 32: (SC, 8 sc inc)*6 (60)
Row 33 – 37: 60
Twist the wire. Make sure the twist is at least half the height of the head; otherwise, the head will wobble over time.
Next, crochet the nose (check its placement; it should be in the center at the front):
Row 38: 30 SC, 5 DC in 1 stitch (nose), 29 SC (60)
Row 39: 19 SC, skip 1 stitch, 1 SC, skip 1 stitch, 1 SC, skip 1 stitch, 3 SC (where the nose is), skip 1 stitch, 1 SC, skip 1 stitch, 1 SC, skip 1 stitch, 19 SC (54) (three decreases in front, right, and left of the nose)
Row 40 – 41: 54 (2 rows)
Row 42: (7 SC, skip 1 stitch)*6 (48)
Row 43: (6 SC, skip 1 stitch)*6 (42)
Stuff the head firmly but leave room for shaping.
Row 44: (5 SC, skip 1 stitch)*6 (36)
Row 45: (4 SC, skip 1 stitch)*6 (30)
Row 46: (3 SC, skip 1 stitch)*6 (24)
Row 47: (2 SC, skip 1 stitch)*6 (18)
Row 48: (1 SC, skip 1 stitch)*6 (12)
Cut the yarn. Leave a small hole so that you can add stuffing if needed. This hole will be closed with hair.
Now, shape the face by pulling in the eye sockets slightly. The rest of the facial features can be added according to your taste and creativity.
Wig:
Make sure to measure the wig to the head; it should fit snugly, not loosely. Adjust the number of rows and stitches in a row as needed.
Row 1: 6 SC in the magic ring.
Row 2: (SC)*6 (12)
Row 3: (SC, 1 SC inc)*6 (18)
Row 4: (2 SC, 1 SC inc)*6 (24)
Row 5: (3 SC, 1 SC inc)*6 (30)
Row 6: (4 SC, 1 SC inc)*6 (36)
Row 7: (5 SC, 1 SC inc)*6 (42)
Row 8: (6 SC, 1 SC inc)*6 (48)
Row 9: (7 SC, 1 SC inc)*6 (54)
Row 10 – 15: 54 (6 rows)
Continue crocheting with slip stitches, single crochets, and double crochets as follows: slip stitch, SC, DC, 3 DC in 1 stitch, DC, SC to the end of the row, and finish with a slip stitch.
Attach the wig to the head.
Next, crochet the hair. The style of the hair can be anything you like, but here’s the basic principle:
Hair Spirals:
For small spirals: (Chain 20, then crochet 3 SC in each chain)*8
For large spirals: (Chain 50, then crochet 3 SC in each chain)*3
For side locks: (Chain 15, then crochet 3 SC in each chain)*2
To make a white bow for the schoolgirl, crochet a small ball (you can wrap a bead with yarn):
Row 1: 6 SC in the magic ring.
Row 2: (SC)*6 (12)
Row 3: (SC, 1 SC inc)*6 (18)
Row 4 – 5: 18 (2 rows)
Row 6: (SC, skip 1 stitch)*6 (12)
Row 7: (1 SC, skip 1 stitch)*6 (6)
Cut the yarn, leaving a long tail for sewing. Shape the ball into a bow and attach it to the wig.
Bows for the First-Grader:
You can use thinner yarn for these bows.
Row 1: 8 SC in the magic ring.
Row 2: (SC)*8 (16)
Continue crocheting by making 3 double crochets in each stitch. Crochet two rows like this.
Attach the bows to the head or the wig as desired.
Apron:
The dimensions of the apron are approximately 4.5 cm by 5.5 cm.
Crochet in straight rows with a turning chain and a turn at the end of each row.
Chain 18.
Rows 1 – 10: 18 SC
Row 11: 18 SC around the apron.
Crochet the side pieces:
Rows 1 – 11: 4 SC
Cut the yarn. Sew the apron together. Place cardboard pieces inside and secure them with glue or tape.
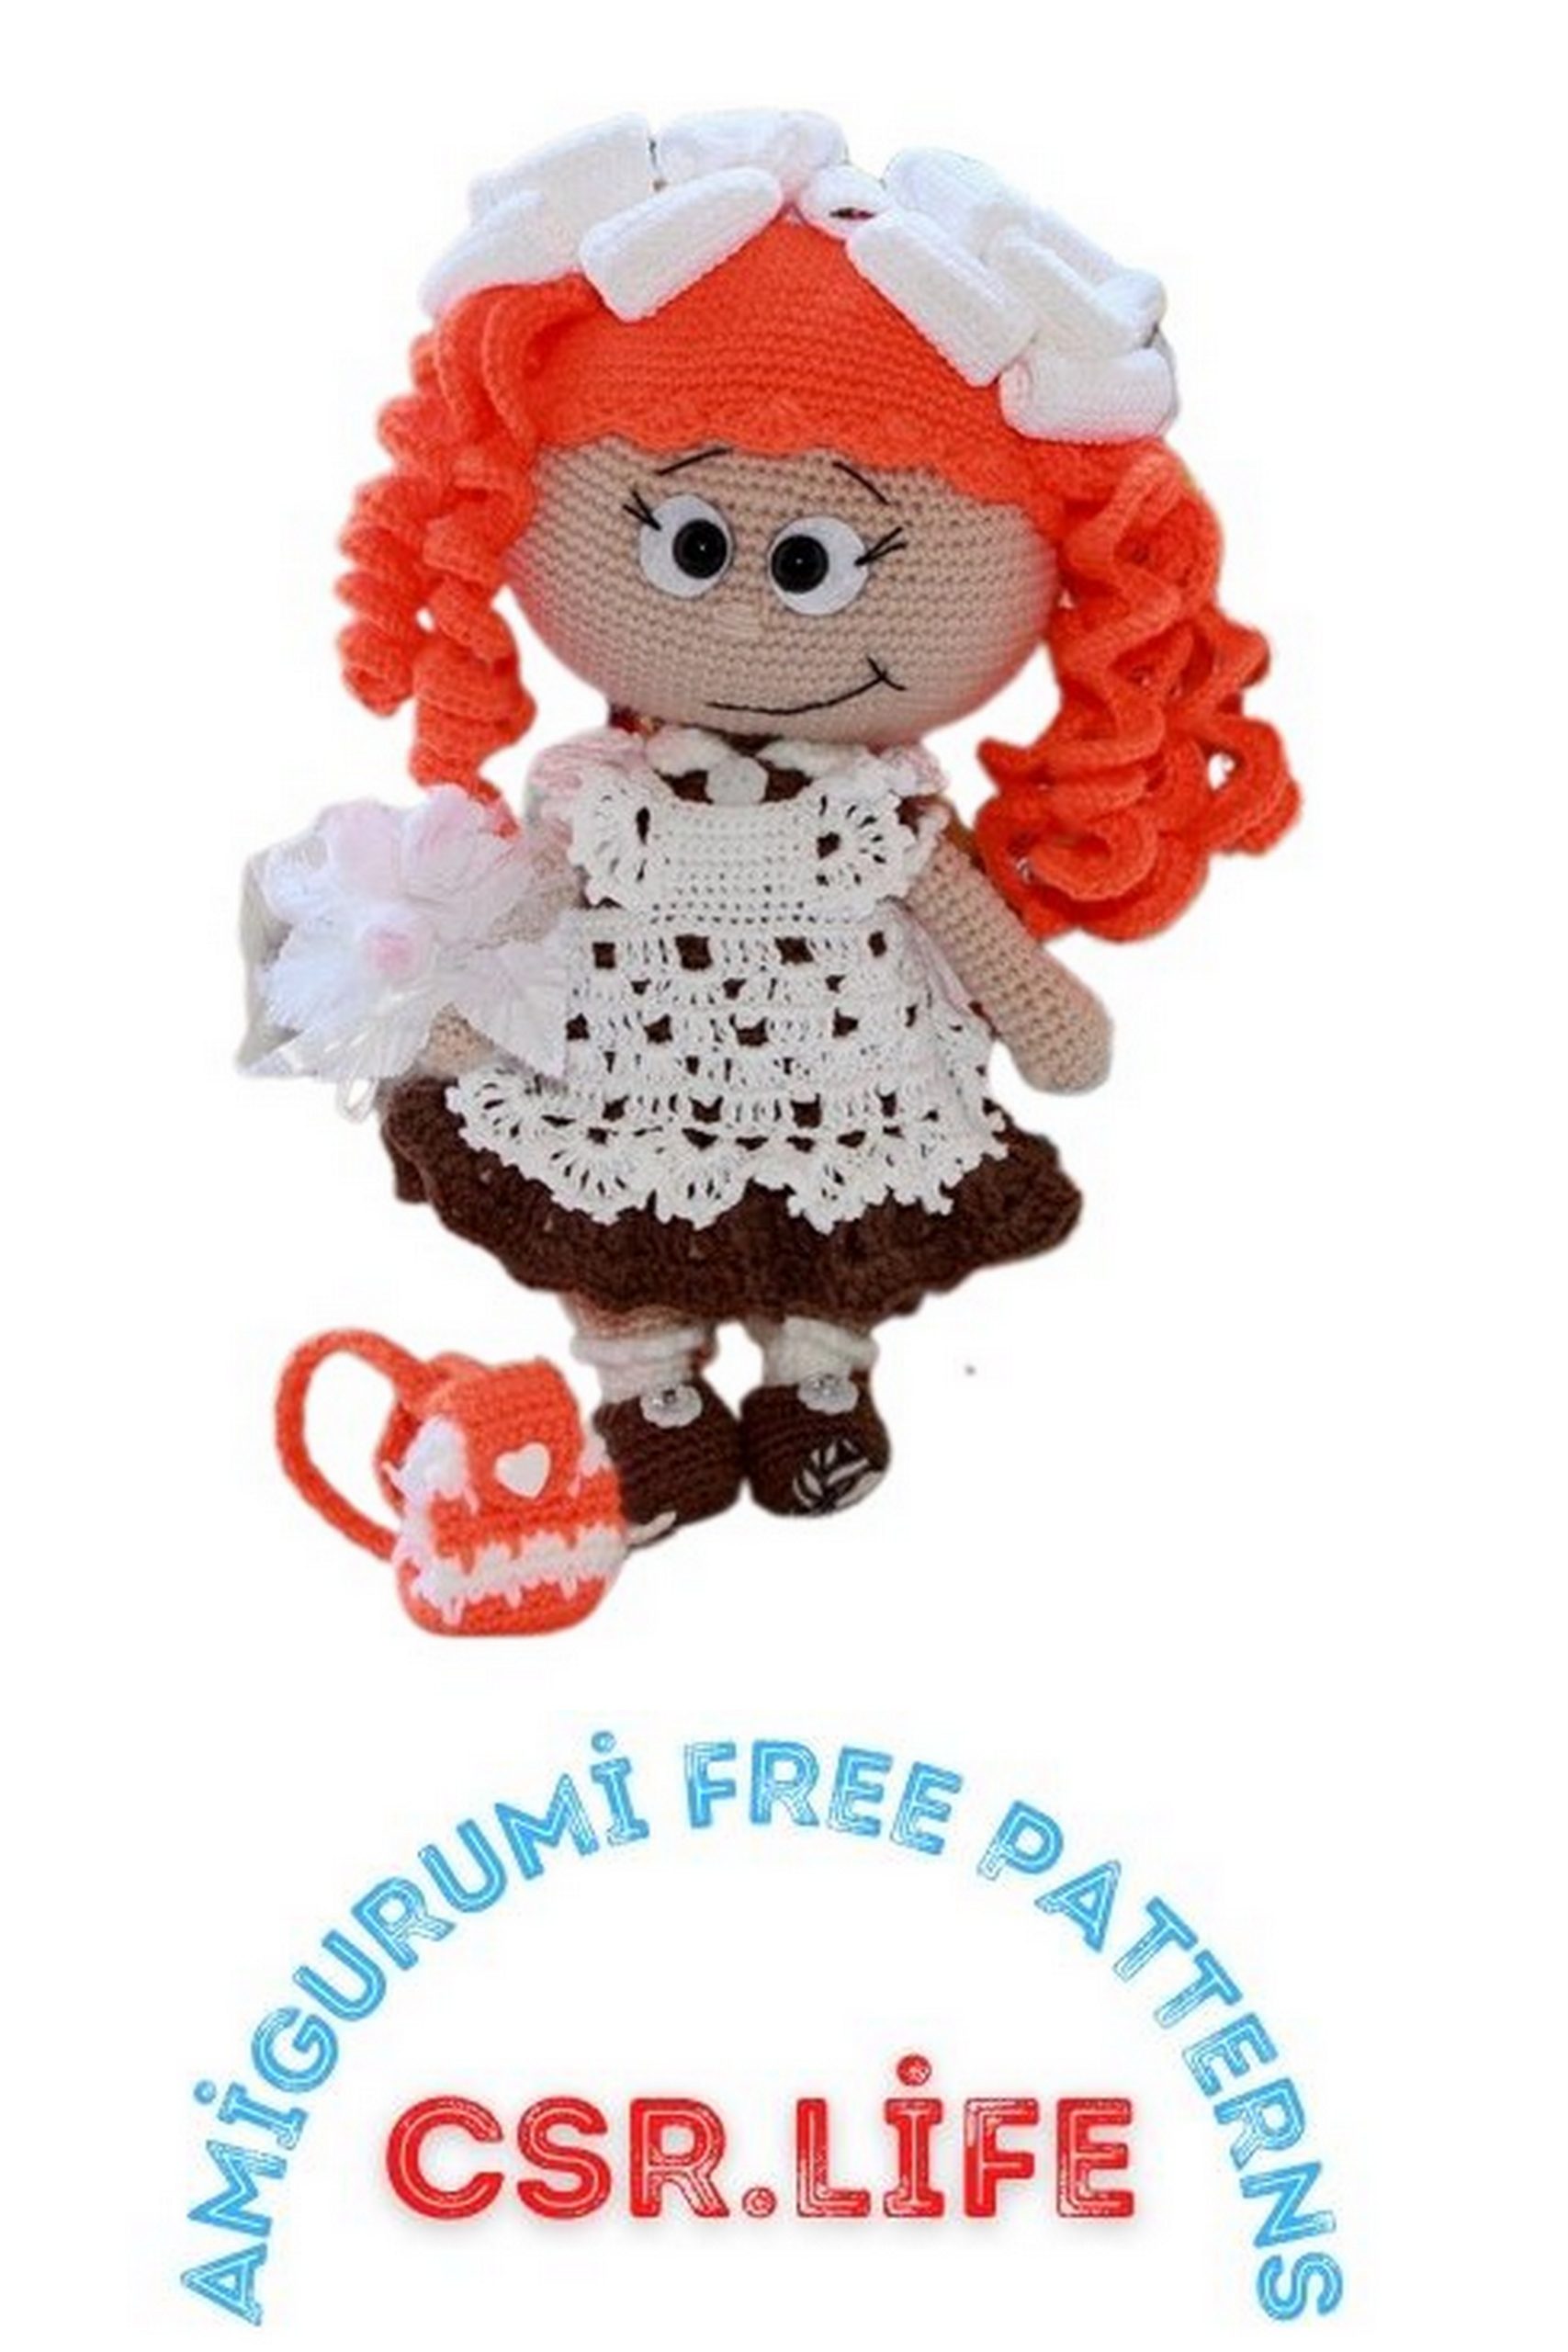
Lock:
Make a lock by chaining 4, then crochet 3 rows of 3 SC in each chain.
Handle (without straps):
Chain 20, then crochet 19 SC along the chain.
Straps:
Chain 50, then along the chain: 15 SC, 3 DC, 2 SC, 10 slip stitches, 2 SC, 3 DC, 15 SC, 3 chains, slip stitch. Then, along the other side of the chain: 1 slip stitch, 20 SC, 2 chains, skip 10 stitches (where the slip stitches are), 20 SC, slip stitch.
Sew the purse pieces together. You can place some cardboard pieces inside, either glued or taped together.
Your doll should be complete with a skirt, head, wig, facial features, hair, bows, apron, purse, and all the other details. Enjoy your crocheting!