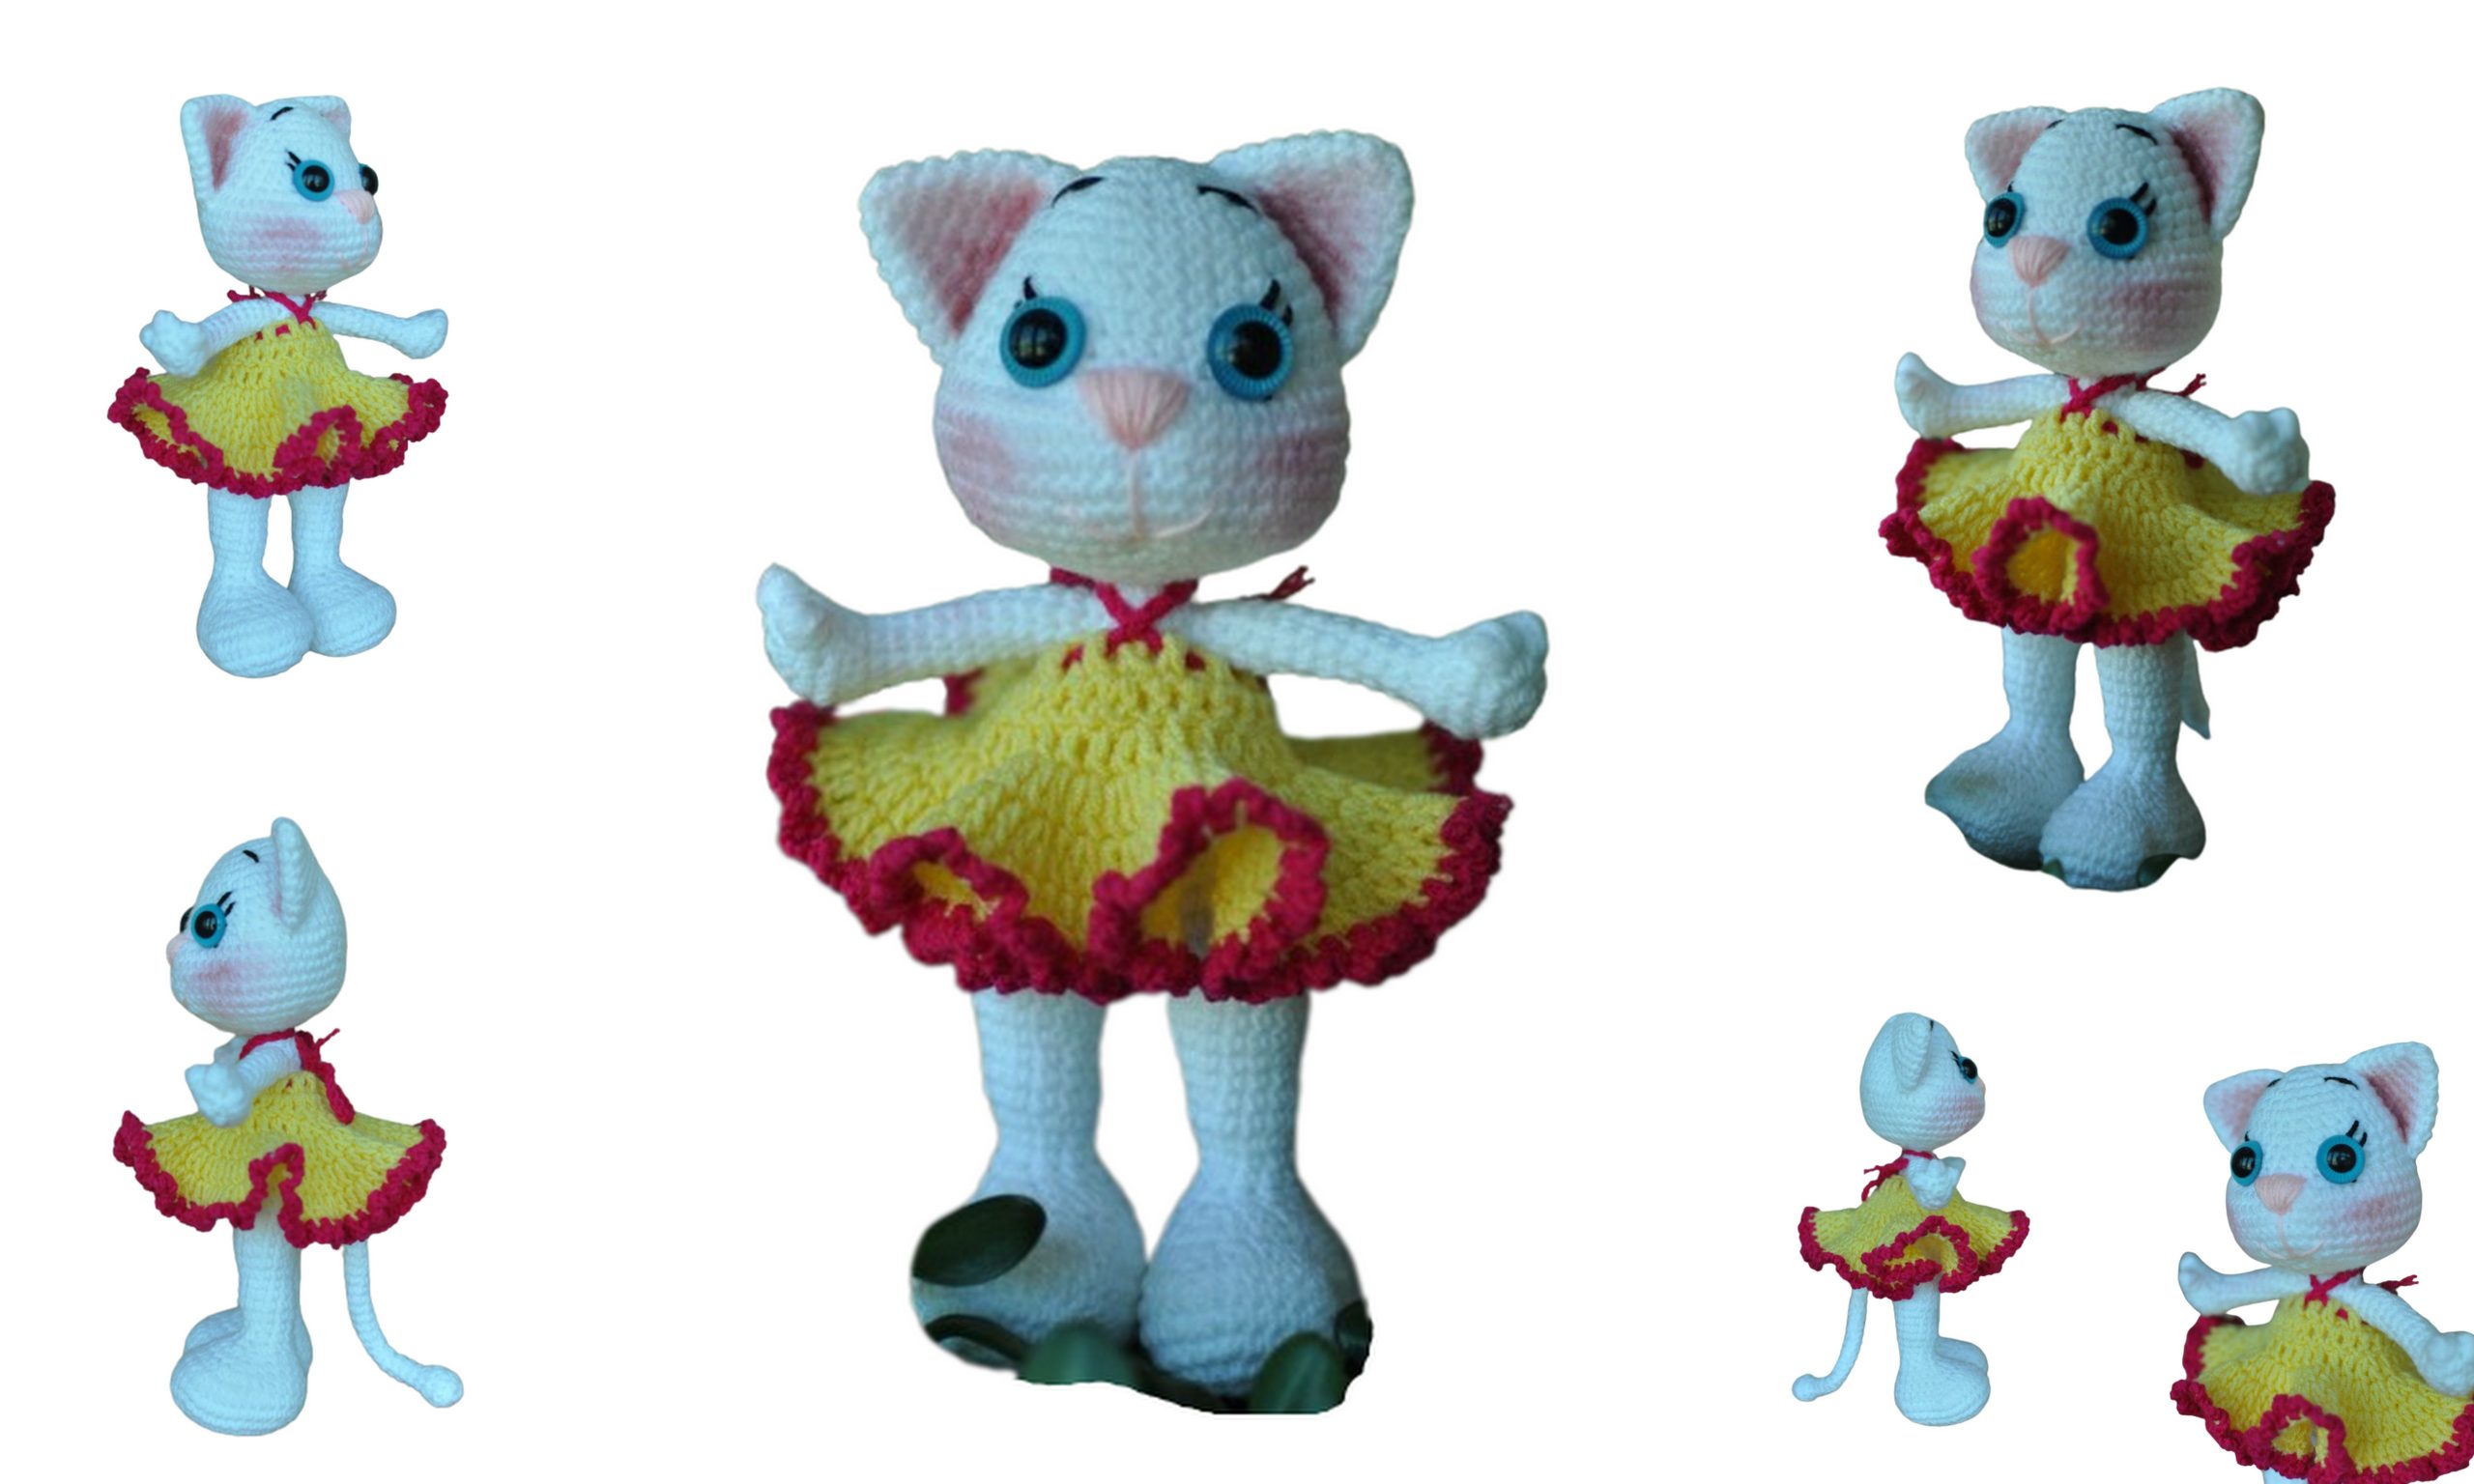
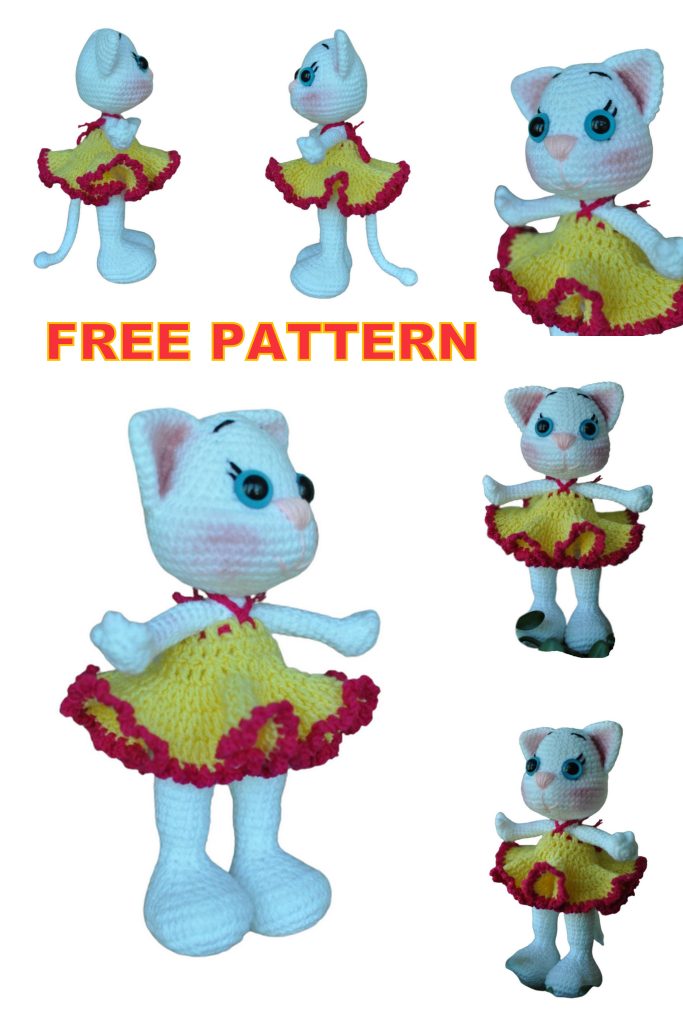
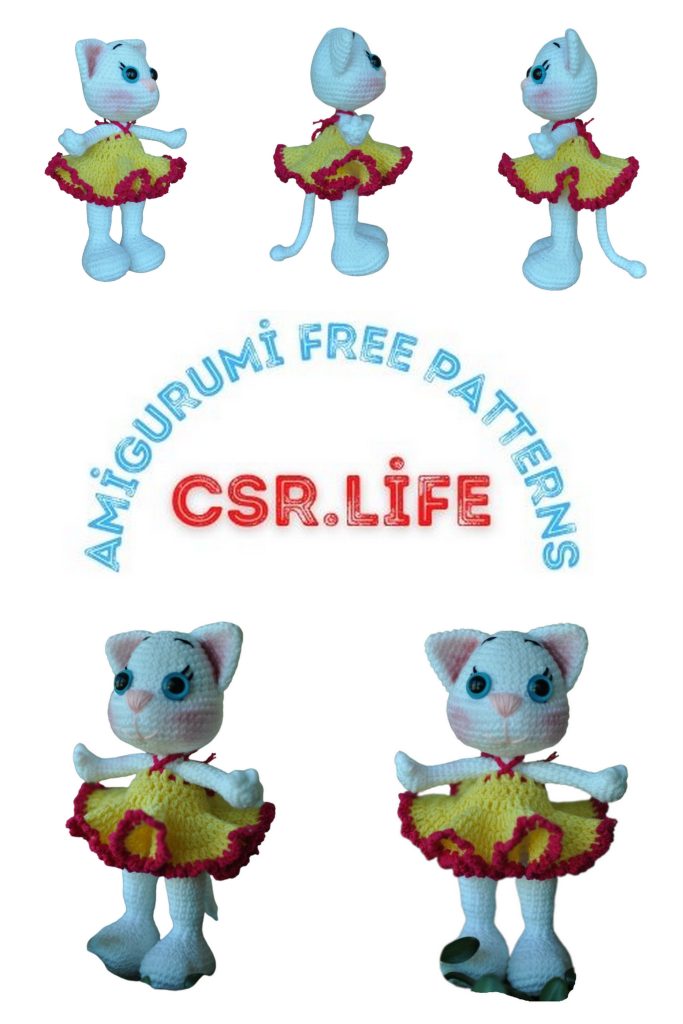
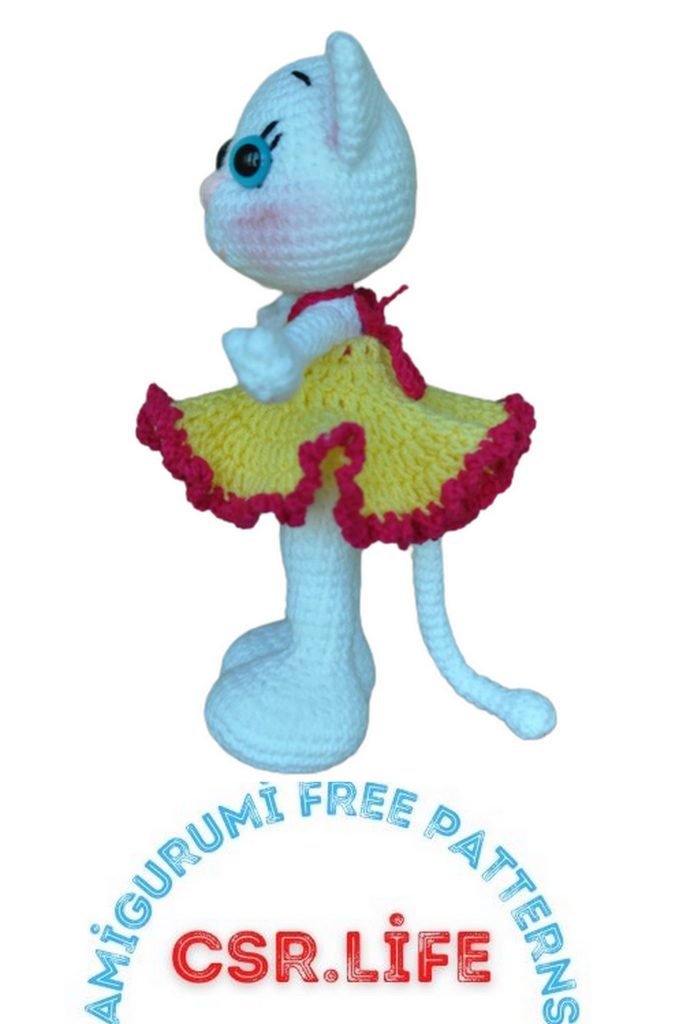
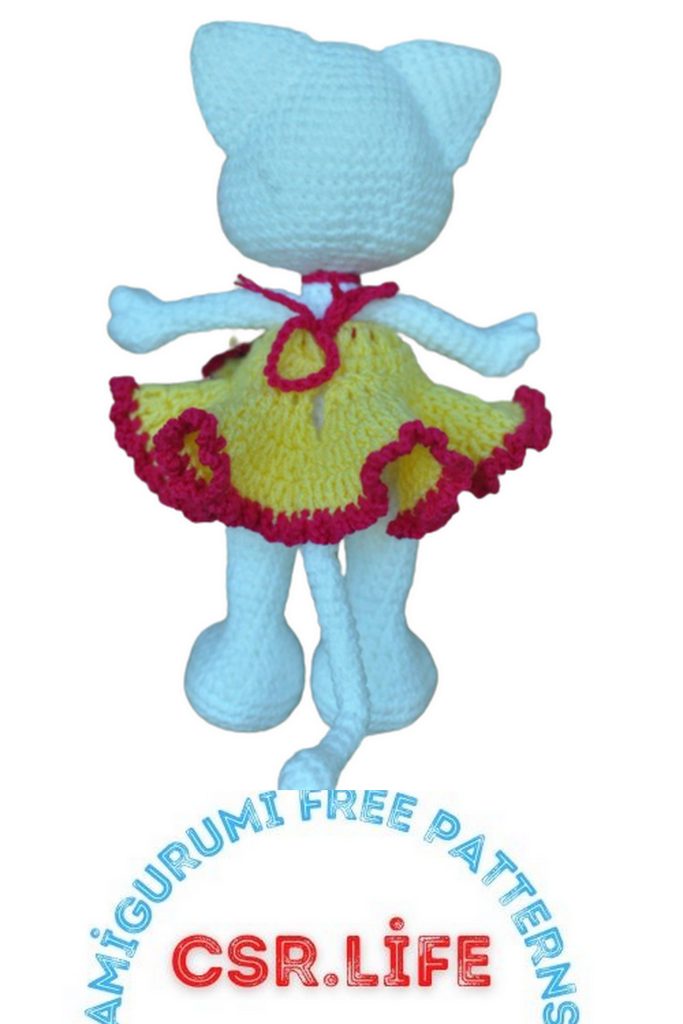
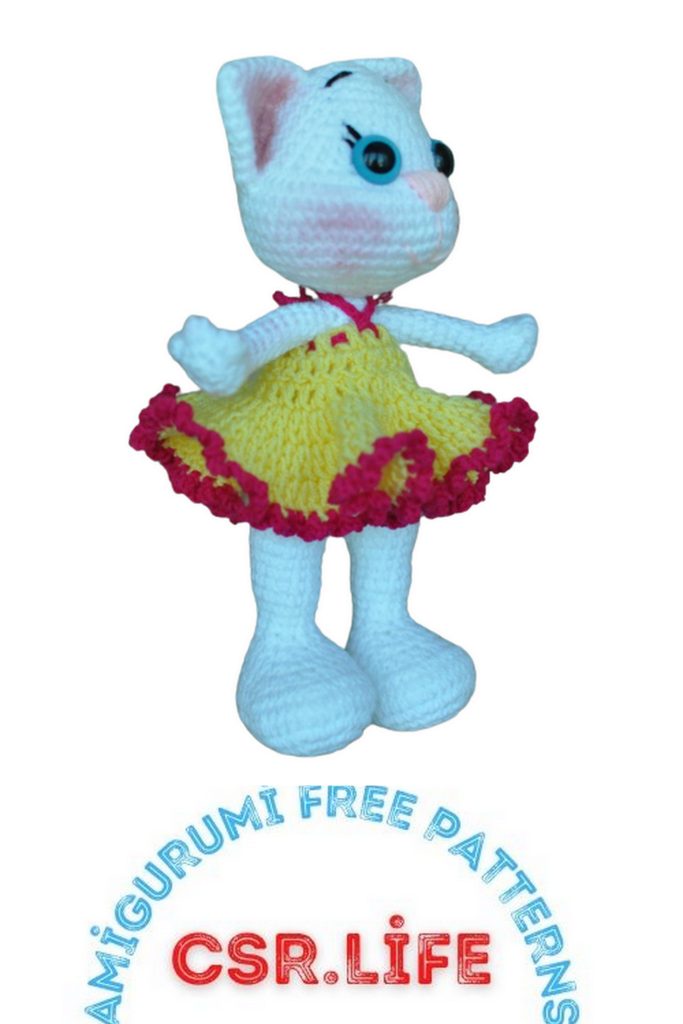
Crochet a Delightful Cute Lady Cat Amigurumi with Our Free Pattern!
Welcome to the enchanting world of amigurumi crafting! If you’re a fan of adorable crochet creations, you’re in for a treat. Our amigurumi free pattern presents the perfect opportunity to bring to life a charming Cute Lady Cat Amigurumi. Whether you’re a seasoned amigurumi enthusiast or a beginner looking for a delightful project, this pattern is designed to spark joy and creativity. Join us on this crochet journey as we guide you through the steps to create your very own lovable feline friend.
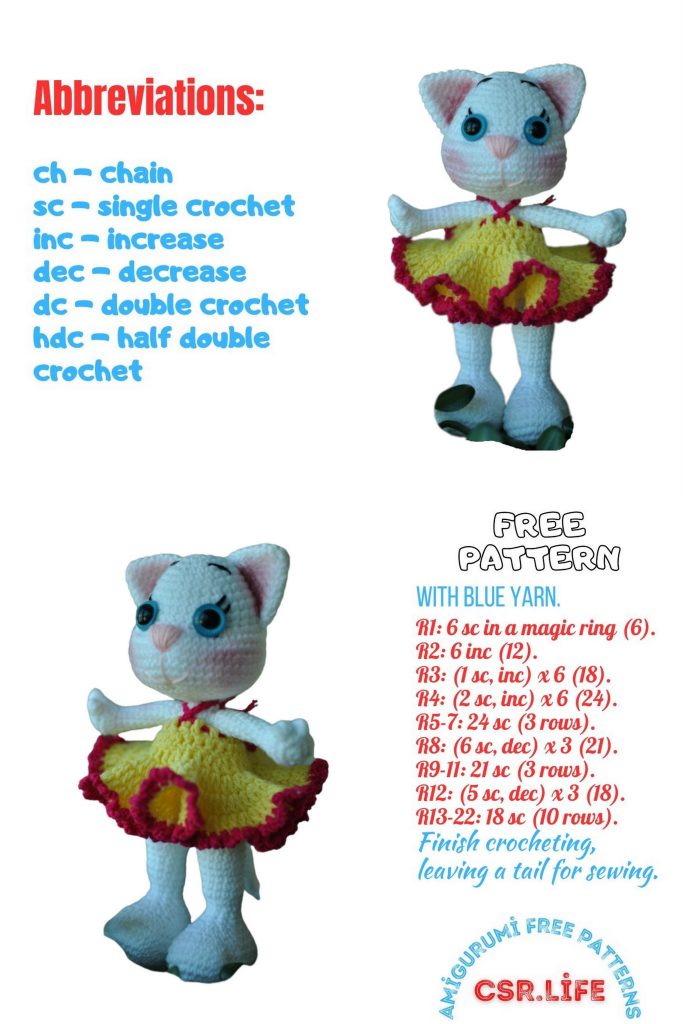
Abbreviations
ch – chain
sc – single crochet
dec – decrease
inc – increase
PATTERN
Ear: Make 2.
Row 1: 6 sc in a ring.
Row 2: (1 sc, inc) (9).
Row 3: (2 sc, inc) (12).
Row 4: (3 sc, inc) (15).
Row 5: (4 sc, inc) (18).
Row 6: (5 sc, inc) (21).
Row 7: in a circle (18).
Row 8: (6 sc, inc) (24).
My result:
Head:
Row 1: 6 sc in a ring.
Row 2: inc (12).
Row 3: (sc, inc) * 6 (18).
Row 4: (2 sc, inc) * 6 (24).
Row 5: in a circle (24).
Row 6: (3 sc, inc) * 6 (30).
Row 7: in a circle (30).
Row 8: (4 sc, inc) * 6 (36).
Rows 9-11: in a circle (36) – 3 rows.
Row 12: 10 inc, 3 sc, 10 inc, 13 sc (56).
Row 13: in a circle (56).
Row 14: 43 sc, dec, 9 sc, dec (54).
Row 15: 43 sc, dec, 7 sc, dec (52).
Row 16: 43 sc, dec, 5 sc, dec (50).
Row 17: 43 sc, dec, 3 sc, dec (48).
Row 18: in a circle (43).
Row 19: (6 sc, dec) * 6 (42).
Row 20: (sc, dec) * 5, dec, 5 sc, dec, (dec, sc) * 6 (29).
Row 21: (2 sc, dec) * 7, sc (22).
Row 22: (sc, dec) * 7, sc (15).
Row 23: (2 sc, dec) * 3, 3 sc (12).

My result:
Front Paws: Make 2.
Row 1: 6 sc in a ring.
Row 2: 6 inc (12).
Row 3: 3 sc, (bobble, sc) * 3, 3 sc (12).
Row 4: inc, 2 sc, 5 fpsc, 3 sc, inc (14).
Row 5: 7 dec (7).
Rows 6-15: in a circle (7) – 10 rows.
Circle on the Paws: 6 sc in a ring, embroider the pads.
My paws. I didn’t embroider them; if you do it on the top, do it on the bottom as well. I thought it would be unnecessary, but you can do it your way.
Back Paws: Make 2 + Torso.
Row 1: Chain of 7 ch. Start crocheting in the second loop from the hook – 5 sc, 3 sc in the last loop, 4 sc, inc (14).
Row 2: 2 inc, 3 sc, 4 inc, 3 sc, 2 inc (22).
Row 3: (sc, inc) * 2, 3 sc, (sc, inc) * 4, 3 sc, (sc, inc) * 2 (30).
Row 4: (2 sc, inc) * 2, 3 sc, (2 sc, inc) * 4, 3 sc, (2 sc, inc) * 2 (38).
Rows 5-6: in a circle without changes (38).
Row 7: (5 sc, dec) * 5, sc, dec (32).
Row 8: 7 sc, 9 dec, 7 sc (23).
Row 9: (6 sc, dec) * 2, 5 sc, dec (20).
Row 10: 5 sc, 5 dec, 5 sc (15).
Row 11: (sc, dec) * 5 (10).
Rows 12-13: in a circle (10).
Row 14: (2 sc, inc) * 3, sc (13).
Rows 15-17: in a circle without changes (13) – 3 rounds.
Row 18: (3 sc, inc) * 3, sc (16).
Rows 19-21: in a circle without changes (16) – 3 rounds.
Now connect the legs. I changed the next row a bit so that the legs stand evenly, not in the first position.
Row 22: 7 sc, 2 ch, 16 sc, 2 sc in 2 ch, 9 sc (36).
Row 23: crochet in a circle, picking up the wire (for those who crochet with it).
Rows 24-27: in a circle without changes (36) – 4 rounds.
Row 28: (5 sc, dec) * 5, sc (31).
Row 29: in a circle without changes (31).
Row 30: (4 sc, dec) * 5, sc (26).
Row 31: in a circle without changes (26).
Row 32: (3 sc, dec) * 5, sc (21).
Row 33: in a circle without changes (21).
Row 34: (2 sc, dec) * 5, sc (16).
Row 35: in a circle without changes (16).
Row 36: (sc, dec) * 5, sc (11).
Rows 37-39: in a circle without changes (16).
If you are crocheting with wire, see the original message (link at the beginning of the post) where they show how to insert and where to place the wire.


Here’s what I got:
Tail:
Row 1: 6 sc in a ring.
Row 2: 6 inc (12).
Row 3: in a circle without changes (12).
Row 4: 6 dec (6).
Rows 5-32: in a circle without changes (6).
You can make any length you want.
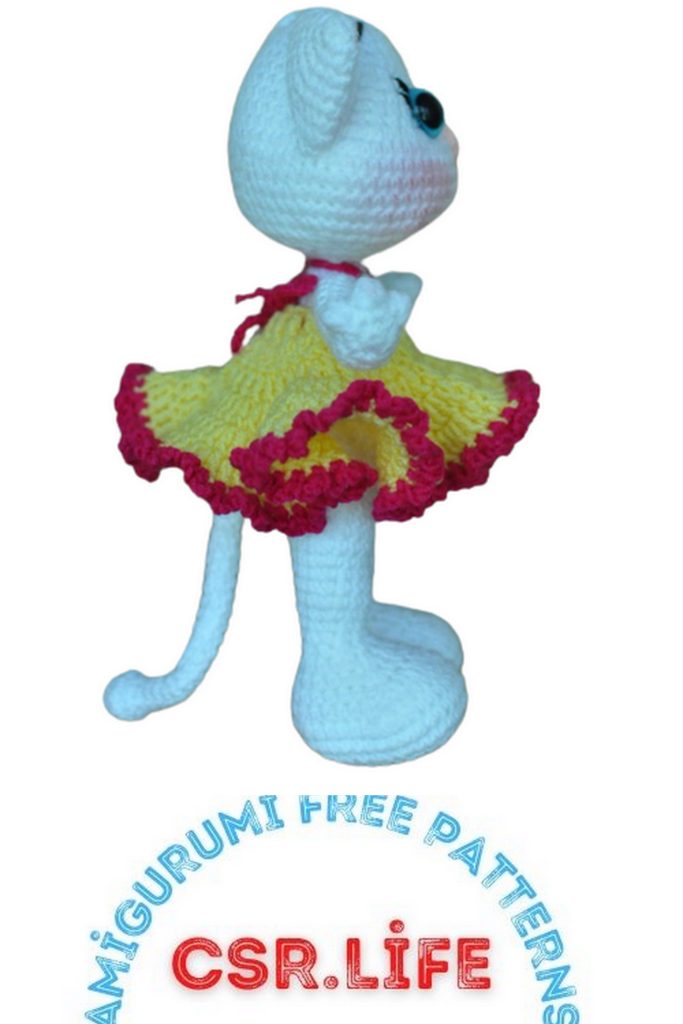
Dress:
My version.
Row 1: 28 ch.
Row 2: 25 sc starting from the 4th loop from the hook. 3 ch. (turn the crochet) (25).
Row 3: (5 sc, inc) * 3, 7 sc, 3 ch. (turn the crochet) (28).
Row 4: (3 sc, inc) * 6, 4 sc, 3 ch. Continue crocheting in a circle (34).
Row 5: 34 inc – increase from sc into each loop.
Row 6: (sc, inc) * 34.
Row 7: (2 sc, inc) * 34.
Change the thread, crochet the lace.
Row 8: (sc, 3 ch) * to the end.
Then crochet a chain of ch, approximately 35-36 cm. Pull it through every other sc of the top row of the dress.
This is how my naked cat turned out. I’m still thinking about toning.
Next is the assembly:
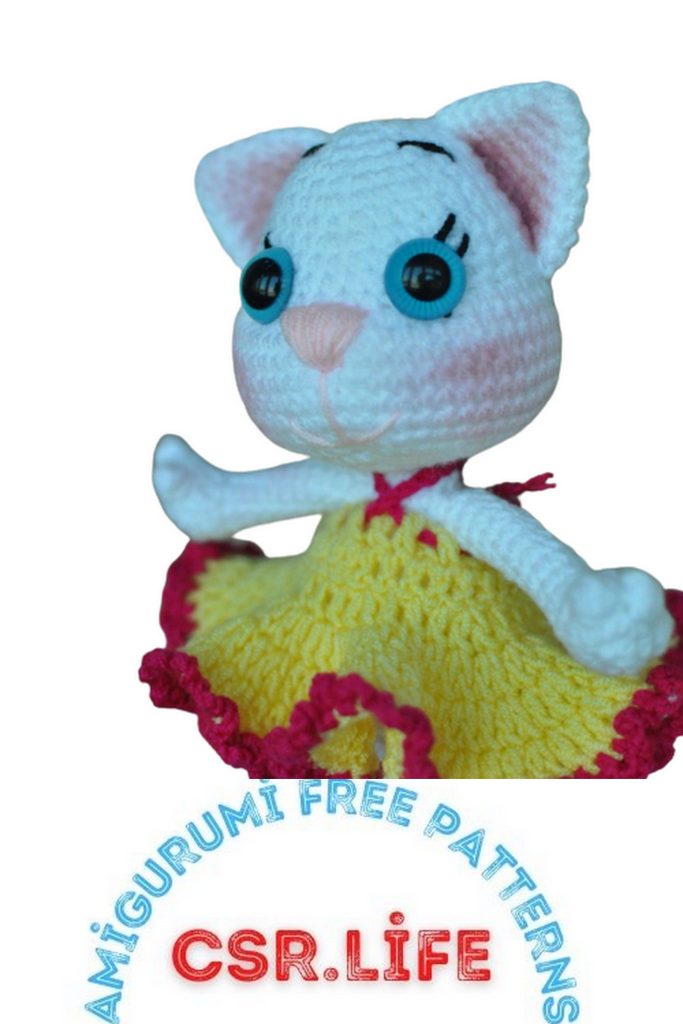
– Embroider the nose (top – 3 sc in the 12th row of the head, height three rows).
– Sew the ears to the head as shown in the picture.
– Tighten the eyes (I grabbed the 5th loop from the center (2nd of the 3 loops in the 12th row of the head or about 2 sc from the embroidered nose).
– Place safety eyes or simply beads/buttons; mine are 14 mm. Tighten the thread after placing the eyes.
– Embroider eyebrows and eyelashes.
– Sew the hands to the torso.
– Sew the torso to the head. For those who will crochet without wire, it’s better to insert something into the neck because if you sew without anything, it will wobble.
– Put on the dress. (Pull the chain of ch from the front of the dress, cross it, put it on the head, then tighten it on the back and tie a bow.)
I really enjoyed crocheting this toy. Toys of this kind are very popular with children. You can crochet many different dresses. Also, you can transform the cat by crocheting, for example, ballet shoes.