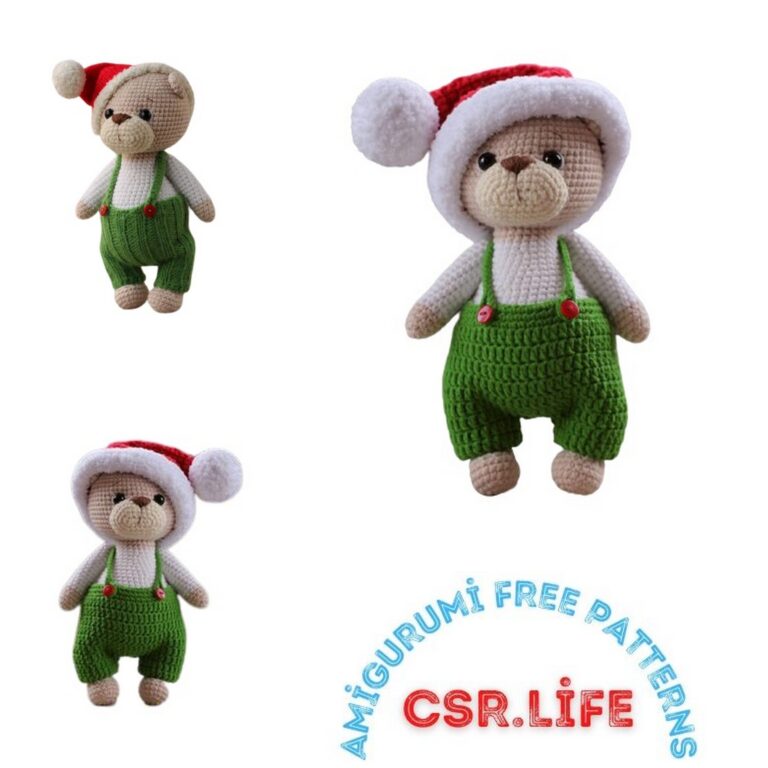
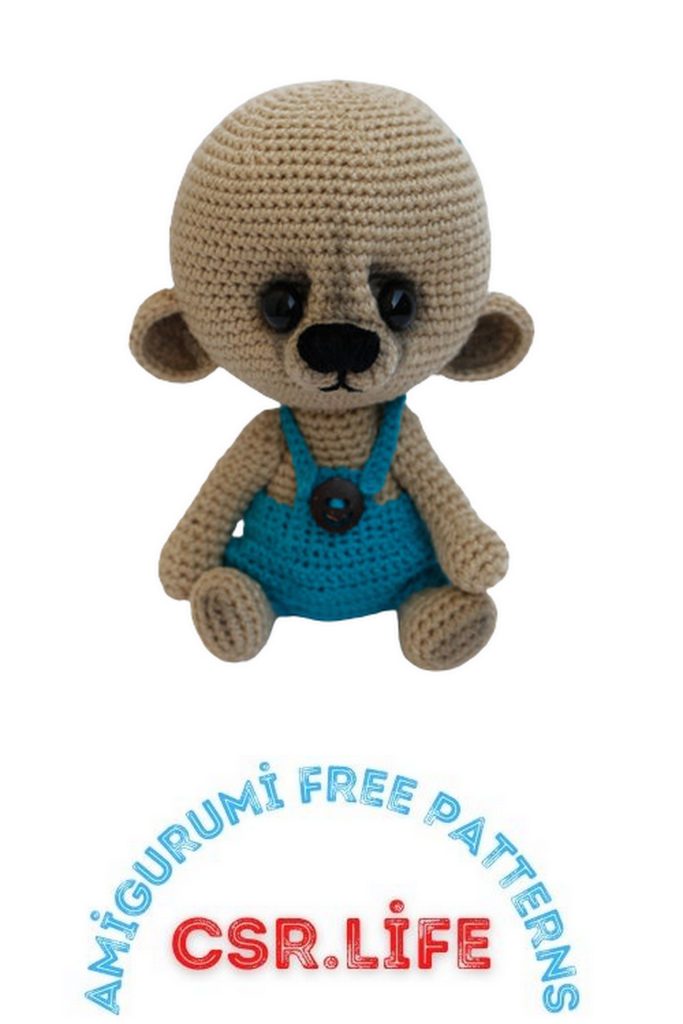
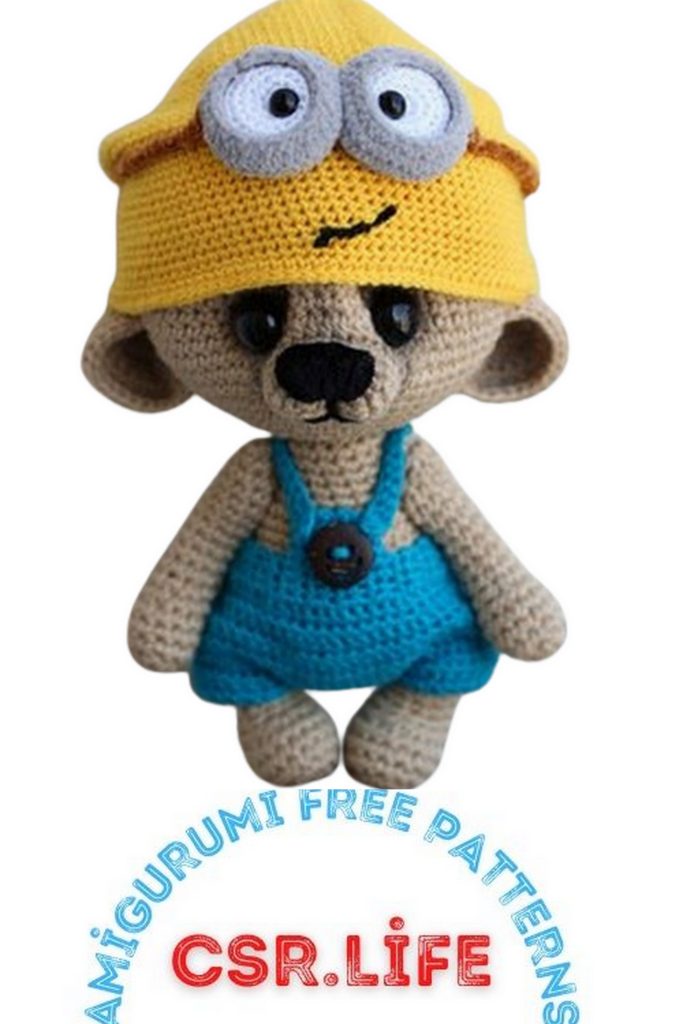
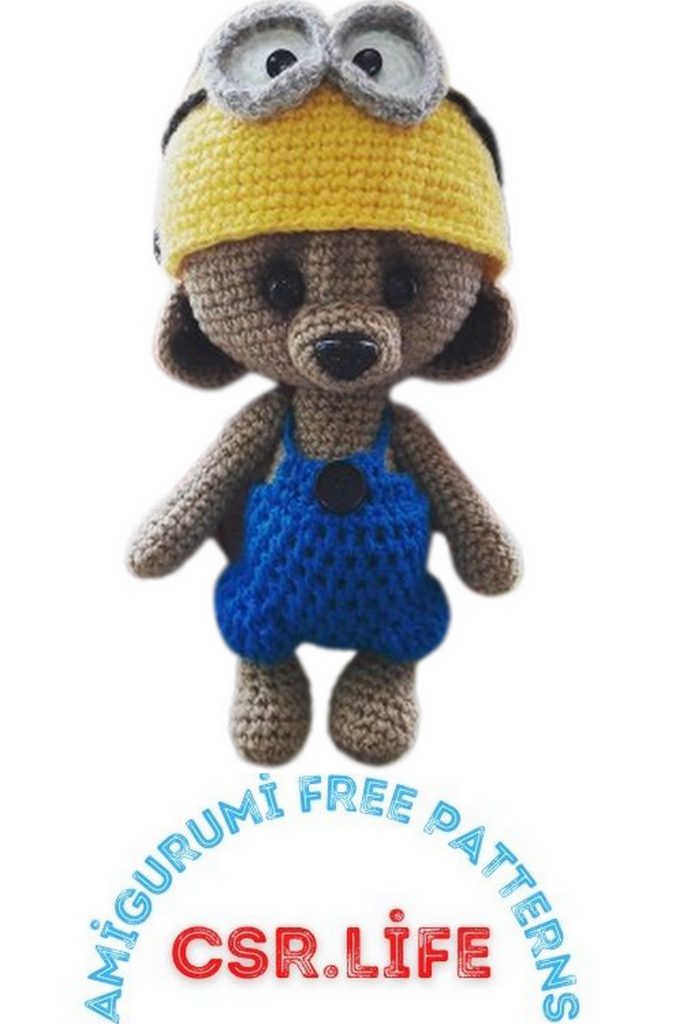
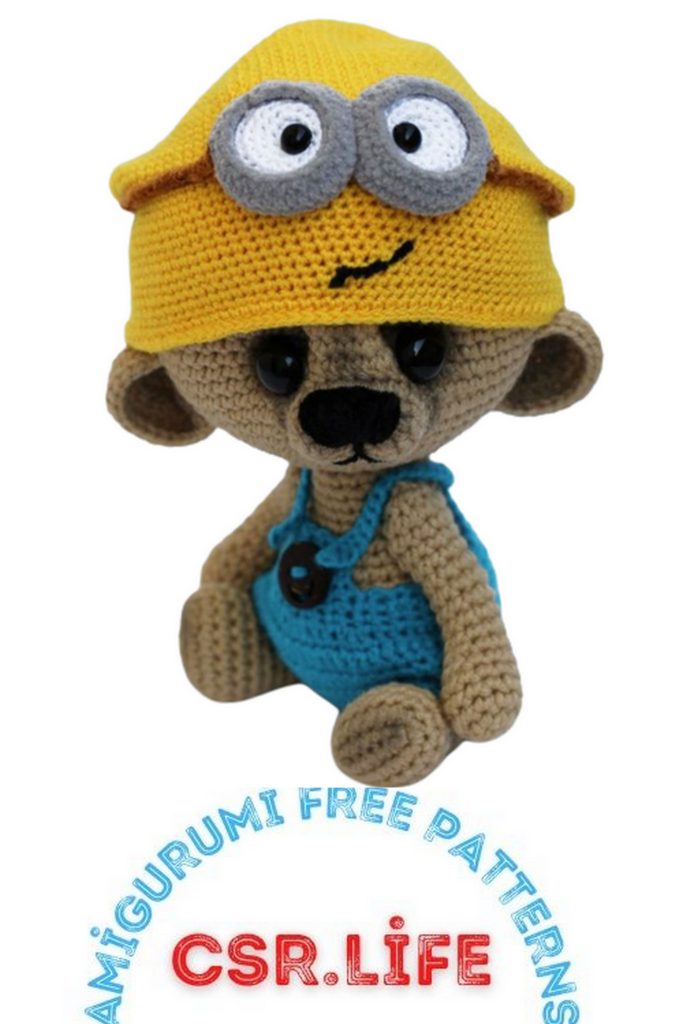
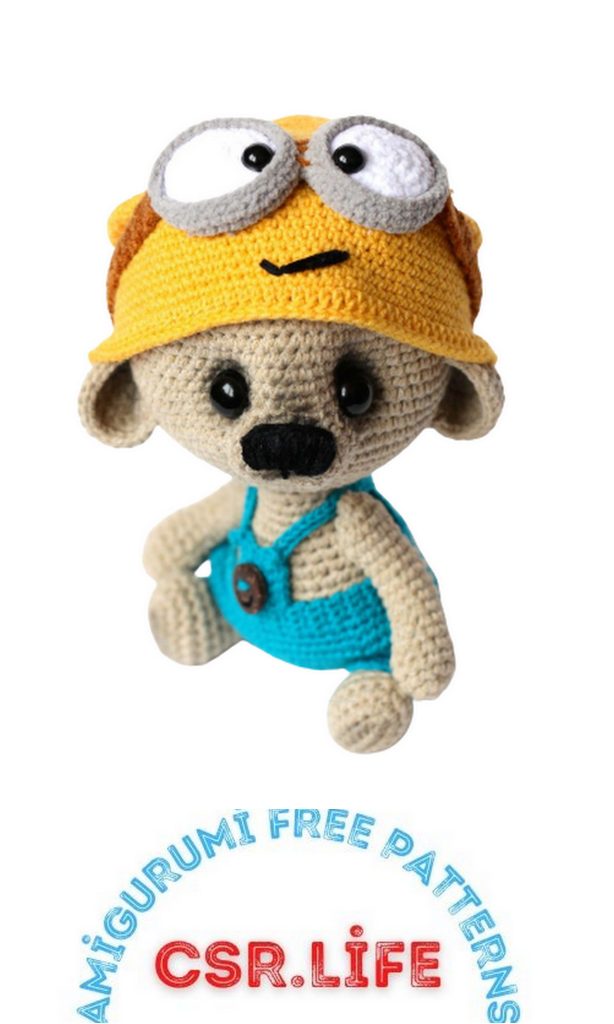
Cute Bear in Hat Amigurumi Free Pattern – Adorable DIY Crochet Toy
Step into the enchanting realm of crochet with our endearing Cute Bear in Hat Amigurumi Free Pattern. This easy-to-follow DIY crochet tutorial is your ticket to creating an irresistibly cute bear toy complete with a charming hat. Whether you’re a crochet enthusiast or a beginner, this amigurumi project offers a delightful crafting experience for all.
Our amigurumi free pattern and detailed instructions make it a breeze to crochet this lovable bear and its cozy hat. Perfect for both seasoned crafters and those new to the art of crochet, this project brings a touch of handmade warmth to your space.
As you embark on this crochet adventure, you’ll find that crafting this adorable bear is not only a joyful experience but also a therapeutic one. Plus, the finished amigurumi makes for a precious handmade gift or a delightful addition to your own collection.
Ready to add a cute bear in a hat to your crochet repertoire? Gather your yarn, hook, and creativity, follow our amigurumi bear free pattern, and let the crafting magic begin. Share your finished creation with the crafting community and spread the joy of DIY amigurumi. Happy crocheting!
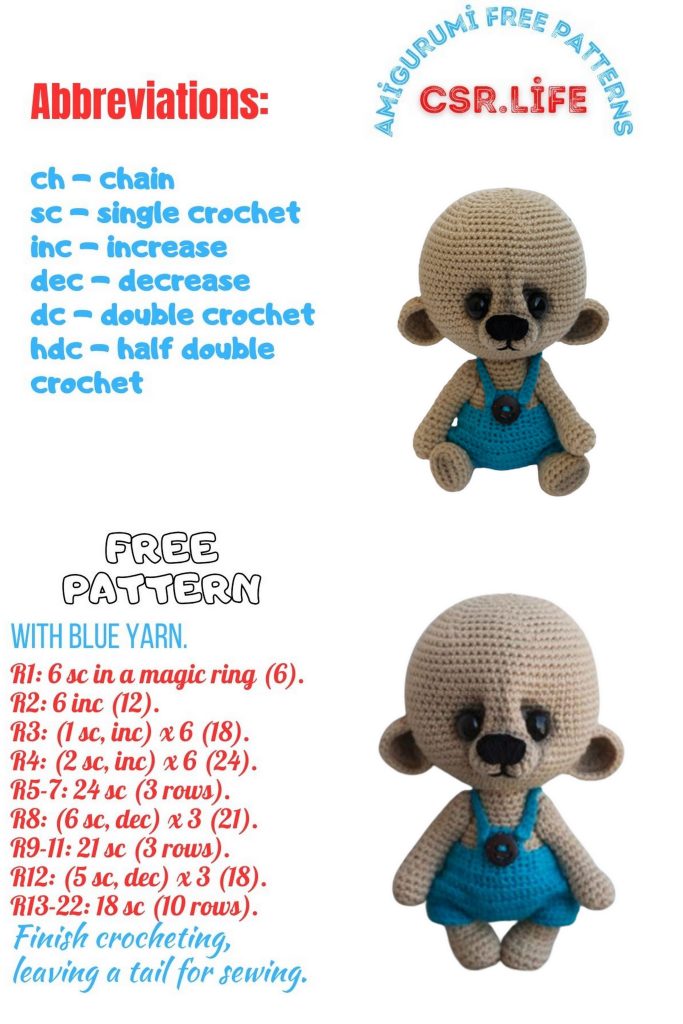
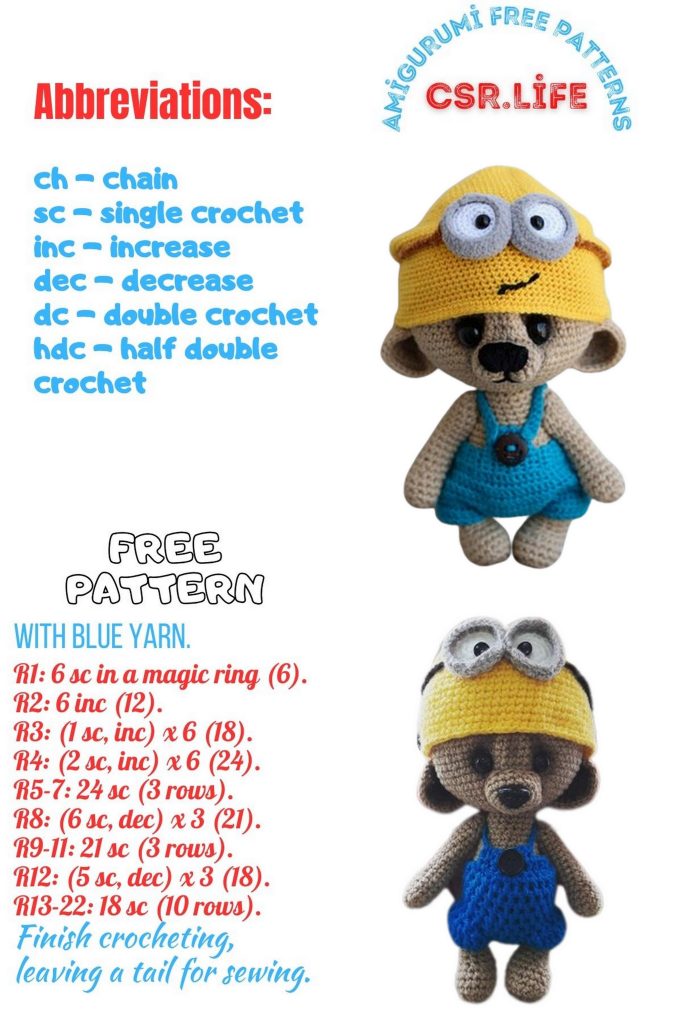
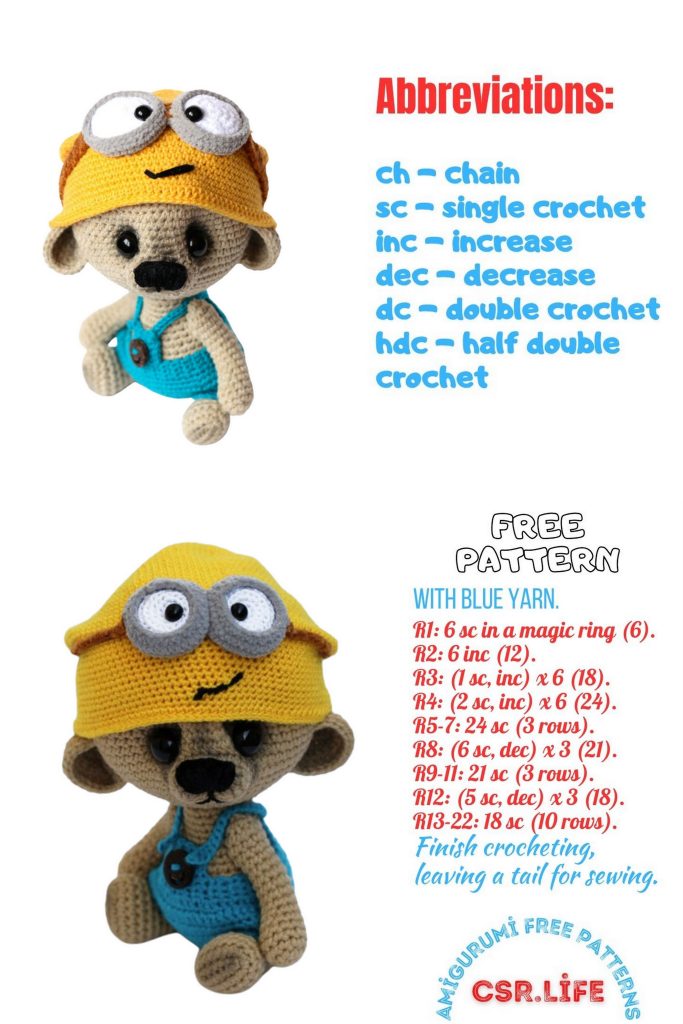
Necessary materials
1. Fluffy yarn – Flora Troitskaya 240m / 100g, color
Cognac, hook 1.75. Gone ка skein.
2. For the bear that was connected in the process
MK design, used jeans yarn from
YarnArt 160m / 50g, hook 1.75. It took ½ skein.
3. Filler holofiber.
4. A wire for reinforcing handles about 0.2 meters,
you can use shaggy wire (it is not necessary
wrap with adhesive tape).
5. Insulating tape or adhesive tape for wrapping the wire.
6. Cotter pins for fastening handles, legs, head.
For the head the T-shaped forelock 28mm (1 piece), 1 washer
9mm and 1 disc 30mm on the head side, 1 washer 15mm with
side of the body;
for handle-legs – 4 T-shaped cotter pins 20mm and 8 washers
diameter 9mm. Can use thread
mount.
7. Plastic buttons for the eyes. I used
Buttons with a diameter of 9 mm.
8. Thread and needle for making tightenings.
9. Pastel and brush for tinting.
10. Weighting agent (granulate, shot or fishing
weights).
11. Black yarn for embroidery spout.
Abbreviations:
ch – chain
sc – single crochet
sl-st – slip-stitch
DEC – decrease
inc – increase
double.inc – we knit 3sc in one loop
PATTERN
Feet (2 parts)
We dial 6ch, continue from the second loop
1st row – 4sc, double.inc, continue along the second side of the chain from ch, 3sc, inc -12sc
2nd row – inc, 3sc, 3inc, 4sc, 2inc = 18sc – the beginning of the row will shift to 1sc
3-5 rows – 18sc
6 row – 4sc, 4DEC, 4sc, DEC -13sc
7 row – 5sc, DEC, 6sc -12sc
8-13 rows – 12sc
We begin to fill the part with holofiber – we fill the sock and the heel. Insert the cotter pin
between 12 and 13 rows and continue to fill the part – the degree of packing is dense, but without
stretching the canvas. For the paws, I use a 20mm T-pin and a 9mm washer (without disc).
Filling the parts and inserting the cotter pin, pay attention to the fact that the right and
left legs.
14 row – 6dec
Add filler and tighten the hole with a needle, fasten and hide the thread inside the foot.
Pens (2 parts)
1 row – 6sc into magic ring
2 row – 6inc = 12sc
3-5 rows – 12sc
6 row – DEC, 10sc = 11sc
7 row – DEC, 9sc = 10sc
8-16 rows – 10sc
We begin to form a foot – first we stuff a palm (average degree of stuffing). Take
fluffy wire dec, cut off the double length of the foot and fold the wire in half.
For the paws, I use a 20mm T-pin and a 9mm washer (without disc).
We withdraw the cotter pin between the 15th and 16th rows (pay attention to the right and left sides) and
insert the wire frame into the foot. If you wish, you can add more holofiber, but I
I am limited only to stuffing my palms.
Torso (1 piece)
1 row – 6sc into magic ring
2 row – 6inc = 12sc
3 row – (1sc, 1inc) x6 = 18sc
4-7 rows – 18sc
8 row – (2sc, 1inc) x6 = 24sc mark the first and fourth increments with a marker (places for
joining the handles to the body)
9-10 rows – 24sc
11 row – (3sc, 1inc) x6 = 30sc
12 row – 30sc
13 row – (4sc, 1inc) x6 = 36sc
Rates 14-17 – 36sc
At this stage of knitting, you need to insert a cotter pin with a disk for attaching the head, removing the tip
cotter pin in the middle of the initial ring of amigurumi. I use a 28mm T-pin and
15mm washer (without disc)
Now you need to attach the handles to the body in the places noted earlier. From the torso
I used a 9mm washer without a disc.
Please note that when twisting the cotter pin, the resulting rings must be
abut against a washerdec, not a disk (when using it) or a knitted fabric.
18 row – (4sc, 1dec) x6 = 30sc
19th row – 30sc, mark with a marker the places for joining the legs to the body between 6 and 7 sc
and 21 and 22 sc.
The photo shows how the marker should be located for attaching the legs. If you have a description
it turns out to be biased, correct it according to your detail.
20 row – (3sc, 1dec) x6 = 24sc
21 row – 24sc
22 row – (2sc, 1dec) x6 = 18sc
We fix the legs to the body in the places marked in the 17th row. From the torso side I used
9mm washer without disc.
We fill the part with holofiber, the degree of packing is dense, but without stretching the canvas.
Since the animal we get is not of standard proportions, a large head can
outweigh, and the toy will fall. To avoid this, you can weight the body and
add metal granulate or fishing weights to the belly (just be sure to put
them in an embroidered bag or bag).
23 row – (1sc, 1dec) x6 = 12sc
24 row – 6dec = 6sc
Add filler. Cut the thread, tighten the hole, fasten and cut the thread, leaving
the end is about 30-50 cm long (we will knit the tail).
Tail
1 row – with the help of a needle we bring the end of the thread between approximately 18 and 19 rows and pick up
on the body 6sc (pay attention to the symmetry of its location relative to
legs), 1ch, turn
2 row – DEC, 2, DEC, 1ch, turn
3 row – 2DEC, 1ch, turn
4th row – DEC, gently sew the tip of the tail to the torso.
If desired, you can type a small circle on the body and tie the tail in the form of a ball
(for a bunny) or make a big fox
Ears (2 parts)
The part is knitted in rotary rows.
1 row – 6sc into magic ring, 1ch, turn
2 row – (1sc, 1inc) x3, 1ch, turn
3 row – (2sc, 1inc) x3, 1ch, rotation
4 row – (3sc, 1inc) x3, 1ch, turn
5 row – 15sc, 1ch, turn
6 row – 15sl-st
Fasten and cut the thread, leaving the end for sewing.
Muzzle (1 piece)
We dial 6ch, continue from the second loop
1 row – 4, double.inc, continue along the second side of the chain of ch, 3, inc = 12sc
2nd row – inc, 3, 3inc, 4, 2inc = 18sc – the beginning of the row will shift to 1sc
3-4 rows – 18sc
5 row – (2sc, 1inc) x6 = 24sc
Fasten and cut the thread, leaving the end for sewing.
Head (1 piece)
1 row – 6sc into magic ring
2 row – 6inc = 12sc
3 row – (1sc, 1inc) x6 = 18sc
4 row – (2sc, 1inc) x6 = 24sc
5 row – (3sc, 1inc) x6 = 30sc
6 row – (4sc, 1inc) x6 = 36sc
7 row – (5sc, 1inc) x6 = 42sc
8 row – (6sc, 1inc) x6 = 48sc
9 row – (7sc, 1inc) x6 = 54sc
10 row – (8sc, 1inc) x6 = 60sc
11 row – (9sc, 1inc) x6 = 66sc
12-25 rows – 66sc
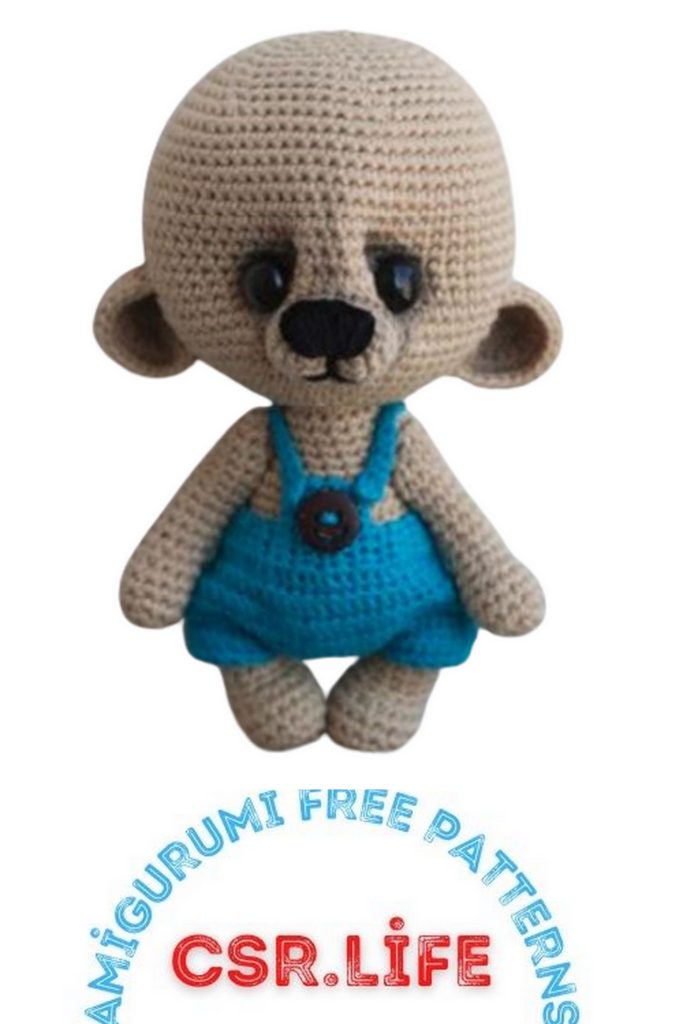
Do not be afraid of the size of your head, the photo shows the ratio of the head and body.
26 row – (9sc, 1dec) x6 = 60sc
27 row – (8sc, 1dec) x6 = 54sc
28 row – (7sc, 1dec) x6 = 48sc
29 row – (6sc, 1dec) x6 = 42sc
30 row – (5sc, 1dec) x6 = 36sc
31 row – (4sc, 1dec) x6 = 30sc
We fasten the head to the body. From the side of the head, I use a 9mm washer and a disc with a diameter of 30mm.
This is necessary so that the head does not fall over on its side (in the photo I showed the ratio upper torso and disc).
Frankly, I did not try to sew such a big head to a small body.
You may have to sew the head to the body (like a button) and insert it into the “bottom” of the head
a circle cut out of plastic with a diameter of about 30 mm and then fill tightly
holofiber.
To those who fasten their heads with a cotter pin, I remind you that the bent ends must abut
in the wasdec, not in the drive.
32 row – (3sc, 1dec) x6 = 24sc
33 row – (2sc, 1dec) x6 = 18sc
34 row – (1sc, 1dec) x6 = 12sc
We fill the head with holofiber, the degree of stuffing is average (we will perform the tightening).
The last row is not tied to the complete design of all the hooks and sewing the eye.
35 row – 6dec
Muzzle decoration
In the lower part of the head we fasten the muzzle with pins and begin to sew it, adding inside
holofiber.
Pay attention, if it is good to stretch the edge of the muzzle during sewing, then the seam will be
not very noticeable even when working with smooth yarn.
Now let’s start embroidering the nose. I usually place it on top of the muzzle.
After the spout is ready, do not cut the thread, we need it to indicate
mouth after performing tightening.
Eye design.
1. Pins indicate the location of the eyes.
2. We take a needle and a thread for making tightenings (I usually take a thread 50-60 cm long, so that is enough
and for tightening and sewing on the eye). We fix the thread at the mark of one of the eyes, further introducing
the needle at the location of one eye, display it at the mark of the other, tighten (fix
Utyazhkdec, but without fanaticism), we repeat one more time.
3. Now you need to slightly “drown” the eyes. To do this, insert the needle into the deepening of the eye and withdraw
it on the back of the head (make sure that the needle comes out between the loops without grabbing the strings,
then the bear will not have a cavity at the back of the head). We return the needle back through the same hole on
the back of the head. Repeat the same for the second eye.
4. We designate a mouth. The needle from one eye is displayed in the lower part of the muzzle in the middle under
nose and through the upper point of the middle of the muzzle (just under the nose) we return it to another
eye. We repeat.
5. We sink the muzzle. The needle from the eye is again inserted into the lower part of the muzzle in the middle and
through the upper middle (under the spout) we bring to the back of the head, tighten and return back to
eye area. Sew on the eyes.
6. The left thread of black embroider mouth.
We bring all the strings to the crown and fix them well there. If the bear on the back of the head
at the place of the hooks the filler “fell”; it can be added through the crown.
Now we tie the remaining row of the head, tighten the hole with a needle and hide the thread.
Sewing on the ears.
Before sewing on the ears, try on them, try different positions (from this
depends on the character and mood of the bear).