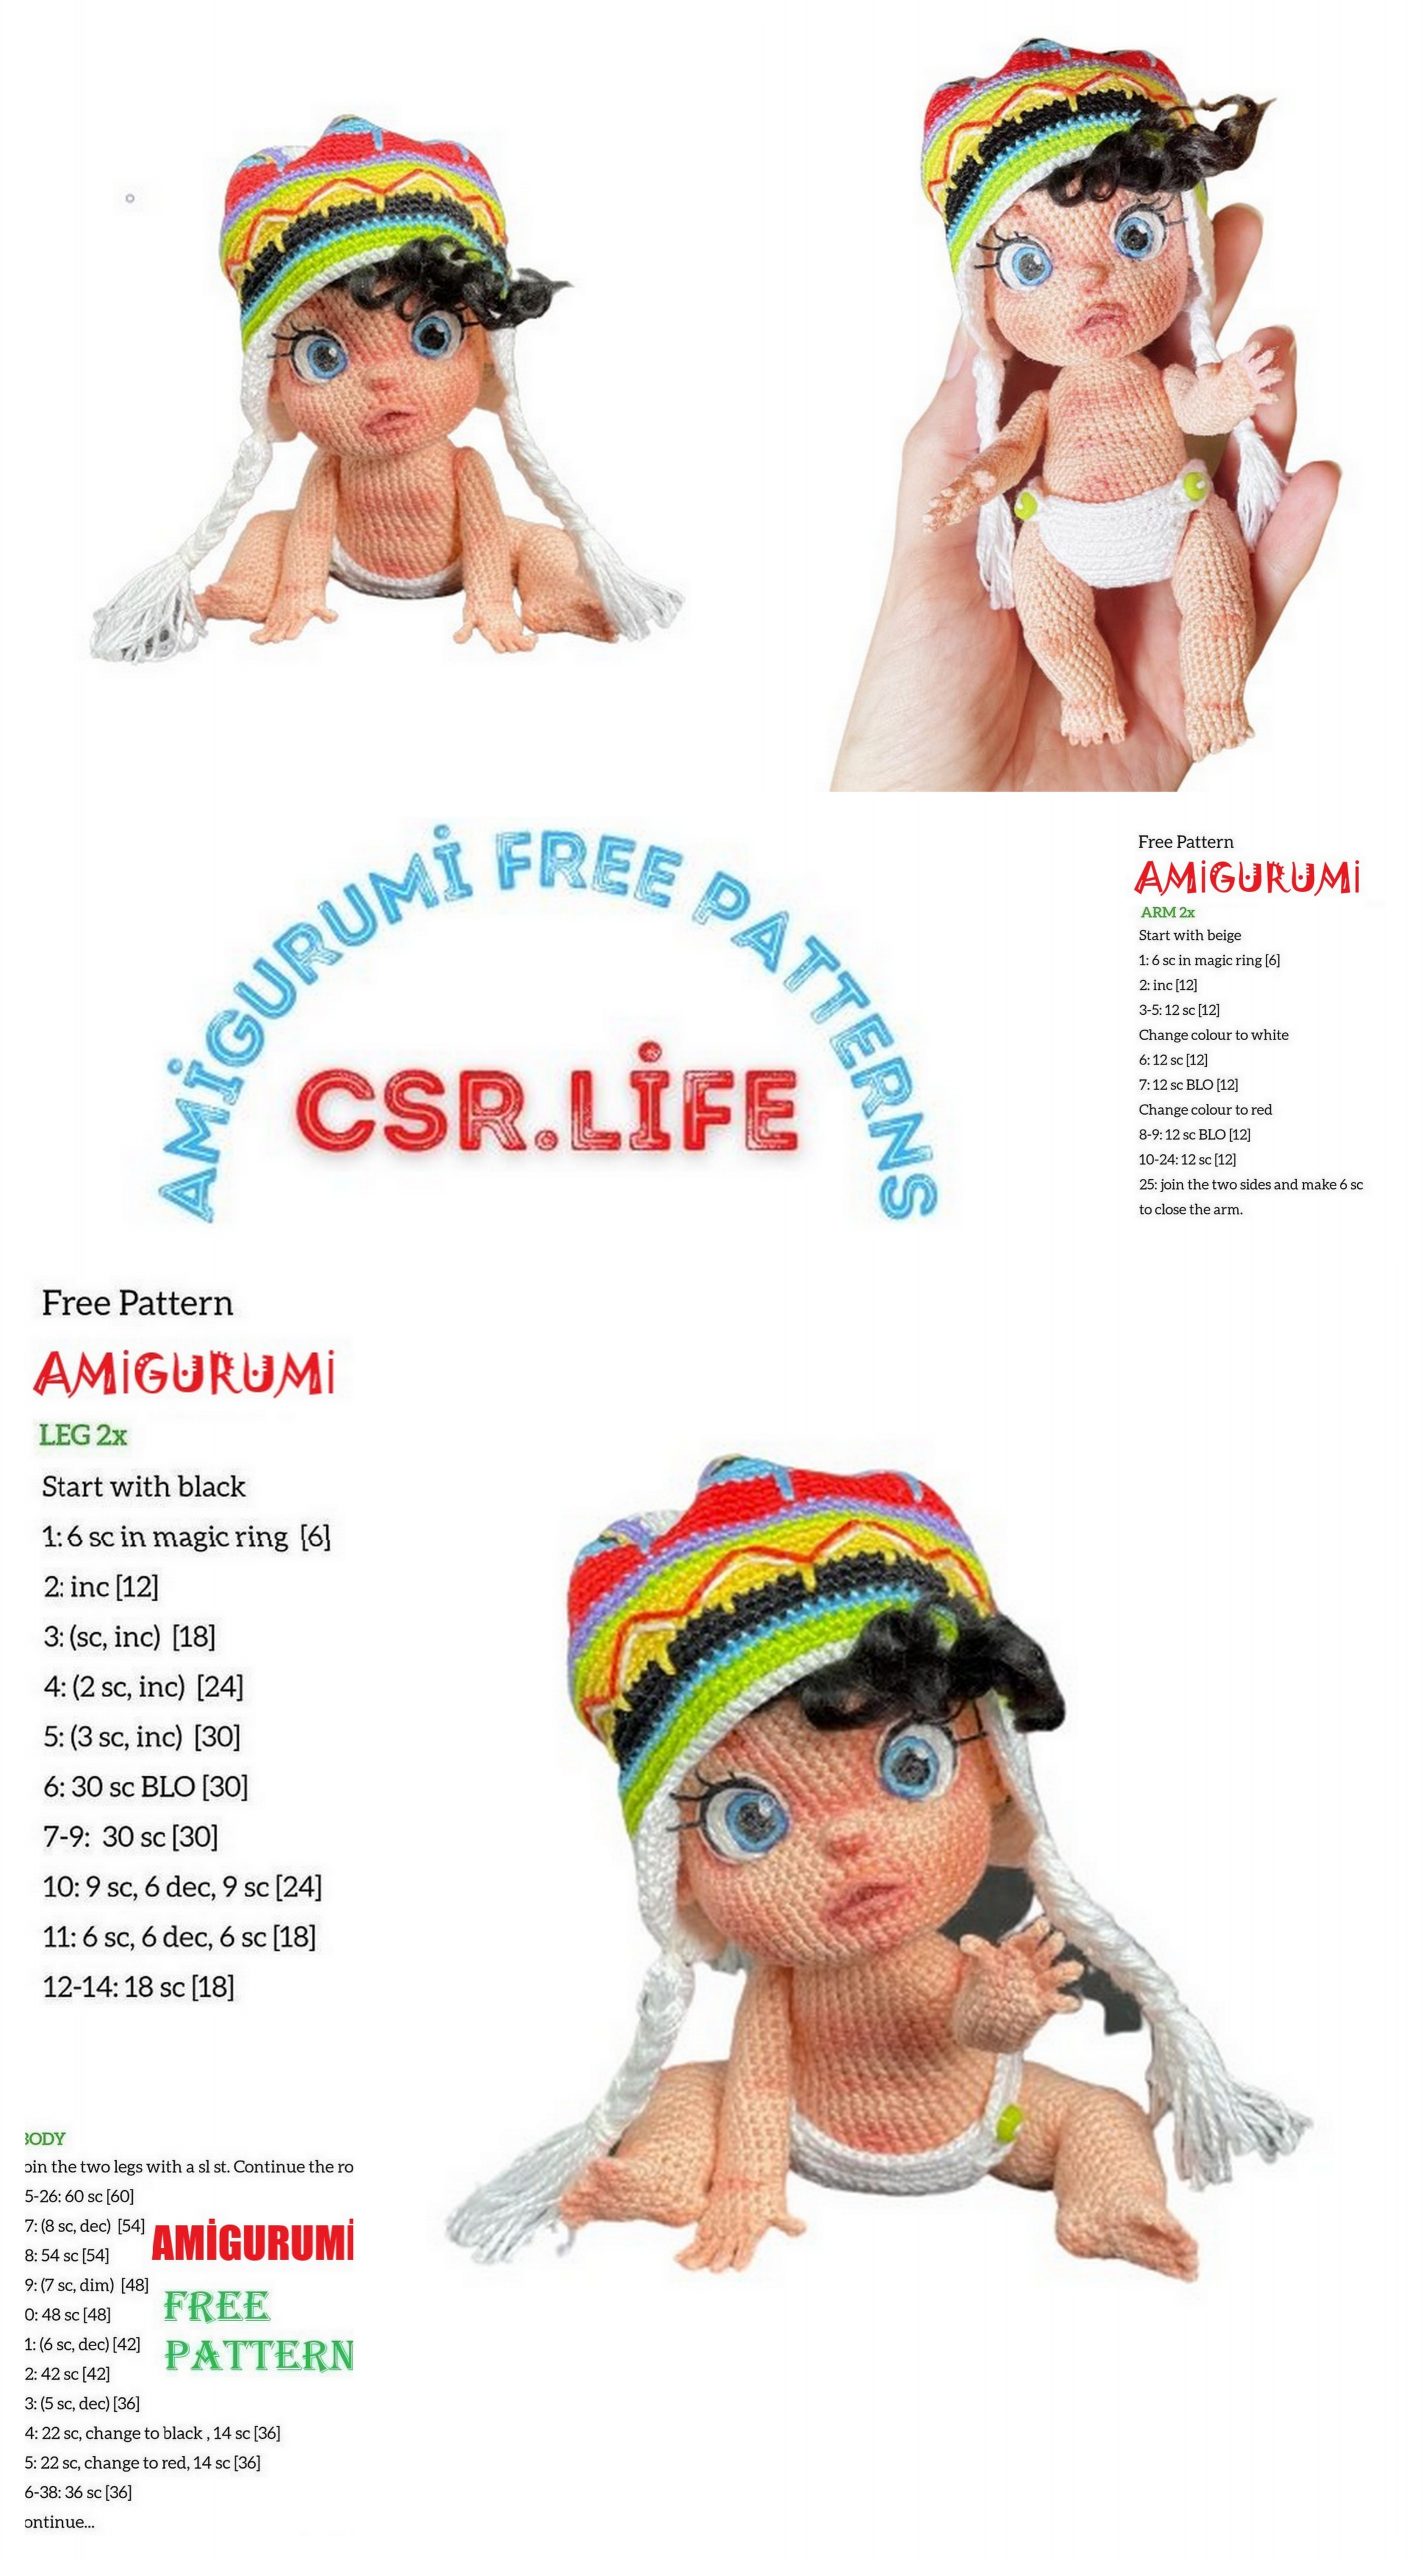
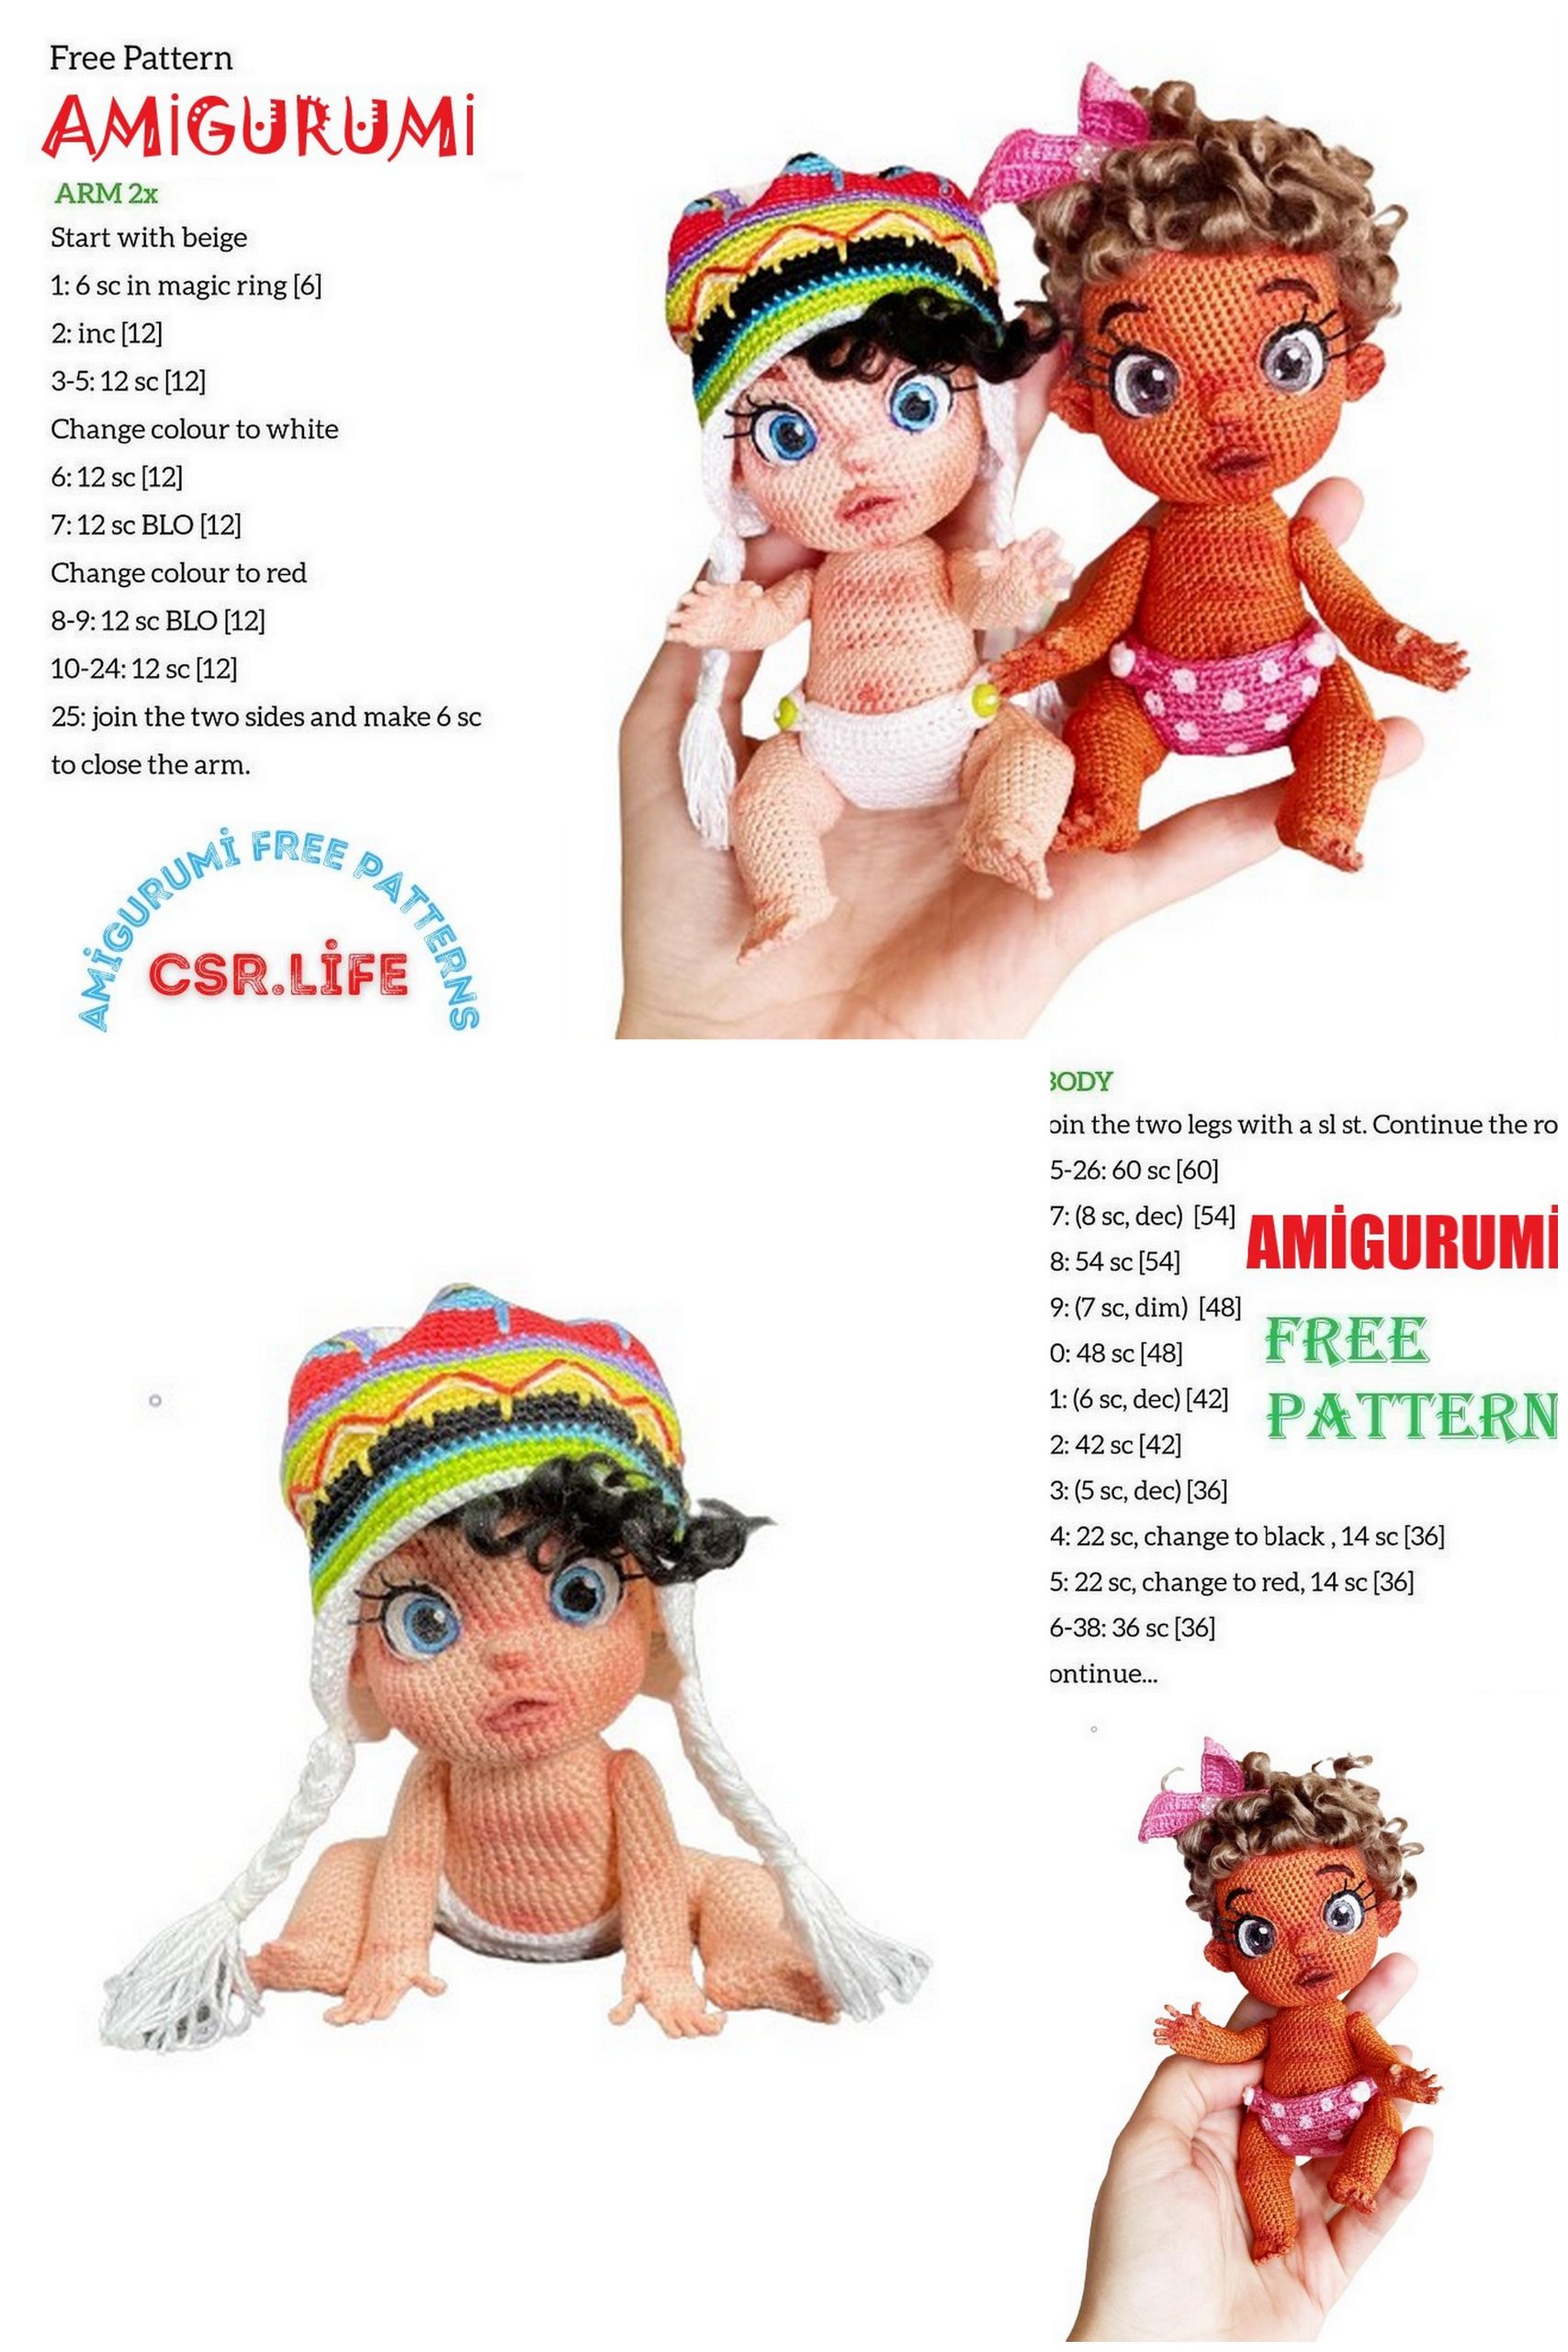
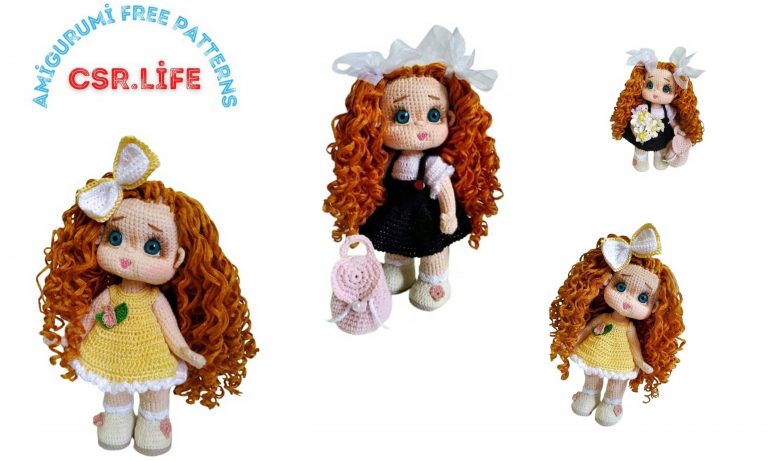
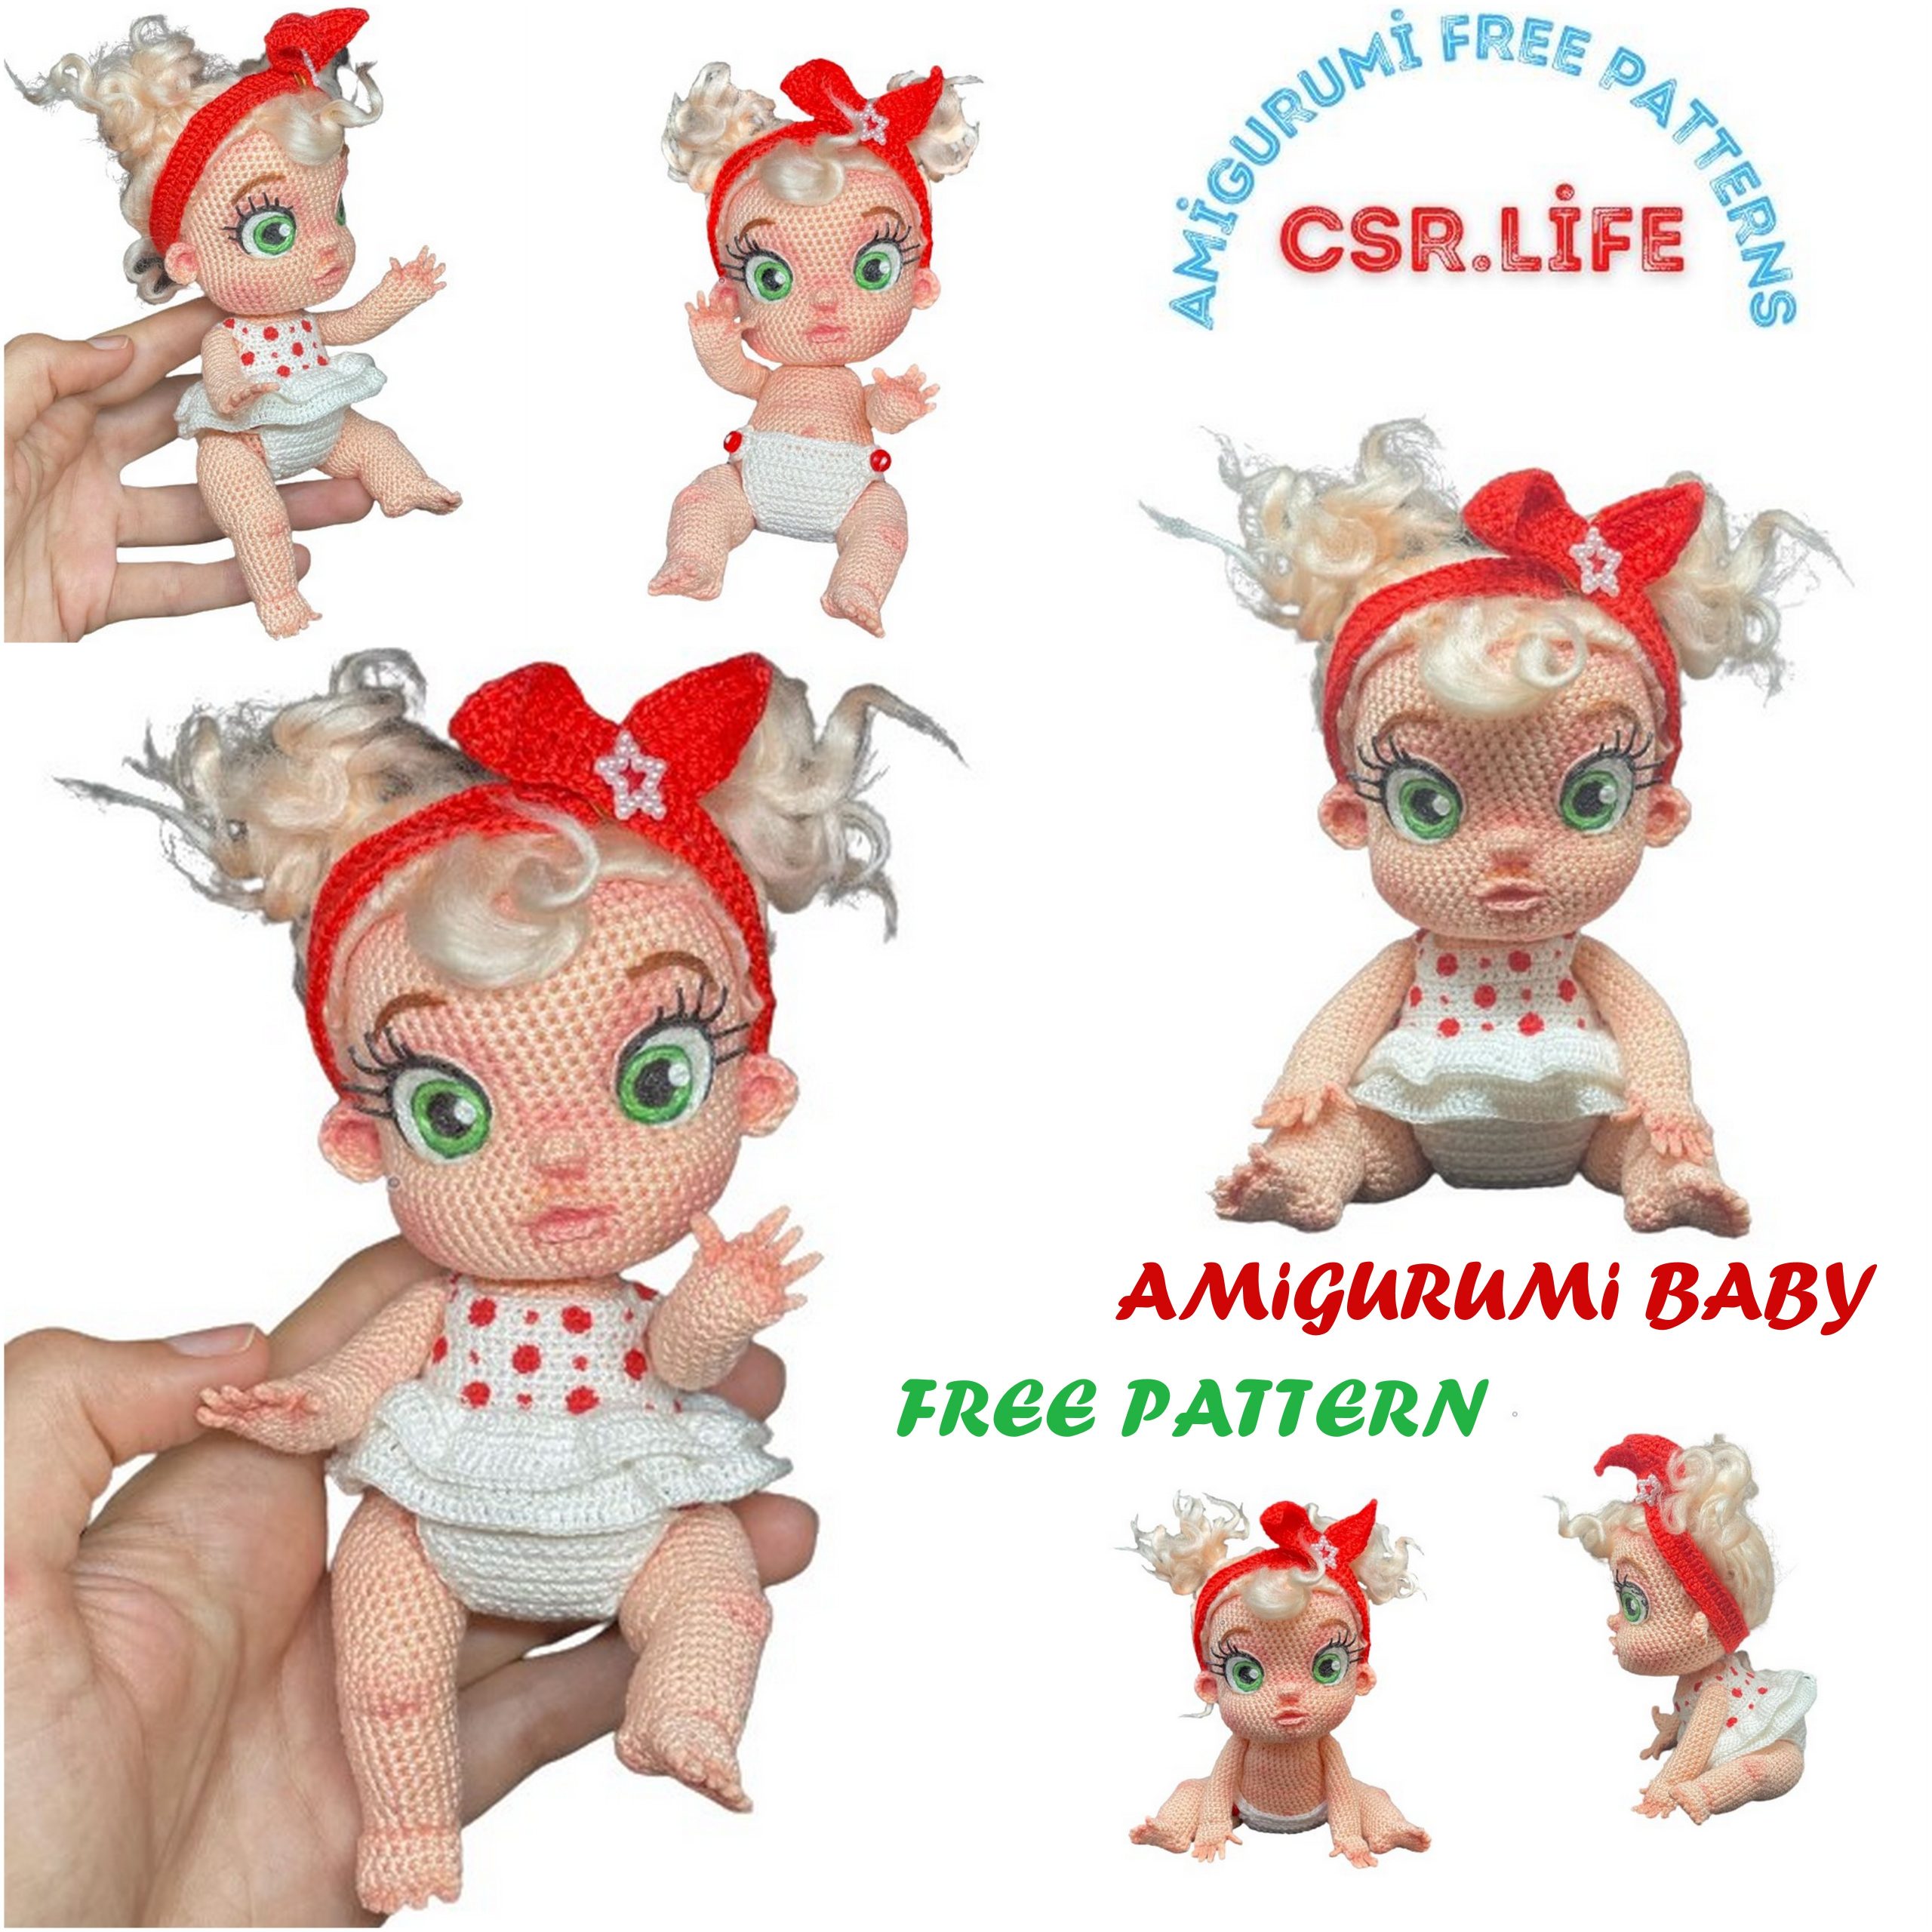
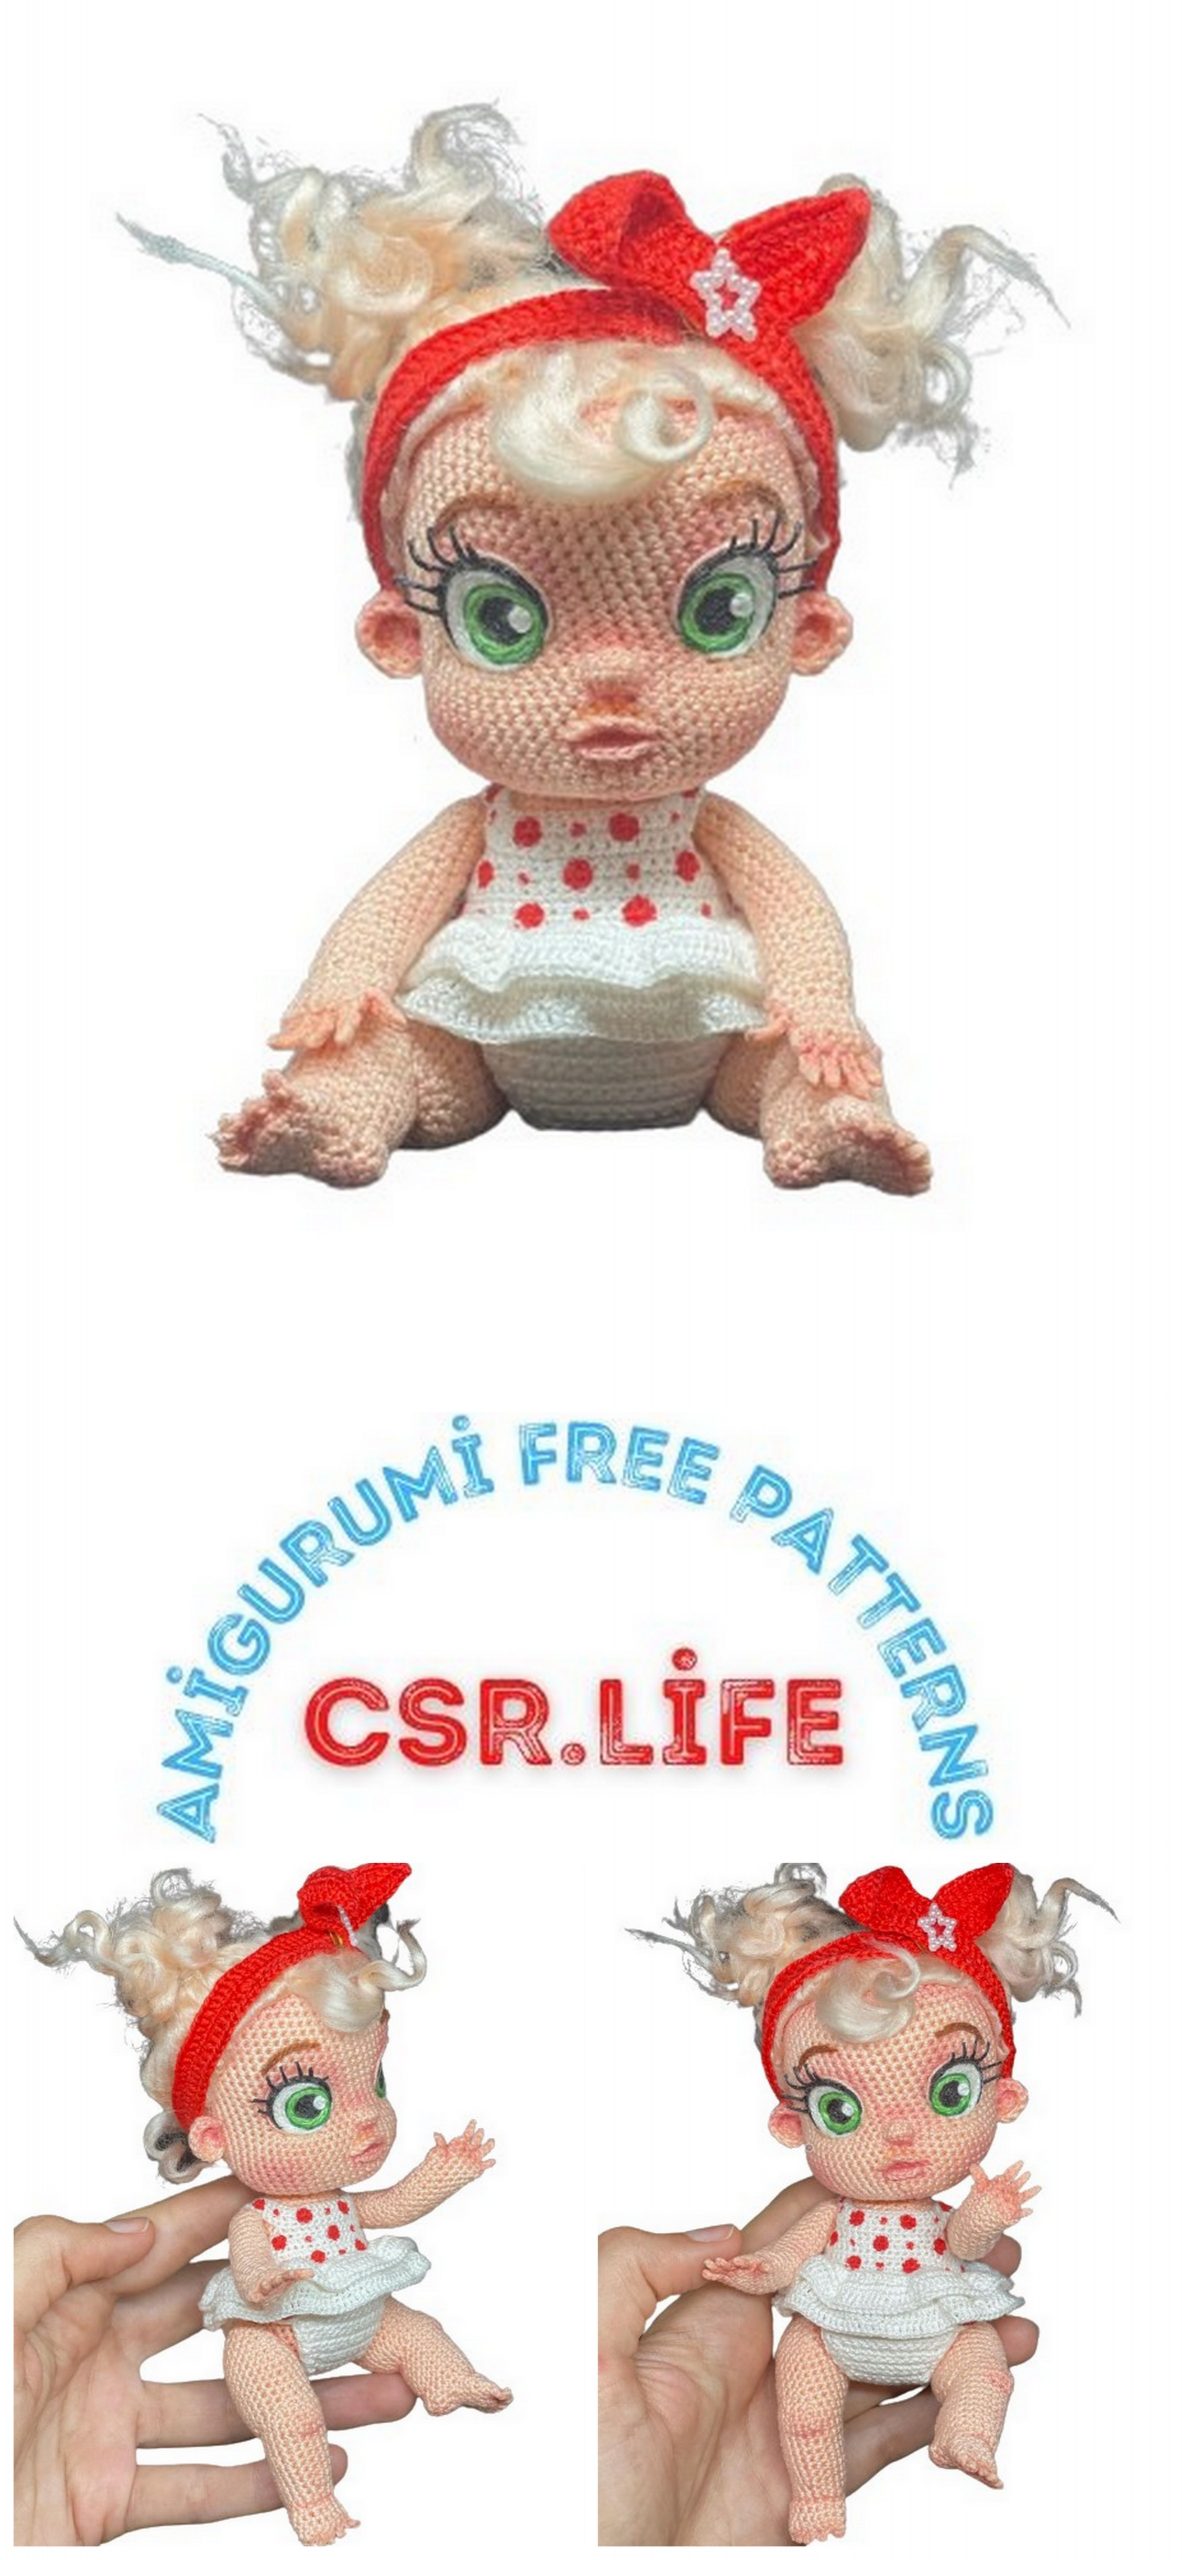
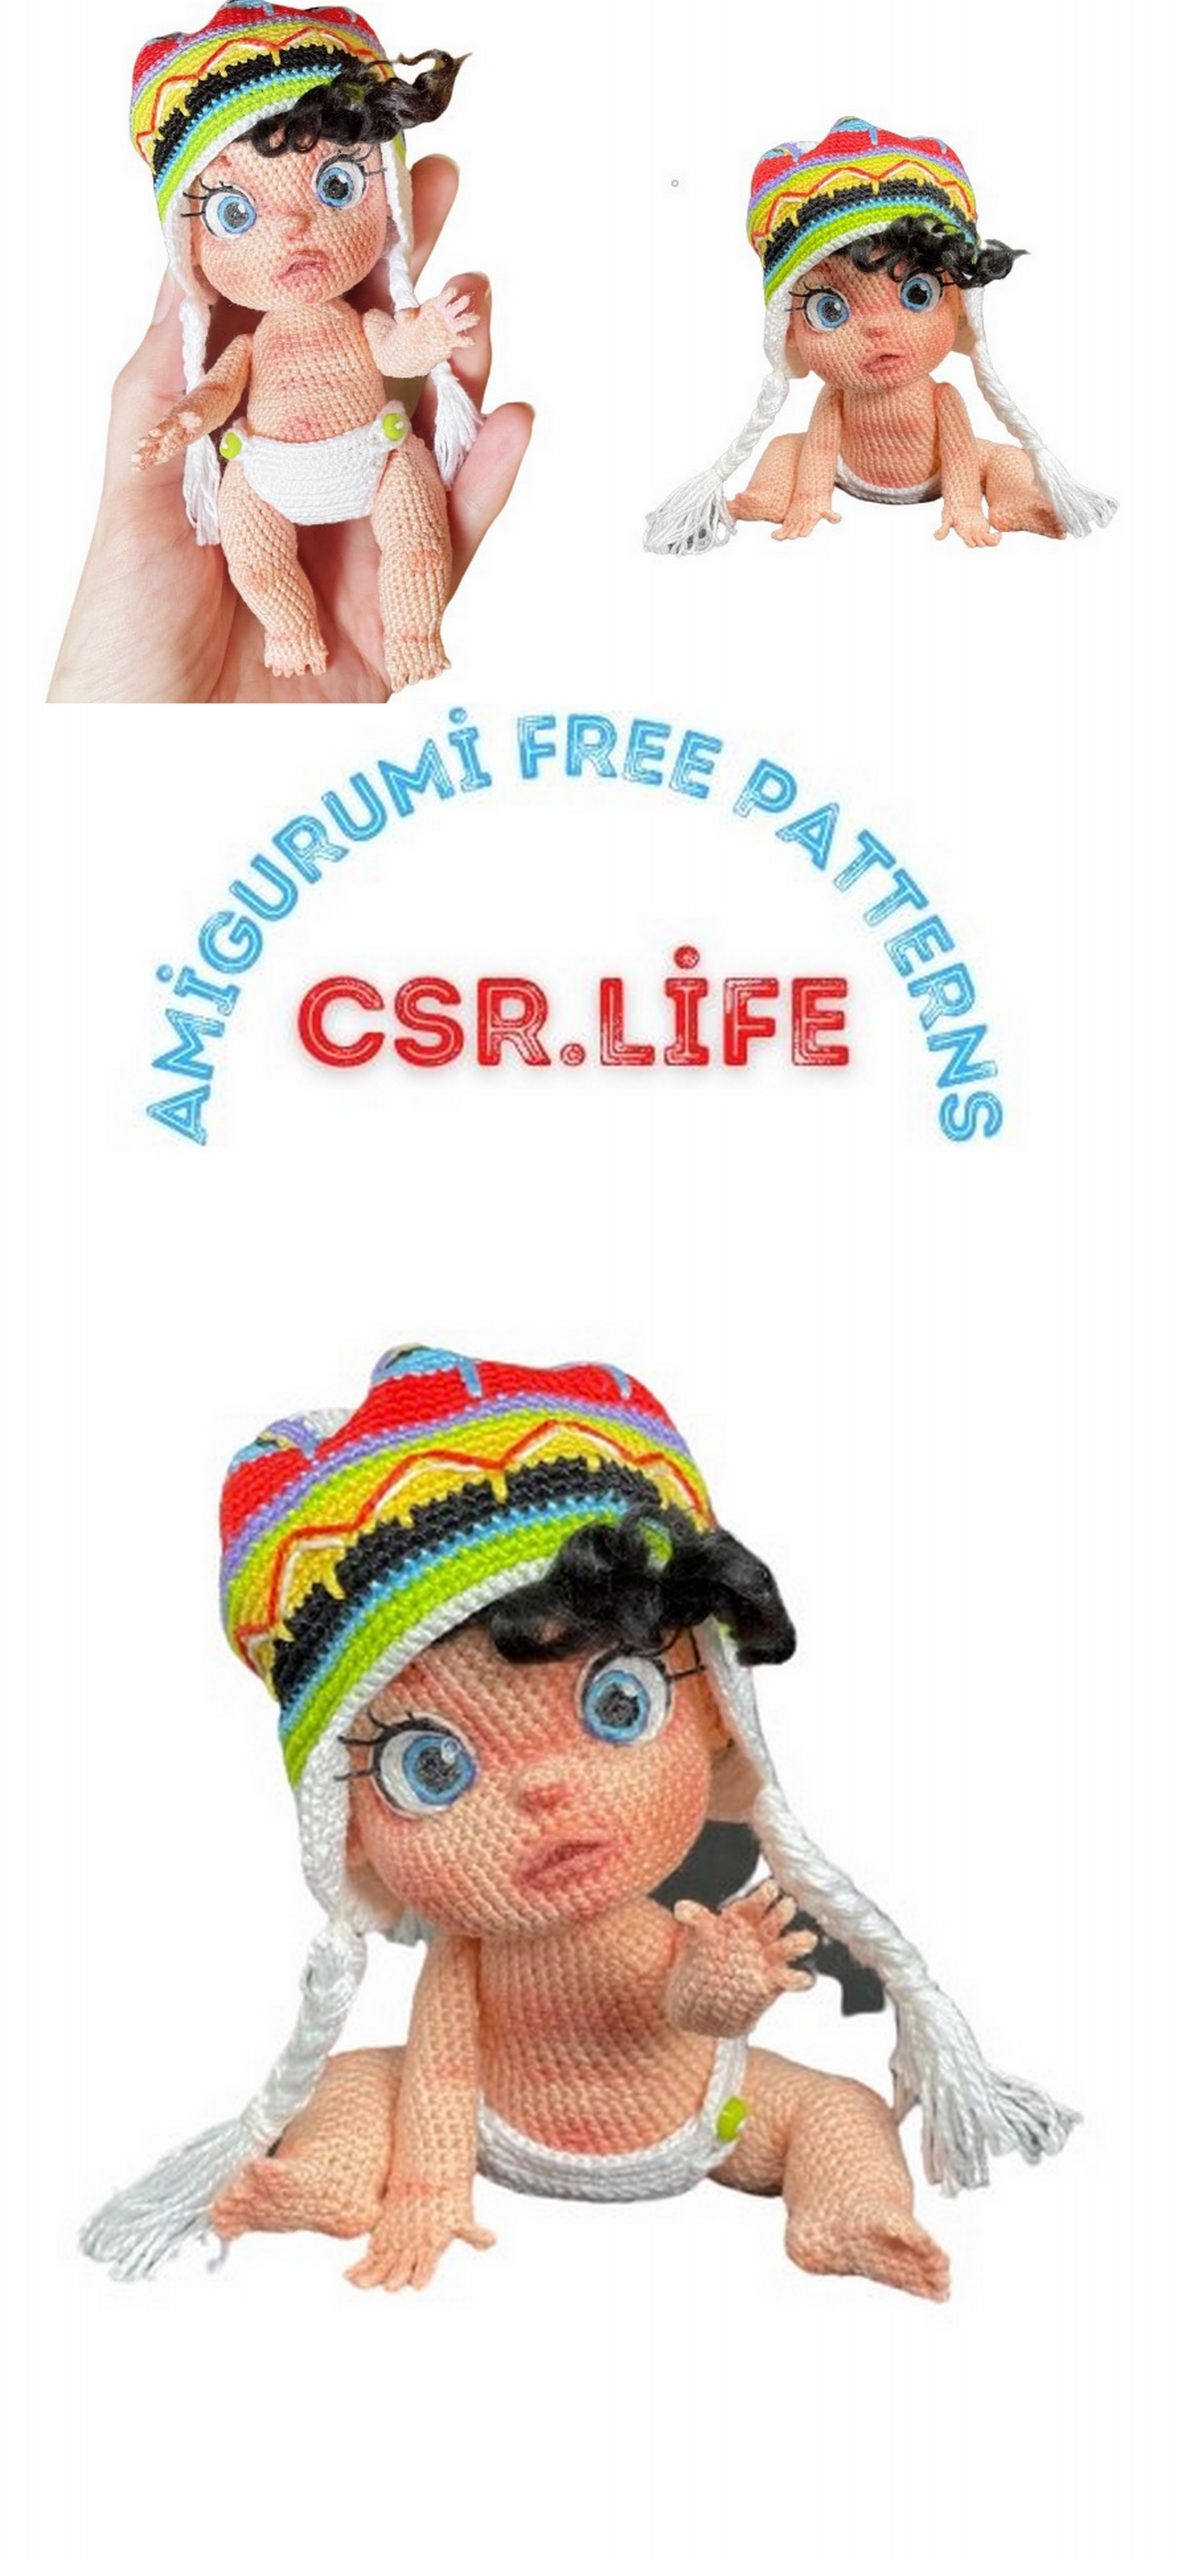
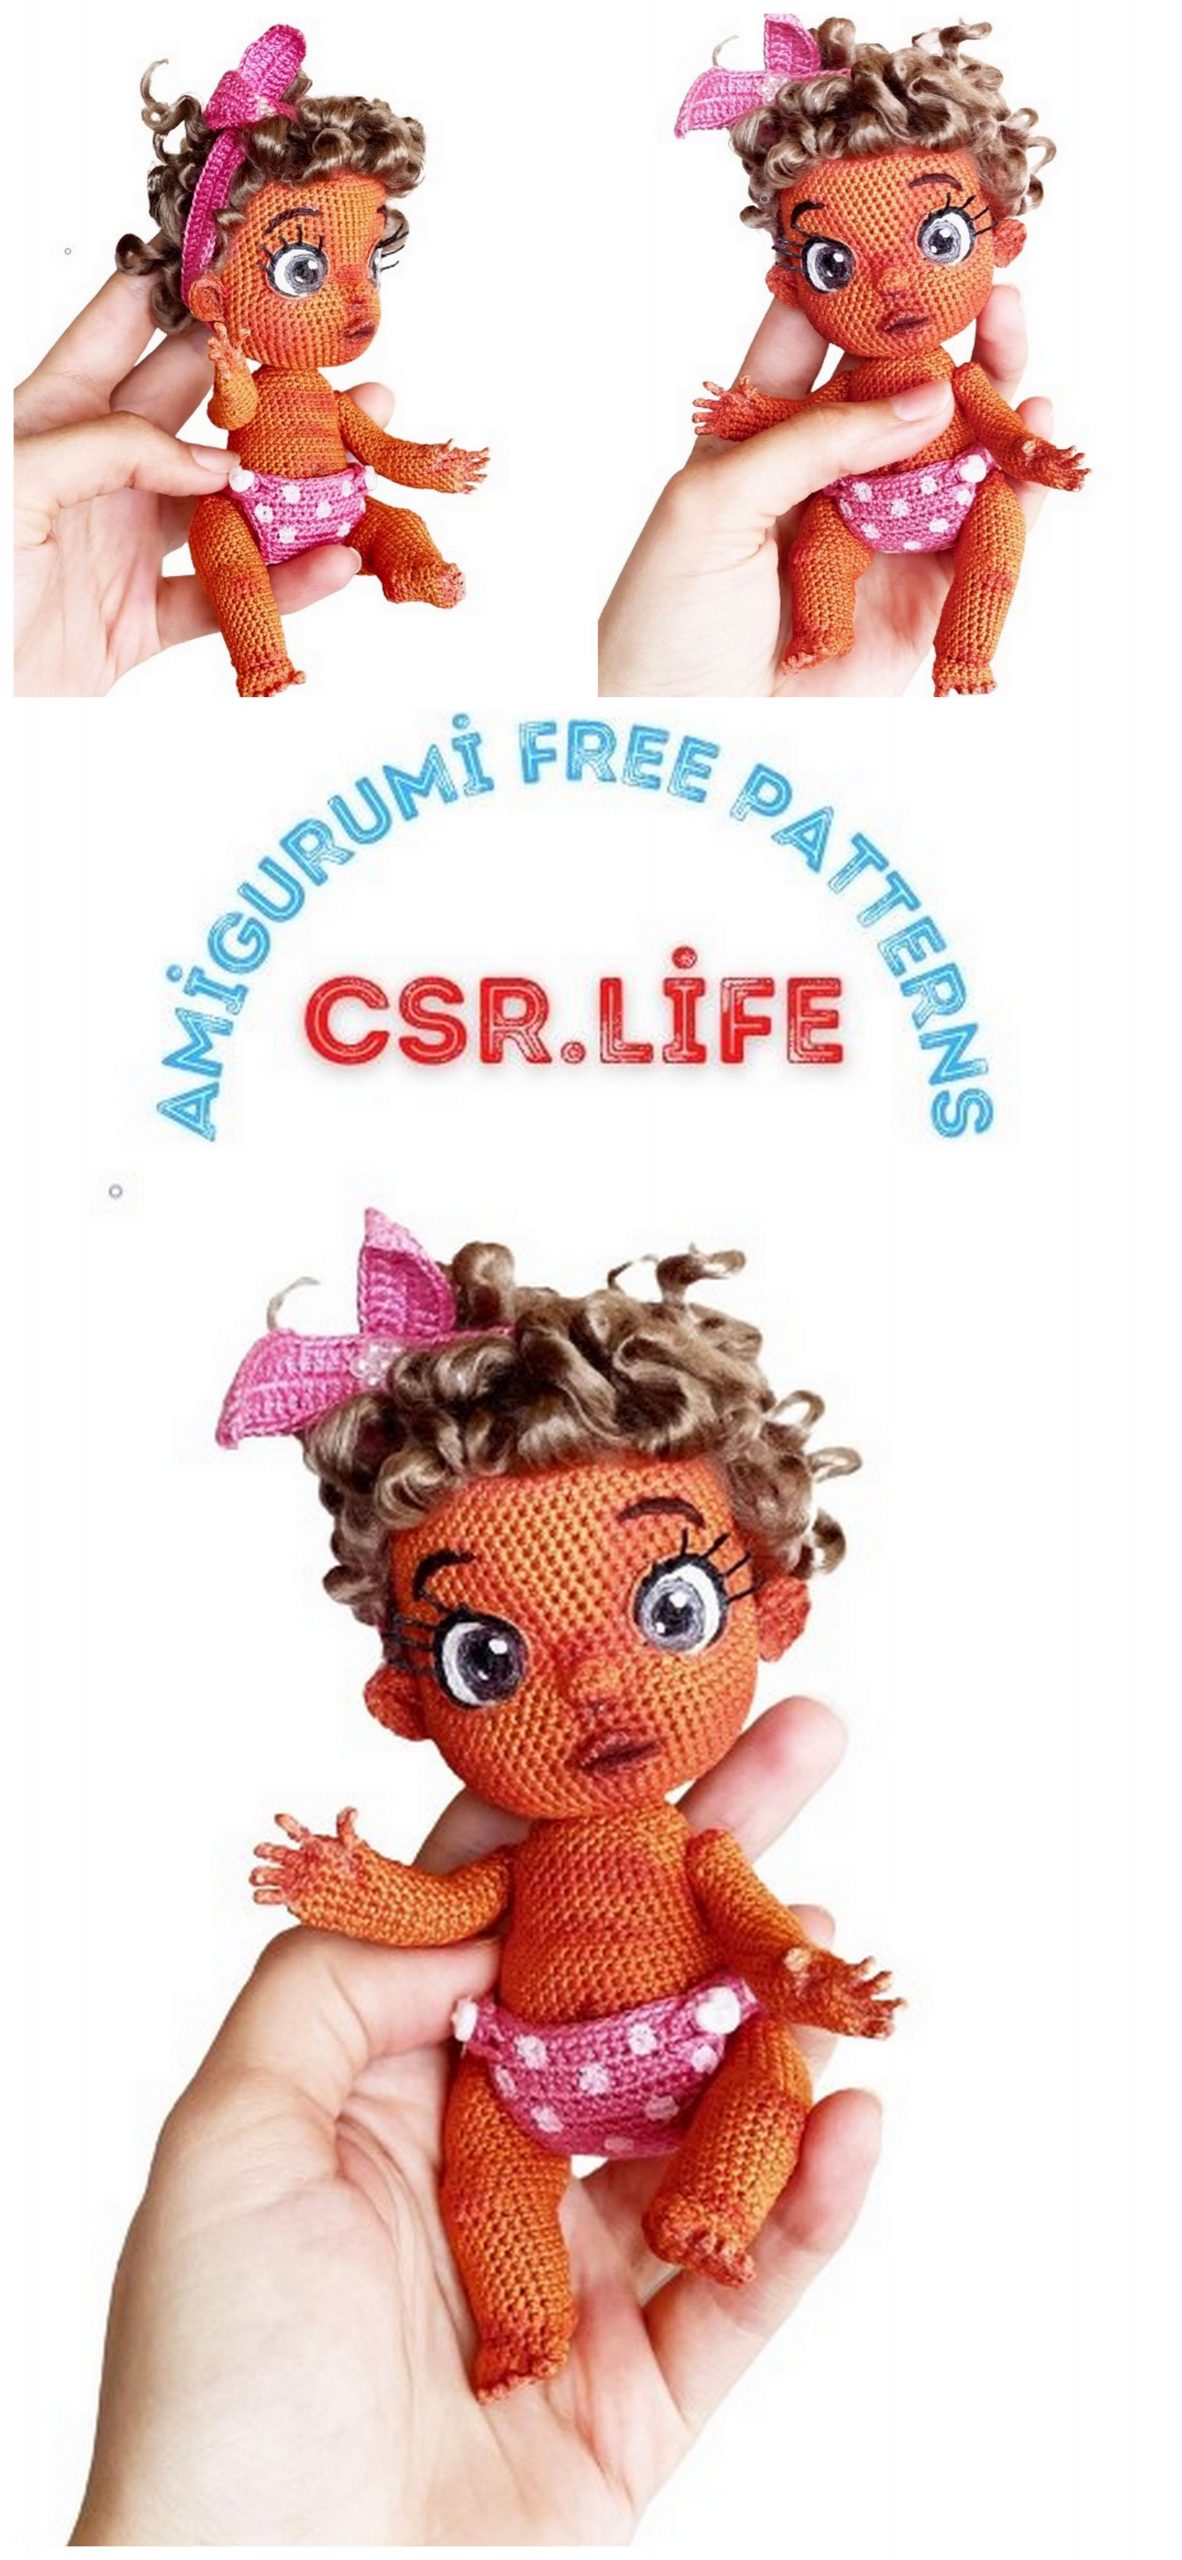
Diapered Baby Amigurumi free pattern
You can visit our website for Amigurumi Diapered Baby free patterns and more. All amigurumi free patterns and tutorials.
Abbrevations
CH – chain;
sc – single crochet;
dc – Double crochet;
hdc – half double crochet;
inc – increase;
dec – decrease;
sl-st – slip stitch;
FLO – front half loop (half loop closest to you);
BLO – back half loop (half loop farther from you).
MATERIALS:
yarn “PEKHORKA Openwork” color No. 68 “tea rose” one skein (50g / 280m);
Aluminum wire 1 mm (15 cm) and 2 mm (30 cm)
scissors;
hook 0.6 mm;
cotter pin T-shaped 1.6×20 mm (2 pcs);
cotter pin with a round head 1.2×16 mm (2 pcs);
filler;
cardboard disc 15 mm (4 pieces), 6 mm (4 pieces);
stuffing sticks of different sizes (you can use a toothpick or a match).
All materials will also be shown and listed in the video. However, you can use any materials with which you are accustomed to work, given the factor that you will have to take more or less wire, etc.

ATTENTION!!!
All knitting takes place inside out, so the doll will come out neater, especially the face, when knitting with the above materials, you should get a doll of about 14 cm.Use materials thinner or thicker if you want to change the size of the doll.
In the process of knitting, you may be faced with the fact that the paired parts of the doll (legs, arms) may be of different lengths or thicknesses.
This is due to the fact that on different days or even within the same day, the tension of the thread in your hands changes. So that you do not have a similar problem, I advise you to knit two paired pieces in parallel
(i.e. knit several rows of one leg, then set it aside and knit several rows of the other leg).
In this MK I knit with the so-called “check marks”. This knitting comes out less dense. There is also knitting with “crosses”, it comes out denser, but, for example, it will be very difficult to embroider a face. When knitting with “check marks” the hook is wound under the thread, and when knitting with “crosses” above it, because of which the pattern of the front loops will be different.
If you knitted toys before and noticed that your marker always goes vertically upward without deviation along the axis, then you will inevitably need to make offset loops and change the position of some increases and decreases. This is due to the fact that in the MK described below, the marker deviates vertically and goes up in a spiral. Also, due to the offset of the marker, some increases and decreases may be located asymmetrically relative to other increases and decreases on the trunk or limbs. Therefore, this should not confuse you.
P.S. I use 2 sizes of skewers for stuffing (thick and thin). A thin skewer is more convenient for stuffing small parts. Also, for your convenience, I advise you to break off the tips of the skewers in the packing, so it will be easier to tamp the filler.
HANDS
RIGHT HAND:
1) 4 CH, 3 sl-st. (3)
2) 5 CH, 4 sl-st. (four)
3) 5 CH, 4 sl-st. (four)
4) 5 CH, 4 sl-st. (four)
The 5th row will knit along the top of all fingers.
5) 5 sc on one side of the fingers, (1 sc, 1 inc) * 2, 1 sc. (12) – marker
6) 12 sc. (12)
7) (4 CH, 3 sc chained), 12 sc.
8) 2 sc over the thumb, 12 sc. (fourteen)
9) 9 sc, 5 sc for FLO. (fourteen)
10) 1 dec, 7 sc, (for 9th row BLO: 2 sc, 1 inc, 2 sc). (fourteen)
11) -16) 14 sc. (fourteen)
17) 4 sc, 1 dec, 8 sc. (13)
18) -20) 13 sc. (13)
21) 4 sc, 1 dec, 7 sc. (12)
22) -23) 12 sc. (12)
24) 4 sc, 1 dec, 6 sc. (eleven)
25) -26) 11 sc. (eleven)
27) 5 sc, 1 CH, 1 p. Skip, 5 sc. (eleven)
Insert a 1.2×16 mm cotter pin with a 6 mm disc into the hole. And also measure the required length of the wire 1 mm thick, insert it into your hand and fill it.
28) 3 dec, 1 sc, 2 dec. (6)
Pull off the remaining hole.
In the 5th row of these 4 fingers, you need to dial 10 sc to continue knitting in a spiral.
The 5th row should end above the index finger.
5) 10 sc (5 sc on one side of the fingers, turn knit and do another 5 sc on the other side of the fingers). (10) – put
marker, it should be above the index finger.
6) 10 sc. (10)
7) 1 sc, (5 CH, 4 sl-st along the chain) <- thumb, 9 sc. (10)
8) 1 sc, 3 sc over the thumb, 9 sc. (13)
9) 3 dec, 1 sc, 3 dec. (7) – make sl-st, CH, cut the thread, leaving the tip 15-20 cm for sewing to the bead, tighten the air loop by pulling the tip.


left hand:
1) 5 CH, 4 sl-st. (four)
2) 5 CH, 4 sl-st. (four)
3) 5 CH, 4 sl-st. (four)
4) 4 CH, 3 sl-st. (3)
Dial the 5th row from the fingers.
5) 5 sc on one side of the fingers, (1 sc, 1 inc) * 2, 1 sc. (12) – marker
6) 12 sc. (12)
7) 5 sc, (4 CH, 3 sc chain), 7 sc. (12)
8) 5 sc, 2 sc over the thumb, 7 sc. (fourteen)
9) 8 sc, 5 sc for FLO, 1 sc. (fourteen)
10) 6 sc, 1 dec, (for 9th row BLO: 2 sc, 1 inc, 2 sc), 1 sc. (fourteen)
11) -16) 14 sc. (fourteen)
17) 3 sc, 1 dec, 9 sc. (13)
18) -20) 13 sc. (13)
21) 3 sc, 1 dec, 8 sc. (12)
22) -23) 12 sc. (12)
24) 3 sc, 1 dec, 7sc. (eleven)
25) -26) 11 sc. (eleven)
27) 4 sc, 1 CH, 1 p. Skip, 6 sc. (eleven)
Insert a 1.2×16 mm cotter pin with a 6 mm disc into the hole. And also measure the required length of the wire 1 mm thick, insert it into your hand and fill it.
28) 2 dec, 1 sc, 3 dec. (6)
Pull off the remaining hole.
In the 5th row of these 4 fingers, you need to dial 10 sc to continue knitting in a spiral.
The 5th row should end above the index finger.
5) 10 sc (5 sc on one side of the fingers, turn knit and do another 5 sc on the other side of the fingers). (10) – put a marker, it should be above the index finger.
6) 10 sc. (10)
7) 1 sc, (5 CH, 4 sl-st along the chain) <- thumb, 9 sc. (10)
8) 1 sc, 3 sc over the thumb, 9 sc. (13)
9) 3 dec, 1 sc, 3 dec. (7) – make sl-st, CH, cut the thread, leaving the tip 15-20 cm for sewing to the bead, tighten the air loop by pulling the tip.
LEGS
left leg:
Before starting knitting, cut a piece of yarn 50 cm, which will later be needed for knitting the heel.
We begin to knit the legs from the fingers, which are knitted similarly to the fingers. If it is difficult for you to knit such small details, then start knitting the foot with a chain of CH and 15 sc along it, and then further along the scheme below (how much CH to do to fit 15 sc on them, you decide, as there are many options to do this ).
1) 3 CH, 2 sc. (2) – thumb
2) 4 CH, 2 sl-st. (2) – 1 CH is left unchecked to create space between thumb and 4 other toes.
3) 3 CH, 2 sl-st. (2)
4) 3 CH, 2 sl-st. (2)
5) 2 CH, 1 sl-st. (one)
We collect the 6th row from the fingers, as well as for the hands.
6) 7 sc on one side of the fingers, 1 sc, 1 inc, 2 sc, 1 inc, 1 sc. (15) – marker
7) – 9) 15 sc. (fifteen)
10) 3 sc, 1 dec, 4 sc, 6 sc per FLO. (fourteen)
Take the piece of yarn you should have cut at the beginning, count 2 loops from the end of the 10th row and fasten the thread to the 3rd loop. Tie your heel according to the pattern below.
Heel:
1) – 4) 4 sc, CH, turn. (four)
We return to the main thread.
11) 1 dec, 3 sc on the side of the heel, (on the top of the heel: 1 sc, 1 dec, 1 sc), 3 sc on the second side of the heel, 1 dec, (behind BLO 10th row: 1 sc, 1 inc , 2 sc, 1 inc, 1 sc) (19)
In the 5th row of these 4 fingers, you need to dial 10 sc to continue knitting in a spiral.
The 5th row should end above the index finger.
5) 10 sc (5 sc on one side of the fingers, turn knit and do another 5 sc on the other side of the fingers). (10) – put a marker, it should be above the index finger.
6) 10 sc. (10)
7) 1 sc, (5 CH, 4 sl-st along the chain) <- thumb, 9 sc. (10)
8) 1 sc, 3 sc over the thumb, 9 sc. (13)
9) 3 dec, 1 sc, 3 dec. (7) – make sl-st, CH, cut the thread, leaving the tip 15-20 cm for sewing to the bead, tighten the air loop by pulling the tip.
12) 19 sc. (nineteen)
13) 5 sc, 1 dec, 8 sc, 1 inc, 3 sc. (nineteen)
14) 5 sc, 2 inc for BLO, 12 sc. (21)
15) – 18) 21 sc. (21)
19) 5 sc, 2 dec, 12 sc. (nineteen)
20) 4 sc, 5 sc for FLO, 5 sc, (for BLO: 1 inc, 1 sc, 1 inc), 2 sc. (21)
21) 4 sc, (for BLO of the 20th row: 2 inc, 1 sc, 2 inc), 12 sc. (25)
22) 6 sc, (1 inc, 1 sc) * 2, 1 inc, 7 sc, 1 dec, 1 sc, 1 dec, 2 sc. (26)
23) 8 sc, 1 inc, 2 sc, 1 inc, 8 sc, 1 dec, 2 sc, 1 dec. (26)
24) 23 sc, 1 dec, 1 sc. (25)
25) – 30) 25 sc. (25)
31) 5 sc, (1 dec, 4 sc) * 2, 1 CH, 1 p. Inc omit, 5 sc, 1 dec. (22)
32) (4 sc, 1 dec) * 2, 8 sc, 1 dec. (nineteen)
Insert the T-shaped cotter pin into the 15 mm disc and place the resulting structure in the skipped loop of the 31st row.
Measure the wire, bend and wrap with adhesive tape, as shown in the video. Insert into the leg and fill.
33) 3 sc, 1 dec, 4 sc, 1 dec, 6 sc, 1 dec. (sixteen)
34) 2 sc, 1 dec, 3 sc, 1 dec, 5 sc, 1 dec. (13)
Decrease 7 times and close the hole.
right leg:
Cut off the thread 50 cm, as for the left leg.
1) 2 CH, 1 sl-st. (one)
2) 3 CH, 2 sl-st. (2)
3) 3 CH, 3 sl-st. (2)
4) 3 CH, 2 sl-st. (2)
5) 4 CH, 2 sc. (2) – 1 CH, remains not tied
6) 7 sc on one side of the fingers, (1 sc, 1 inc, 2 sc, 1 inc, 1 sc). (15) – marker
In the 5th row of these 4 fingers, you need to dial 10 sc to continue knitting in a spiral.
The 5th row should end above the index finger.
5) 10 sc (5 sc on one side of the fingers, turn knit and do another 5 sc on the other side of the fingers). (10) – put a marker, it should be above the index finger.
6) 10 sc. (10)
7) 1 sc, (5 CH, 4 sl-st along the chain) <- thumb, 9 sc. (10)
8) 1 sc, 3 sc over the thumb, 9 sc. (13)
9) 3 dec, 1 sc, 3 dec. (7) – make sl-st, CH, cut the thread, leaving the tip 15-20 cm for sewing to the bead, tighten the air loop by pulling the tip.
7) – 9) 15 sc. (fifteen)
10) 3 sc, 1 dec, 4 sc, 6 sc per FLO. (fourteen)
Take the piece of yarn that you should have cut at the beginning, count 2 loops from the end of the 10th row and fasten the thread at
3rd loop. Tie your heel according to the pattern below.
Heel:
1) – 4) 4 sc, CH, turn. (four)
We return to the main thread.
11) 1 dec, 3 sc on one side of the heel, (along the top of the heel: 1 sc, 1 dec, 1 sc), 3 sc on the other side of the heel, 1 dec, (behind 10th row BLO: 1 sc, 1 inc, 2 sc , 1 inc, 1 sc). (nineteen)
12) 19 sc. (nineteen)
13) 5 sc, 1 dec, 8 sc, 1 inc, 3 sc. (nineteen)
14) 5 sc, 2 inc for BLO, 12 sc. (21)
15) -18) 21 sc. (21)
19) 5 sc, 2 dec, 12 sc. (nineteen)
20) 4 sc, 5 sc for FLO, 6 sc, (for BLO: 1 inc, 1 sc, 1 inc), 1 sc. (21)
21) 4 sc. (for BLO of the 20th row: 2 inc, 1 sc, 2 inc), 12 sc. (25)
22) 6 sc, (1 inc, 1 sc) * 2, 1 inc, 8 sc, (1 dec, 1 sc) * 2. (26)
23) 8 sc, 1 inc, 2 sc, 1 inc, 8 sc, 1 dec, 2 sc, 1 dec. (26)
24) 23 sc, 1 dec, 1 sc. (25)
25) – 30) 25 sc. (25)
31) 1 dec, 5 sc, 1 CH, 1 p. Skip, (4 sc, 1 dec) * 2, 5 sc. (22)
32) 1 dec, 8 sc, (1 dec, 4 sc) * 2. (nineteen)
Insert the T-shaped cotter pin into the 15 mm disc and place the resulting structure in the skipped loop of the 31st row.
Measure the wire, bend and wrap with adhesive tape, as shown in the video. Insert into the leg and fill.
33) 1 dec, 6 sc, 1 dec, 4 sc, 1 dec, 3 sc. (sixteen)
34) 1 dec, 5 sc, 1 dec, 3 sc, 1 dec, 2 sc. (13)
Make 7 decreases, pull off the remaining hole.
In the 5th row of these 4 fingers, you need to dial 10 sc to continue knitting in a spiral.
The 5th row should end above the index finger.
5) 10 sc (5 sc on one side of the fingers, turn knit and do another 5 sc on the other side of the fingers). (10) – put a marker, it should be above the index finger.
6) 10 sc. (10)
7) 1 sc, (5 CH, 4 sl-st along the chain) <- thumb, 9 sc. (10)
8) 1 sc, 3 sc over the thumb, 9 sc. (13)
9) 3 dec, 1 sc, 3 dec. (7) – make sl-st, CH, cut the thread, leaving the tip 15-20 cm for sewing to the bead, tighten the air loop by pulling the tip.
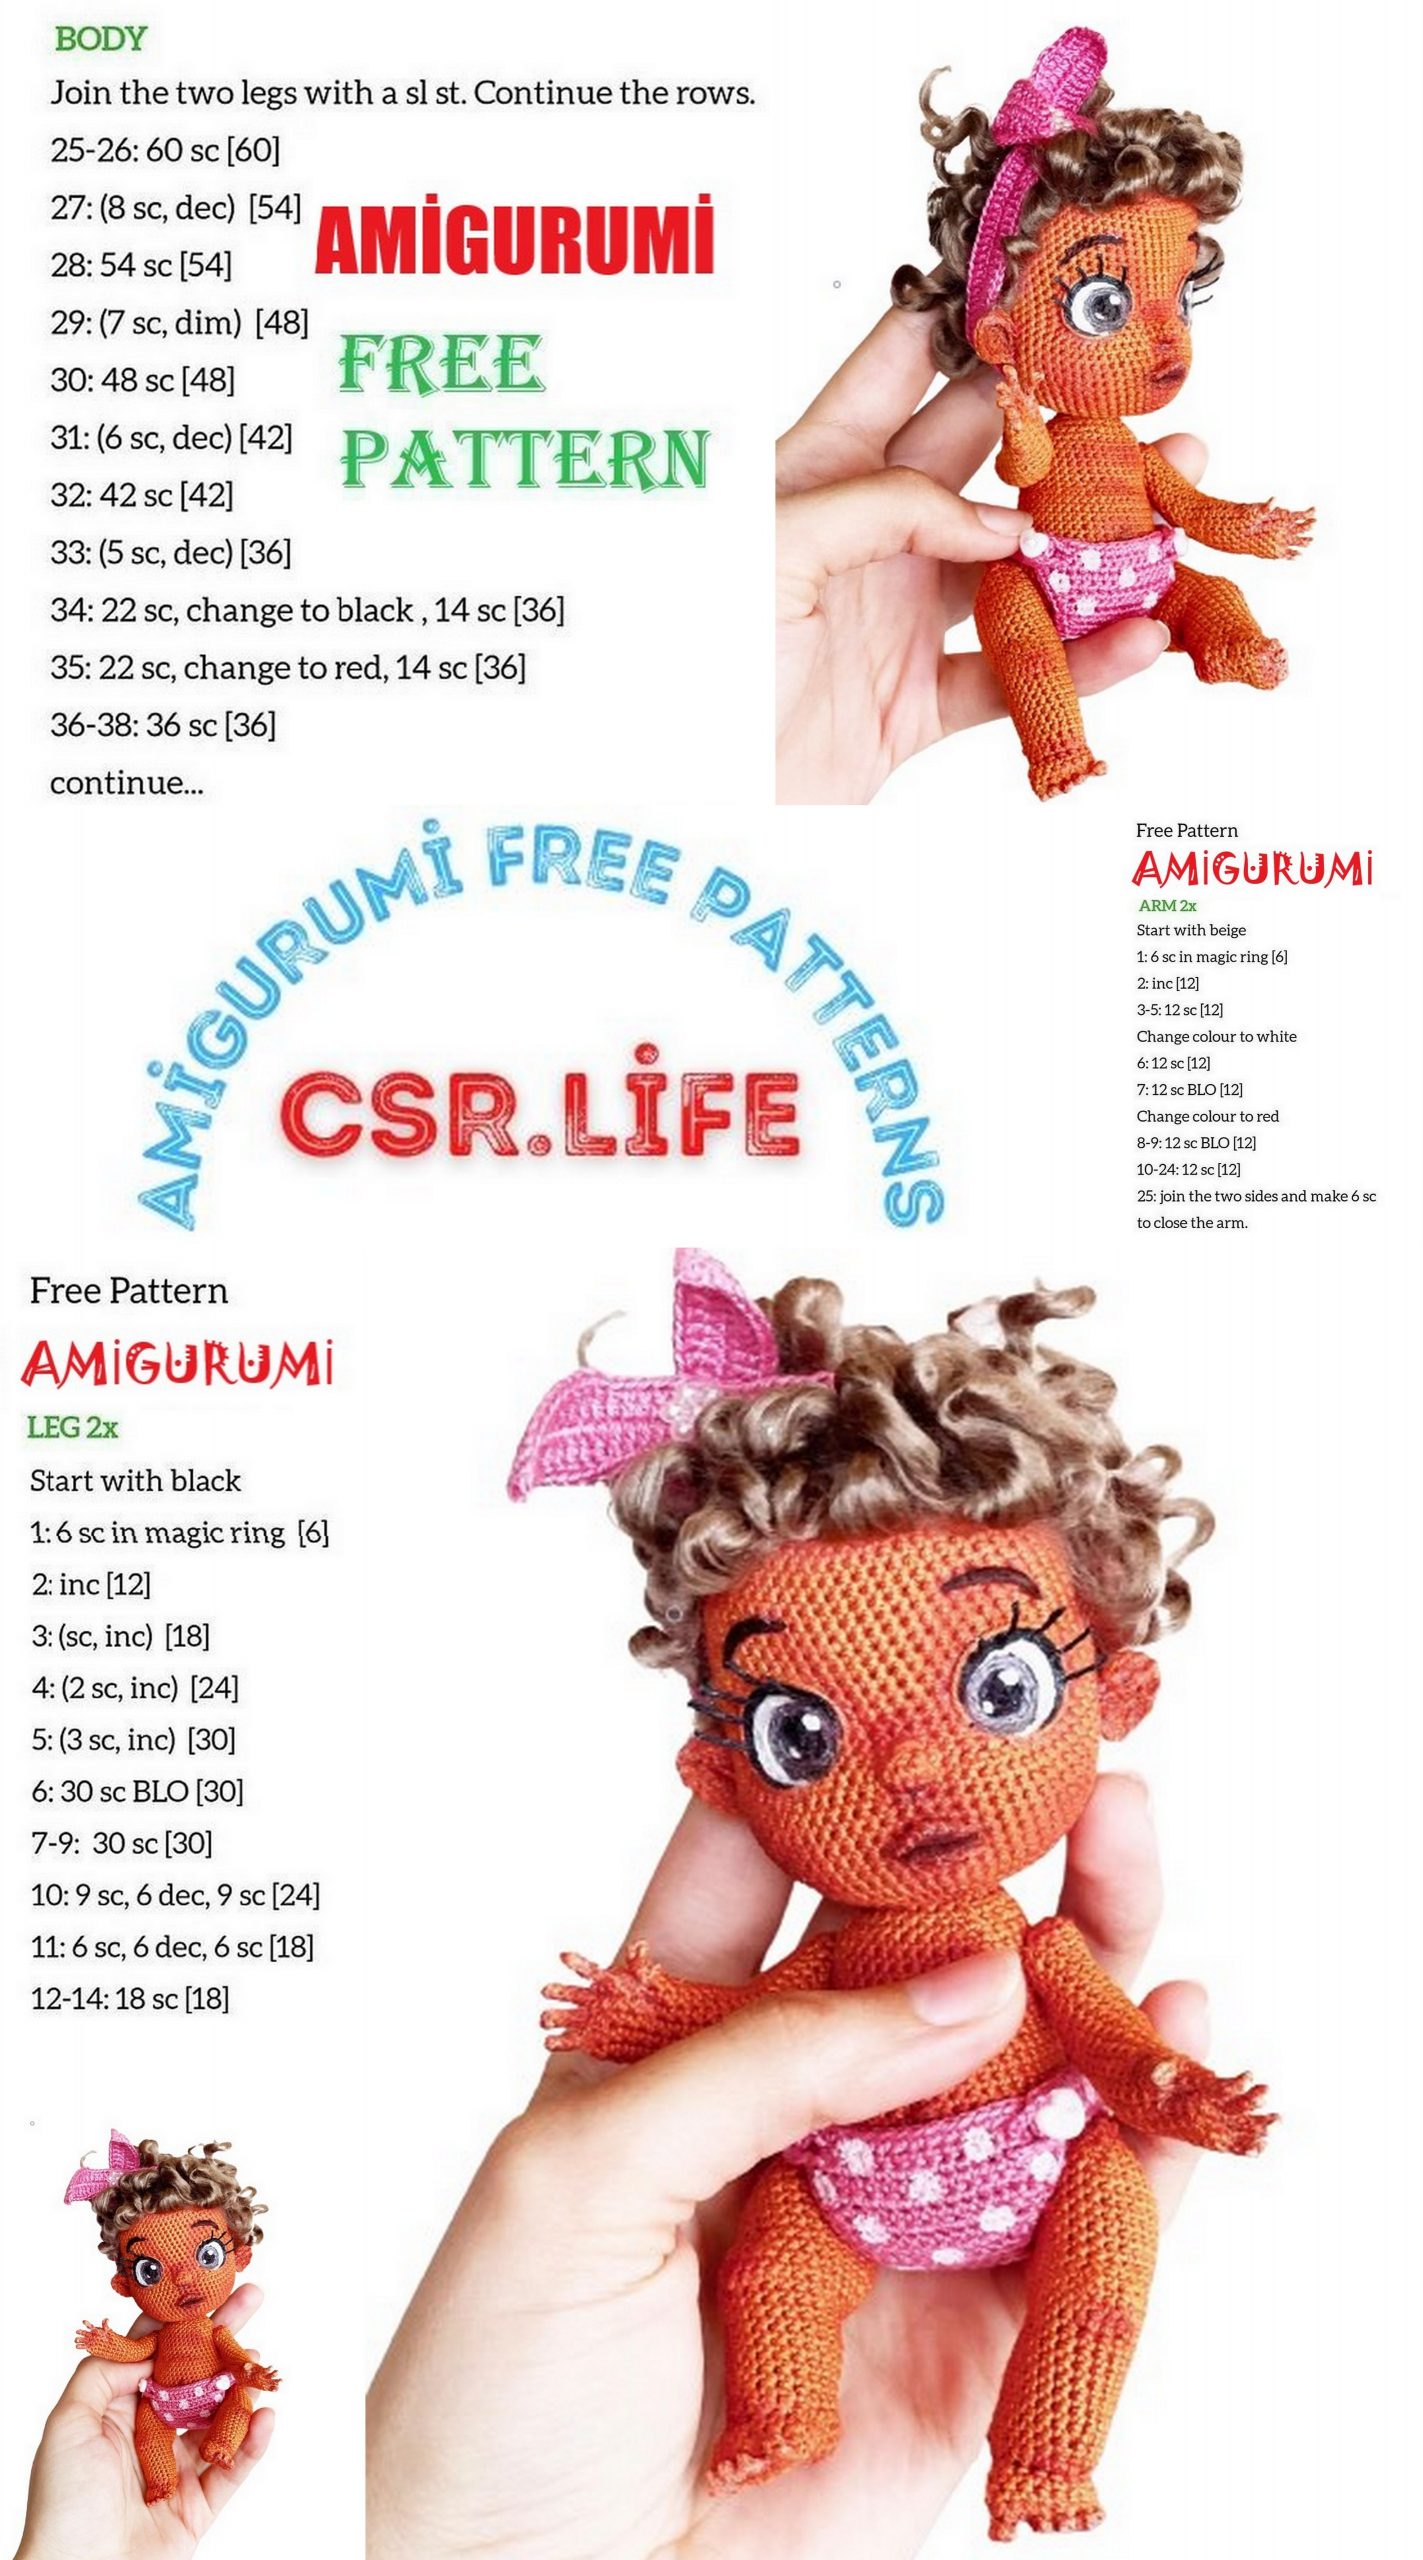
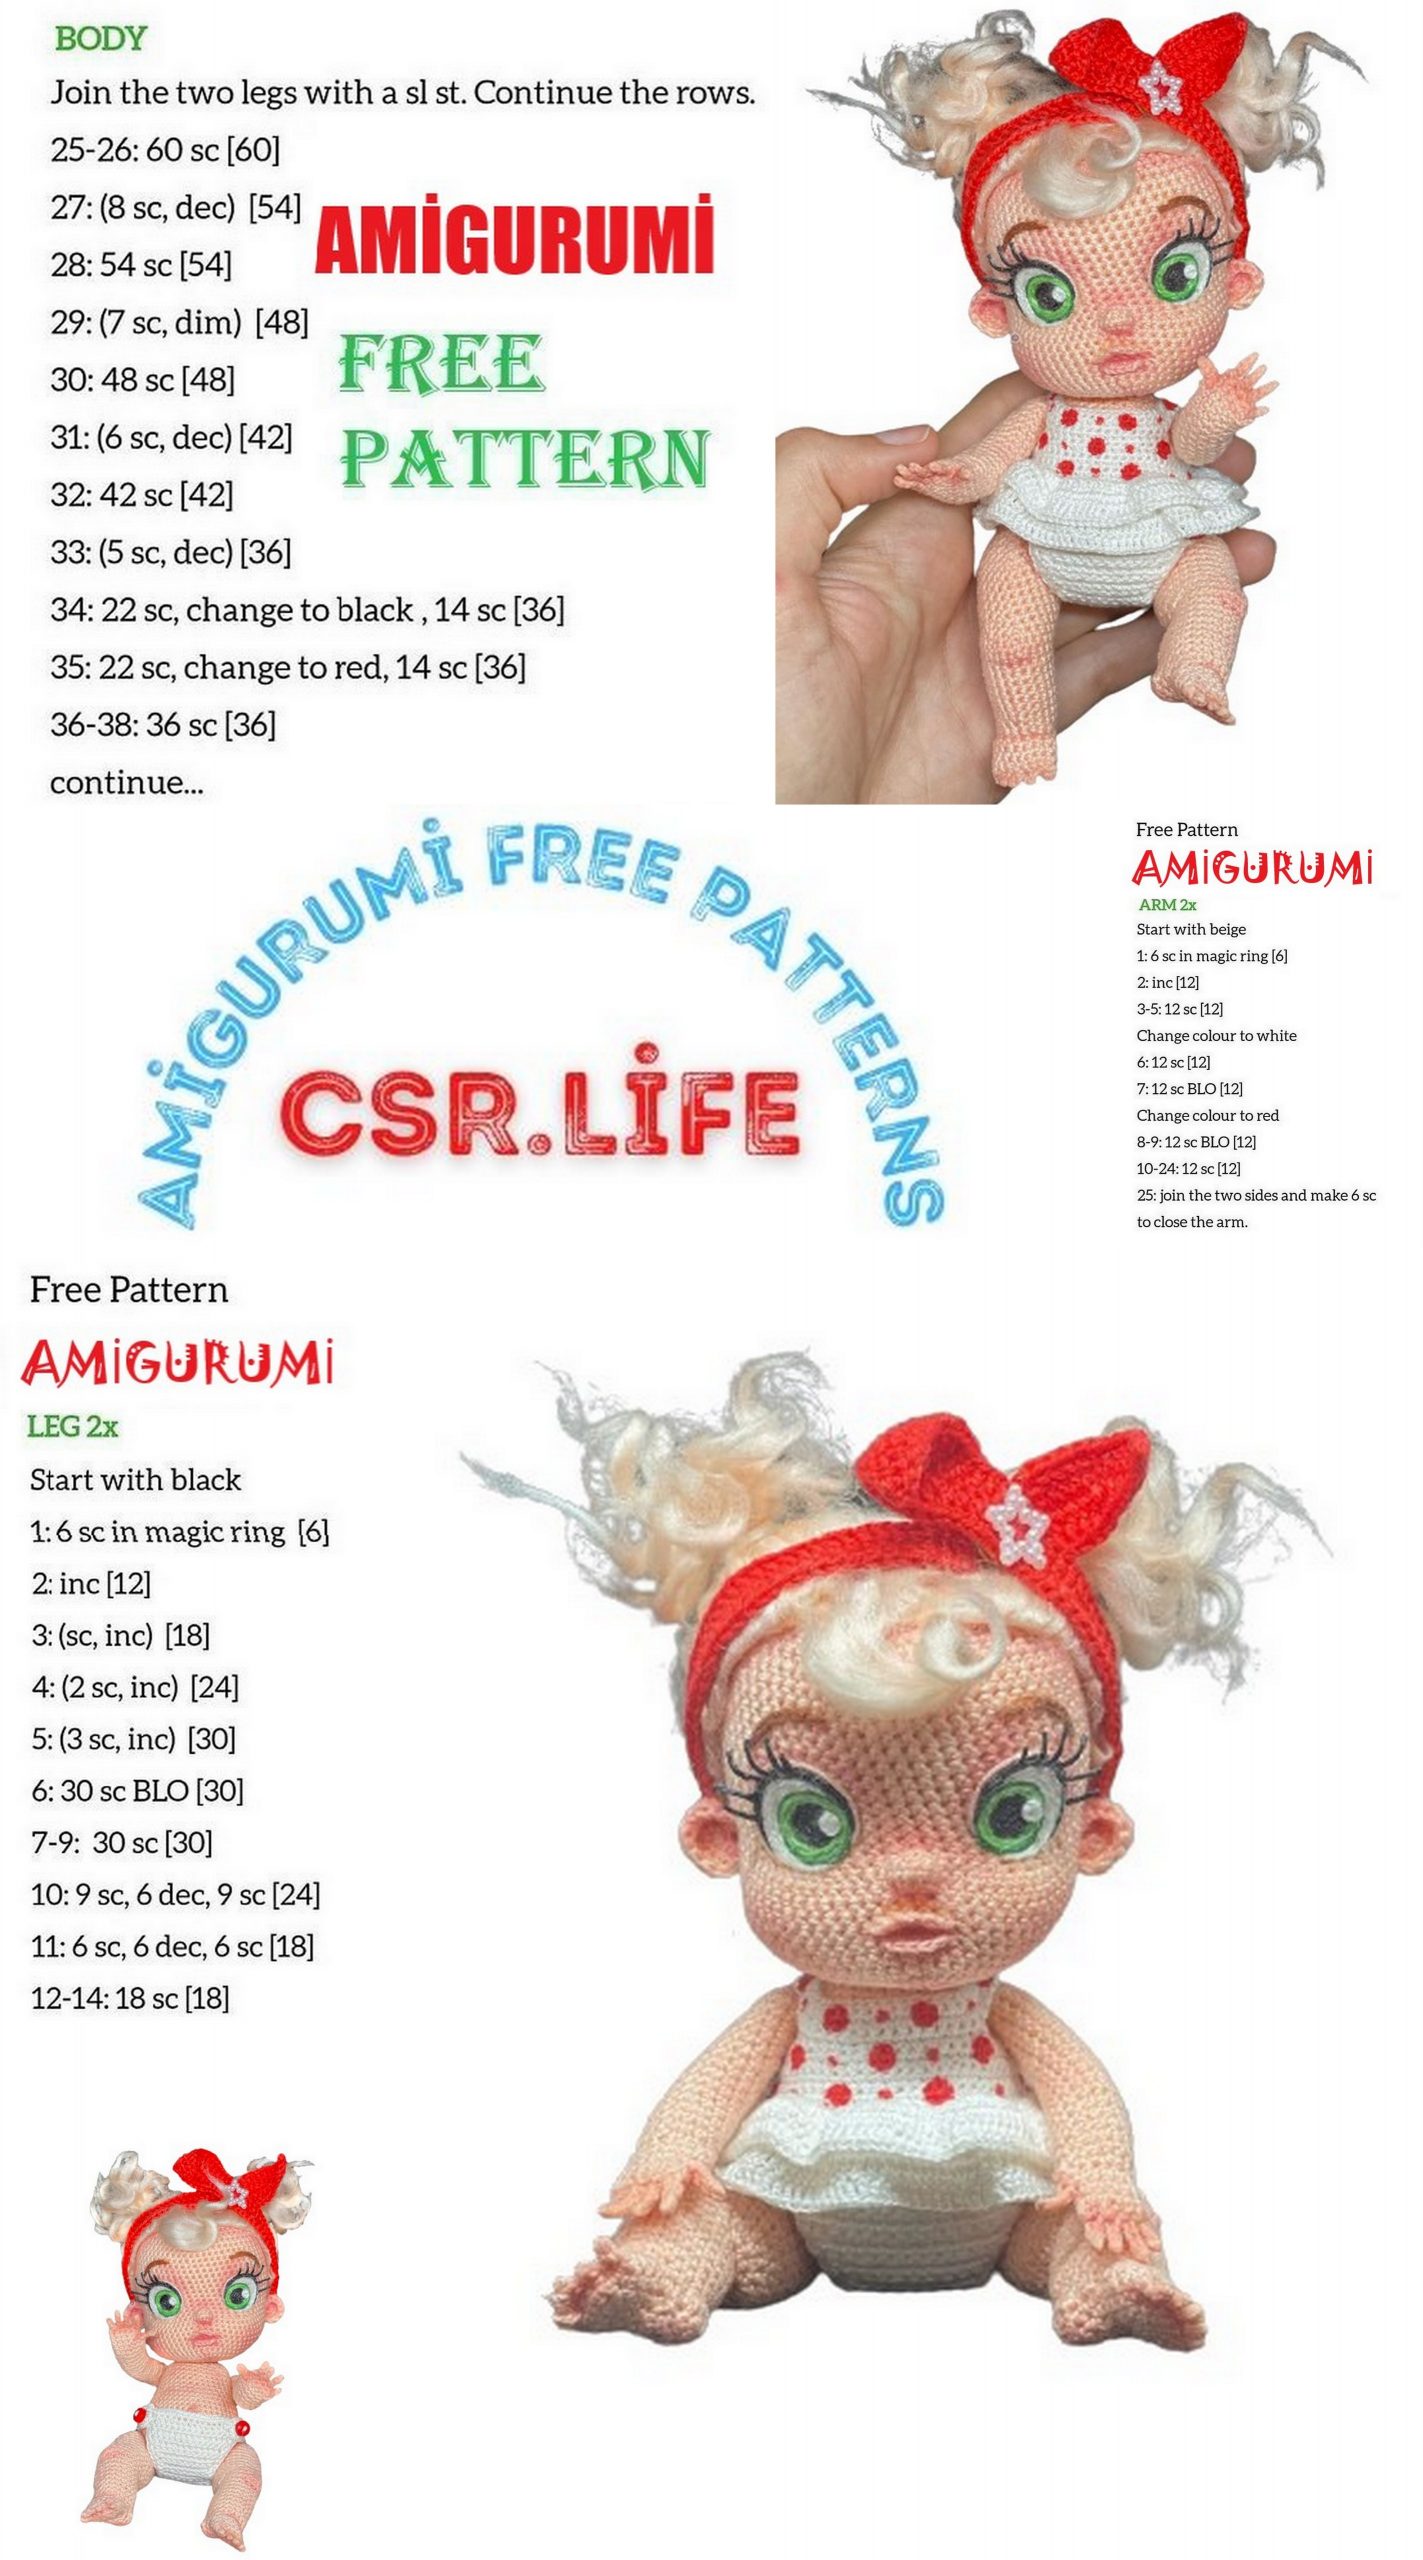
BODY
1) 6 sc into magic ring. (6) – marker
2) 6 inc. (12)
3) (1 inc, 1 sc) * 6. (eighteen)
4) (1 inc, 2 sc) * 6. (24)
5) (1 inc, 3 sc) * 6. (thirty)
6) 1 sc, 4 inc, 7 sc, 1 inc, 4 sc, 1 inc, 7 sc, 4 inc, 1 sc. (40)
7) 40 sc. (40)
8) 1 sc, (1 sc, 1 inc) * 3, 9 sc, 1 inc, 6 sc, 1 inc, 9 sc, (1 inc, 1 sc) * 3, 1 sc. (48)
9) 13 sc, 1 CH, 1 point skip, 20 sc, 1 CH, 1 point skip, 13 sc. (48)
10) 19 sc, 1 inc, 8 sc, 1 inc, 19 sc. (fifty)
11) 50 sc. (fifty)
12) 13 sc, 1 inc, 22 sc, 1 inc, 13 sc. (52)
13) 14 sc, 1 inc, 22 sc, 1 inc, 14 sc. (54)
We insert the legs into the missed loops of the 9th row. We take 2 discs 15 mm, put them on the cotter pins from the inside and fix them by twisting the ends of the cotter pin with round nose pliers. It is necessary to tighten the ends of the cotter pins very tightly so that the legs fit snugly against the body and do not dangle.
14) 54 sc. (54)
15) (1 sc, 1 dec) * 3. (46)
16) 46 sc. (46)
17) (1 sc, 1 dec) * 2, 34 sc, (1 dec, 1 sc) * 2. (42)
18) – 20) 42 sc. (42)
21) 15 sc, (1 dec, 1 sc) * 5, 12 sc. (37)
22) – 23) 37 sc. (37)
24) 11 sc, 1 CH, 1 point skip, 18 sc, 1 CH, 1 point skip, 6 sc. (37)
25) – 26) 37 sc. (37)
In the 5th row of these 4 fingers, you need to dial 10 sc to continue knitting in a spiral.
The 5th row should end above the index finger.
5) 10 sc (5 sc on one side of the fingers, turn knit and do another 5 sc on the other side of the fingers). (10) – put
marker, it should be above the index finger.
Insert your hands into the skipped stitches of the 24th row. Put 6 mm discs on the cotter pins from the inside of the body and fix them tightly with the ends of the cotter pins.
27) 7 sc, 1 dec, 5 sc, 1 dec, 10 sc, 1 dec, 5 sc, 1 dec, 2 sc. (33)
28) 6 sc, 1 dec, 5 sc, 1 dec, 8 sc, 1 dec, 5 sc, 1 dec, 1 sc. (29)
29) (5 sc, 1 dec) * 2, 6 sc, 1 dec, 5 sc, 1 dec. (25)
30) 7 sc, 2 dec, 8 sc, 2 dec, 2 sc. (21)
Measure out a wire that is approximately 11 cm 2 mm thick (if you are using a different yarn, you will need more or less wire). Bend and wrap one end of the wire as shown in the video. Insert the wire into the body and stuff the torso tightly.
31) 21 sc. (21)
32) 10 dec, 1 p. Skip. (10) – fill
33) – 51) 10 sc. (10) – 190 sts in total.
Cut the thread, pull off the remaining hole.
HEAD
The video on the head can be viewed at the link ->
1) – 2) 12 sc, sl-st, CH. (12)
3) – 4) 12 sc. (12)
5) 12 inc. (24)
6) 6 sc, (3 sc in one st, 5 sc) * 3. (thirty)
7) 7 sc, 1 inc, 7 sc, 3 sc in one p., 7 sc, 1 inc, 6 sc. (34)
8) 7 sc, 1 inc, 9 sc, 3 sc in one point, 9 sc, 1 inc, 6 sc. (38)
9) 7 sc, 1 inc, 11 sc, 3 sc in one p., 11 sc, 1 inc, 6 sc. (42)
10) 7 sc, 1 inc, 13 sc, 3 sc in one p., 13 sc, 1 inc, 6 sc. (46)
11) (1 inc, 2 sc) * 2, 37 sc, 1 inc, 2 sc. (49)
12) 1 sc, (1 inc, 3 sc) * 2, 1 inc, 31 sc, (1 inc, 3 sc) * 2. (54)
13) (1 inc, 4 sc) * 2, 39 sc, 1 inc, 4 sc. (57)
14) 14 sc, 1 inc, 6 sc, 1 inc, 7 sc, 5 sc per FLO, 7 sc, 1 inc, 6 sc, 1 inc, 8 sc. (61)
15) 3 sc, 1 inc, 6 sc, 1 inc, 20 sc, 5 sc per FLO, 20 sc, 1 inc, 4 sc. (65)
In the 5th row of these 4 fingers, you need to dial 10 sc to continue knitting in a spiral.
The 5th row should end above the index finger.
5) 10 sc (5 sc on one side of the fingers, turn knit and do another 5 sc on the other side of the fingers). (10) – put
marker, it must be above the index sticksm.
6) 10 sc. (10)
7) 1 sc, (5 CH, 4 sl-st along the chain) <- thumb, 9 sc. (10)
8) 1 sc, 3 sc over the thumb, 9 sc. (13)
9) 3 dec, 1 sc, 3 dec. (7) – make sl-st, CH, cut the thread, leaving the tip 15-20 cm for sewing to the bead, tighten the air loop by pulling the tip.
15) 3 sc, 1 inc, 6 sc, 1 inc, 20 sc, 5 sc per FLO, 20 sc, 1 inc, 4 sc. (65)
16) 64 sc. (64)
17) 35 sc, (in one loop: sl-st, 6 sc, sl-st), 28 sc. (71)
18) 35 sc, sl-st, 6 sc, sl-st, 28 sc. (71)
19) 24 sc, 4 dec, 3 sc, (1 point skip, 1 sc) * 4, 3 sc, 4 dec, 17 sc. (59)
20) 17 sc, 1 inc, 14 sc, 3 sc with a common vertex, 14 sc, 1 inc, 9 sc. (59)
21) -22) 59 sc. (59)
23) 26 sc, 1 inc, 14 sc, 1 inc, 17 sc. (61)
24) -34) 61 sc. (61)
35) (1 dec, 10 sc) * 5, 1 p. Skip. (55)
36) (1 dec, 9 sc) * 5. (fifty)
37) (1 dec, 8 sc) * 5. (45)
38) (1 dec, 7 sc) * 5. (40)
39) (1 dec, 6 sc) * 5. (35)
40) (1 dec, 5 sc) * 5. (thirty)
41) (1 dec, 4 sc) * 5. (25)
Tuck the first 4 rows inside the head. Put your head on the doll’s neck or on a skewer. Fill tightly.
42) (1 dec, 3 sc) * 5. (twenty)
43) (1 dec, 2 sc) * 5. (fifteen)
44) (1 dec, 1 sc) * 5. (10) – fill
45) 5 dec. (five)
Cut the thread, pull off the remaining hole.
LIPS:
Cut off 2 strands of 30 cm each.Attach the first strand to BLO of the 15th row (as shown in the video), make CH from this loop and knit the upper lip according to the pattern from the following loop: 1 sc, 1 inc, 1 sc, sl-st …
Then we attach the second thread to BLO of the 14th row, make CH and in the next loop we knit the lower lip: 3 sc, sl-st.
Bring the ends of the threads to the base of the head and fasten.
In the 5th row of these 4 fingers, you need to dial 10 sc to continue knitting in a spiral.
The 5th row should end above the index finger.
5) 10 sc (5 sc on one side of the fingers, turn knit and do another 5 sc on the other side of the fingers). (10) – put
marker, it should be above the index finger.
6) 10 sc. (10)
7) 1 sc, (5 CH, 4 sl-st along the chain) <- thumb, 9 sc. (10)
8) 1 sc, 3 sc over the thumb, 9 sc. (13)
9) 3 dec, 1 sc, 3 dec. (7) – make sl-st, CH, cut the thread, leaving the tip 15-20 cm for sewing to the bead, tighten the air loop by pulling the tip.
Ears:
We knit both ears according to the same pattern, but at the end we turn them in different directions. You can also tie the second ear mirrored in the same way as shown below.
1) into magic ring: 1 hdc, 7 dc, 1 sc, CH, turn. (nine)
2) sl-st, 1 hdc, 2 dc, 1 dcİNC, 2 hdc, 1 sc, sl-st. (10)
Leave the ends of the threads 5 cm to fix them on the head. It is better to fasten the ears after the face is embroidered.
EMBROIDERY OF THE FACE, HAIR, CLOTHING