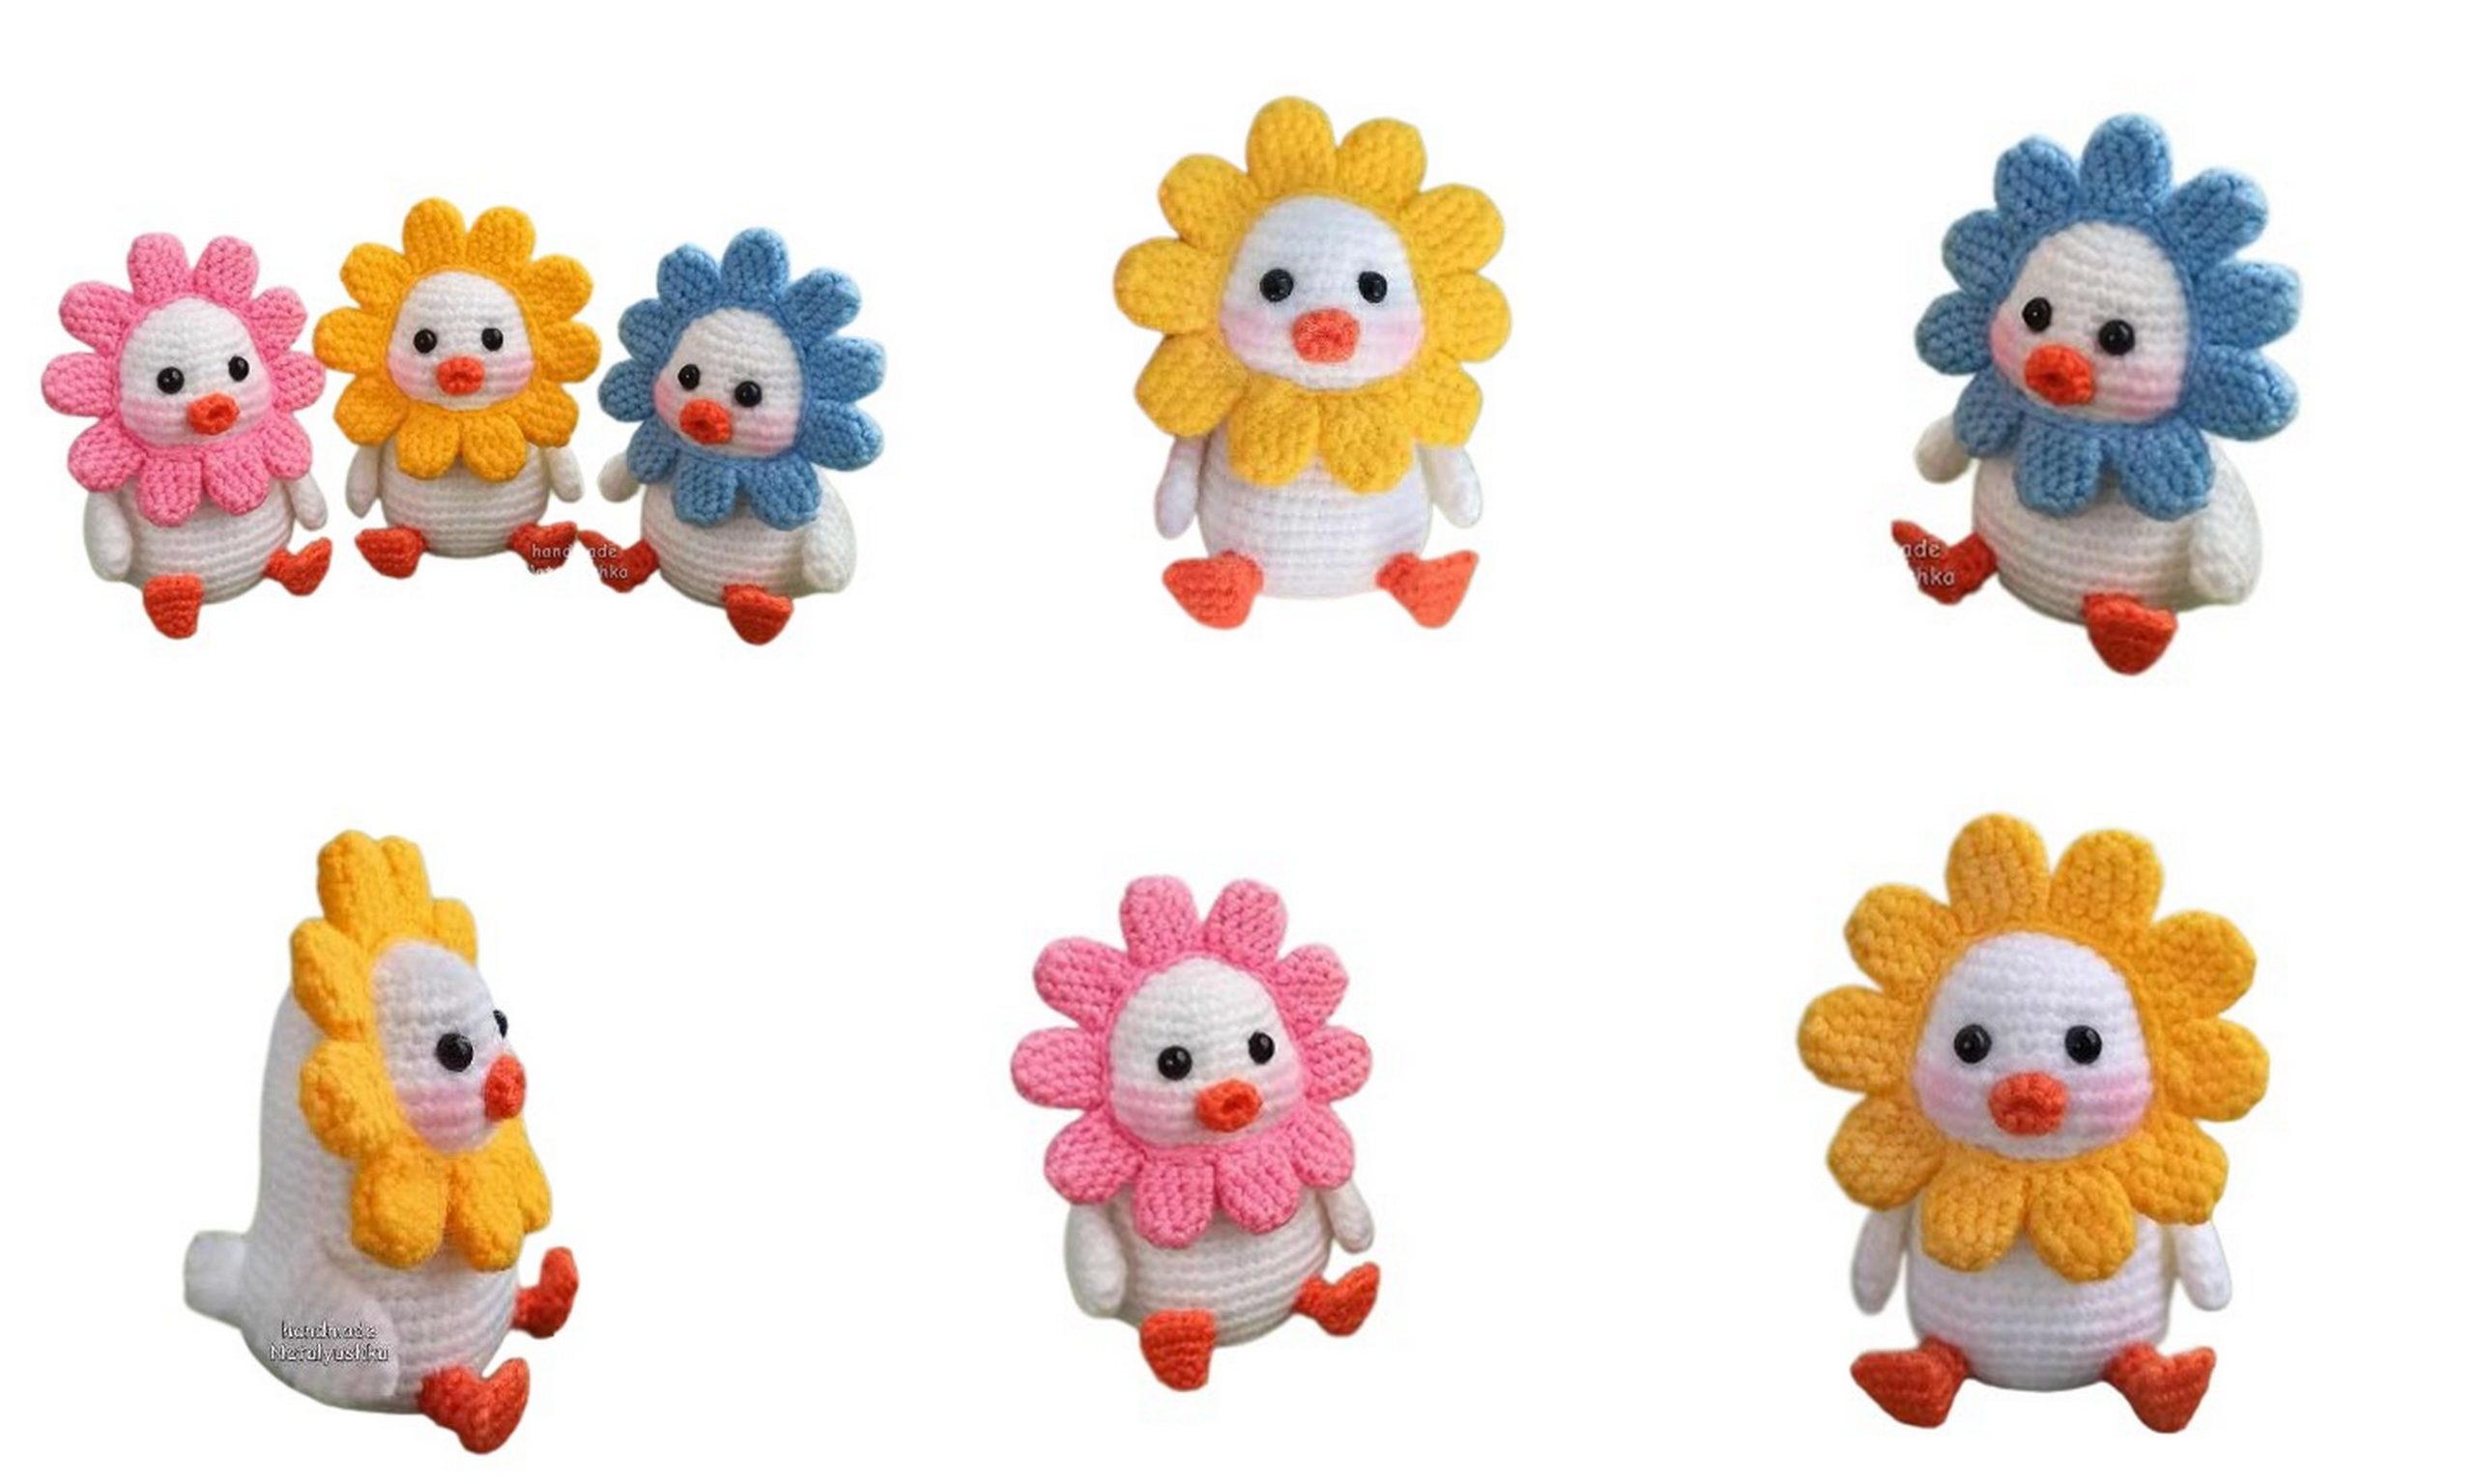
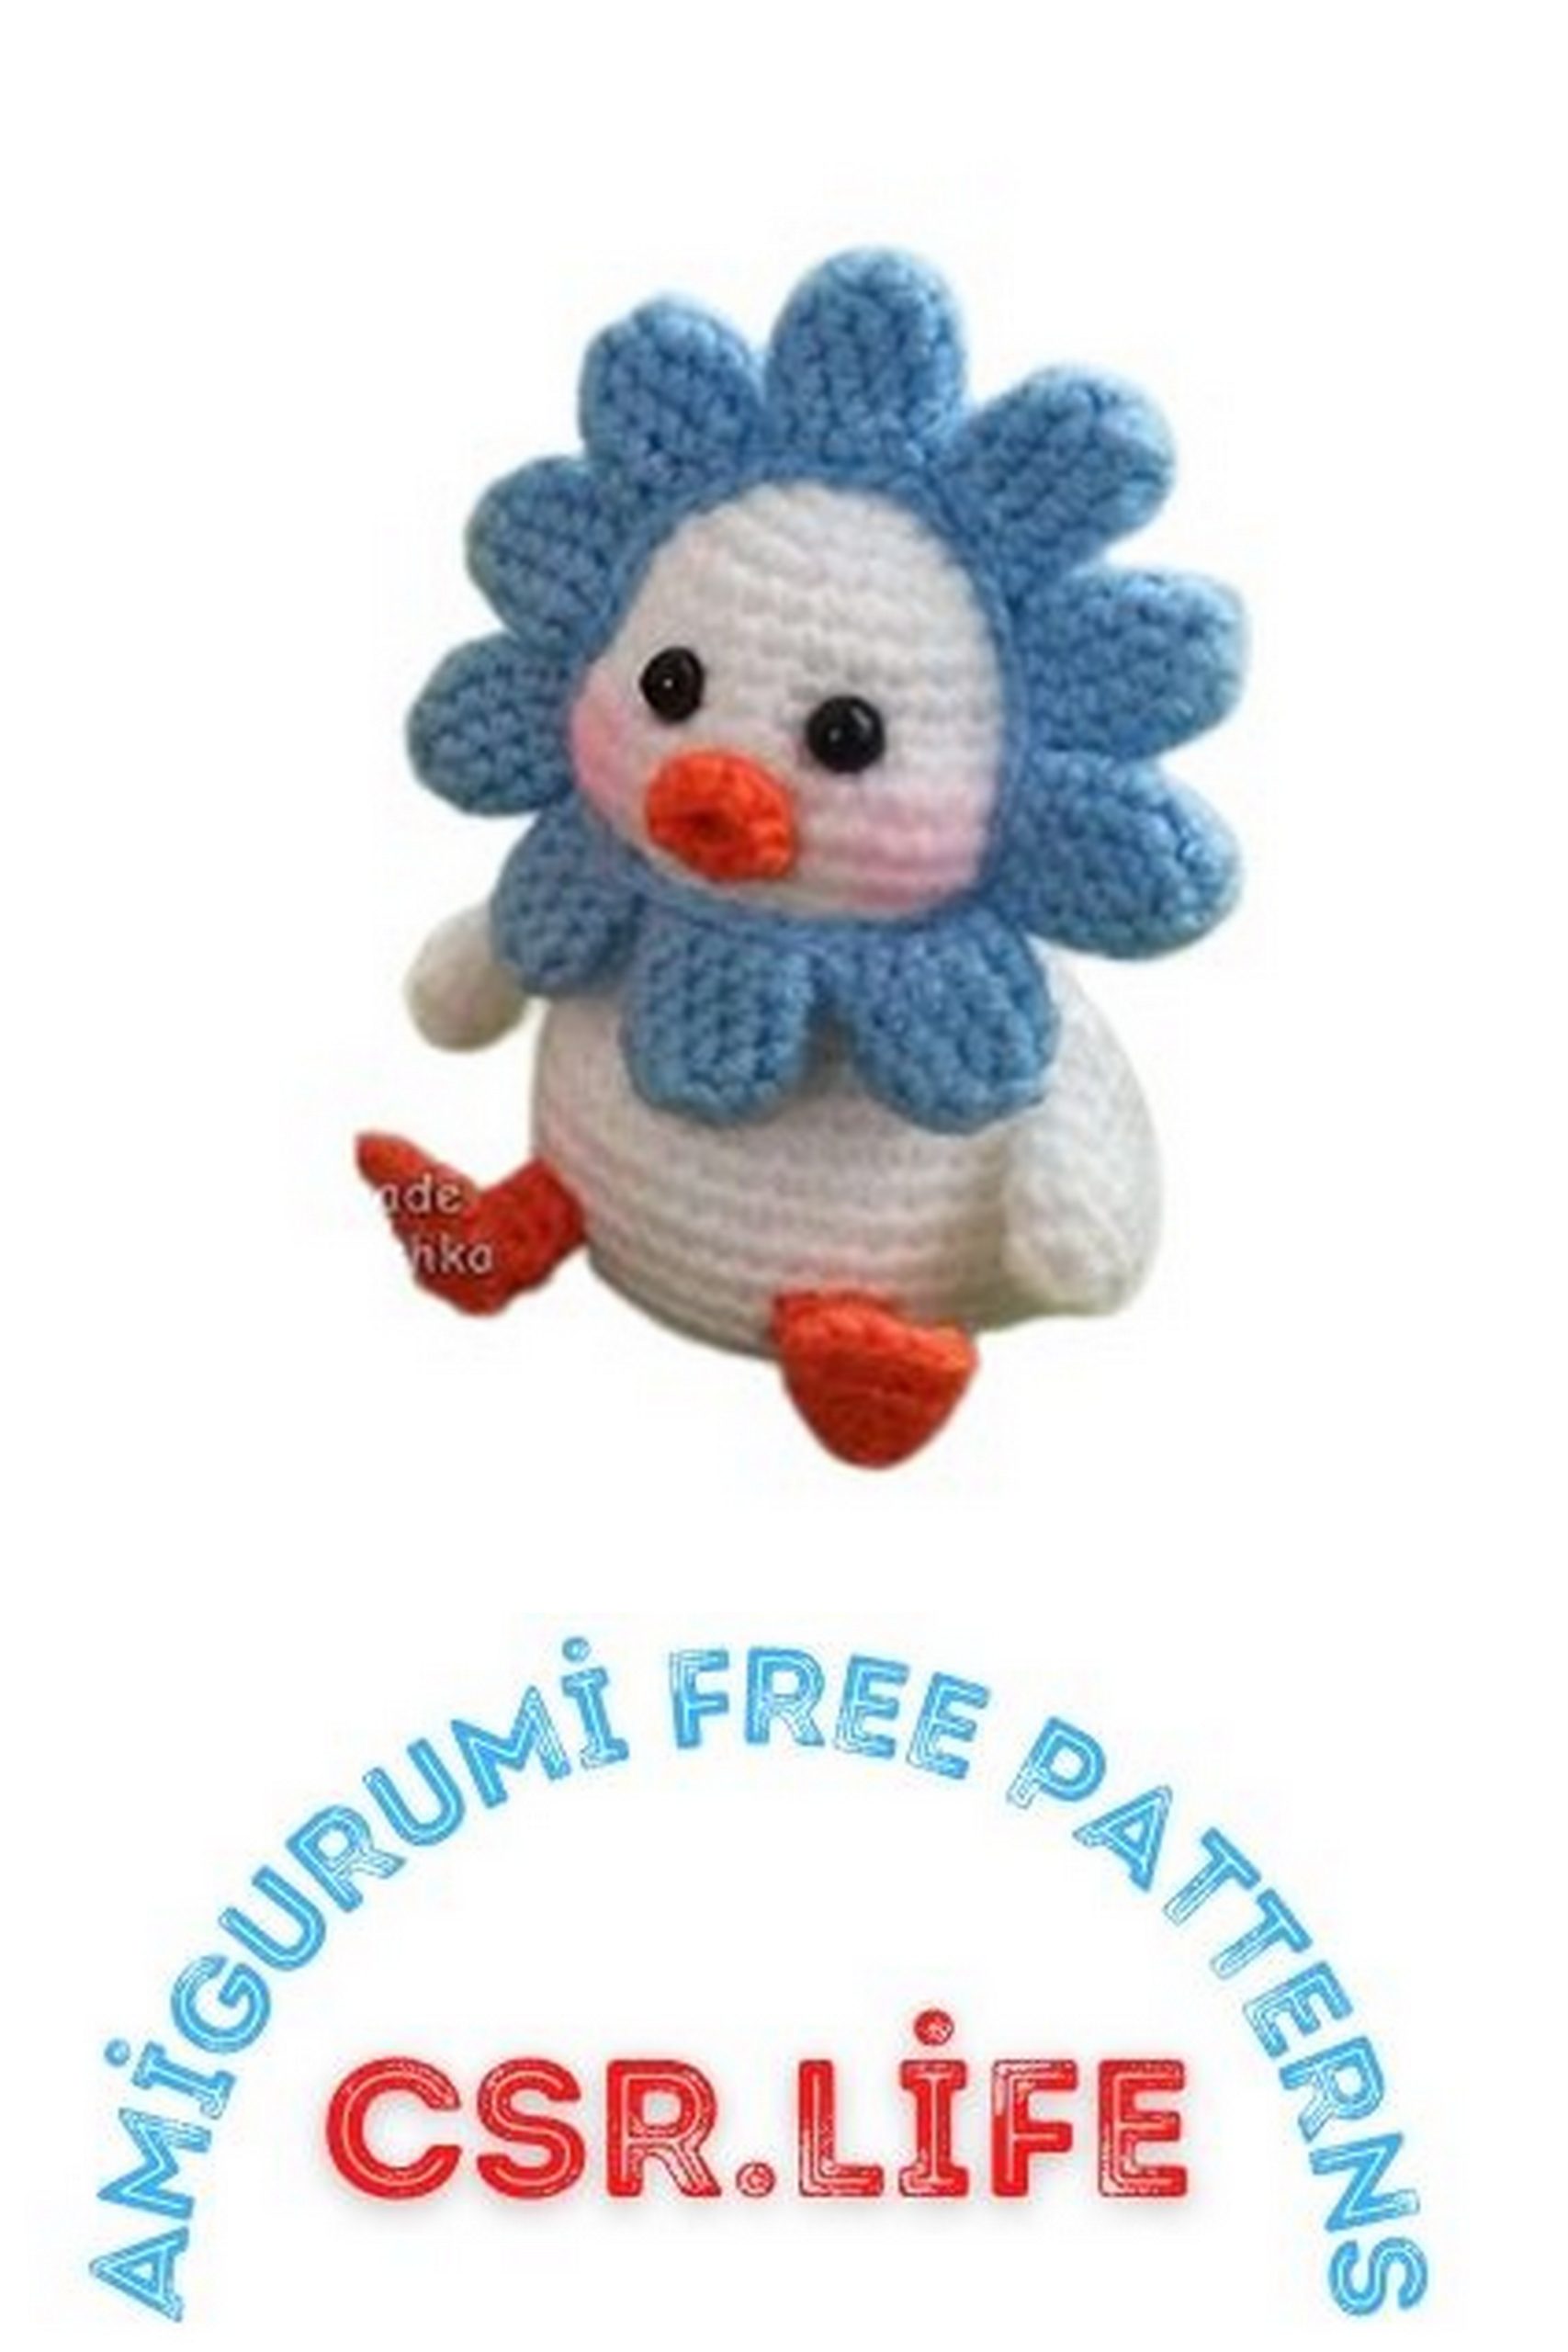
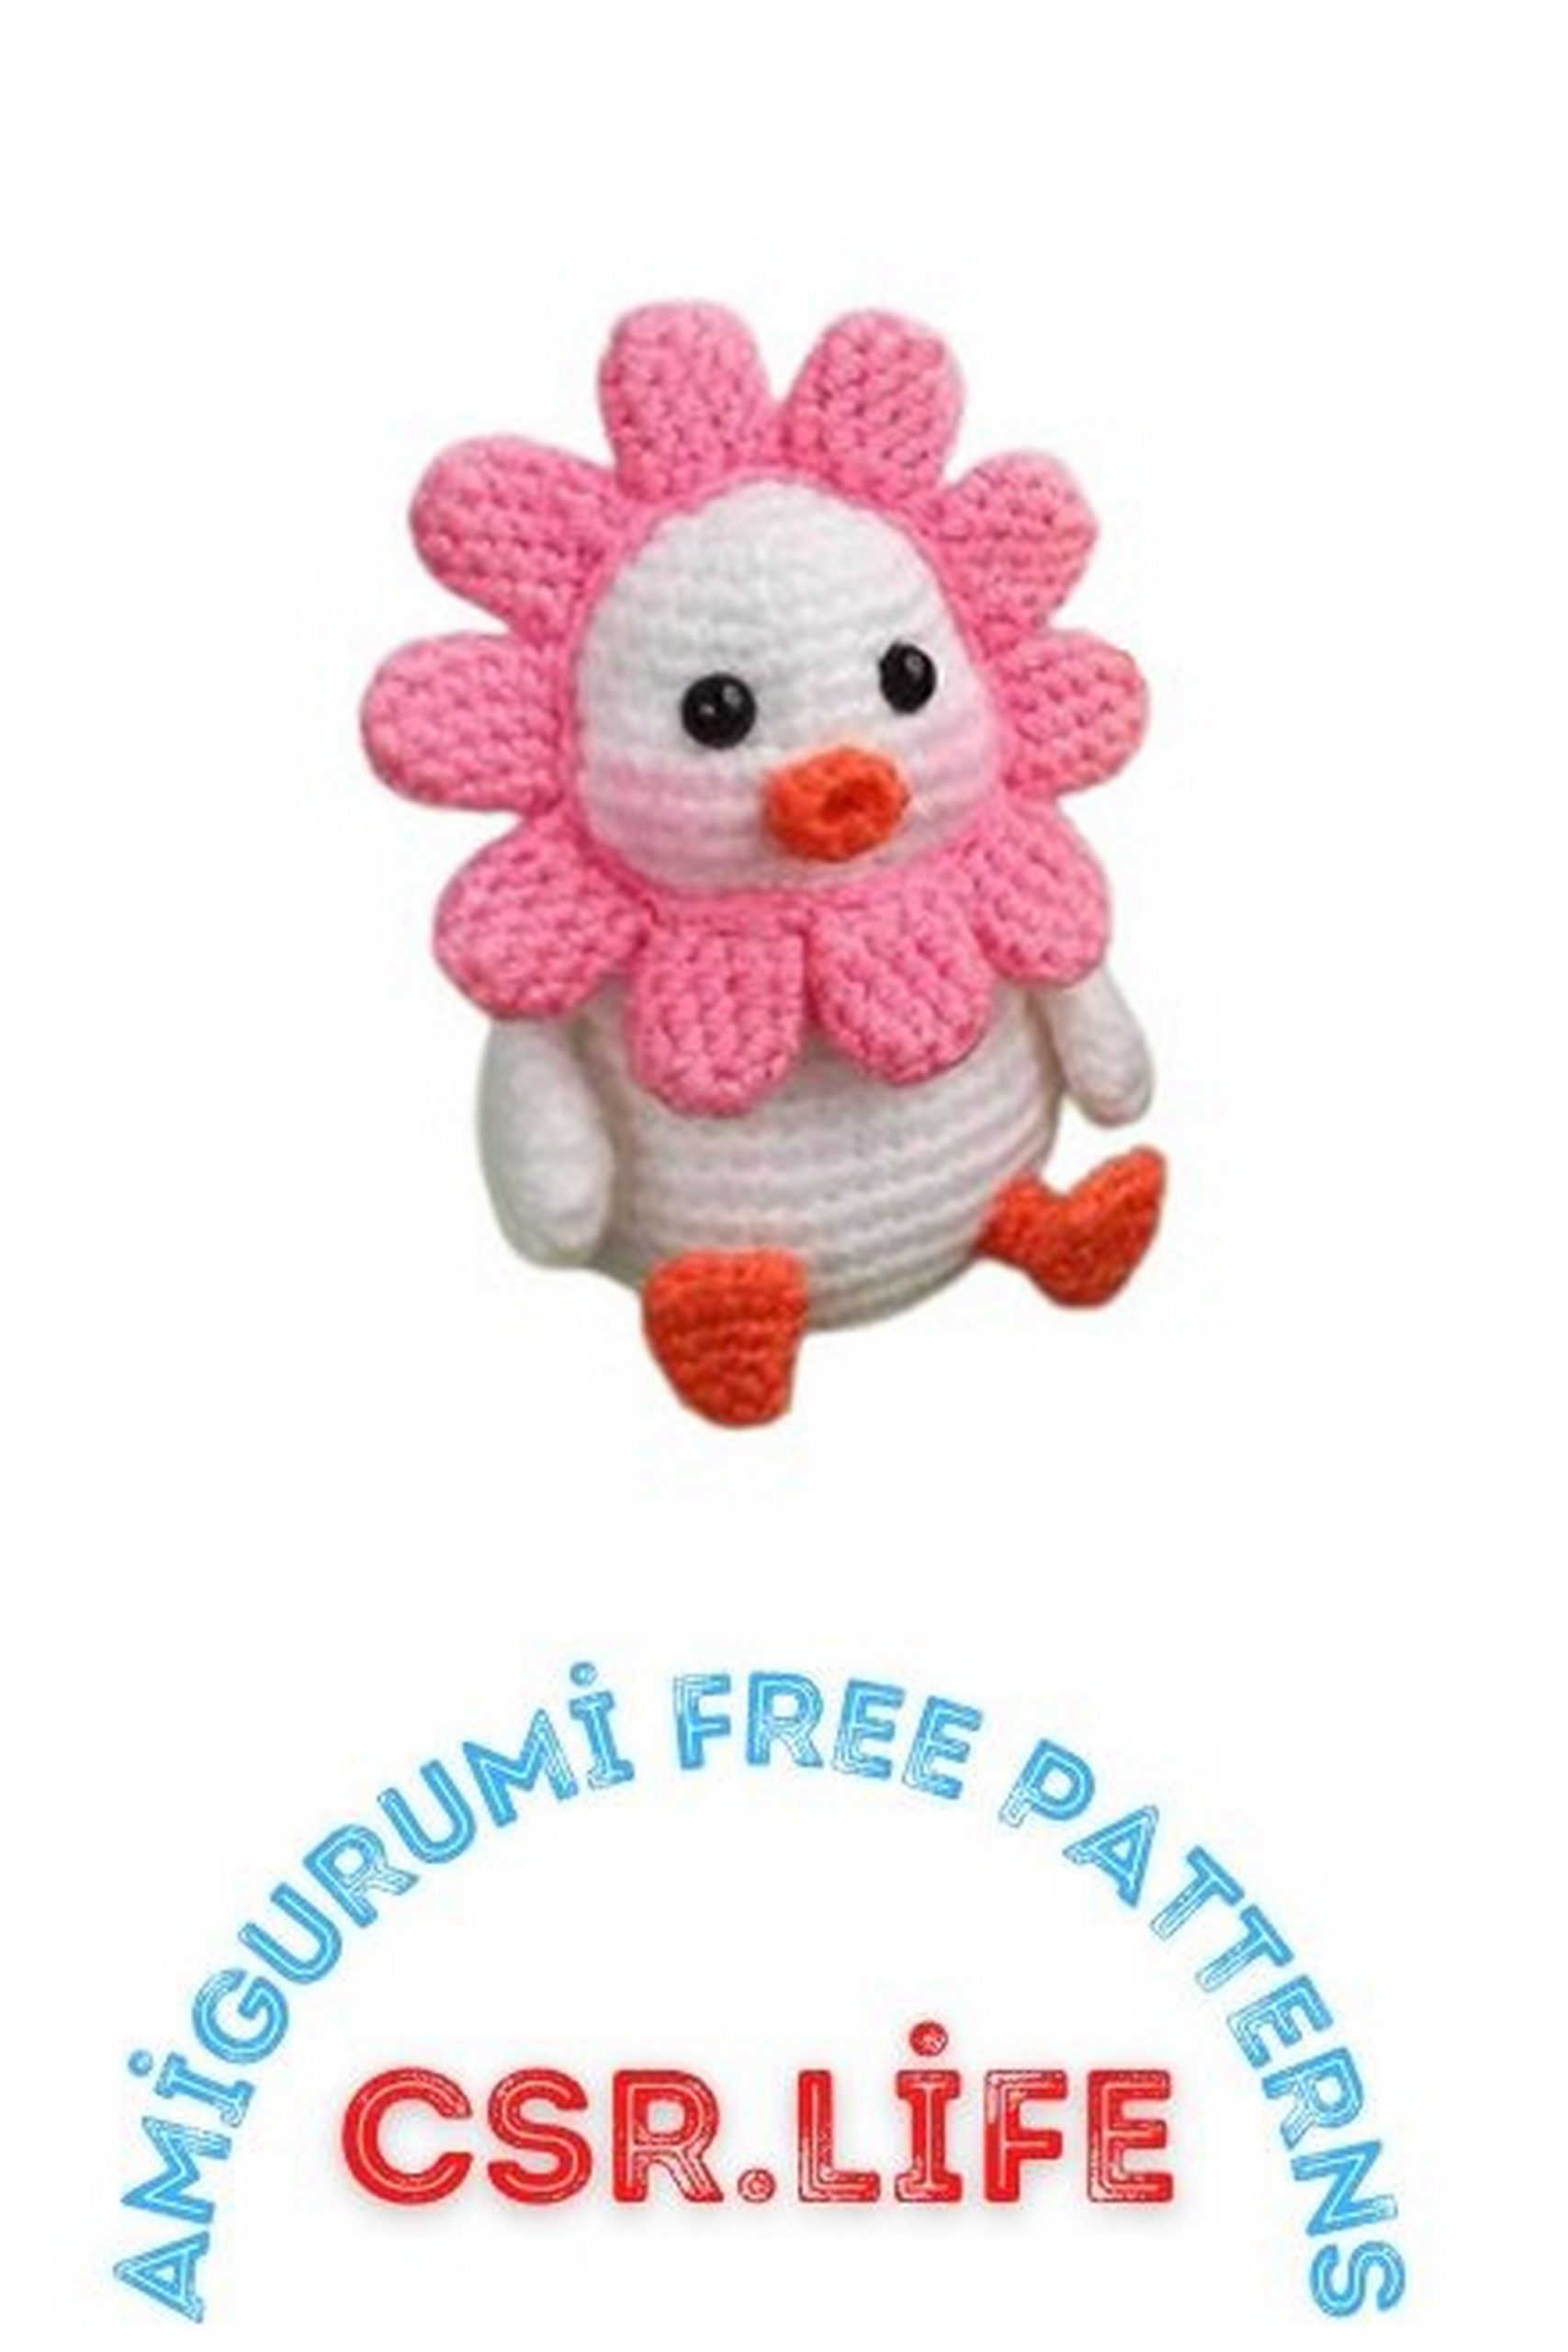
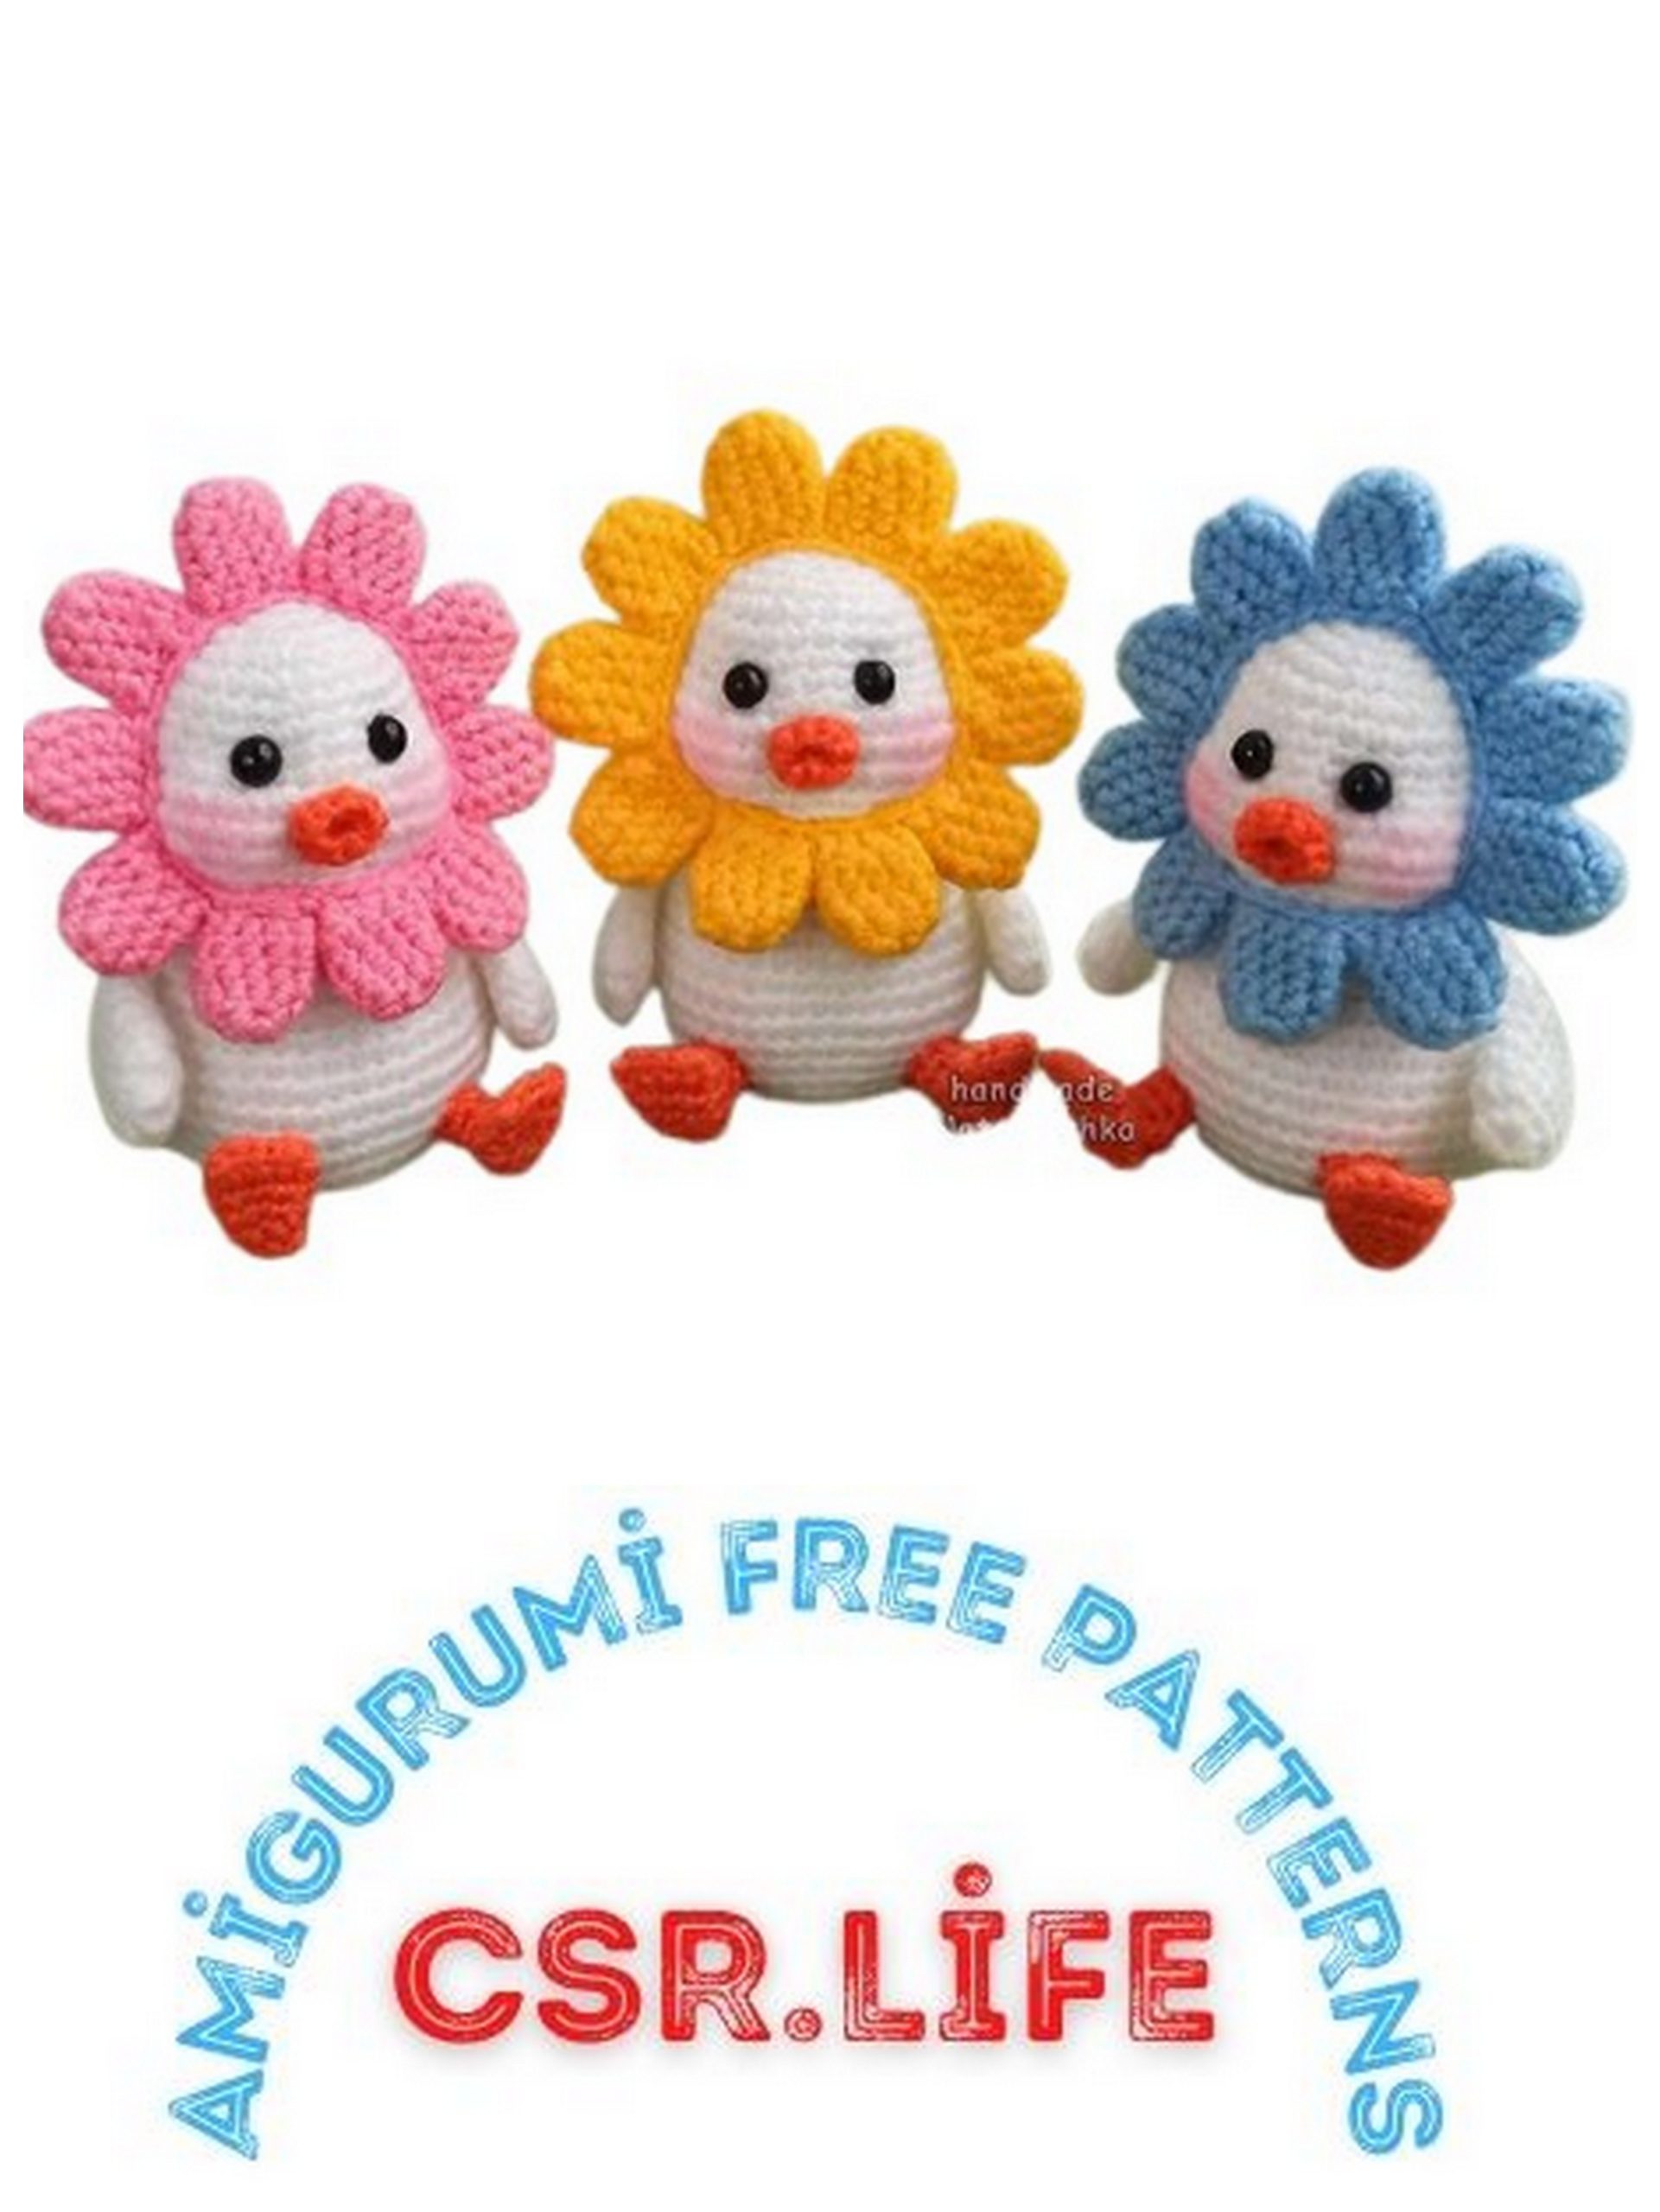
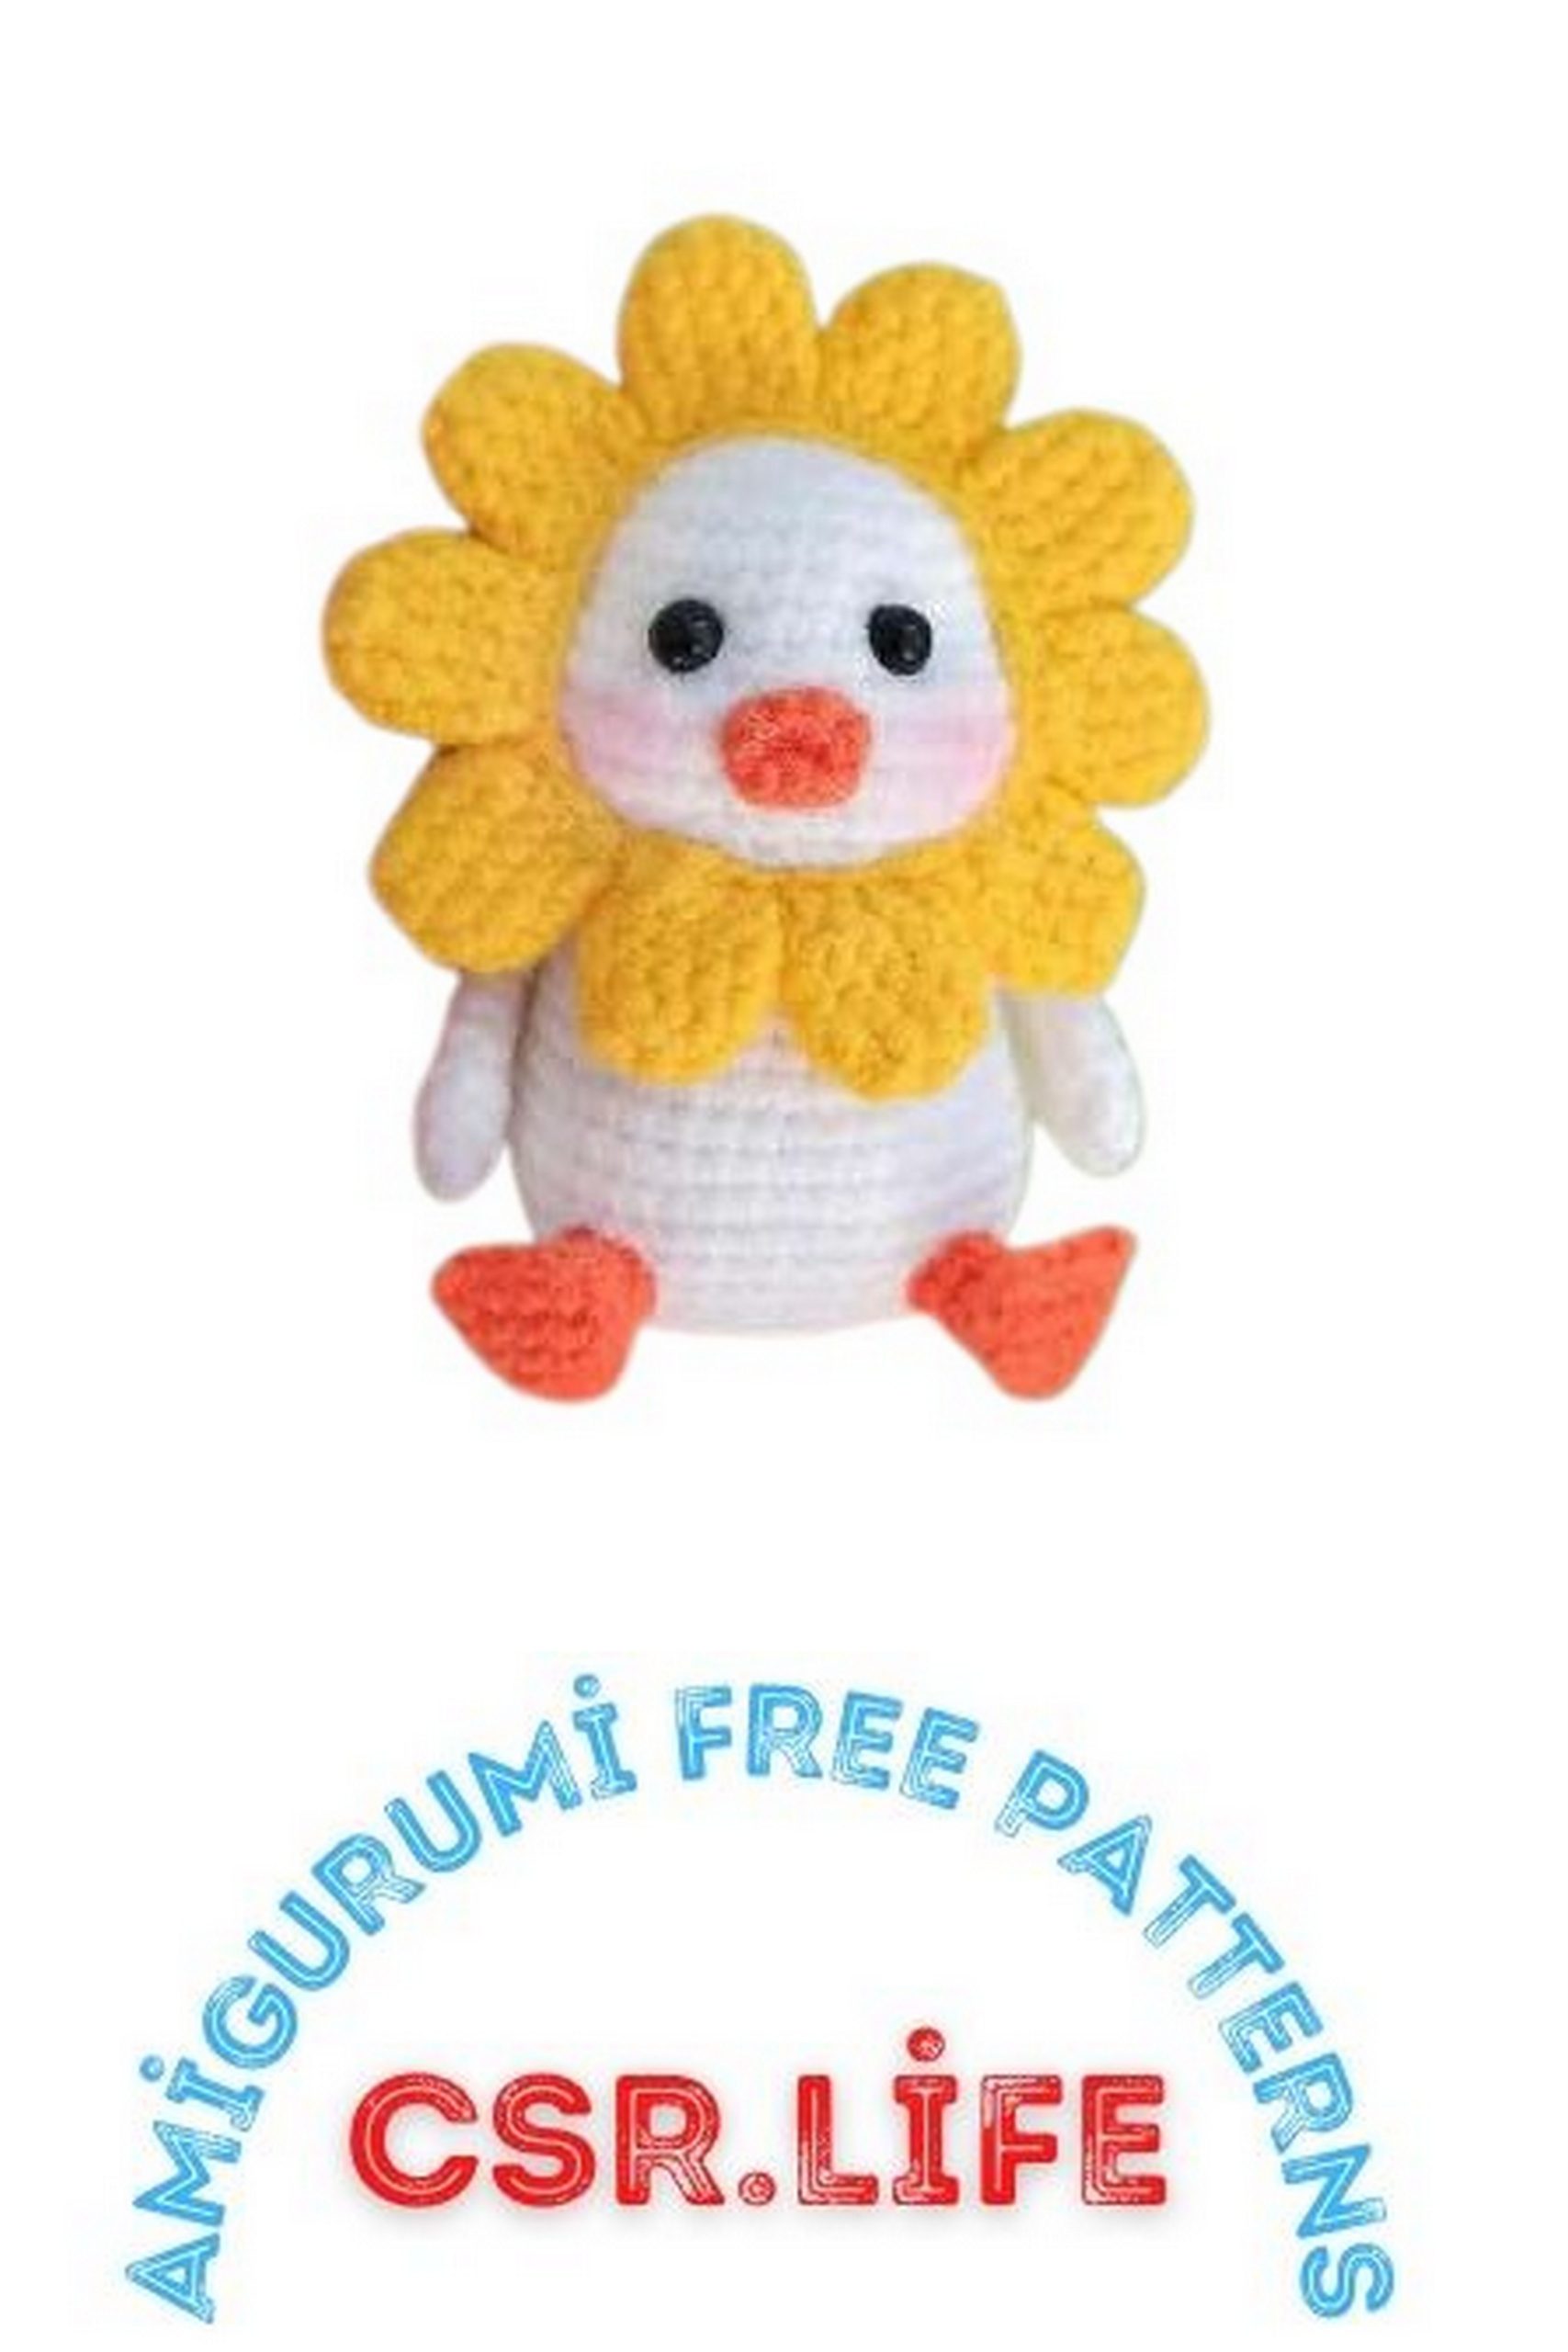
Little Cute Duck Amigurumi Free Pattern
Welcome to our Little Cute Duck Amigurumi Free Pattern! If you’re a crochet enthusiast or a beginner looking to dive into the world of amigurumi, you’re in for a treat. This easy-to-follow pattern will guide you step by step in creating an endearing little duck that will bring smiles to everyone who sees it. Grab your crochet hook and let’s get started on this delightful amigurumi duck adventure!
Duck Size: 9 cm
Materials Needed:
Yarn: Baby novelty (50g/200m)
Crochet hook: 1.5mm
6mm black safety eyes
Polyester fiberfill or stuffing
Scissors
Yarn needle
Instant glue
Plastic circle with a diameter of 30mm
PATTERN
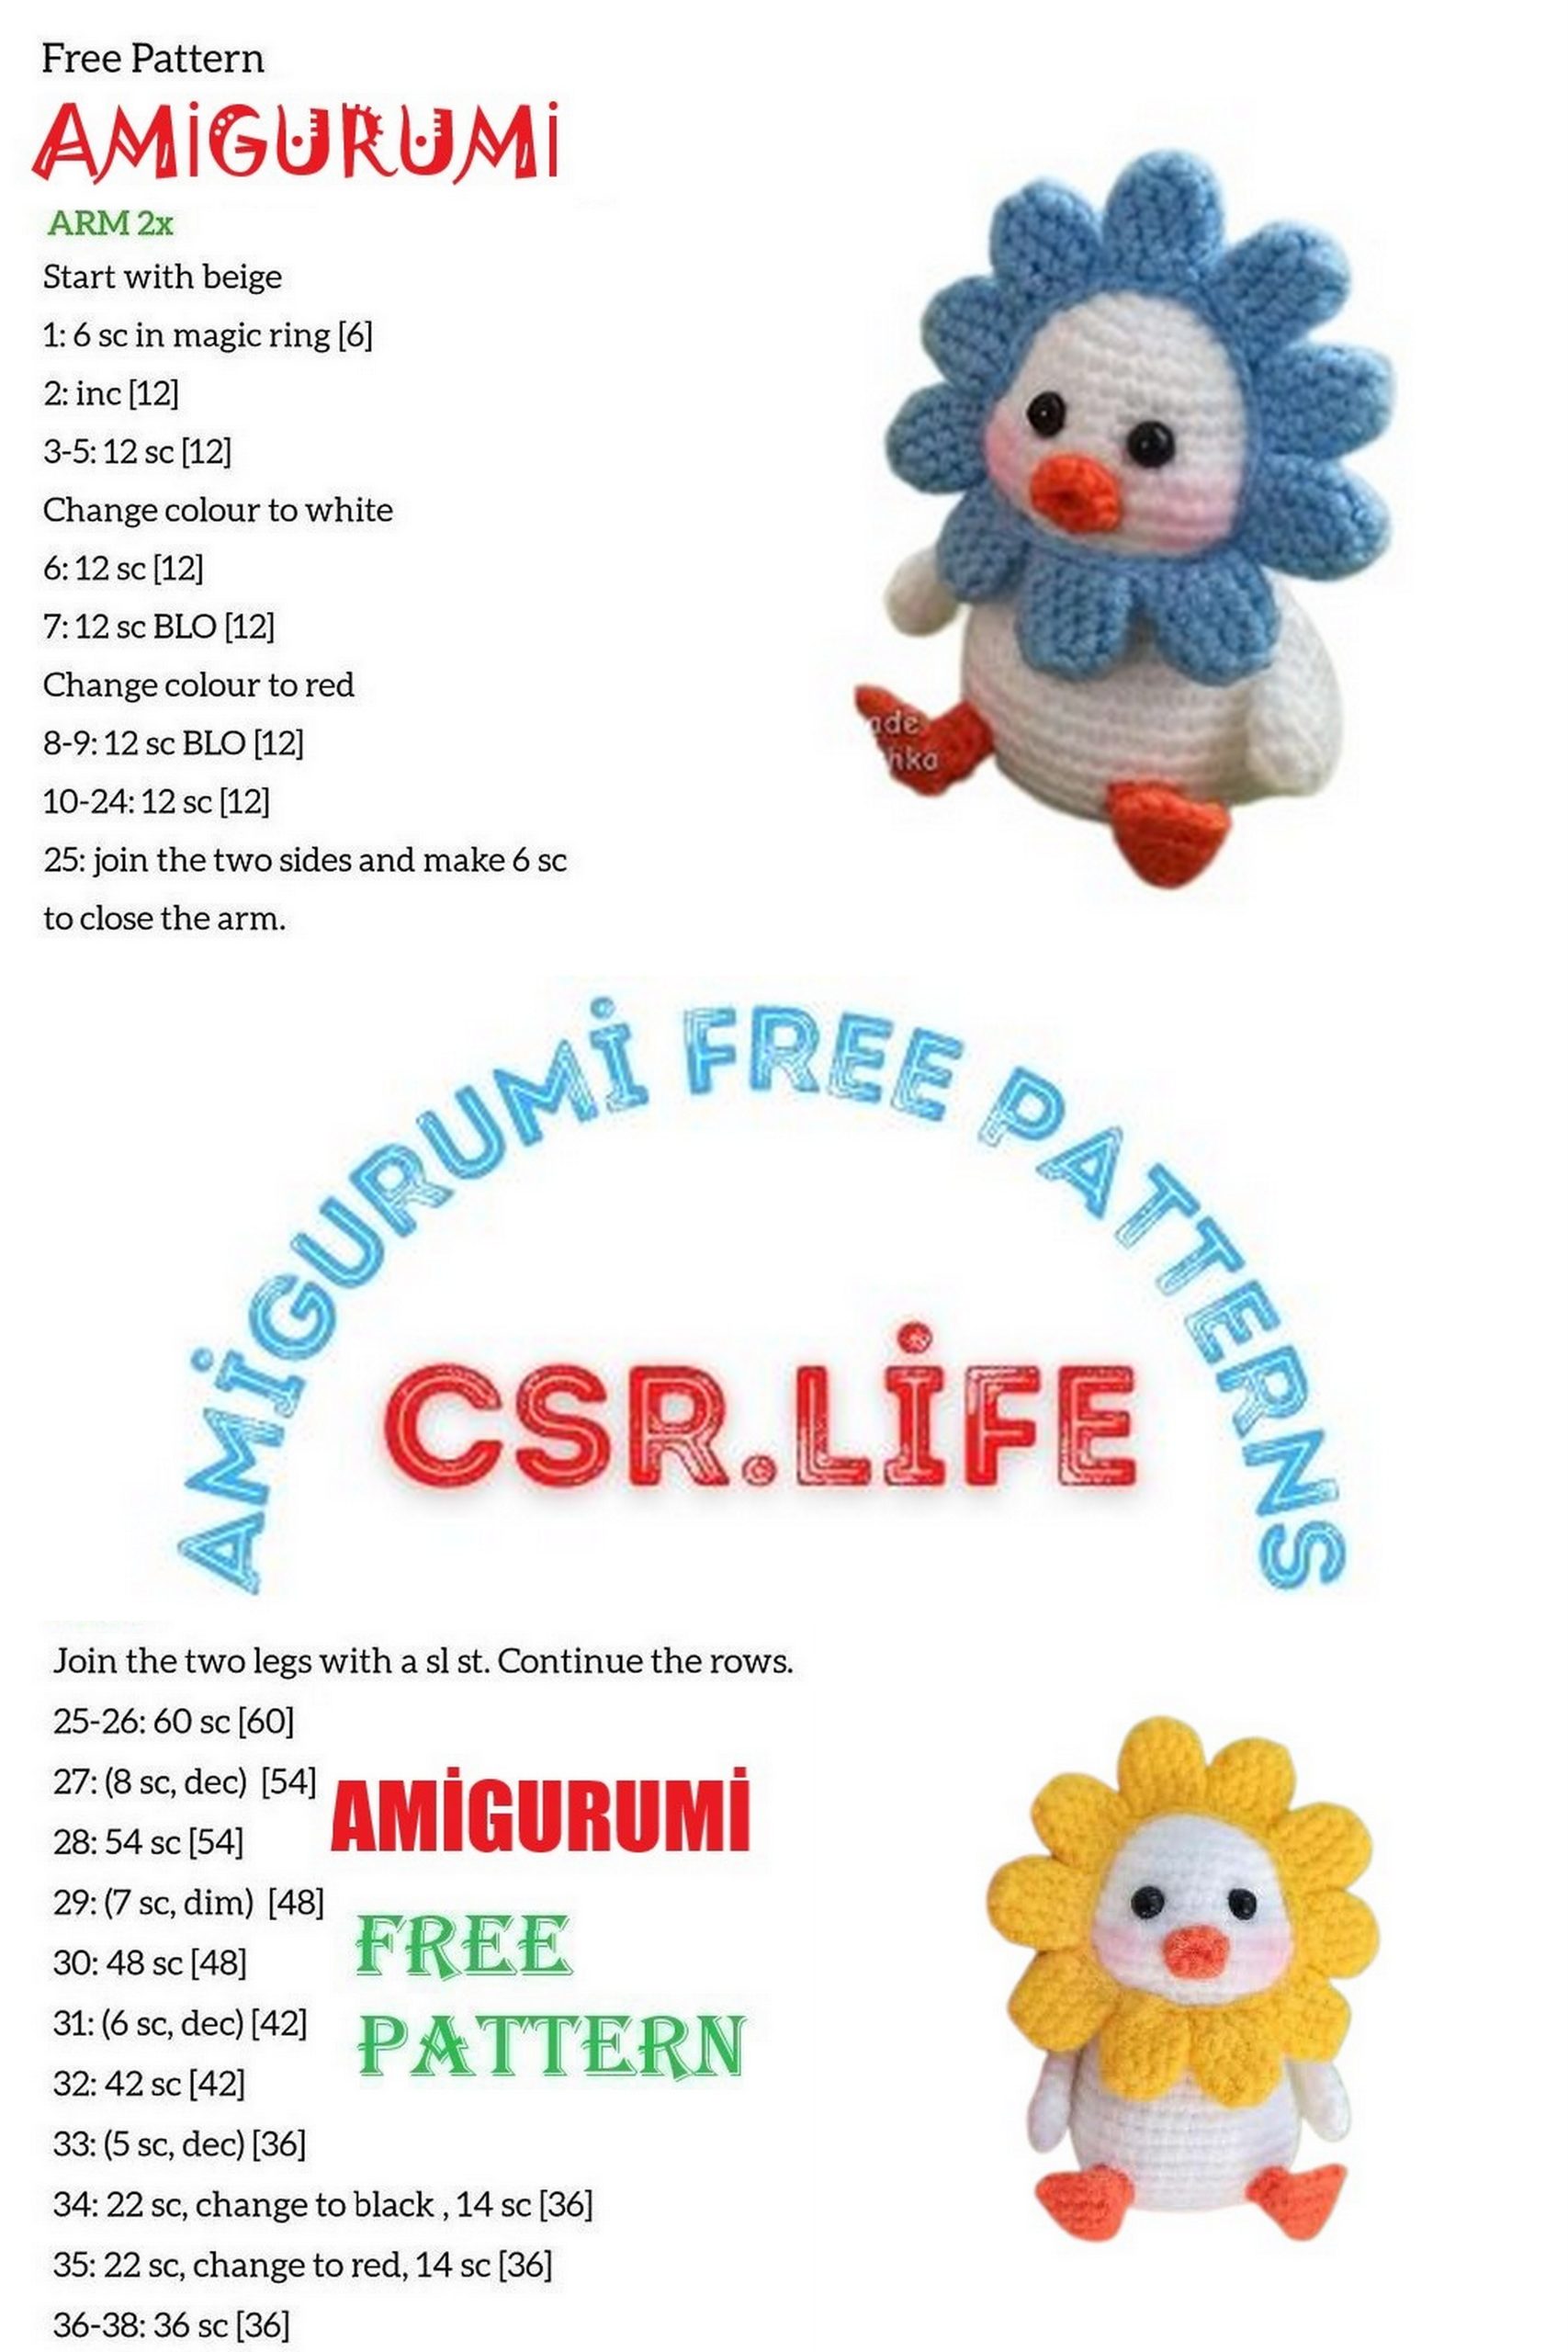
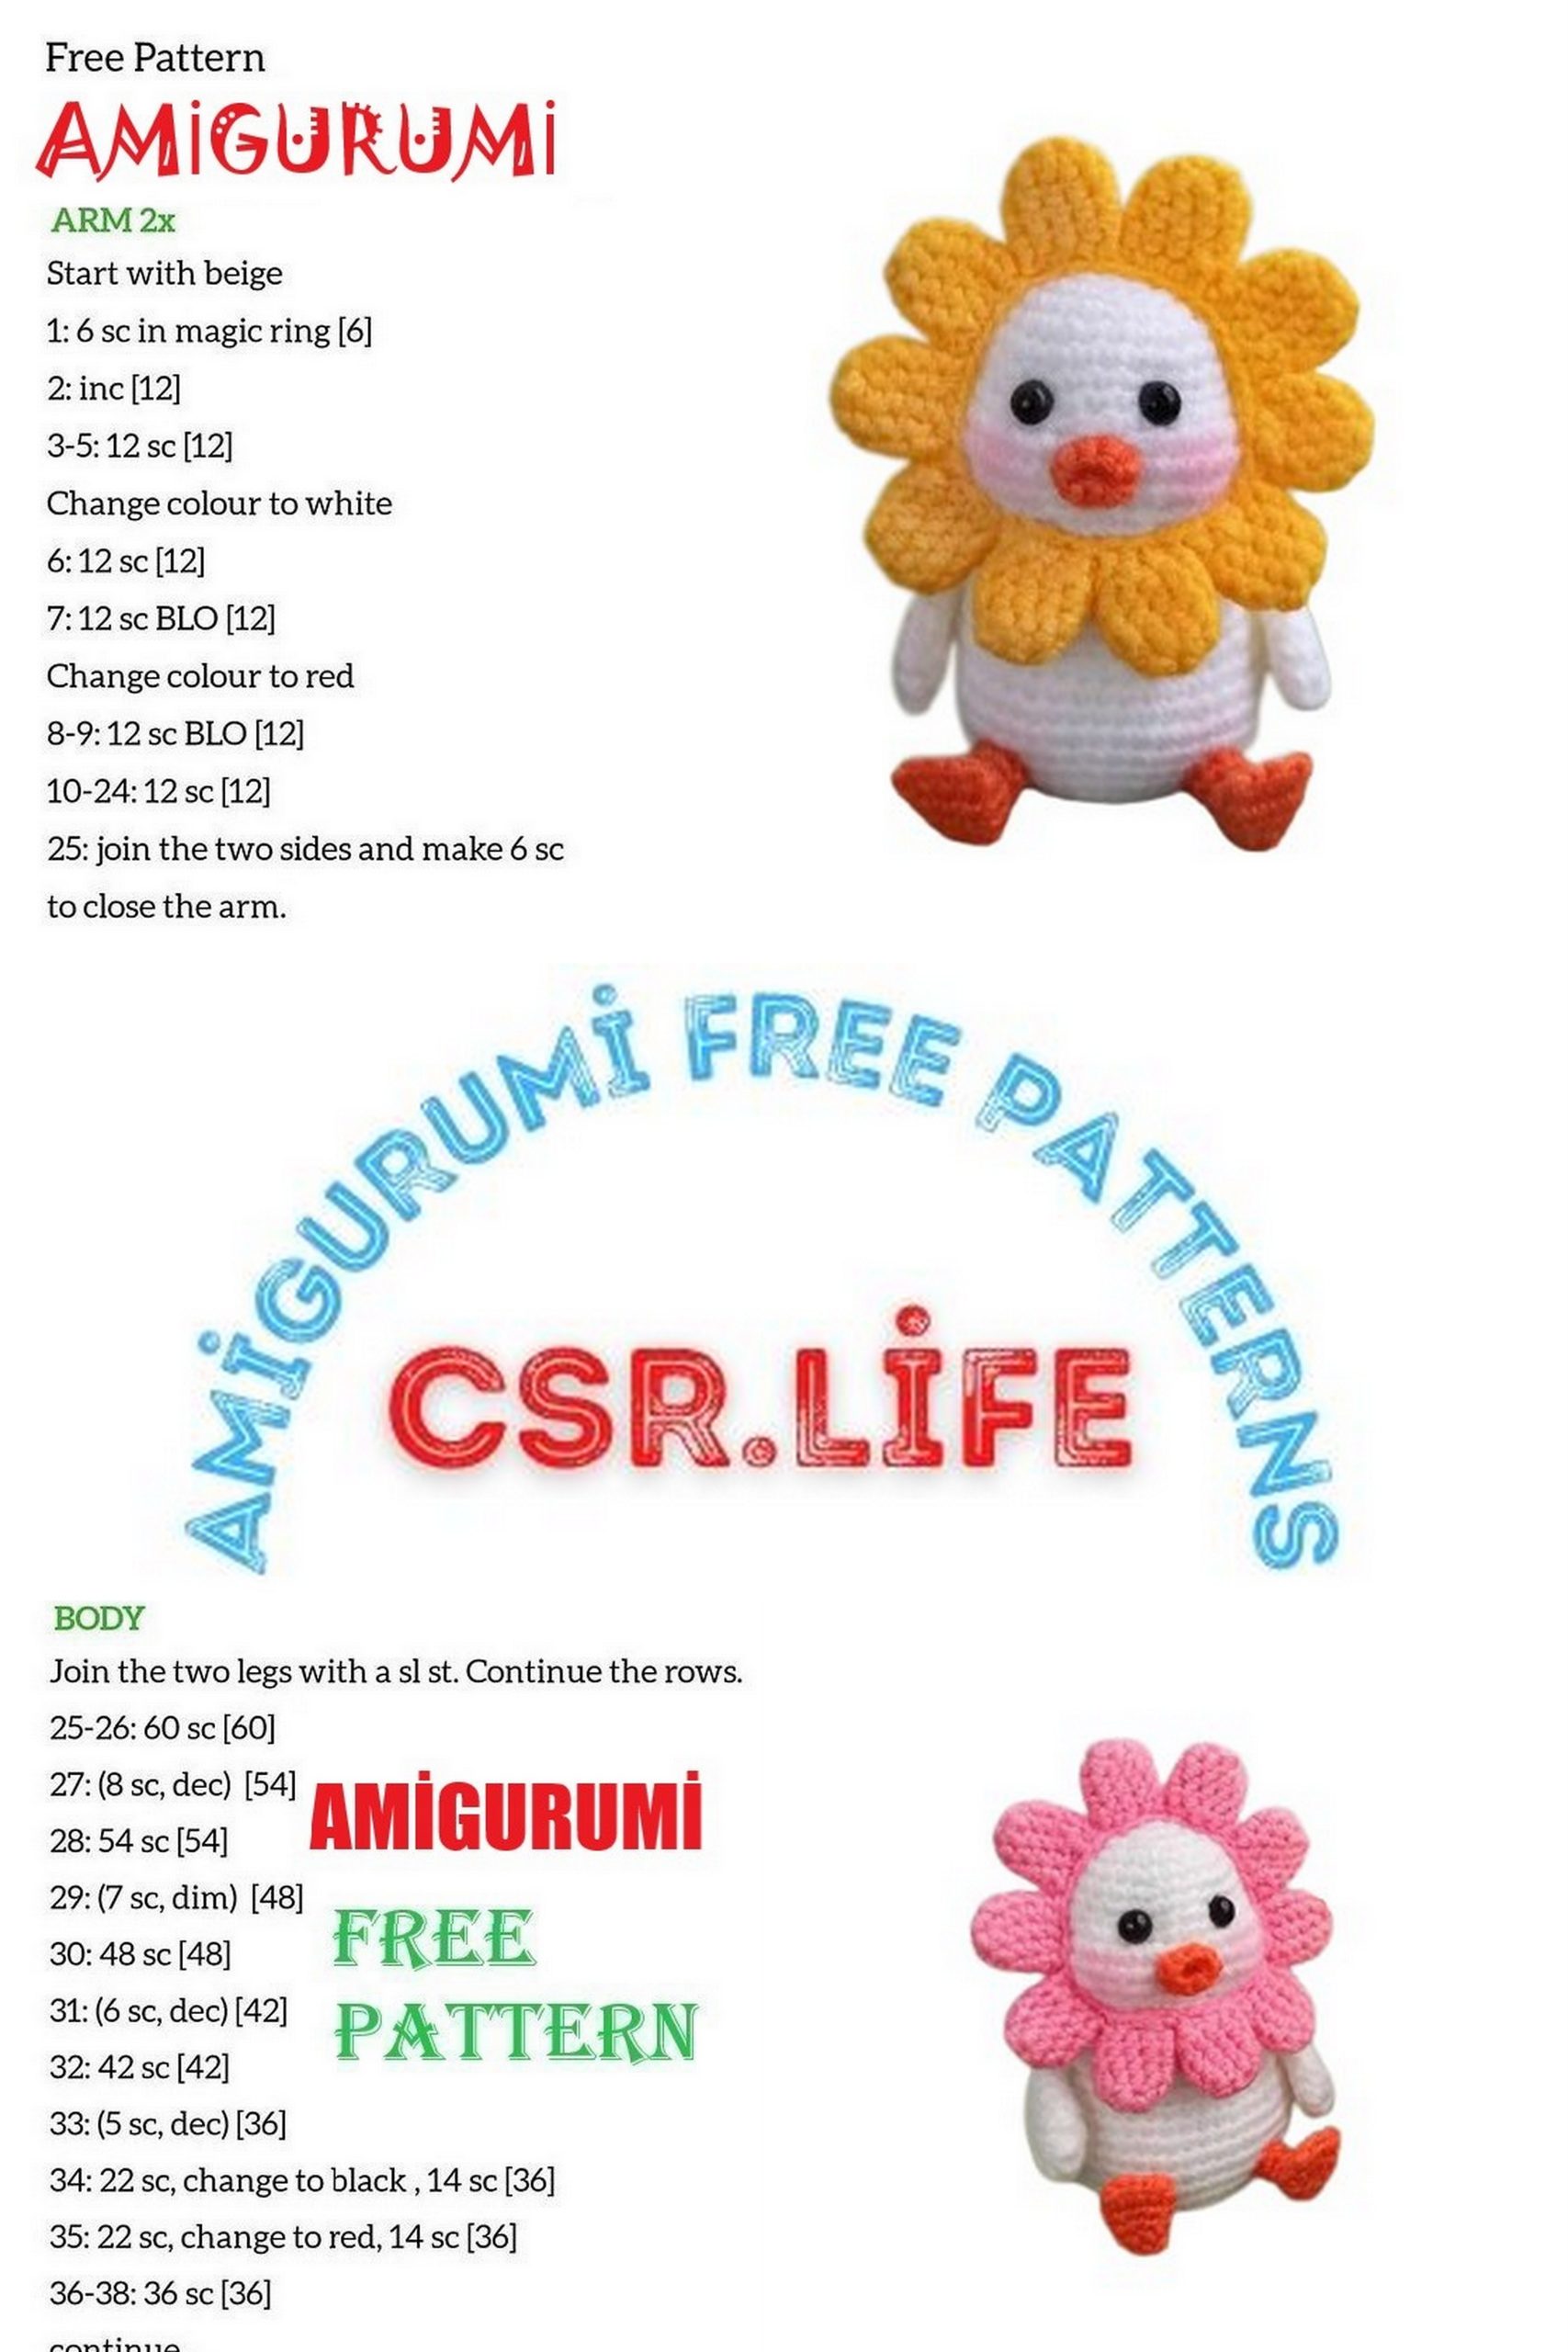
Head + Body
1st Row: Make a magic ring, crochet 6 single crochets (6 sc)
2nd Row: 6 increases (12)
3rd Row: (1 sc, inc) repeat 6 times (18)
4th Row: (2 sc, inc) repeat 6 times (24)
5th Row: (3 sc, inc) repeat 6 times (30)
6th to 8th Row: (30)
9th Row: 10 sc, 2 increases, 6 sc, 2 increases, 10 sc (34)
10th Row: 10 sc, (1 sc, inc) twice, inc, 4 sc, inc, (inc, 1 sc) twice, 10 sc (40)
11th and 12th Row: (40)
13th Row: 10 sc, (1 sc, dec) twice, dec, 4 sc, dec, (dec, 1 sc) twice, 10 sc (34)
14th Row: 10 sc, 2 decreases, 6 sc, 2 decreases, 10 sc (30)
15th Row: 7 sc, 16 sc in the back loops (we’ll attach a flower to the front loops), 7 sc (30)
16th to 18th Row: (30)
19th Row: (4 sc, inc) repeat 6 times (36)
20th Row: (36)
21st Row: (5 sc, inc) repeat 6 times (42)
22nd Row: (42)
23rd Row: (6 sc, inc) repeat 6 times (48)
24th to 27th Row: (48)
28th Row: (4 sc, dec) repeat 8 times (40)
29th Row: (3 sc, dec) repeat 8 times (32)
Stuff the body firmly, paying special attention to the cheeks. Insert a plastic circle with a diameter of 30mm into the body.
30th Row: (2 sc, dec) repeat 8 times (24)
31st Row: (1 sc, dec) repeat 8 times (16)
32nd Row: 8 decreases (8)
Cut the yarn and hide the end.
Attach the eyes between the 8th and 9th rows, with a 4-stitch gap. Create a small indentation for the eyes.
Beak
1st Row: Make a magic ring, crochet 6 single crochets (6 sc)
2nd Row: 3 increases, 3 sc (9)
Cut the yarn and hide all the ends. Turn it inside out and shape the beak. Attach it between the cheeks.
Legs (Make 2)
1st Row: Make a magic ring, crochet 6 single crochets (6 sc)
2nd Row: (1 sc, inc) repeat 3 times (9)
3rd and 4th Row: (9)
5th Row: Join the edges and crochet 5 single crochets.
Cut the yarn and hide the end. This creates the lower part of the leg.
Next, crochet the upper part. On the leg, make 6 single crochets in a circle. Crochet for 3 rounds with 6 single crochets each. You can add some stuffing. Finish the legs, leaving a long thread to attach them to the body.
Wings (Make 2)
1st Row: Make a magic ring, crochet 6 single crochets (6 sc)
2nd Row: 6 increases (12)
3rd to 7th Row: (12)
8th Row: Join the edges and crochet 6 single crochets.
Leave a thread for sewing and attach the wings below the 17th row.
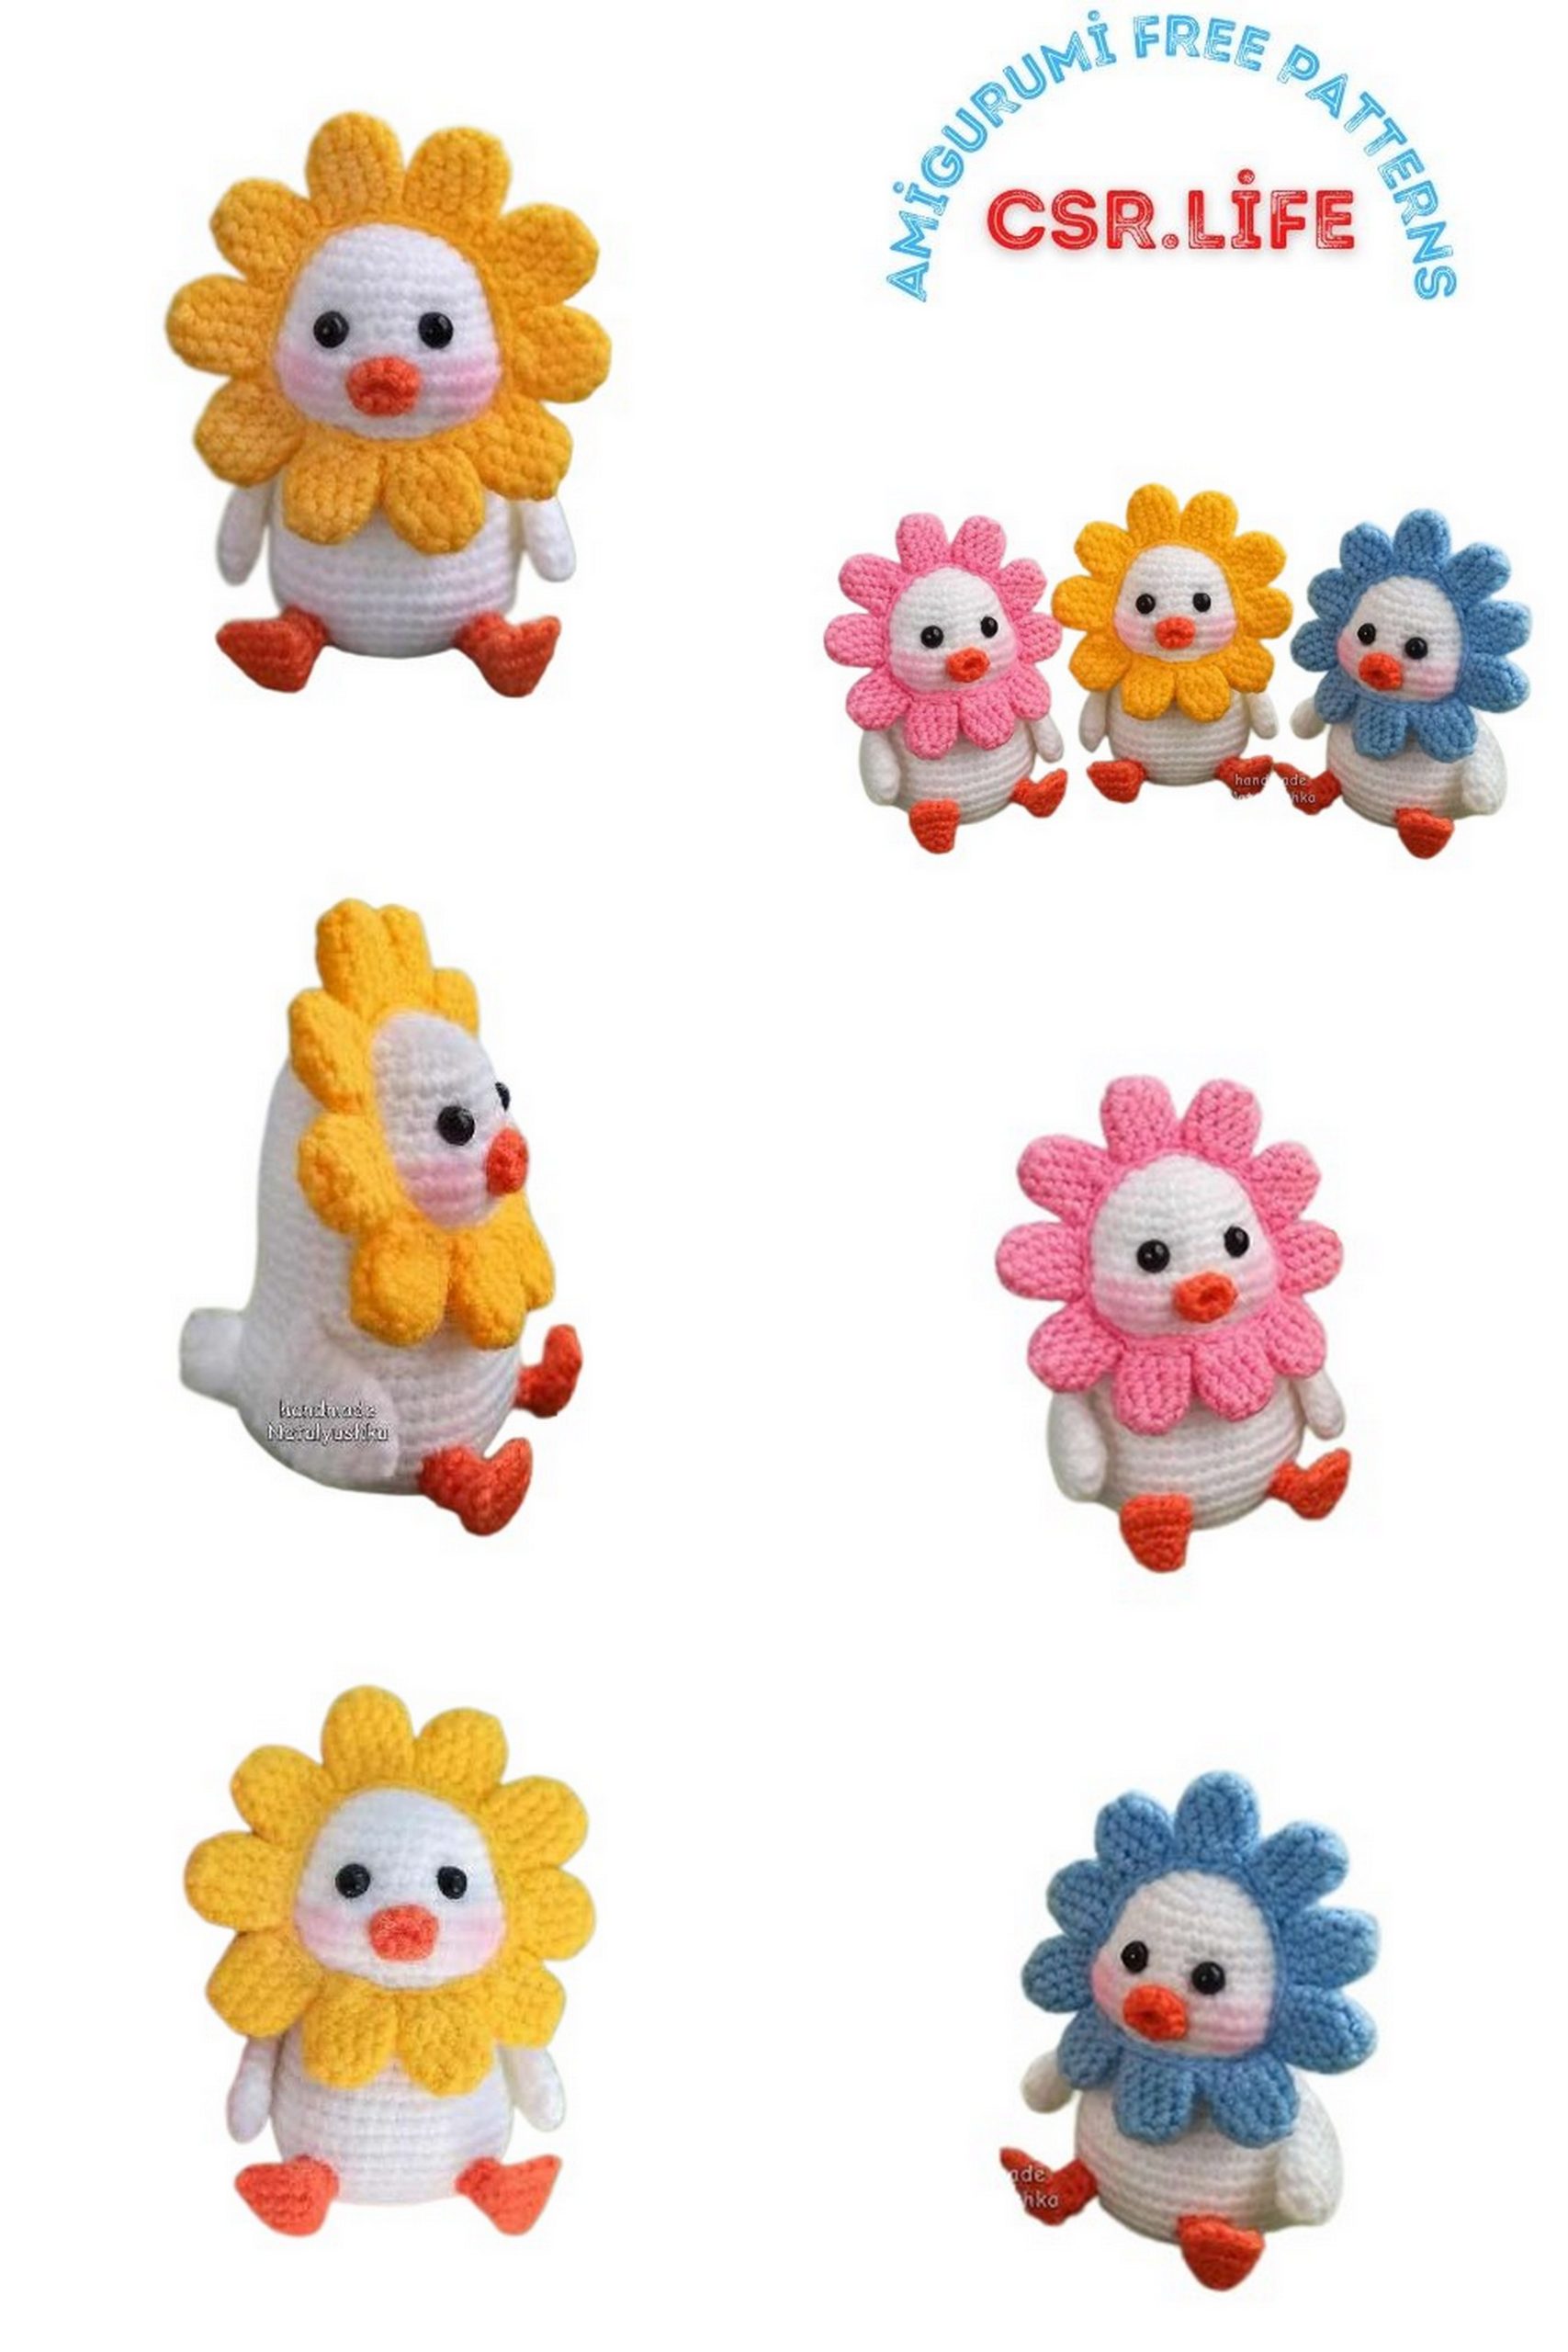
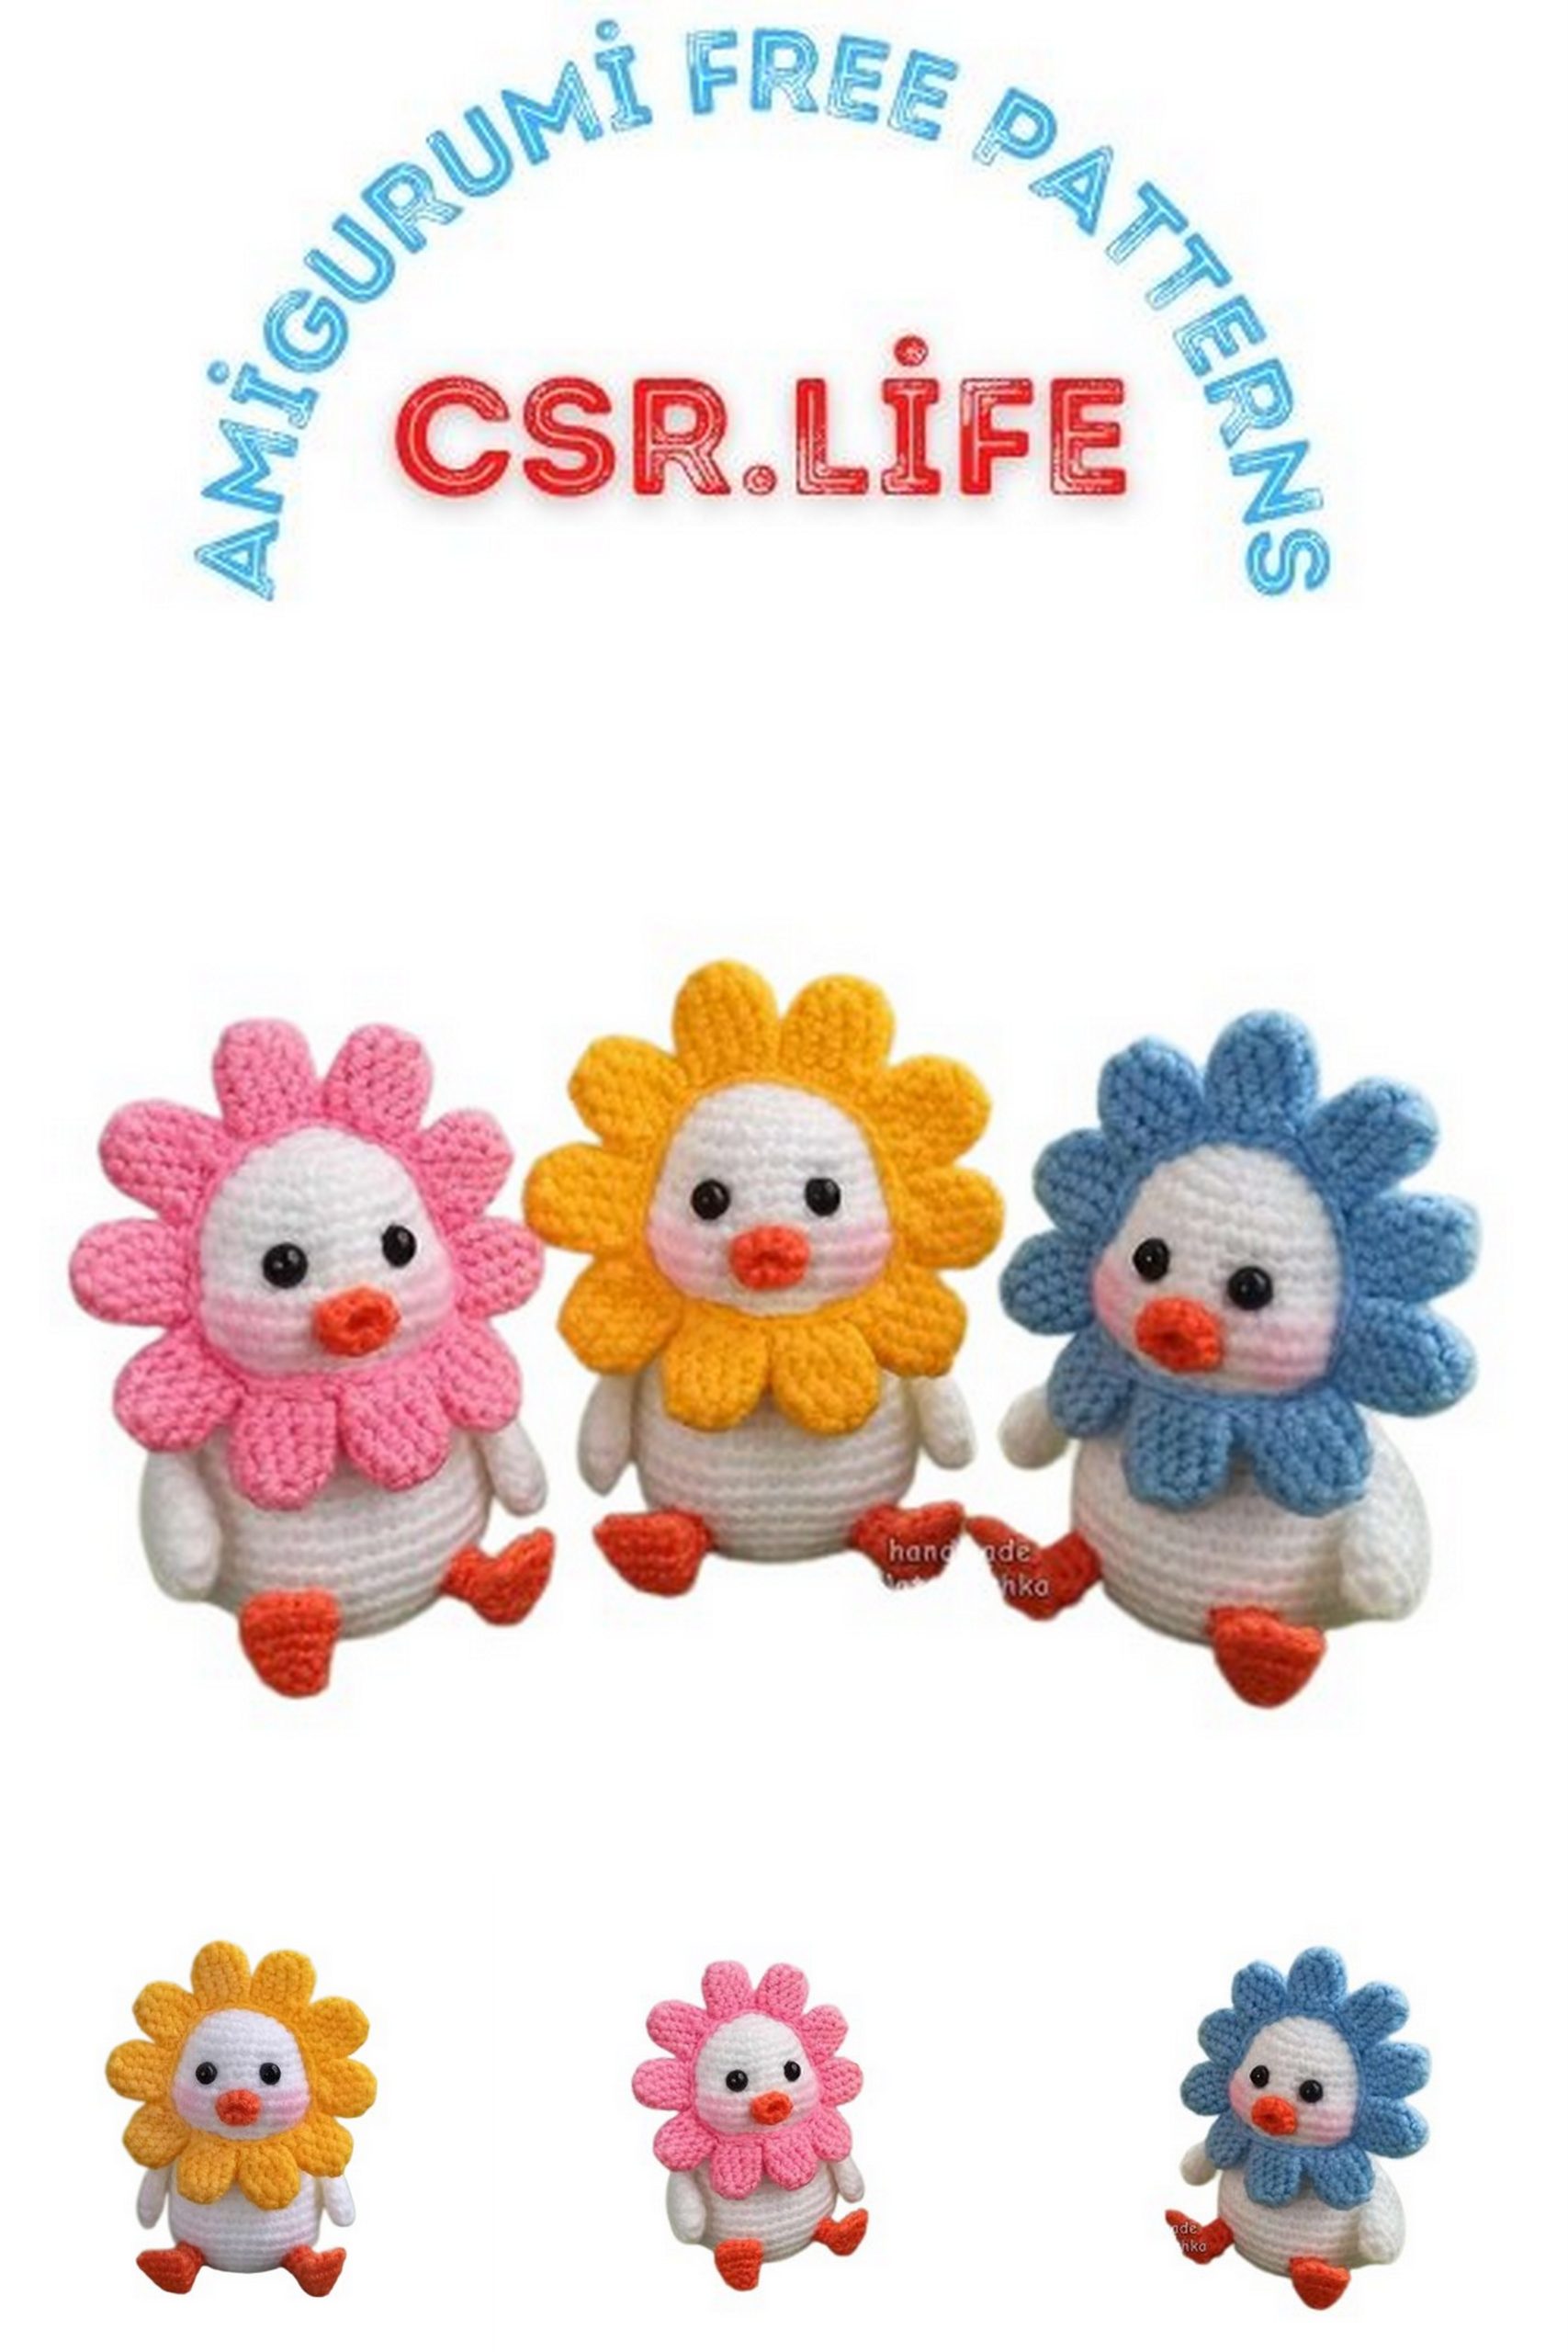
Petals (Make 10)
You can either crochet the petals with the wrong side facing out from the beginning or crochet them with the right side facing out and then turn them inside out after the 5th row.
1st Row: Make a magic ring, crochet 5 single crochets (5 sc)
2nd Row: 5 increases (10)
3rd to 5th Row: (10)
6th Row: 1 decrease, slip stitch.
Cut the yarn and hide the ends on all the petals except the last one. Do not cut the thread on the 10th petal; instead, begin connecting all the other petals together with single crochets, using both sides of the petal. Crochet 4 single crochets on each petal. Then, join the petals in a circle with a slip stitch.
Leave a long thread for sewing and attach the flower: below the 15th row from the bottom, in the center of the head, and on the sides near the cheeks.
Tail
Cut 10 pieces of white yarn, each approximately 5 cm long. Take 2 pieces, fold them in half, and attach them to the body using the loops. Attach all the pieces in two rows. In the bottom row, you’ll have 6 pieces, and in the top row, you’ll have 4 pieces. Trim the yarn to the desired length and fluff the tail using a needle.
Your Duck Amigurumi is ready! 😊
Feel free to reach out if you have any questions.