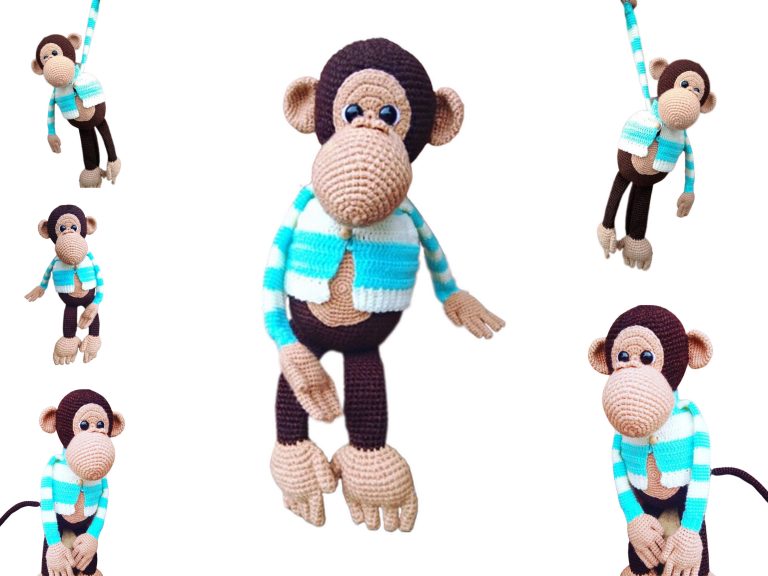
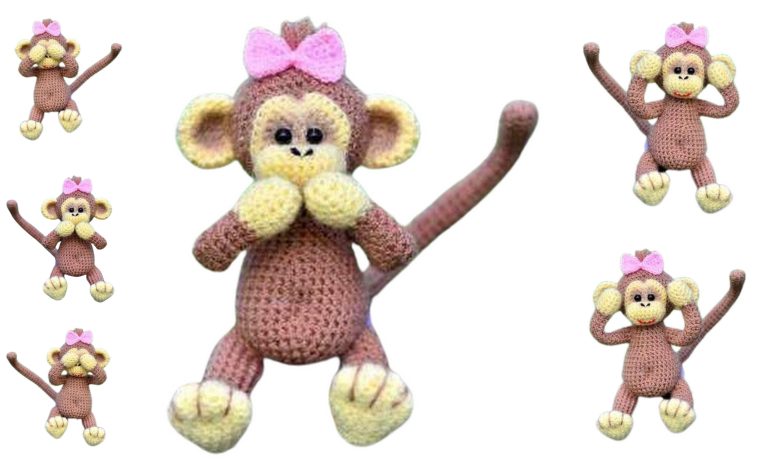
Monkey Anita Amigurumi – Free Crochet Pattern
The Monkey Anita Amigurumi is a cute and playful crochet doll featuring charming details, long limbs, and a lovely handmade outfit. This free crochet pattern is designed for intermediate crocheters and includes step-by-step instructions for creating the monkey’s body, arms, legs, tail, face, and dress. With its expressive look and customizable colors, Monkey Anita makes a perfect handmade gift, decorative doll, or collectible amigurumi character.
Materials
- Yarn:
- Detskaya Novinka (Children’s Novelty) yarn, orange – a little less than one skein
- Beige yarn – a small amount for hands and muzzle
- Pekhorka Handicraft yarn – any main color and any additional color for the dress
- Crochet hook: 1.5 mm
- Stuffing
- Eyes: 8 mm safety eyes or black, white, and green embroidery floss
- Acrylic fabric paints (for eye details, optional)
Abbreviations
- sc – single crochet
- MR – magic ring
- ch – chain
- ch-turn – turning chain
- inc – increase
- dec – decrease
- Puff stitch – 3 half double crochets in one stitch, crocheted together as one stitch
- BLO / FLO – back loop only / front loop only
Important Notes
- Copying, translating, and distributing this pattern is prohibited.
- Finished toys made using this pattern may be used at your discretion.
- When publishing finished works, please credit the author.
- The toy is crocheted in one piece (legs, body, arms, head).
Only the muzzle and ears are sewn on separately.

Arms
Start with beige yarn.
Fingers (Make 4)
1: 5 sc in MR
2–3: sc in all stitches
Do not cut the yarn on the last finger.
Palm Joining
4:
Join the last finger to the second finger with sl st,
2 sc along the second finger,
join with sl st to the third finger,
5 sc along the third finger,
3 sc along the second finger,
3 sc along the first finger (15)
Place a marker.
5: 15 sc
(Marker stays on the left side when holding the palm with fingers facing away from you.)
Left Arm
6: 1 sc, 3 sc together with finger, 11 sc (15)
7: 1 sc, 2 sc along the finger, 11 sc (14)
8: dec, 6 sc, dec, 4 sc (12)
9: Change yarn to orange
dec, 4 sc, dec, 4 sc (10)
10–13: 10 sc
14: 2 sc, 3 inc (center of the palm), 1 sc, 2 dec (11)
15: 9 sc, dec (10)
16–18: 10 sc
Right Arm
Marker remains on the left side.
6: 5 sc, sc together with finger, 7 sc (15)
7: 5 sc, 2 sc along the finger, 7 sc (14)
8: dec, 6 sc, dec, 4 sc (12)
9: Change yarn to orange
dec, 4 sc, dec, 4 sc (10)
10–13: 10 sc
14: 2 sc, 3 inc (center of the palm), 1 sc, 2 dec (11)
15: 9 sc, dec (10)
16–18: 10 sc
Tail
1: 6 sc in MR
2–18: sc in all 6 stitches
Legs
Toes (Make 6)
1: 6 sc in MR
2: sc in all 6 stitches
Foot Assembly (Join 3 Toes)
3:
Join first toe to second with sl st,
3 sc,
join to third toe,
6 sc,
3 sc along second toe,
3 sc along first toe (18)
Place a marker.
4–6: 18 sc
7: 1 sc, ch 6, skip 6 sc, 11 sc (18)
8: 18 sc
9: 9 dec
10: 5 dec
Attach orange yarn on the right side:
6 sc along the back part,
6 sc along the front part (12)
12–13: 12 sc
14: 2 dec, 2 sc, 3 inc, 3 sc (13)
15: 13 sc
16: dec, 4 sc, 2 inc, 5 sc (14)
17: inc, 4 sc, 3 dec, 3 sc (12)
18–20: 12 sc
Joining Legs & Body
21:
Crochet the second leg, do not fasten off.
Ch 2, join with sl st to the first leg.
Marker in front.
12 sc on first leg,
2 sc on chains,
12 sc on second leg,
2 sc on chains (28)
22: 5 sc, inc, 13 sc, inc, 8 sc (30)
23–24: 30 sc
25: (4 sc, inc) × 6 (36)
Tail Attachment
26: 16 sc, 3 sc together with lower tail row, 17 sc (36)
27: 16 sc, 3 sc together with upper tail row, 17 sc (36)
28–30: 36 sc
Body & Head
31: (4 sc, dec) × 6 (30)
32–33: 30 sc
34: Attach arms – arms slightly forward on the sides:
7 sc, 3 sc together with arm, 14 sc, 3 sc together with arm, 3 sc (30)
35: 7 sc, 7 sc along arm, 14 sc, 7 sc along arm, 3 sc (38)
36: 8 sc, 3 dec, 16 sc, 3 dec, 2 sc (32)
37: 2 sc, dec, 3 sc, dec, 16 sc, dec, 3 sc, dec (28)
38: 4 sc, 2 dec, 13 sc, 2 dec, 3 sc (24)
39: (2 sc, dec) × 6 (18)
40: 18 sc
41: inc × 18 (36)
42: (5 sc, inc) × 6 (42)
43: (6 sc, inc) × 6 (48)
44: (7 sc, inc) × 6 (54)
45–53: 54 sc
54: (7 sc, dec) × 6 (48)
55: 48 sc
56: (6 sc, dec) × 6 (42)
57: 42 sc
58: (5 sc, dec) × 6 (36)
59: (4 sc, dec) × 6 (30)
60: (3 sc, dec) × 6 (24)
61: (2 sc, dec) × 6 (18)
62: (1 sc, dec) × 6 (12)
63: 6 dec
Ears (4 Pieces)
Make 2 beige + 2 orange.
1: 6 sc in MR
Turn, ch-turn
2: inc, 4 sc, inc
Join one beige and one orange piece and crochet around the edge.
Muzzle
1: Ch 7, from 2nd ch: inc, 4 sc, 4 sc in last ch, 4 sc, inc (16)
2: 2 inc, 5 sc, 3 inc, 5 sc, inc (22)
3–4: 22 sc
Dress
Worked in rows. Use Pekhorka Handicraft yarn, hook 1.5 mm.
⚠️ Using different yarn or hook size may cause the dress not to fit.
1: Ch 40, skip 8 ch, from 9th ch crochet 32 sc
2: (3 dc, inc dc) × 8 (40)
3: (4 dc, inc dc) × 8 (48)
4: Create armholes:
10 sc, ch 6, skip 8 st, 12 sc, ch 6, skip 8 st, 10 sc
5: 10 dc, 6 dc along chains, 12 dc, 6 dc along chains, 10 dc (44)
6: 44 dc
7: Ch 8 (button loop), from 9th st crochet 44 dc
8: BLO, 44 dc
9: inc dc in every stitch, join both halves with sl st
10: inc puff stitch in every stitch
11–13: puff stitch
Second Layer
Return to Round 8, attach another color:
8: 44 sc
9: inc hdc in every stitch
10: hdc
11: hdc
Assembly & Decoration
- Sew the muzzle between Rounds 16–19 (count from top)
- Place or embroider eyes between Rounds 11–15
- Sew ears between Rounds 13–18
- Shape the muzzle by pulling thread from bottom center to the middle of Round 2
- Paint eyes with acrylic fabric paint
- Add eyelashes and highlights after paint dries
- Make a hair tuft on the head using short strands
- Dress the doll
🎉 Monkey Anfiska is Finished!