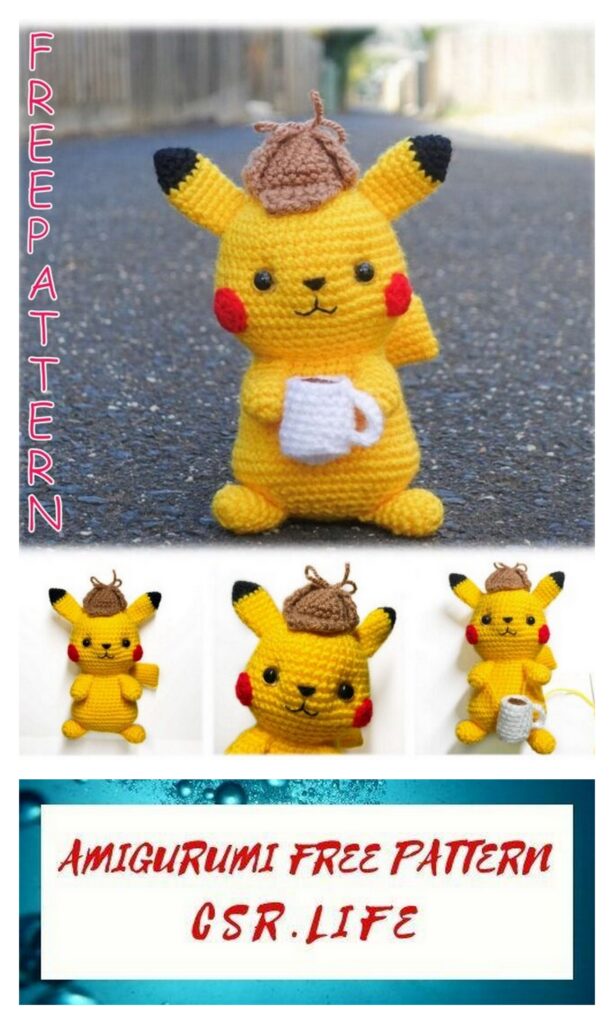
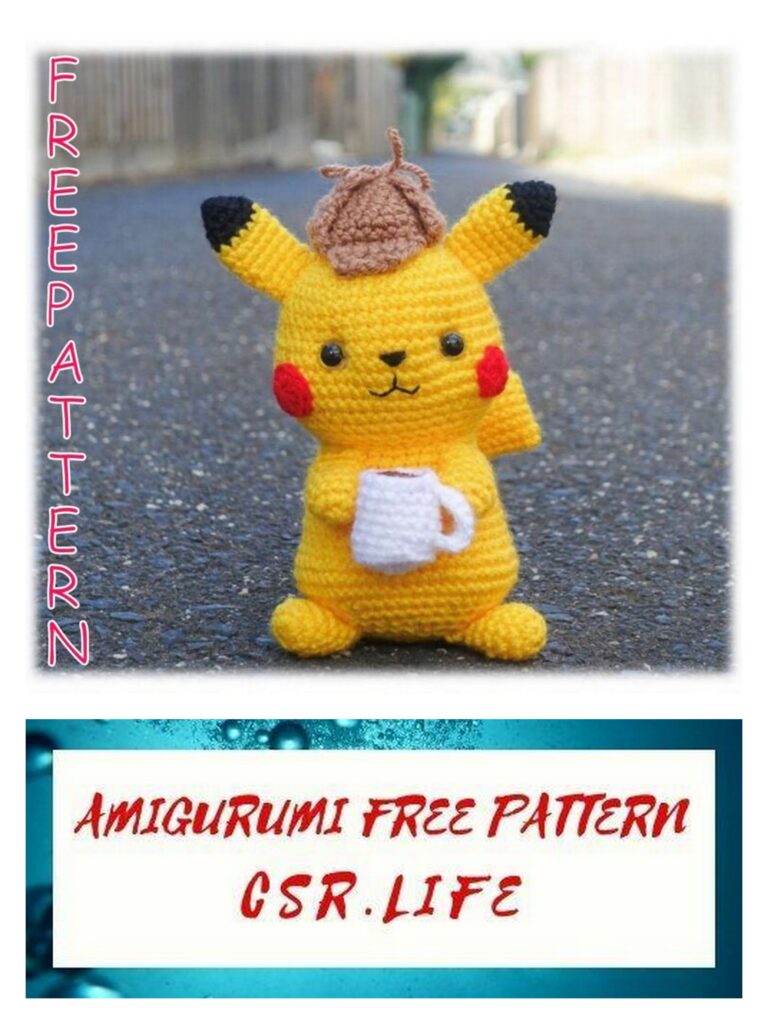
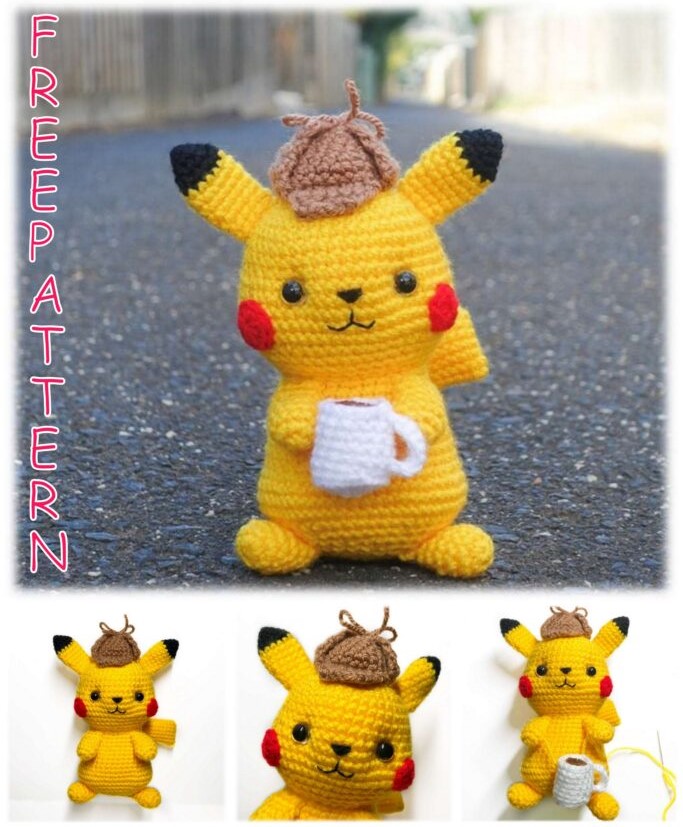
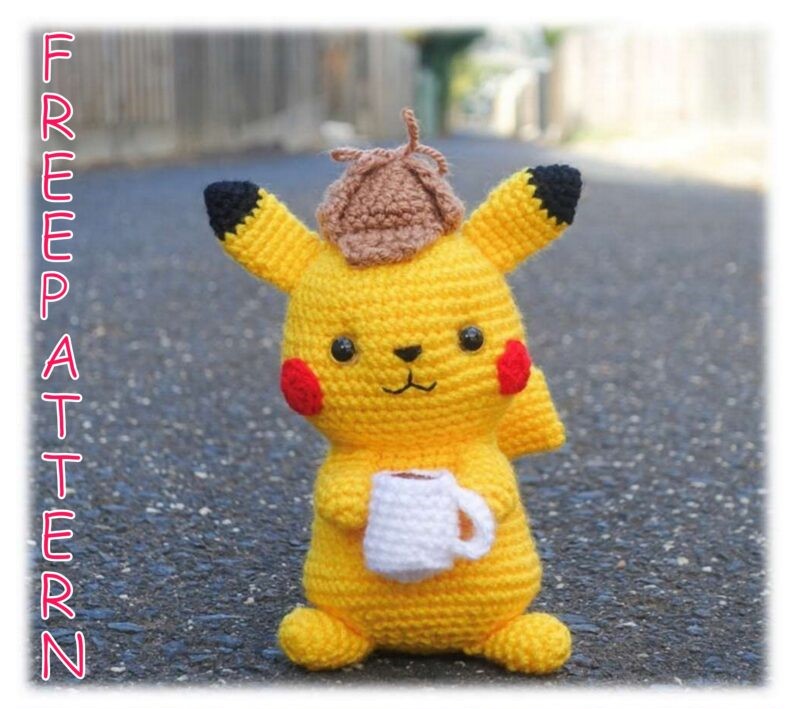
Pikachu Amigurumi Free Crochet Pattern
We are working to deliver amigurumi free patterns to you every day. In this content, we shared the amigurumi pikachu pattern for you. Legendary cartoon pokemon’s favorite character, Pikachu yu, you can easily do it thanks to the free pattern we shared with you as an amigurumi toy.
Materials:
3mm hook
Aran weight yarn (Paintbox Simply Aran)
o Buttercup Yellow 222, Pure Black 201,
Paper White 200, Coffee Bean 210, Soft
Fudge 209, Rose Red 213
12mm safety eyes
Black Embroidery Thread
Stuffing
Yarn needle
Stitch marker
Abbreviations:
ch – chain
sc – single crochet
hdc – half double crochet
st/sts – stitch/stitches
sl st – slip stitch
inc – increase
dec – invisible decrease
BLO – back loops only
FO – fasten off (sl st to the next st)
SP – spike stitch
An elongated single crochet. In this pattern, you will work a single crochet into the stitch just below the new row (so one row below
The pattern is written in English using US crochet terminology and is worked in continuous rounds unless otherwise stated. Instructions are easy to follow if you are familiar with basic crochet techniques.
The size of the Pokémon is approximately 6in from head to bottom. It may vary though depending on the kind of yarn and hook size used.
Gauge is not important if the stitches are tight enough to hold the filling.
You can also use any color of your choice.
Feel free to add more accessories to your very own Pokémon. Imagination is your limit.
So, go ahead and start your magical craft. Don’t forget to enjoy.

PATTERN

Head
Using yellow yarn
1 6 sc in magic circle 6
2 inc around 12
3 (inc, sc) around 18
4 (inc, 2 sc) around 24
5 (inc, 3 sc) around 30
6 (inc, 4 sc) around 36
7 (inc, 5 sc) around 42
8-12 sc around 5 rounds 42
13 mark the beginning 11 sc, 6 inc, 8 sc, 6 inc, 11 sc 54
14-17 sc around 4 rounds 54
18 12 sc, 6 dec, 8 sc, 6 dec, 10 sc 42
19 sc around 42
20 (dec, 5 sc) around 36
21 (dec, 4 sc) around 30
22 (dec, 3 sc) around 24
Do not FO as we are going to continue working on the body later.
Place safety eyes between R13-14 with 10 sts apart. Hold the head upside down. Count 21 sts from the beginning of R13, insert safety eyes between sts 21-22 for left eye and sts 31-32 for right eye.
Stuff the head firmly. Add some more on the sides where the highlighted increases were made for chubby cheeks on R13.
Continue working on the body.
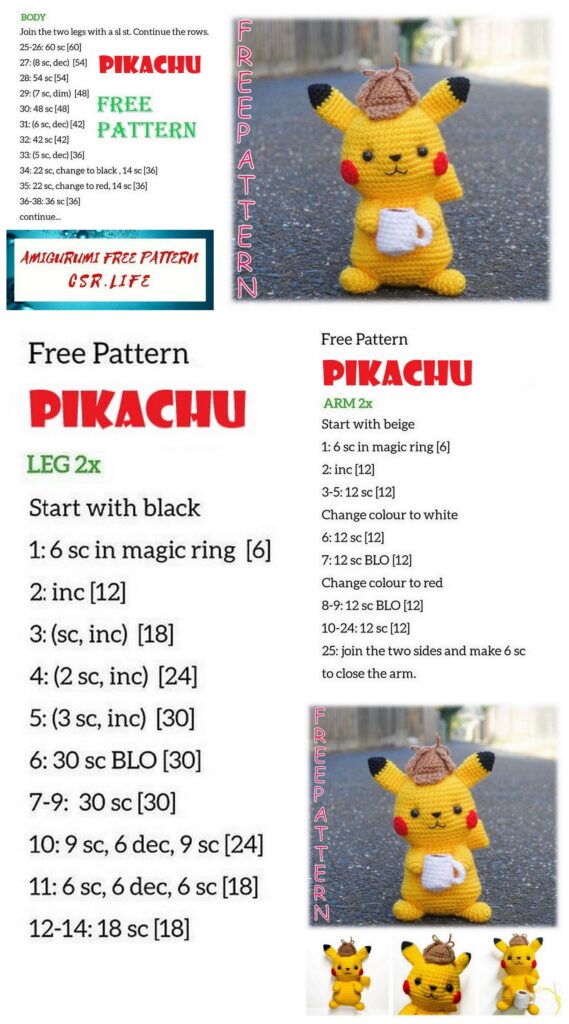
Body
Using yellow yarn
Using black yarn
*be mindful of switching colors to achieve the stripes at the back
1 (inc, sc) around 36
2-3 sc around 2 rounds 36
4 (inc, 5 sc) around 42
5 40 sc, 2 sc 42
6 7 sc, 33 sc, 2 sc 42
7 7 sc, 35 sc 42
8 sc around 42
9 40 sc, 2 sc 42
10 7 sc, 8 sc, 6 inc, 8 sc, 6 inc, 5 sc, 2 sc 54
11 7 sc, 9 sc, 3(3 sc, inc), 8 sc, 3(inc, 3 sc), 6 sc 60
12-13 sc around 2 rounds 60
14 19 sc, 6 dec, 8 sc, 6 dec, 9 sc 48
15 (dec, 6 sc) around 42
16 (dec, 5 sc) around 36
Start putting stuffing inside the body.
Add extra stuffing on the highlighted increases on R10 and 11 for legs to make it more prominent.
You may want to add some more stuffing before finishing.
17 (dec, 4 sc) around 30
18 (dec, 3 sc) around 24
19 (dec, 2 sc) around 18
20 (dec, sc) around 12
21 dec around 6
FO, weave in ends.
Eye Indentations
To give Pikachu’s face more definition, we need to sculpt it by sewing.
Using the same yellow yarn in a needle, start by inserting the needle from anywhere in the head to the top inner side of right eye, bringing down about 2 sts below, then into the top inner side of left eye. Give it a pull to create indentation.
Bring the needle down about 2 sts below and into the top inner side of right eye again.
Pull as much as you can until you get the desired indentation. From there, insert the needle to
anywhere in the head and secure it with knots. FO.
Face Detail
Using black yarn, embroider a tiny inverted triangle nose between the eyes.
And using a black thread, embroider the mouth below the nose.
Refer to the diagram below for proper placement of the stitches.
Cheeks (2)
Using red yarn
1 8 hdc in magic circle 8
FO, leave a long tail for sewing.
Sew the cheeks on both sides of the face.
Ears (2)
Using black yarn
1 4 sc in magic circle 4
2 (inc, sc) around 6
3 (inc, sc) around 9
4 (inc, 2 sc) around 12
Switch to yellow yarn
5-8 sc around 4 rounds 12
9 (dec, 4 sc) around 10
10-11 sc around 2 rounds 10
FO, leave a long tail for sewing later.
Sew the ears on both sides of top of the head between R7-10
Arms (2)
Using yellow yarn
1 6 sc in magic circle 6
2 inc around 12
3-4 sc around 2 rounds 12
5 3 dec, 6 sc 9
6-7 sc around 2 rounds 9
FO, leave a long tail for sewing.
Stuff lightly.
Sew the arms in a slanted manner to both sides of the body between R1-3 with 6 sts apart. The arms should look like they are hugging the tummy.
Feet (2)
Using yellow yarn
1 6 sc in magic circle 6
2 inc around 12
3-5 sc around 3 rounds 12
6 (dec, 2 sc) around 9
7 sc around 9
FO, leave a long tail for sewing.
Stuff and sew the feet to the bottom on both sides of the body between R17-18 with 5 sts apart. The feet should be facing slightly outward at the front.
Tail
Using yellow yarn
*The tail is very tricky, but you will be guided through every part with lots of details.
*Due to the unique construction of the tail, some rows will be made in spiral and the others will be in the rounds.
Make a foundation ch of 16, start in 2nd ch from the hook,
1 14 sc, inc in the last ch, continue working on the other side of the foundation ch, 14 sc 30
2-6 sc around 5 rounds 30
7 23 sc, sc (mark this st), 6 sc 30
8 7 sc flip your work, insert your hook in the marked st and continue, 7 sc 14
9 14 sc 14
10a sc, make a foundation ch of 5, start in the 2nd ch from hook,
10b 4 sc,continue working on the front, 7 sc
11 mark the beginning, 7 sc, 4 sc at the back of the chs, turn and continue working on the other side, 11 sc 22
12-13 sc around 2 rounds 22
14 6 sc, sc (mark this st), 4 sc 22
15 mark the beginning, 5sc, flip your work, insert your hook in the marked st and continue, 5 sc 10
16-17 sc around 2 rounds 10
Switch to black yarn
18 5 (SP, sc) 10
19-20 sc around 2 rounds 10
FO, leave a long tail for sewing.
Stuff the tail very lightly. Close the openings by doing whip stitch to both sts using the same color of yarn.
Sew the tail to the bottom between R17-18 of the body.
Make sure it is in the middle of both feet.
To keep the tail upright, secure it with a stitch at the very back 2 rows above the top stripe.
Accessories
Hat
Using light brown yarn
Body:
1 6 sc in magic circle 6
2 (inc, sc) around 9
3 (inc, 2 sc) around 12
4 (inc, 3 sc) around 15
5 (inc, 4 sc) around 18
6 (inc, 2 sc) around 24
7a sc around 24
7b sl st N/A
Do not FO as we are going to continue making the first flap.
Flaps (2):
*Work in the rounds, ch 1 after turning.
1 6 sc, mark the next st, turn and ch 1 6
2-3 6 sc, turn and ch 1 2 rounds 6
4 dec, 2 sc, dec, turn and ch 1 4
5 4 sc, turn and ch 1 4
6 2 dec, turn and ch 1 2
7 2 sc, sl st 2
FO, leave about 15 cm of tail for the bow later.
Count 6 sts starting at the mark from R1 of flaps and insert your hook in the next st.
Repeat R1-7 to make the other flap.
FO, and leave the same length of tail.
Brim:
*Work in the rounds, ch 1 after turning.
The brim is made in between of both flaps and in the front loops only of body.
Insert your hook in the next st after R1 of right flap.
1-2 6 sc, turn and ch 1 6
3 dec, 2 sc, dec, sl st 4
FO, leave a long tail for sewing later.
Fold the flaps on the side of the body.
Insert both tail in between R1-2. Make a bow using these tails.
Stuff and sew the hat on top of the head in between both ears.
Coffee mug
Using white yarn
1 6 sc in magic circle 6
2 inc around 12
3 (inc, 3 sc) around 15
4 sc around in BLO 15
5-9 sc around 5 rounds 15
10 sl st around 15
Do not FO yet as we are going to make the handle.
Insert your hook below R9 on the side where the last st was made and try to grab the yarn from the inside. Make a ch of 4 and sl st to R5.
From there, make 6 sc around the chs and sl st to secure.
FO, leave a long tail for sewing later.
Make the coffee with 6 hdc in a magic circle using brown yarn.
FO, weave in ends.
Stuff the mug and use the tail from the mug to sew the coffee on top.
OPTIONAL:
To secure the coffee mug in both hands, run the needle with yellow yarn through the left hand to
the coffee to the right hand.