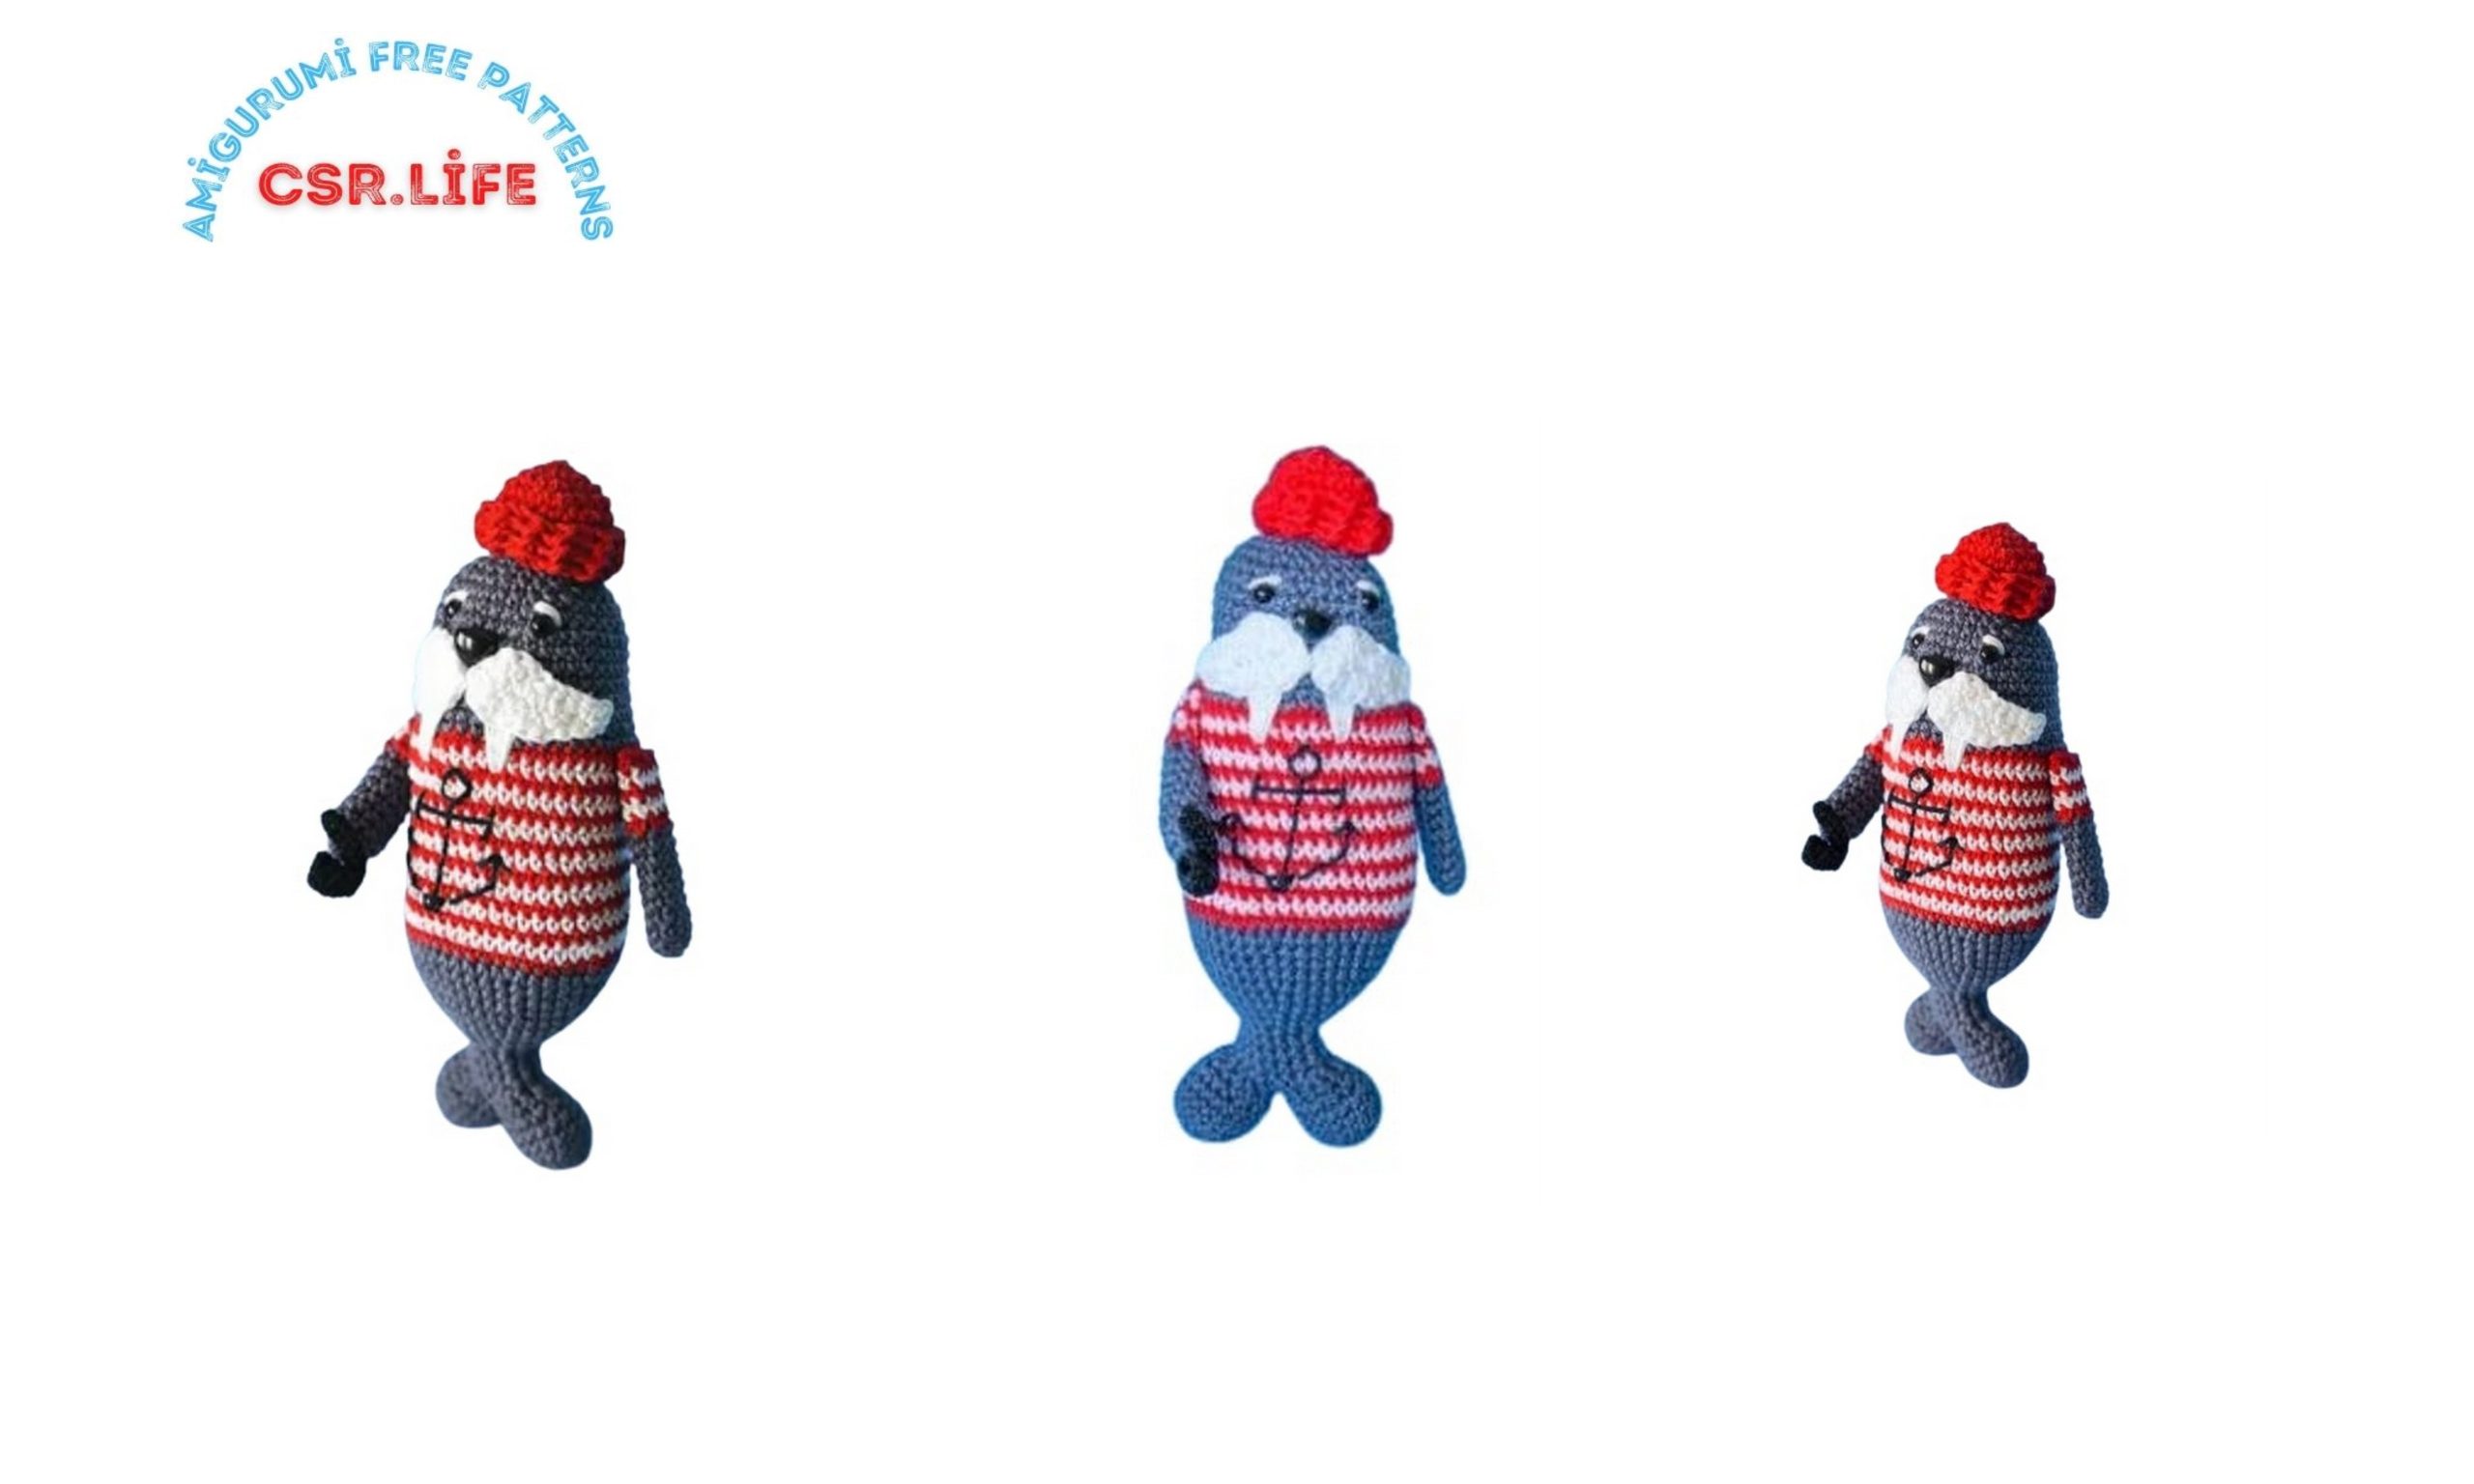
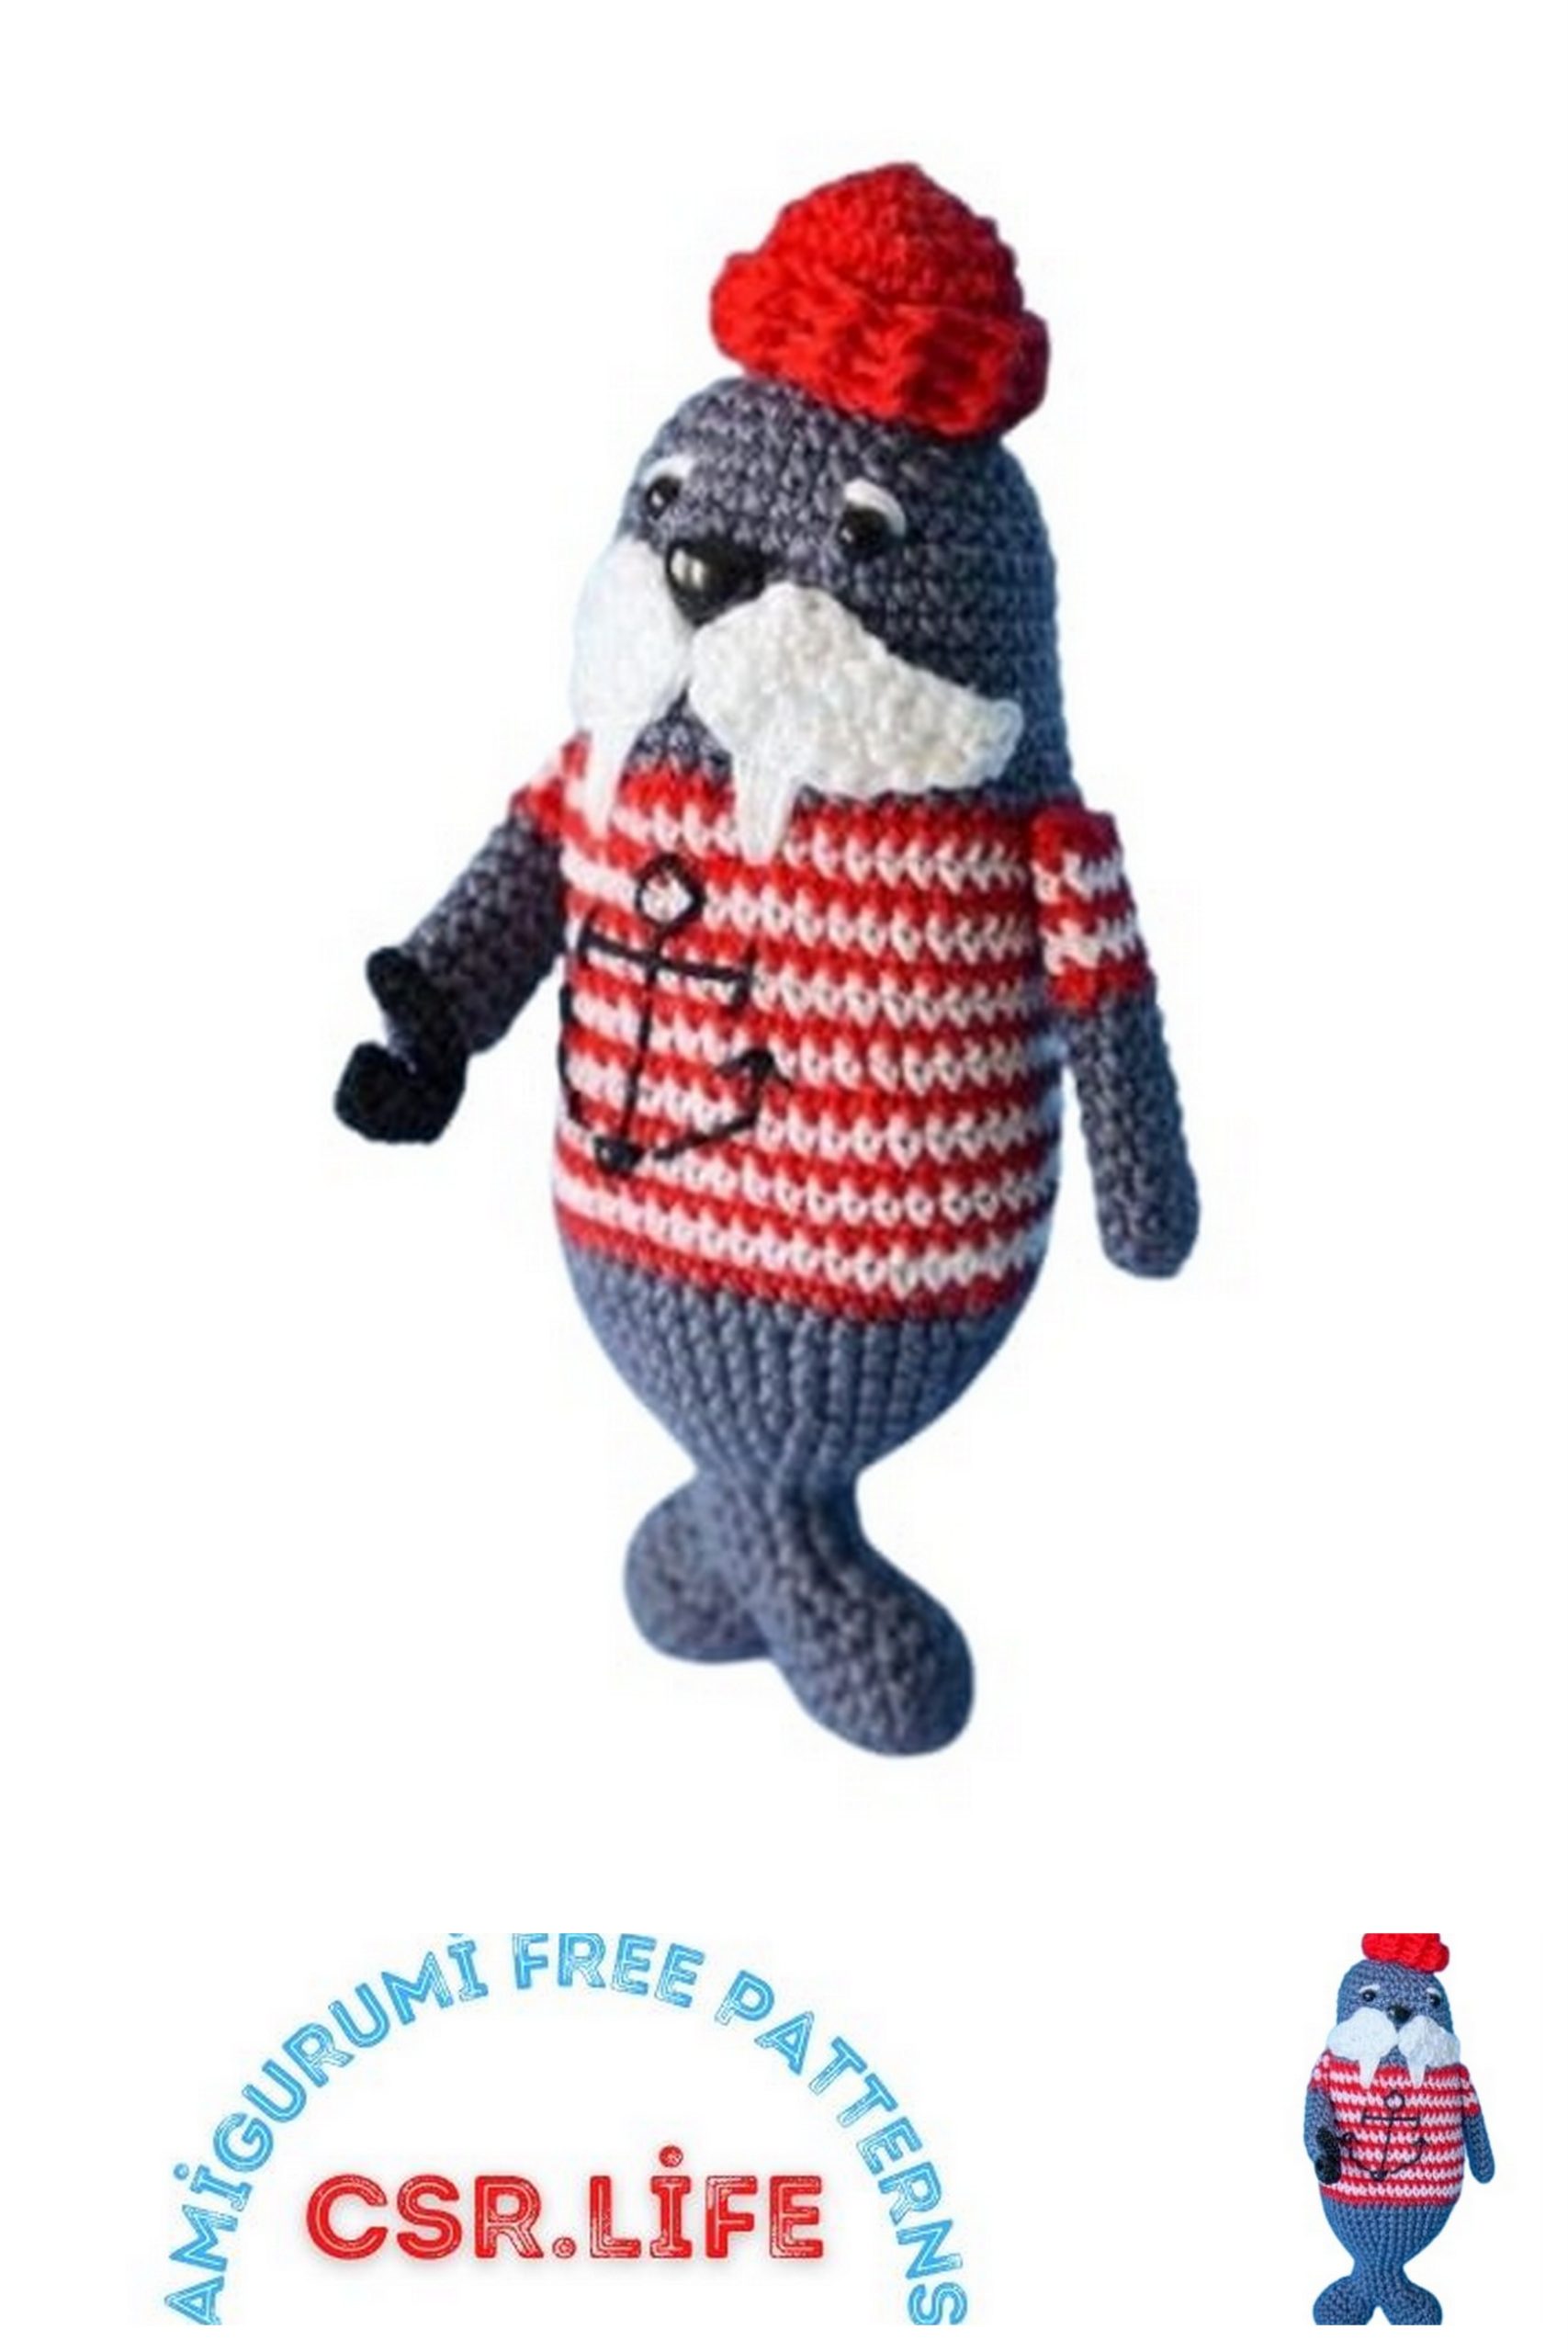
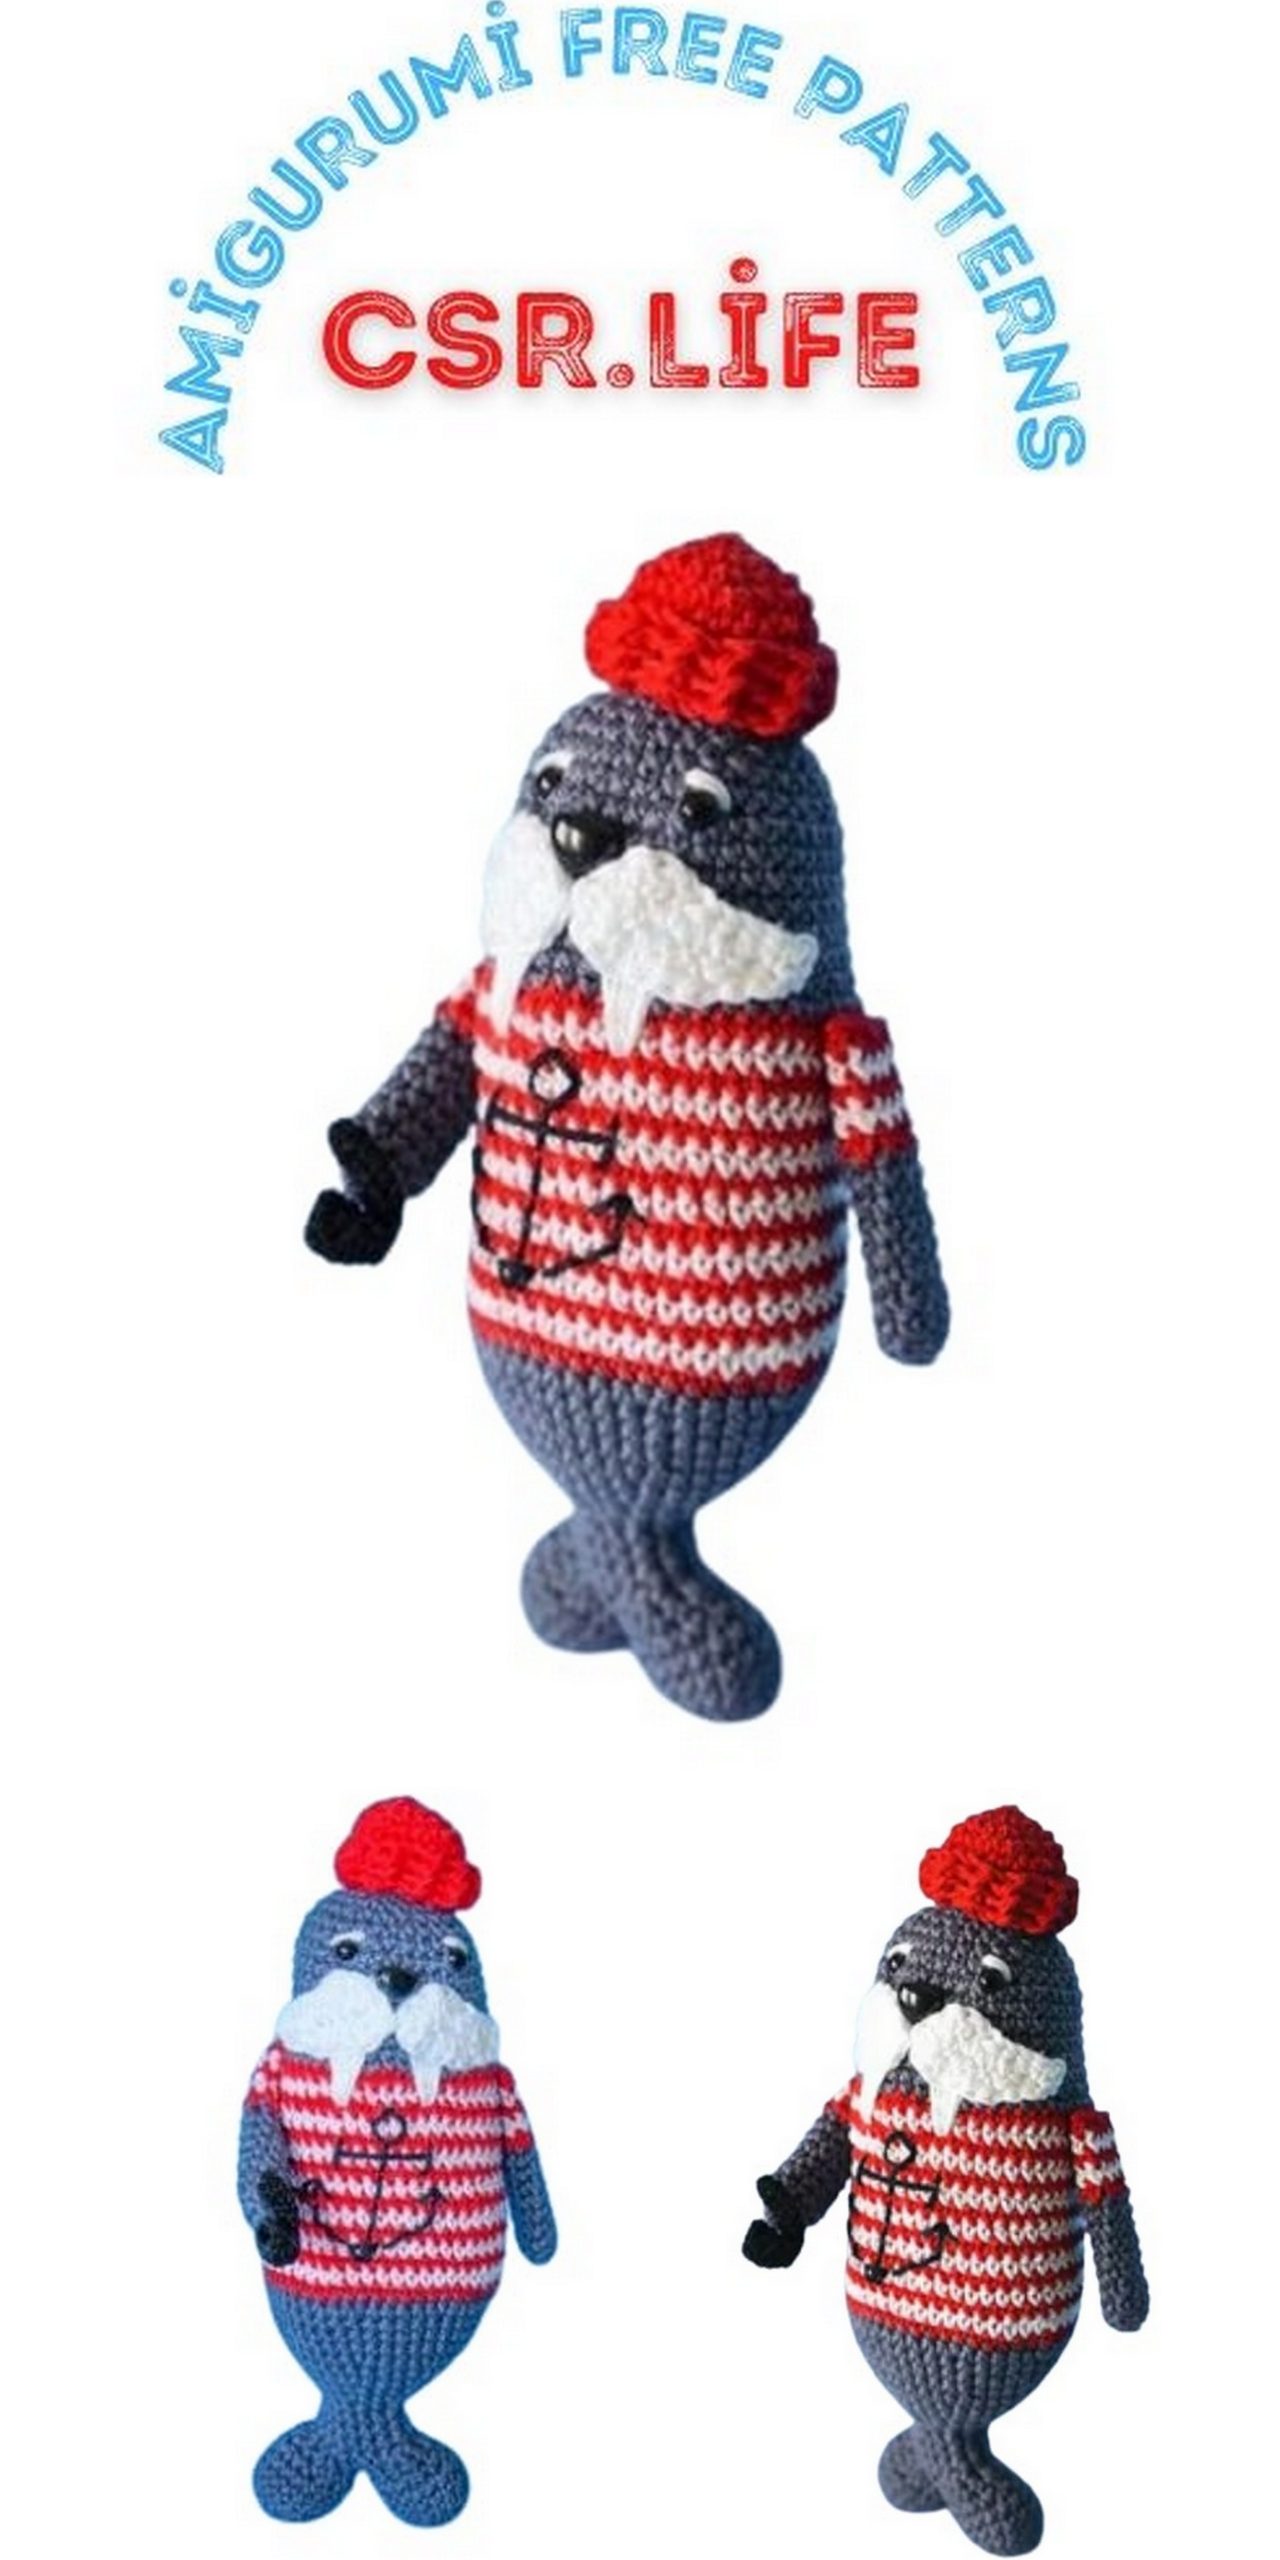
Amigurumi Captain Triky Seal Free Crochet Pattern
Welcome to our website where you can find the most beautiful and highest quality samples of Amigurumi patterns.
SYMBOLS & ABBREVIATIONS
st(s) stitch(es)
ch chain
sl st slip stitch
sc, dc single crochet, double crochet (UK)
sc2tog sc 2 stitches together
inc 2 sc (dc) in same stitch
(…) x repeat instructions in braces … times
[…] x total number of stitches
FPSC Front Post Single Crochet
BPSC Back Post Single Crochet
tr treble crochet
MATERIALS:
CATANIA 100% PURE COTTON:
• Schachenmayr Catania Originals Blue Gray
• Schachenmayr Catania Originals White
• Schachenmayr Catania Originals Red
• Cablè cotton n.5 Black
I used 50gr yarn balls, for the body (blue gray) it took about half ball. The other colours are used in small quantity.
Yarn alternatives You can use a different yarn, just change the hook accordingly.
Crochet hook size: 2.50 mm, 1.25 mm
(I’m using a smaller hook then what is suggested on the yarn label to get tighter sts)
Safety eyes 6 mm
Safety nose 12 mm
Yarn/tapestry needle
Stuffing fiber fill for stuffing
Scissors
DIMENSIONS:
H : 20 cm
W: 8 cm
NOTE:
Work in continuos round,
Mark the first stitch
Use the invisible decrease technique,
I’m left handed so consider this while looking at the pictures and at the scheme
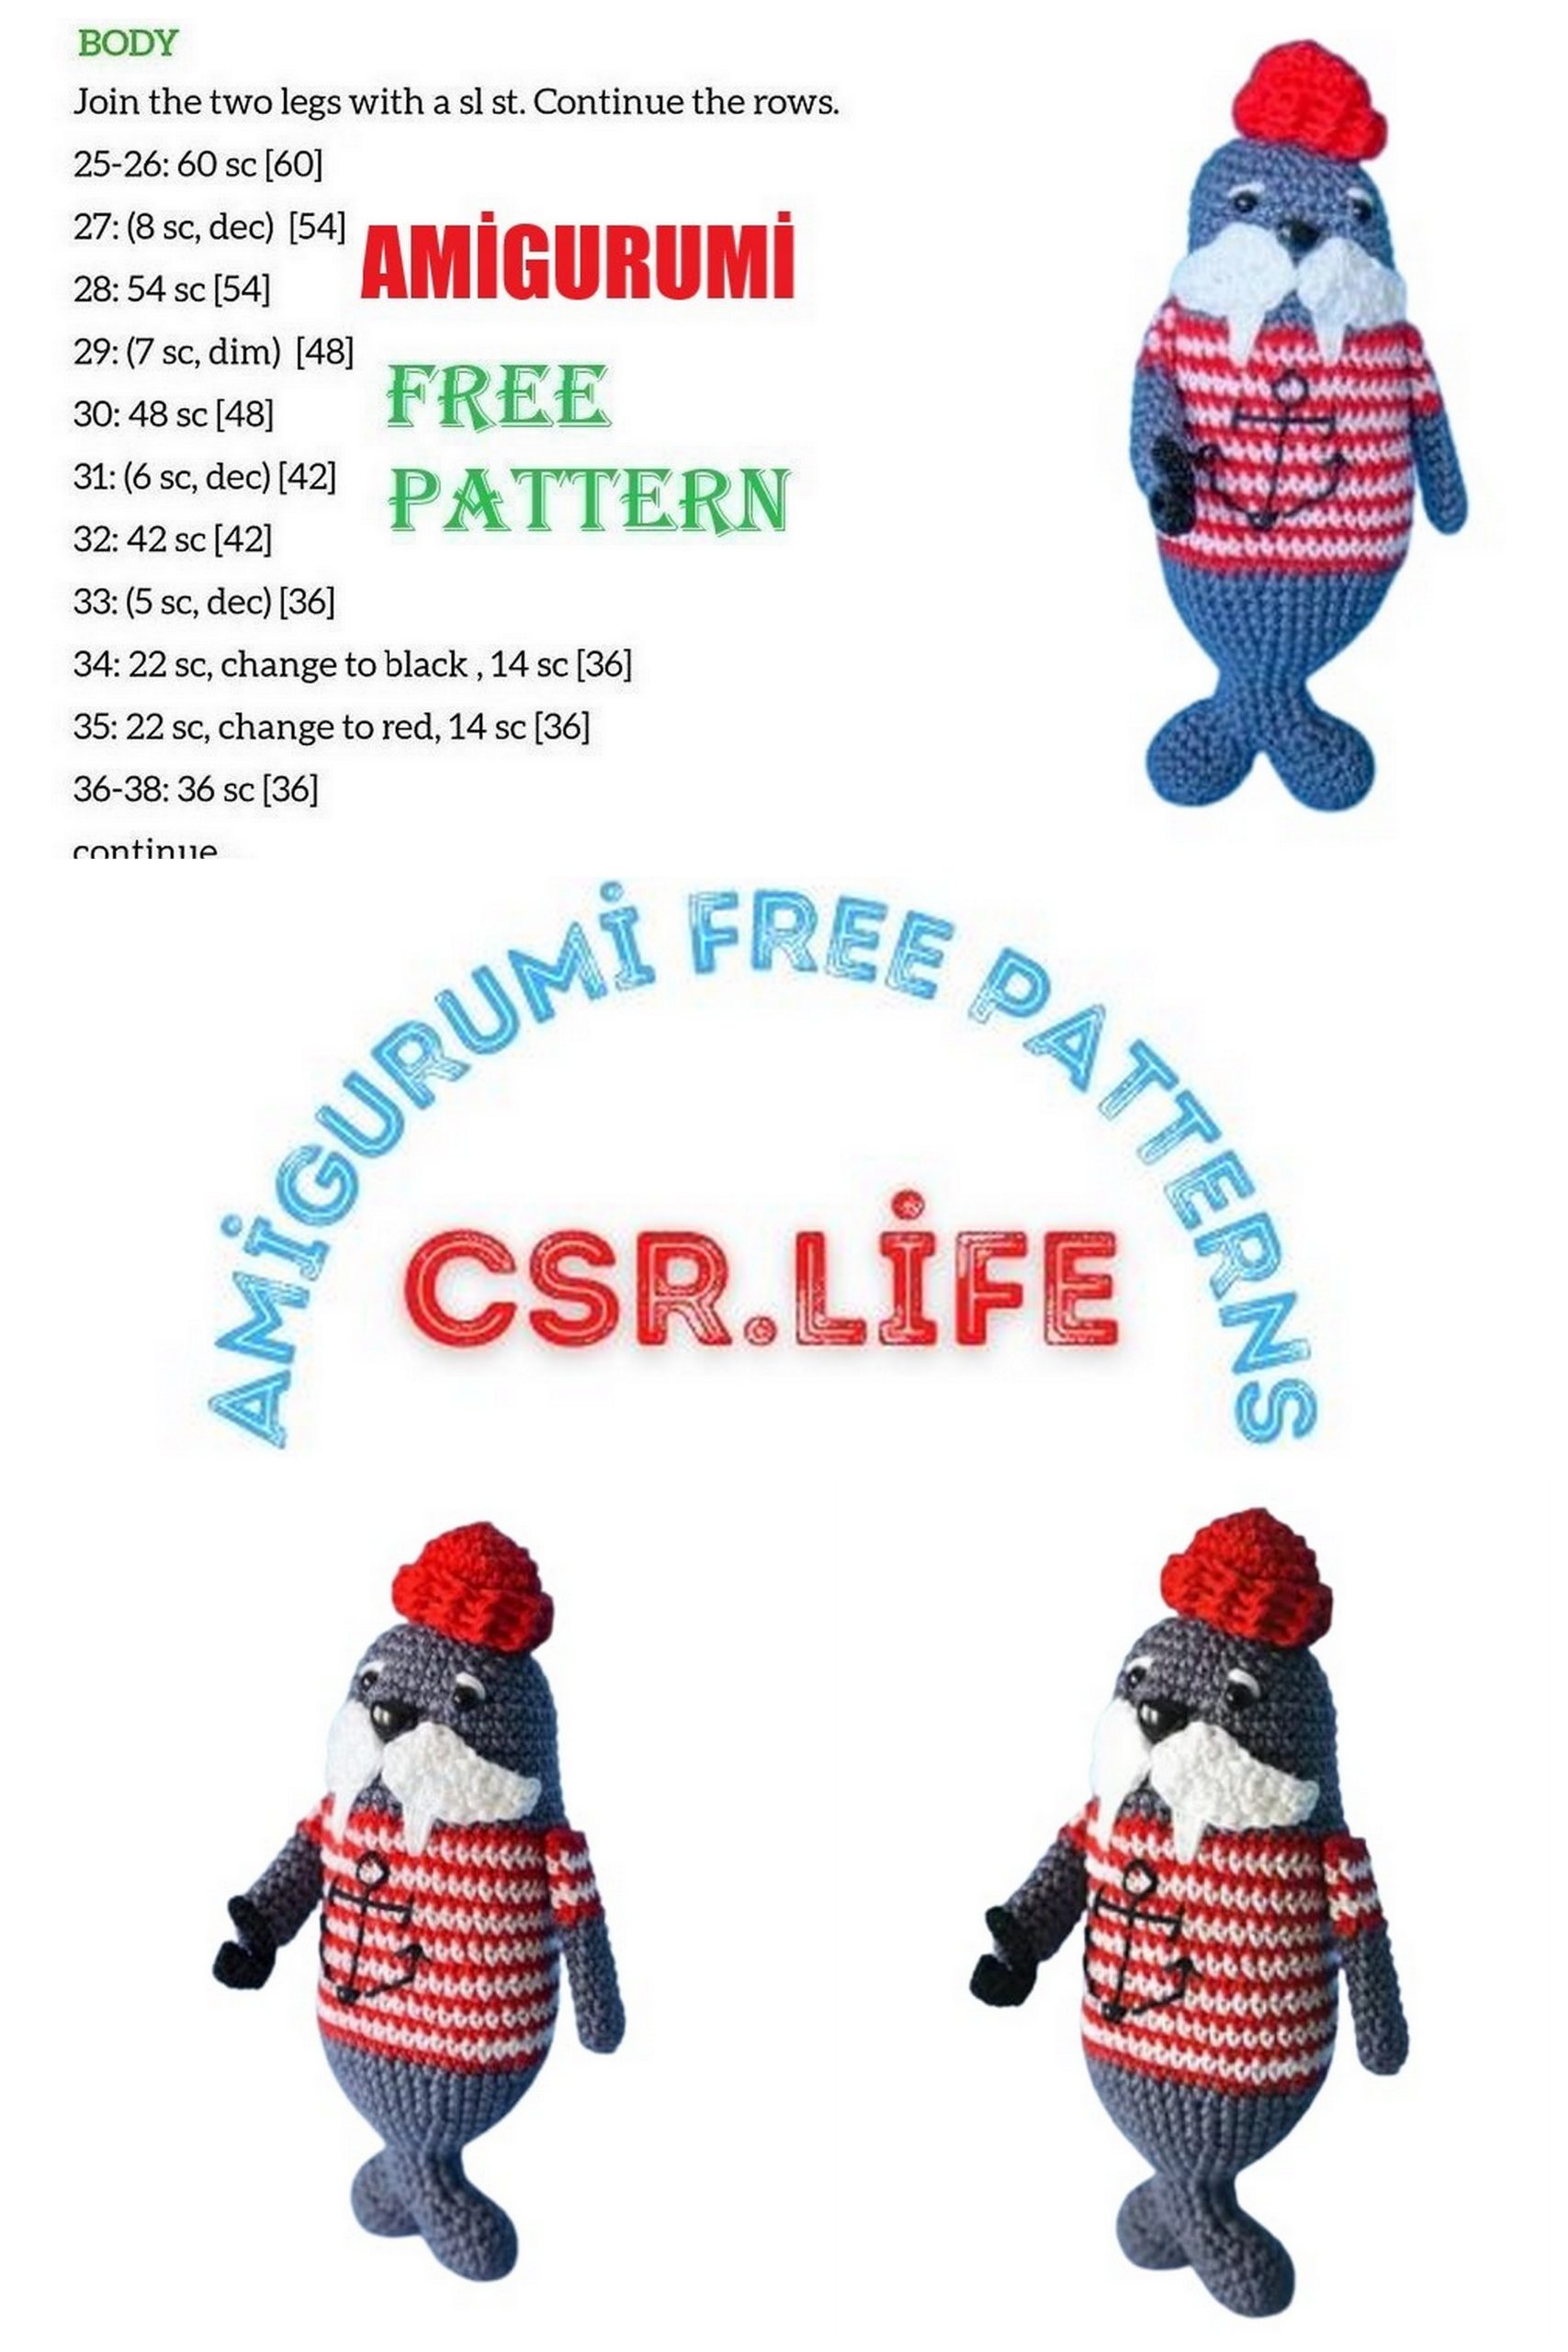
BODY:
The body is worked bottom to top in continuos rounds.
For colour changes follow the instructions, start with blue gray yarn.
Tail fin 1
Start: 6 sc in magic loop
Row 1: (inc) x 6 [12]
Row 2: (sc, inc) x 6 [18]
Row 3-6 : sc around
Row 7: (sc, sc2tog) x 6, join the end with a ss. [12]
Make a knot, leave a tail for weaving in ends.
Tail fin 2: create a second ear like the first but do not cut the yarn in this case!
Row 8: Now it’s time for joining the two fins, sc in the first ss of the right fin (mark this as the first st of the row), 1sc x 10 in the right fin, sc in the first st of the left fin, 1sc x 11. [24]
Row 9: (sc,sc2tog) x 8 [16]
Row 10-13: sc around, start filling the tail with fiber.
Row 14: (sc, inc) x 8 [24]
Row 15: sc around
Row 16: (2 sc, inc) x 8 [32]
Row 17: sc around
Row 18: (3 sc, inc) x 8 [40]
Row 19-21: sc around
Righ fin (1st) Left fin (2nd)
Start here!
Row 22: (4 sc, inc) x 8 [48]
The next rows will form the red and withe striped shirt, start with red in row 23, row 24 white, row 25 red, and so on… The last row of the shit (37), has to be red.
Row 23-37: sc around
Row 38: switch to blue and sc around
Row 39: (4 sc,sc2tog) x 8 [40]
Row 40-45: sc around
Row 46: (3 sc,sc2tog) x 8 [32]
Row 47: sc around
Now fill with fiber untill about half t-shirt, or the fiber will make it difficoult to sew the fangs. Place the eyes between row
45/46 spacing them by 6 holes. Embroid the brows (see pics). Place the nose between row 43/43 in the center of our work (st16th). Embroid the fangs between row 35/40 spacing them by 5/6 holes. The mustaches will hide the upper side of the fangs. See the instruction for the mustaches at page 4.
Sew the mustaches between row 39/44, and give them a bit of inclination. Once all the parts are sewed/fixed start filling with fiber.
Row 48: (2 sc,sc2tog) x 8 [24]
Row 49: sc around
Row 50: (sc,sc2tog) x 8 [16]
Row 51: (sc2tog) x 8 [8]
Insert the last fiber if needed, ten cut the yarn leaving a lon tail, close the work, make a know and weave the excess yarn in ends.
6 holes
R 45/46
R 43/44
R 35/40
MUSTACHES X2:
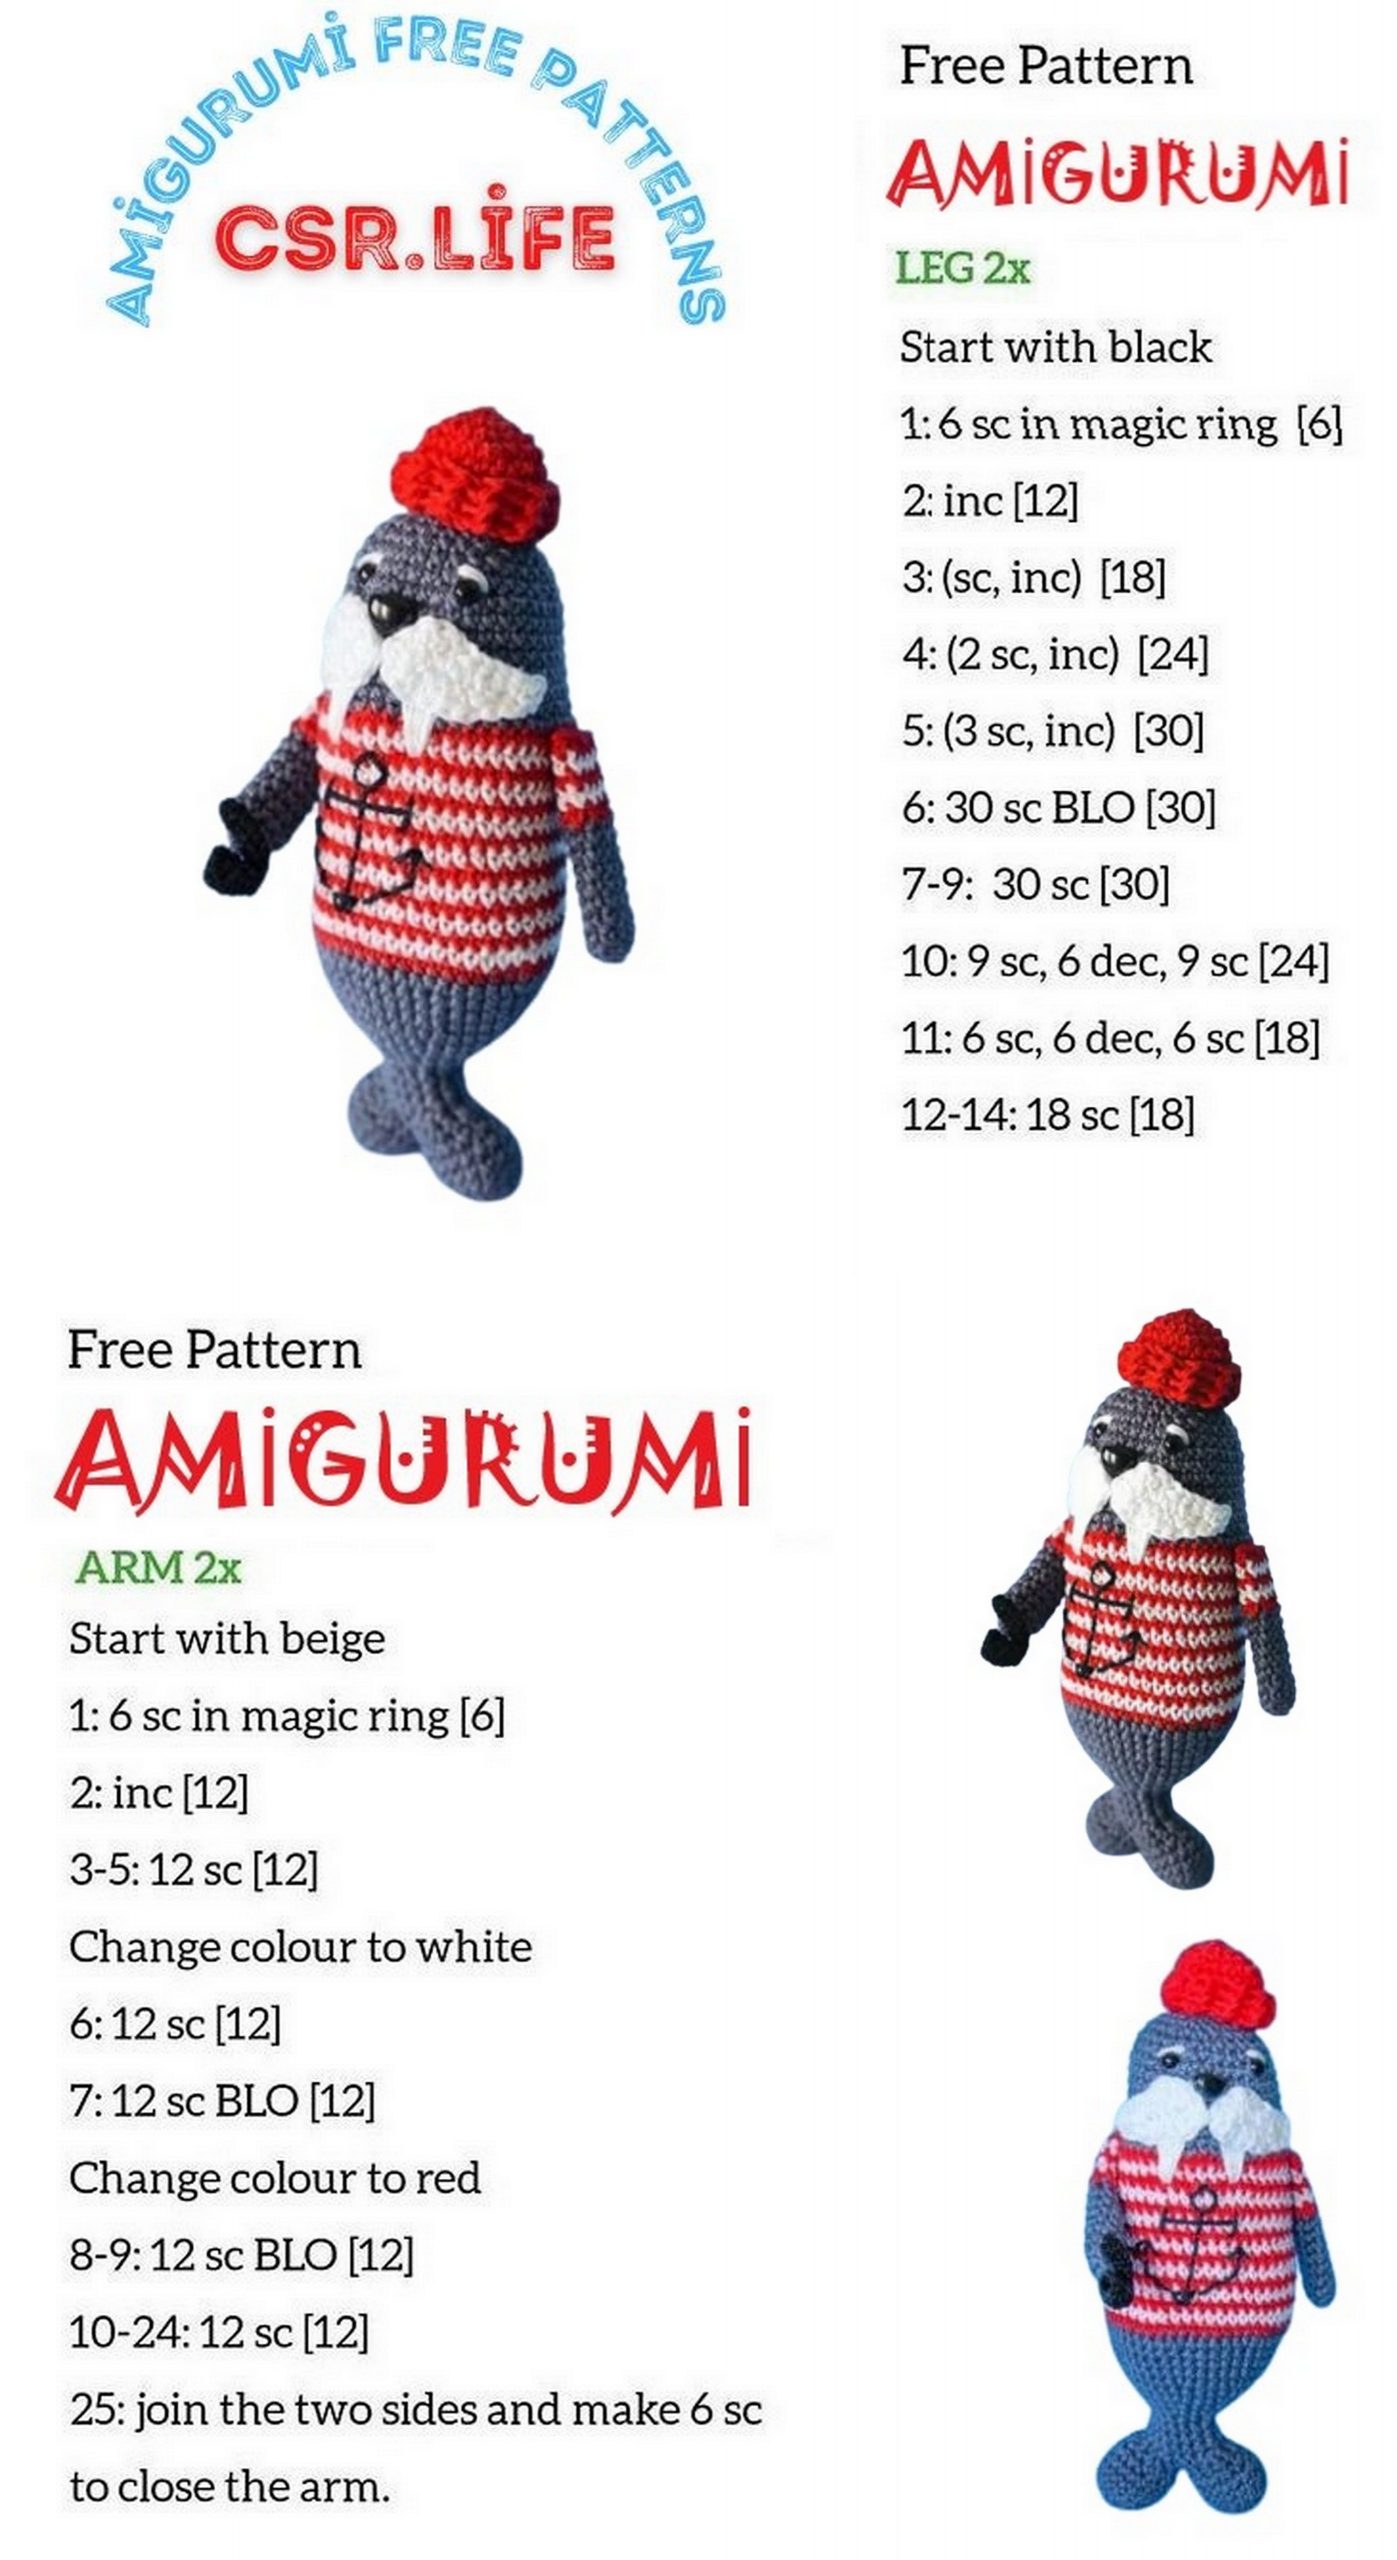
ARMS X 2:
Start: 5 sc in magic loop
Row 1: (inc) x 5 [10]
Row 2-9 : sc around
Row 10-16: start this row with red, sc around. Switch to white in the next row (always sc around), keep alternating the red and white rows until the end. The last row should be red.
When done make a knot and leave a long tail for sewing the arms to the body. Sew the arms to the body matching the last red stripe of the shirt with the last row of the arms.
Make two and flip the other, start here ( ).
Do not sew them straight but tilt them at about 20°as shown.
20°
PIPE:
The pipe is made of two pieces, I used black cablè cotton n.5 and a 1,25 mm hook.
BOWL:
Start: 6 sc in magic loop
Row 1: (inc) x 3 [9]
Row 2-3 : sc around
STEM:
Stert: chain 10 [10]
Row 1: sc in 2nd chain from hook, sc in each chain to end, turn [9]
Row 2: chain 1 (does no count as 1th stitch), sc in each sc to end, turn [9]
Row 3: repeat row 2
Sew the two ends togheter then sew the stem to the bowl, weave in ends the excess yarn.
HAT:
Work the hat with red yarn, I suggest to use a 2mm hook.
The last 3 rows are worked alternating one FPSC to one BPSC.
If you don’t know how to make FPSC and BPSC you will find many tutorials on pinterest or youtube, my favorite is here.
Start: 6 sc in magic loop
Row 1: (inc) x 6 [12]
Row 2: (sc, inc) x 6 [18]
Row 3: (2 sc, inc) x 6 [24]
Row 4-8 : sc around
Now we will work the border, to give the textured look I alternated one FPSC to one BPSC for 3 rows
Row 9-11 : (FPSC x1, BPSC x1) x all the sc to end.
Cut the yarn leaving a long tail, fold the hat at row 8 and sew it to fix it, then if you want sew the hat to the doll’s head.
EMBROIDED ANCHOR:
Use the black cablè cotton n.5 to embroid the anchor between tow 26-35, trying to center it and to make it symmetrical.
The bottom part is 10 sc wide, wile the upper part is 6 sc.
Now your Captain Triky is done! I hope you had fun with this pattern, if something it’s not clear,