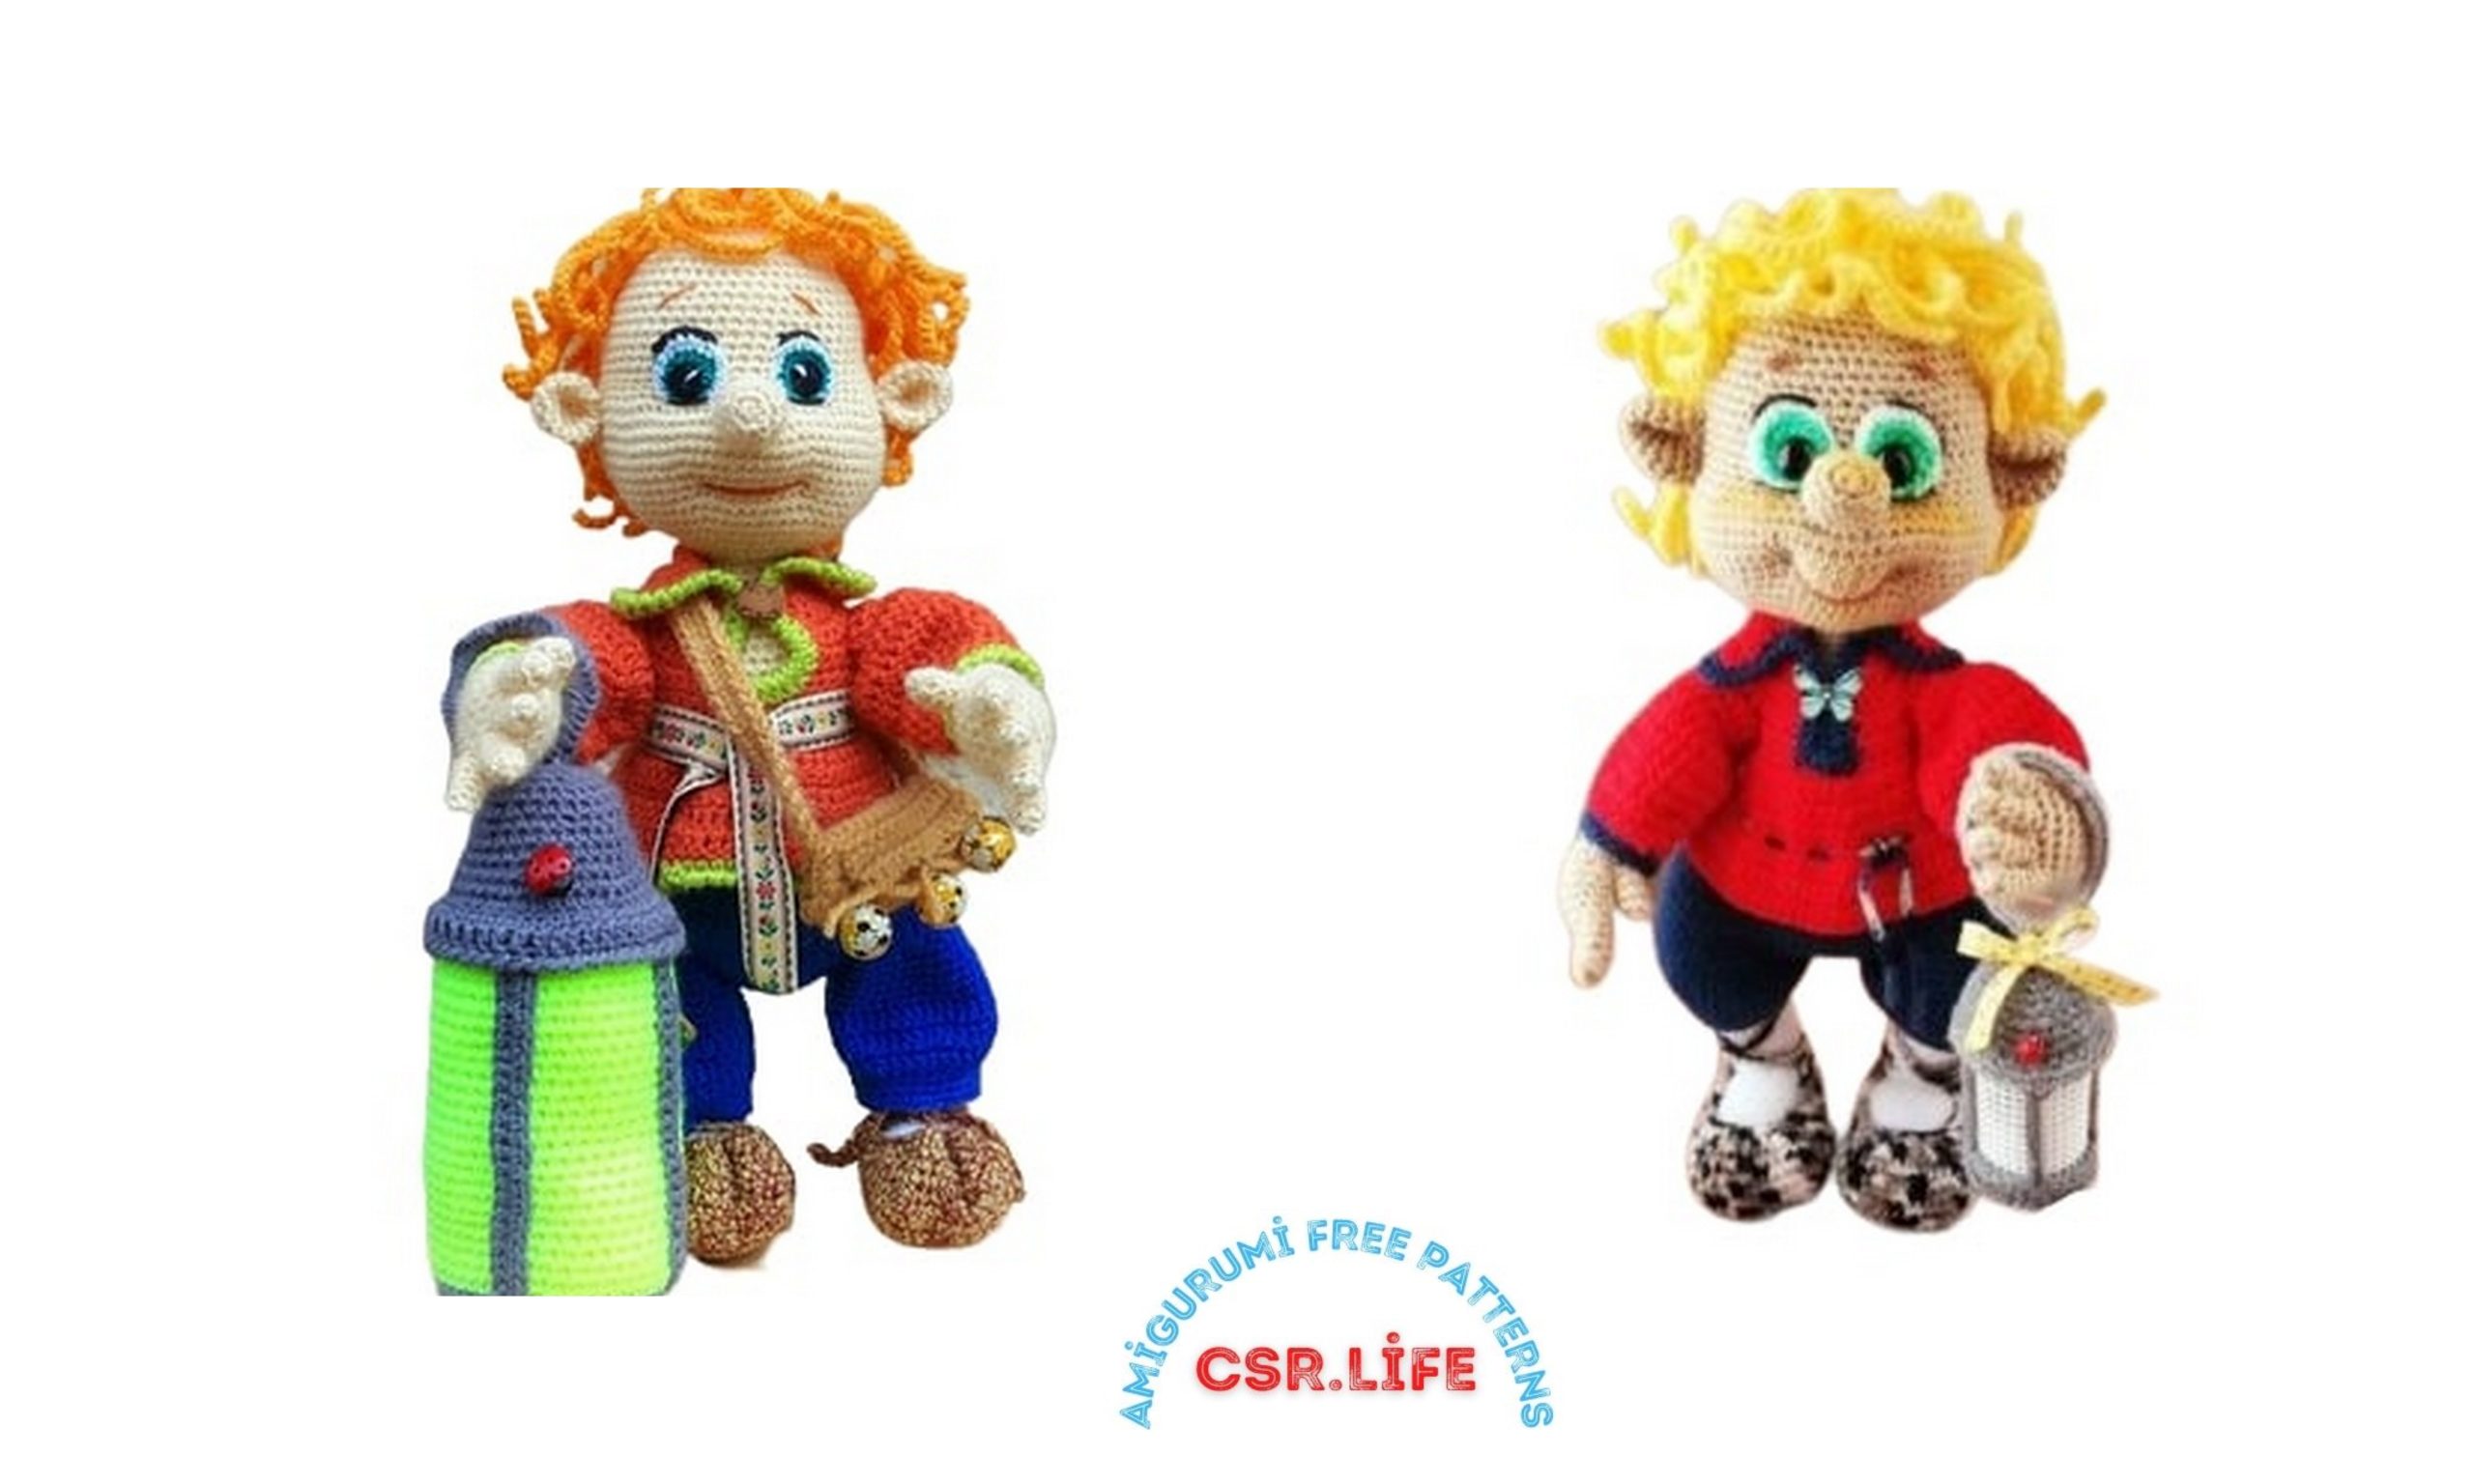
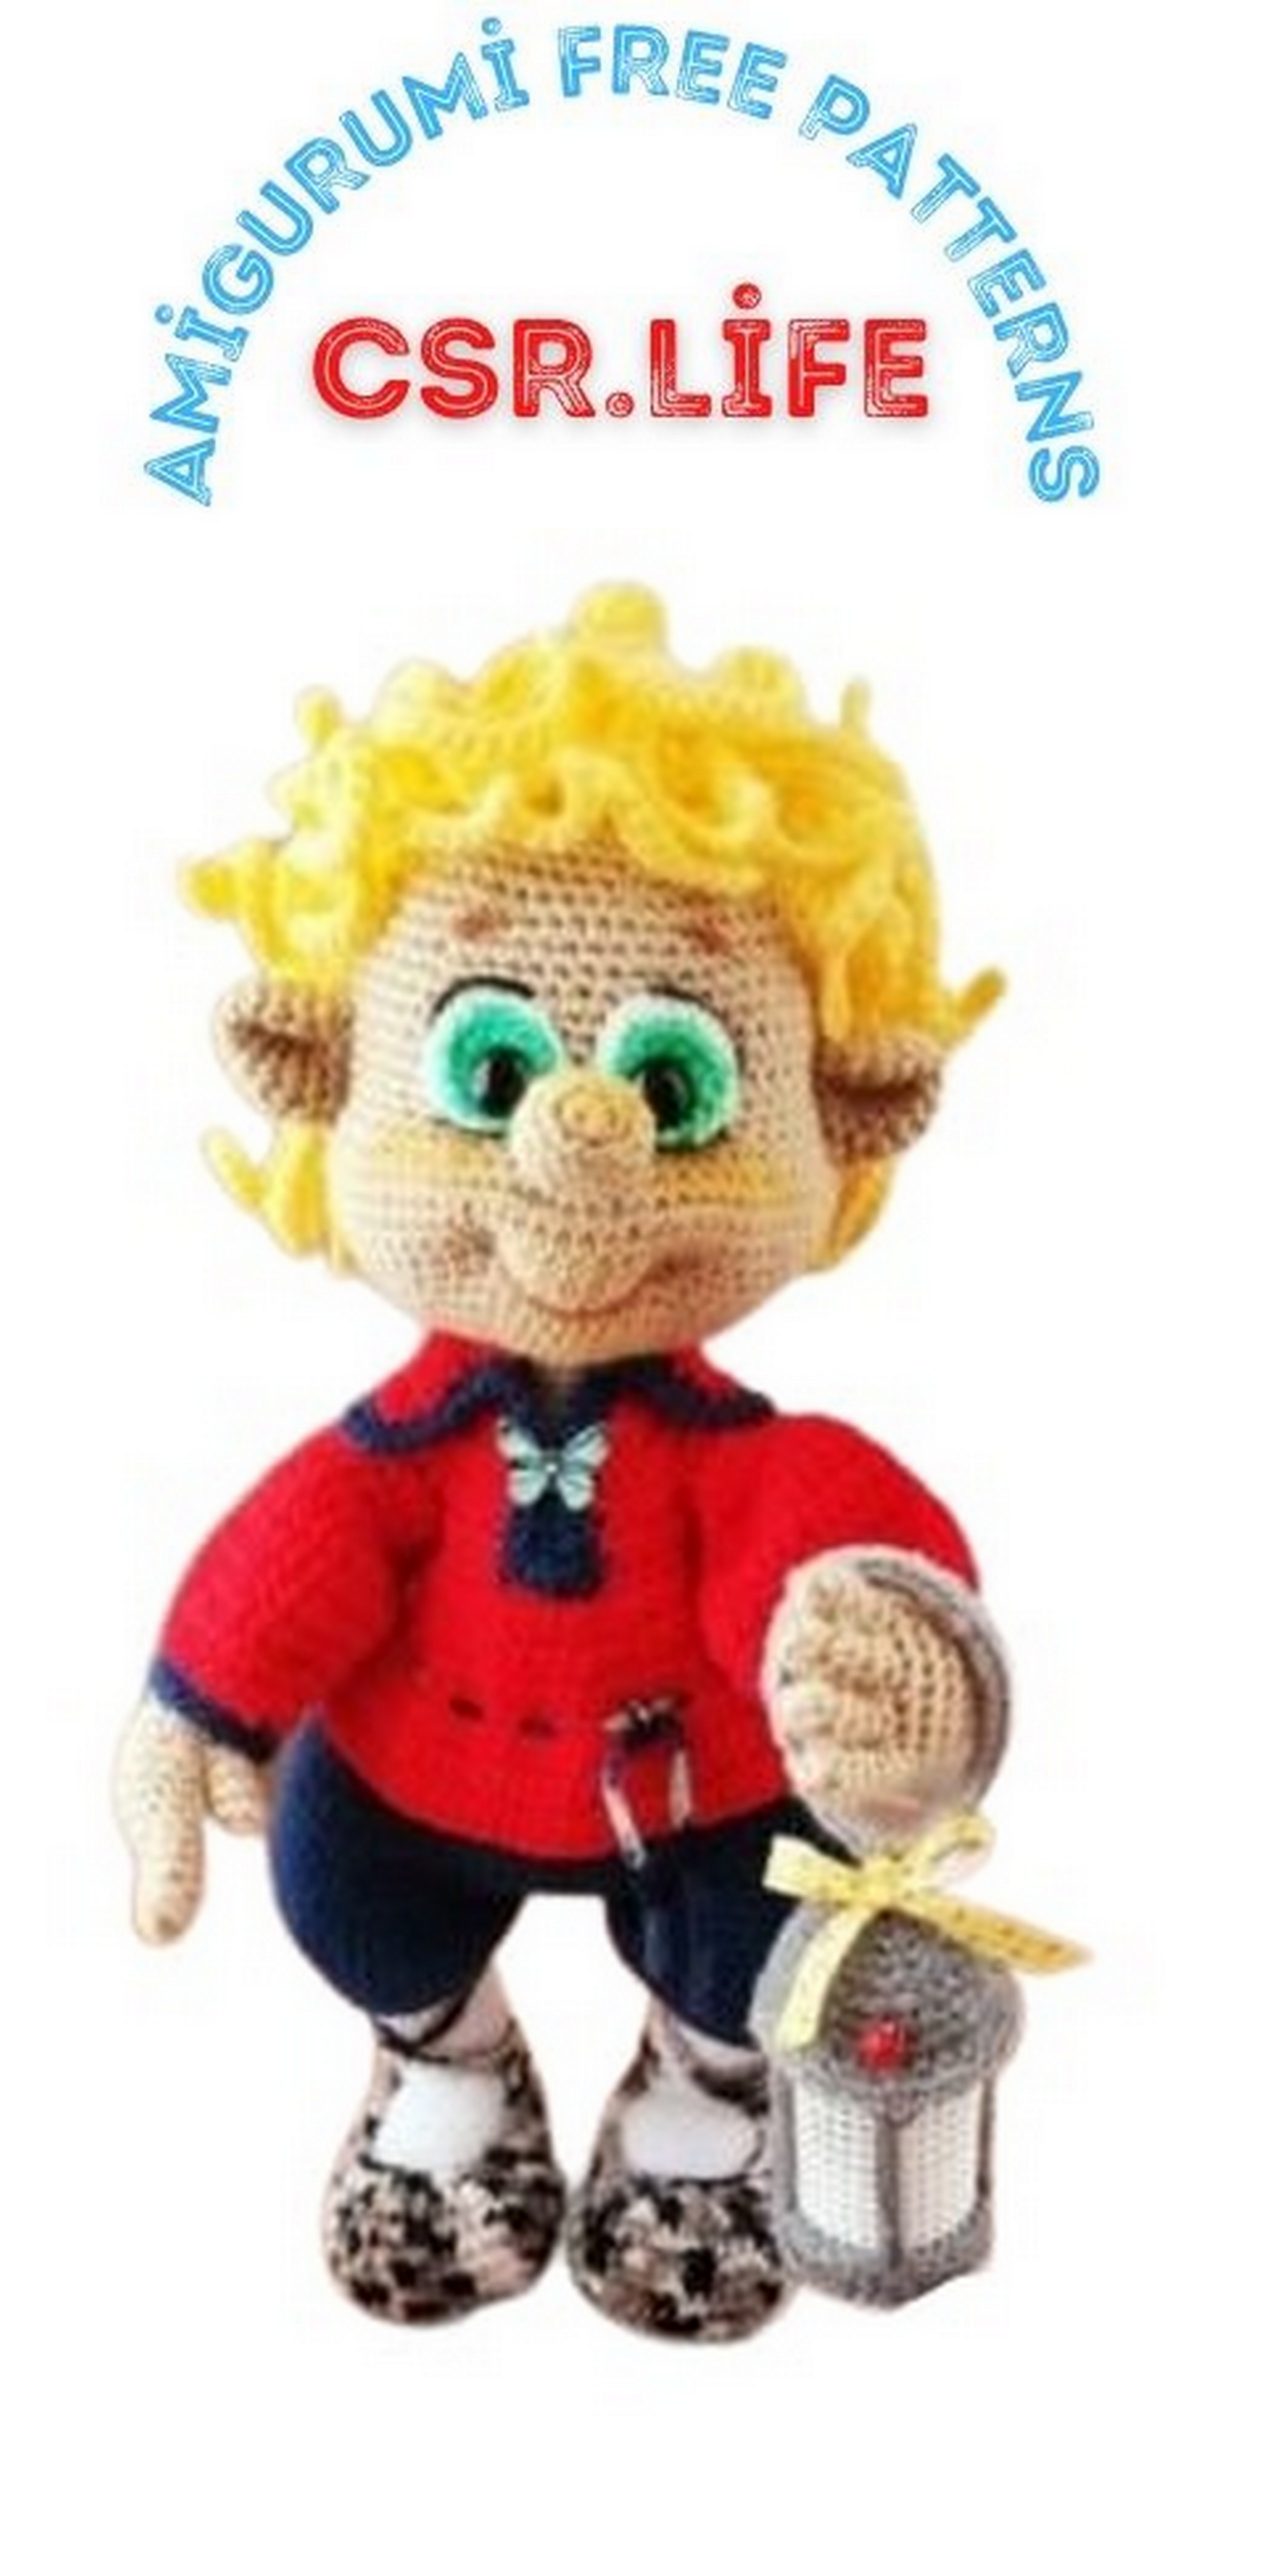
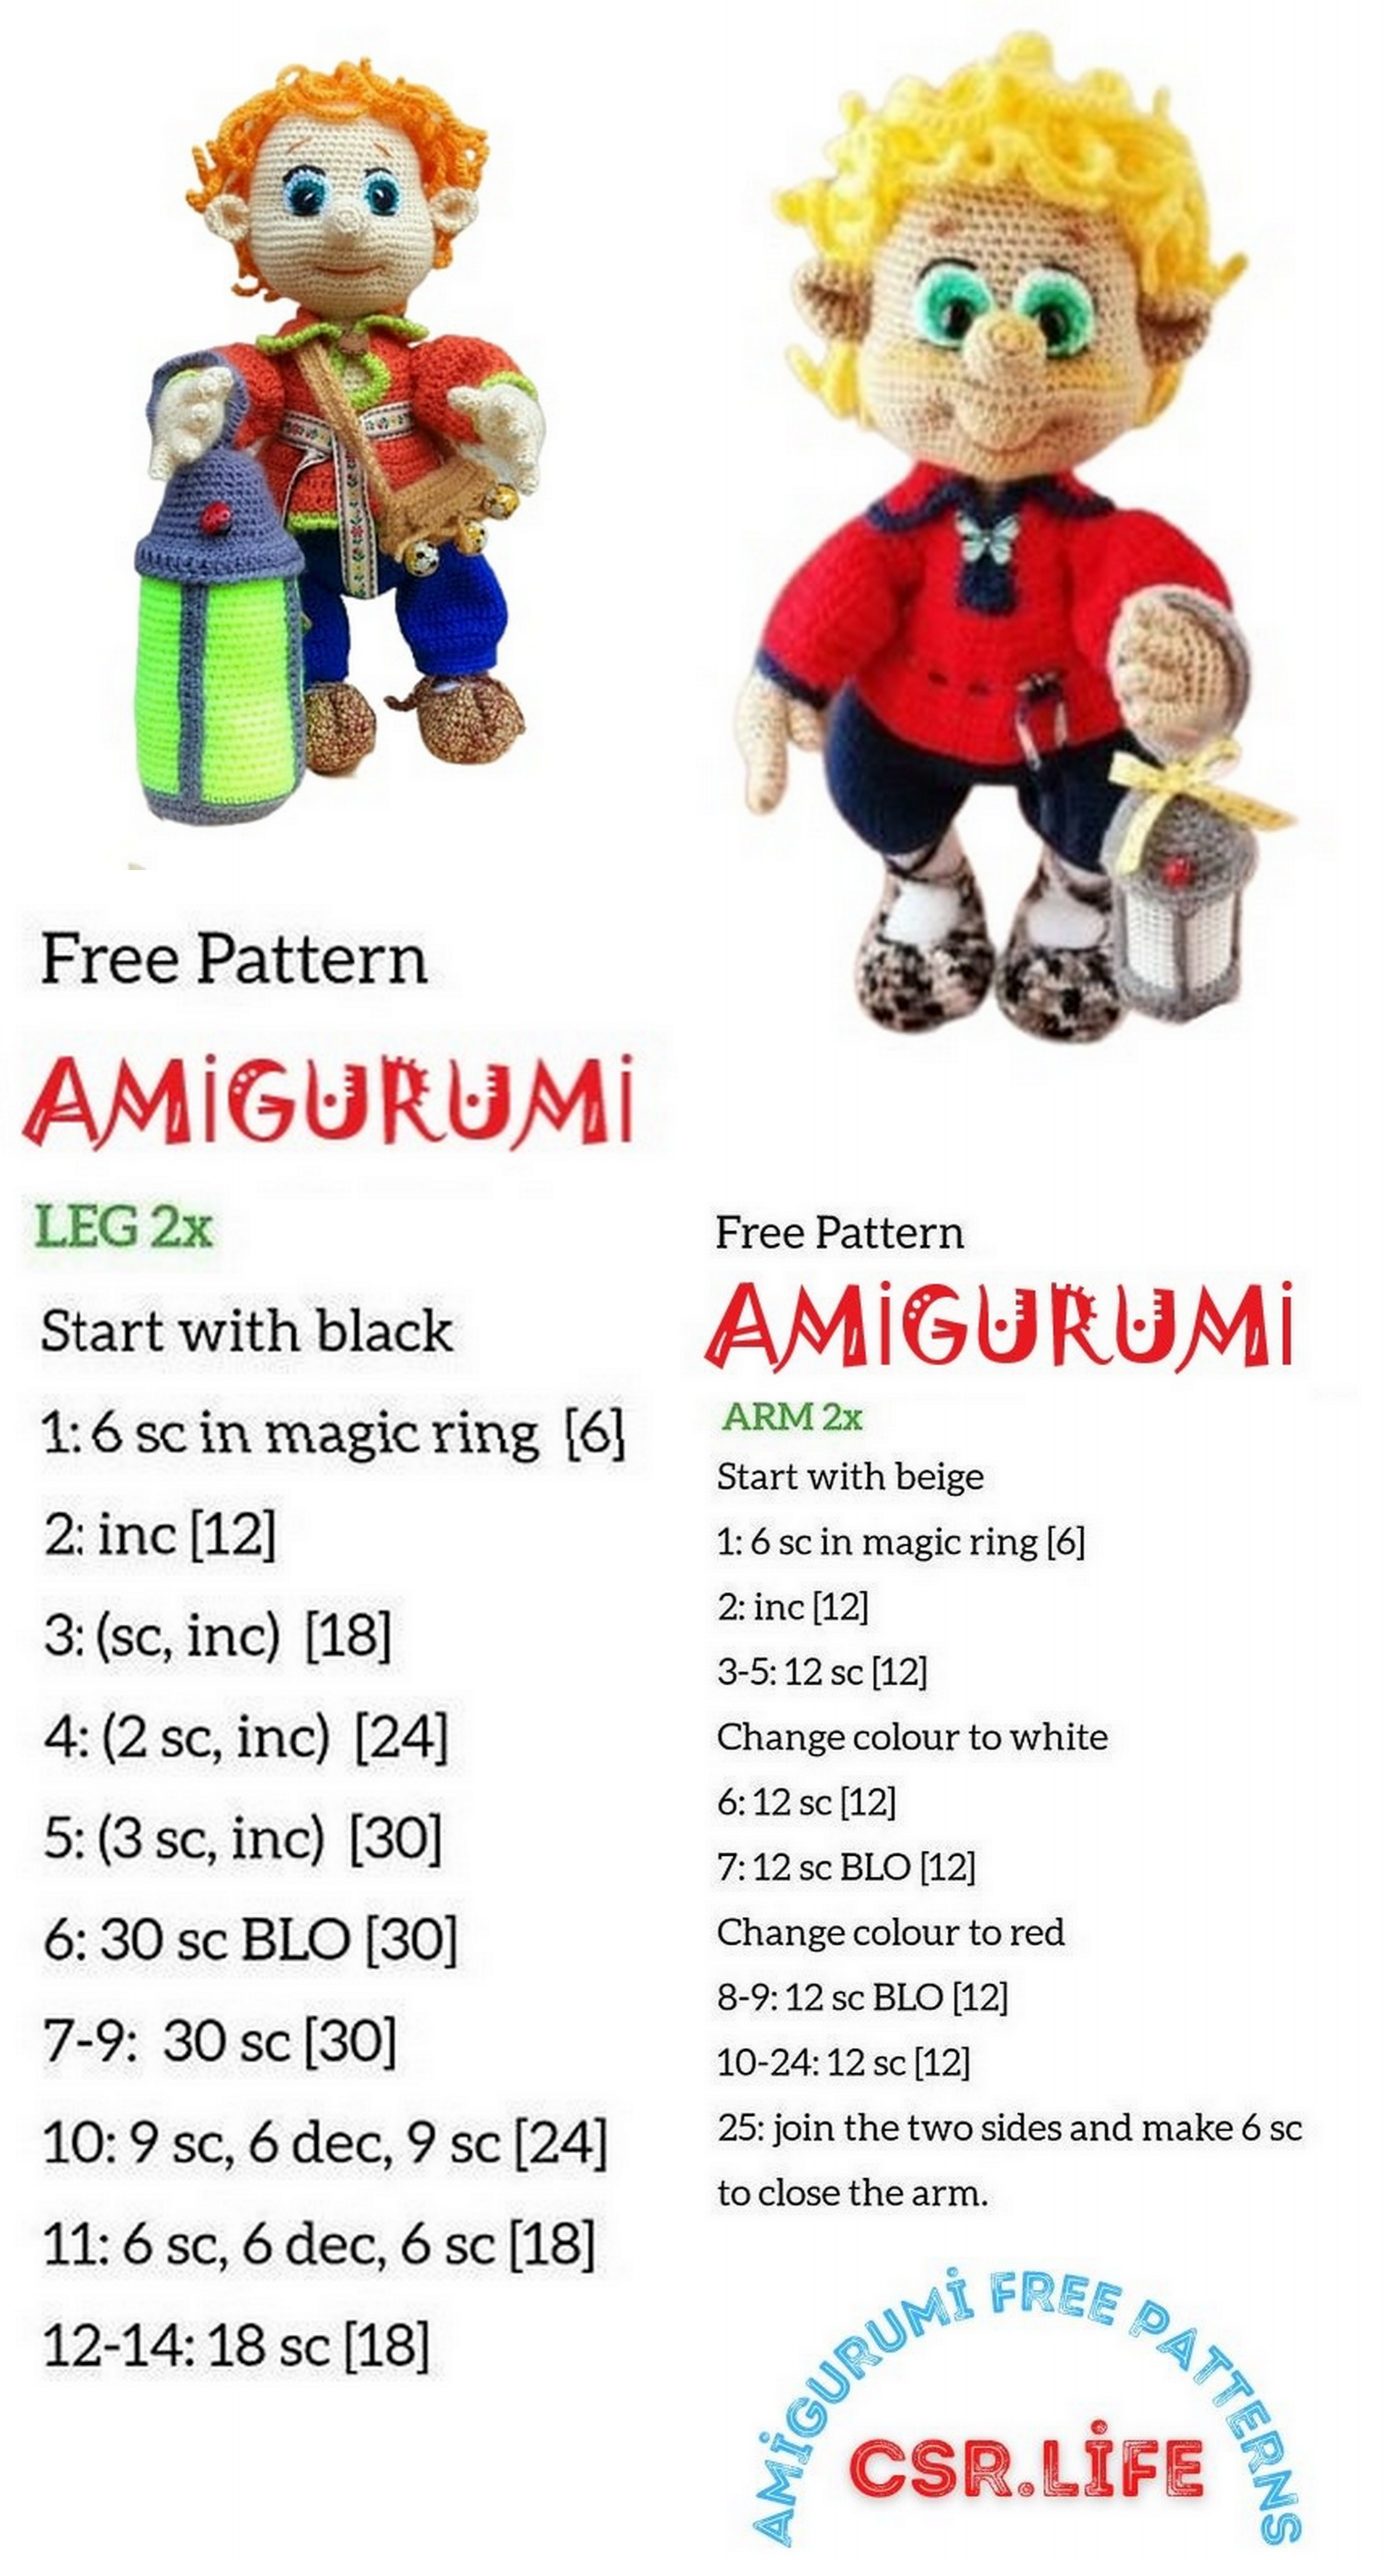
Amigurumi Elf Dobbi Free Pattern
Welcome to our website where you can find the most beautiful and highest quality samples of Amigurumi patterns.
Necessary materials
Yarn:
– white
– beige / flesh,
– yellow
– red
– navy blue
– gray
– color / section (gray-beige shade).
Crochet hook matching your yarn.
Wire frame
Cardboard or plastic
Sintepon / sintepuh / hollofiber
Scissors
Needle
Black eye beads
Clasp-clasp for jewelry (in our case, for a flashlight).
Small electronic tablet candle.
White plastic mesh with small cells (can be replaced clear plastic).
Glue.
Abbreviations
Magic ring: Magic ring
SC: Single Crochet
İnc: Increase
Dec: Decrease
Blo: Knitting from the back lobe
Flo: Knitting from the front lobe
Ch: Chain
PATTERN
HANDS (2 parts)
Flesh / Beige
Start knitting with fingers
Thumb
1) Magic ring into 6sc
2-4) 3 Rows: 6 sc in a circle. Fasten the thread, cut.
Fingers (4 parts)
1) Magic ring into 5sc
2-5: 4 Rows: 5 sc in a circle. Fasten the thread, cut. Having connected the 4th finger, the thread does not crop! Put a marker here in the 4th finger.
Connect fingers together
6) 20 sc around 4 fingers. Read more: 1 sc in the 4th finger, 2 sc in the 3rd finger, 2 sc in
2nd finger, 5 sc on the 1st finger, 3sc in the 2nd finger, 3 sc in the 3rd finger, 4 sc in the 4th finger.
7-9) 3 Rows: 20 sc
Attach thumb
Left hand
10) Knit 2 sc, capturing the loops of the thumb and palm, 18 sc (20)
11) 4 sc over the remaining thumb loops, 18 sc (22)
12) 4 sc, (dec, 4 sc) x3 times (19)
Make a wire frame for fingers and hands. Fill palm with padding polyester.
13) (dec, 4 sc) x3 times, 1 sc (16)
14) 16 sc
15) (dec, 2 sc) x4 times (12) Fill in the process of knitting.
16-35) 20 rows: 12 sc. Fasten, cut the thread.
Right hand
10) 17 sc, 2 sc, grabbing 2 thumb loops, 1 sc (20)
11) 17 sc, 4 sc on the remaining thumb loops, 1 sc (22)
12) (dec, 4 sc) x3 times, 4 sc (19)
Make a wire frame for fingers and hands. Fill palm with padding polyester.
13) 1 sc, (dec, 4 sc) x3 times (16)
14) 16 sc
15) (dec, 2 sc) x4 times (12) Fill in the process of knitting.
16-35) 20 rows: 12 sc. Fasten, cut the thread.
LEGS
Each detail consists of two parts, the foot and the leg itself.
Knit white yarn
Feet (2 parts)
Dial a chain of 7 air loops. Knit around the chain.
1) Starting from the second loop from the hook: inc, 4 sc, 3 sc into the last loop of the chain; on the back of the chain: 5 sc (14)
2) 1 sc, inc, 4 sc, inc, 1 sc, inc, 4 sc, inc (18)
3) 18 sc
4) (inc, 2 sc) x6 times (24)
5-8) 4 rows: 24 sc in a circle.
9) 2 sc, dec, 10 sc, dec, 8 sc (22) Dec must be on the sides of the foot!
10) 22 sc
11) 2 sc, dec, 9 sc, dec, 7 sc (20)
12-13) 2 rows: 20 sc in a circle.
14) (3 sc, dec) x4 times (16)
15) 16 sc
16) 6 sc, 4 ch, inc; let 4 loops of the previous row, 6 sc (16)
17) 6 sc, 4 sc in ch, 6 sc (16)
18) 16 sc
19) (2 sc, dec) x4 times (12)
20) (1 sc, dec) x4 times (8)
21) 4 decreases. Fasten, cut the thread. Tighten the loop, closing the hole on the heel.
Hide the remaining end of the thread inside the part.
Prepare sufficiently long wire cuts. At one end make out wire loop in the shape of the foot a little smaller. Insert wire frame in the part in the hole between the 16m and 17m rows. Fill foot with padding polyester tight enough.
Middle (inguinal) This part must be connected now, since when the legs will be ready, you will need to start knitting the torso.
White yarn. Knit around the chain.
Dial a chain of 11 ch.
1) Starting from the second loop from the hook: inc, 8sc, 3sc into the last loop of the chain; on the back of the chain: 9sc (22)
2) 2 inc, 8sc, 3 inc, 8sc, 1 inc (28)
3) 1 inc, 1sc, 1 inc, 10sc, (inc, 1sc) x2 times, 1 inc, 10sc (33)
4-5) 2 rows: 33sc in a circle. Fasten, cut the thread.

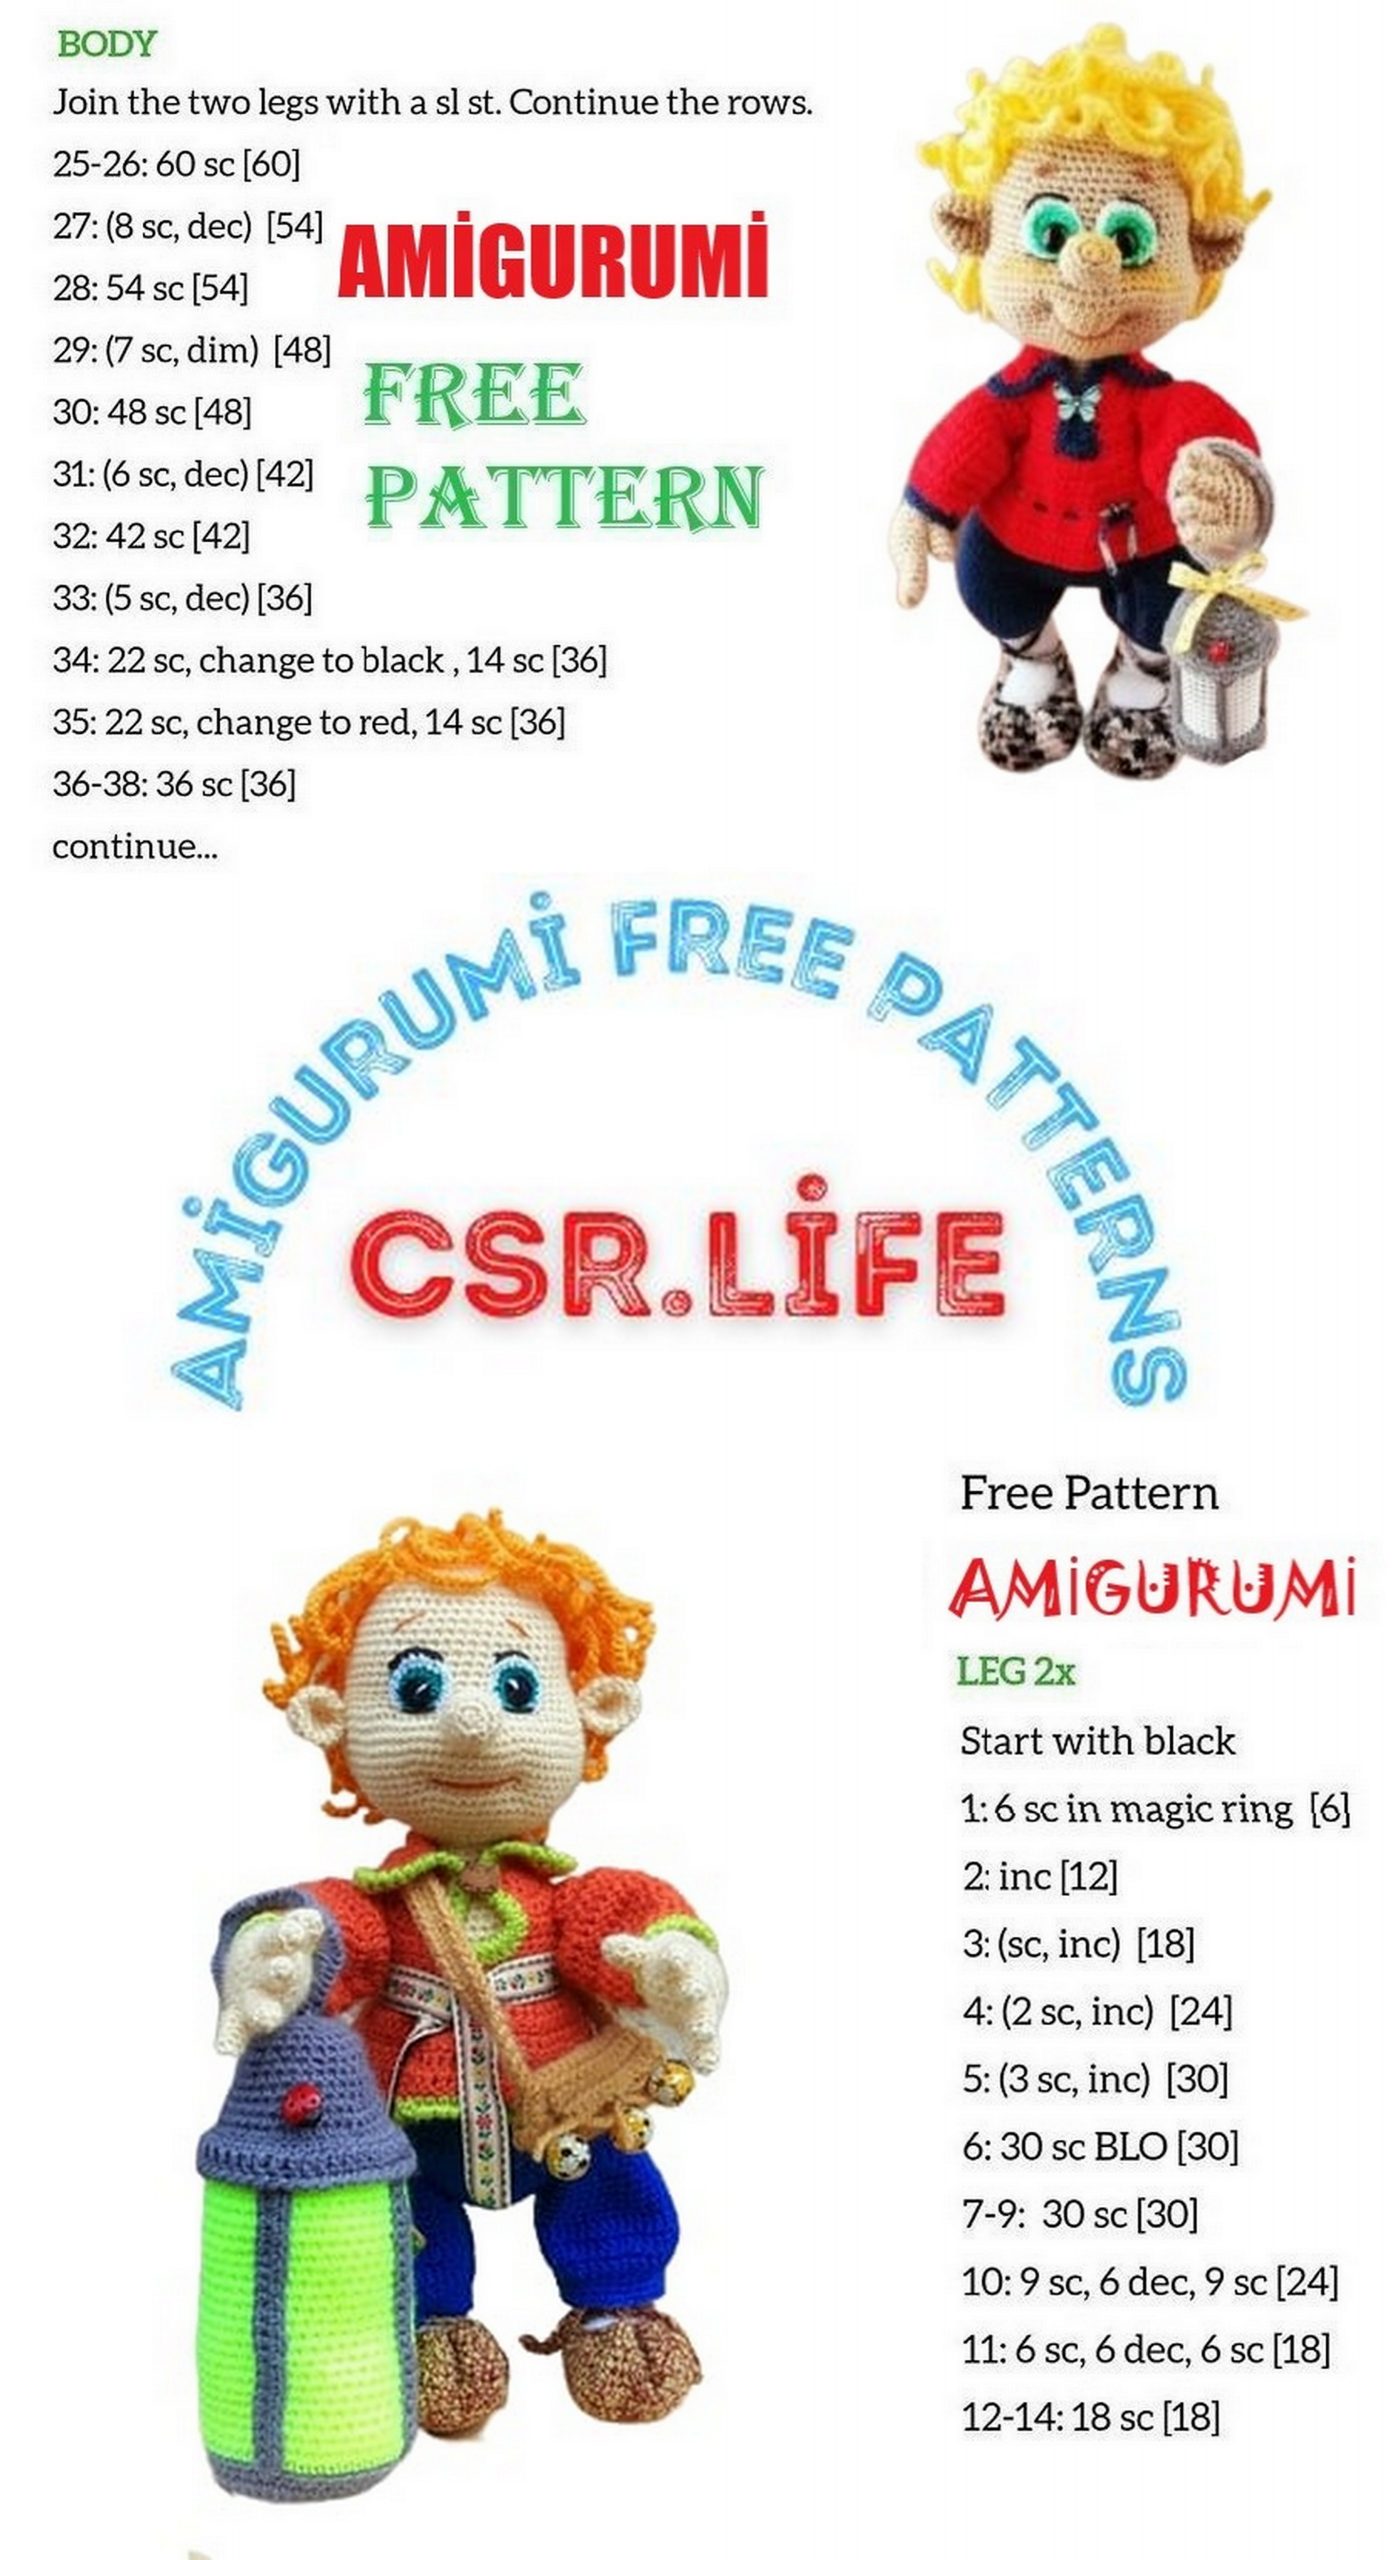
Legs (2 parts)
In white. Do not fill up yet!
At the beginning of knitting, leave the end of the thread for sewing.
Dial a chain of 15 air loops. Ring together using sl-st.
1-22: 15 sc in a circle. Fasten, cut the thread. Having tied the second leg, the thread does not crop!
Before continuing to knit the torso, you need to sew the legs-tubes to the feet.
Put the leg-tube on the wire sticking out of the foot, pin it with pins and
Sew in a neat circle. Fill the part by placing the padding pad around wire.
BODY
We begin to connect the legs and groin. We knit white yarn left at the second leg.
Fill your torso as you progress in knitting.
1) 7 sc along the second leg (left leg), 16 sc along the middle (inguinal) part, attach the first (right) leg in the place where the last loop was, knit 15 sc, 17 sc middle (inguinal) part, 8 sc along the second (left) leg. (63)
2) 15 sc, dec, 46 sc (62)
3) dec, 28 sc, dec, 30 sc (60)
4) (2 sc, dec) x2 times, 13 sc, (dec, 2 sc) x3 times, 2 sc, dec, 14 sc, dec, 5 sc, dec (52)
5-6) 2 rows: 52 sc in a circle.
7) 5 sc, dec, 12 sc, dec, 10 sc, dec, 12 sc, dec, 5 sc (48) Make sure to decrease placed two in front and behind the joints of the legs with the inguinal part.
Change thread to beige / flesh
8) 48 sc
9) (6 sc, dec) x6 times (42)
10-15) 6 rows: 42 sc in a circle.
16) (5 sc, dec) x6 times (36)
17-21) 5 rows: 36 sc in a circle.
It’s time to attach your hands to the body.
Be careful! Hands should be placed on the sides of the body! At if necessary, move the marker to the desired number of loops forward or backward.
22) 2 sc, (attach the left hand) 4 sc, capturing the loops of the inside of the arm (armpit) and torso loops, 14 sc, 4 sc with the right hand, 12 sc.
23) 2 sc (over the body), / 3 sc, dec, 3 sc / – on the left hand, 14 sc (over the body), / 3 sc, dec, 3 sc / – on the right hand, 12 sc (on the body) (42)
24) 2 sc, / (dec, 1sc) x2 times, dec / – on the left hand, 12 sc, / (dec, 1 sc) x2 times, dec / – on the right arm, 12 prs (36)
25) (dec, 6 sc) x3 times, dec, 10 sc (32)
26) Make one decrease on each “shoulder”: 3 sc, dec, 13 sc, dec, 12 sc (30)
Put together all the wires (from the legs and arms), they should be enough to a strong neck “held” a fairly large head.
Well fill the torso and shoulders
27) (3sc, dec) x6 times (24)
28) (2sc, dec) x6 times (18)
29) (1sc, dec) x6 times (12)
30-33: 4 rows: 12sc in a circle.
Getting to the knitting of the head!
For the most part, increases should be placed on the sides of the head and on front (front) side (except for those rows in which increases with alternating same amountsc.)
34) 1sc, 3 inc, 4sc, 3 inc, 1sc (18)
35) (1sc, inc) x3 times, 2sc, 2 inc, 2sc, (inc, 1sc) x3 times (26)
36) 3sc, (inc, 1sc) x10 times, 3sc (36)
37) (5sc, inc) x6 times (42)
38) 5sc, (inc, 3sc) x3 times, 10sc, (inc, 3sc) x3 times, 3sc (48)
39) 5sc, (inc, 4sc) x3 times, 10sc, (inc, 4sc) x3 times, 3sc (54)
40-42: 3 rows: 54sc in a circle.
43) (8sc, inc) x6 times (60)
44) (9sc, inc) x6 times (66)
45) (10sc, inc) x6 times (72)
46-48: 3 rows: 72sc in a circle.
49) Mark with pins the reference points for the nose and cheeks to make decavings in the desired places: 20sc, / (dec, 4sc) x3 times / – for the first cheek, / dec, 2sc, dec / – place of the future nose, / (4sc, dec) x3 times / -for the second cheek, 10sc (64)
50) 20sc, (dec, 3sc) x3 times, 2 dec, (3sc, dec) x3 times, 10sc (56)
51) In this row, decavings should be on the sides: 18sc, dec, 26sc, dec, 8sc (54)
52-61: 10 rows: 54sc in a circle.
62) (7sc, dec) x6 times (48)
63) (6sc, dec) x6 times (42)
64) (5sc, dec) x6 times (36)
65) (4sc, dec) x6 times (30)
66) (3sc, dec) x6 times (24) Fill the head well.
67) (2sc, dec) x6 times (18)
68) (1sc, dec) x6 times (12)
69) 6 decavs) Fasten, cut the thread) Stitch the loop, hide the thread)
NOSE
Beige
1) Magic ring into 5sc
2) 5 inc (10)
3) (pr, 2 sc) x3 times, 1 sc (13)
4-5) 13 sc
6) (2 sc, dec) x3 times, 1 sc (10)
7) 10 sc, sl-st. Fasten, cut the thread, leaving the end for sewing. Fill up the nose is not too tight. Sew to the head.
EARS (2 parts)
Beige / flesh color. Do not stuff details!
1) Magic ring into 6sc
2) 6 inc (12)
3) (1 sc, inc) x6 times (18)
4-5) 2 rows: 18 sc
6) (1 sc, dec) x6 times (12)
7) 12 sc, sl-st. Cut the thread, leaving the end for sewing.
Sew on the ears by slightly bending the top edge.
EYES (2 parts)
Iris
A little trick: when knitting an iris, use two colors of thread, only one should be thinner than the other (for example: yarn – green acrylic (for hook3) and iris turquoise color)
In green
1) Magic ring into 6sc, sl-st
2) 2 vp, 6 inc of Hdc, sl-st (12)
Next, we will knit the white part of the eye. Change thread to white:
3) The row is not complete! For the back half loops: 1 VP, 2 SL-ST, 1 SC, OL, (1 Hdc, 1 OL from Hdc) x2 times, 1 sc, 2 sl-st.
Leave the end of the thread for sewing. Before sewing on your eyes, as you wish,
You can make a pair. Mark where the corners of the mouth will be, and make places designated for the eyes and corners of the mouth.
Sew eyes close to the nose. Glue the black half-drops as pupils.
Embroider the brow and mouth with brown thread.
HAIRSTYLE
We knit yellow yarn in a spiral. Do not connect the ranks!
The basis of the “hat”
1) Magic ring into 6sc
2) 6 inc of Hdc (12)
3) for the rear half-loops: (1 Hdc, pr from Hdc) x6 times (18)
4) for the rear half-loops: (1 dc, pr from dc) x6 times (27)
5) for the rear half loops: 27 inc of dc (54)
6) for the rear half-loops: (2 dc, pr from dc) x18 times (72)
7-8) for the rear half loops: 72 dc
9) for the rear half-loops: (7 dc, dec from dc) x8 times (64)
10) The row is not complete: 2 dc, 3 Hdc, 2 sc, 2 sl-st. Cut the thread, leave enough long end for sewing.
Locks
Knit in a spiral with yellow yarn.
We start to knit from the last front half loop (the one at the end knitting basics) to the first (the one at the beginning of knitting).
Attaches a thread to the last half-loop of the 8th row:
1st SERIES:
1st strand: 15 ch, starting from the second from the loop hook, we return to the base connecting posts, 3 sl-st on the base-cap. Similarly, we will knit and all other locks.
2-5th strands: (4 strands): 15 ch, 14 sl-st back in the chain, 3 sl-st in the “cap”.
6-8th strands: (3 strands): 17 ch, 16 sl-st back in the chain, 3 sl-st in the “cap”.
9-18th strands: (10 strands): 13 ch, 12 sl-st back in the chain, 3 sl-st in the “cap”.
19-25th strands: (7 strands): 17 ch, 16 sl-st back in the chain, 3 sl-st in the “cap”. 2nd SERIES: (21 ch, 20 sl-st back in the chain, 5 sl-st in the base-cap) repeat to the end row.
3rd SERIES: (23 ch, 22 sl-st back in the chain, 5 sl-st in the “hat”) repeat to the end row.
4th ROW: (25 ch, 24 sl-st back in the chain, 7 sl-st in the “hat”) repeat to the end row.
5th SERIES: (27 ch, 26 sl-st back in the chain, 9 sl-st in the base-cap) so knit until the very first half-loop of the base spacecraft.
Fasten the thread, hide, cut.
Attach the hair wig with pins to the head so that the first strands placed above the middle of the forehead. Sew a hairstyle.
TROUSERS
We knit with dark blue yarn. You can take the yarn a little thinner than the one that was knitted torso, but leave the size of the hook the same.
We start knitting with legs.
Dial a chain of 28 ch, connect into a ring using sl-st.
1-3) 1 ch, 28 sc, sl-st
4) For the front half loops: 2 ch, (3 dc, inc from dc) x7 times, sl-st (35)
5) 2 ch, (4 dc, inc from dc) x7 times, sl-st (42)
6) 2 ch, 42 dc, sl-st (42)
7) 1 ch, (5 sc, dec) x6 times, sl-st (36)
8) 1 ch, 36 sc, sl-st. Having finished knitting the first leg, fasten the thread, cut it. At do not cut the second leg of the thread!
Tie the second leg in the same way and continue to knit trousers:
9) Dial 10 ch and attach to the 1st leg in the place where you finished knitting, 36 sc for the first leg, 10 sc for the chain, 36 sc for the second leg, 10 sc for chain, put a marker – this will be the beginning of the row (behind) (92)
10-11) 92 sc
12) (3 sc, dec) x9 times, 1 sc, (3 sc, dec) x9 times, 1 sc (74)
13) (dec, 5 sc) x10 times, 4 sc, sl-st (64)
14-15) 2 ch, 64 dc, sl-st.
16) 2 ch, (6 dc, dec from dc) x8 times, sl-st (56)
17) 2 ch, (5 dc, dec from dc) x8 times, sl-st (48)
18) 2 ch, (6 dc, dec from dc) x6 times (42)
19) 2 ch, 42 dc, sl-st.
20) 1 ch, 42 Hdc, sl-st. Fasten, cut, hide the thread.
RDECASHKA
Knit red yarn. You can take the yarn a little thinner than the one that was knitted torso, but leave the size of the hook the same.
We start knitting with a collar. We knit in the back and forth rows.
1) Dial a chain of 32 ch, then starting from the third from the loop hook: 30 dc, 2 ch, turn.
2) 3 dec of dc, 18 dc, 3 dec of dc, 2 ch, turn (24)
3) 2 dec of dc, 16 dc, 2 dec of dc, 2 ch, turn (20)
4) 20 dc, 2 ch, turn (20)
5) 2 inc of dc, 16 dc, 2 inc of dc, 2 ch, turn (24)
6) 3 inc of dc, 18 dc, 3 inc of dc, 1 ch, turn (30)
7) 1 inc, 28 sc, 1 inc, 1 ch, turn (32)
8) 32 sc, 1 ch, turn (32)
9) 5 sc, / pr, 4 sc, inc / for the 1st sleeve, 10 sc, / inc, 4 sc, inc / for the 2nd sleeve, 5 sc, 1ch, turn (36)
10) 5 sc, 6 ch, skip 8 loops, 10 sc, 6 ch, skip 8 loops, 5 sc, 1 ch, turn (32)
11) 5 sc, 6 sc in the air loops of the previous row, 10 sc, 6 sc in the air hinges of the previous row, 5 sc, 1 ch, turn (32)
12) 32 sc, knit 4 ch and connect with the 1st loop of this row into the ring and on knit in a circle, connecting each row at the end.
13) 1 ch, 32 sc, 4 sc in the air loops of the previous row, sl-st (36)
14) 2 ch, (5 dc, inc from dc) x6 times, sl-st (42)
15) 2 ch, (6 dc, inc from dc) x6 times, sl-st (48)
16) 2 ch, (7 dc, inc from dc) x6 times, sl-st (54)
17) 1 ch, 54 sc, sl-st.
18) 2 ch, (2 dc, inc of dc) x18 times (72)
19-20) 2 ch, 72 dc, sl-st. Fasten, cut, hide the thread.
To put on a cup over your legs.
Sleeves (2 parts)
Attach the red thread to the hole left in the shirt (between 9m and 10m rows) in the middle of the “armpit”:
1) 1 ch, 14 sc (8 sc above and 6 sc below), sl-st (14)
2) 2 ch, (1 dc, inc from dc) x7 times, sl-st (21)
3) 2 ch, 21 dc, sl-st (21)
4) 2 ch, (2 dc, inc from dc) x7 times, sl-st (28)
5-8) 4 rows: 2 ch, 28 dc, sl-st.
9) 2 ch, (5 dc, dec from dc) x4 times, sl-st (24)
10) 2 ch, (4 dc, dec from dc) x4 times, sl-st (20)
Change thread to dark blue:
11-12: 1 ch, 20 sc, sl-st. Fasten, cut, hide the thread.
Also tie the second sleeve.
Collar shirt collar
Dark blue yarn.
When knitting, keep the shirt facing you. Attach a thread to the 16th loop of the 1st row shirts. Knit two rows of sc, making 3 sc each in the corners of the collar and decrease in
deepenings of the neck (passing from the loop of the 11th row to the loop of the 12th row of the shirt and vice versa – from the loop of the 12th to the loop of the 11th row). At the beginning of each row, 1 ch, at the end of sl-st.
You can make a belt for a shirt by knitting a chain of air loops length suitable for you.
Sew a beautiful button to the collar. Make a loop from a thread.
LAPTI (2 parts)
Colored thread (gray-beige shades). In this case, the yarn is slightly thinner than yarn of legs.
Sole knit in rotary rows “back and forth” from toe to heel.
1) Dial a chain of 11 ch, starting from the second from the loop hook: 10 sc, 1 ch, turn
2-8) 7 рядов: 10 sc, 1 ch, поворот.
9) 1 dec, 6 sc, 1 dec, 1 ch, поворот (8)
10-12) 3 ряда: 8 sc, 1 ch, поворот
13) 1 dec, 4 sc, 1 dec, 1 ch, поворот (6)
14-19) 6 рядов: 6 sc, 1 ch, поворот
20) 1 dec, 2 sc, 1 dec, 1 ch, поворот (4)
21-23) 3 ряда: 4 sc, 1 ch, поворот
24) 2 decreases.
Next, we knit around the perimeter of the resulting sole:
25) 1 ch, 62 sc (3 sc each in corners) (62)
26-28) 3 rows: 62 sc
29) Decreases on the sides of the toe: 23 sc, dec, 8 sc, dec, 27 sc (60)
30) 17 sc, 12 dec of Hdc, 19 sc (48)
31.2 dec, 12 sc, 8 dec from Hdc, 11 sc, 2 dec, 1 sc, sl-st. Do not cut the thread yet!
We knit the ties of bast shoes: dial a chain of 51st ch, 50 sl-st back along the chain to the heel bast shoes, sl-st in the loop of the base of the chain; tie the second tie-string in the same way.
Returning to the base, tie the edge of the bast shoes with connecting posts in a circle.
Fasten, cut, hide the thread.