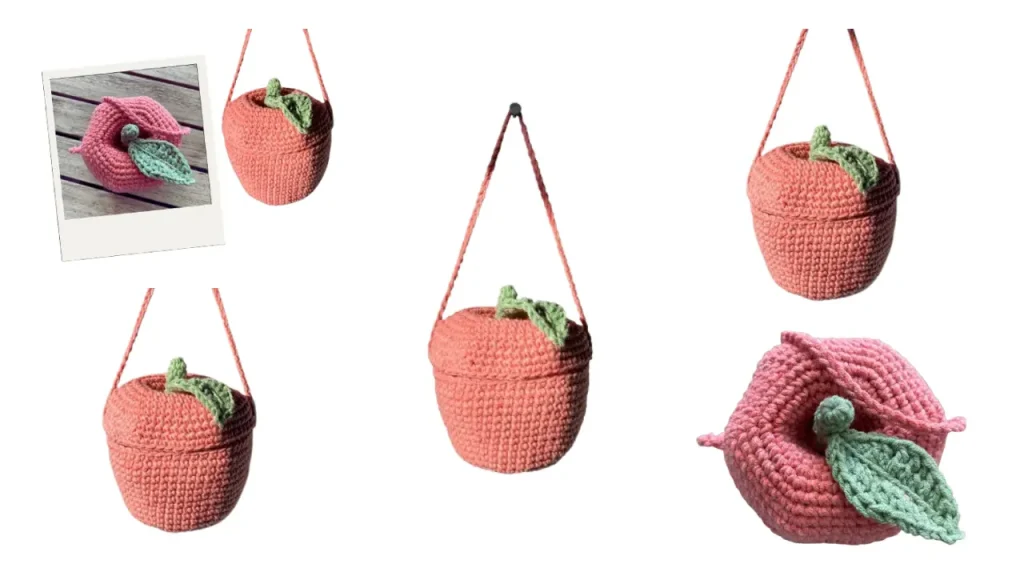
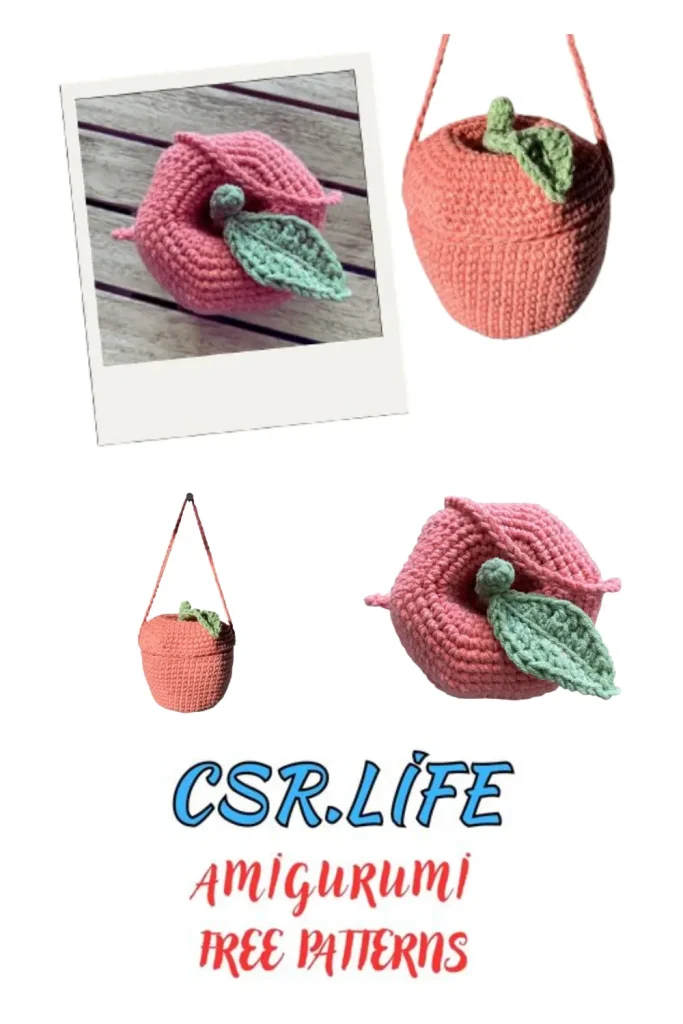
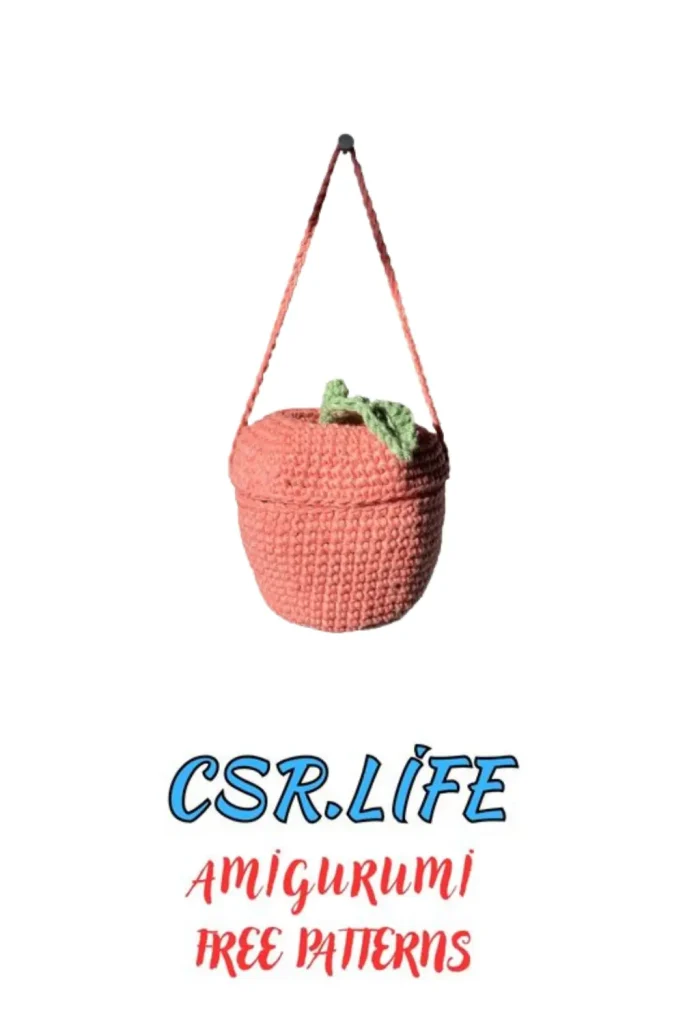
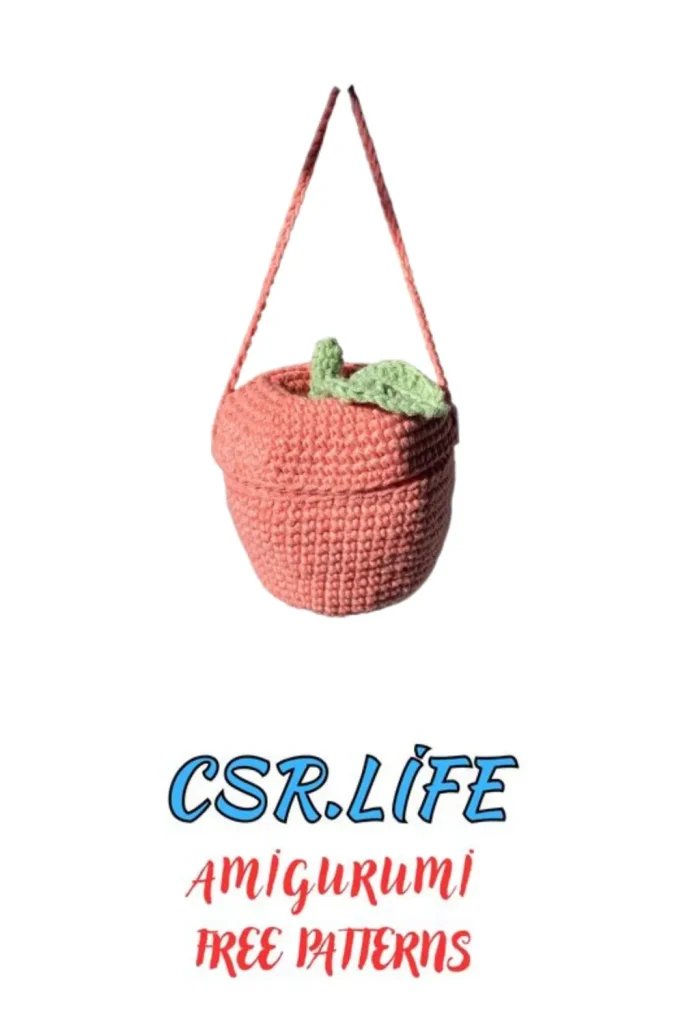
Apple Pouch Amigurumi Free Pattern – Crochet Tutorial
The Apple Pouch Amigurumi is a cute and practical crochet project that combines playful design with everyday usability. This free crochet tutorial guides you step by step through creating a small apple-shaped pouch, perfect for storing coins, earbuds, or tiny accessories. Easy to customize with different colors and sizes, this amigurumi pouch is a fun and quick make for gifts, markets, or personal use.
Apple Pouch
What You Will Need
1: Red 8 ply / DK yarn
2: Green 8 ply / DK yarn
3: Stitch markers
4: Sewing needle
5: 4 mm hook
6: Scissors
7: This pattern is written in US terminology.
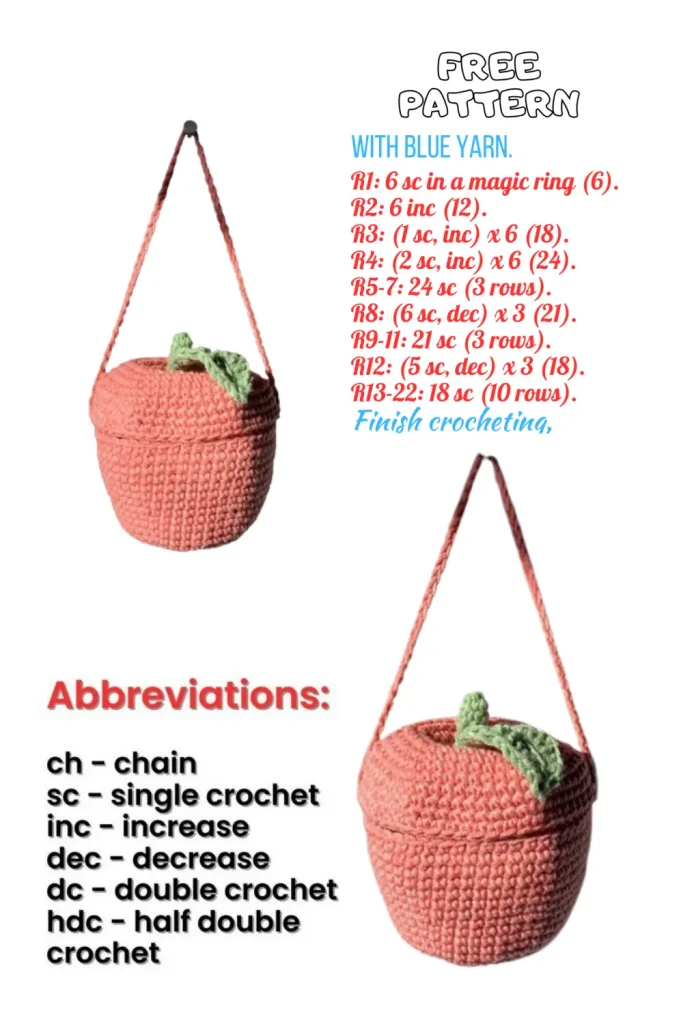
Abbreviations
1: ch – chain
2: st – stitch
3: sc – single crochet
4: inc – increase
5: dec – decrease
6: dc – double crochet
7: tr – triple crochet
8: x # – repeat
9: brackets – that many times
10: slst – slip stitch
11: inv slst – invisible slip stitch
PATTERN
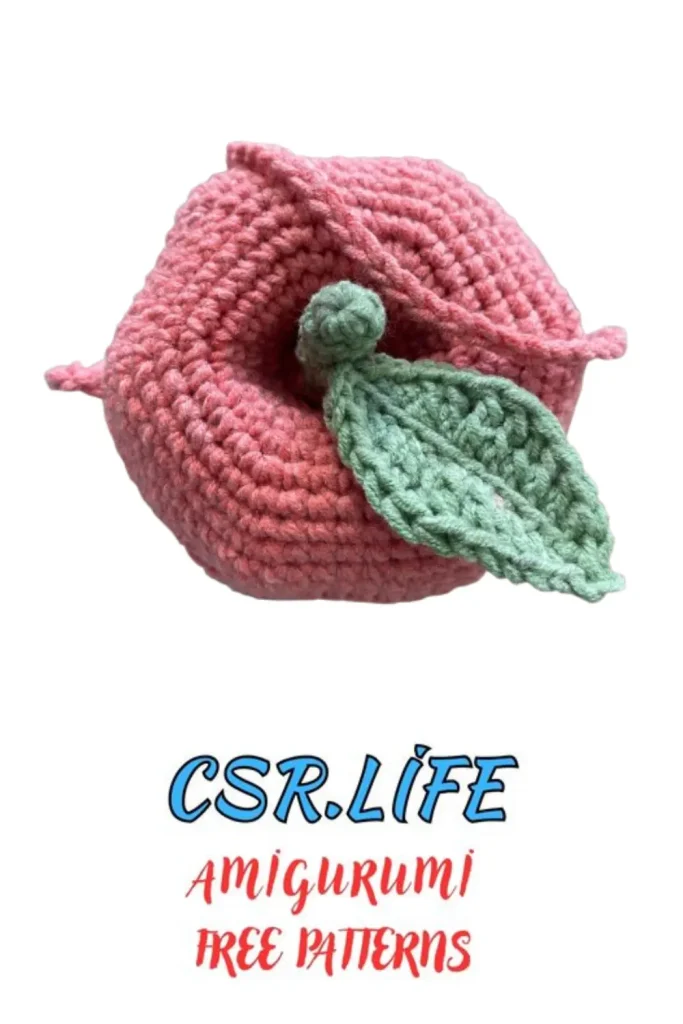
Apple Body
Red yarn:
1: 6 sc in magic ring [6]
2: 1 sc in each st [6]
3: Repeat row 2 once more (2 rows total)
4: (1 sc, inc) x 3 [9]
5: inc in each st [18]
6: (1 sc, inc) x 9 [27]
7: (2 sc, inc) x 9 [36]
8: (5 sc, inc) x 6 [42]
9: 1 sc in each st [42]
10: (6 sc, inc) x 6 [48]
11: 1 sc in each st [48]
12: Repeat row 11
13: Repeat row 11 (3 rows total)
14: (7 sc, inc) x 6 [54]
15: 1 sc in each st [54]
16: Repeat row 15
17: Repeat row 15
18: Repeat row 15
19: Repeat row 15
20: Repeat row 15
21: Repeat row 15 (7 rows total)
22: Slst into the next st, ch 60.
23: Fasten off, leaving enough yarn to sew to the other side of the pouch. Cut yarn.
24: Mark the stitch on the opposite side of the pouch, approximately 27 sts from the base of the chain.
Apple Lid
Starting with green yarn:
1: 6 sc in magic ring [6]
2: 1 sc in each st [6]
3: Repeat row 2
4: Repeat row 2
5: Repeat row 2
6: Repeat row 2
7: Repeat row 2
8: Repeat row 2
9: Repeat row 2
10: Repeat row 2 (9 rows total)
Switch to red yarn:
11: inc in each st [12]
12: 1 sc in each st [12]
13: Repeat row 12
14: Repeat row 12 (3 rows total)
15: (1 sc, inc) x 6 [18]
16: 1 sc in each st [18]
17: (2 sc, inc) x 6 [24]
18: 1 sc in each st [24]
19: Tip – Push the stem down through the lid to create the desired shape.
20: (3 sc, inc) x 6 [30]
21: (4 sc, inc) x 6 [36]
22: (5 sc, inc) x 6 [42]
23: (6 sc, inc) x 6 [48]
24: (7 sc, inc) x 6 [54]
25: (8 sc, inc) x 6 [60]
26: 1 sc in each st [60]
27: (8 sc, dec) x 6 [54]
28: 1 sc in each st [54]
29: Inv slst to next stitch. Weave in ends.
Leaf
Green yarn:
1: Ch 14
2: Slst into the 2nd ch from hook. Slst in each st along one side of the chain (13 sts).
3: Turn to work down the back loops of the chain. Skip 1 st, slst in next, then work:
(sc, hdc, 1 dc in next 2 sts, 1 tr in next 3 sts,
1 dc in next 2 sts, hdc, sc, slst). Ch 2.
4: Slst in the same st as the previous slst.
5: Turn to work on the remaining back loops on the opposite side of the leaf.
6: Repeat the stitches from step 3. Slst in last st.
7: Fasten off and leave enough yarn to attach the leaf to the stem of the lid.
8: Secure the leaf to the middle of the stem. Tie knots inside the stem and weave in ends.
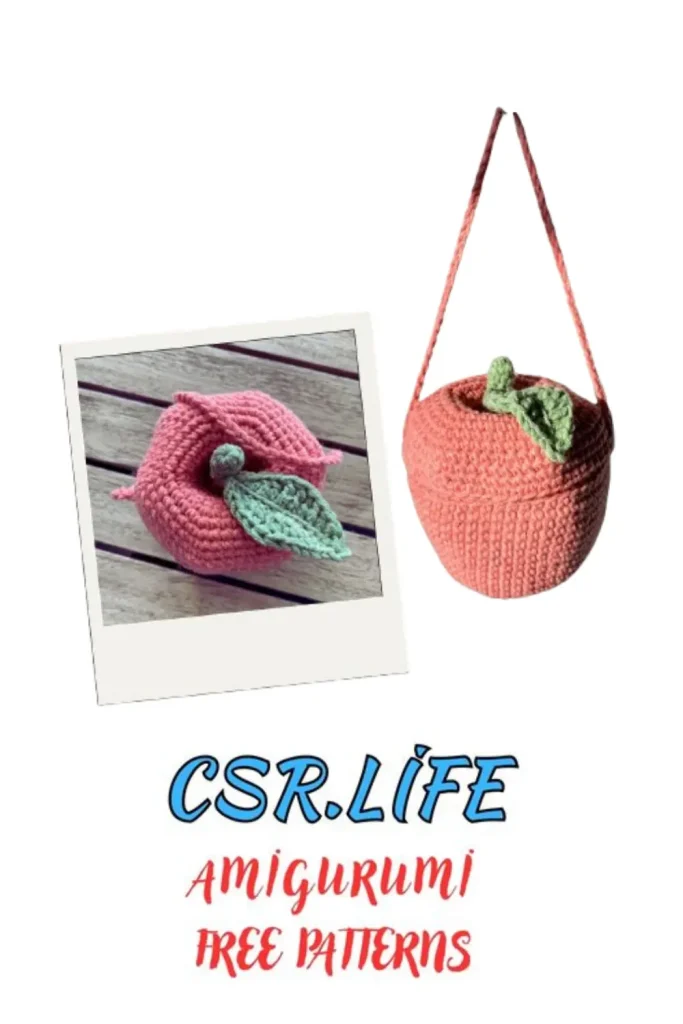
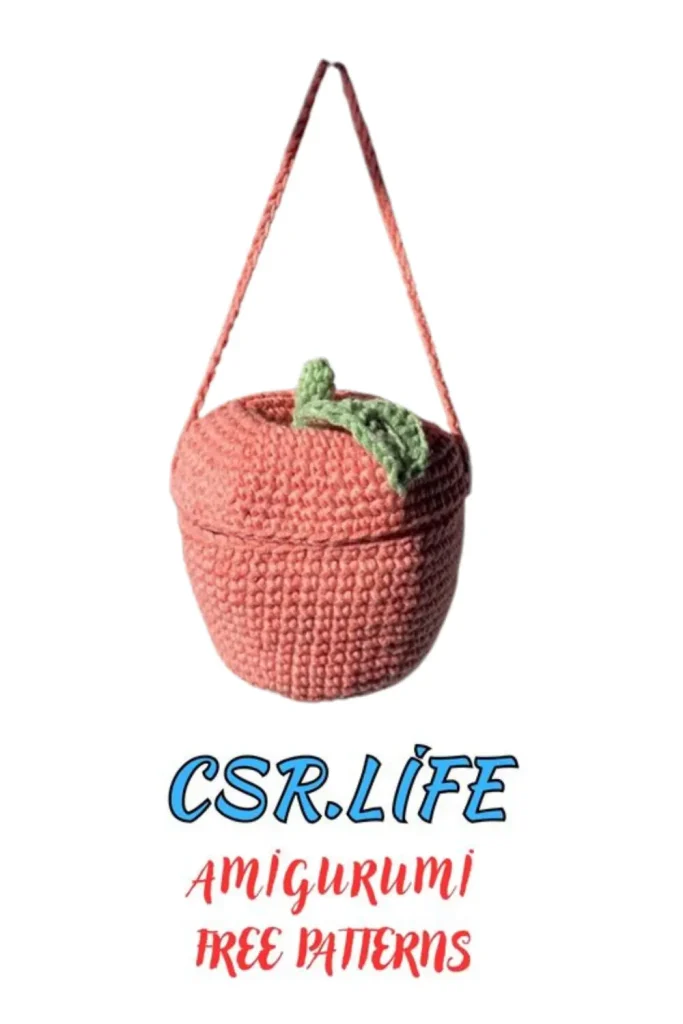
Attach Lid to Body
1: Thread the yarn at the end of the chain onto a sewing needle.
2: Pull the chain through any stitch on the outer row of the lid from underneath, pointing up.
3: Find the stitch exactly across from where you entered (approximately 27 sts away).
4: Thread the chain through that stitch from the top going down.
5: Attach the chain to the stitch marked earlier on the apple body.
6: Double loop or tie a knot, then weave the end securely inside the apple.
🎉 Your Apple Pouch is complete!