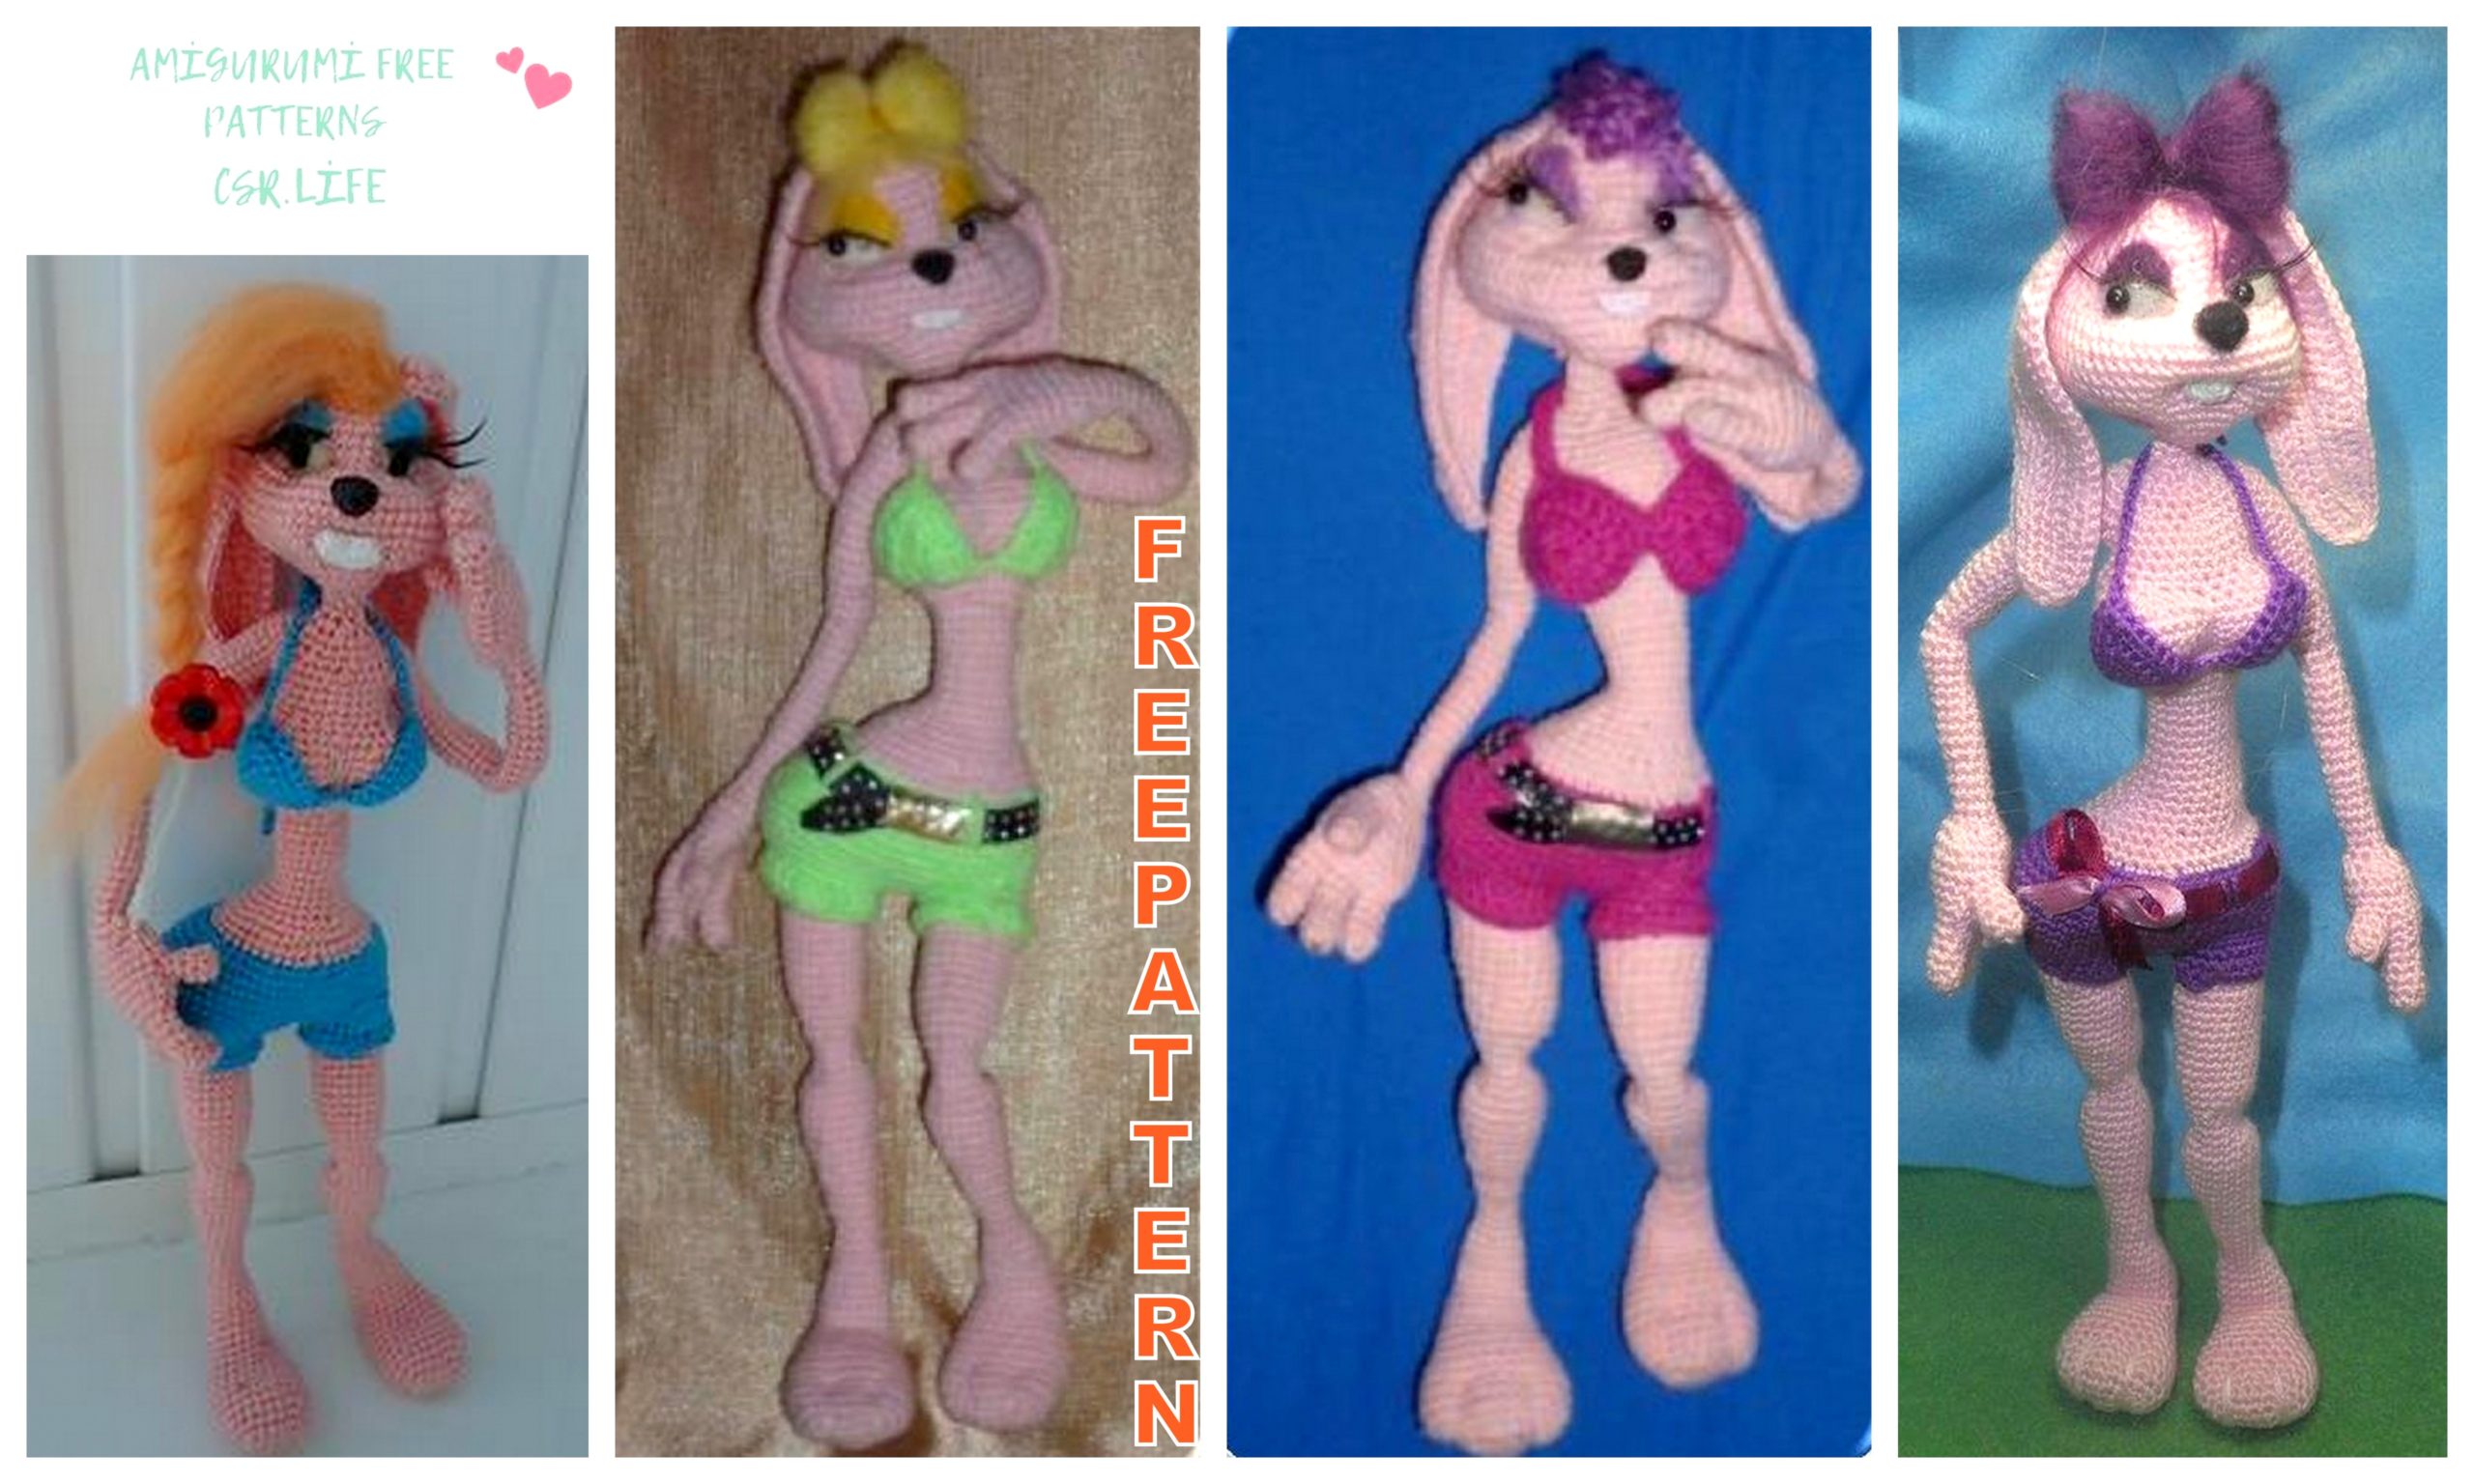
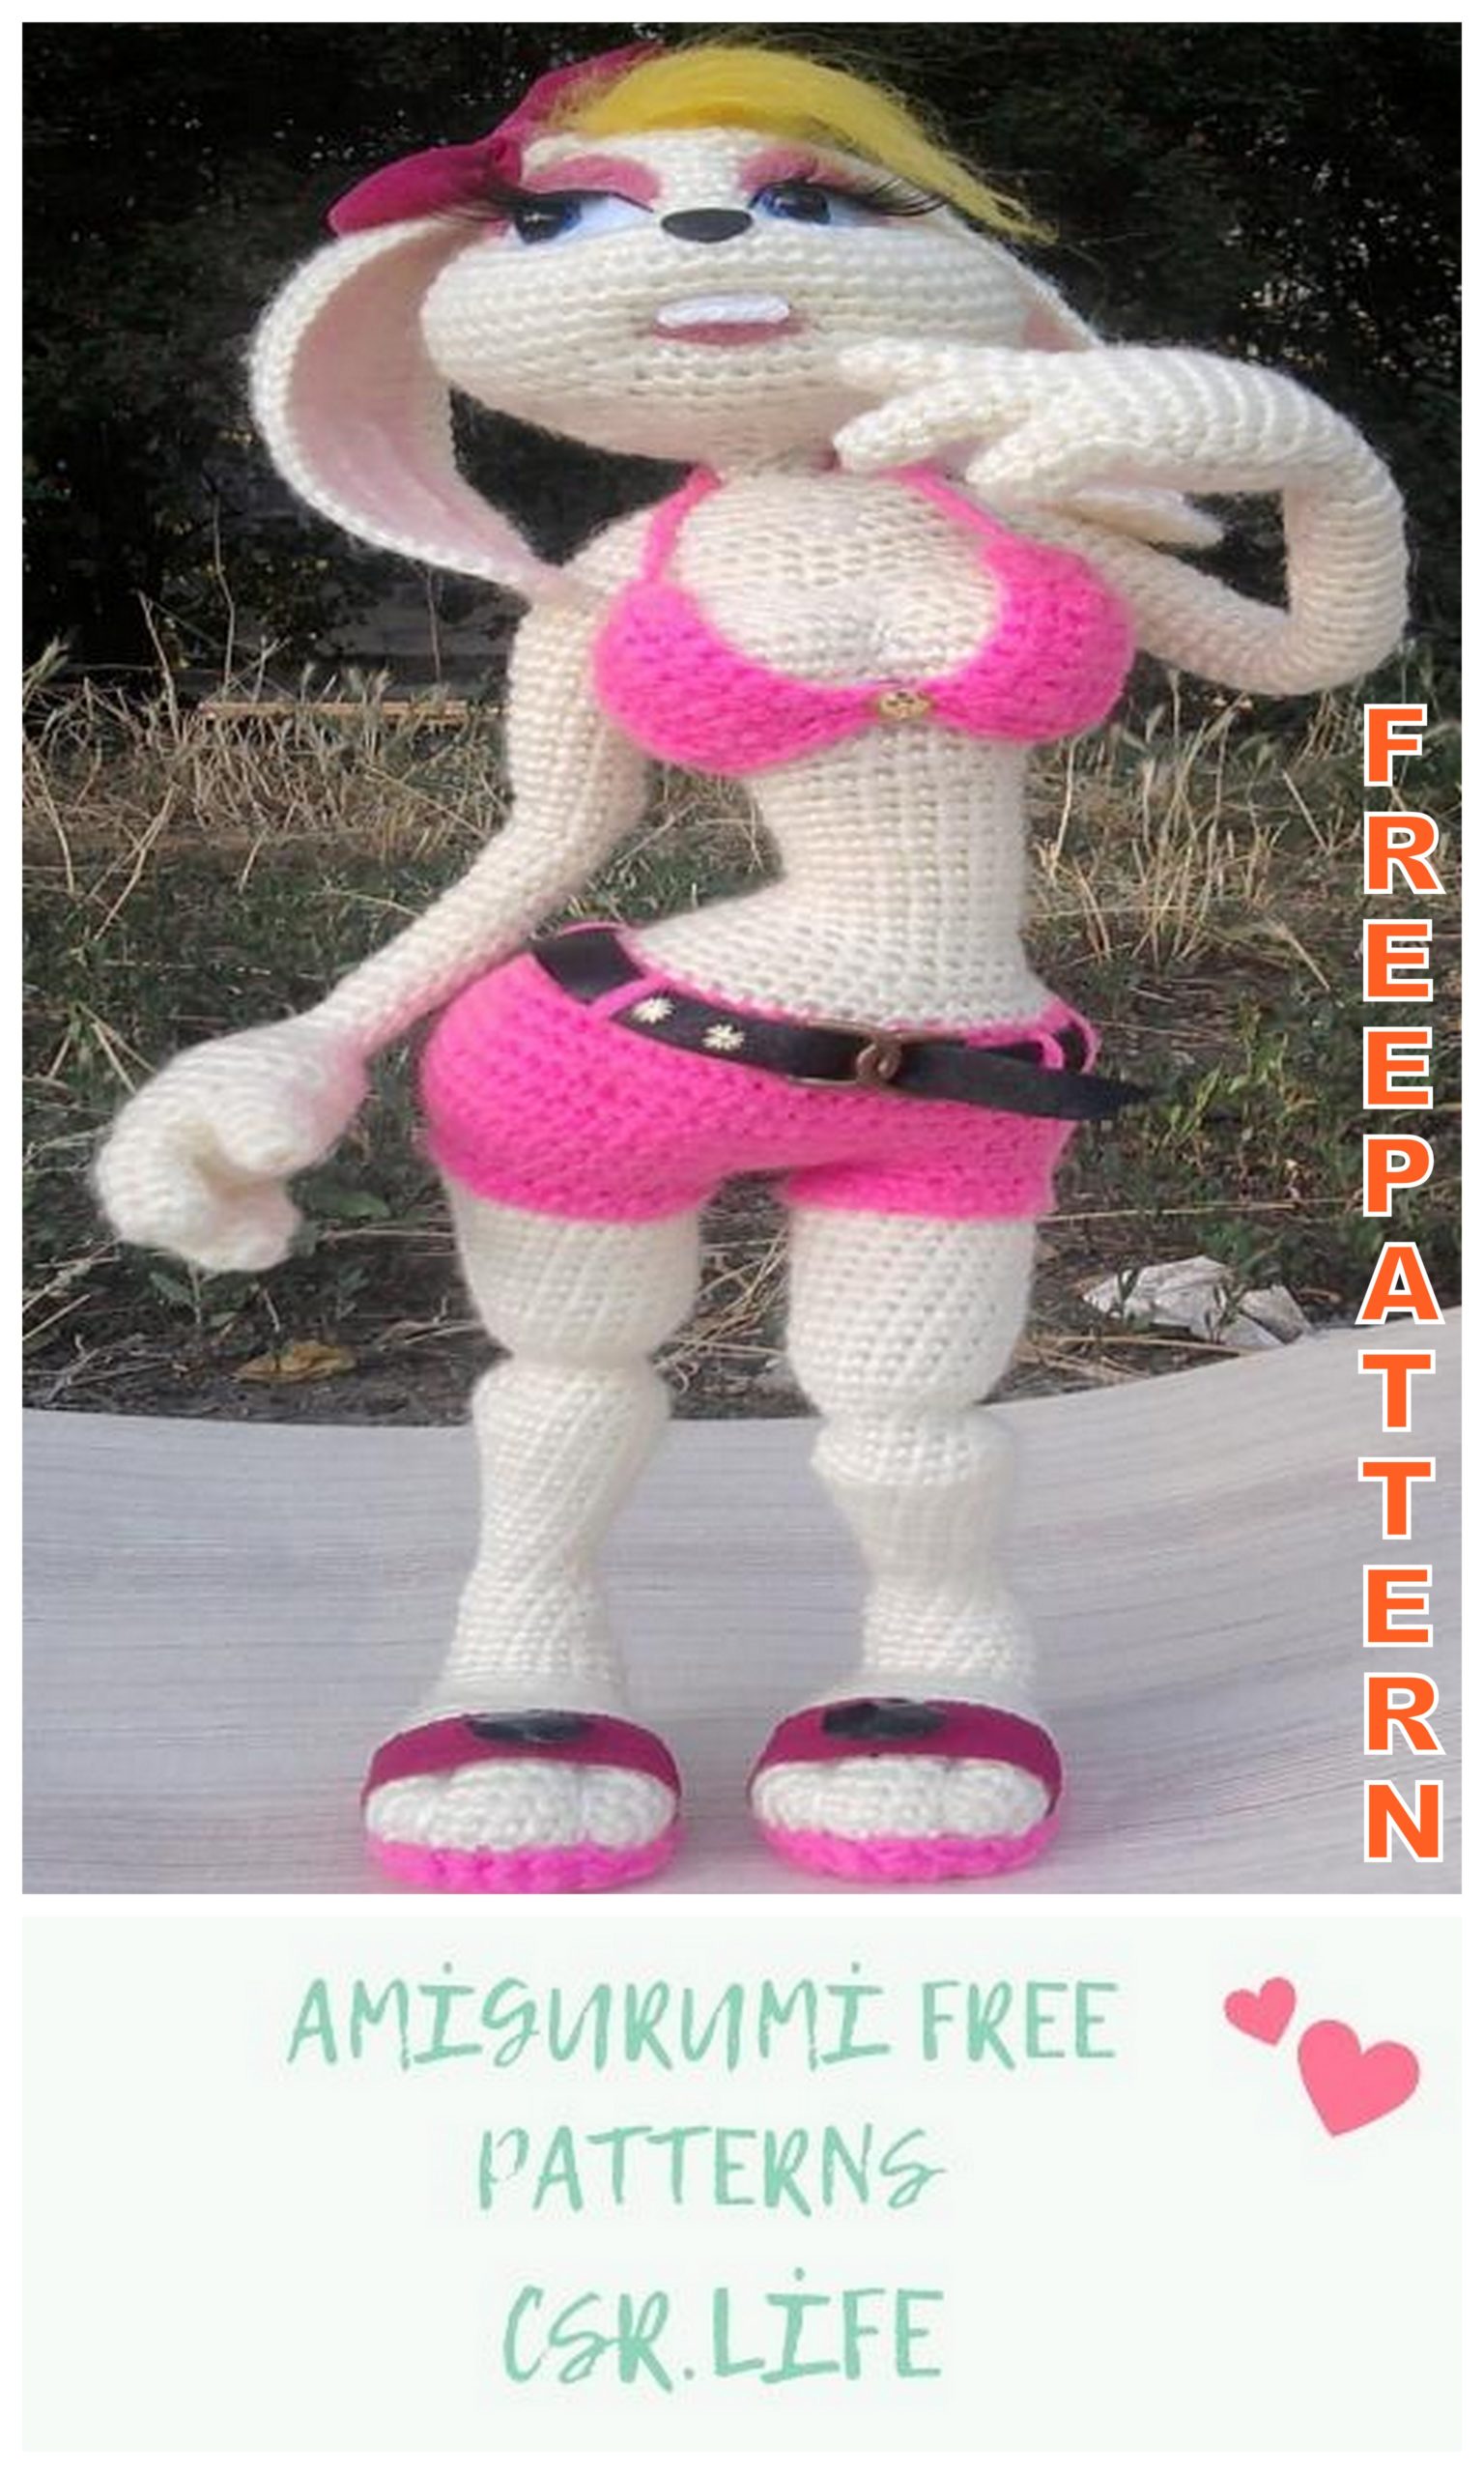
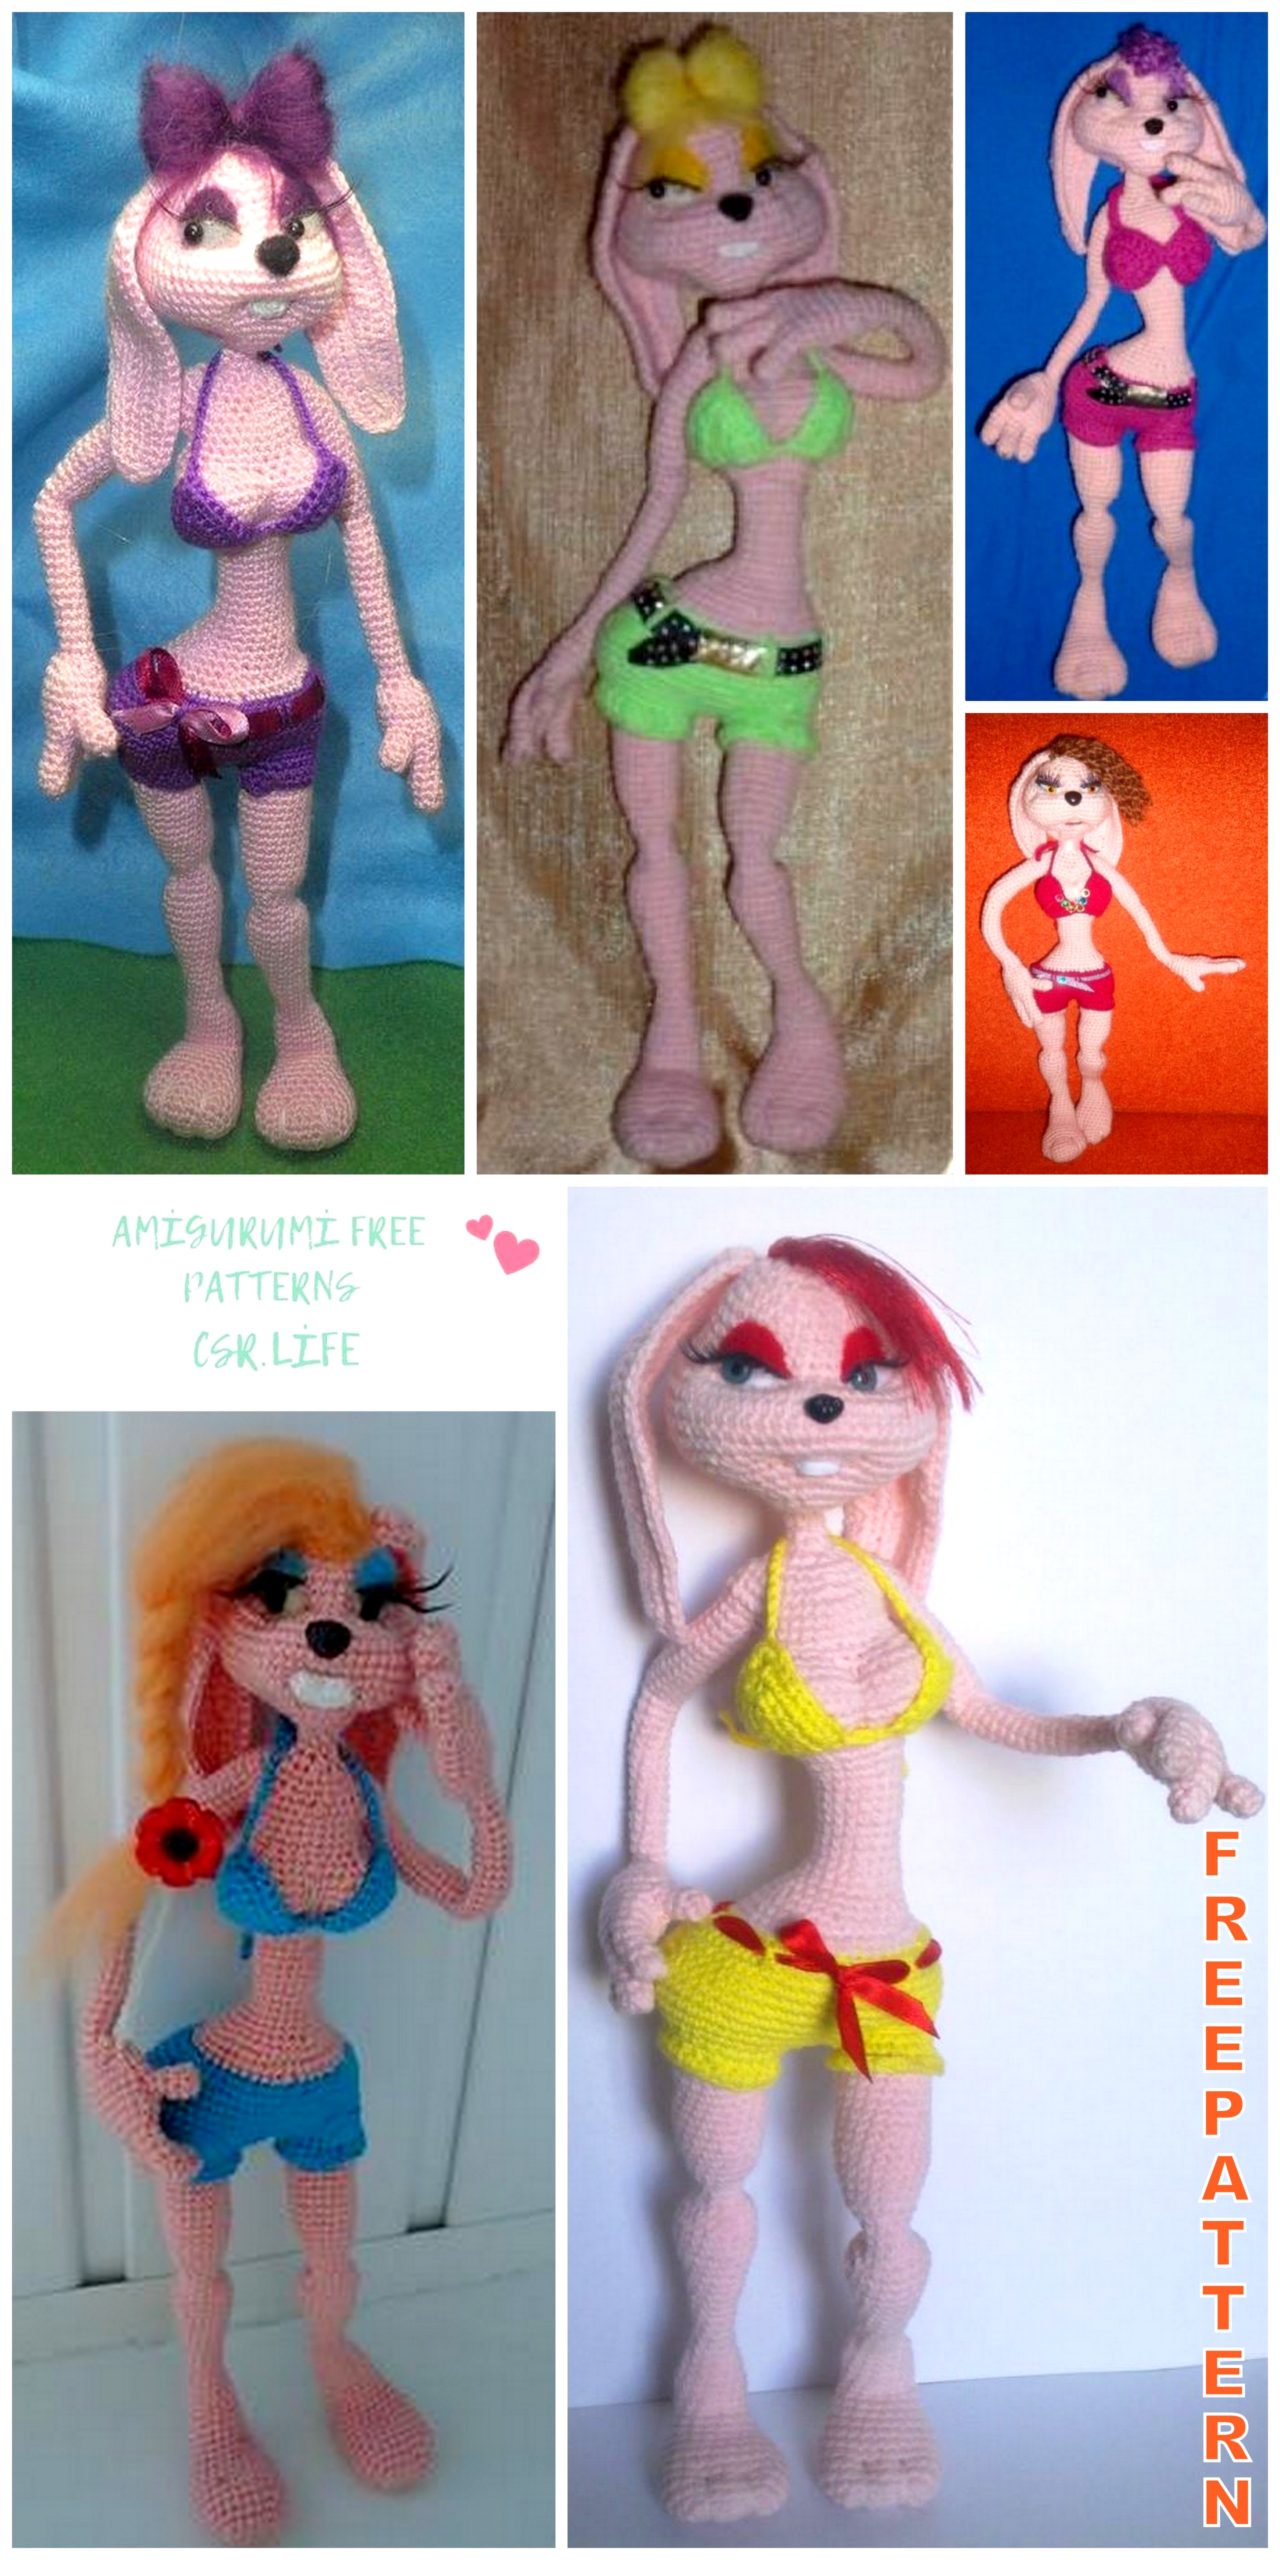
Bunny Girls Amigurumi Free Pattern
We continue to share the most beautiful and high quality amigurumi patterns for free. In this article, we shared a wonderful amigurumi bunny pattern for you.
You will need:
1. Threads 100% acrylic; pink for the body and any other for
clothes. I used BABY from “vita” 100gr / 400m.
2. Threads are thin, white (I have a “gamma” iris), you need
about 20 – 30 cm.
3. Hook No. 1.0
4. Copper wire, it took me about one meter
5. A little wool for felting and a needle (black for the nose; white
for eyes; and colored for hair and eyelids.
6.2 beads for pupils
7. Sewing needle.
8. Not a large section of leather / deputy. for the belt. Its length is
hip circumference + 1 – 1.5 cm.
Filler
Legend:
sc – single crochet
dc – double crochet
hdc – half double crochet
sl-st – slip sititch
inc – increase
dec – decrease
double dec – knit three stitches together
double inc – knit three stitches from one loop
Hands:
Index finger (2pcs.)
1st row. – dial 6sc in the amigurumi ring. = 6sc
2-5 rows = 6sc
Middle finger (2pcs.)
1st row – dial 6sc in the amigurumi ring. = 6sc
2-6 rows – = 6sc.
Thumb (2pcs.)
1st row – dial 6sc in the amigurumi ring. = 6sc.
2-4 rows – = 6sc.
Little finger (2 pcs.)
1st row – Dial 6sc in the amigurumi ring. = 6sc
2-4 rows – = 6sc, do not cut the thread, start knitting the palm:
1st row – (on the little finger) 3sc., (On the middle) 3sc., (On the index) 6sc., (On the middle) 3sc., (On the little finger) 3sc. = 18sc
2nd row – inc, 7sc., Inc, 9sc. = 20sc
3rd row – = 20sc
4th row – 7sc., Next 3sc. knit together with thumb 3sc, 10sc. = 20sc (For the right hand.)
5th row – 7sc., Further along the thumb – 3sc., 10sc. = 20sc
6th row – = 20sc
7th row – (dec, 8sc.) X 2 times = 18sc
8th row – = 18sc.
9th row – double dec, 3sc., Double dec, (1sc., Double dec) x 2 times, 1sc. = 10sc
10th row – 4sc., Double dec, 3sc. = 8sc
11th row – dec, 6sc. = 7sc
12th row – = 7sc
13th row – inc, 6sc. = 8sc
14th row – = 8sc
15th row – 5sc., Inc, 2sc. = 9sc
16 – 25 rows – = 9sc
26 row – knit the elbow: 1sc., Dec, 1sc., Double inc, 4sc. = 10sc
27th row – 1sc., Dec, 2sc., Double inc, 4sc. = 11sc
28th row – 3sl-st., 8sc. = 11sc
29 – 41 rows – = 11sc. Fasten the thread, cut off.
For the left hand:
knit like right, only in
4th row – 12sc., Next 3sc knit together with 3sc thumb, 5sc = 20sc
5th row – 12sc., Then 3sc. on the thumb, 5sc. = 20sc
Then knit again like the right hand. Fasten the thread, cut.
Feet:
In the footsteps, be careful! I knit not much differently than many
and therefore there are explanations, namely when I knit around the chain from ch.,
I mark the last loop with a marker for convenience!
It is she who will be the first loop in the second row!
Otherwise, you will have offsets.
1st row – Dial 6ch. Knit along the chain. İnc, 3sc., Double inc, 3sc = 12sc
2nd row – inc, 1sc., Inc, 3sc., Inc, 1sc., Inc, 3sc = 16sc
3rd row – 2sc., Inc, 1sc., Inc, 5sc., Inc, 1sc., Inc, 3sc = 20sc
4th row – 3sc., Inc, 1sc., Inc, 7sc., Inc, 1sc., Inc, 4sc = 24sc
5-8 rows – = 24sc
9th row – 5sc., Dec, 10sc., Dec, 5sc = 22sc
10th row – = 22sc
11th row – 5sc., Dec, 9sc., Dec, 4sc = 20sc
12th row – = 20sc
13th row – 7sc., 8 ch. (mark 3 ch. from it after we will knit a leg), skip 8 sc and from 16st knit 5sc = 20sc
14th row – (dec, 1sc) x 6 times, dec = 13sc
15th row – dec X 5 times, double dec Sew up the hole. This is what the leg frame looks like (the length is based on the length of the hare)
Leg – right
Along the hole formed, from the marked loop (from the heel side), tie 16sc in a circle.
2 – 4 rows – = 16sc
5th row – 2sc., Dec, (it is important that dec are on the sides !!!), 7sc., Dec, 3sc = 14sc
6th row – = 14sc
7th row – 2sc., Dec, 6sc., Dec, 2sc = 12sc
8th row – 2sc., Dec, 4sc., Dec, 2sc = 10sc
9 – 11 rows – = 10sc
12th row – inc, 9sc = 11sc (inc back) Stuff while knitting.
13th row – 1sc., Inc, 9sc = 12sc
14th row – = 12sc
15th row – inc, 3sc., Inc, 7sc = 14sc
16th row – = 14sc
17th row – 1sc., Inc, 3sc., Inc, 8sc = 16sc
18th row – = 16sc
19 row – 1sc., (Inc, 2sc.) X 3 times, 6sc = 19sc
20 – 23 rows – = 19sc
24th row – 1sc., (Dec, 1sc.) X 4 times, 6sc = 15sc
25th row – double dec, 1sc., Dec, 1sc., Double dec, 5sc. = 10sc
26 – 27 rows – = 10sc
28th row – (1sc., Inc) х 3 times, 2sc., Inc, 1sc. = 14sc
29th row – (2sc., Inc) x 4 times, 2sc. = 18sc
30 – 31 row – = 18sc
32 row – 3sc., Inc, 6sc., Inc, 7sc. = 20sc
33 – 39 rows – = 20sc
40 row – 6sc., Inc., 3sc., Sl-st., Turn
41 row – with 2 loops 8sc., Sl-st., Turn
42 row – 3sc., Inc, 3sc., Inc, 11sc = 21
43 row – = 14 sc. The row is not complete.
Leg – left:
Knit, as well as right, but from row 33 to row 42 = 20sc. We knit in a circle.
43 rows are missing!
The straight and back rows should have turned out a little from the side:
This marked loop is not a marker that reads the rows, This is in order to see it, but a marker, as usual at the end of the row! – The green thread is
marker, and orange is just a marked loop, from which the second row will begin, namely the first increase. After orange. the thread can be removed, then it will not
needed.
Loop (on a chain) noted:
She’s here:
Booty – shorts:
With a thread of a different color (the color of the shorts, and it is advisable to take the same thread as the bunny itself was knitted!) Dial 22ch., Close in
ring, while the hook must be taken half a size larger, that is, No. 1.5
For the right leg
– knit one row 22sc along the chain
2nd row – Important! Then we knit a crochet No. 1.0 (or with the one that knitted the arms of the legs), put a knitted ring from 22sc on top on
right leg, knit both shorts and leg together. Start from the first loop. Finish work, break the thread.
For the left leg.
Cast on chain 20 ch crochet number 1.5. Crumple in a ring, knit one row = 20sc
2nd row – as well as knit the right leg together with the leg, already crochet No. 1.0. Start from first loop (left leg)
new marker – this will be the beginning of the row.
3rd row – 5sc., 3ch., Next sc in the fourth loop of the right leg – knit 10sc., (Inc, 1sc.) X 4 times, 5sc. (Here will be
second sc. knitted in the last loop of the previous row.), (along the chain) – 3sc., (on the left leg) – 15sc. = 53sc
4th row – 6sc., Double inc, 8sc., (Inc, 1sc.) X 2 times, inc x 5 times, (1sc., Inc) x2 times, 6sc., Double dec, (1sc., Inc) x 4 times,
skip 1 loop, 7sl-st. = = 65sc
5th row – 4sl-st., 45sc., (Inc, 1sc.) X 4 times, skip 1 loop, 7sl-st. – behind the back wall p. = 68sc.
6th row – 4sl-st.-behind the back wall, 58sc., 6sc.- behind the back wall = 68
7th row – 2sc. – behind the back wall, double dec, 63sc. = 66sc
8th row – = 66sc
9th row – 20sc., (Dec, 3sc.) X 3 times, 28sc., Inc, 2sc = 64sc.
10th row – (1sc., Inc) x 3 times, 16sc., (Dec, 2sc.) X 3 times, 6sc., Double dec, (3sc., Dec) x 3 times, 6sc. = = 59sc
11th row – = 59sc.
12th row – 4sc., Dec, 12sc., Dec, (2hdc., Dechdc.) X 3 times, 7sc., Double dec, 5sc., Dec, 10sc. = 51
13th row – (dec, 4sc.) X 3 times, (dec, 1sc.) X 4 times, 3sc., Double dec (put a new marker here), 15sc. = 42sc. A thread
fix, trim.
There are no straps on the pope. If everything is done correctly and well, properly filled with filler, then she will lie down like us
it is necessary. Here you also need to ensure that the lift at the right leg remains on the side.
Watch the ledge, if it is strictly from the side, then everything is correct:
We knit together and as a whole, i.e. or anything will not be sewn. From any place, only the right leg, and connect the left
starting with the first loop! here is a photo – here we put on a knitted ring and tie it
to the leg. Next, we also do it with the second leg, but we do not break the thread, but we knit further and connect it to the right –
Then knit according to the description. Both on the right and on the left it is better to start with the first loop, and
then how to chastise 4 loop?
Body:
Knit from a new marker, body color, behind the back wall. (14th row)
14th row – (3sc., Dec) x 2 times, (11sc., Dec) x 2 times, 6sc. = 38sc.
15th row – 4sc., Dec, 32sc = 37sc
16th row – 20sl-st., 17sc. = 37sc
17th row – (5sc., Dec) x 5 times, 2sc = 32sc
Row 18 – (2sc., Dec) x 2 times, 4sc., Dec, 8sc., Dec, (2sc., Dec) x 2 times. = 26sc
19 row – 18sc., Dec, 4sc., Dec = 24sc
20 row – 18sc., Dec, 2sc., Dec = 22sc
21 row – = 22sc
22 row – 20sc., Dec = 21sc
23rd row – dec, 1sc., Dec, 16sc. = 19sc
24 – 29 rows – = 19sc. Knit behind marker 9sc. Put a new marker (now this is the beginning of the row)
30th row – 2sc., Inc, (3sc., Inc) х 3 times, 4sc. = 23sc
Row 31 – = 23sc
32 row – 2sc., Inc, 3sc., Inc, 4sc., Inc, 11sc. = 26sc
Series 33 – inc, 11sc., Inc, 13sc. = 28sc
34th row – (2sc., Inc) х 9 times, 1sc. = 37sc
35 row – 4sc., Double inc, 3sc., Dec, 3sc., Double inc, 23sc. = 40sc
36 row – 4sc., Inc x 4 times, 2sc., Dec, 2sc., Inc x 4 times, 4sc., Dec, 14sc., Dec = 45sc
37th row – 14sc., Dec, 29sc. = 44sc
38 – 39 rows – = 44sc
40 row – 3sc., (Dec, 2sc.) X 3 times, double inc, (2sc., Dec) x 3 times, 16sc. = 40sc.
41 row – (double dec, 3sc.) X 4 times, double dec, 13sc = 30sc
42 row – 3sc., Double dec, 2sc., Inc, 2sc., Double dec, 16sc. = 27sc
43 row – = 25sc do not tie to the marker! (new marker here)
44th row – we knit this row together with the hands:
Knit, grabbing 10,9,8 loops (left hand), 14sc (along the body), then again with the hand (right) from 11,10,9 loops, then 7sc to
body = 27sc Note how the frame is located. It is better to cut off the excess wire, and fix the edges at
using glue or wrapping, but not in a thick layer !!!
45 row – knit in a large circle = (on the left hand) 8sc., 14sc. (On the body), (on the right) 8sc., 7sc (on the body. = 37sc
46th row – = 37sc
47 row – (3sc., Dec) x 2 times, 3sc., Double dec, (3sc., Dec) x 2 times, 3sc., 8sc. = 31sc
48th row – 8sc., (2sc., Dec) х 2 times, 8sc., Dec, 3sc., Dec = 27sc
49th row – dec x 4 times, 7sc., Dec x 4 times, 4sc. = 19sc
50th row – (1sc., Dec) x 6 times, 1sc. = 13sc
51 row – dec х 6 times, 1sc. = 7sc
52 – 53 rows – = 7sc.
Fasten the thread, leave for sewing
Head:
1st row – dial 6sc in the amigurumi ring
2nd row – inc x 6 times = 12sc
3rd row – (1sc., Inc) x 6 times = 18sc
4th row – = 18 sc
5th row – (2sc., Inc) x 6 times = 24sc
6th row – (3sc., Inc) x 6 times = 30sc
7 – 9 rows – = 30sc
10th row – 10sc., (Inc, 1sc.) X 10 times = 40sc
11th row – 10sc., (Inc, 1sc.) X 15 times = 55sc
12 – 16 rows – = 55sc
17th row -1sc, (7sc., Dec) x 6 times = 49sc
18 row -1sc, (6sc., Dec) x 6 times. = 43sc
19 row -1sc, (5sc., Dec) x 6 times = 37sc
20 row – = 37sc
21.-row -1sc, (4sc., Dec) x 6 times = 31
22 row -1sc, (3sc., Dec) x 6 times = 25sc
23rd row – = 25sc
24 row -1sc, (2sc., Dec) x 6 times = 19sc
25 row -1sc (1sc., Dec) x 6 times = 13sc
26th row – dec x 6 times. Finished, leave the thread for the tightening.
Ears: 2pcs
1st row – Dial 32 ch., From 2 loops: 5sc., 5hdc., 11dc., 6hdc., 3sc., Inc in the extreme 32 loop + 2ch., On the reverse side
chain: inc 32, 3sc., 6hdc., 11dc., 5hdc., 5sc.
2nd row Ch., Turn, 4sc., 5hdc., 13dc., 6hdc., 4sc. Now we knit in the arch: 1sc + 2ch, 1sc. Into the arch. On reverse
side: 4sc., 6hdc., 13dc., 5hdc., 4sc.
3rd row – 1Sl-st., 31sc., 1 sc in the arch + 1ch., 1sc in the arch, 31 sc., 1sl-st. Fasten the thread, leave for sewing.
Teeth
before you type ch. leave the long end of the thread. (we will need it later!)
Cast on 7ch. With fine yarn, starting at 2, knit 5hdc., 1sl-st .. Make a knot and with a sewing needle
or hook, thread the thread to the opposite end, fasten, leave for sewing.
Registration:
Foot tightening:
We do the tightening at the level of 5 or 6 rows.
Breast tightening:
Anyone who likes breasts without weights can be left as they are! I just wanted to emphasize it. I originally inserted the needle
through the neck, in order to hide the bundle, and brought it under the chest. Then she pulled it a little from the sides (by the method back and forth.) And
again brought the needle under the chest to make a tightening between the breasts. (from bottom to top; and from top to bottom), then inserted the needle along
in the middle, and pulled it with a small stitch, after which she again brought the needle into the neck and secured it, cut it off.
Head tightening:
First, press in with your fingers to locate the eyes and mouth. The mouth should be about 10 – 11
row (count from the bottom) After you have determined, insert the needle from the bottom and bring it to the corner of the mouth, after (with a small
stitch) bring to the eye area. Then back to your mouth, but to another corner
Then pull the bridge of the nose. Then shape the chin.
And the last jerk, to shape the cheeks. After we overcome this, you need to sew on the ears at the level of 4 rows and
arrange them so that they are slightly behind, and not exactly on the sides.
Then we take our teeth. In the hole that we pulled under the mouth, we apply it to the top at the level you need, and at
using a hook or needle, we stretch the long ends of the thread left by us, to the top, and, as it were, tighten the teeth, they
they will snap into place, and you will only have to imperceptibly fasten the thread and hide the ends.
Weld on the nose, or sew on a bead. Sew the head to the neck. Make eyes out of felt or felted.
You can even customize a hairstyle and a hat.
And, of course, a belt and a bra. Connect two triangles, connect with two ch. together, make chains from ch. for strings.