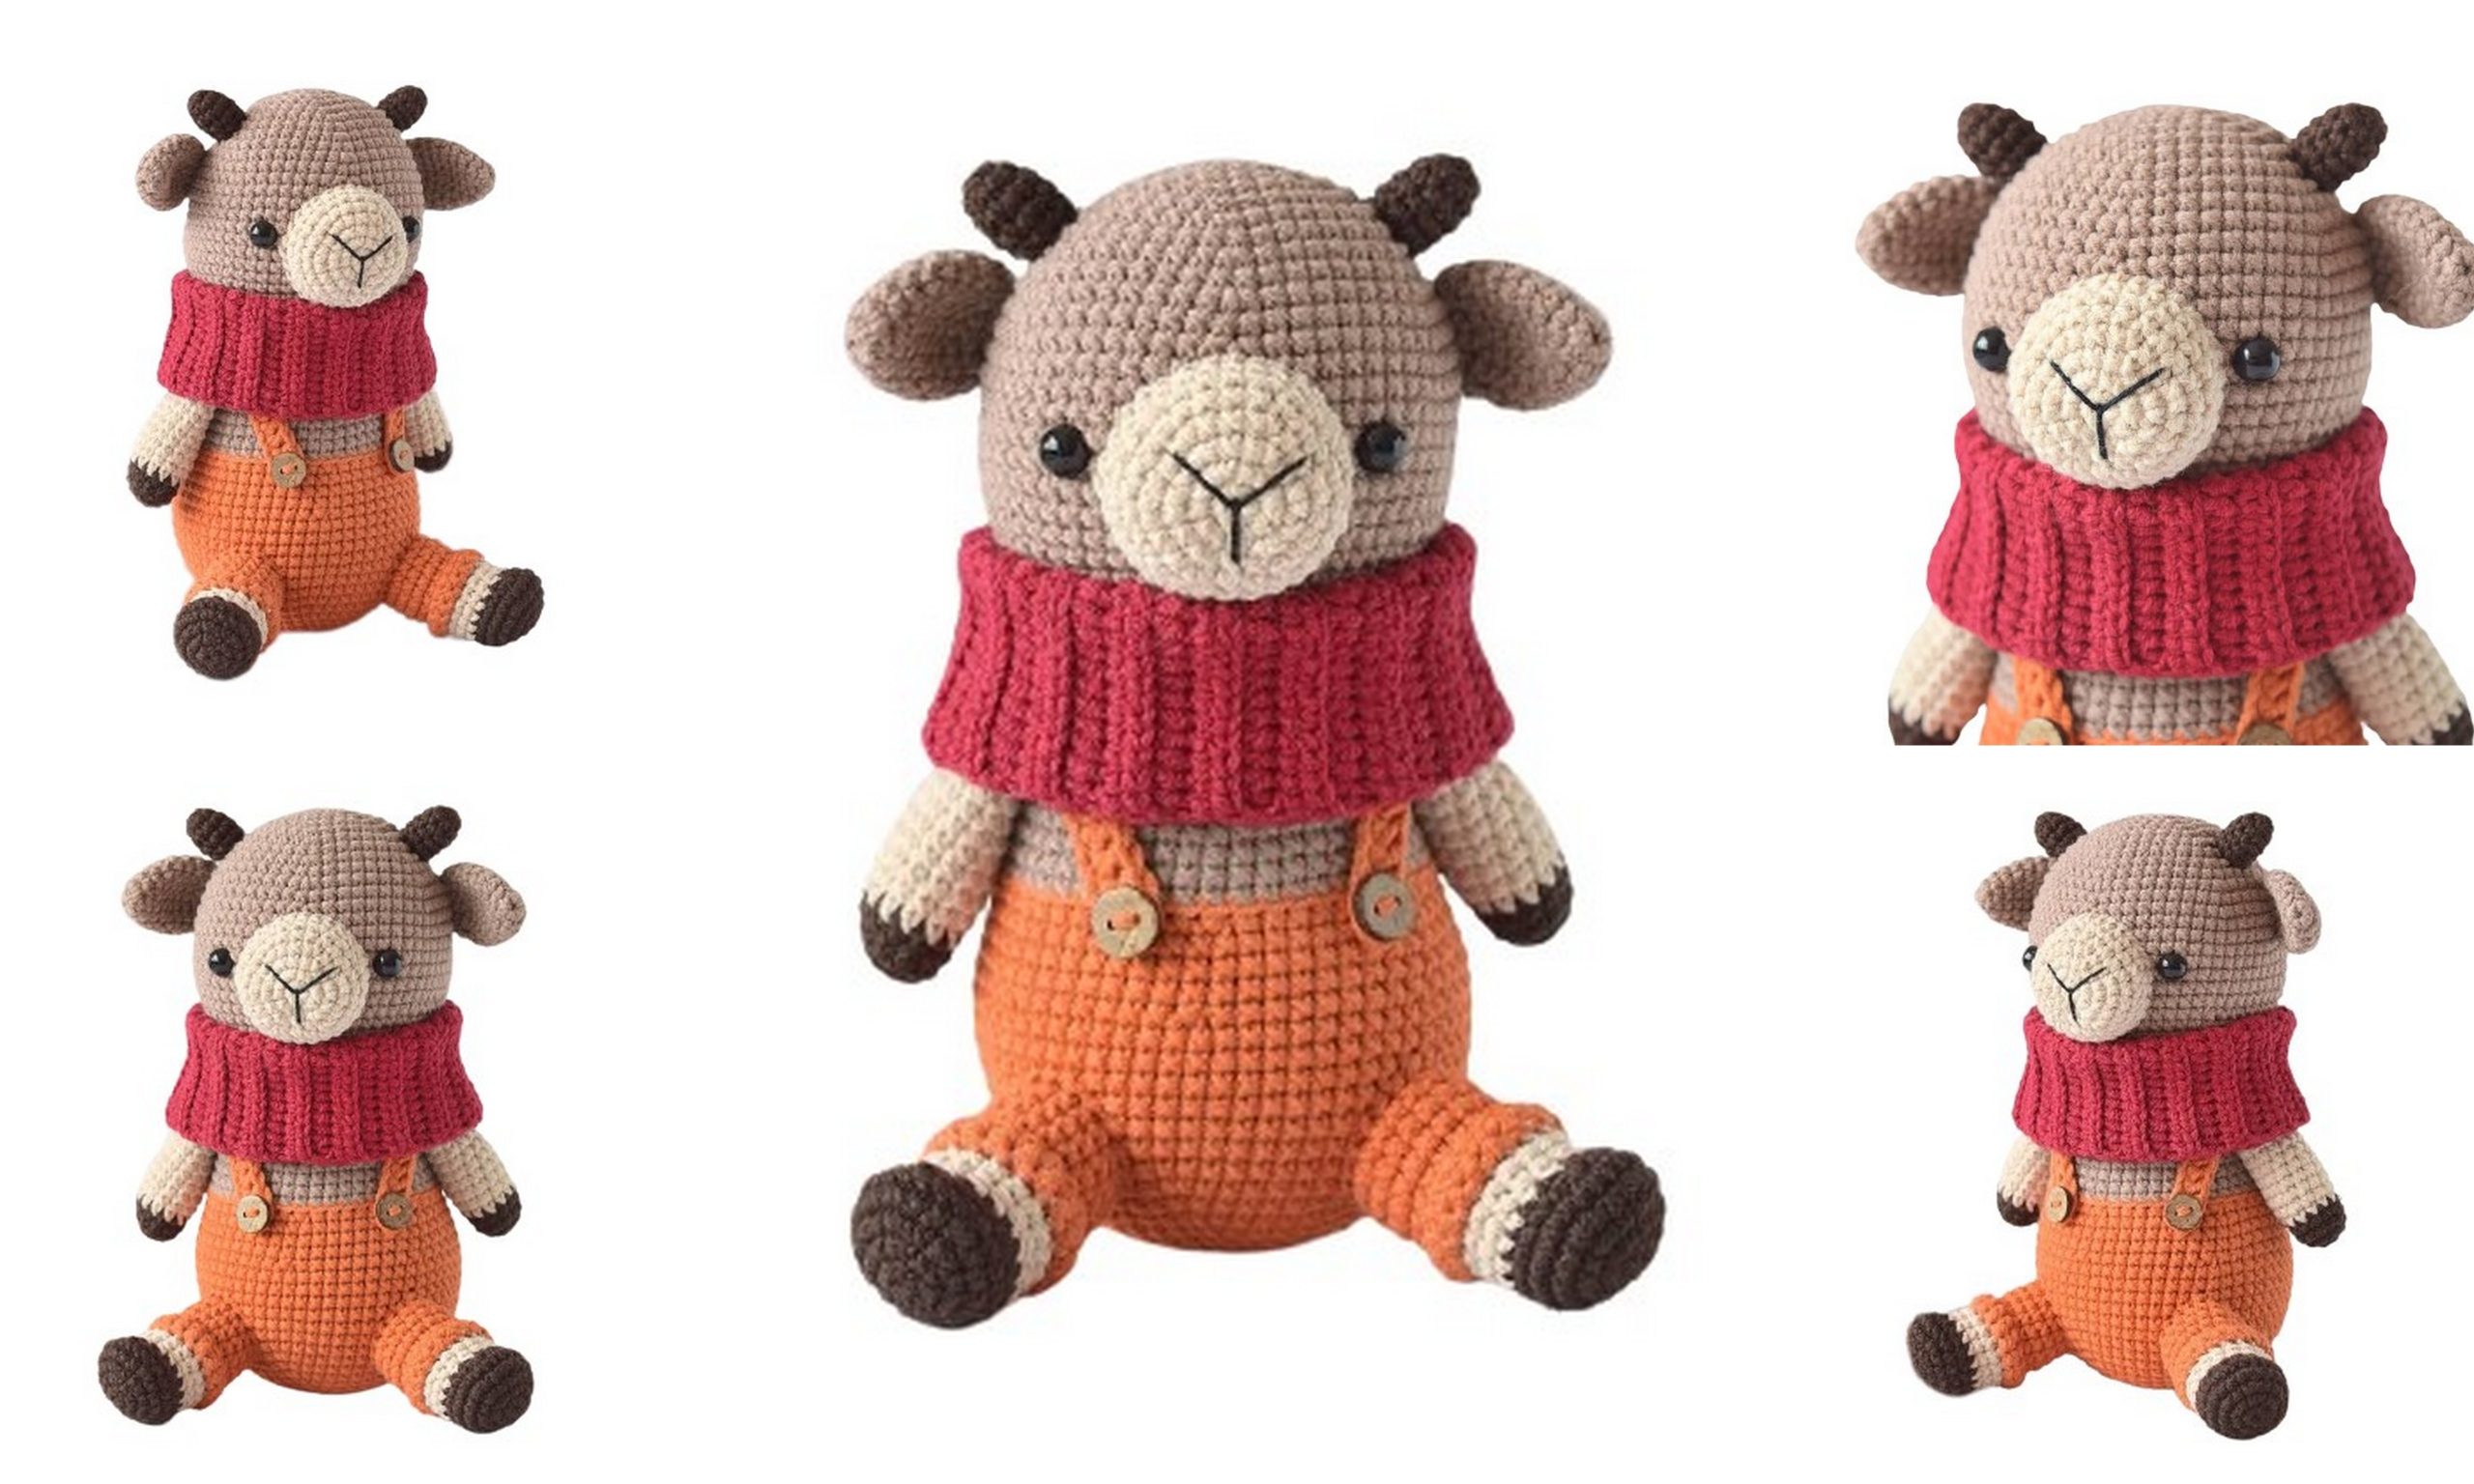
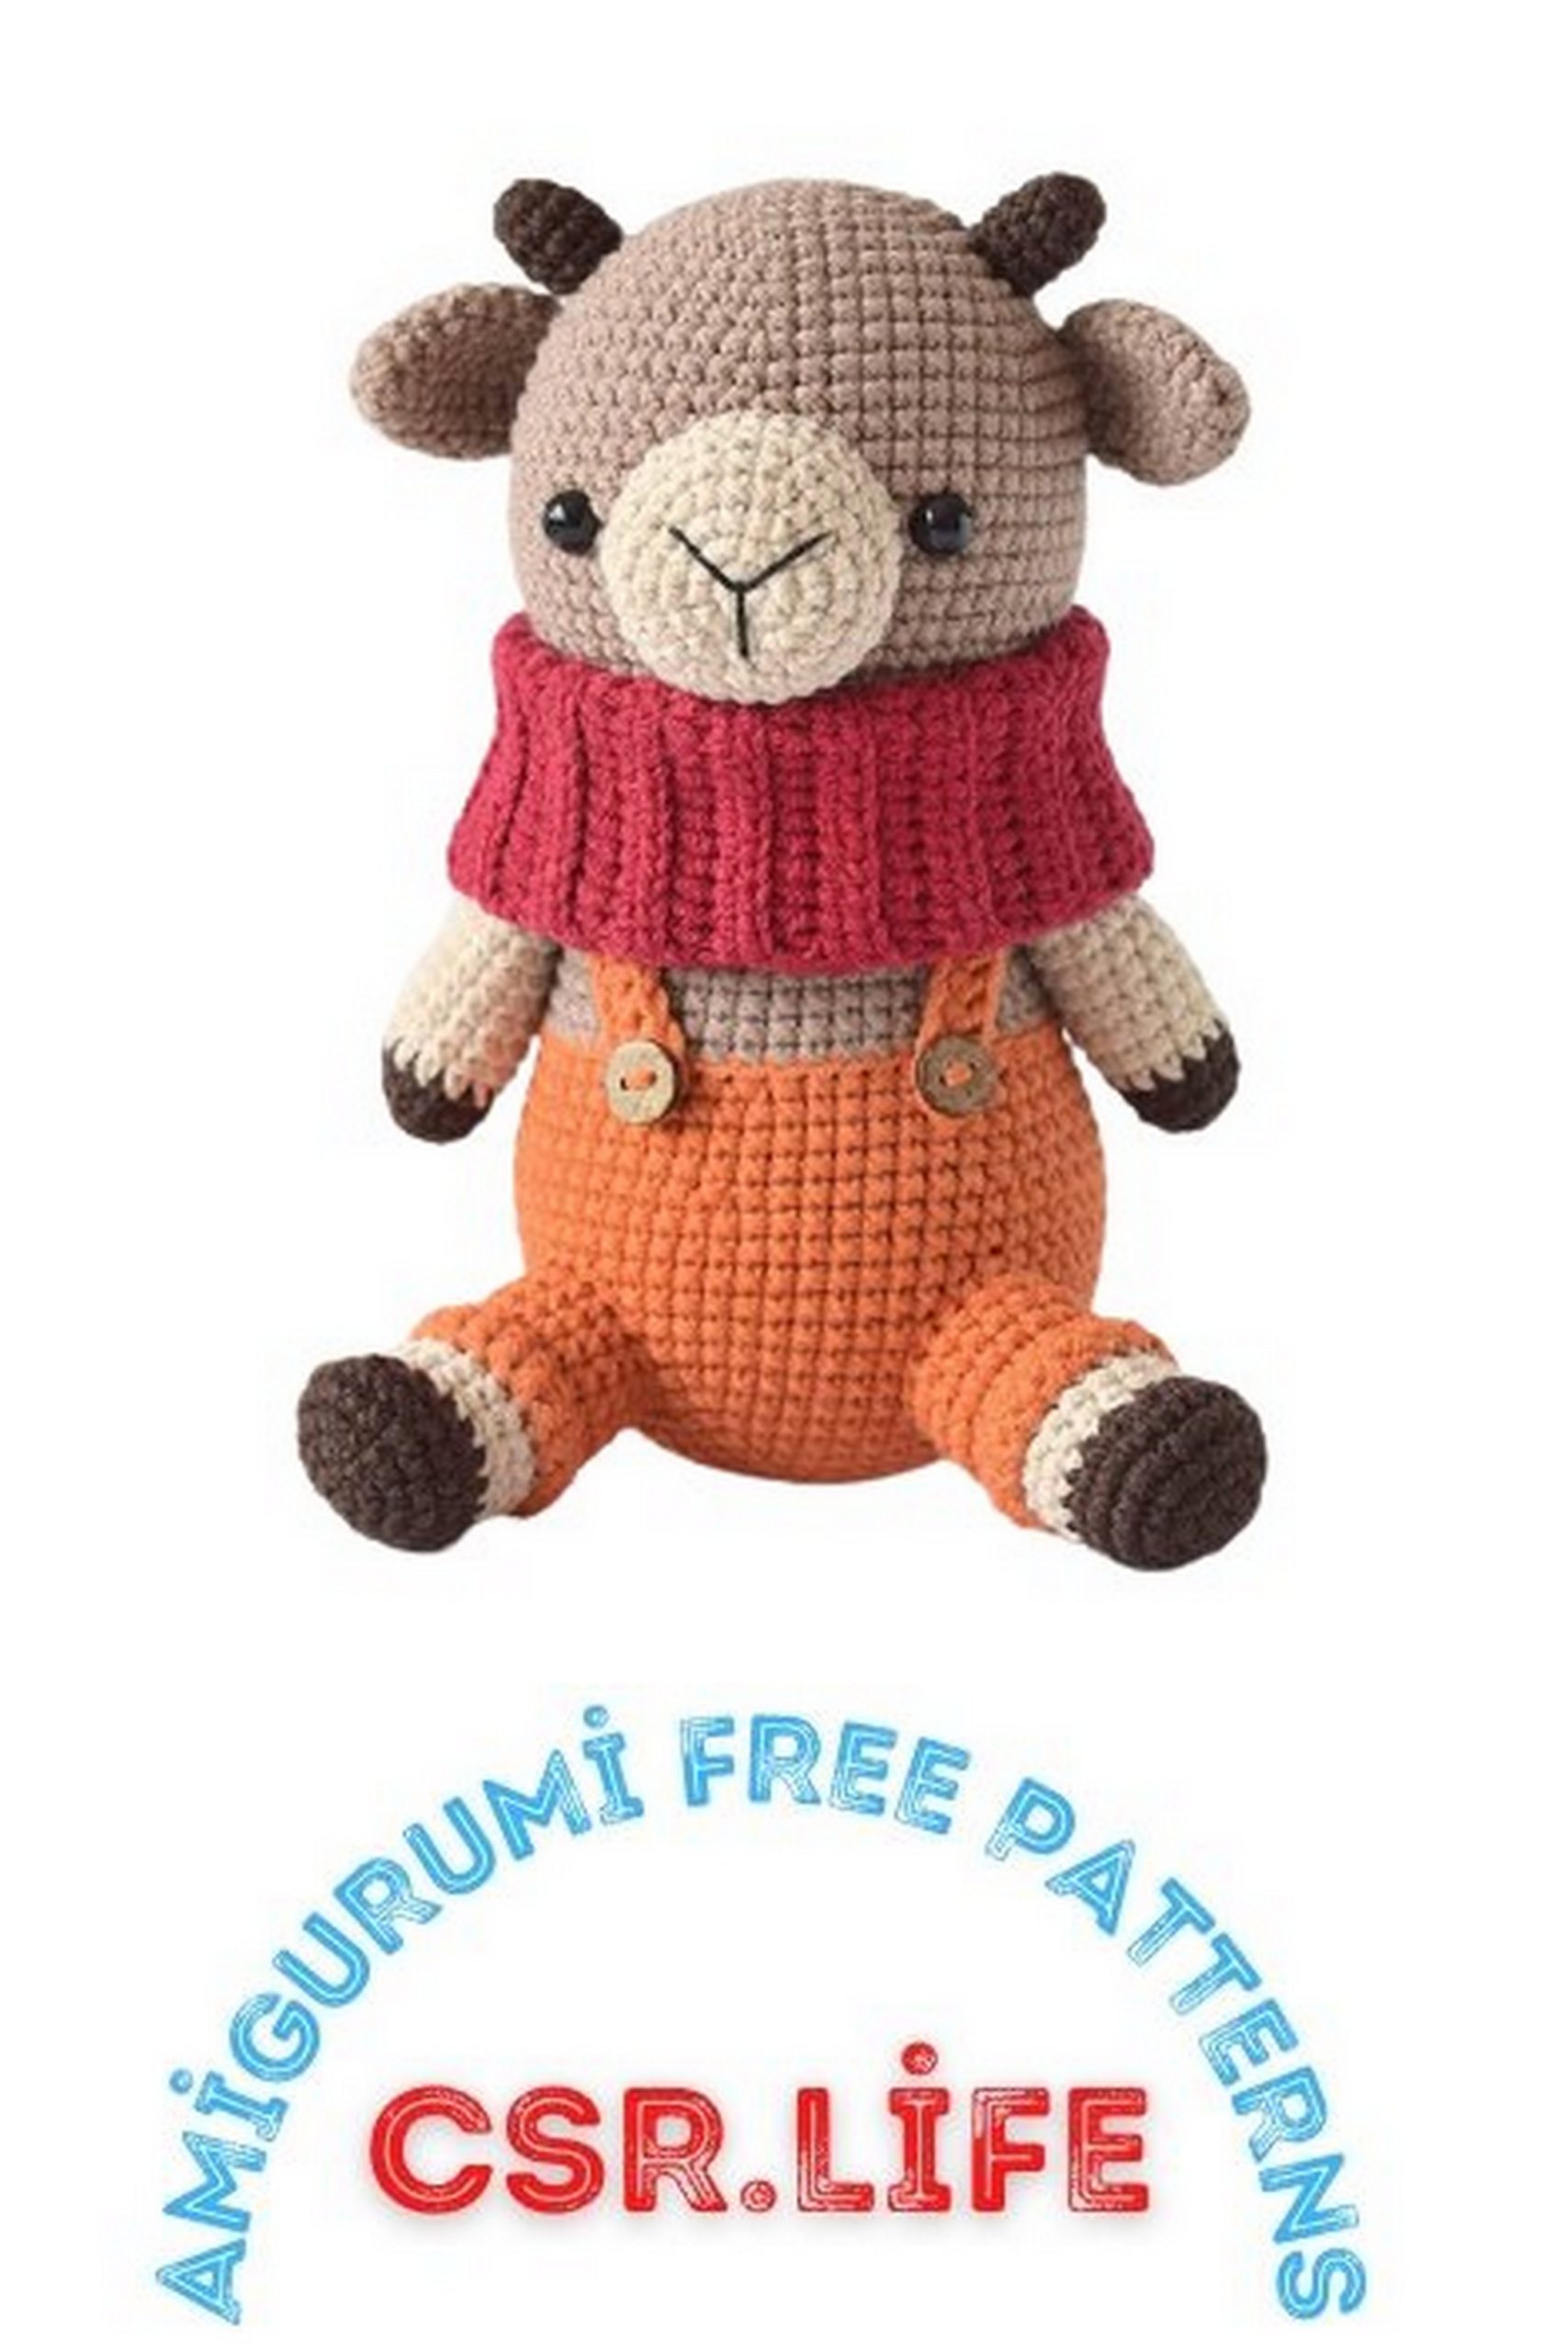
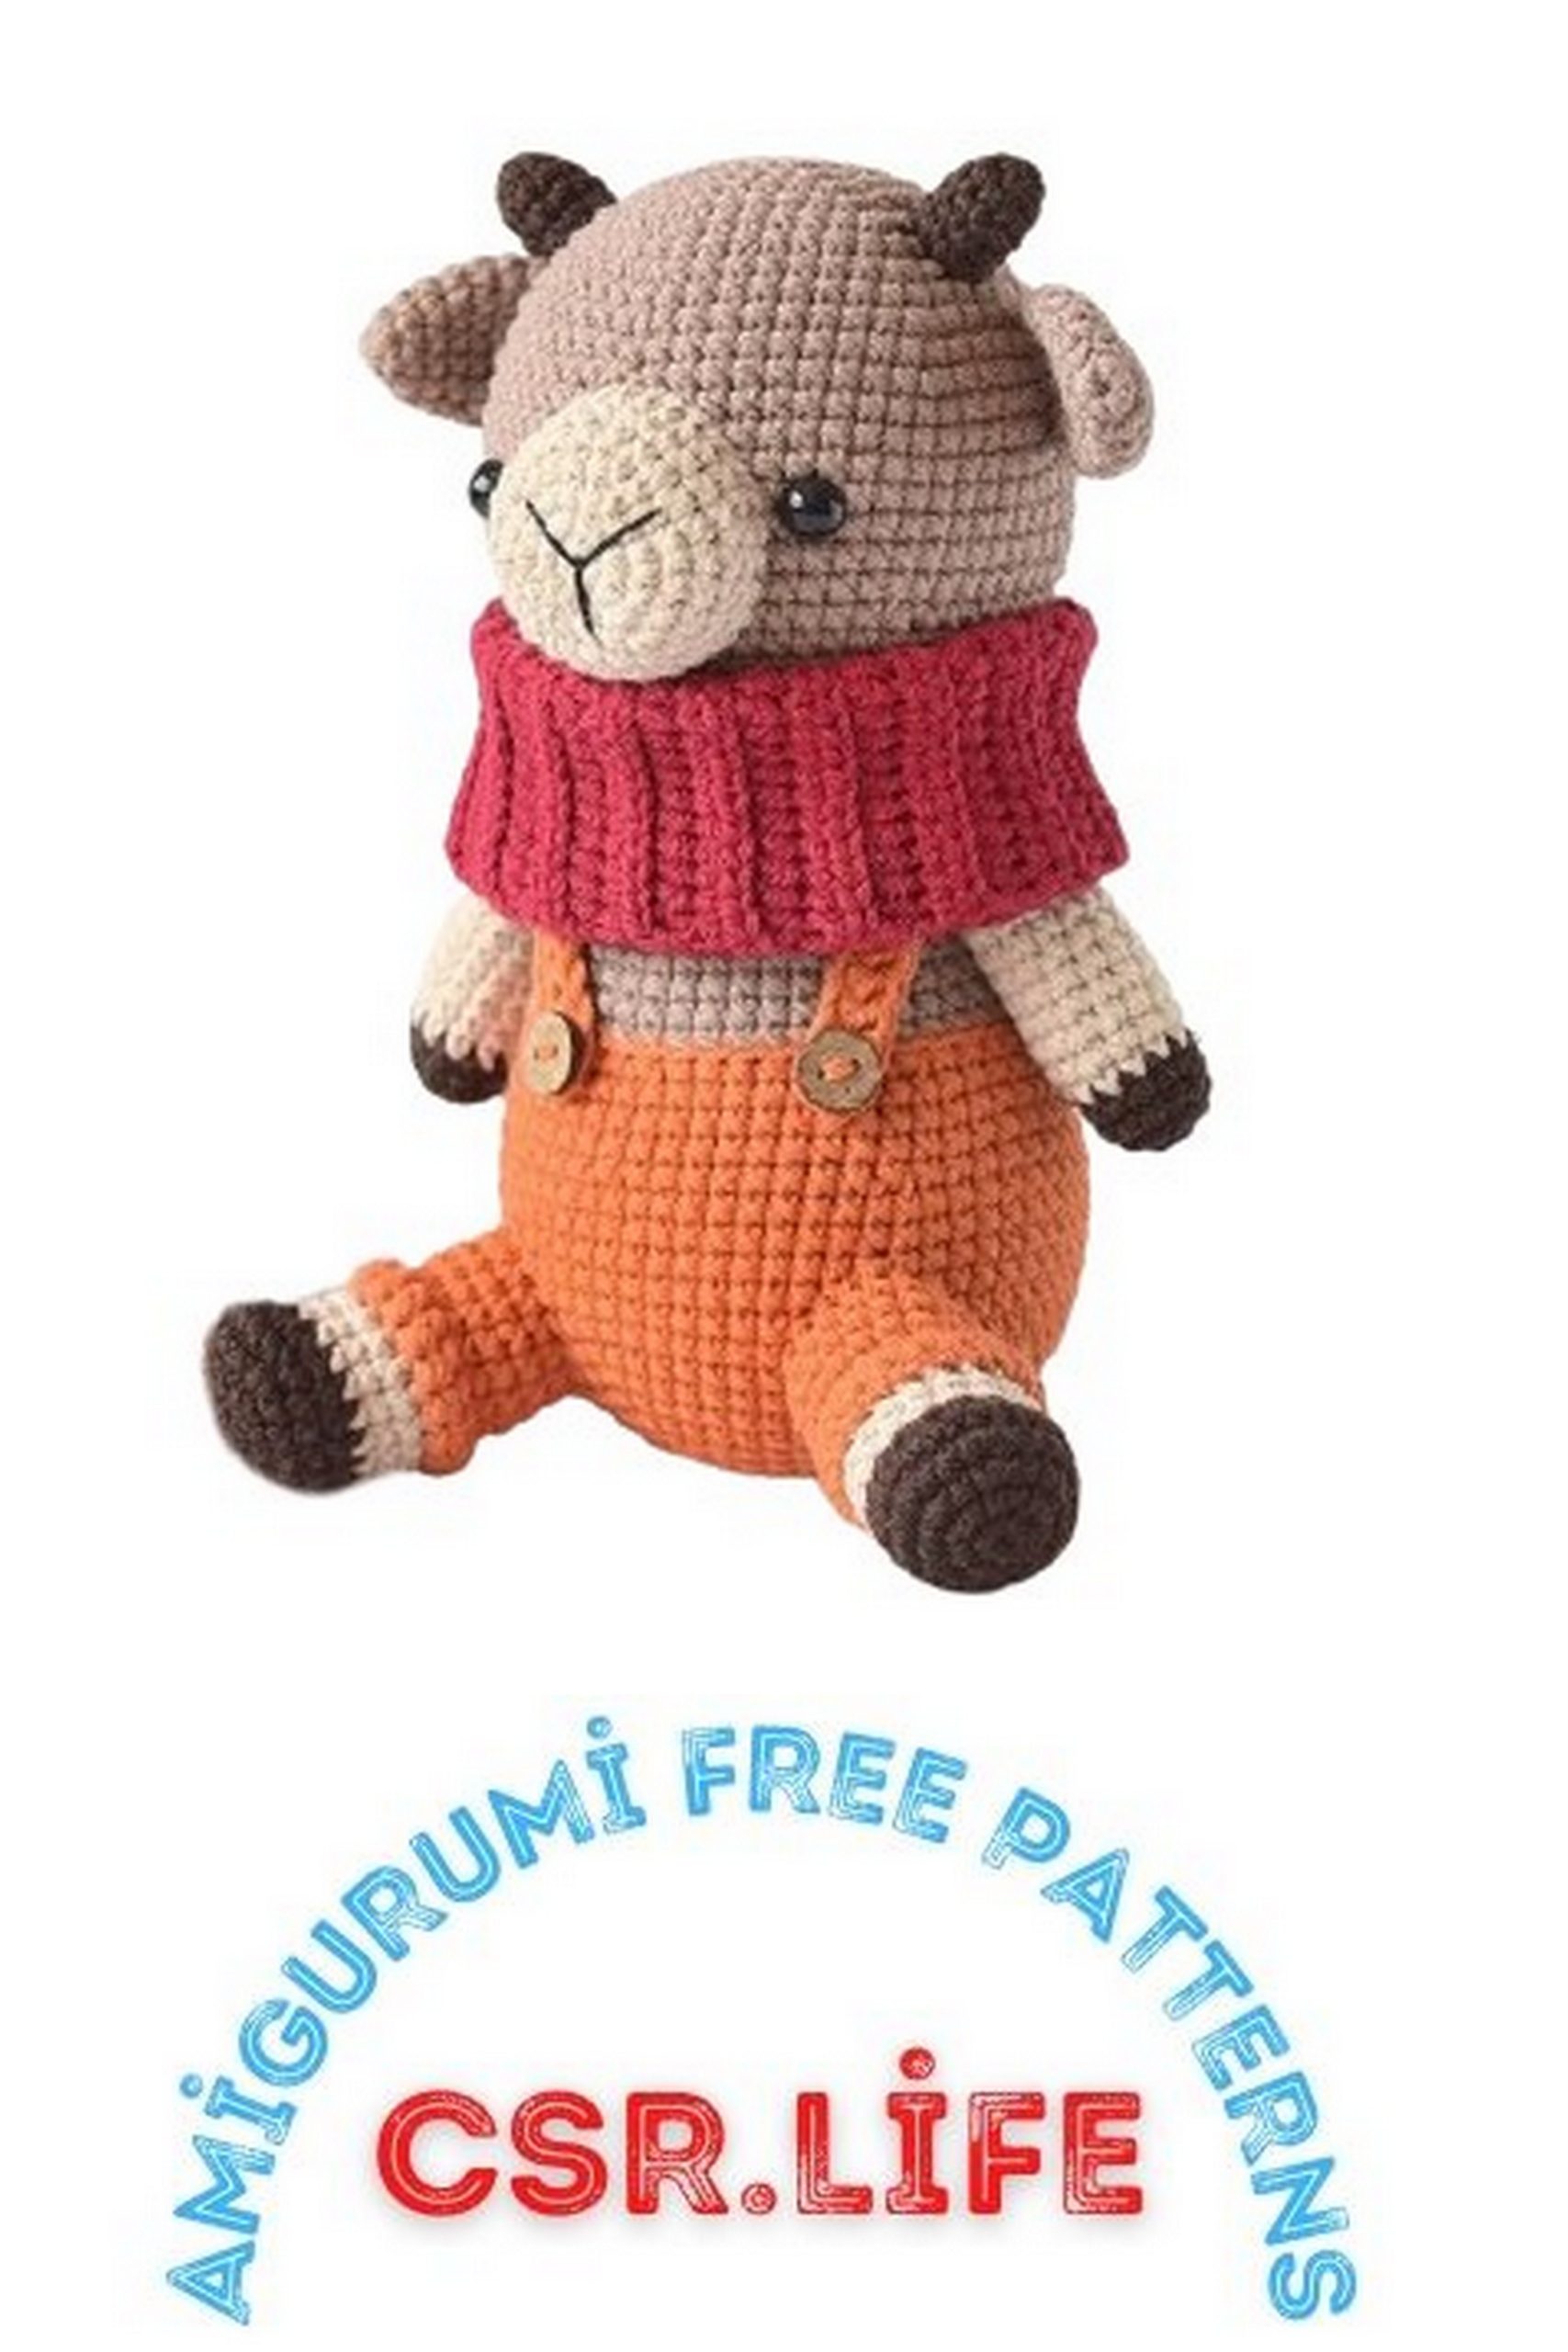
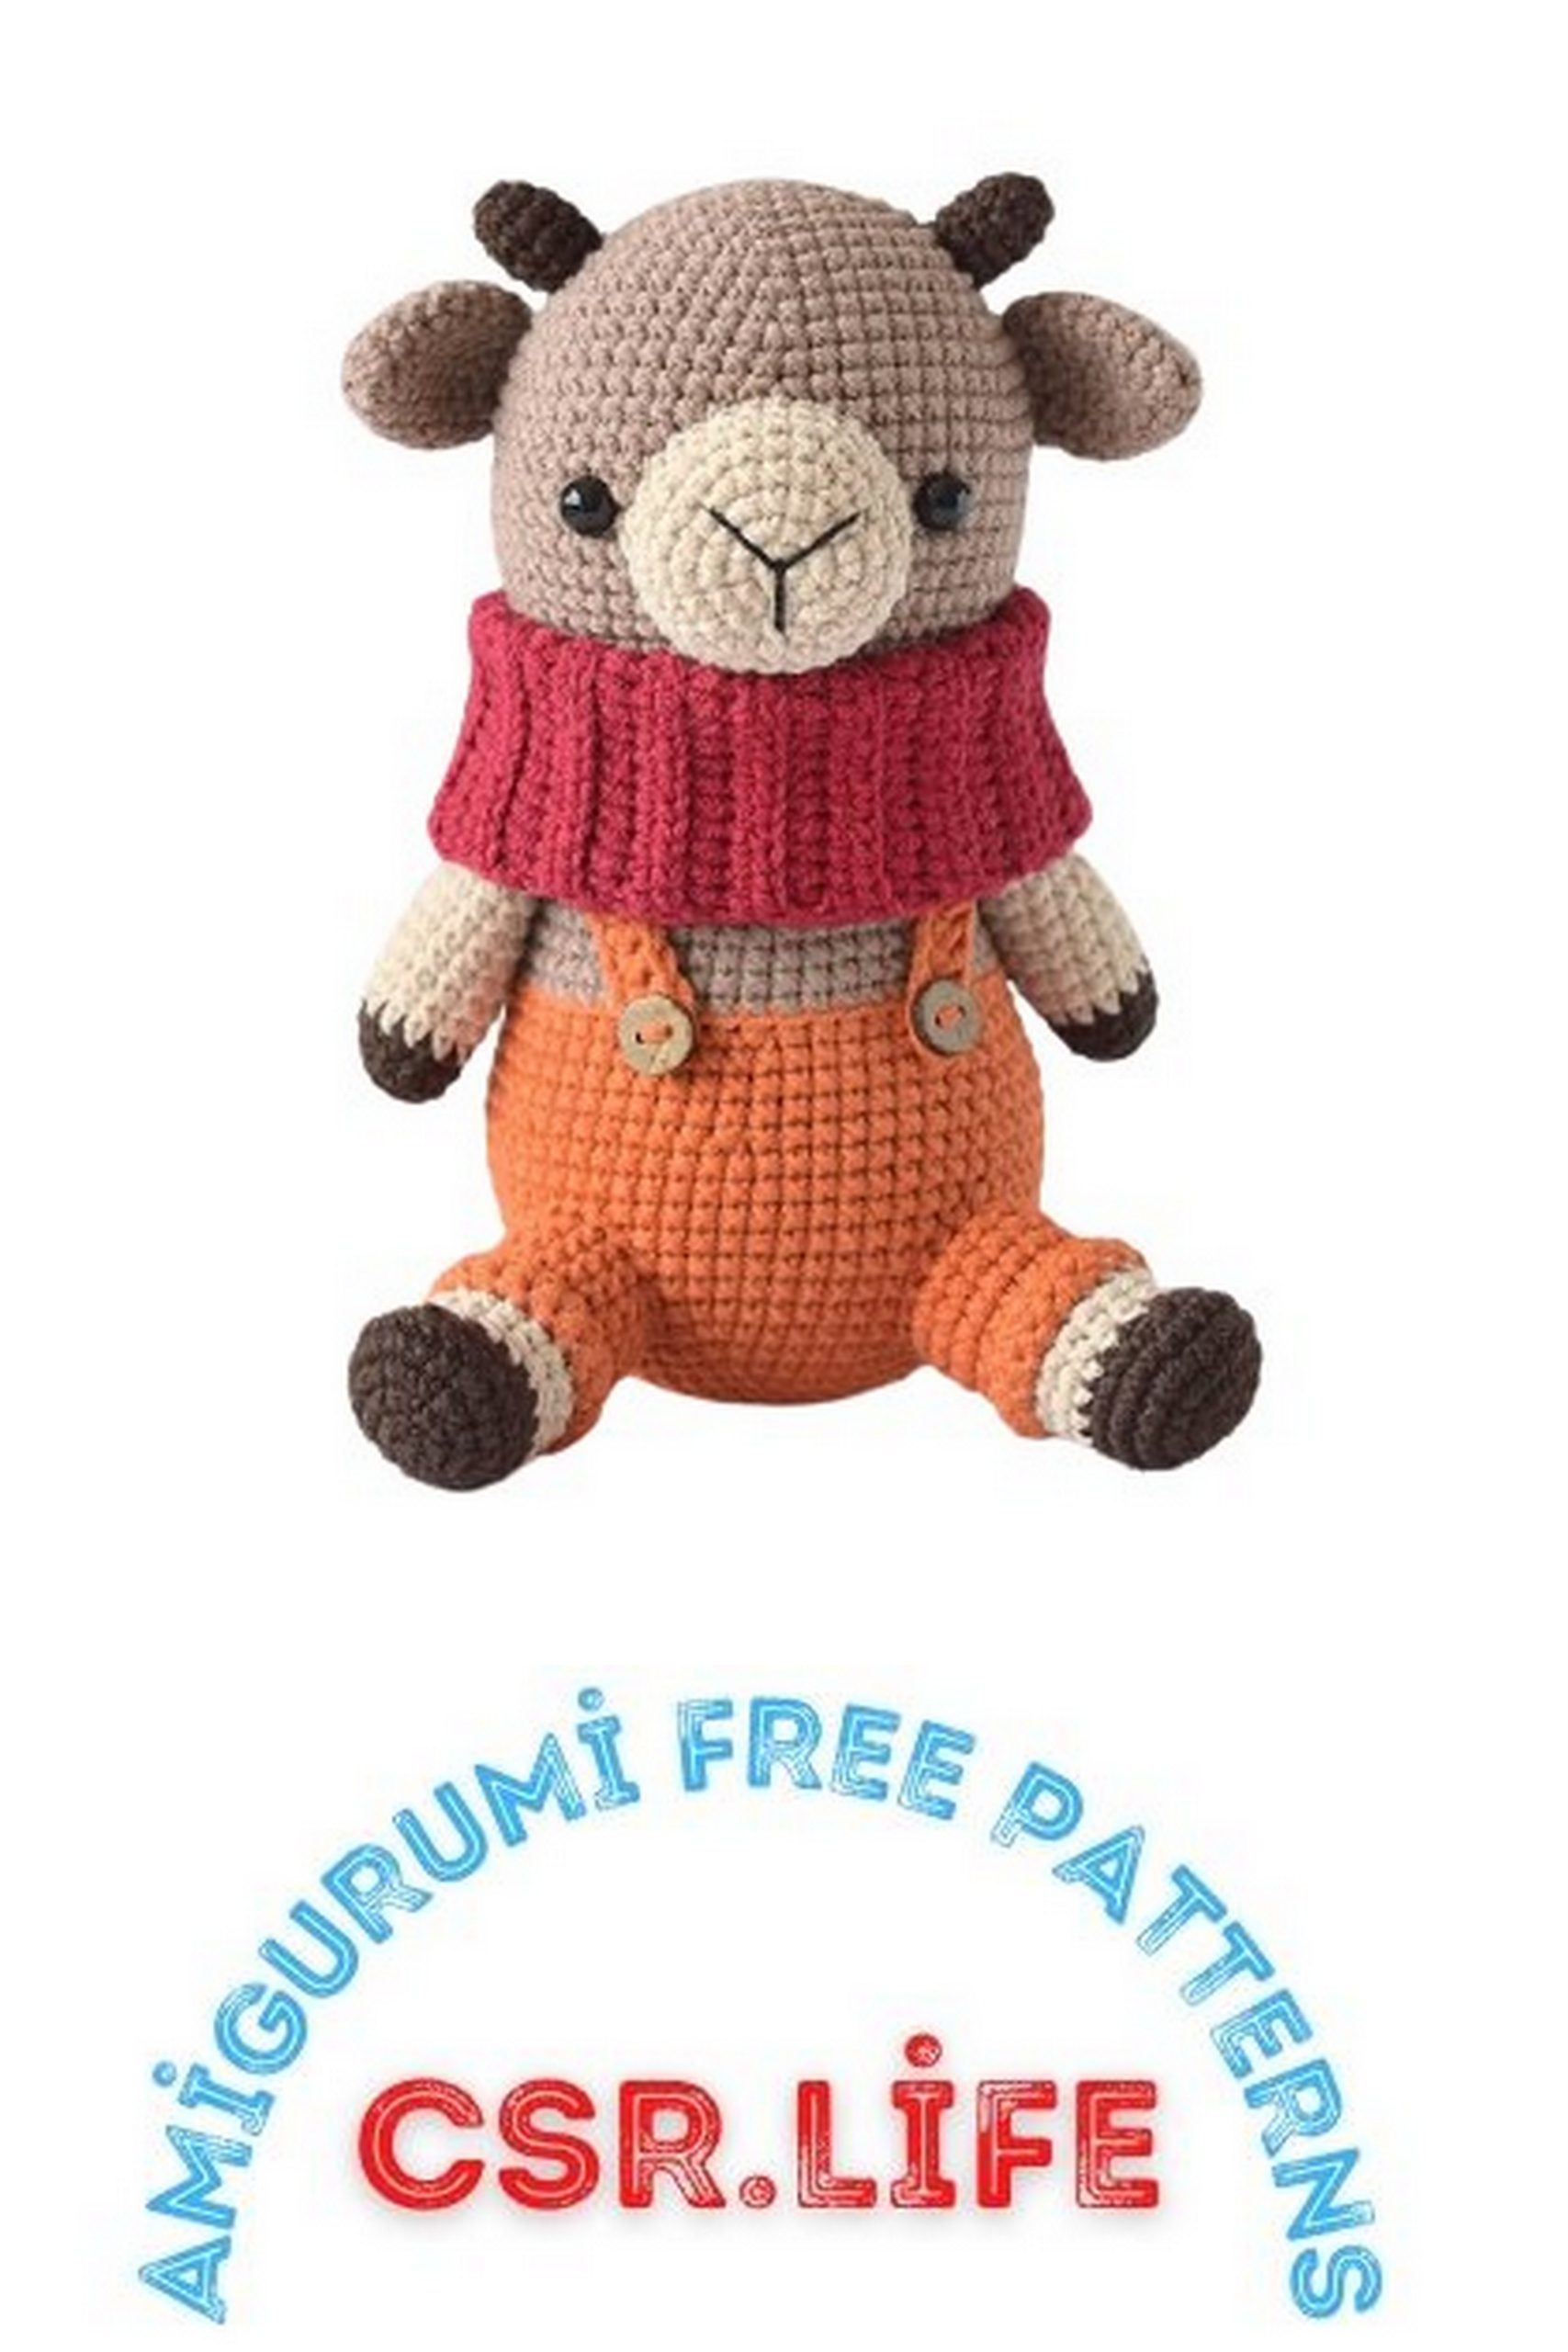
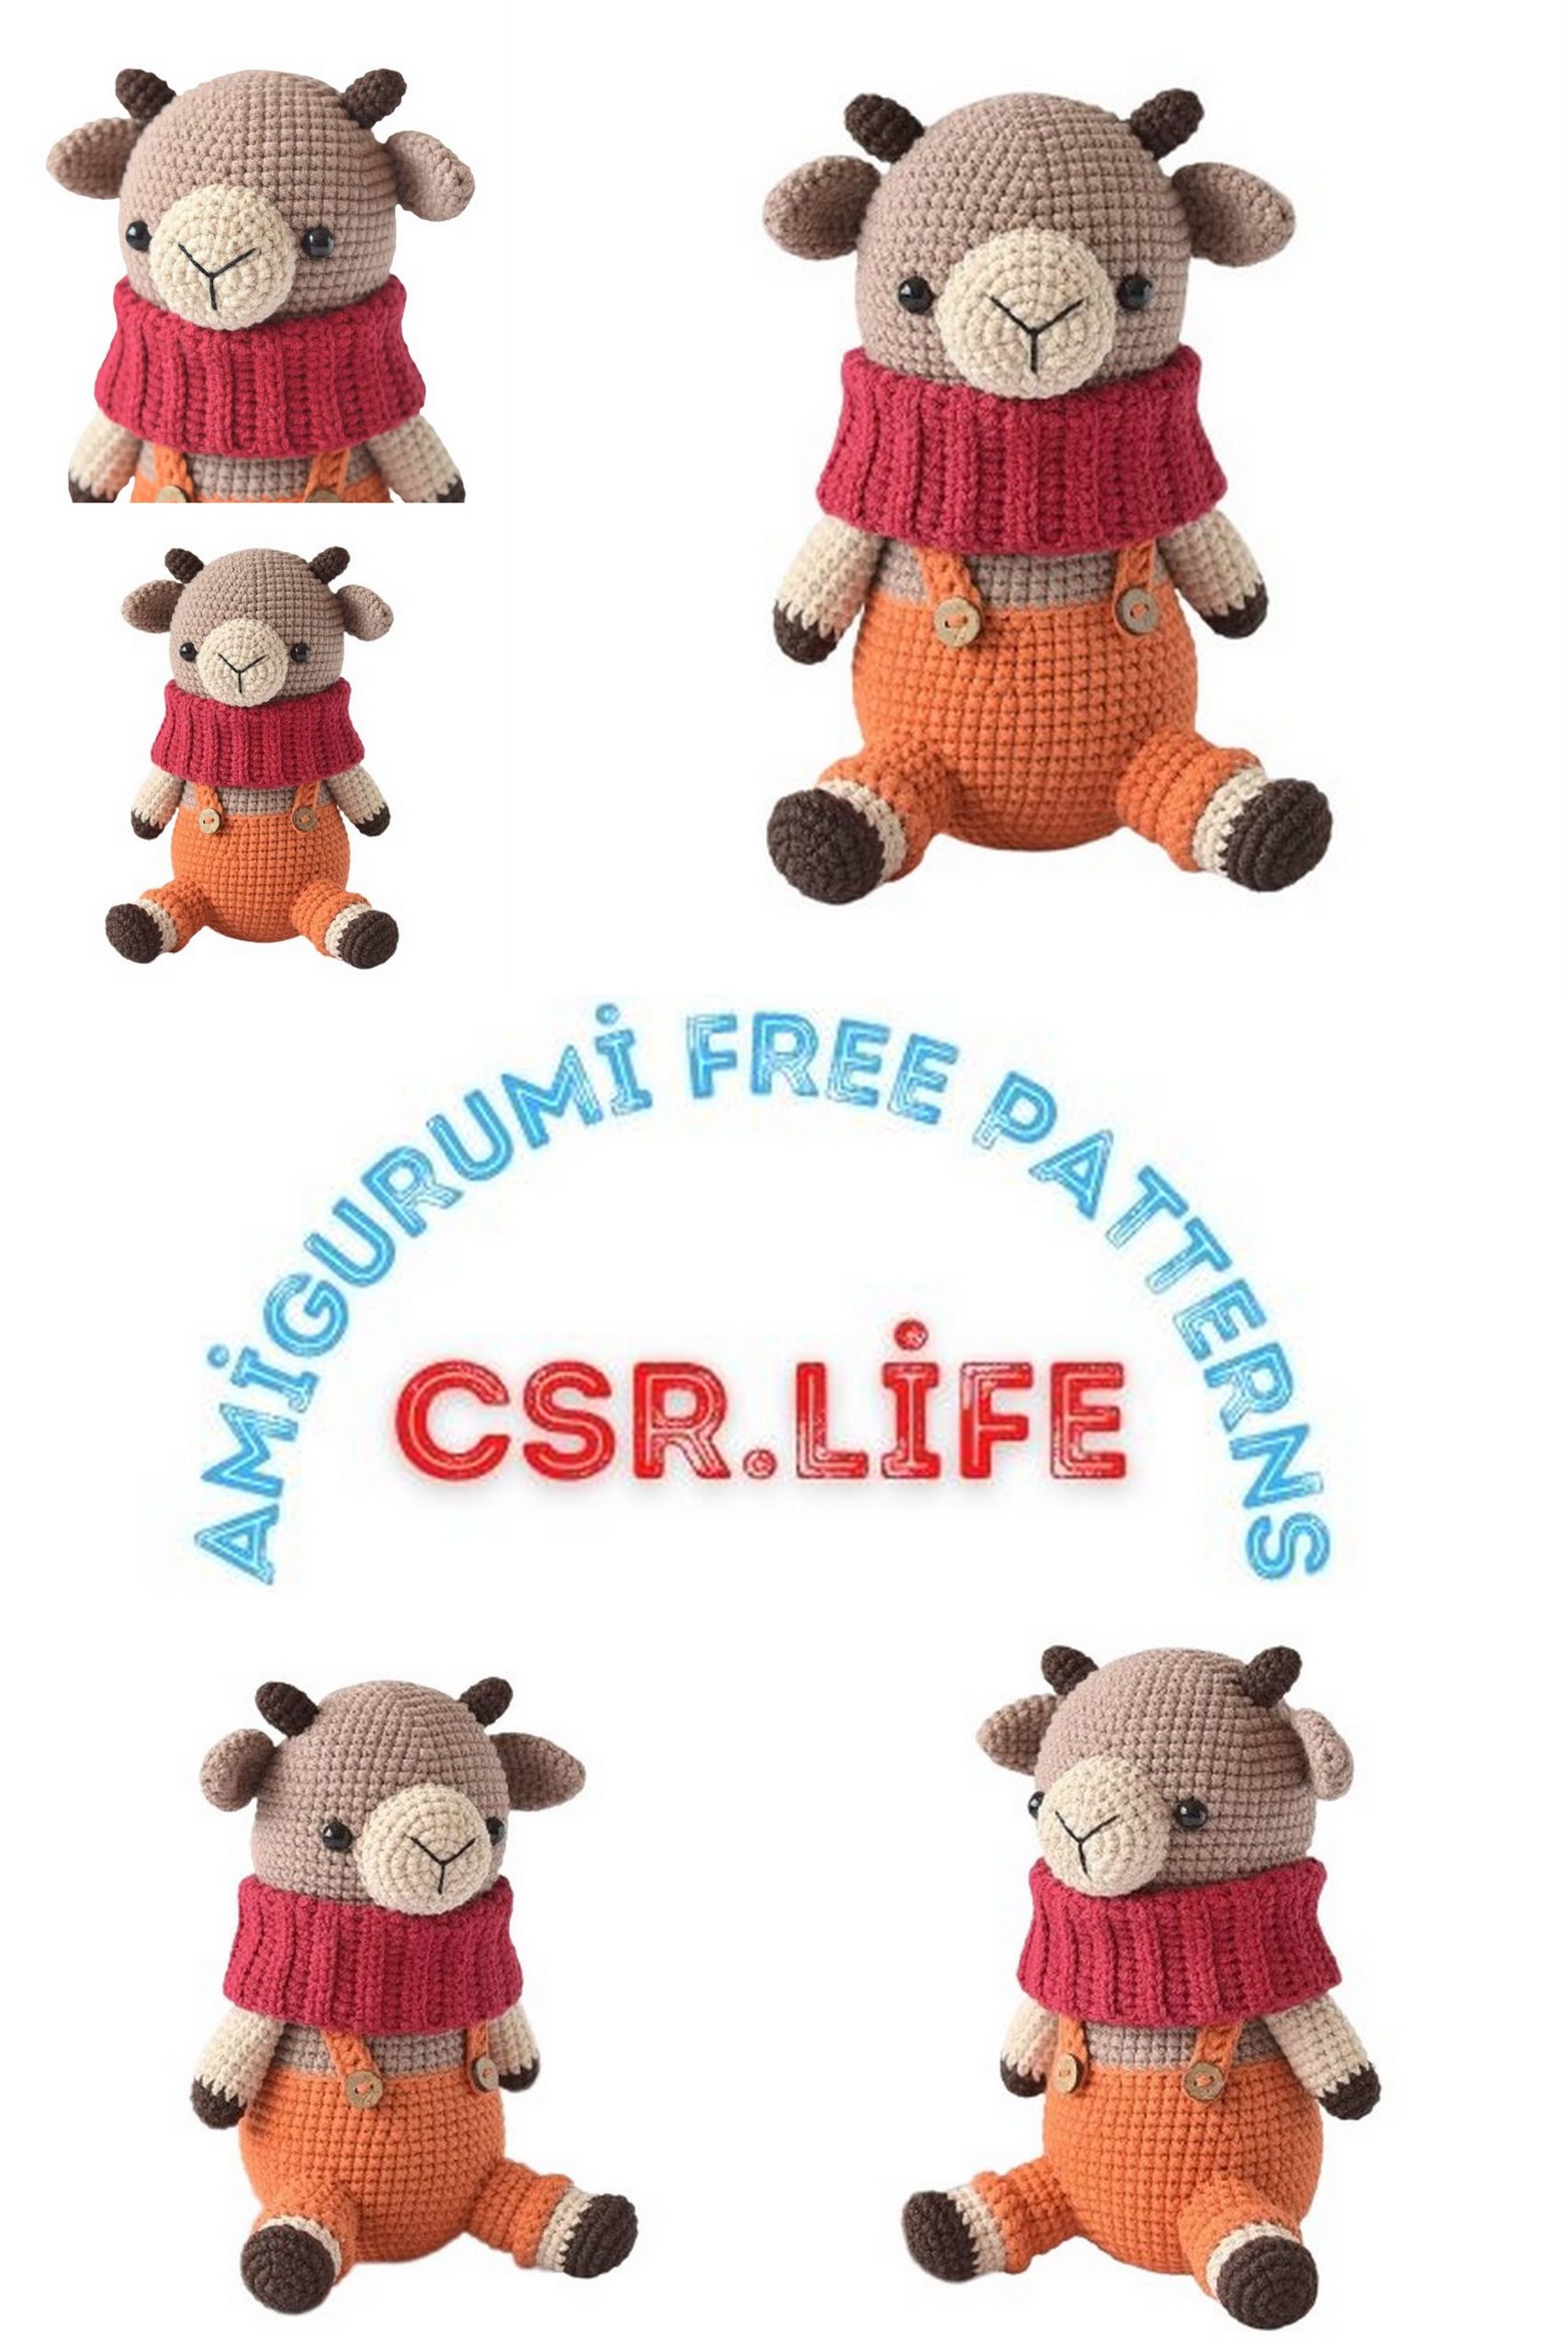
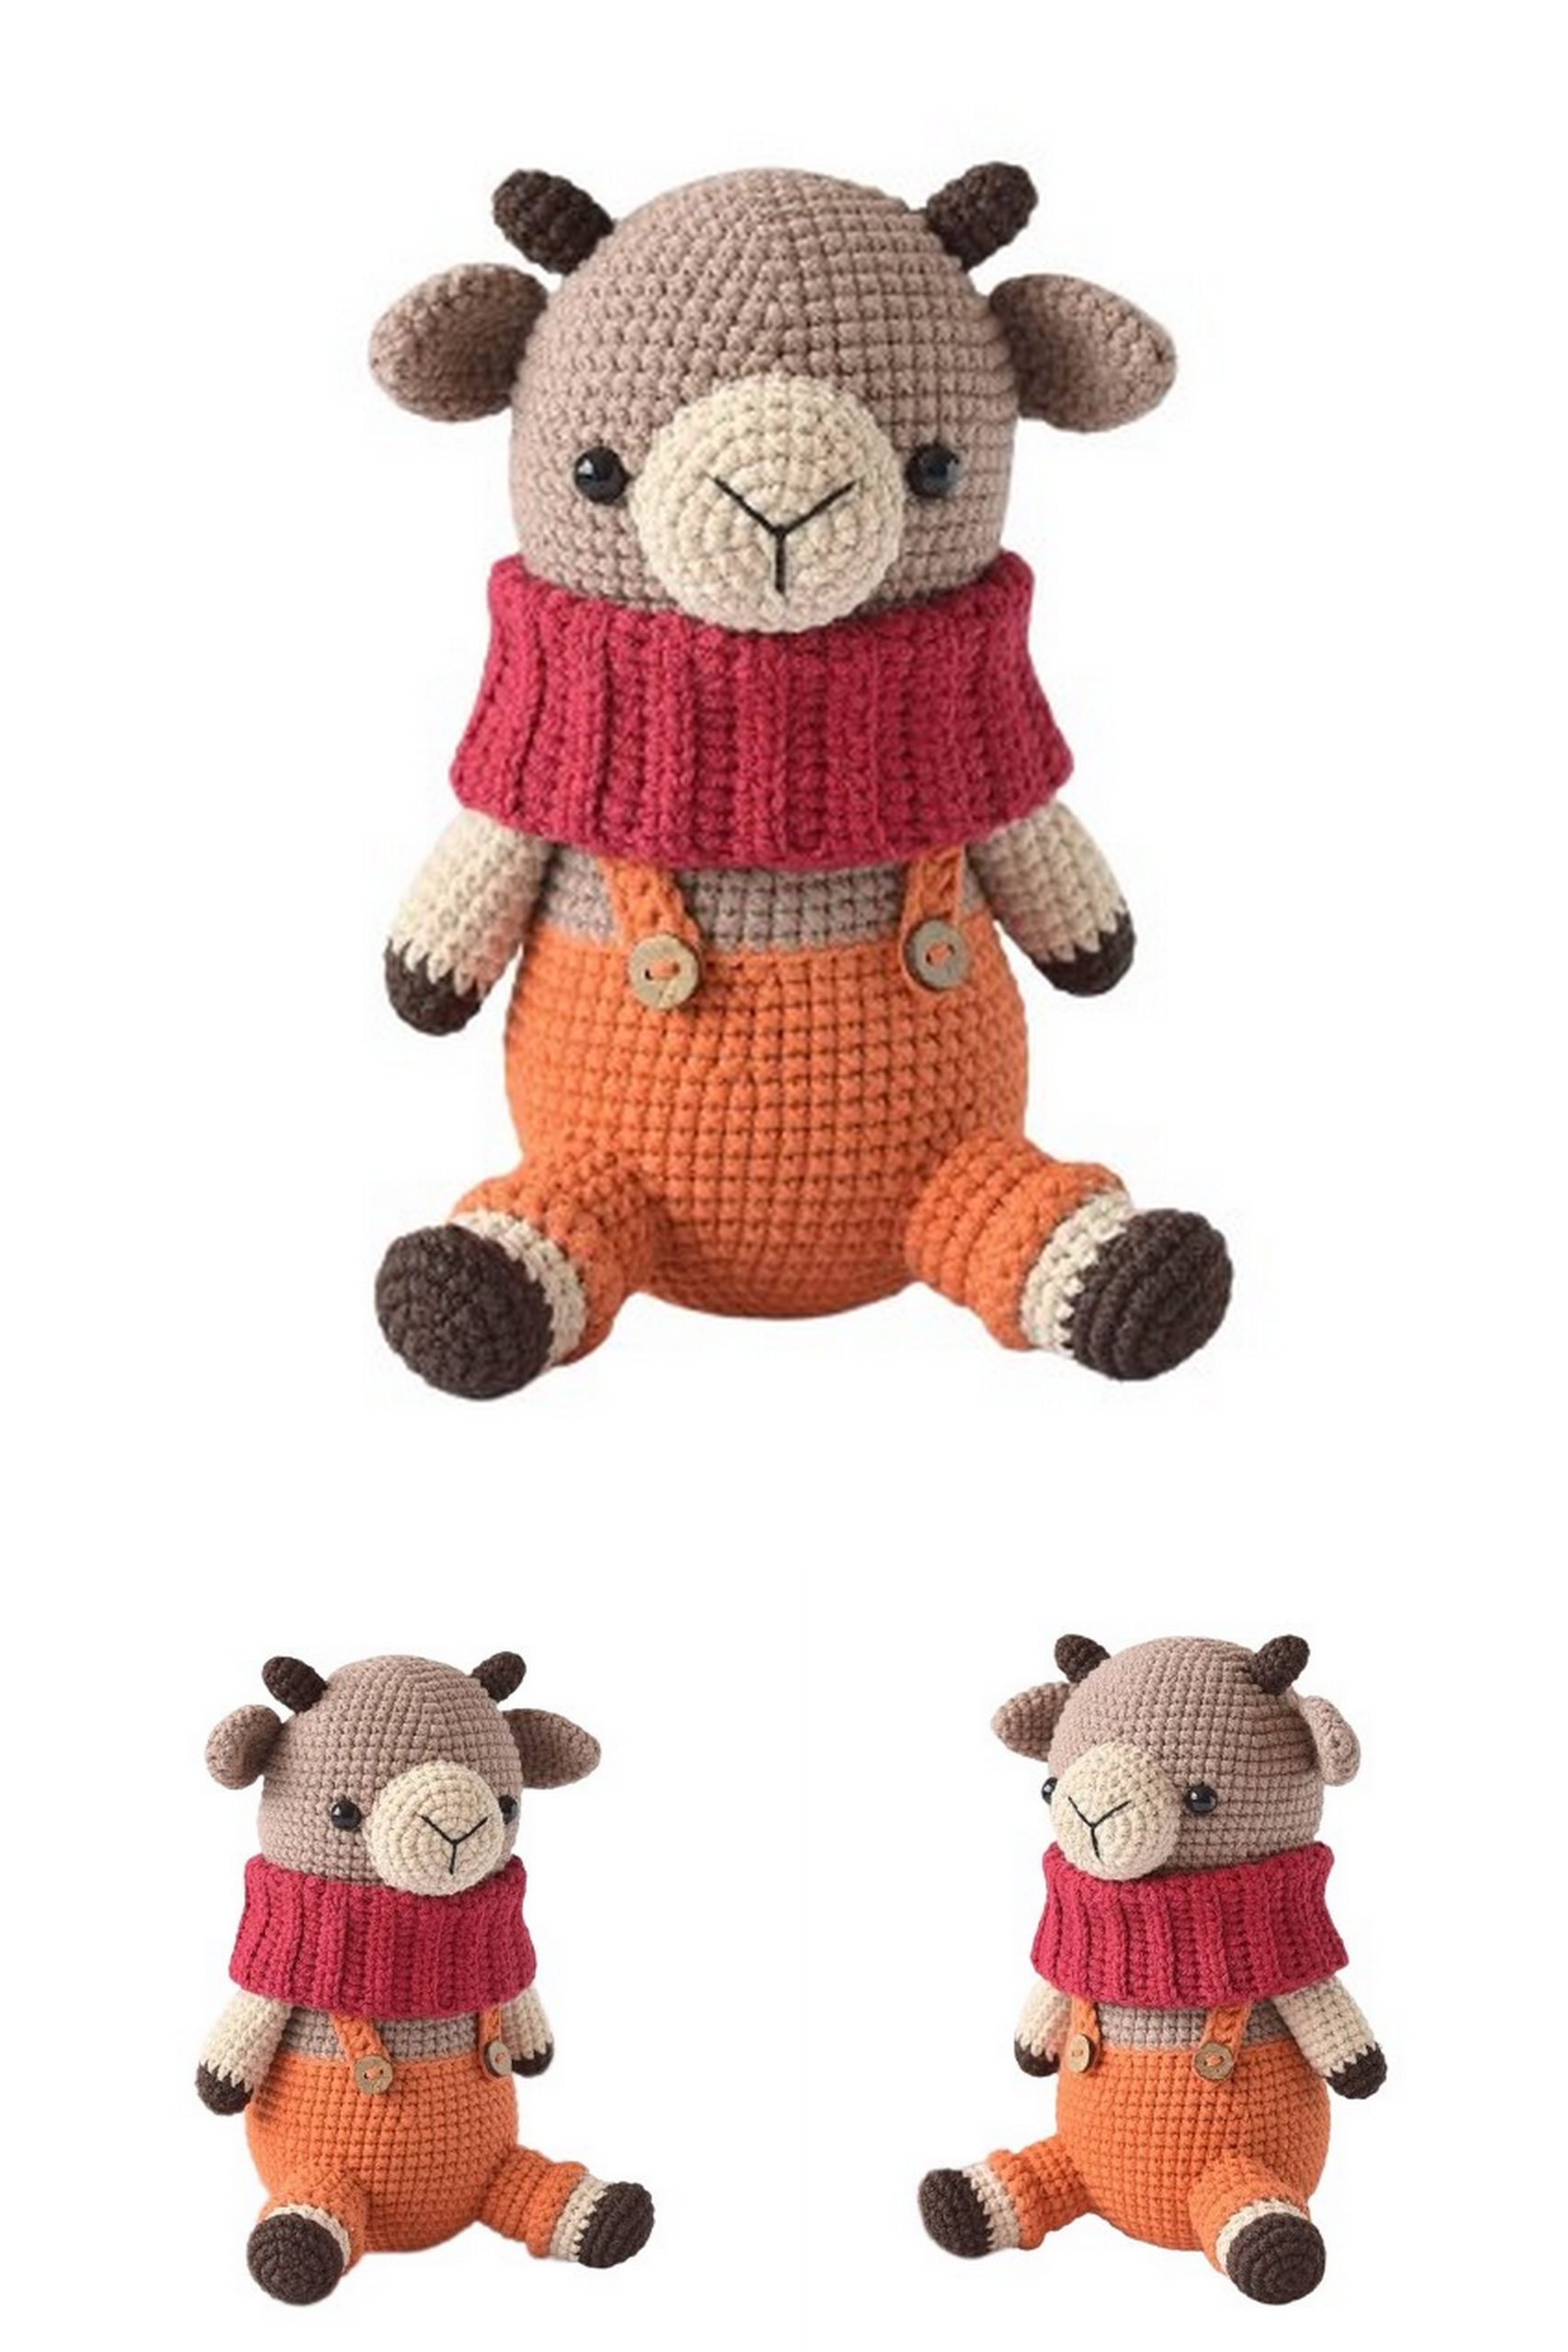
Cute Bull Amigurumi with Overalls Free Pattern
Create a charming bull amigurumi with overalls using this free crochet pattern. Follow step-by-step instructions to craft this adorable toy, complete with its unique outfit. Get the crochet pattern and instructions right here!
The world of amigurumi is an endless source of creativity for crafters and knitting enthusiasts. If you’re looking to make a cute bull amigurumi, you’ve come to the right place! This free pattern will guide you through creating a bull wearing overalls.
This fun and adorable bull amigurumi can make for a wonderful gift or a handmade decor item, especially for kids. The creative and unique outfit of the overall-wearing bull adds a special touch that sets it apart from other amigurumi toys.
Welcome to the world of amigurumi, and get ready to enhance your crafting skills with this special bull amigurumi pattern. Let’s get started!
Abbreviations:
CH – air loop
SL-ST – slip stitch
SC – single crochet
INC – increase
DEC – decrease
Materials:
Yarn in five different colors. I used Yarnart Jeans semi-cotton yarn: milk chocolate (71), beige (87), brown (70), brown-orange (85), cherry (51). A small amount of black cotton yarn (like Mouliné or Iris) for embroidering the “nose.”
Crochet hook #2.
Polyester fiberfill.
Plastic safety eyes, 6mm (beads or half-beads).
2 buttons.
Needle, scissors.
Head. Color 71.
1st row: 6 CH into the ring (6)
2nd row: 6 INC (12)
3rd row: (1 SC, 1 INC) x 6 (18)
4th row: (2 SC, 1 INC) x 6 (24)
5th row: (3 SC, 1 INC) x 6 (30)
6th row: (4 SC, 1 INC) x 6 (36)
7th row: (5 SC, 1 INC) x 6 (42)
8th row: 42 SC
9th row: (6 SC, 1 INC) x 6 (48)
10th row: 48 SC
11th row: (7 SC, 1 INC) x 6 (54)
12th row: 54 DEC
13th row: (8 SC, 1 INC) x 6 (60)
14th-20th rows: 60 SC
21st row: (8 DEC, 1 INC) x 6 (54)
22nd row: 54 SC
23rd row: (7 DEC, 1 INC) x 6 (48)
24th row: 48 SC
25th row: (6 SC, 1 DEC) x 6 (42)
Insert the safety eyes between rows 17 and 18, approximately 4-5 cm apart. You can start stuffing the head at this stage.
26th row: (5 SC, 1 DEC) x 6 (36)
27th row: (4 SC, 1 DEC) x 6 (30)
28th row: (3 SC, 1 DEC) x 6 (24)
Stuff the head with fiberfill.
29th row: (2 SC, 1 DEC) x 6 (18)
30th row: (1 SC, 1 DEC) x 6 (12)
31st row: 6 DEC
Pull the hole closed, secure the thread, and hide it.
Muzzle. Color 87.
1st row: 6 CH into the ring (6)
2nd row: 6 INC (12)
3rd row: (1 SC, 1 INC) x 6 (18)
4th row: (2 SC, 1 INC) x 6 (24)
5th row: 24 SC
6th row: (3 SC, 1 INC) x 6 (30)
Leave a thread for sewing. Stuff the piece and sew it to the head.
Ears (2 pieces). Color 71.
1st row: 6 CH into the ring (6)
2nd row: (1 SC, 1 INC) x 3 (9)
3rd row: (2 SC, 1 INC) x 3 (12)
4th row: 12 SC
5th row: (3 SC, 1 INC) x 3 (15)
6th-8th rows: 15 DEC
9th row: (1 SC, 1 DEC) x 5 (10)
Fold the resulting piece, shape it, crochet 5 SC through both sides. Leave a thread for sewing. Sew it on.
Horns (2 pieces). Color 70.
1st row: 6 CH into the ring (6)
2nd row: (1 SC, 1 INC) x 3 (9)
3rd-5th rows: 9 SC, 1 SL-ST.
Stuff and leave a thread for sewing.
Sew the horns to the head.
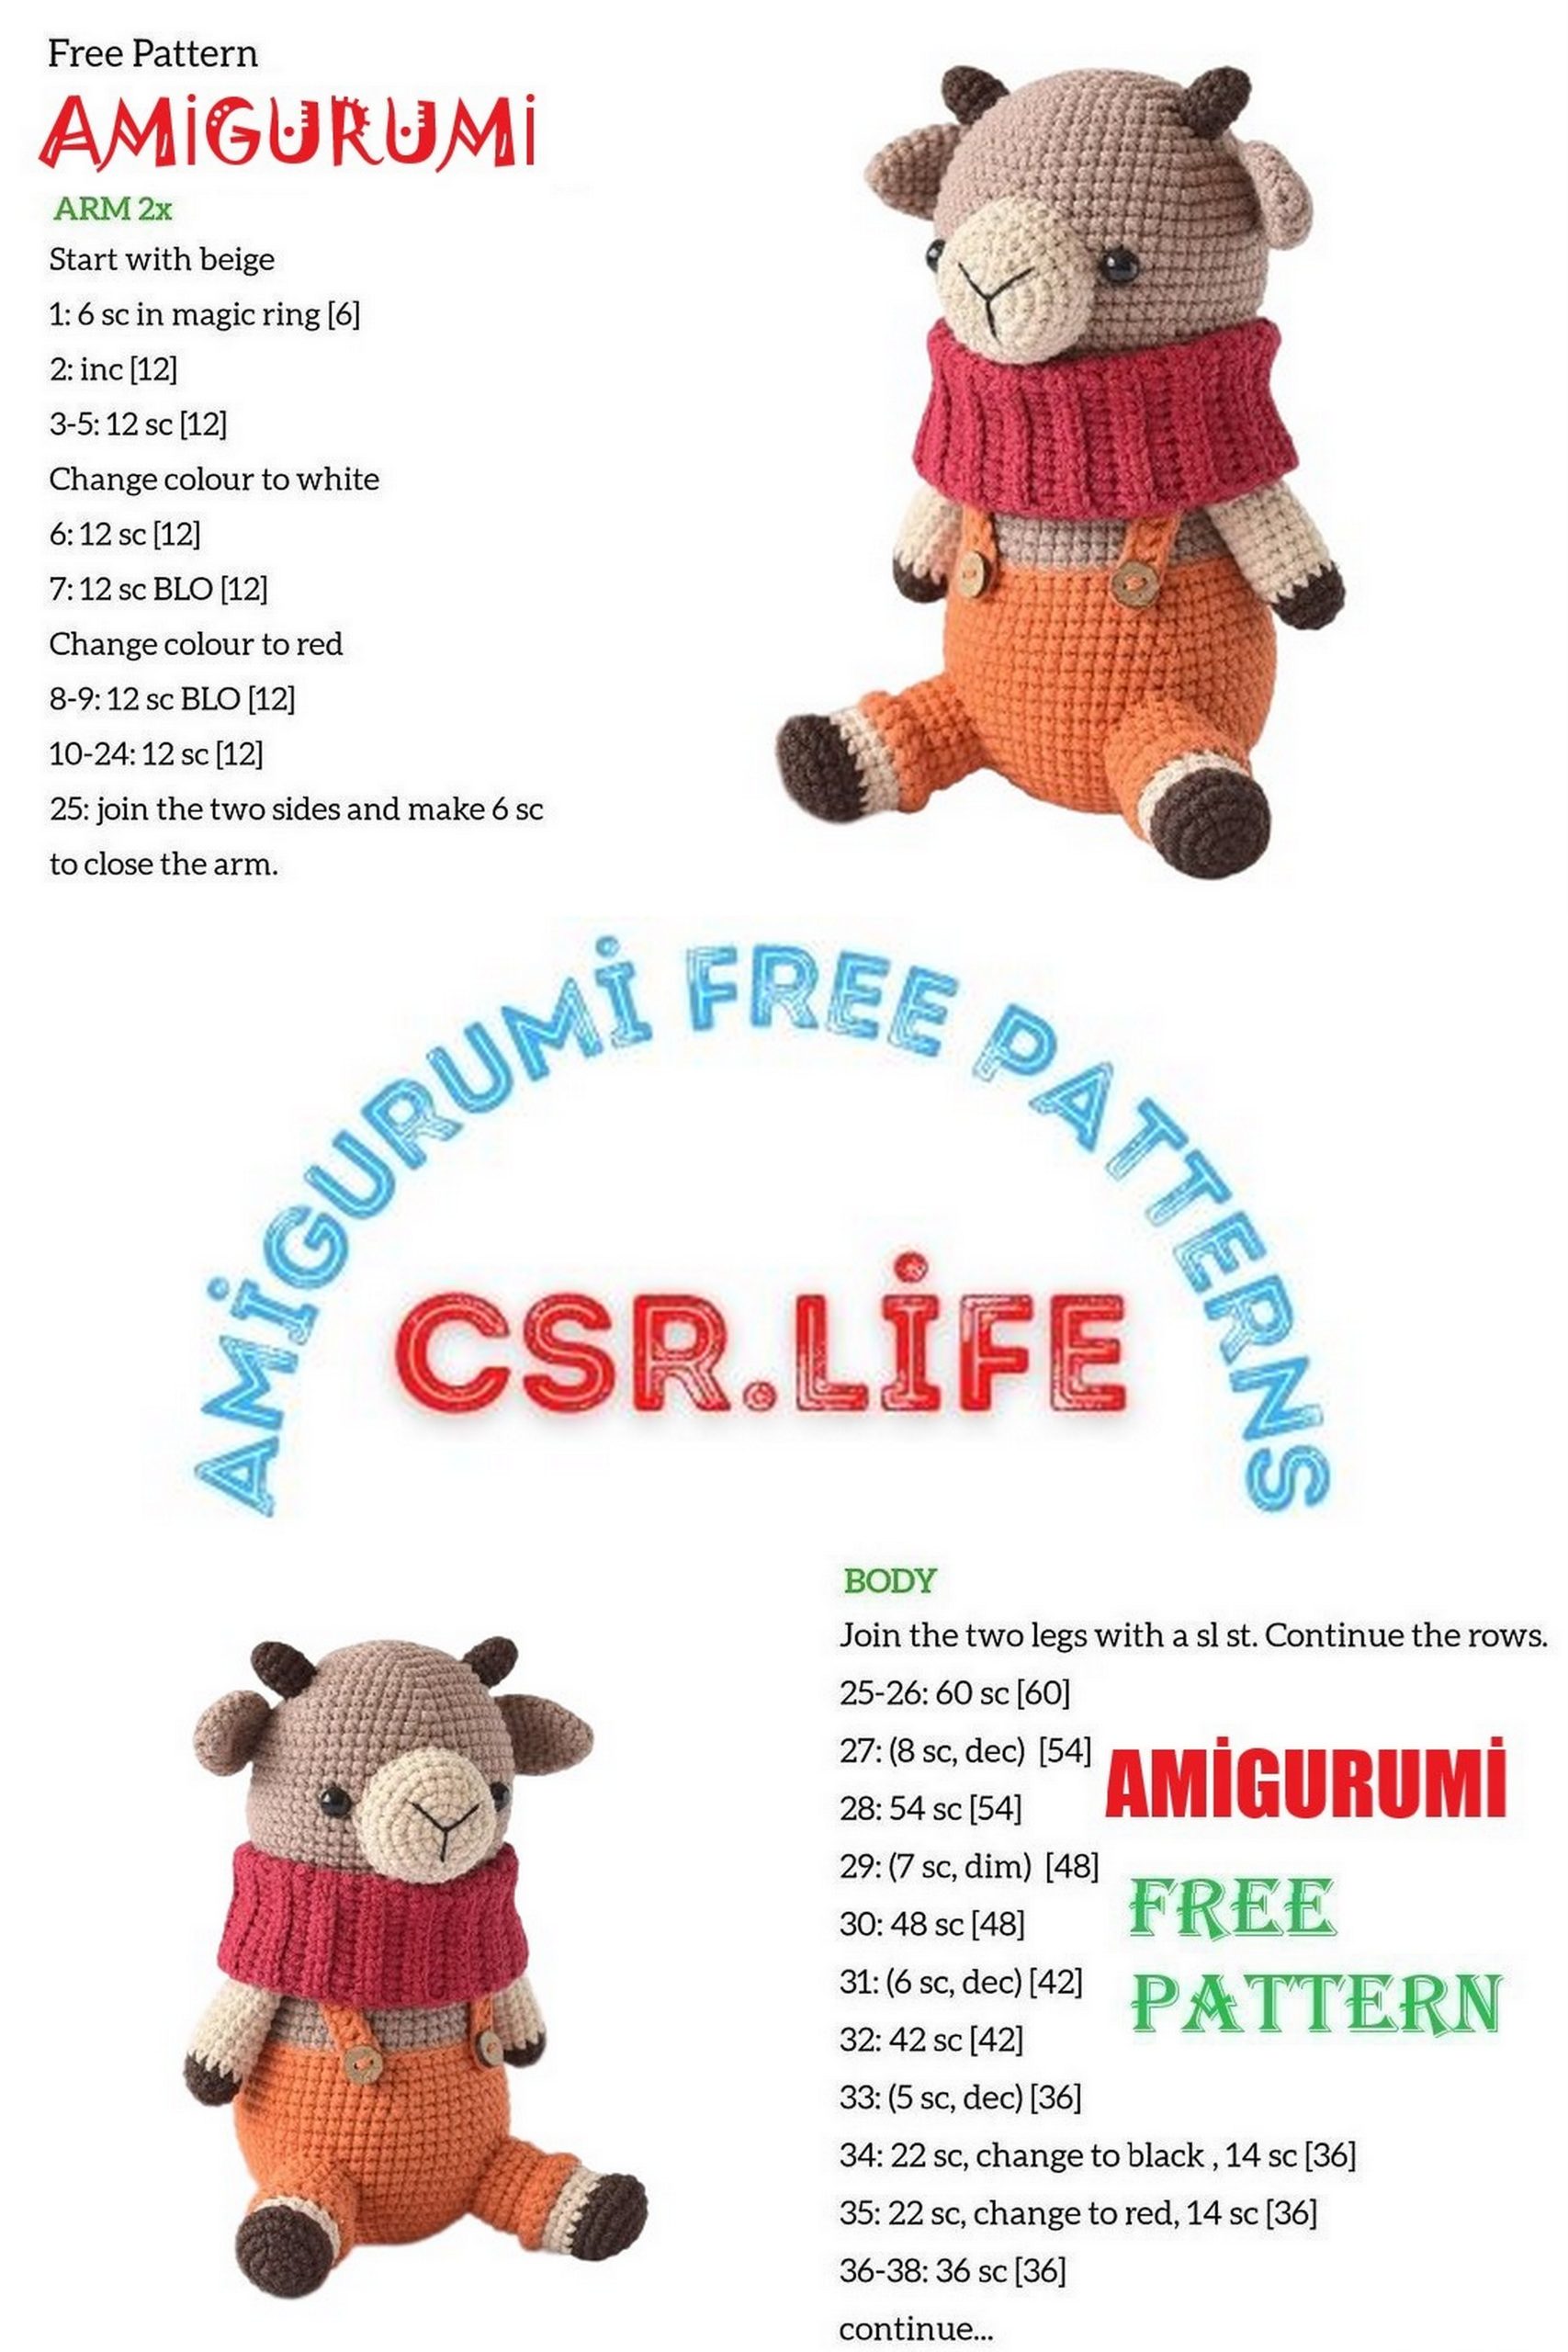
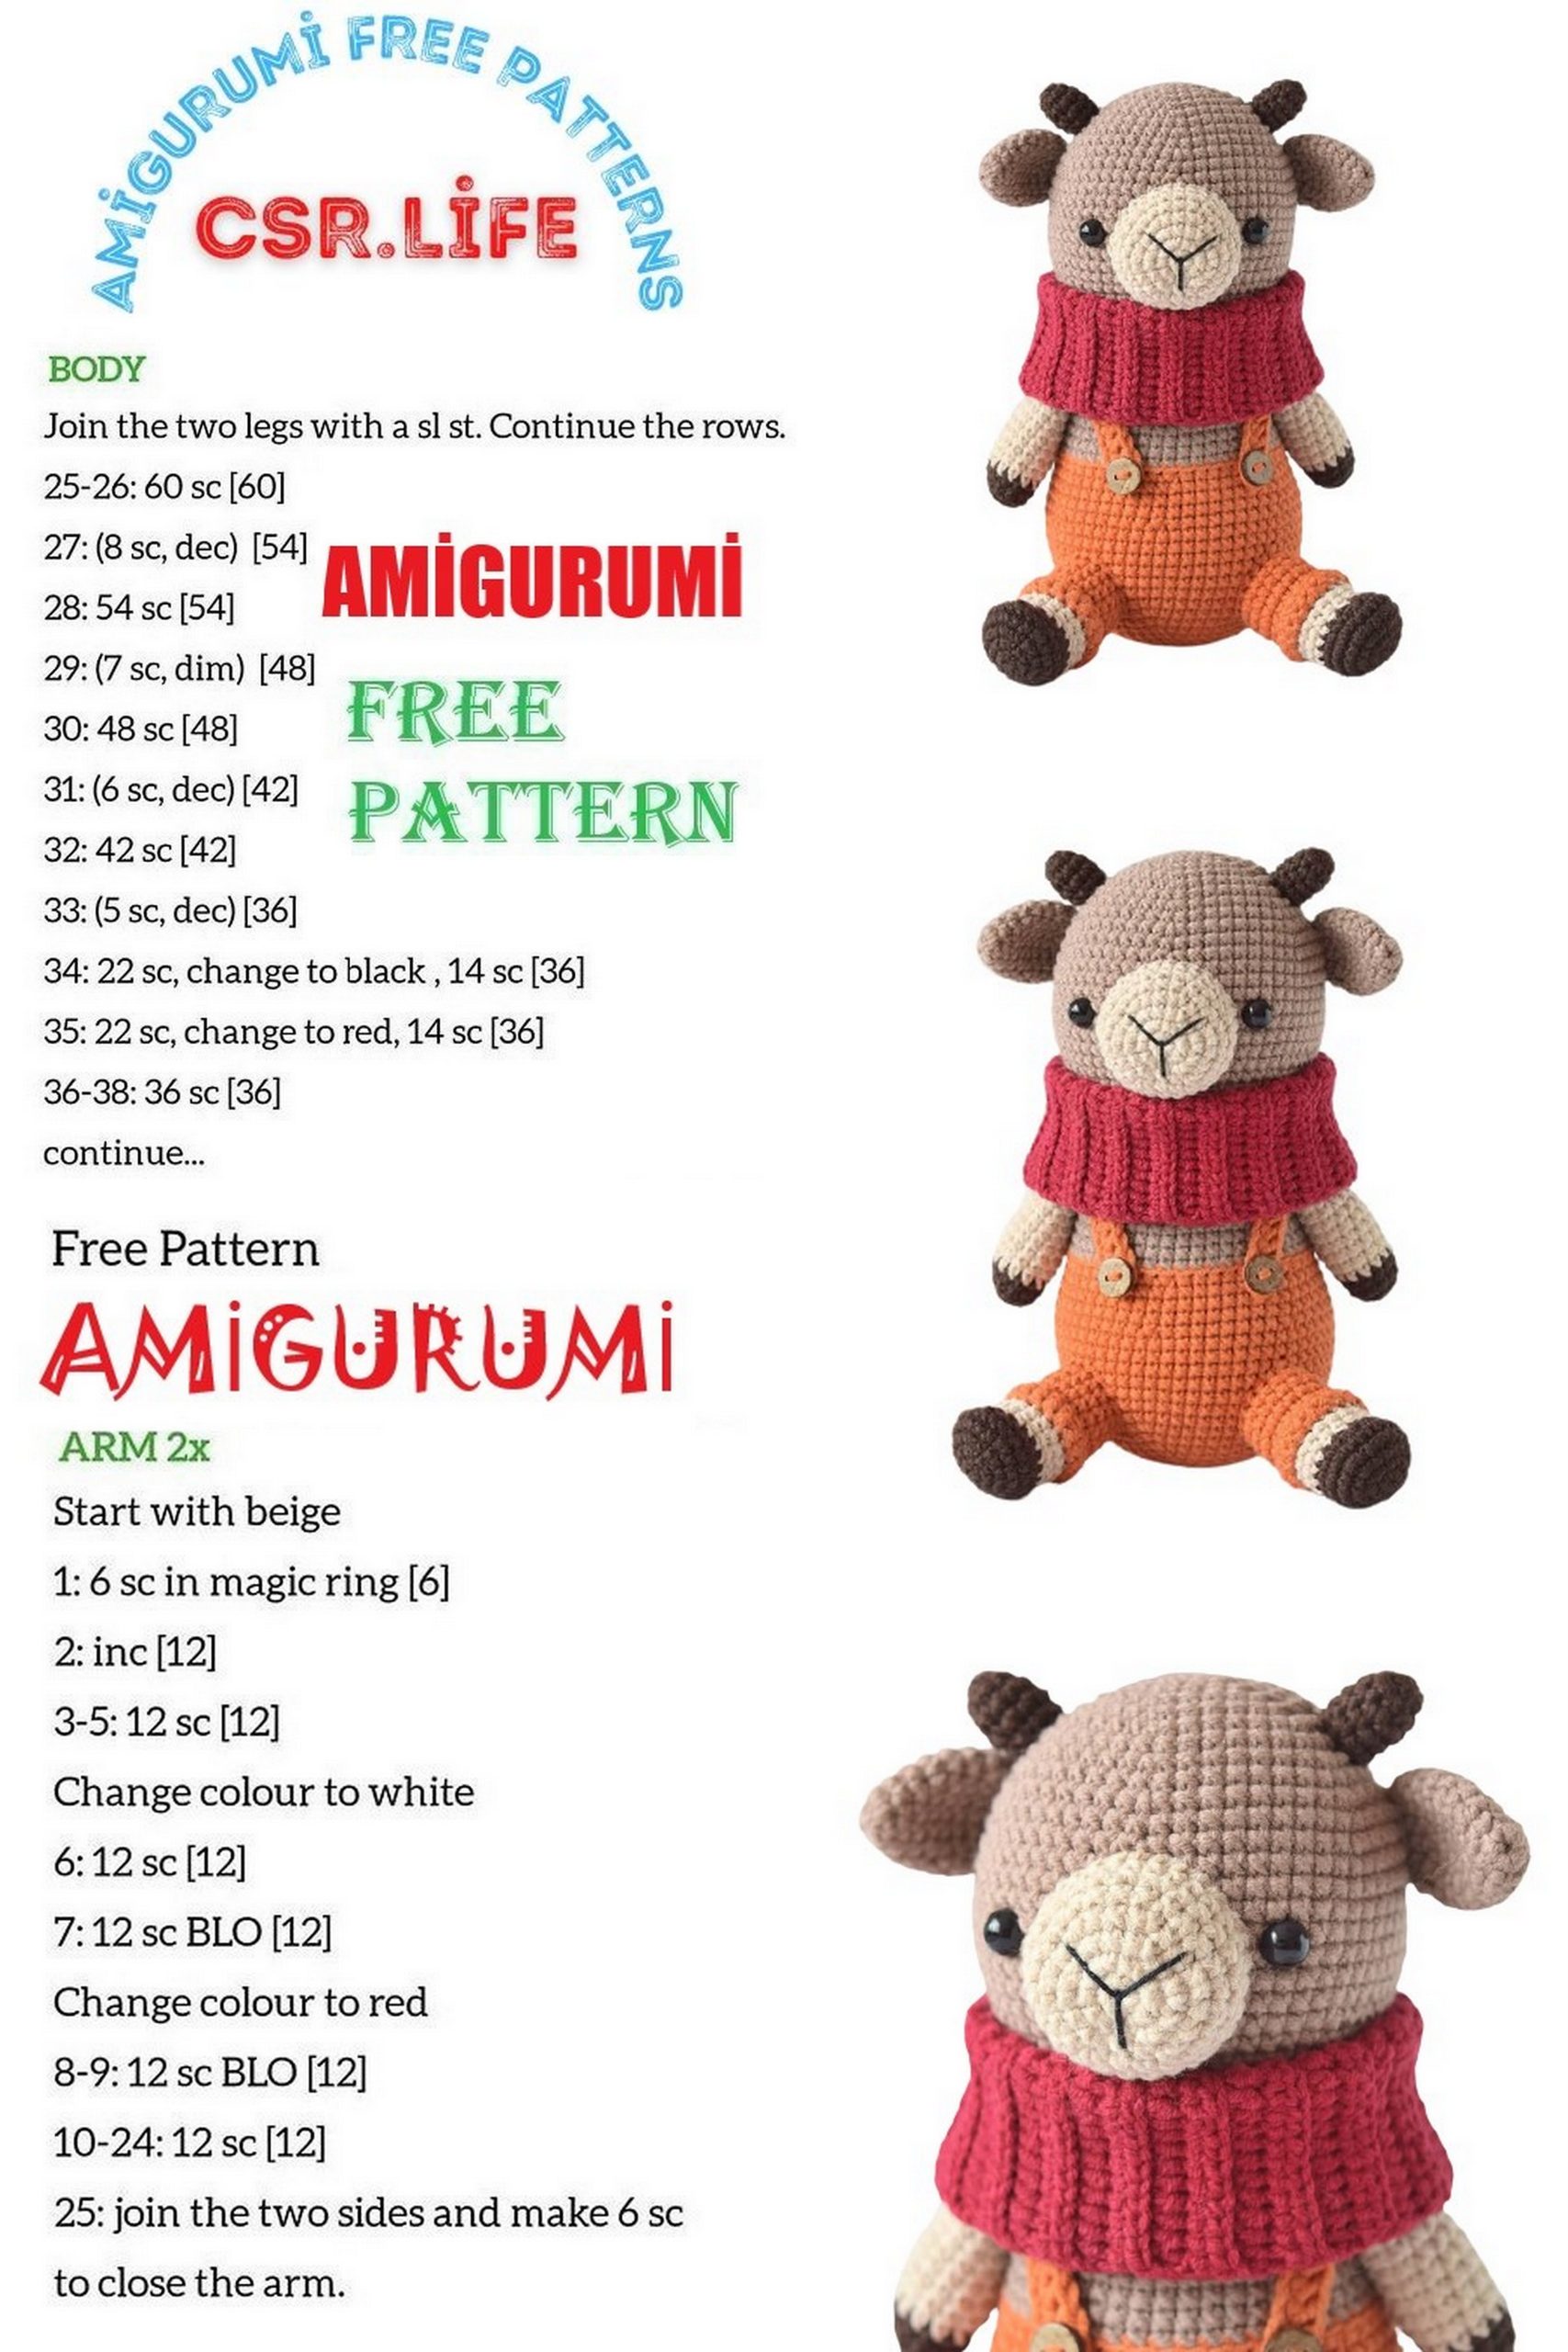
Front Legs (2 pieces). Color 70.
1st row: 6 CH into the ring (6)
2nd row: 6 INC (12)
3rd row: 12 SC
4th row: (5 SC, 1 INC) x 2 (14)
Change the color to 87.
5th-14th rows: 14 SC, partially stuff the piece.
15th row: (5 SC, 1 DEC) x 2 (12)
16th row: 12 SC
Fold the two sides together and crochet 6 SC through both halves.
Body. Color 85.
1st row: 6 CH into the ring (6)
2nd row: 6 INC (12)
3rd row: (1 SC, 1 INC) x 6 (18)
4th row: (2 SC, 1 INC) x 6 (24)
5th row: (3 SC, 1 INC) x 6 (30)
6th row: (4 SC, 1 INC) x 6 (36)
7th row: (5 SC, 1 INC) x 6 (42)
8th row: (6 SC, 1 INC) x 6 (48)
9th row: (7 SC, 1 INC) x 6 (54)
10th row: 54 SC
11th row: (8 SC, 1 INC) x 6 (60)
12th-18th rows: 60 SC
19th row: (8 SC, 1 DEC) x 6 (54)
20th-22nd rows: 54 SC
23rd row: (7 SC, 1 DEC) x 6 (48)
Change the color to 71.
24th row: 48 SC through the back loop
25th-27th rows: 48 SC
28th row: (6 SC, 1 DEC) x 6 (42)
29th-30th rows: 42 SC
31st row: (5 SC, 1 DEC) x 6 (36). Begin stuffing.
32nd row: 6 SC, 6 SC (attach the leg), 12 SC, 6 SC (attach the leg), 6 SC (36)
33rd row: 36 SC, fully stuff the piece.
34th row: (4 SC, 1 DEC) x 6, 1 SL-ST (30). Leave a thread for sewing.
Back Legs (2 pieces). Color 70.
1st row: 6 CH into the ring (6)
2nd row: 6 INC (12)
3rd row: (1 SC, 1 INC) x 6 (18)
4th row: (2 SC, 1 INC) x 6 (24)
5th row: 24 SC
6th row: 9 SC, 3 DEC, 9 SC (21)
Change the color to 87.
7th row: 8 SC, 3 DEC, 7 SC (18)
8th-9th rows: 18 SC, partially stuff the bottom of the leg.
Change the color to 85.
10th row: 18 SC through the back loop
11th-15th rows: 18 SC, 1 SL-ST. Stuff the piece. Leave a thread for sewing.
Return to the 10th row, attach the color 85 thread and crochet 18 SC through the front loop. Crochet one more row of 18 SC, secure the thread, and hide it.
Tail. Color 71.
Wrap the yarn around two fingers 3-4 times, then remove the loops from your fingers while holding them. Crochet 1 CH through the loops, then make 10 CH, and crochet 10 SL-ST. Secure the thread and leave a long strand. Divide the remaining thread into two parts. Use the first part to wrap several times at the base of the long loops, secure the thread, and cut the long loops. Sew the tail to the body using the second part of the divided thread.
Overall Straps (2 pieces). Color 85.
Cast on 34 CH, skip 2 CH, and crochet 32 HSC into each CH. Secure the thread, hide it, and cut it. Sew the straps to the sides of the overalls. Cross them over the shoulders and sew them to the front of the overalls using buttons for decoration.
Snood. Color 51.
1st row: 24 CH, 22 HSC in the 3rd loop from the hook, 2 CH as the turning chain.
2nd row: 22 HSC through the back loop, 2 CH as the turning chain.
3rd-34th rows: 22 HSC through the back loop, 2 CH as the turning chain.
35th row: 22 SC through the back loop. Leave a thread for sewing. Sew both ends of the snood together.
Your little bull is ready. Enjoy your crocheting! Don’t forget to tag me in your work; I’d love to see your little bulls.