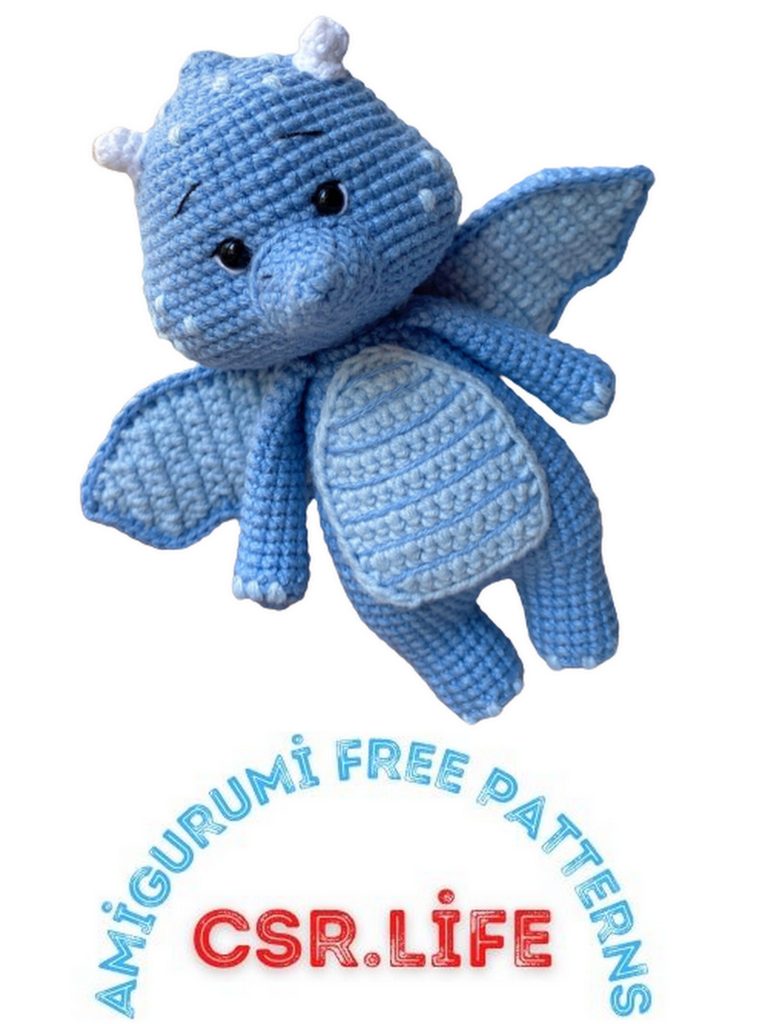
Free Amigurumi Dragon Pattern: Create Your Own Mythical Companion
Discover a magical world of crochet with our free amigurumi dragon pattern. Craft your very own fantastical companion with step-by-step instructions. Unleash your creativity and embark on a mythical journey today.
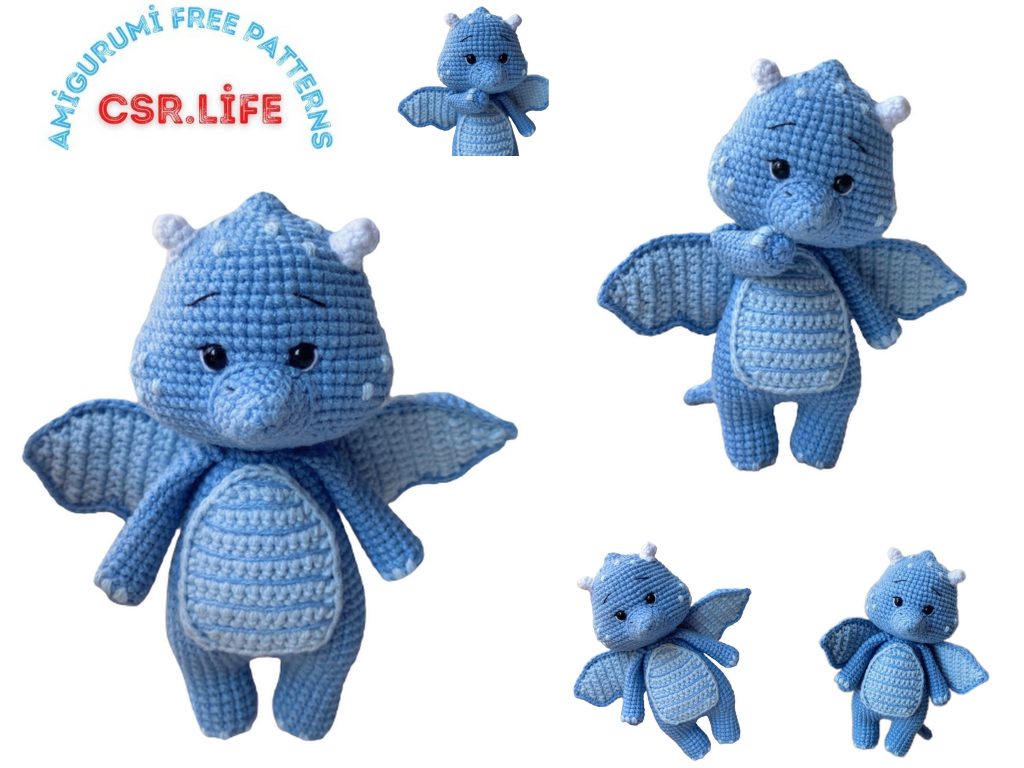
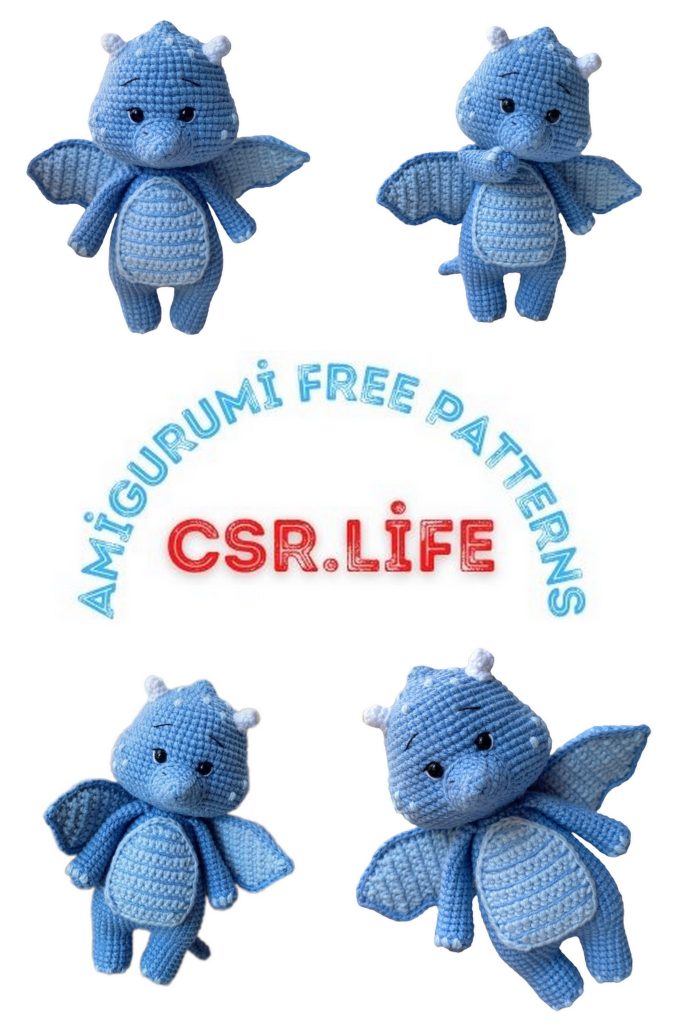
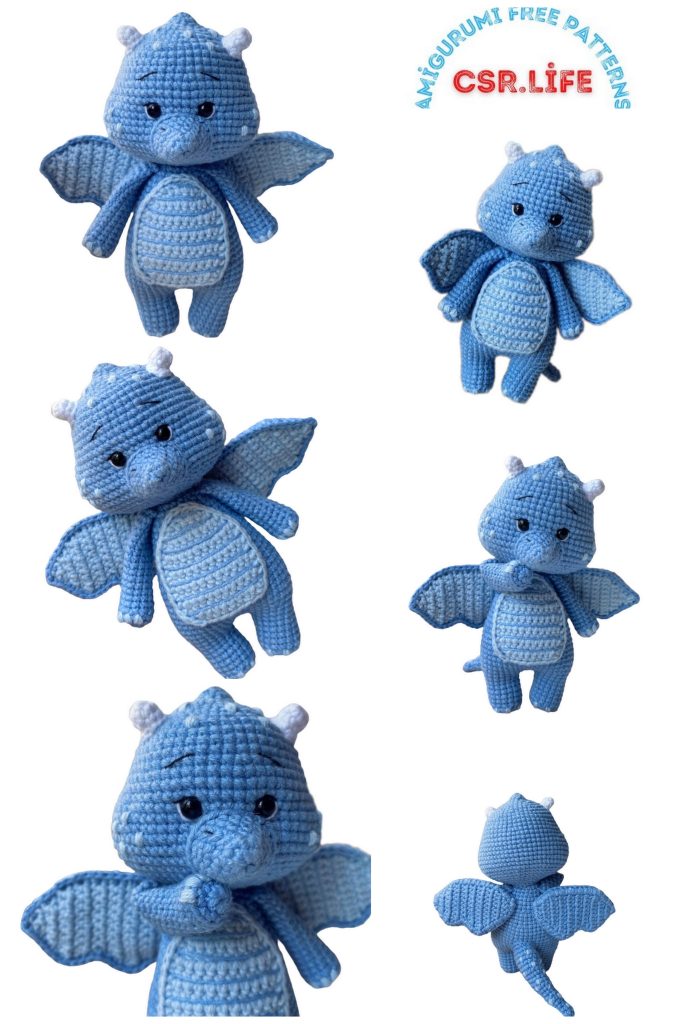
Welcome to the enchanting realm of amigurumi crafting, where imagination takes flight and mythical creatures come to life! In this article, we’re thrilled to share with you a captivating amigurumi dragon pattern that’s both free and fabulous. Whether you’re an experienced crocheter or a novice, this project promises to ignite your creativity and transport you to a world of legends and fantasy.
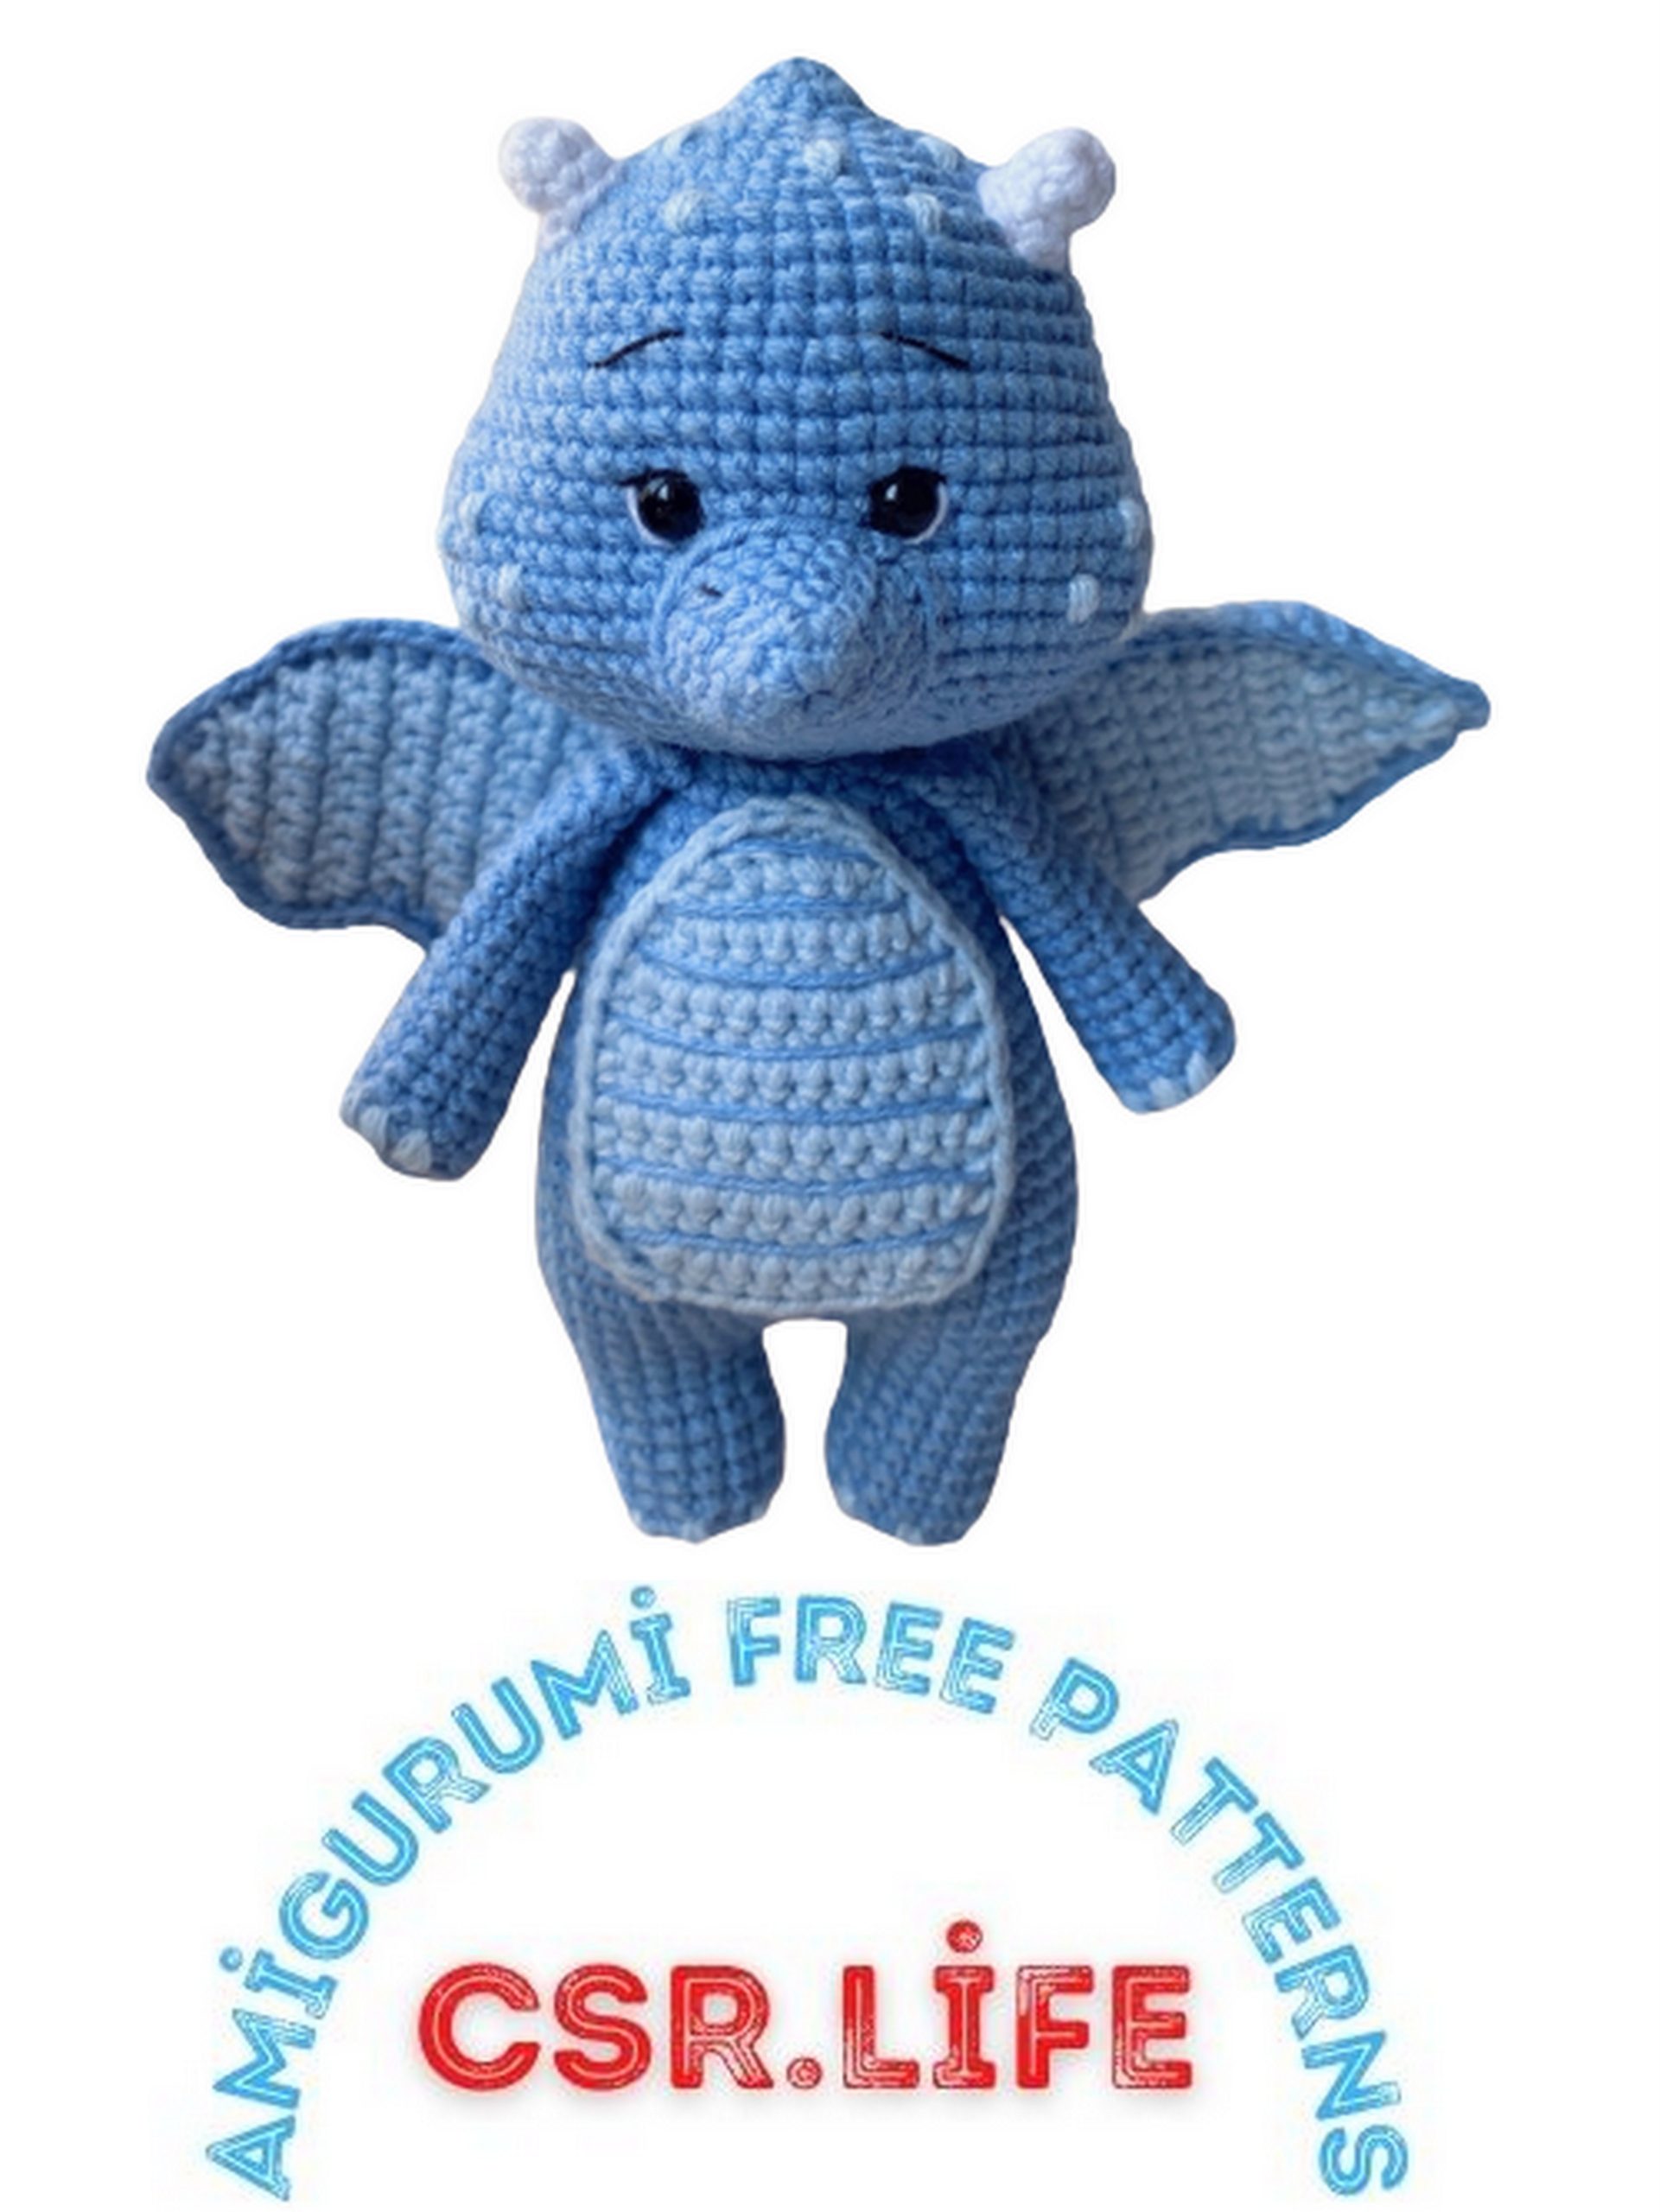
Amigurumi, the Japanese art of crocheting small, stuffed creatures, has gained a devoted following worldwide. With our detailed instructions and easy-to-follow pattern, you’ll be able to conjure your very own dragon, complete with intricate scales, majestic wings, and a charming personality. This amigurumi dragon is perfect for gifting, decorating, or simply adding a touch of magic to your crochet collection.
As you embark on this mythical journey, you’ll not only create a delightful dragon but also hone your crochet skills. From selecting the right yarn and hooks to mastering essential stitches, we’ll guide you every step of the way. Plus, we’ll provide tips and tricks to make your amigurumi experience enjoyable and rewarding.
So, grab your crochet hook, select your favorite yarn colors, and let’s embark on an adventure of creativity and wonder. By the end of this journey, you’ll have a whimsical amigurumi dragon that will capture hearts and spark imaginations. Get ready to breathe life into your very own dragon – the stuff of legends begins here!
Materials Needed:
- Alize Cotton Gold Hobby yarn
- Composition: 55% cotton, 45% acrylic
- Weight / Length: 50 g / 165 m
- Yarnart Jeans yarn
- Composition: 55% cotton, 45% polyacrylic
- Weight / Length: 50 g / 165 m
- Colors: 374-blue, 55-white, 24-light blue
- Safety eyes with 6 mm fasteners
- Black and white thread for embellishments
- Polyester fiberfill or any other stuffing material
- Scissors
- Crochet hook (I use a 1.75 mm hook, but use the one you’re comfortable with)
- Finished toy height is approximately 12 cm
Abbreviations:
- MR – magic ring
- SC – single crochet
- CH – chain
- SLST – slip stitch
- INC – increase (2 SC in the same stitch)
- DEC – decrease (invisible decrease recommended)
- BLO – back loop only
- FO – fasten off
Hands (2 pieces):
Stuff the parts only halfway!
Using blue yarn.
Round 1: 6 SC in MR (6)
Round 2: INC in each stitch (12)
Round 3: BLO, 12 SC (15 rounds in total)
Fold in half and crochet 6 SC through both sides. Cut the yarn and secure it.
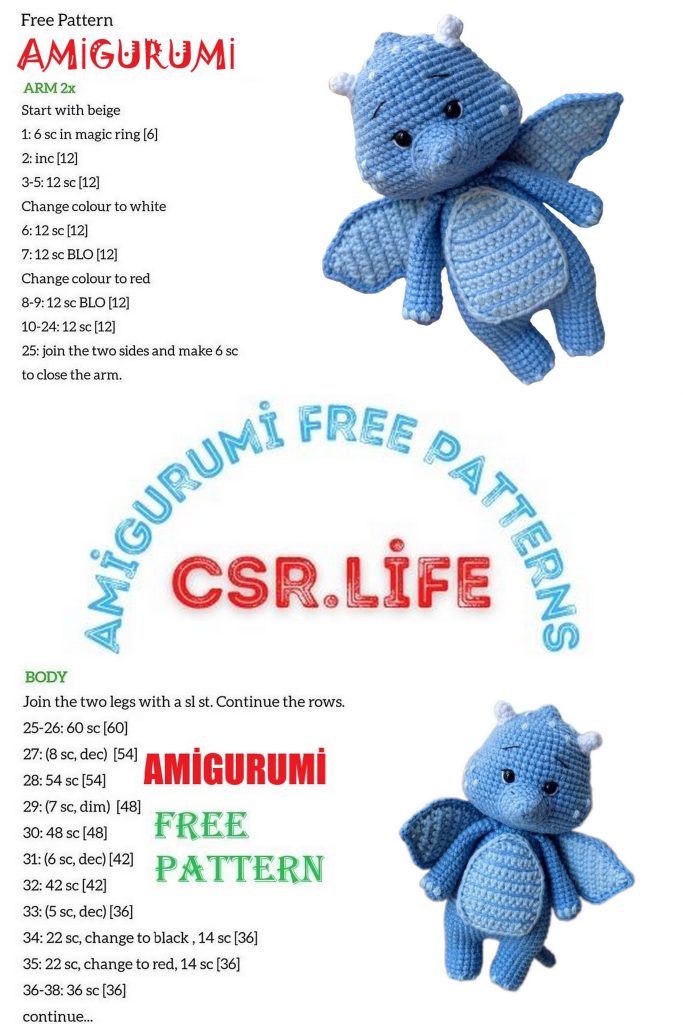
Legs/Body:
Stuff as you go along.
Using blue yarn.
Round 1: 8 SC in MR (8)
Round 2: INC in each stitch (16)
Round 3: BLO, 16 SC (6 rounds in total)
Cut and secure the yarn for the first leg.
Make the second leg similarly but do not cut the yarn. Make 3 CH and join the second leg to the first one, then continue crocheting in a round.
Round 10: 16 SC on the first leg, 3 SC in the chain, 16 SC on the second leg, 3 SC in the chain (38)
Round 11: 7 SC, INC, (9 SC, INC) x 3 (42)
Round 12: (6 SC, INC) x 6 (48)
Rounds 13-18: 48 SC (6 rounds)
Round 19: (6 SC, DEC) x 6 (42)
Rounds 20-22: 42 SC (3 rounds)
Round 23: (5 SC, DEC) x 6 (36)
Rounds 24-26: 36 SC (3 rounds)
Round 27: (4 SC, DEC) x 6 (30)
Rounds 28-30: 30 SC (3 rounds)
Round 31: (3 SC, DEC) x 6 (24)
In the next round, attach the arms.
Round 32: 3 SC, 6 SC through the loops of the first arm and body at the same time, 6 SC, 6 SC through the loops of the second arm and body at the same time, 3 SC (24)
Round 33: (2 SC, DEC) x 6 (18)
Cut the yarn and secure it.
Tail:
Using blue yarn.
Round 1: 6 SC in MR (6)
Rounds 2-4: 6 SC (3 rounds)
Round 5: (1 SC, INC) x 3 (9)
Rounds 6-8: 9 SC (3 rounds)
Round 9: (2 SC, INC) x 3 (12)
Rounds 10-12: 12 SC (3 rounds)
Round 13: (3 SC, INC) x 3 (15)
Rounds 14-16: 15 SC (3 rounds)
Round 17: (4 SC, INC) x 3 (18)
Rounds 18-20: 18 SC (3 rounds)
Cut the yarn and leave a long tail for sewing. Stuff the detail.
Body:
Using blue yarn.
Row 1: 4 CH, starting from the second chain from the hook, 3 SC, 1 CH, turn (3)
Row 2: INC, 1 SC, INC, 1 CH, turn (5)
Row 3: INC, 3 SC, INC, 1 CH, turn (7)
Row 4: INC, 5 SC, INC, 1 CH, turn (9)
Row 5: INC, 7 SC, INC, 1 CH, turn (11)
Rows 6-13: 11 SC, 1 CH, turn (8 rows)
Row 14: DEC, 7 SC, DEC, 1 CH, turn (9)
Row 15: DEC, 5 SC, DEC, 1 CH, turn (7)
Edge the piece with SC. Cut the yarn and fasten it, leaving a long tail for sewing.
NOTE: When edging the wings, keep in mind that they should be mirrored. To achieve this, start edging one wing from the top, and the other from the bottom, i.e., in different directions.
Wings (2 pieces):
Using blue yarn.
Row 1: 5 CH, starting from the second chain from the hook, 4 SC, 1 CH, turn (3)
Row 2: INC, 2 SC, INC, 1 CH, turn (6)
Row 3: INC, 4 SC, INC, 1 CH, turn (8)
Row 4: 7 SC, INC, 1 CH, turn (9)
Row 5: INC, 8 SC, 1 CH, turn (10)
Row 6: 9 SC, INC, 1 CH, turn (11)
Row 7: INC, 10 SC, INC, 1 CH, turn (12)
Row 8: 10 SC, DEC, 1 CH, turn (11)
Row 9: DEC, 9 SC, 1 CH, turn (10)
Row 10: 8 SC, DEC, 1 CH, turn (9)
Row 11: DEC, 7 SC, 1 CH, turn (8)
Row 12: 7 SC, INC, 1 CH, turn (9)
Row 13: INC, 8 SC, 1 CH, turn (10)
Row 14: 9 SC, INC, 1 CH, turn (11)
Row 15: DEC, 7 SC, DEC, 1 CH, turn (9)
Row 16: DEC, 5 SC, DEC, 1 CH, turn (7)
Row 17: DEC, 3 SC, DEC, 1 CH, turn (5)
Row 18: DEC, 1 SC, DEC, 1 CH, turn (3)
Row 19: DEC, 1 SC, 1 CH, turn (2)
Row 20: DEC (1)
Cut the yarn and fasten it. Create another identical piece with blue yarn but do not cut the yarn. Make an additional CH. Attach the blue piece to the blue one, ensuring that the blue is on top. Edge around the entire piece with SC, making 2 SC in each corner.
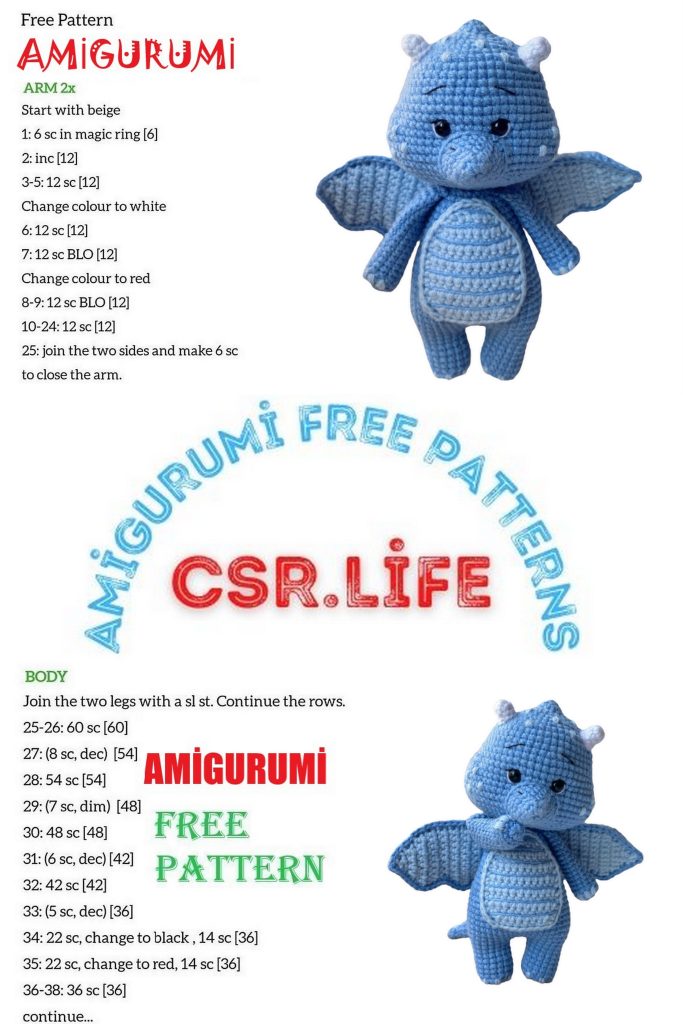
Head:
Using blue yarn.
Row 1: 6 SC in MR (6)
Row 2: (1 SC, INC) x 3 (9)
Row 3: (2 SC, INC) x 3 (12)
Row 4: (1 SC, INC) x 6 (18)
Row 5: 1 SC, INC, (2 SC, INC) x 5, 1 SC (24)
Row 6: (3 SC, INC) x 6 (30)
Row 7: 2 SC, INC, (4 SC, INC) x 5, 2 SC (36)
Row 8: (5 SC, INC) x 6 (42)
Row 9: 3 SC, INC, (6 SC, INC) x 5, 3 SC (48)
Rows 10-12: 48 SC (3 rows)
Row 13: (7 SC, INC) x 6 (54)
Rows 14-15: 54 SC (2 rows)
Row 16: 9 SC, 6 INC, 20 SC, 6 INC, 13 SC (66)
In the next row, create openings for safety eyes. If you are using sew-on or adhesive eyes, crochet 66 SC without any changes.
Row 17: 27 SC, 1 CH, skip one stitch, 6 SC, 1 CH, skip one stitch, 31 SC (66)
Rows 18-22: 66 SC (5 rows)
At this stage, you can insert the eyes. Stuff the head as you crochet. Pay special attention to shaping the cheeks during stuffing.
Row 23: (9 SC, DEC) x 6 (60)
Row 24: 4 SC, DEC, (8 SC, DEC) x 5, 4 SC (54)
Row 25: (7 SC, DEC) x 6 (48)
Row 26: 3 SC, DEC, (6 SC, DEC) x 5, 3 SC (42)
Row 27: (5 SC, DEC) x 6 (36)
Row 28: 2 SC, DEC, (4 SC, DEC) x 5, 2 SC (30)
Row 29: (3 SC, DEC) x 6 (24)
Row 30: 1 SC, DEC, (2 SC, DEC) x 5, 1 SC (18)
Cut the yarn and fasten it, leaving a long tail for sewing.
Muzzle:
Using blue yarn.
Row 1: 6 SC in MR (6)
Row 2: (1 SC, INC) x 3 (9)
Row 3: (2 SC, INC) x 3 (12)
Row 4: (3 SC, INC) x 3 (15)
Row 5: (4 SC, INC) x 3 (18)
Row 6: (5 SC, INC) x 3, SS (21)
Cut the yarn and fasten it, leaving a long tail for sewing. Stuff the piece.
Attach the muzzle under the eyes on the head.
Eye Ties:
Take a long needle and the main color thread. Insert the needle at the bottom of the head and bring it out at point 1 (near the eye). Leave a 1 SC gap and insert the needle at point 2, bring it out at point 3, opposite the other eye, insert it again, shifting by 1 SC, at point 4, and bring it out at the bottom of the head. Tighten, but not too tightly to avoid sinking the eyes. You can repeat this process once more. Tie both ends into two knots and hide them inside the head.
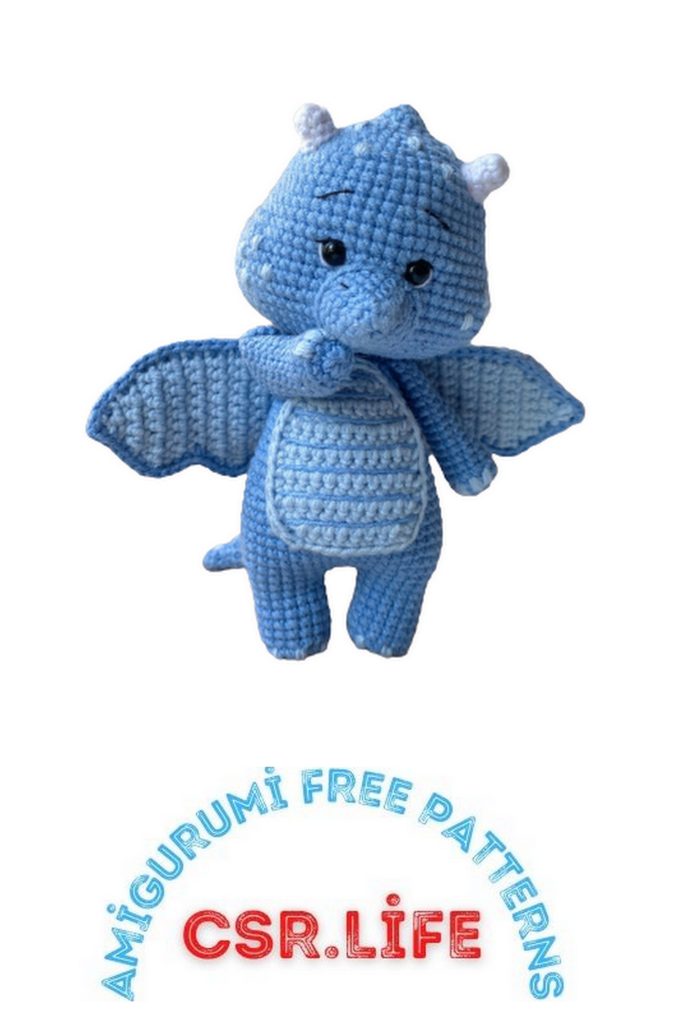
Horns (2 pieces):
Using white yarn.
Row 1: 6 SC in MR (6)
Row 2: 6 SC (6)
Row 3: (1 SC, INC) x 3, SS (9)
Cut the yarn and fasten it, leaving a long tail for sewing.
Use thin white thread to embroider the white of the eyes.
Use thin black thread to embroider eyelashes, eyebrows, and nostrils.
Attach the horns to the head.
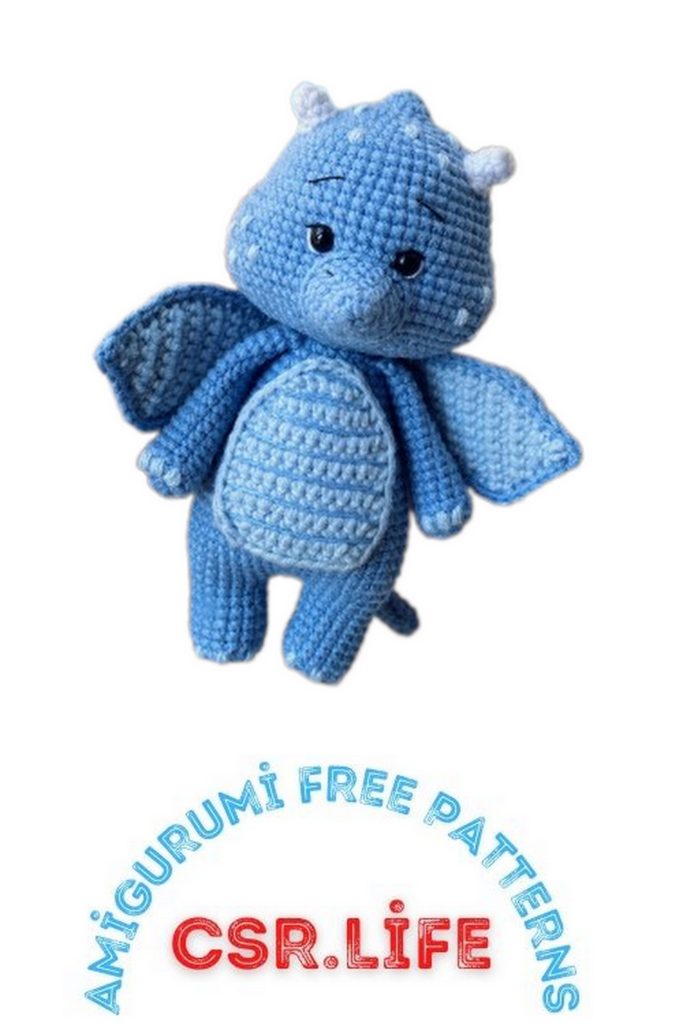
Attach the head to the body.
Attach the abdomen to the body. Use blue yarn to embroider veins on it.
Attach the tail to the body. Embroider blue scales on it.
Attach the wings on the back.
Use blue yarn to embroider scales on the head and cheeks.
Use blue yarn to embroider nails on the hands and feet.