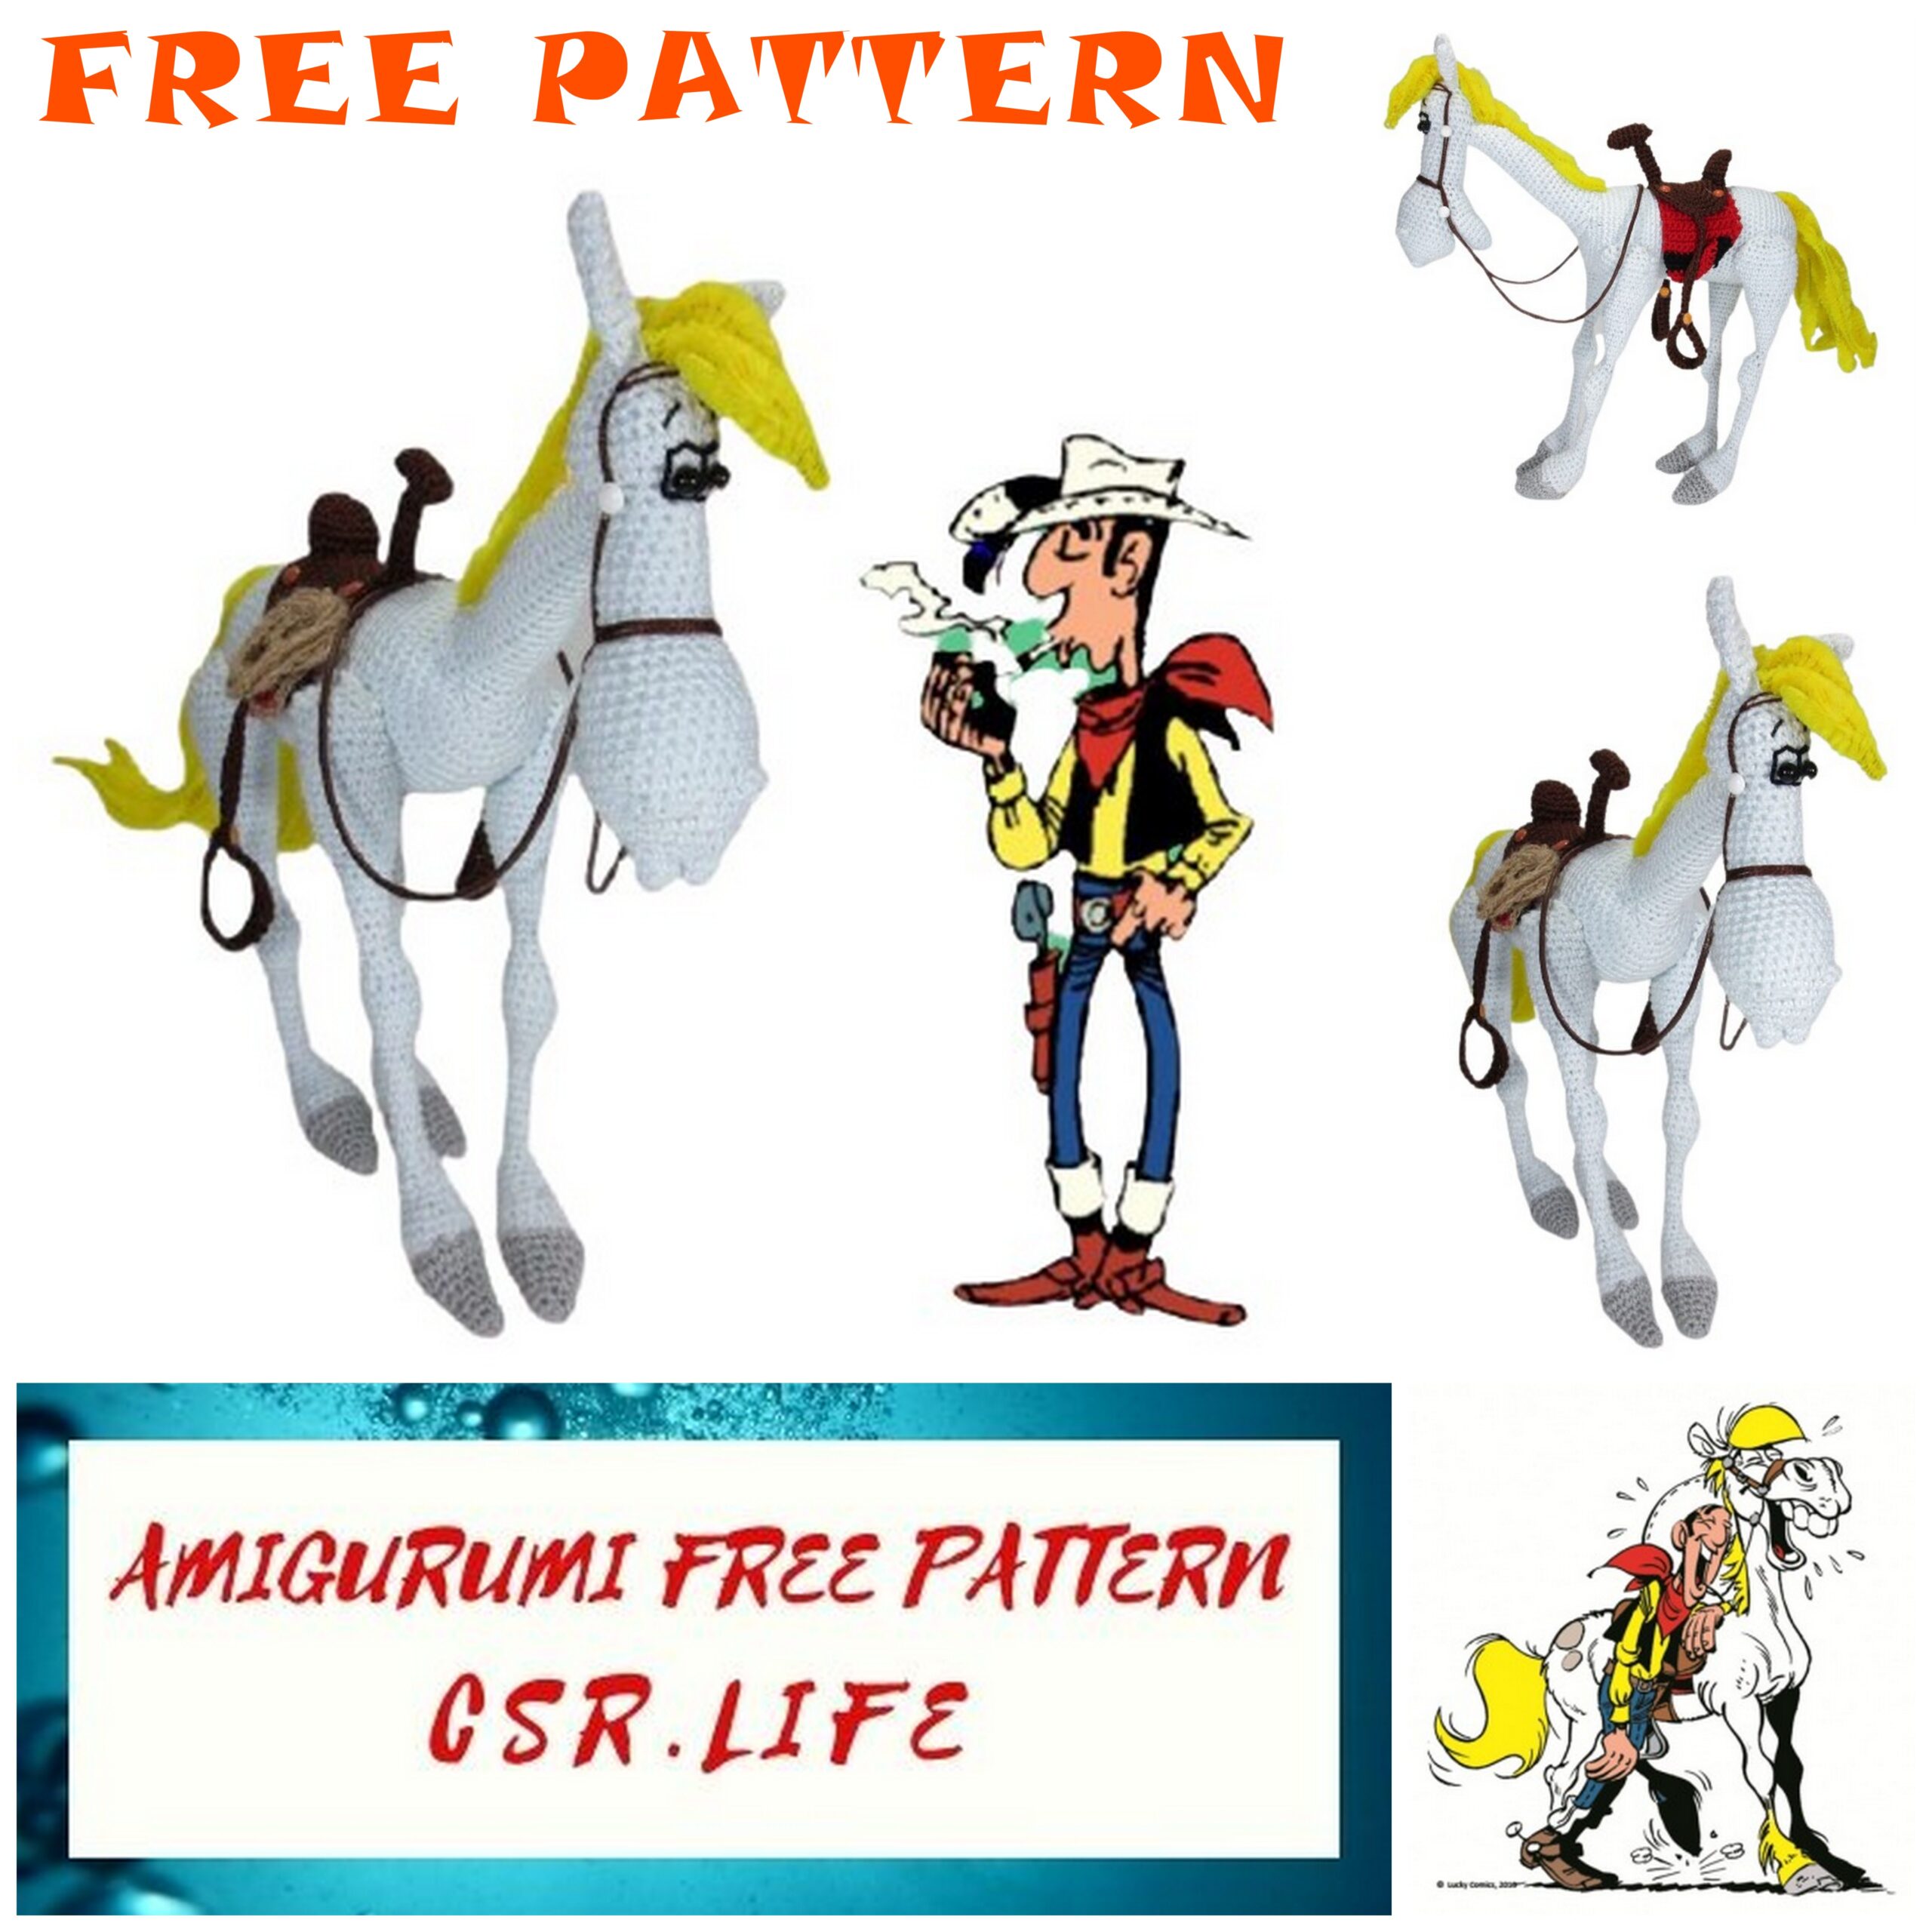
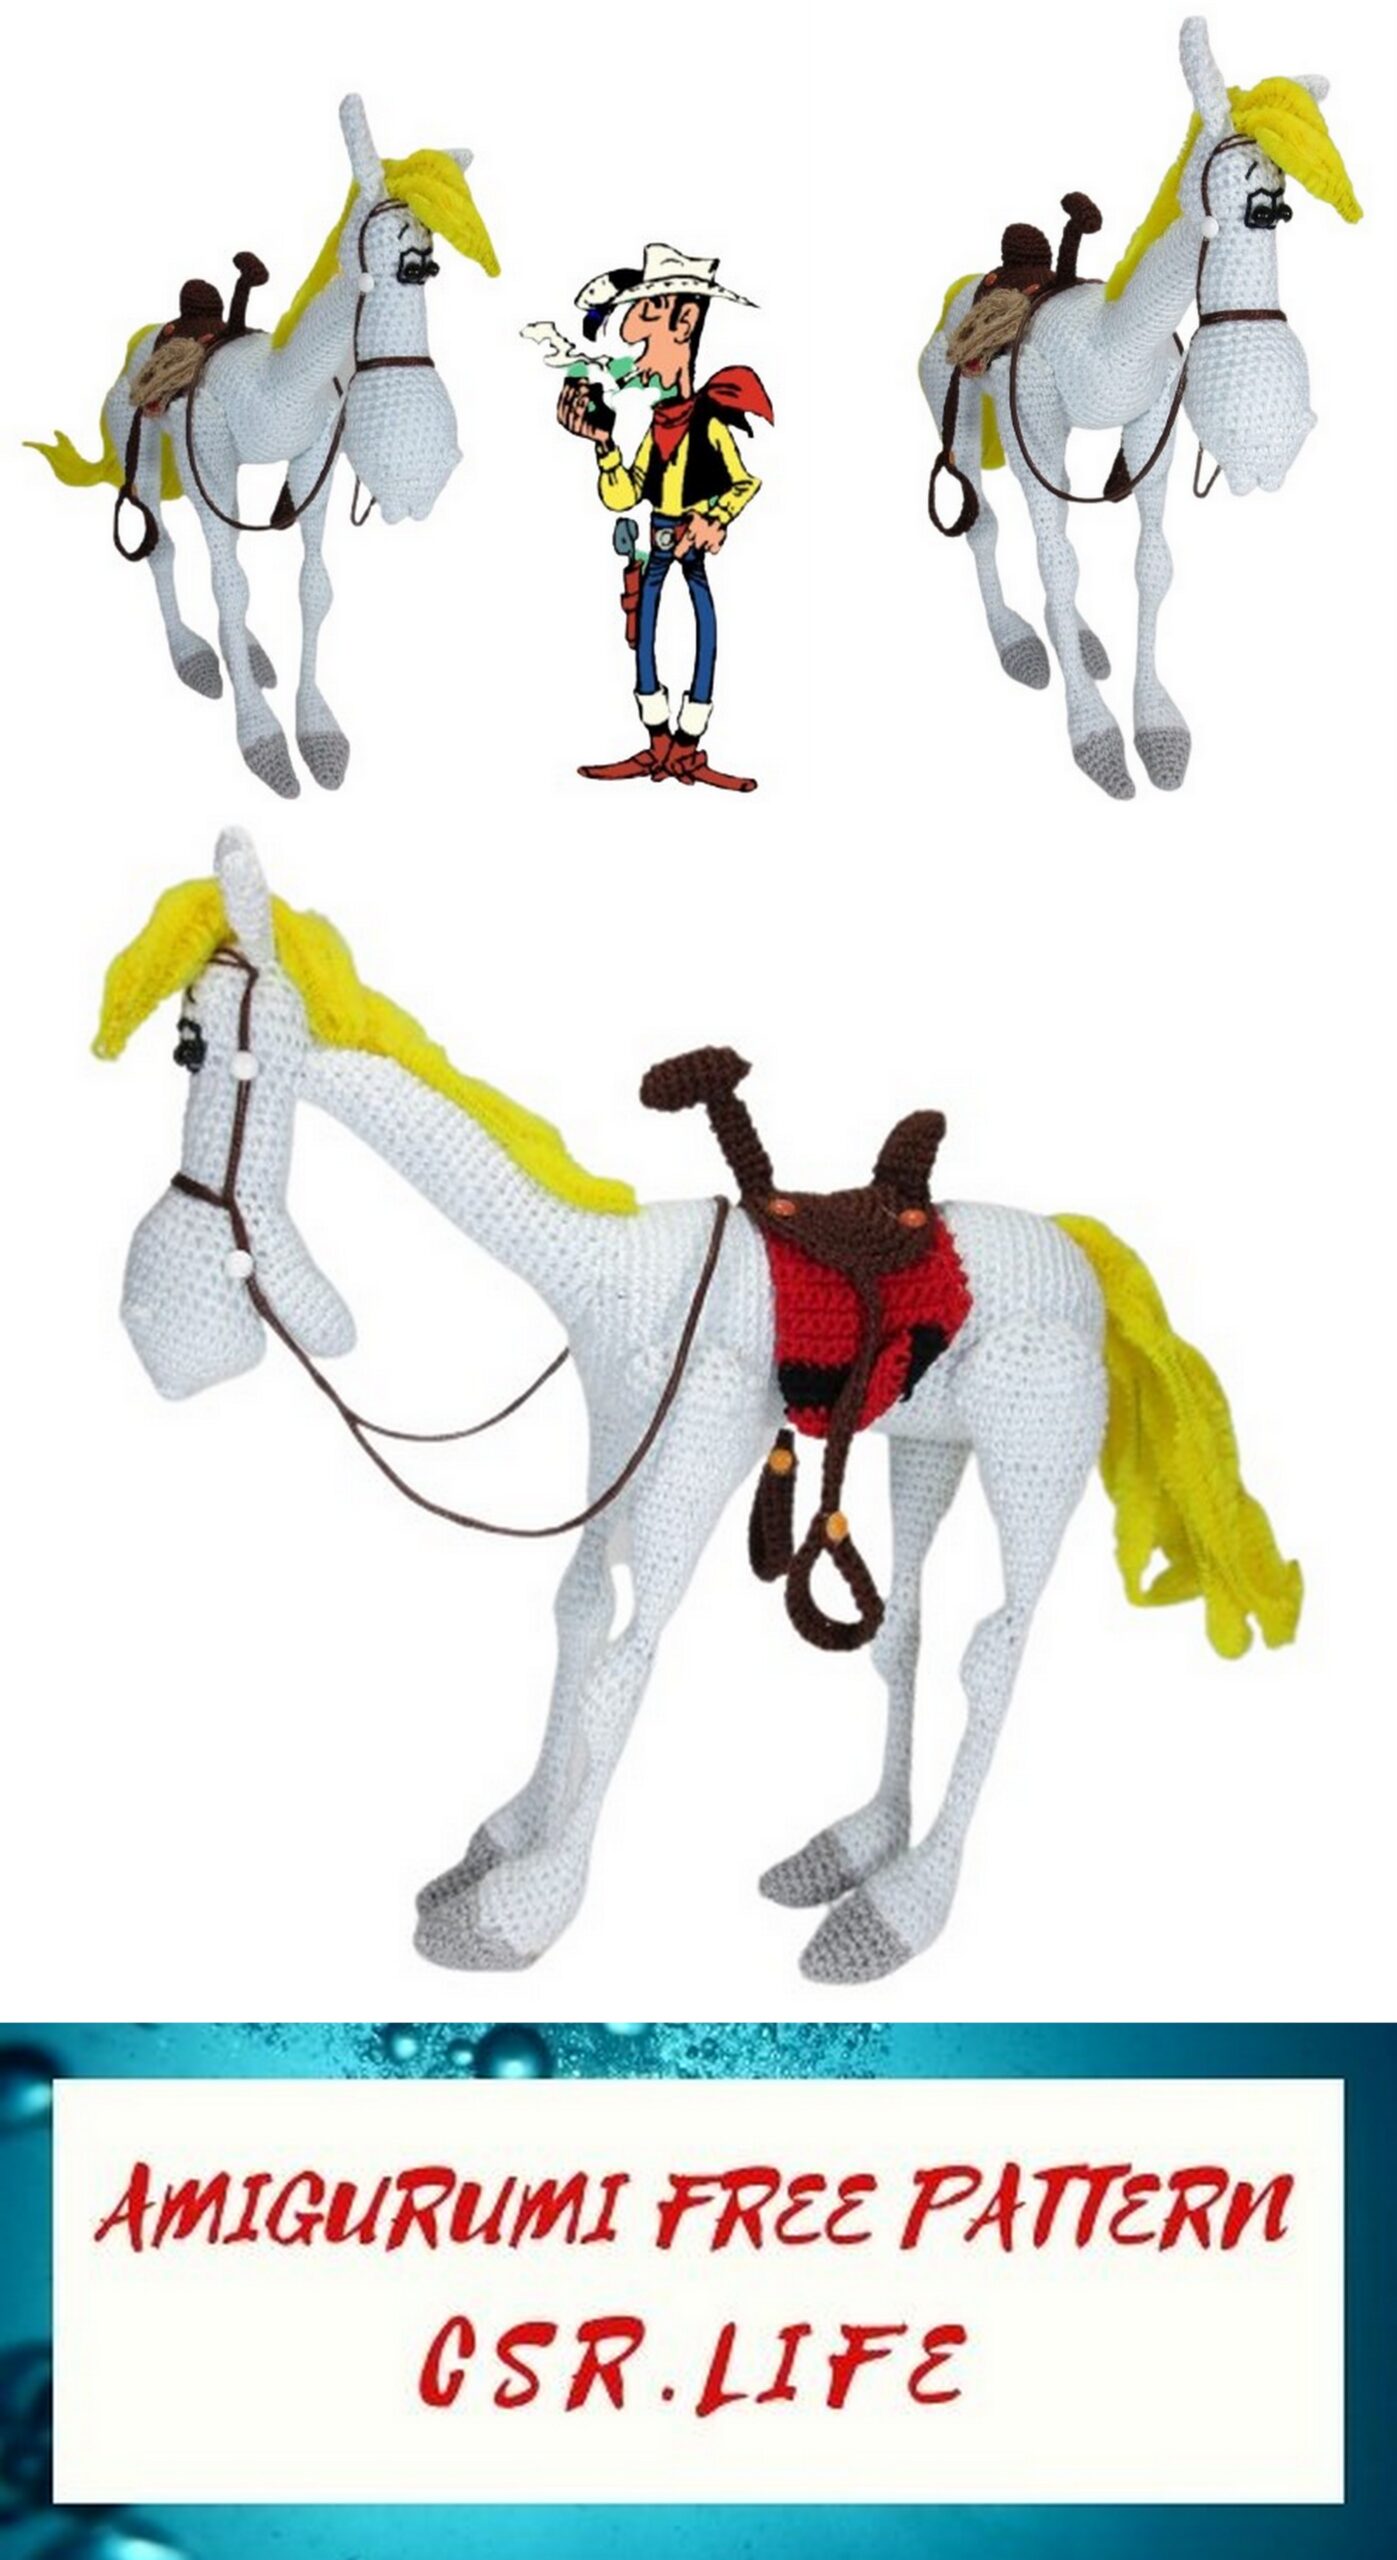
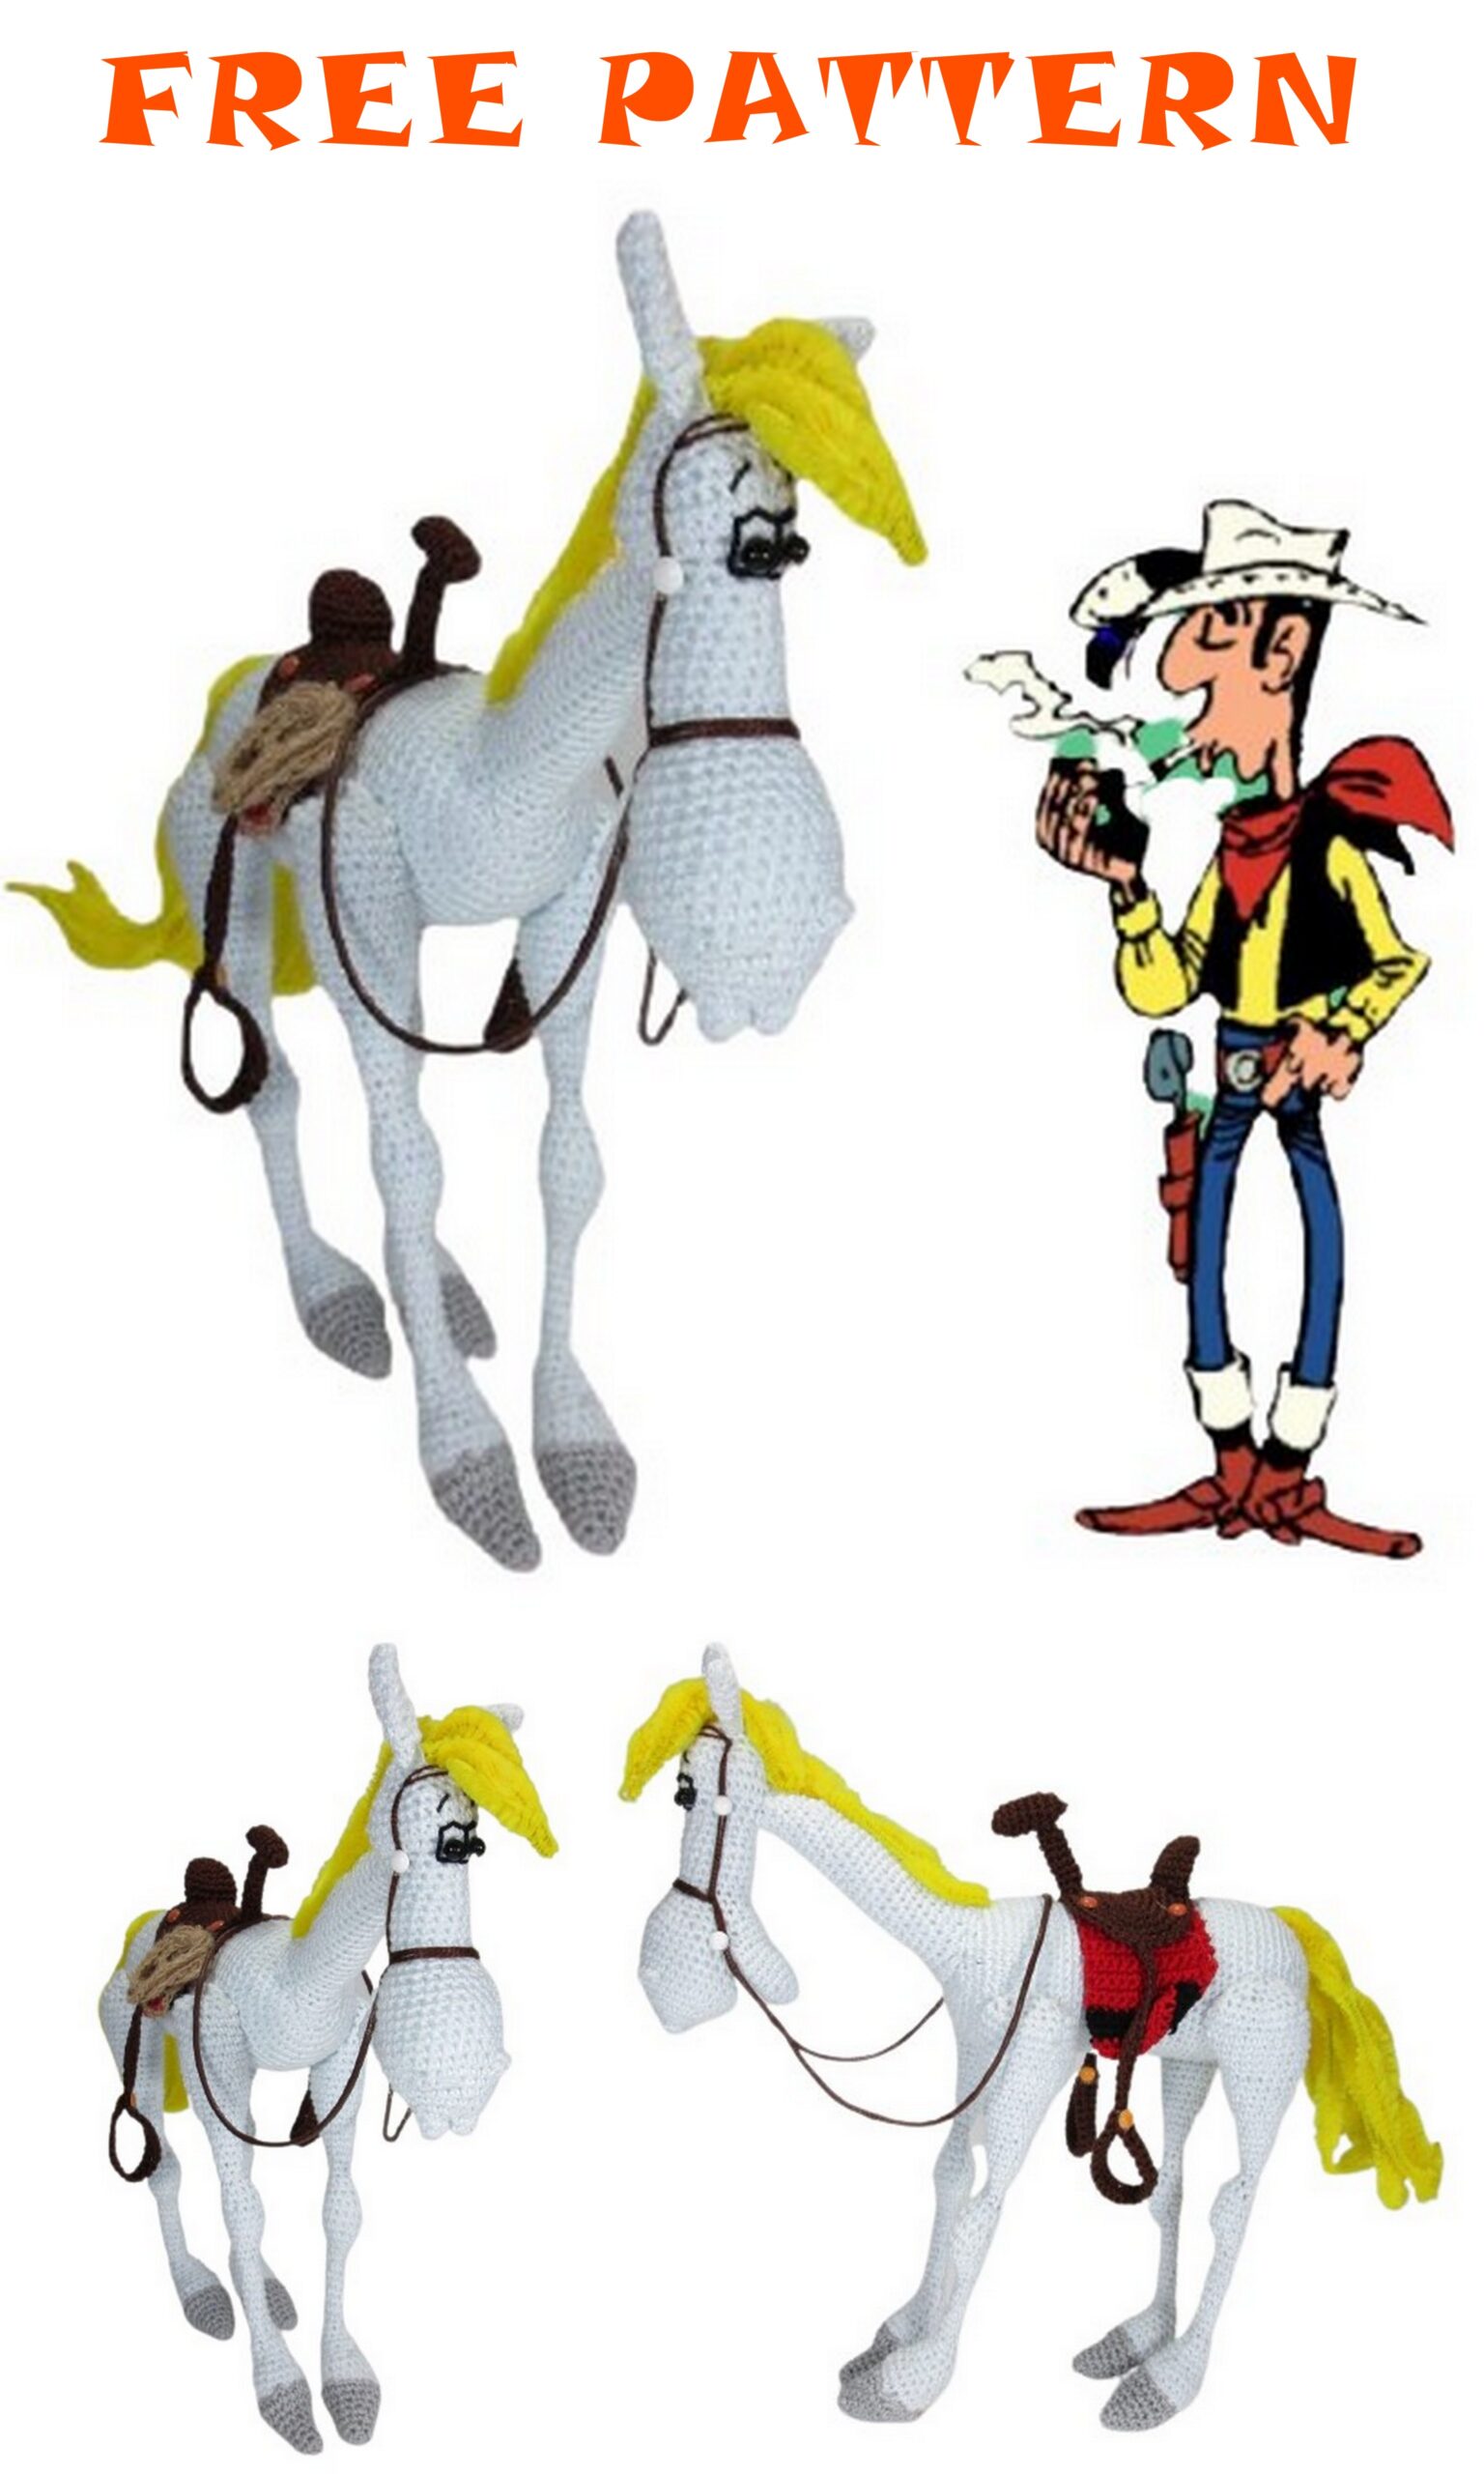
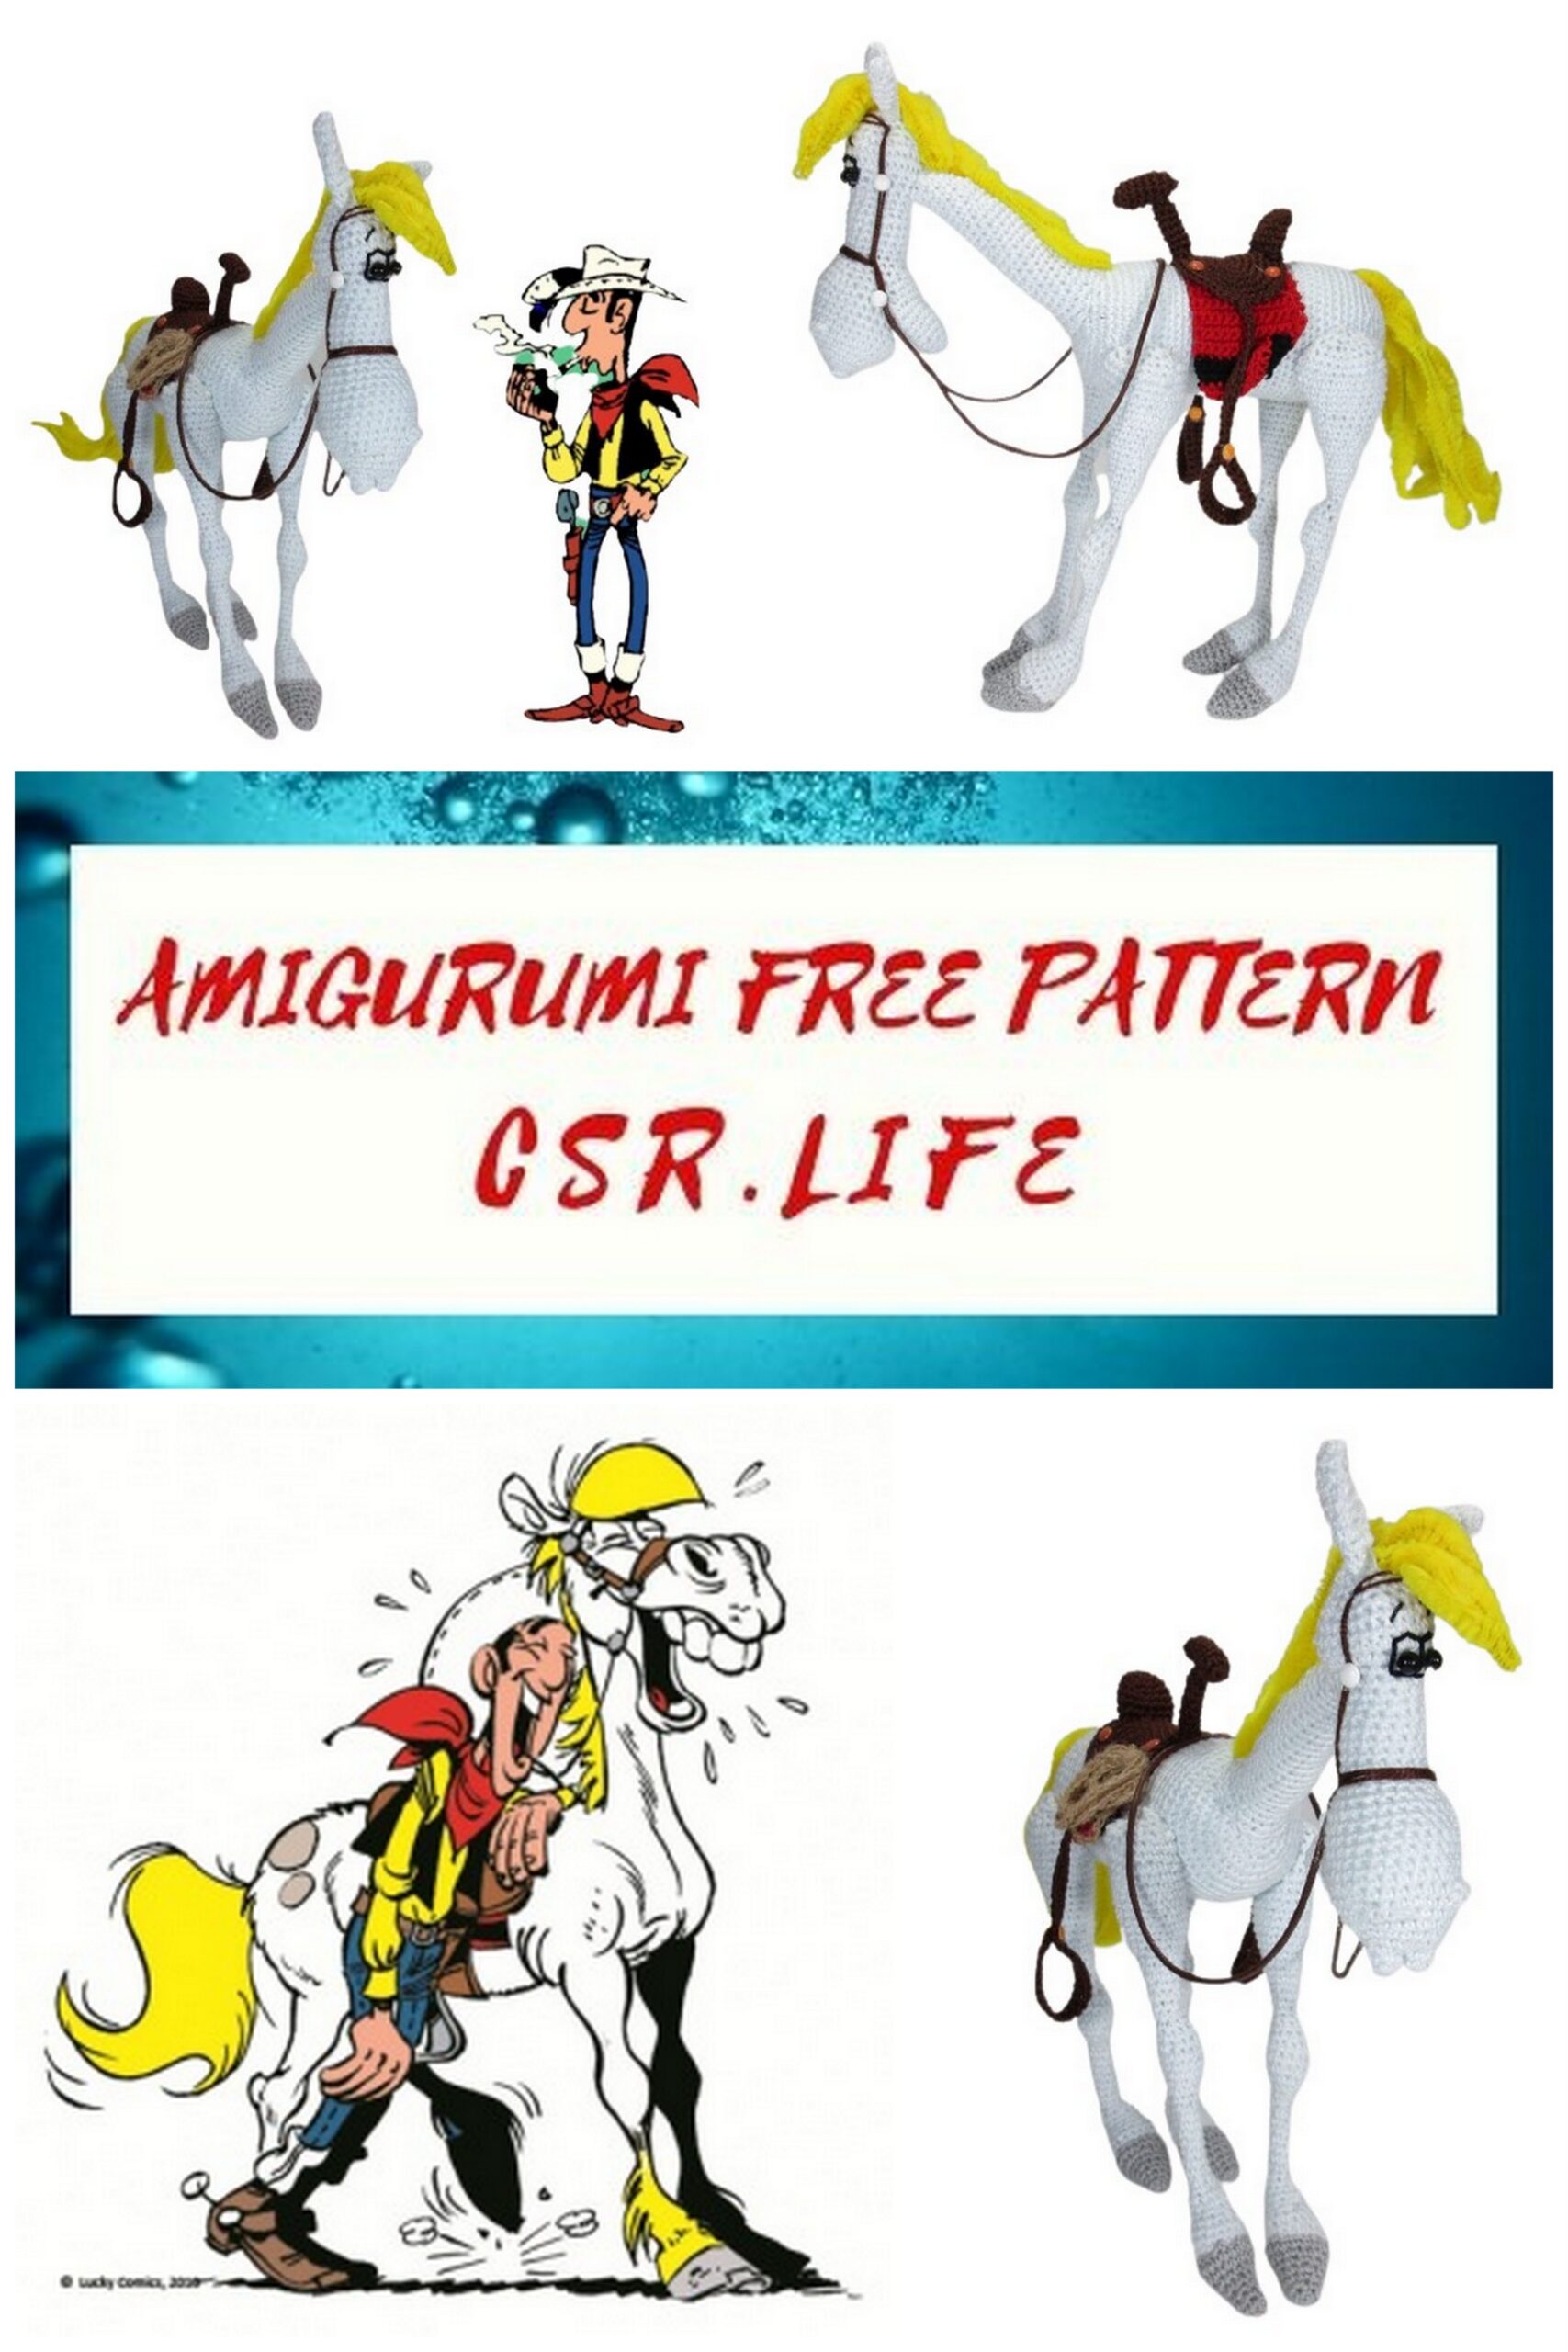
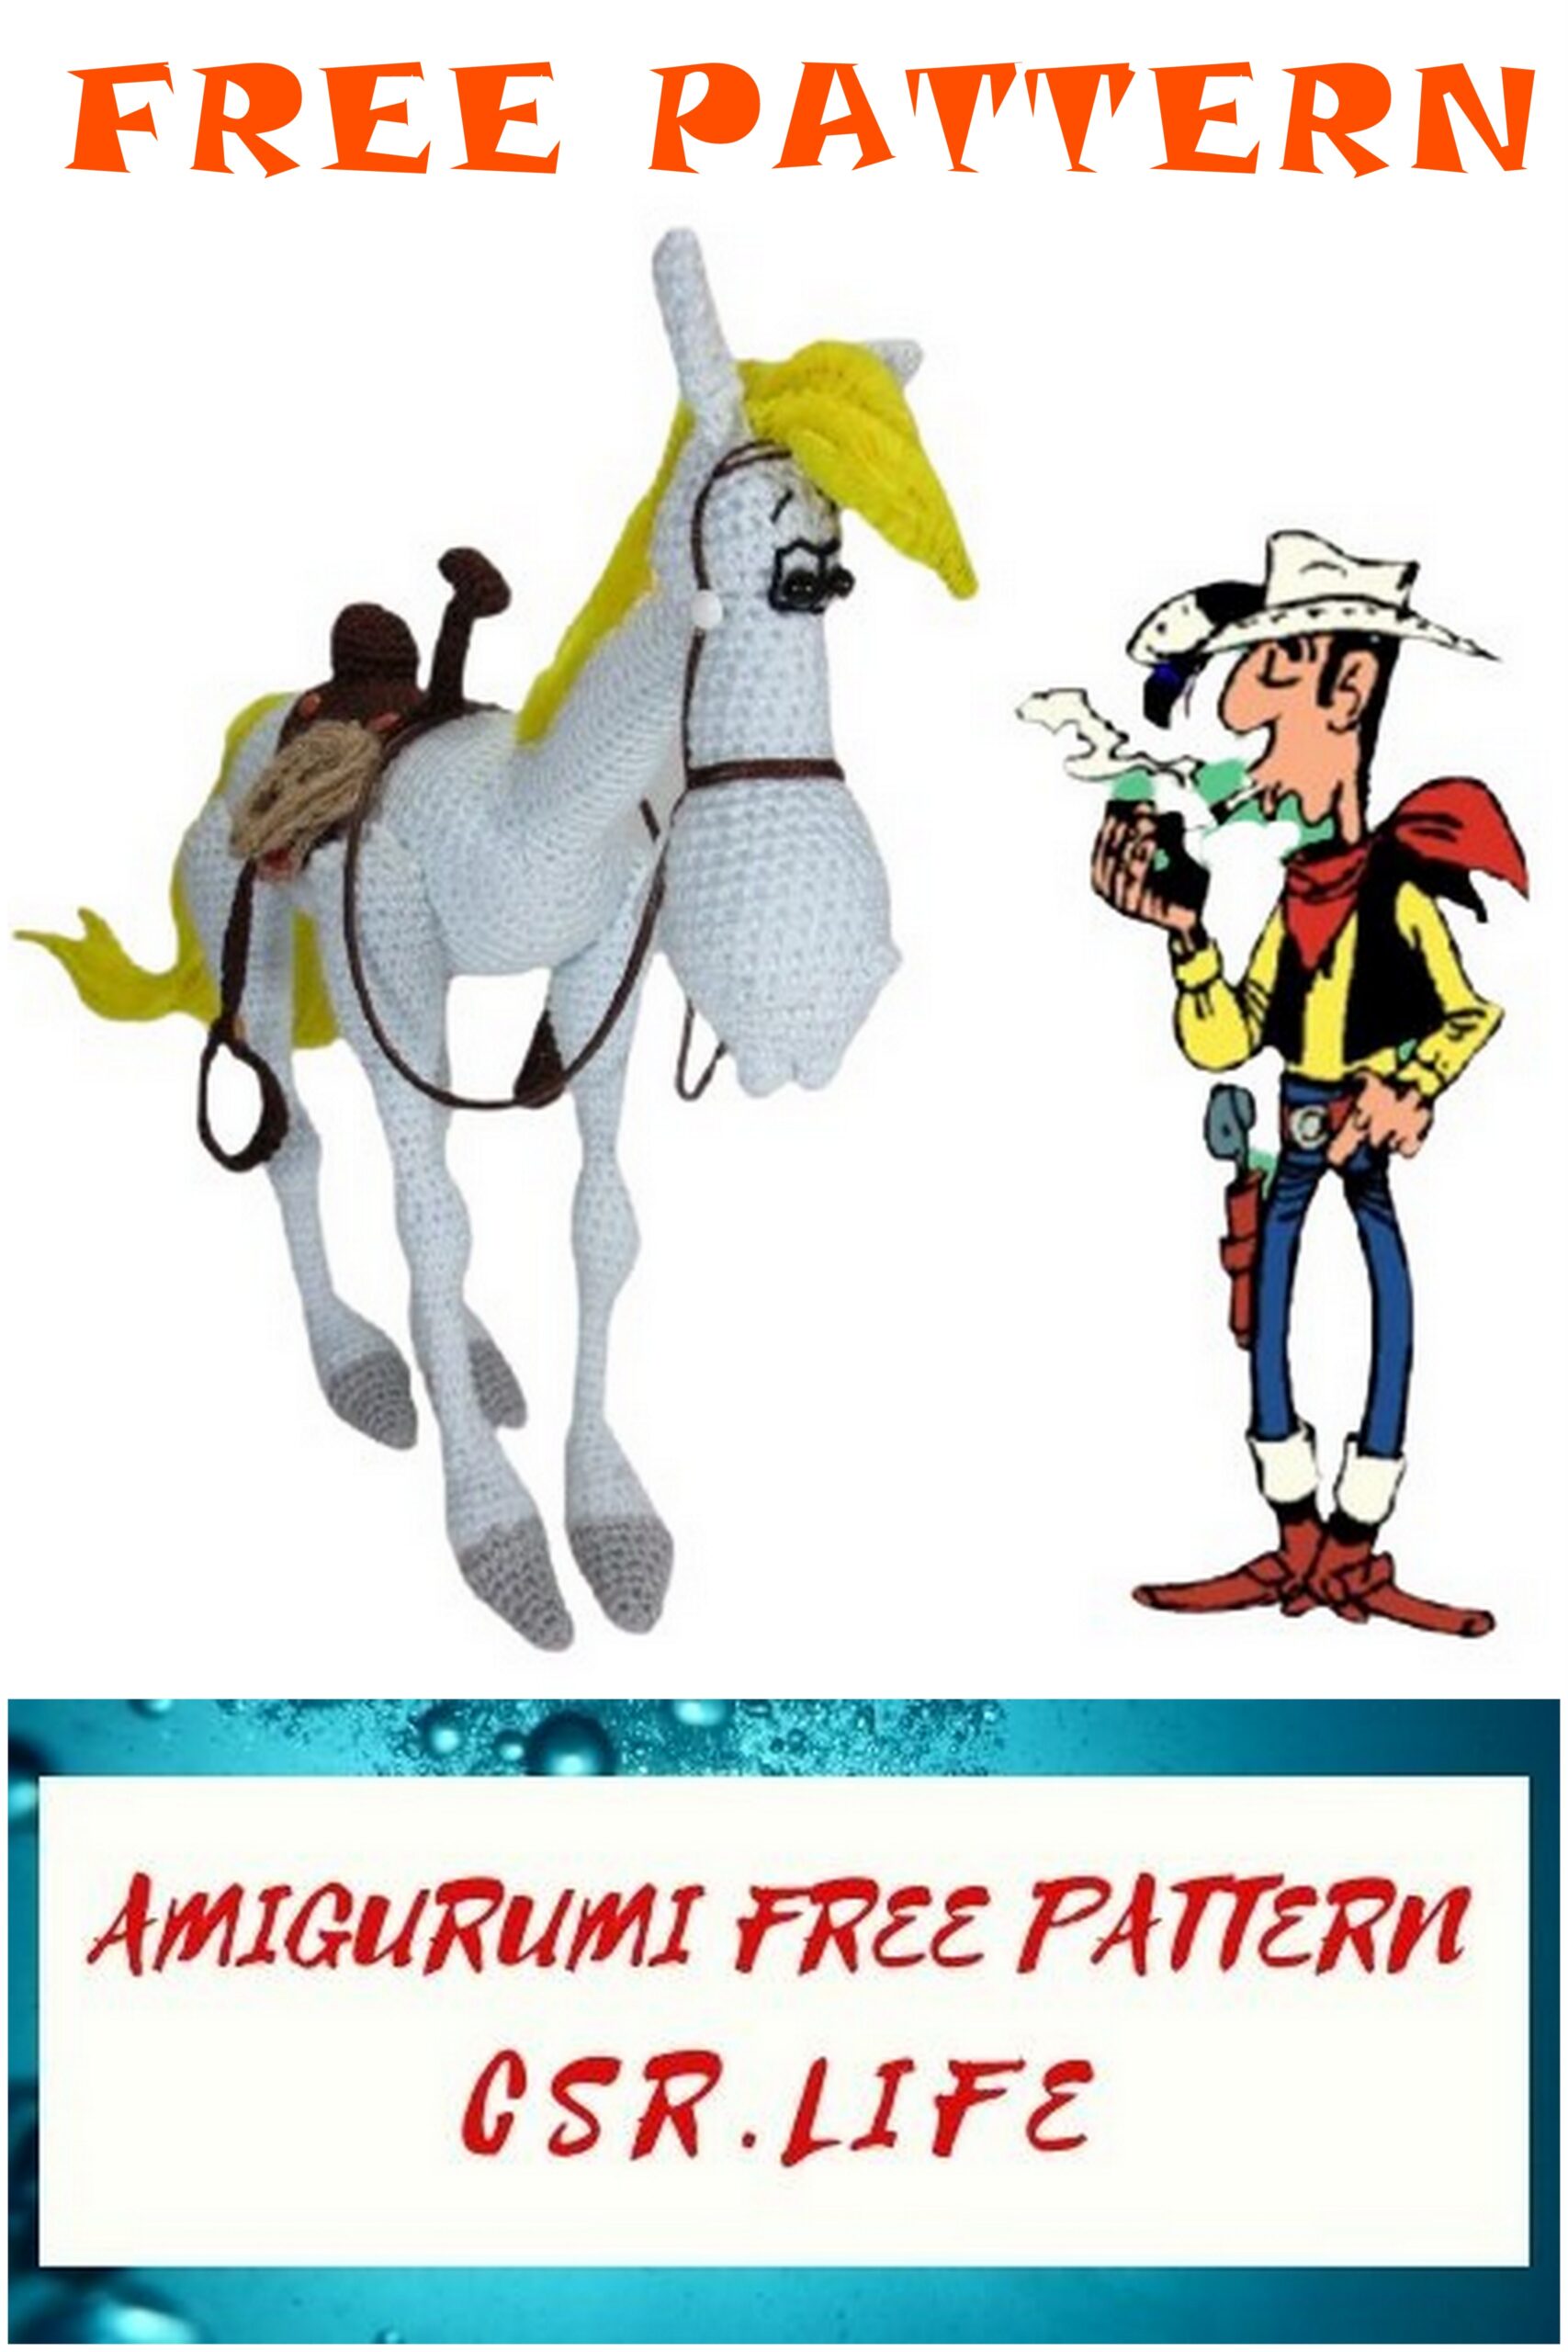
Jolly Jumper Amigurumi Free Crochet Pattern
Amigurumi cartoon characters are on this site for free. I shared the amigurumi jolly jumper pattern in this article.
Abbreviations
Sc: Single Crochet
Inc: Increase
Dec: Decrease
Hdc: Half Double Crochet
Ch: Chain
MATERIALS
Cotton thread No. 5 white, brown, red, black and gray
Yellow pipe cleaners for hair
Safety eyes
Wire to articulate the legs
Round stickers to make rivets, very small buttons or rubber band
A marker
A very long wool needle
Crochet 1.5 mm
Fleece
LEGS
4 Color White
ROW1 6sc Magic Ring
ROW2 6 inc (12)
ROW3 (1sc, inc) x6 (18)
ROW4-ROW6 18sc
ROW7 (1sc, dec) x6 (12)
ROW8-ROW9 12sc
ROW10 (2sc, dec) x3 (9)
ROW11 9sc
ROW12 (1sc, dec) x3 (6)
ROW13-ROW22 6sc
ROW23 (1sc, inc) x3 (9)
ROW24 9sc
ROW25 (2sc, inc) x3 (12)
ROW26-ROW27 12sc
ROW28 (2sc, dec) x3 (9)
ROW29 9sc
ROW30 (1sc, dec) x3 (6)
ROW31-ROW32 6sc
ROW33 (1sc, inc) x3 (9)
ROW34-ROW35 9sc
ROW36 (2sc, inc) x3 (12)
ROW37-ROW38 12sc
ROW39 (3sc, inc) x3 (15)
ROW40-ROW41 15sc
ROW42 (4sc, inc9x3 (18)
ROW43-ROW44 18sc
ROW45 (2sc, inc) x6 (24)
ROW46 24sc
ROW47 (7sc, inc) x3 (27)
ROW48 27sc
ROW49 (7sc, dec) x3 (24)
ROW50 (2sc, dec) x6 (18)
ROW51 (1sc, dec) x6 (12)
ROW52 6 dec.
Do not fill the thigh part too much to be able to squish it a little when you stick it to the body.
Helmets
Gray
ROW1 6sc Ring
ROW2 6sc
ROW3 (1sc, inc) x3 (9)
ROW4 9sc
ROW5 (2sc, inc) x3 (12)
ROW6 12sc
ROW7 (1sc, inc) x6 (18)
ROW8 18sc
Sew them to the legs.
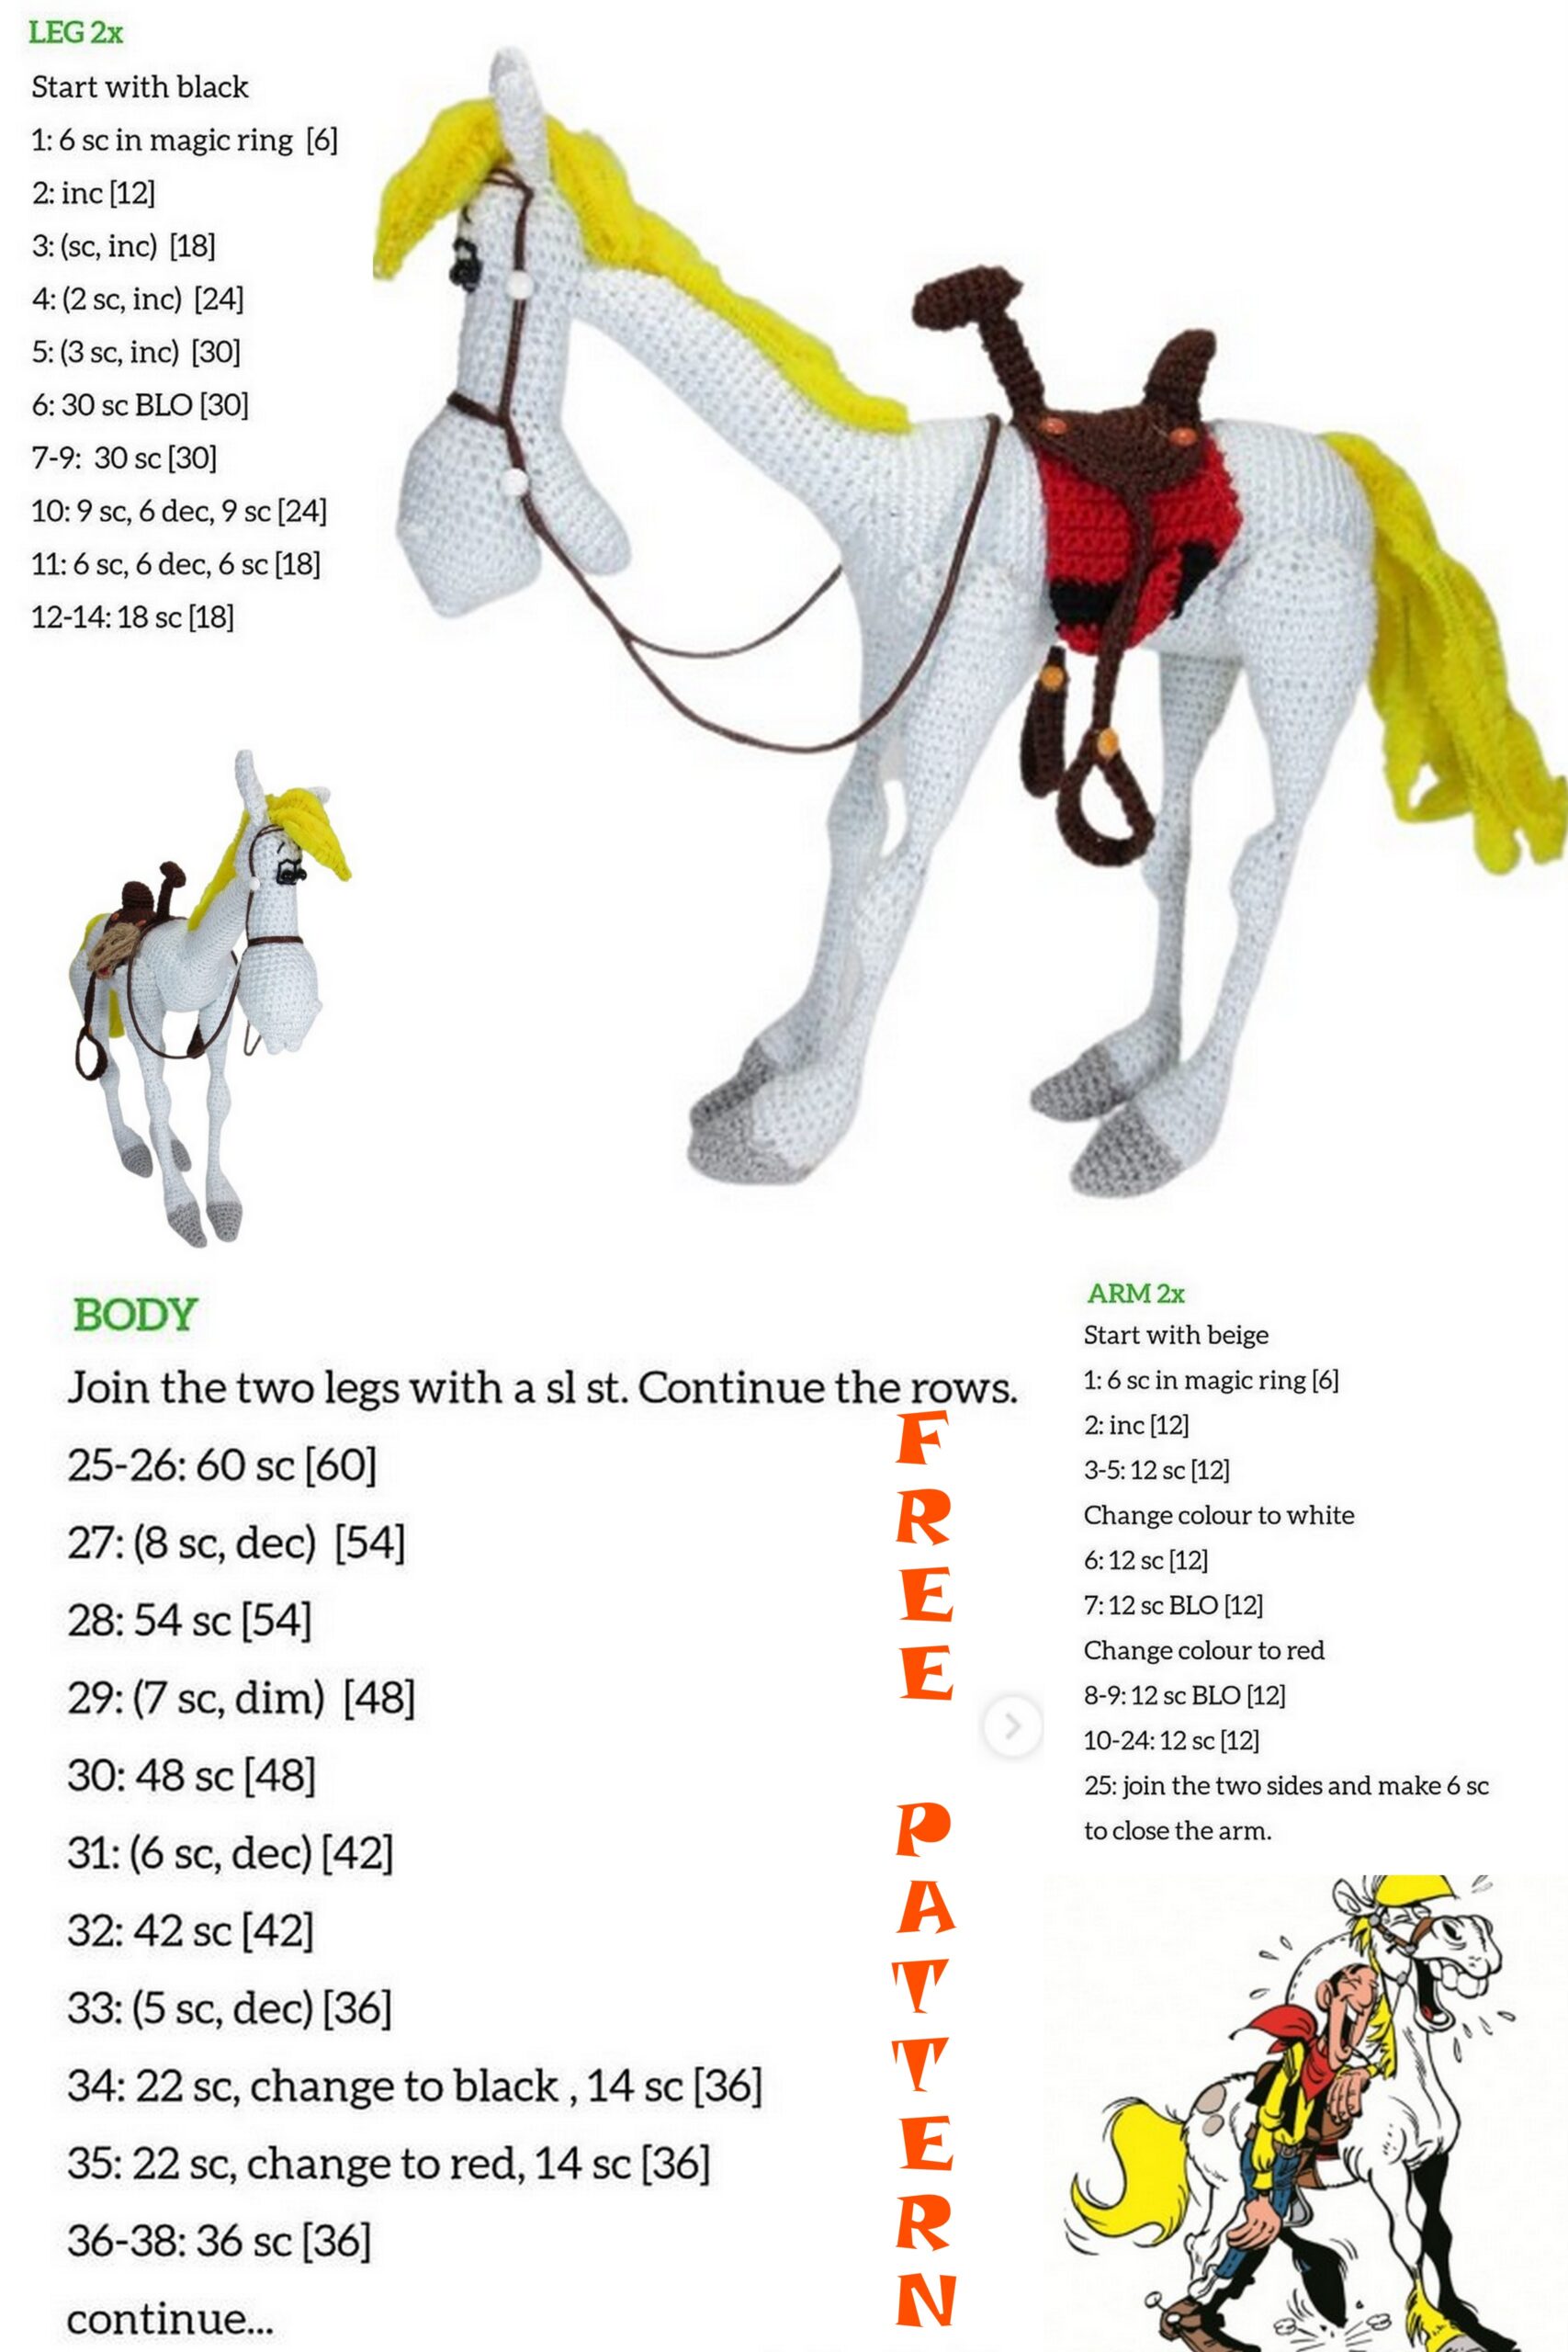
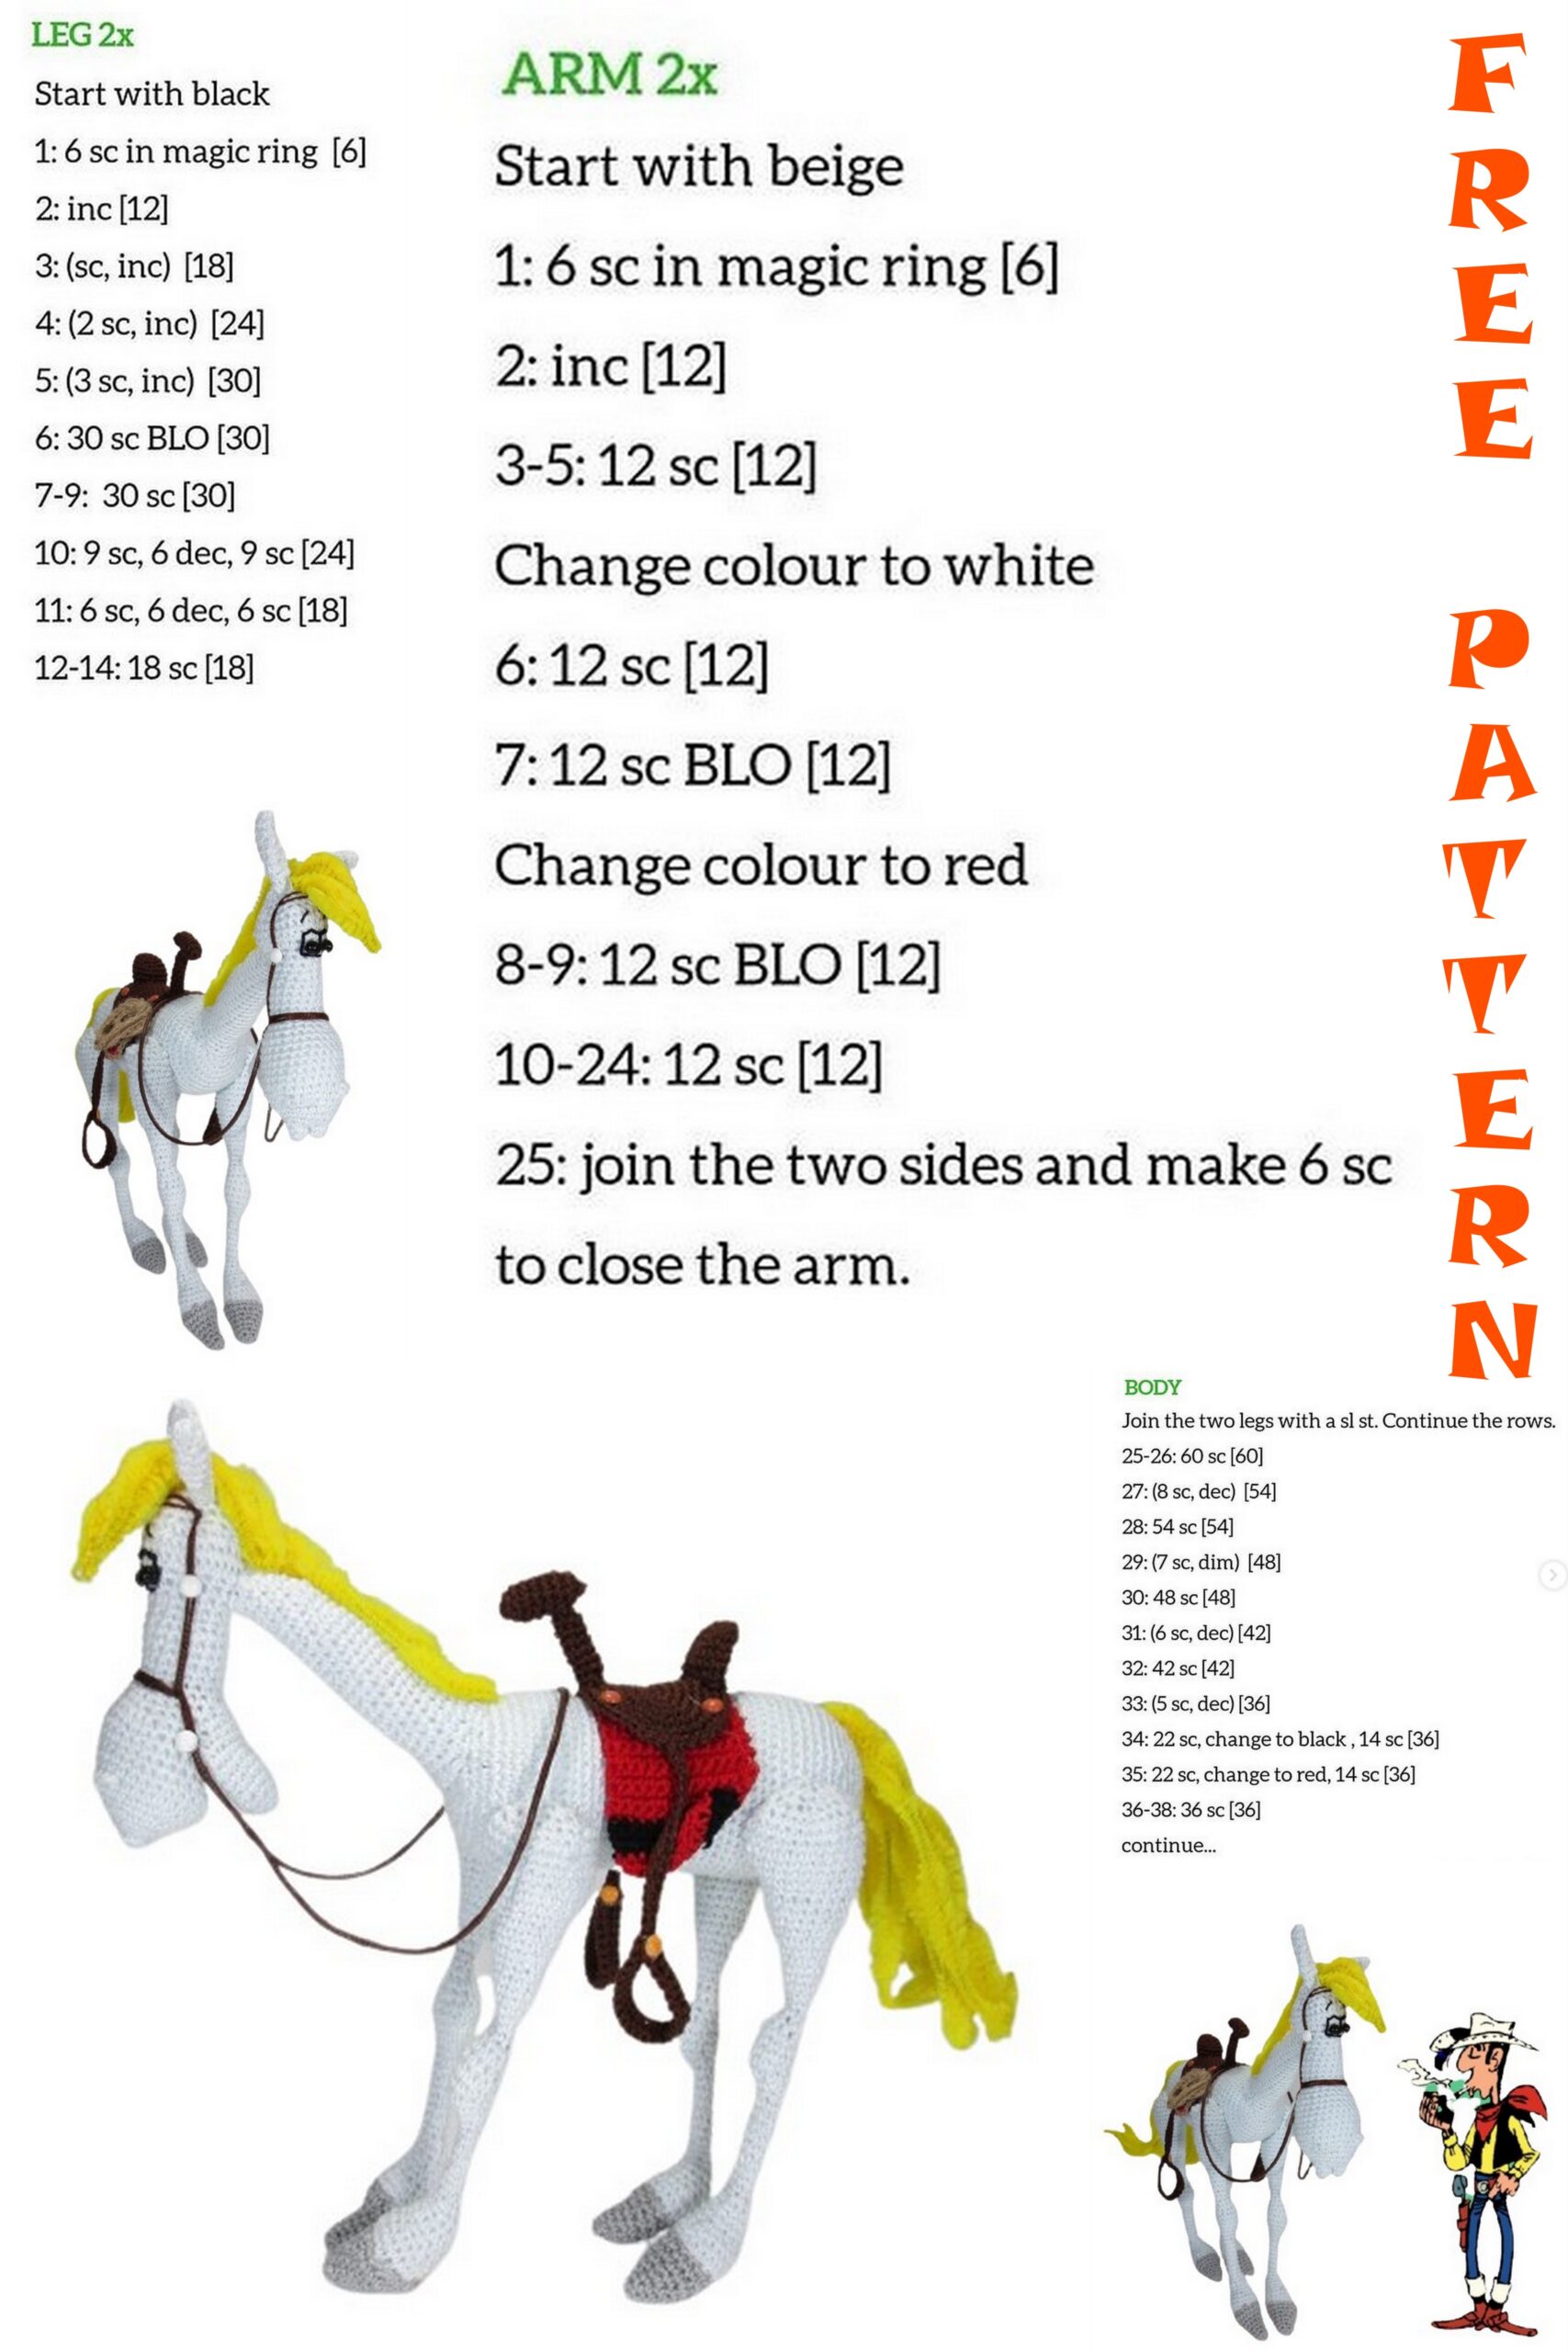
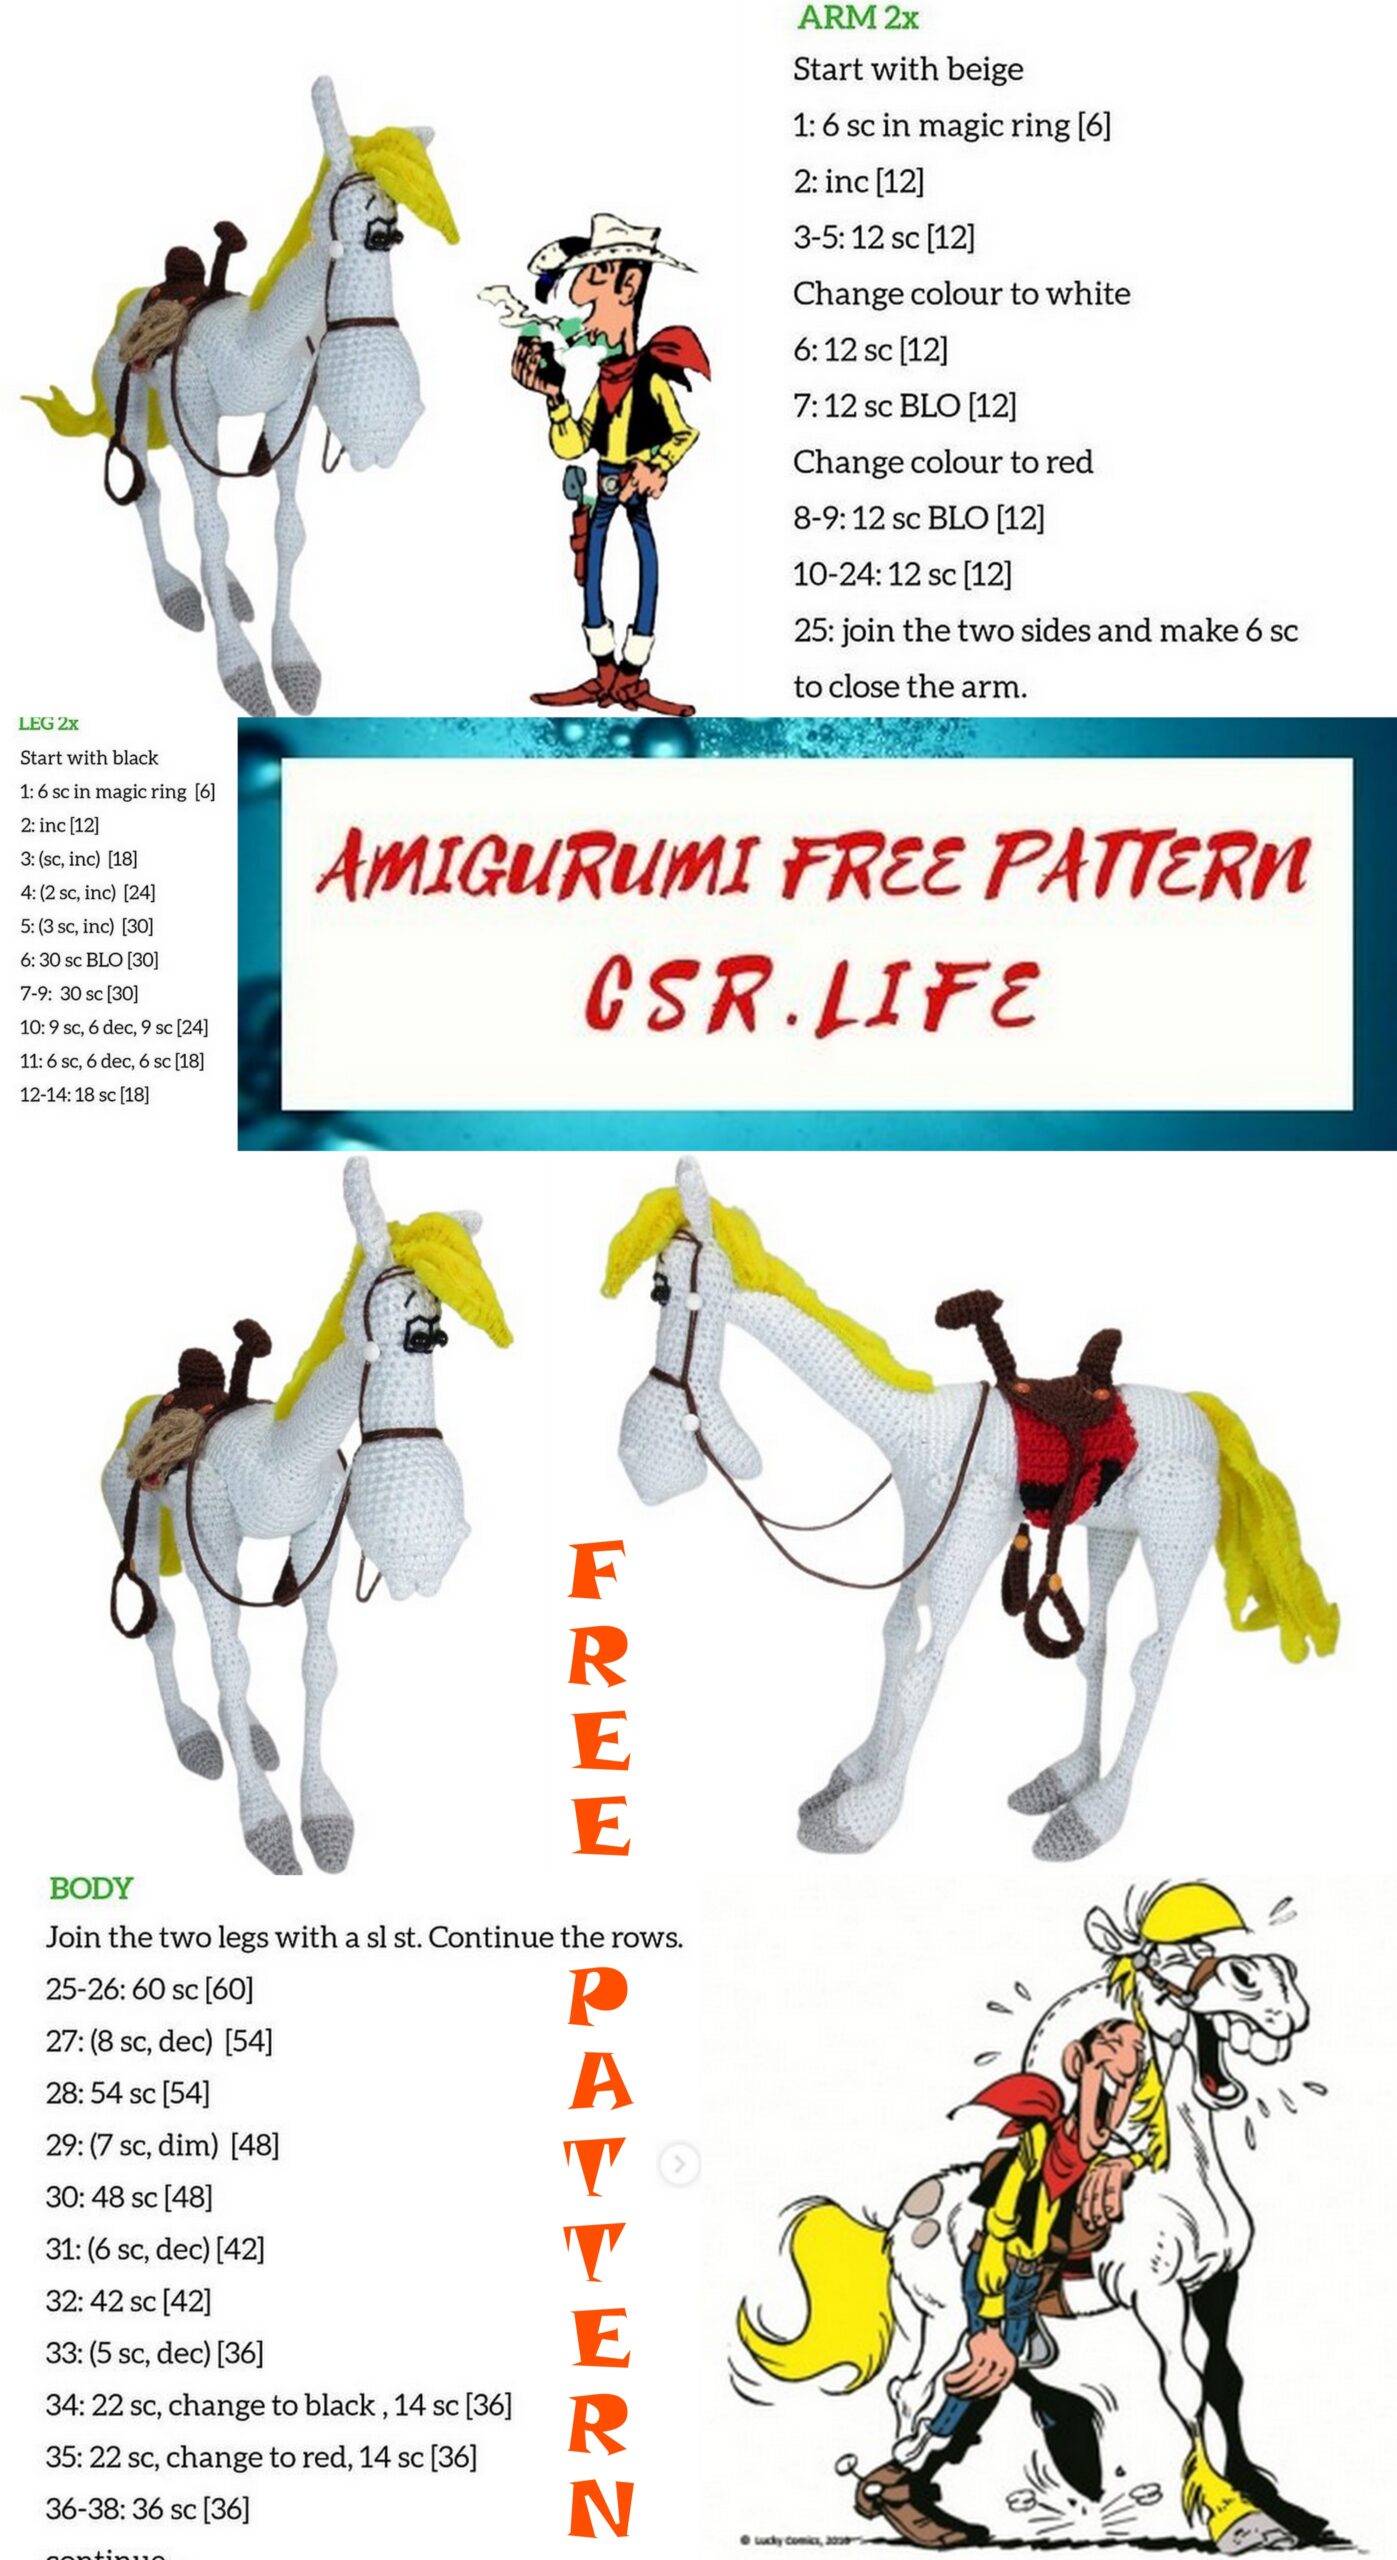
BODY
In white
ROW1 6sc Ring
ROW2 6 inc (12)
ROW3 (1sc, inc) x6 (18)
ROW4 (2sc, inc) x6 (24)
ROW5 (3sc, inc) x6 (30)
ROW6 (4sc, inc) x6 (36)
ROW7 (5sc, inc) x6 (42)
ROW8 (6sc, inc) x6 (48)
ROW9-ROW18 48sc
ROW19 6dec, 36sc (42)
ROW20-ROW34 42sc
ROW35 6 inc, 36sc (48)
ROW36-ROW45 48sc
ROW46 (6sc, dec) x6 (42)
ROW47 (5sc, dec) x6 (36)
ROW48 (4sc, dec) x6 (30)
ROW49 (3sc, dec) x6 (24)
ROW50 (2sc, dec) x6 (18)
ROW51 (1sc, dec) x6 (12)
ROW52 6 dec. Bind off and hide the thread
HEAD
First we knit the lower lip:
ROW1 6sc Ring
ROW2 (1sc, inc) x3 (9)
ROW3 (2sc, inc) x3 (12)
ROW4 (1sc, inc) x6 (18)
ROW5-ROW7 18sc
ROW8 (5sc, inc) x3 (21)
ROW9 21sc
Now we start with the head:
We knit two little pieces that consist of a 6sc ring, and one more 6sc row. Let’s hook these two little pieces:
ROW1 3sc in the first, 6sc surrounding the second and 3sc in the first (12)
ROW2 (1sc, inc) x6 (18)
ROW3 18sc
ROW4 (2sc, inc) x6 (24)
ROW5 24sc
ROW6 (3sc, inc) x6 (30)
ROW7-ROW11 30sc
Now we are going to knit with the lower lip piece:
ROW12 you knit 3sc, we knit 10sc facing the head and lip by inserting the crochet from inside the lip, 20sc through the head (33)
ROW13 10sc knitting only along the free edge of the lower lip, 18sc through the head, 1dec (30)
If the accounts do not come out, compensate with inc or dec to have 30sc, and we start the decreases
ROW14 (8sc, dec) x3 (27)
ROW15 (7sc, dec) x3 (24)
ROW16 (6sc, dec) x3 (21)
ROW17 (5sc, dec) x3 (18)
ROW18-ROW22 18sc
ROW23 (4sc, dec) x3 (15)
ROW24-ROW27 15sc
ROW28 15 inc (30). In this row go the safety eyes
ROW29-ROW30 30sc
ROW31 (1sc, dec) all round (20)
ROW32 20sc
ROW33 (8sc, dec) x2 (18)
ROW34 18sc
ROW35 (1sc, dec) x6 (12)
ROW36 6 dec. Bind off and cut the thread
HOCICOS (2)
ROW1 We knit a row of 5ch
ROW2 From the second ch from the hook we knit 1sc, 3hdc. We sew it to the face
EARS
ROW1 6sc Magic Ring
ROW2 (1sc, inc9x3 (9)
ROW3-ROW5 9sc
ROW6 (1sc, dec) x3 (6)
ROW7-ROW8 6sc Bind off and leave thread to sew to the head
NECK
ROW1 12sc Magic Ring. Don’t close it tight to make it neck size
ROW2-ROW9 12sc
ROW10 (3sc, inc) x3 (15)
ROW11-ROW25 15sc
ROW26 (4sc, inc9x3 (18)
ROW27 (5sc, inc) x3 (21)
ROW28 (6sc, inc) x3 (24)
BLANKET
ROW1 In red knit a row of 14ch
ROW2 From the second ch from the hook we knit 13sc
ROW3 13sc
ROW4-ROW6 13sc in black
ROW7-ROW36 13sc in red color
ROW37-ROW39 13sc in black
ROW40-ROW41 13sc in red color. Bind off and hide the thread.
SADDLE
ROW1 One row of 11ch
ROW2 From the second ch from the hook we knit 9sc, 3sc in the same stitch, we turn to work from the other side of the ch row and we knit 9sc, 3sc in the same stitch (24)
ROW3 9sc, 3 inc, 9sc, 3inc (30)
ROW4 9sc, (sc, inc) x3, 9sc, (sc, inc) x3 (36)
ROW5 9sc, (2sc, inc) x3, 9sc, (2sc, inc) x3 (42)
ROW6 9sc, (3sc, inc) x3, 9sc, (3sc, inc) x3 (48)
ROW7 9sc, (4sc, inc) x3, 9sc, (4sc, inc) x3 (54)
CHAIR BACK
ROW1 6sc Ring
ROW2 6 inc (12)
ROW3 12sc
ROW4 (3sc, inc) x3 (15)
ROW5-ROW7 15sc
Sew to the chair
FRONT CHAIR GRIP
ROW1 6sc Ring
ROW2 (1sc, inc) x3 (9)
ROW3-ROW7 9sc
ROW8 (1sc, dec) x3 (6)
FRONT GRIP MAST
ROW1 6sc Ring
ROW2-ROW8 6sc Sew to shank
FOOTREST
ROW1 We knit a 43ch row
ROW2 From the second ch from the hook we knit 42sc
ROW3 As we have not made a complete row, we have a piece that is wider. This part will be the stirrups to place the feet.
To finish, let’s add the details:
1. We need to place the tail, the mane and the bangs with yellow pipe cleaners
2. Embroider the eyes and eyebrows
3. Put rivets on the saddle and stirrups
4. And maybe make a roll of rope to put on the side of the chair.
5. I made the reins with round leather strips, but you can also use chubby wool.