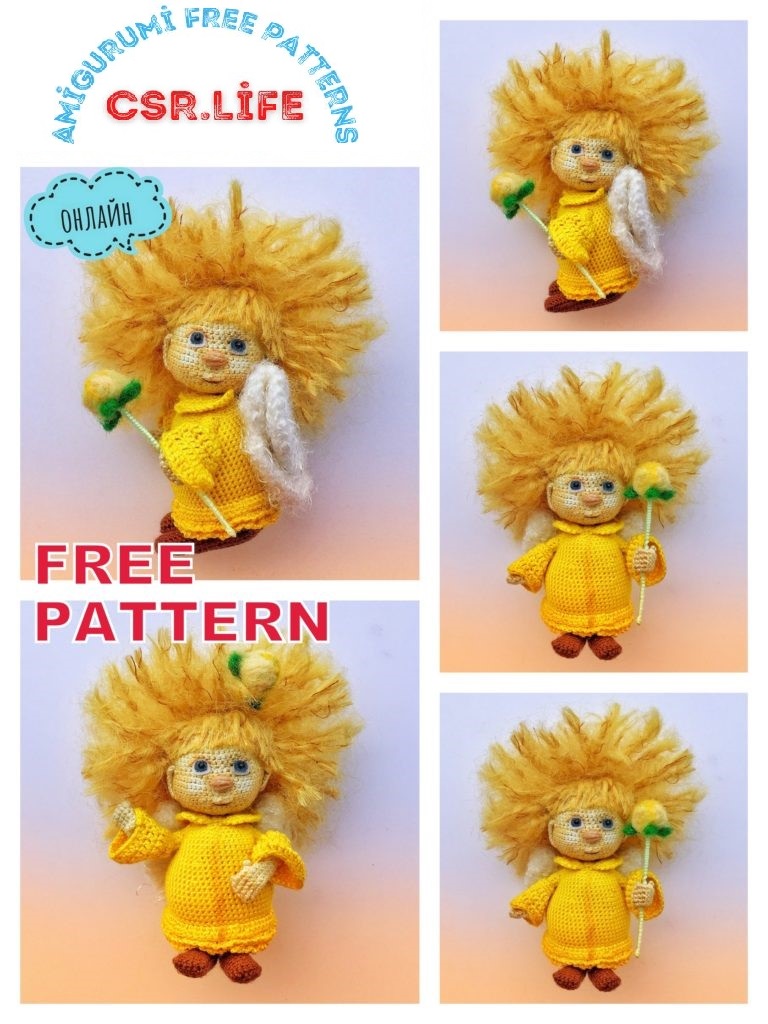
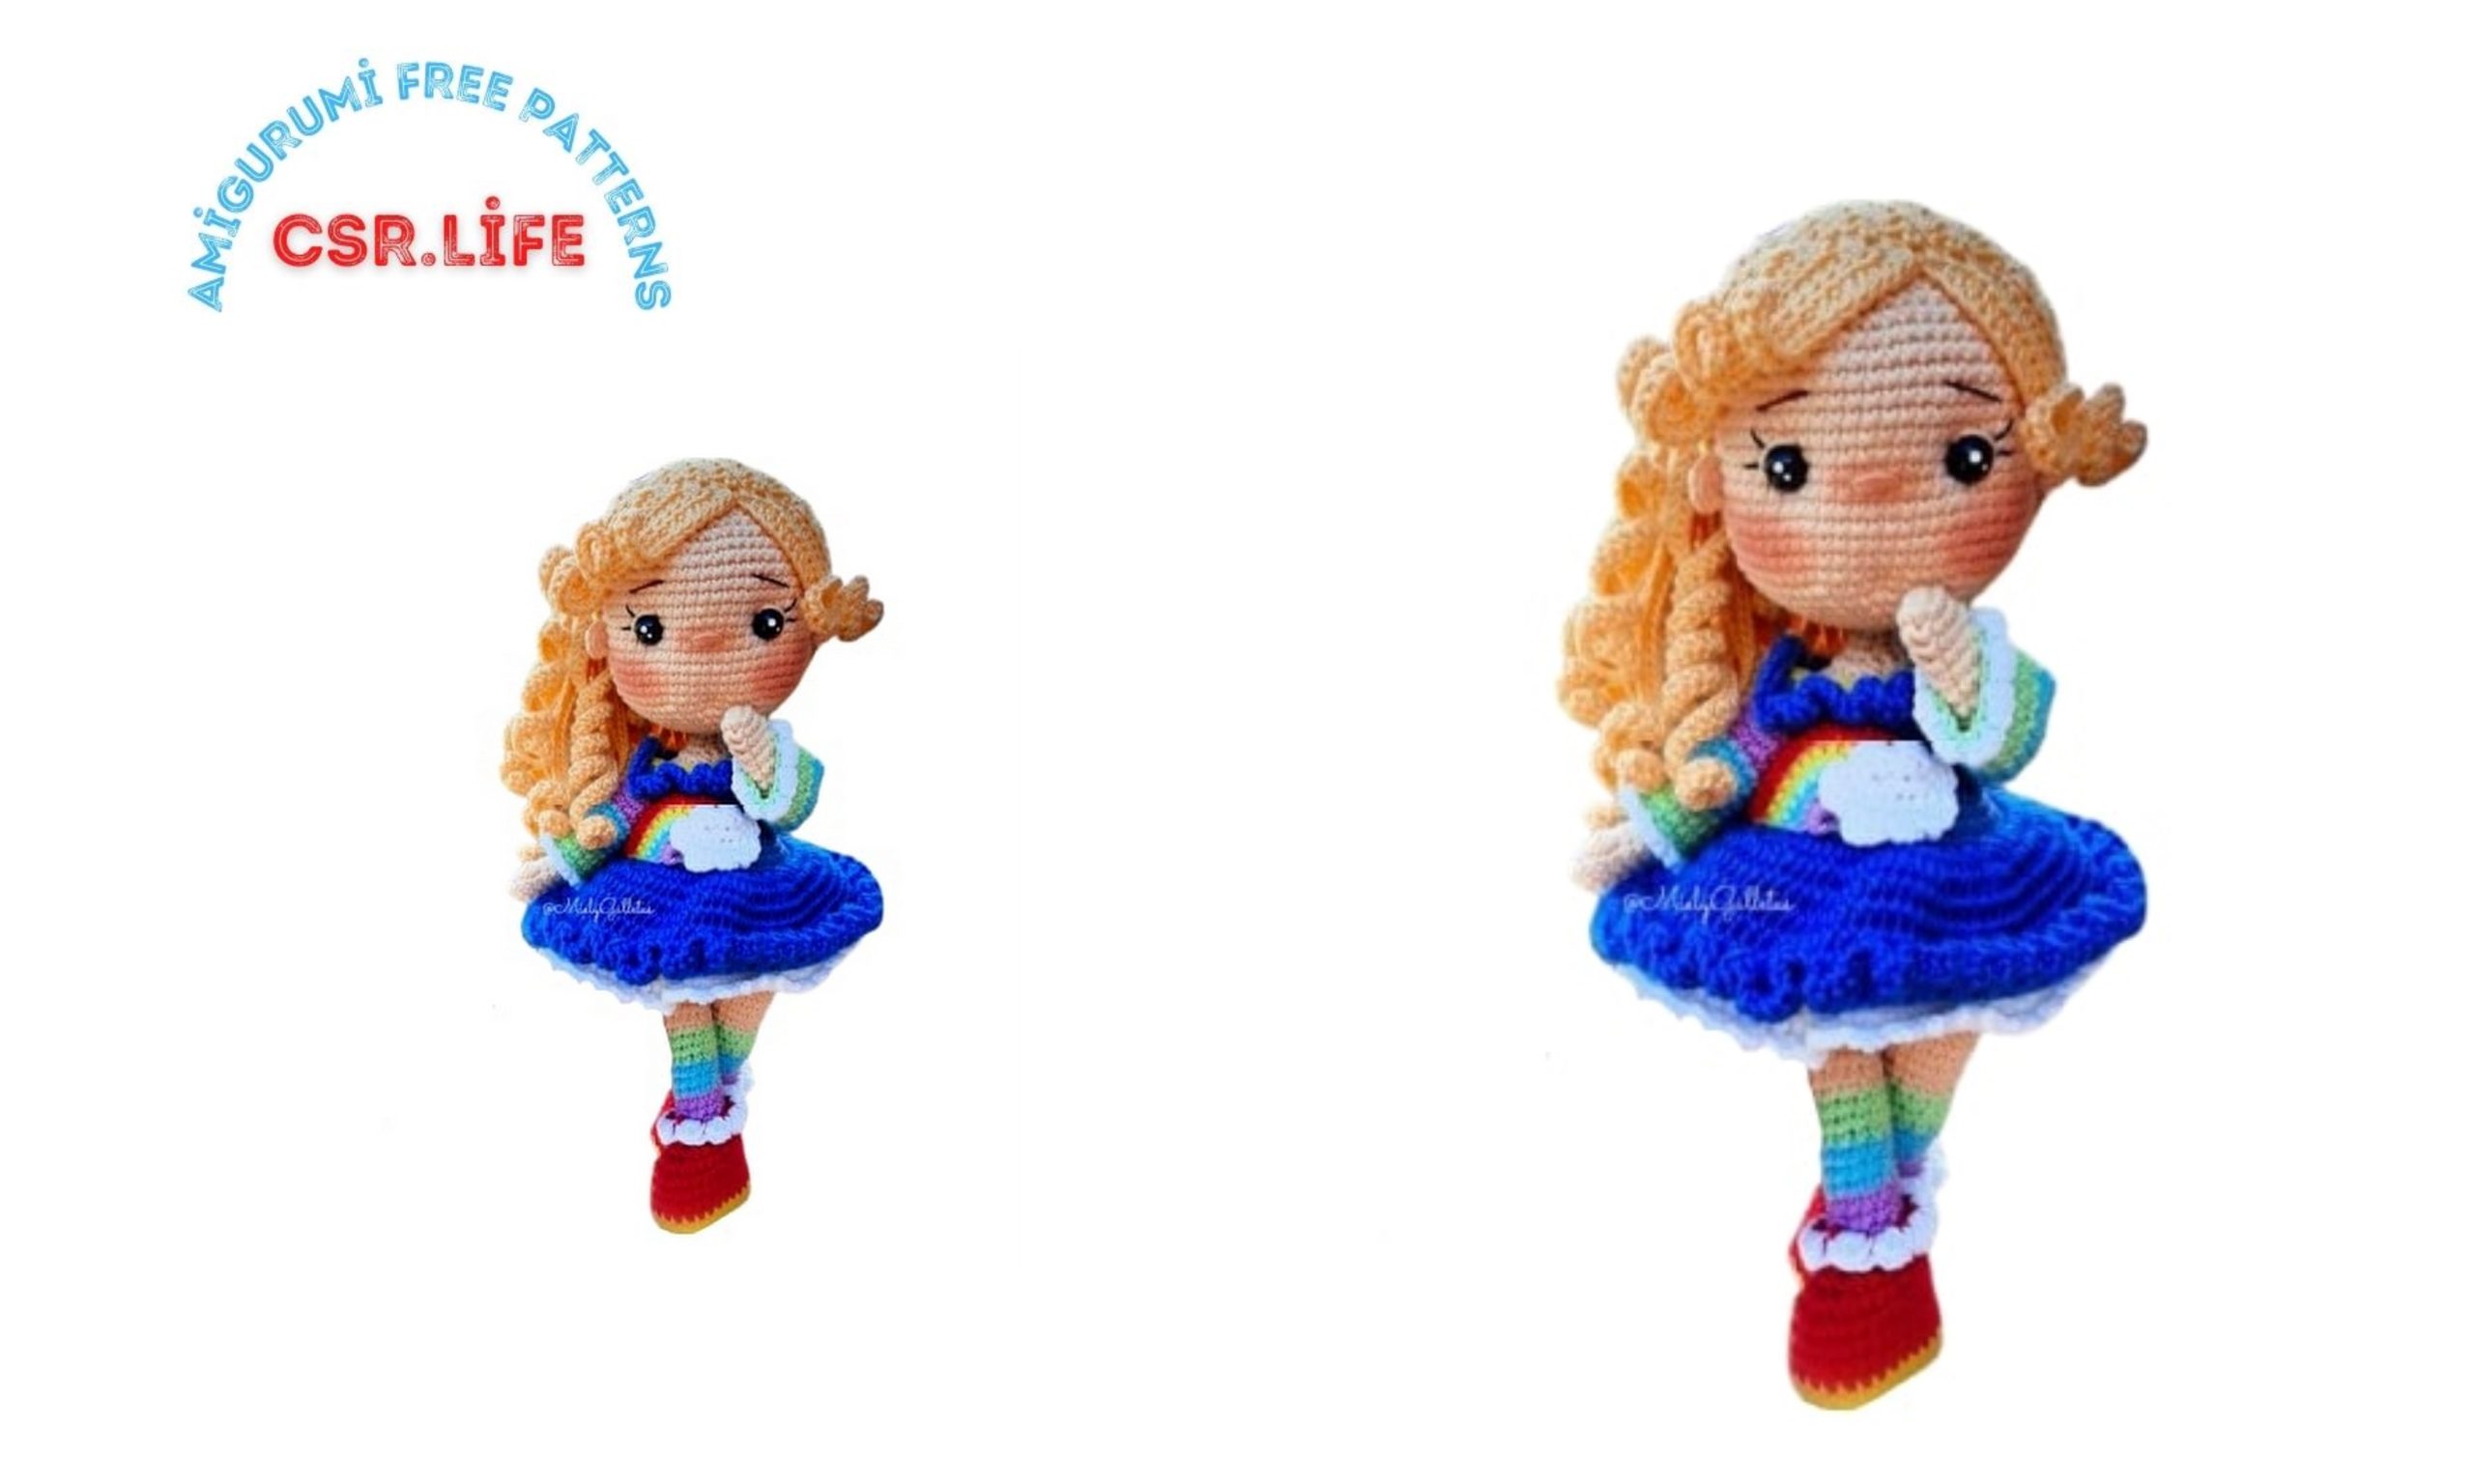
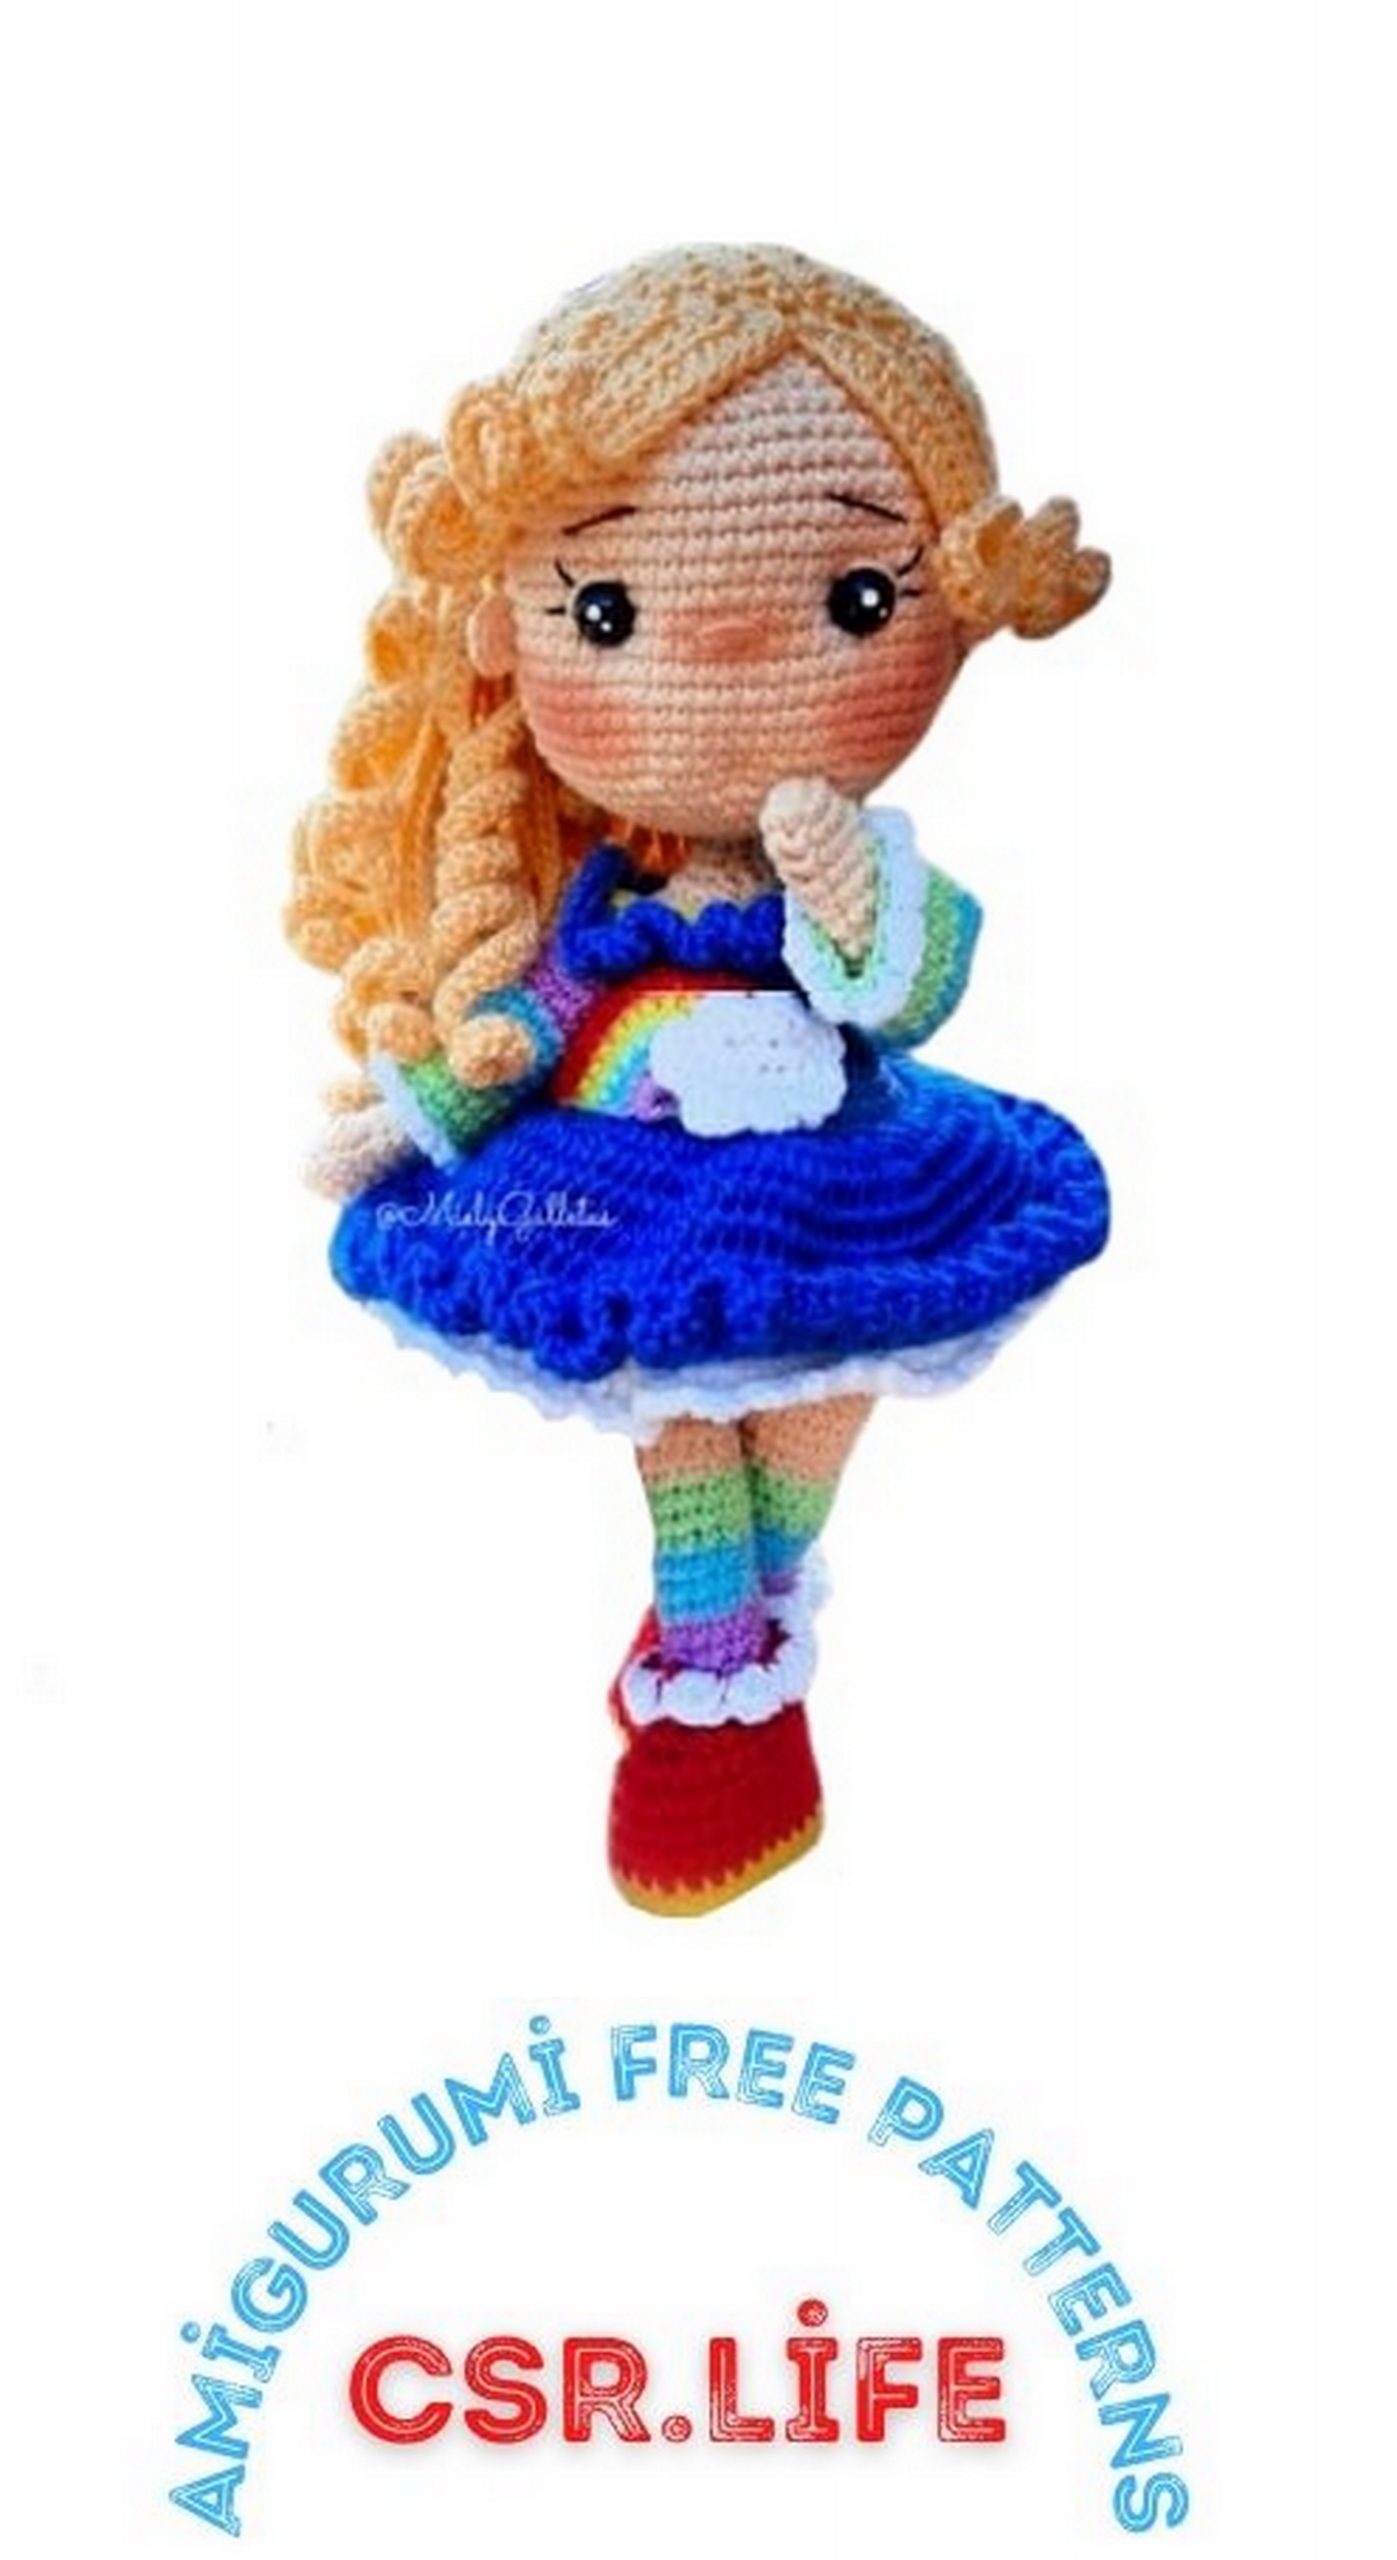
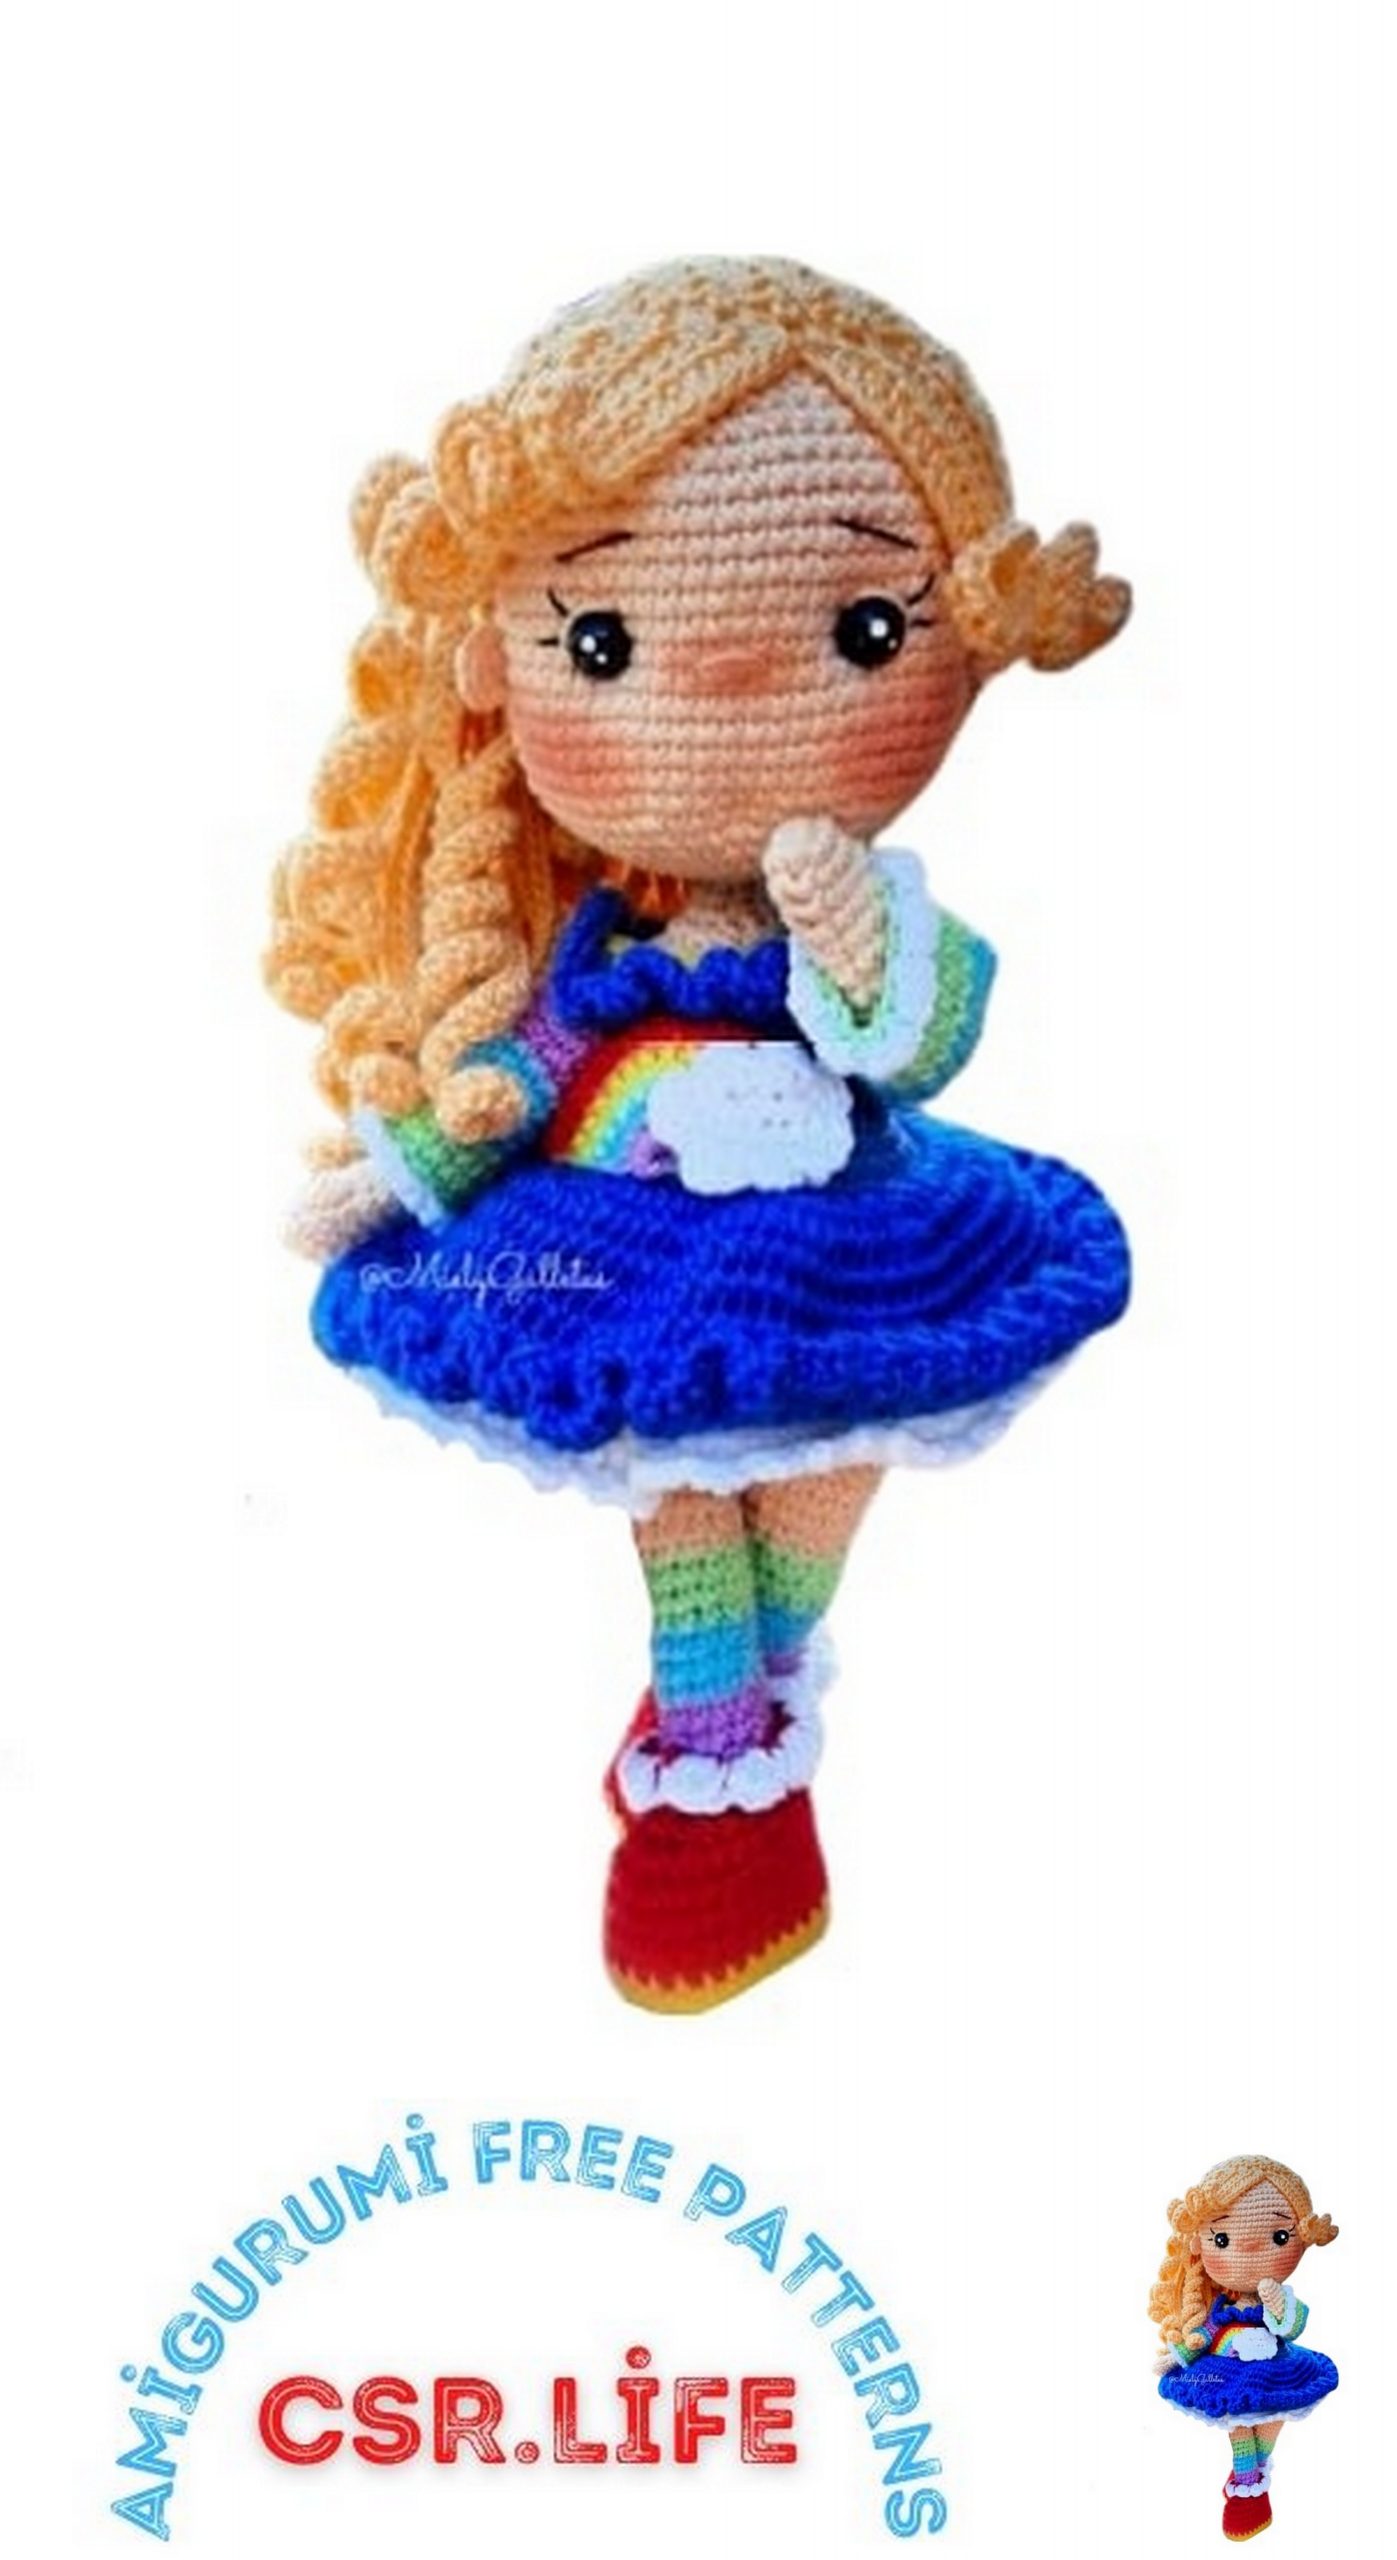
Rainbow Doll Amigurumi Free Pattern
Free amigurumi patterns with quality images are available on this site. In this article, we shared with you the amigurumi doll rainbow pattern.
Difficulty level High.
Materials:
General:
• Crochet: in measurements:
to. 2.00 MM.
b. 2.5 MM.
• Needles:
to. Wool needle
b. Needle for sewing
• Plastic head pins.
• Point markers.
• Brush to blend (makeup / eyes).
• Silicone fleece / cloud filling / wadding.
• Scissors.
• Lighter.
• Hot or cold silicone.
• White acrylic paint.
• Pointer.
• 12 gauge sheathed copper wire.
• Insulating tape (preferably white).
• A plastic sheet for binding.
• Wire cutters.
• Matte pink or peach blush or eyeshadow.
Specific:
• Yarn for amigurumi (2.00 mm) in the colors:
to. Leather (50 gr. Approx.)
b. Wheat Yellow (100 gr. Approx.)
c. Yellow (10 gr. Approx.)
d. Royal blue (50 gr. Approx.)
and. Denim blue (20 gr. Approx.)
F. Red (15 gr. Approx.)
g. Lilac (05 gr. Approx.)
h. Sky blue (05 gr. Approx.)
i. Lemon green (05 gr. Approx.)
j. Orange (05 gr. Approx.)
k. White (10 gr. Approx.)
• Pearl thread in the colors:
to. Black.
b. Coffee.
c. Skin.
• Satin slats (2.00 cm wide):
to. Royal blue (1.00 m.)
• One pair of 10.00mm safety eyes.
• Buttons (1.00 cm in diameter) in the colors:
to. Yellow (1 piece)
General table of terms and abbreviations By:
Term / Abbreviation Meaning
NC Slip Knot
INTO MAGIC RING Magic Ring
SC Low Point
Inc Increase
Decrease
SL-ST Slip Point
Ch String (s)
HDC Medium High Point
Inchdc Mid Point High Rise
DC High Point
Puff Point Puff
DPPuff Double Point Puff
TPPuff Triple Point Puff
Trc Low Point Range (Three SCs in the same point.)
HFV Until the End of the Tour
HFR Until End of Round
HFCh Until the End of the Chain
V Vuelta (spiral knitting)
R Round (topping each round)
SBF Front Loops Only
SBT Back Loops Only
CV Closure of Return
CR Round Close
CE Spiral Closure (with SBF needle)
Special techniques implemented in this pattern
Articulation with wire
The wire articulation of this amigurumi doll is really very simple and easy to do, especially if this is a new technique for you.
Legs:
1. Cut a strip of wire that covers both legs, and a little more to bend the ends so that they do not hurt the fabric of your amigurumi, cover these ends with electrical tape.
2. Bend the wire into an inverted “U” shape and insert the piece into the wrist when the pattern indicates it.
Arms:
1. Cut two strips of wire whose dimensions exceed the size of the amigurumi’s arms by approximately 15 cm. Fold only one end of each strip so as not to hurt the fabric, cover these ends with electrical tape.
2. Introduce each of the strips with the end that we have prepared of each one up to the hands of the doll.
3. Join both strips towards the neck of the amigurumi, twisting them and covering them with insulating tape to ensure that the joint does not break.
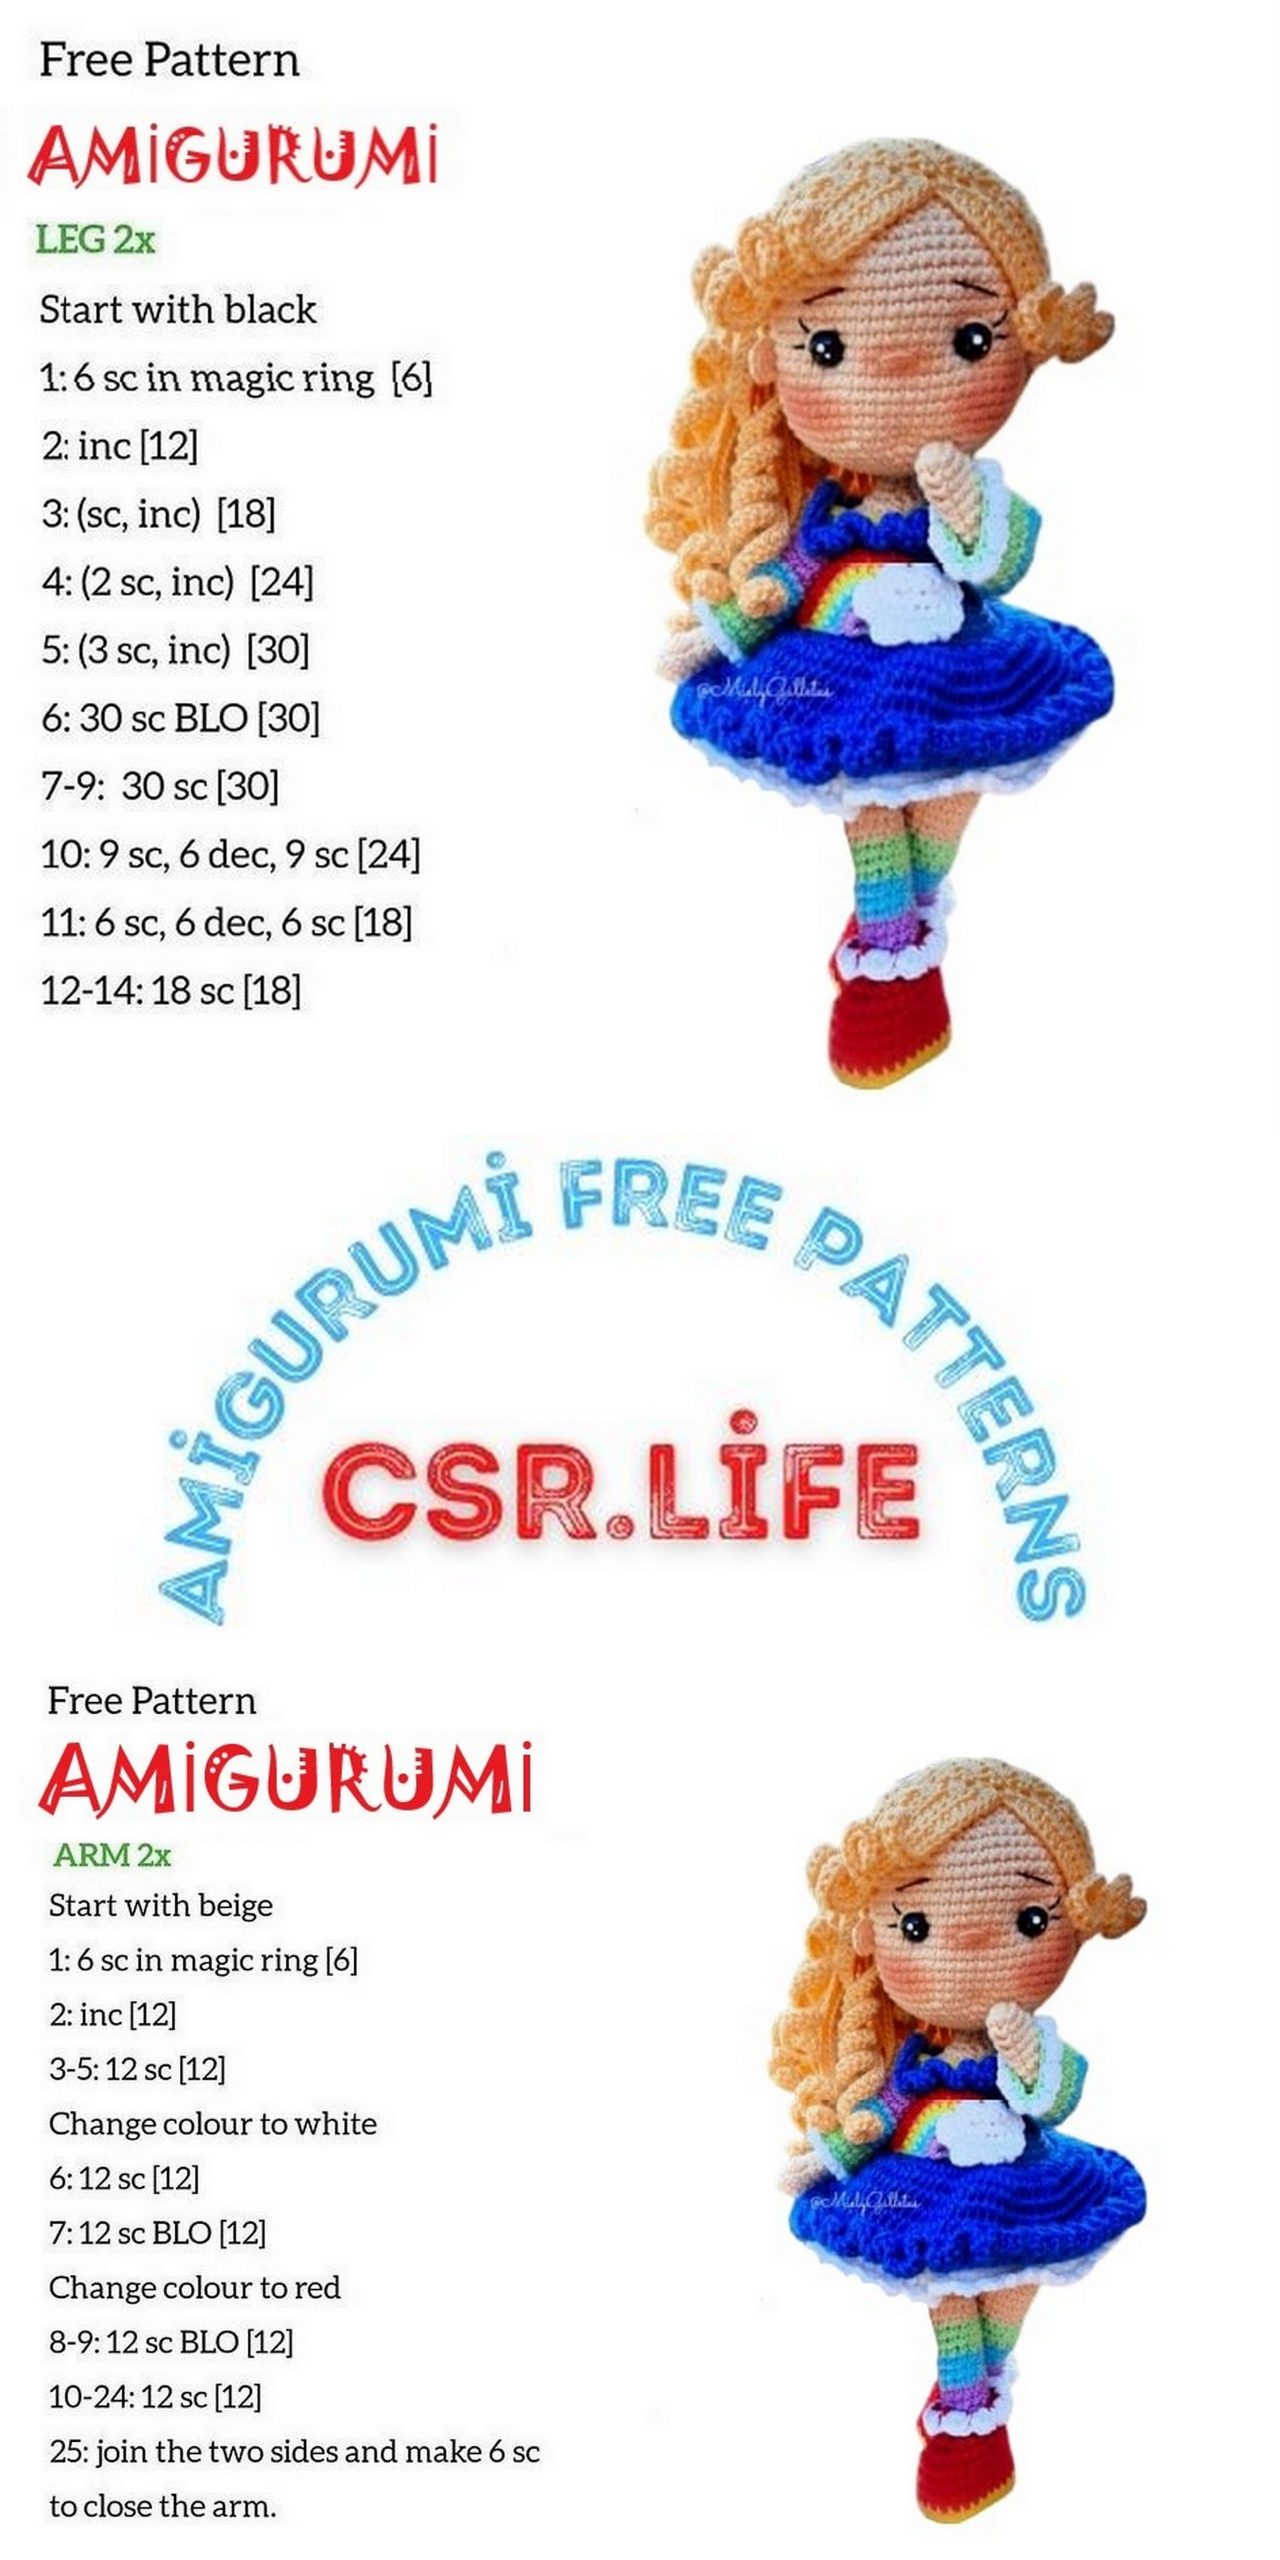
Arms:
Skin. 2.0 mm crochet.
Knit two pieces.
R1: INTO MAGIC RING 8 SC (8 pts.)
R2 – R3: Two rounds. 8 SC
A4: Finger. 3 SC + 1 PPuff + 4 SC (8 pts.)
R5 – R9: Five rounds. 8 SC
R10: 1 Inc + 7 SC (9 pts.)
R11 – R18: Eight rounds. 9 SC
Bind off both pieces with SL-ST. Cut the thread and leave a long thread (you will use it later, in R47).
Do not fill the piece, as they will articulate with the copper wire later.
Legs:
Yellow. 2.00 mm crochet.
Knit two pieces.
Important note: We will start knitting to simulate the booties. It is recommended to fill the fabric moderately as it is knitted, the legs will be articulated with wire later.
R1: 6 Ch in the second from the crochet: 4 sc + 3 sc (in the last stitch). On the other side of the chain. 4 SC + 3 SC (in the last point). (14 pts.)
R2: (4 SC + 3 Inc) x 2 (20 pts.)
R3: (5 SC + (1 Inc + 1 SC) X 2 + 1 Inc) x2 (26 pts.)
A4: SBT. 26 SC
Color change to red.
R4 – R6: Three rounds. 26 SC
Important note: Mark on the plastic sheet to bind a pair of templates that fit perfectly on the pair of soles that we already carry. Stick with hot or cold silicone. Be very neat and careful in this step. CAUTION.
R7: 20 SC + 1 Dec + 2 SC + 1 Dec (24 pts.)
R8: 18 SC + 3 Dec (21 pts.)
R9: 17 SC + 2 Dec (19 pts.)
R10: 17 SC + 1 Dec (18 pts.)
R11: SBF. 18 SC
Color change to lilac.
Important note: Starting to knit is R right in the middle back of the booties.
A12: About SBT that have been pending in
R11. (4 SC + 1 Dec) x3 (15 pts.)
R13: (3 SC + 1 Dec) x3 (12 pts.)
R14: 12 SC
Color change to sky blue.
R15 – R17: Three rounds. 12 SC
Color change to lemon green.
R18 – R20: Three rounds. 12 SC
Color change to skin.
R21: 12 SC
R22: 8 SC + 3 Inc + 1 SC (15 pts.)
R23 – R25: Three rounds. 15 SC
R26: (4 SC + 1 Inc) x3 (18 pts.)
R27 – R31: Five rounds. (18 pts.)
Holán of the boots:
White. 2.00 mm crochet.
A: About R11. (1 Trc + 1 SL-ST) X9
Bind off with SL-ST. Hide excess thread inside the fabric.
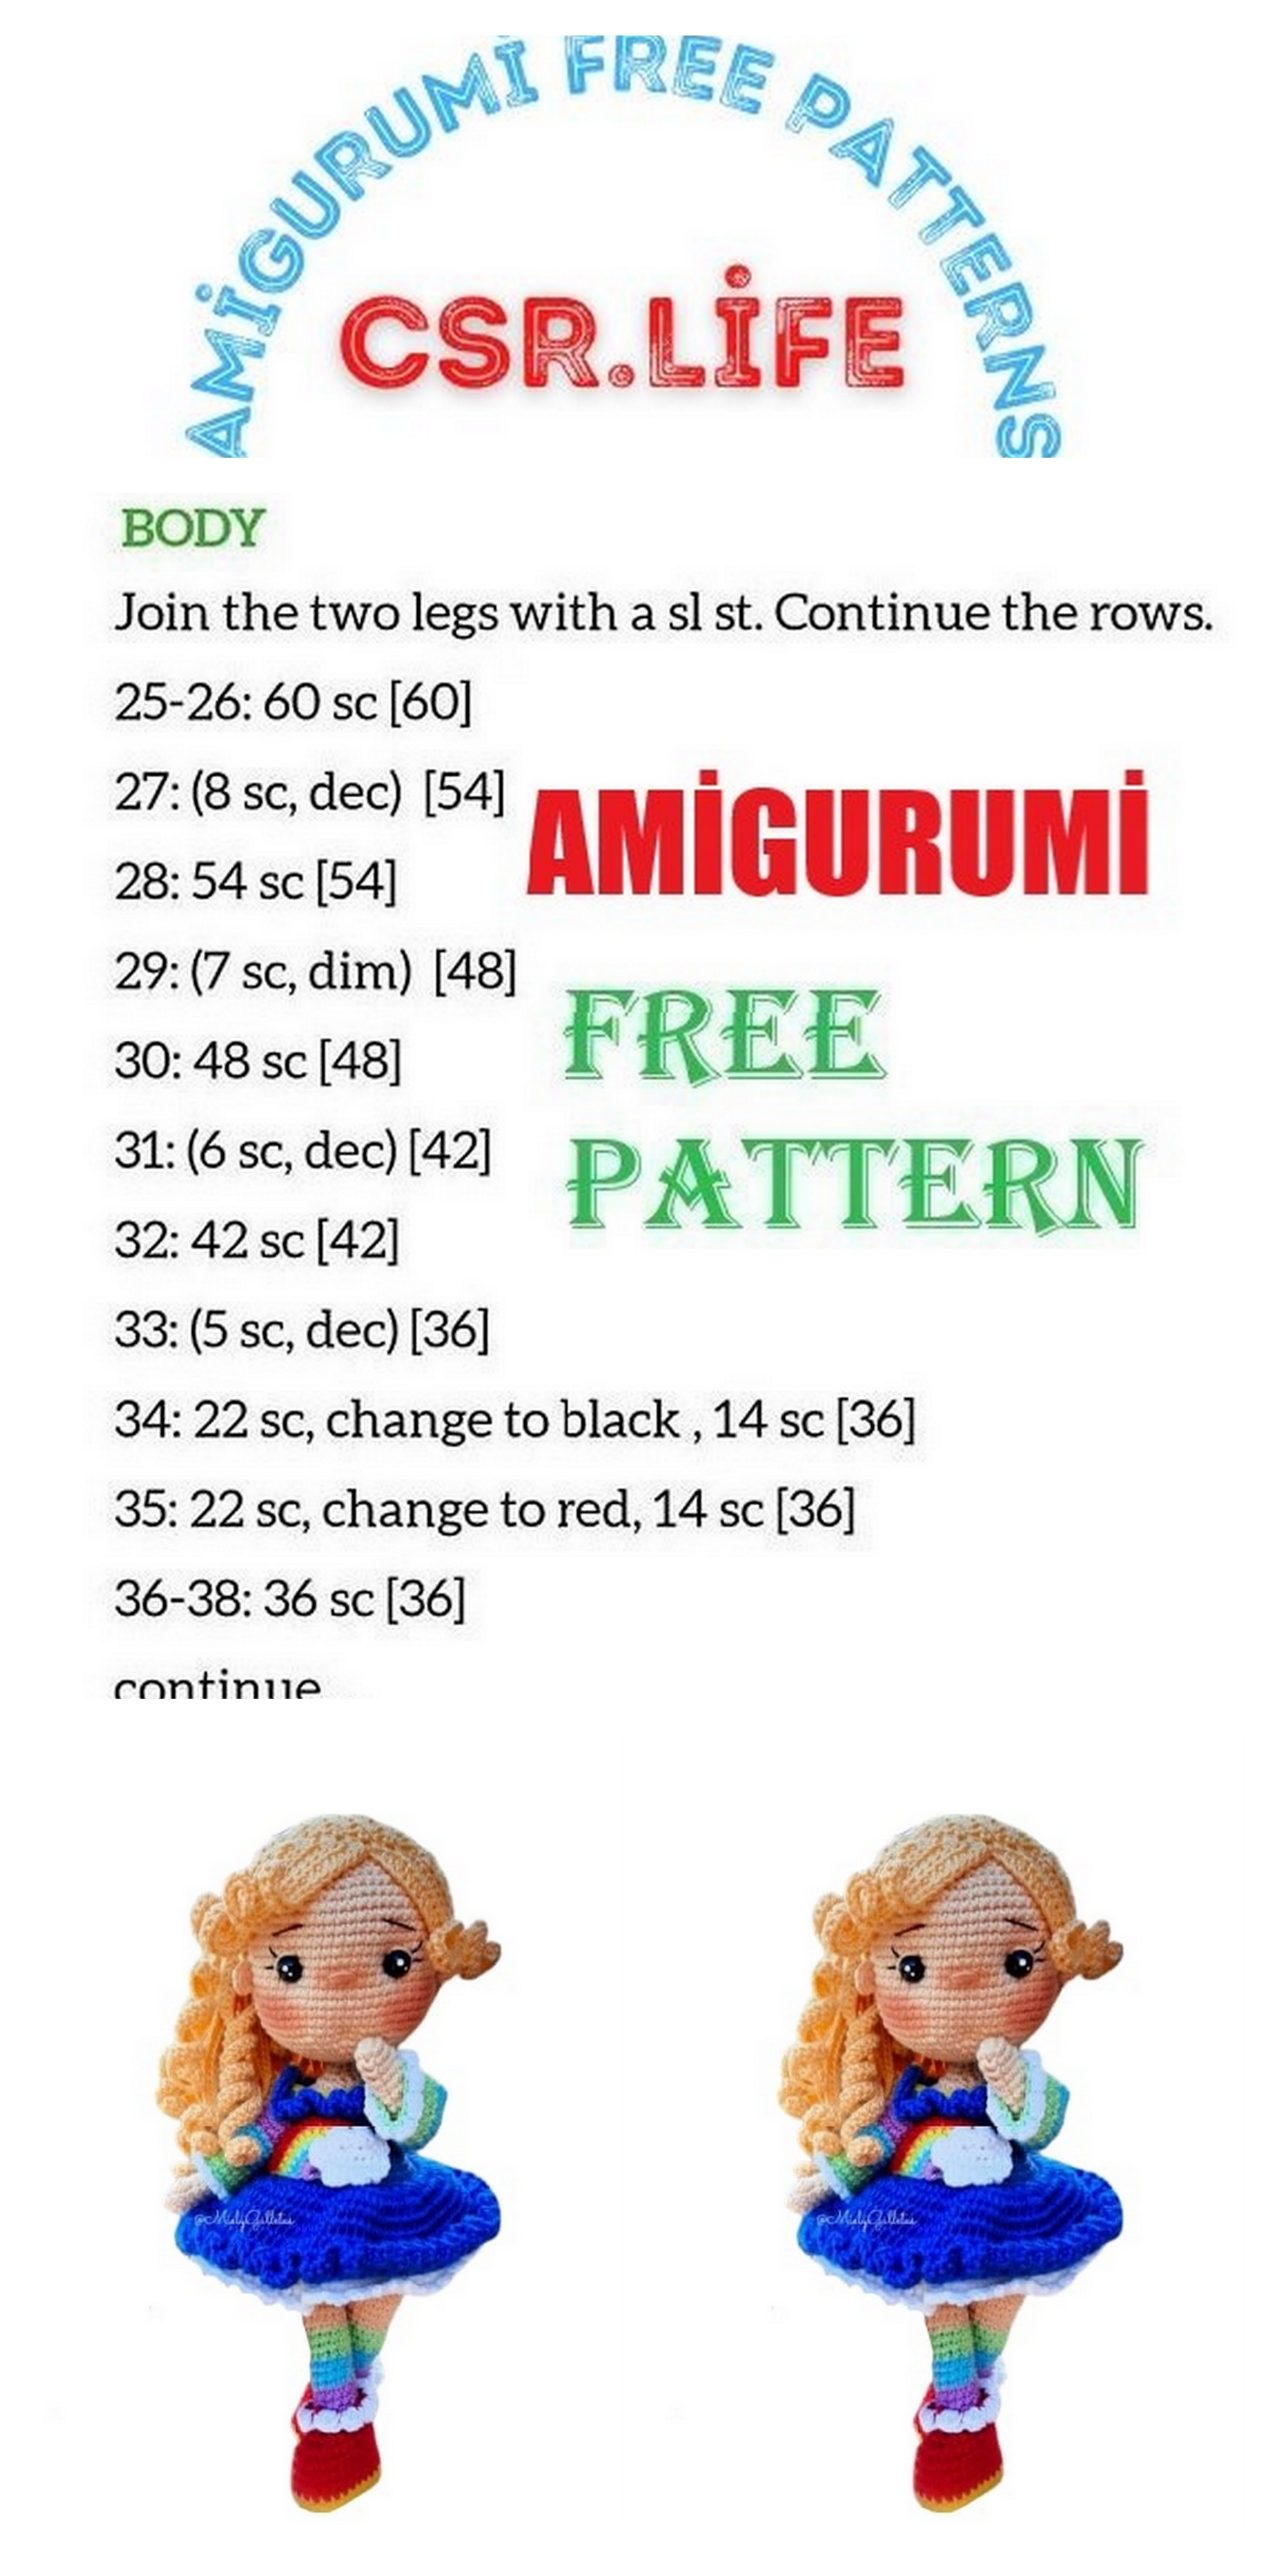
Body:
Denim blue. 2.00 mm crochet.
R32: Joint of the legs. Take one of the pieces, which will be the right leg. Count eight stitches from the end of the round, perform an NC: 1 Ch (this first will help us to lift the beginning of a new R) + 3 Ch + 18 SC (join with in the first point after the close of R of the left leg) + 3 SC (over the 3 Ch joining) + 17 SC (42 pts.)
Important note: The closing and lifting of the new R will be carried out on the first Ch of R32, which is slightly inclined to the back right side of the amigurumi body.
R33 – R37: Five rounds. 42 SC
R38: 5 SC + 1 Dec HFR (36 pts.)
R39: 36 SC
R40: 36 SL-ST
Close with an SL-ST. Make a discreet knot so that the work does not unravel.
Insert the inverted “U” of lined wire, until it stops with the sole of the boots.
Color change to skin.
A41: Count four points towards the left back side; perform a NC and a Ch to lift the new round (this does not count as a point); the new R should start right in the mid-back of the doll’s body.
R42: 4 SC + 1 Dec HFR (30 pts.)
R43 – R44: Two rounds. 30 SC
R45: 3 SC + 1 Dec HFR (24 pts.)
R46: 24 SC
R47: Union of the arms to the body. Make sure each thumb is on the front of the doll’s body: 6 SC + 6 SC (on the left arm, jump three points under the arm) + 9 SC + 6 SC (on the right arm, jump three points under the arm) + 3 SC (30 pts.).
Important note: As you can see, in R47 under each arm there is a hole that covers three points, both in each arm, and the three that we jump from the body. Ehdclmar both pieces perfectly and with the help of your wool needle close this hole, use the excess thread from each arm to do this. Insert the covered wire joints of each arm, then join and screw each other through the center with insulating tape, this joint will serve as a support for the neck and head of our amigurumi.
R48 – R49: Two rounds. 30 SC.
R50: 3 SC + 1 Dec HFR (24 pts.)
R51: 2 SC + 1 Dec HFR (18 pts.)
R52: 1 SC + ´1 Dec HFRF (12 pts.)
R53: (2 SC + 1 Dec) x3 (9 pts.)
R54 – R55: Two rounds. Neck. 9 SC
Head:
Continue with skin.
R56: (2 SC + 1 Inc) x3 (12 pts.)
R57: 12 Inc (24 pts.)
R58: 3 SC + 1 Inc HFR (30 pts.)
R59: 4 SC + 1 Inc HFR (36 pts.)
R60: 5 SC + 1 Inc HFR (42 pts.)
R61: 6 SC + 1 Inc HFR (48 pts.)
R62: 7 SC + 1 Inc HFR (54 pts.)
R63: 8 SC + 1 Inc HFR (60 pts.)
R64 – R76: Thirteen rounds. 60 SC
Important note: Make the details and facial finishes before continuing. Place the safety eyes between R70 and 71 at fourteen points of separation from each other, give depth with the help of a fine needle and skin-colored pearl thread, likewise, carry out this same procedure on the middle part of the face on R64, this detail will form a tiny mouth. Give them more expressiveness with white acrylic paint, a pointer, the black pearl thread to detail some eyelashes and in the same way, embroider eyelids with the same skin color thread with which you are knitting. Make a few stitches between R69 and R70 right in the middle of the eyes to make a small nose. Embroider the eyebrows on R73 diagonally twelve points apart between them. Shade certain areas on the doll’s face with the makeup smudge brush and pink or peach blush or eyeshadow.
R77: 8 SC + 1 Dec HFR (54 pts.)
R78: 7 SC + 1 Dec HFR (48 pts.)
R79: 6 SC + 1 Dec HFR (42 pts.)
R80: 5 SC + 1 Dec HFR (36 pts.)
R81: 4 SC + 1 Dec HFR (30 pts.)
R82: 3 SC + 1 Dec HFR (24 pts.)
R83: 2 SC + 1 Dec HFR (18 pts.)
R84: 1 SC + 1 Dec HFR (12 pts.)
Fill the piece well. Finish off the piece with SL-ST and make a CE.
Ears:
Skin. 2.00 MM crochet
Knit two pieces.
R1: 7 SC INTO MAGIC RING (7 pts.)
Don’t close the AM. Sew between R69 and R70 six stitches apart from each eye.
Wig:
Wheat yellow. 2.5 MM crochet.
In the middle back of the base of the wig, SBF, right next to where the closure scar of each R is, weave each M all around the wig in the left direction:
Important note: Skip a point between each M; Secure each M with an SL-ST before starting a new one. Do this both in the M around the base and also in the bangs.
R1: INTO MAGIC RING of 6 SC (6 pts.)
R2: 6 Inc (12 pts.)
R3: 1 SC + 1 Inc HFR (18 pts.)
R4: 2 SC + 1 Inc HFR (24 pts.)
R5: 3 SC + 1 Inc HFR (30 pts.)
R6: 4 SC + 1 Inc HFR (36 pts.)
R7: 5 SC + 1 Inc HFR (42 pts.)
R8: 6 SC + 1 Inc HFR (48 pts.)
R9: 7 SC + 1 Inc HFR (54 pts.)
R10: 8 SC + 1 Inc HFR (60 pts.)
R12 – R21: Ten rounds. 60 SC
Finish off the piece with SL-ST and hide the excess thread inside the fabric.
M1 – M3: Three strands. 60 Ch In the third from the crochet: 57 HDC
M4 – M6: Three Strands. 65 Ch In the third from the crochet: 62 HDC
M7 – M12: Six Strands. 75 Ch In the third from the crochet: 72 HDC
M13 – M18: Six strands. 85 Ch In the third from crochet: 82 HDC
M19 – M24: Six strands. 90 Ch In the third from crochet: 87 HDC
M25 – 27: Three strands. 95 Ch In the third from crochet: 92 HDC
M28 – M30: Three strands. 75 Ch In the third from crochet: 72 HDC Bind off piece with SL-ST.
Fringe:
Continue with new strand. Wheat yellow.
2.5 MM crochet.
Layer the wig on the doll’s head so that the CR at the base of the doll is just in the middle of the back of the head. Put twelve points in front of it. Begin knitting from the right to the left.
M1: 30 Ch In the third from the crochet: 27 HDC.
M2: 27 Ch In the third from the crochet: 24 HDC.
M3: 24 Ch In the third from the crochet: 21 HDC.
M4: 21 Ch In the third from the crochet: 18 HDC.
M5: 27 Ch In the third from the crochet: 24 HDC.
M6: 30 Ch In the third from the crochet: 27 HDC.
Hairstyle:
1. Fix everything in place with the help of plastic head pins. Fix the bangs, from M1 to M4 it will bend all towards the right side of the doll’s face, while from M5 to M6 towards the left.
2. Glue the strands of the bangs in place with hot or cold silicone, do the same with the base of the wig (hat), be very careful not to stick the M around the base. BE PULCRA AND CAREFUL IN THIS STEP.
3. With the M around the base, we will make a high ponytail with an inclination to the upper right side of the wrist.
Knot very well.
4. With the royal blue ribbon, decorate the top of the ponytail with a bow.
Dress:
Yellow. 2.5mm crochet.
A1: Buttonhole. 38 Ch In the eighth from crochet 1 SL-ST. 30 SC (30 pts.)
Color change to denim blue.
R2: 4 SC + 1 Inc HFR (36 pts.)
R3: SBF. 36 SC
A4: Sleeves holes. 6 SC + 6 Ch (skip six points) + 12 SC + 6 Ch (skip six points) + 6 SC (36 points)
R5 – R6: Two rounds. 36 SC
Important note: From R6 close each R with SL-ST.
R7: (3 SC + 1 Inc) x3 + 12 SC + (1 Inc + 3 SC) x3 (42 pts.)
R8 – R11: Four rounds. 42 SC
Color change to royal blue.
R12: 42 Inchdc (84 pts.)
R13: (6 HDC + 1 Inchdc) x12 (96 pts.)
R14 – R18: Five rounds. 96 HDC
R19: SBF. (3 DC at the same point) x96
Bind off with SL-ST. Hide excess thread inside the fabric.
Holán (upper part of the dress):
Blue King. 2.5mm crochet.
A: SBT that have been pending on R3: (3 DC at the same point) x36
Bind off with SL-ST, hide excess thread inside the fabric. Place the yellow button with a diameter of 1.00 cm at the height of the buttonhole.
Sleeves:
Lilac. 2.5 MM crochet.
Over the sleeve gaps located between R4 and R5.
R1: 6 SC (over the six points located in R4) + 2 SC (located between R4 and R5) + 6 SC (over the six points located in R5) + 2 SC (located between R5 and R4) (16 points)
R2 – R4: Three rounds: 16 SC
Color change to sky blue.
R5 – R8: Four rounds. 16 SC.
Color change to lemon green.
R9 – R13: Four rounds. 16 SC
Color change to white.
R14: (1 Trc + 1 SL-ST) X8
Bind off with SL-ST. Hide excess thread inside the fabric.
Rainbow with cloud:
Lilac. 2.00 mm crochet.
Important note: Leave the excess threads in the lower part of the piece at each color change.
R1: INTO MAGIC RING of 8 SC (DO NOT close the AM)
Color change to sky blue.
R2: 8 SC
Color change to lemon green.
R3: (1 SC + 1 Inc) x4 (12 pts.)
Color change to yellow.
R4: 12 SC
Color change to orange.
R5: (2 SC + 1 Inc) x4 (16 pts.)
Color change to red.
R6: 16 SC
Finish off the piece with SL-ST. Hide excess threads at the back of the piece.
Cloud:
White. 2.00 mm crochet.
R1: 6 Ch in the second from the crochet: 4 sc + 3 sc (in the last stitch). On the other side of the chain. 4 SC + 3 SC (in the last point). (14 pts.)
R2: (1 Trc + 1 SL-ST) x7
Bind off with SL-ST and hide excess thread at the back of the fabric. Glue or sew to one of the sides of the rainbow. Glue or sew the cloud rainbow to the top front of the dress.
BE PULCRA AND CAREFUL IN THIS STEP.
Congratulations! You have finished.