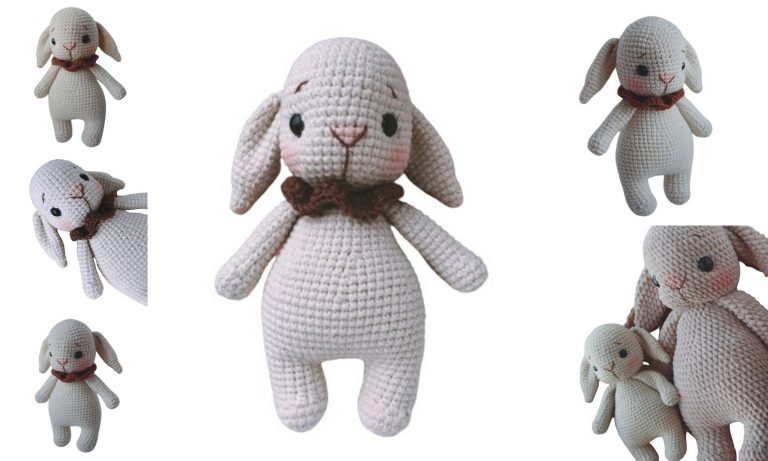
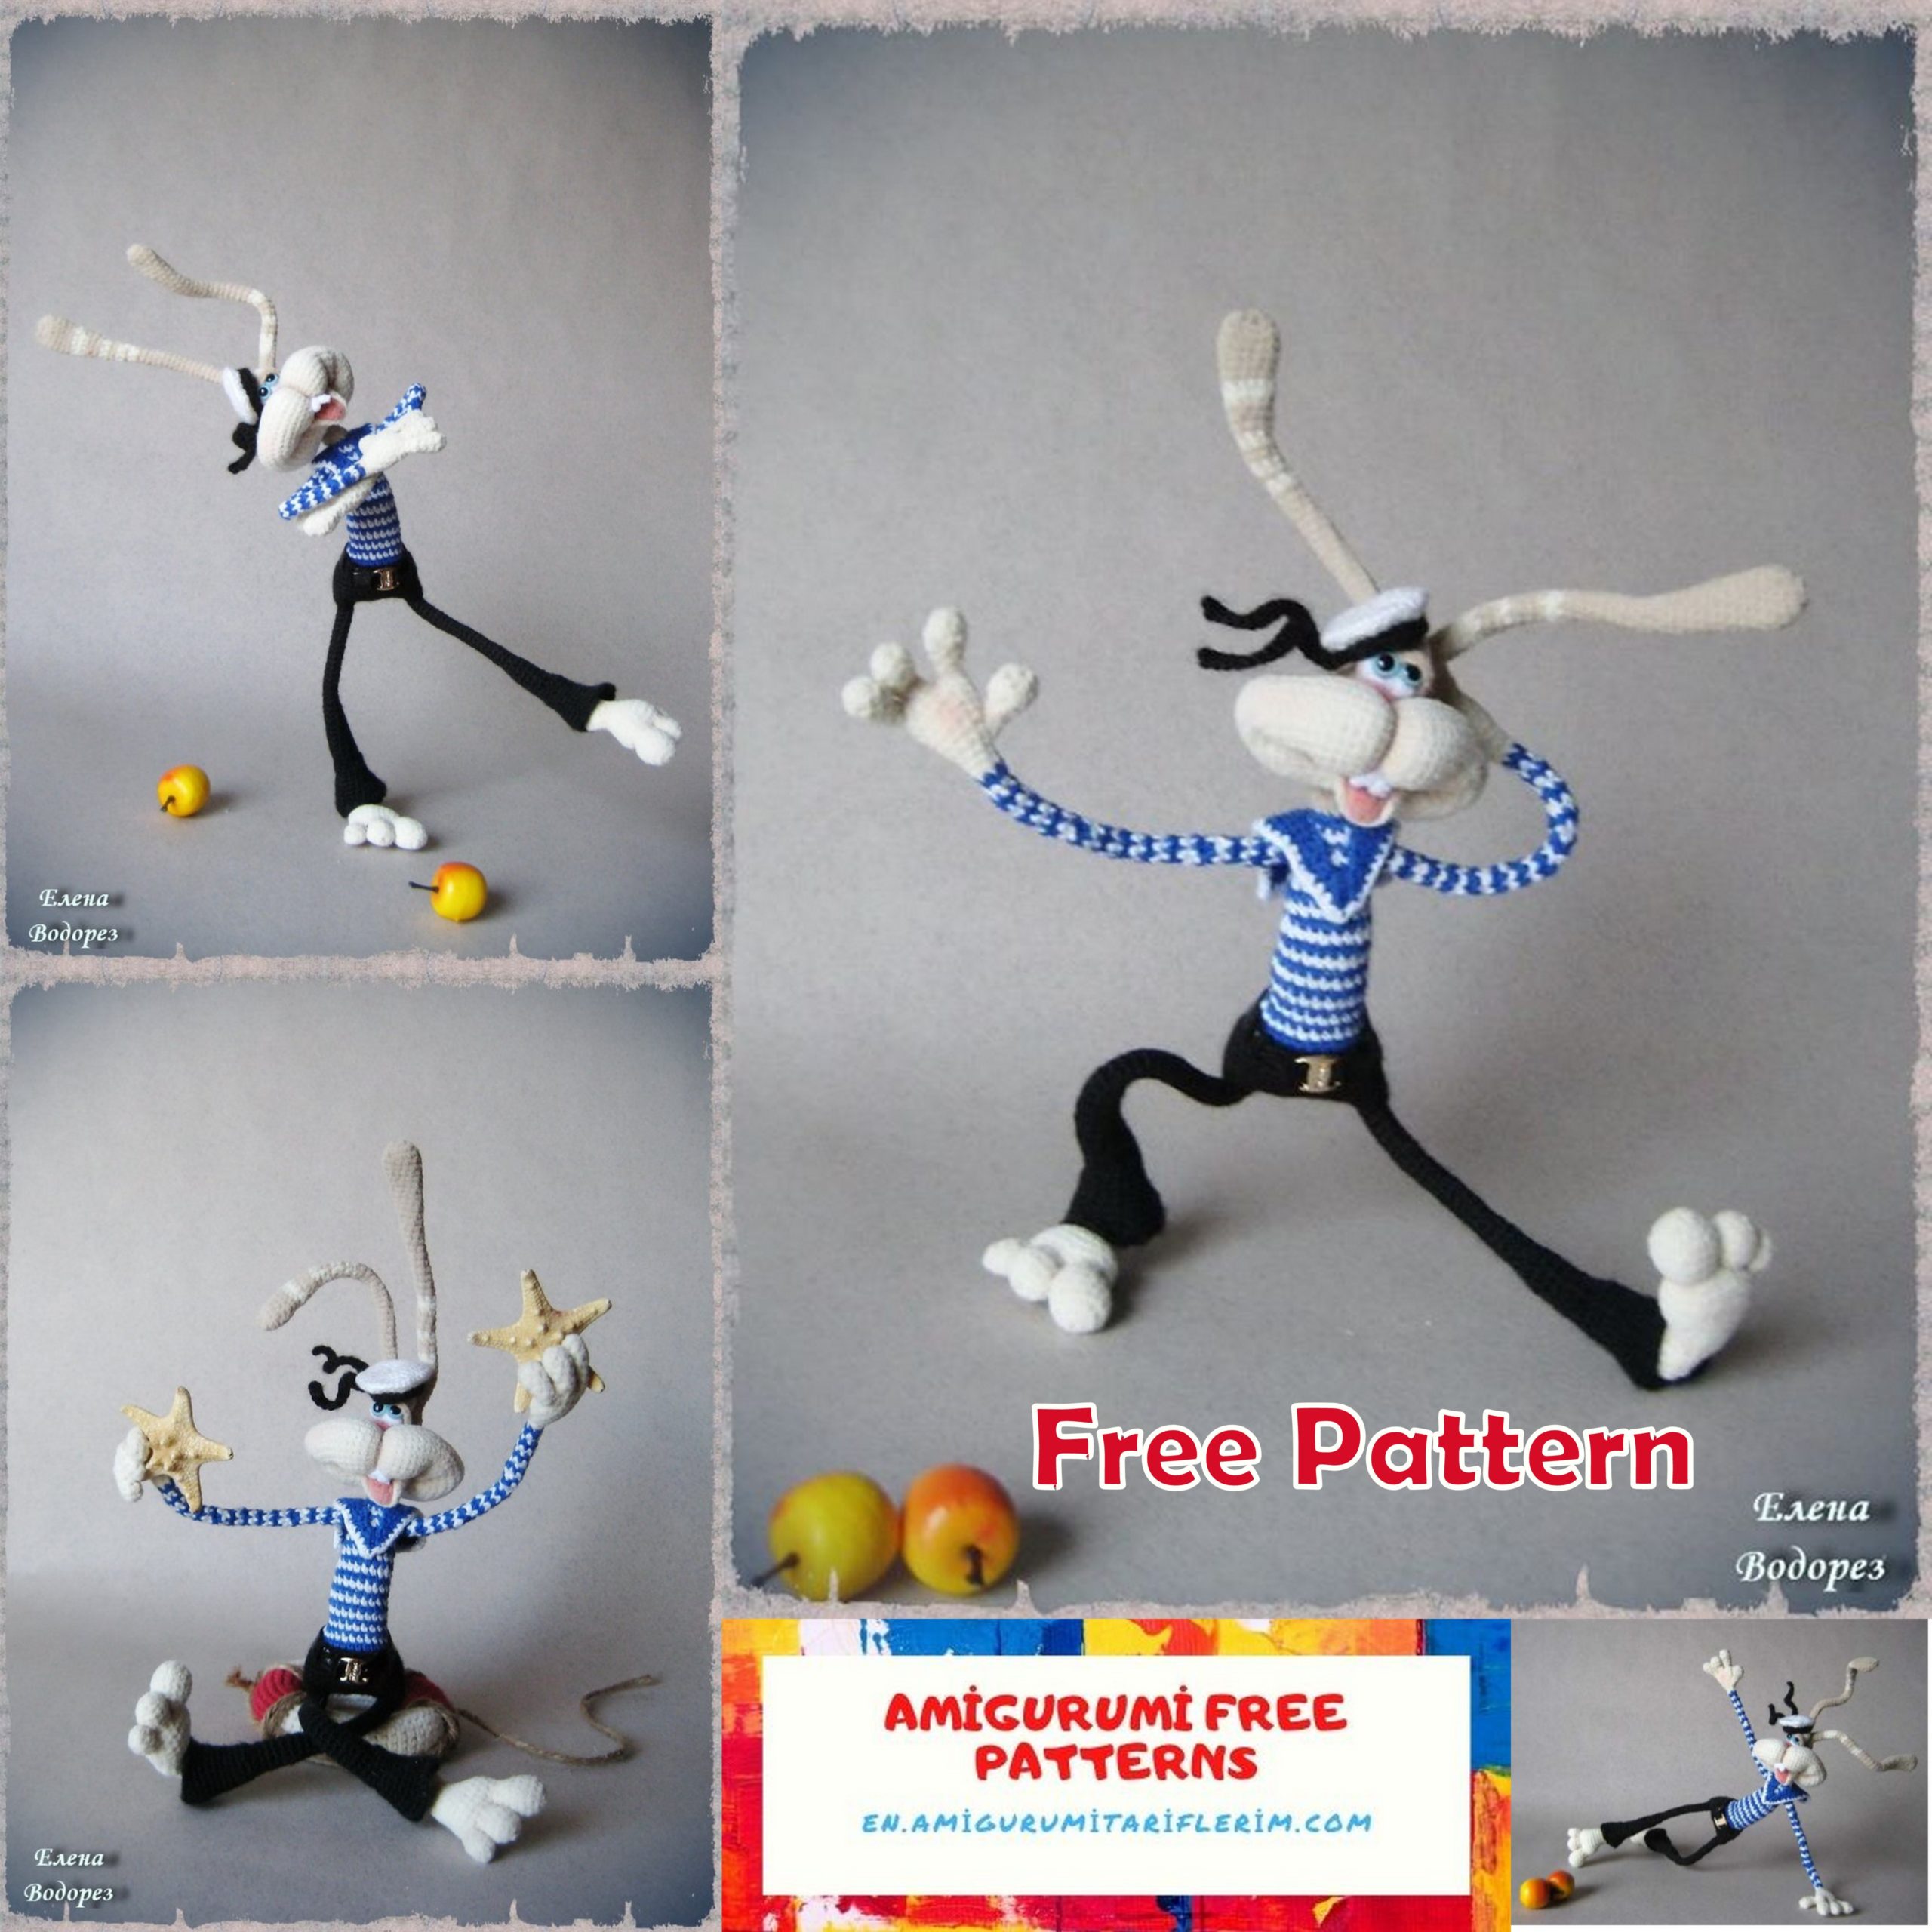
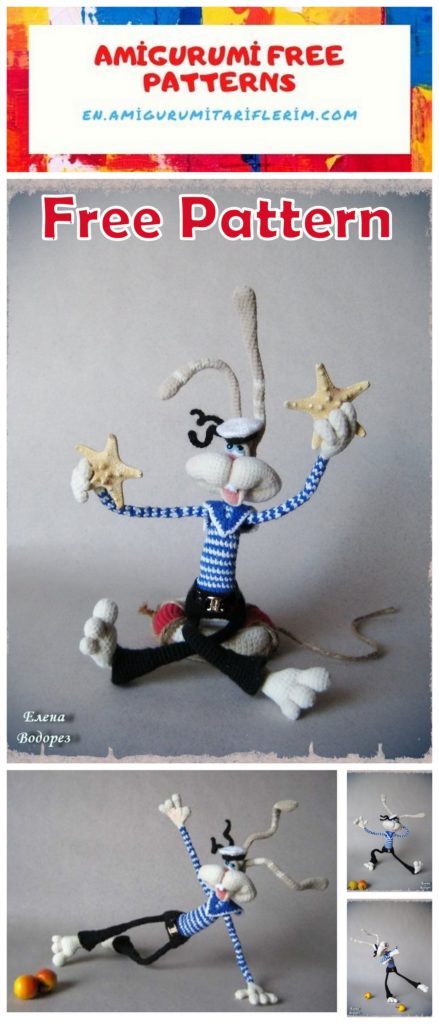
Tiny Sailor Bunny Dude Amigurumi Free Pattern
Amigurumi crochet toys, we continue to share with you the most beautiful amigurumi. In this article you can find amigurumi tiny sailor bunny dude doll free pattern.
ABBREVATİONS
Sh – Magic Ring
Ch – Chain
Sl-st – slip stitch
sc – single crochet
DC – double crochet
hdc – half double crochet
inc – increase
PATTERN
NOTE: The colors for the sailor rabbit are blue and white.
With white yarn If you are going to make another color rabbit, the color choice is yours. Leave it on PAGE 14. Change color.
QUEUE
Row 1: Magic ring into 6sc = (6)
Row 2 :: 6inc = (12)
Row 3: (1sc, 1inc) * 6 = (18)
Row 4: (2 sc, 1 inc) * 6 = (24) Switch to yarn of white color.
Row 5: 24sc, Change color.
Rows 6-8: 24sc Switch to white color yarn.
Row 9: (1dec 2 sc) * 6 = (18)
Row 10: (1dec 1sc) * 6 = (12) Softly fill.
Row 11: (1sc, 1dec) * 4,1sl-st = (8),
secure it and hide the tip inside the tail.
FINGERS (make 4 for each hand)
With yellow rope
Row 1: Magic ring into 7sc = (7)
Row 2-3: 7sc = (7)
Row 4: 1dec 5sc = (6)
Row 5: 1dec 4sc (5)
Fill the fingertip softly.
Row 6: 1dec 3 sc = (4)
FINGER JOINT
Row 1: 1sc to second finger, 4sc to first finger, 3sc to second finger, 4sc to third finger = 12
Row 2: 2inc, 9sc, 1inc = 15sc
Rows 3-4: 15sc
Row 5: 2dec, 9sc, 1dec = 12sc
RIGHT HAND
We add the thumb
Row 6: 1sc, 2 sc to handle with thumb, 9 sc = (12)
Row 7: 1sc, 2 sc to the thumb, 7 sc, 1 dec = (11)
LEFT HAND
We add the thumb
Row 6: 9 sc, 2 sc to thumb and hand, 1sc = (12)
Row 7: 1 dec 7 sc, 2 sc to thumb, 1 sc = (11)
For both hands
Row 8: 1dec 7sc, 1dec = (9)
Row 9: 1dec 5sc, 1dec = (7)
Row 10: 1dec 5sc = (6)
Row 11: 1dec 4sc = (5)
Now we will knit by changing the color.
Optional, if you don’t want to continue from row 12.
C: WHITE W: COLOR (any color you want)
Left arm: WWW-CW-CC-WW-CC-WCWC-WW-CC-WW-CC-WW-CC
Right arm: WW-CW-CC-WW-CC-WWW-CC-WCWCW-CC-WW-CC.
12 to 37: fix 5sc, 1sl-st = (5).
FEET FINGERS 6 GRAIN (3 fingers to each foot)
thumb with colored rope
Row 1: Magic ring into 6 sc = (6)
Row 2: 6inc = (12)
Row 3: (2sc, 1inc) * 4 = (16)
Rows 4-5: 16sc = (16)
Row 6: (2 sc, 1dec) * 4 = (12)
Row 7: (1sc, 1dec) * 4 = (8)
Middle finger: With colored thread
Row 1: Magic ring into 6 sc = (6)
Row 2: 6th = (12)
Rows 3-4: 12sc
Row 5: 6dec = (6)
Little finger:
With colored rope
Row 1: Magic ring into 6 sc = (6)
Row 2: (1 sc, 1 inc) * 3 = (9)
Row 3: 9sc
Row 4: (1sc, 1dec) * 3 = (6)
LEFT FOOT
Row 1: 3sc little finger, 4sc middle finger, 8sc thumb, 2sc middle finger, 3sc little finger = (20)
Row 2: 12 sc, 6 inc, 2 sc = (26)
3-4 rows: 26sc
Row 5: 12 sc, 6dec, 2sc = (20)
Row 6: 7 sc, 1 dec 2 sc, 1 dec 7 sc = (18)
Row 7: 6 sc, 1 dec 2 sc, 1 dec 6 sc = (16)
Row 8: 6 sc, 1 dec 2 sc, 1 dec 4sc = (14)
Row 9: 6 sc, 1 dec 1 sc, 1 dec 3 sc = (12)
Row 10: 5 sc, 1inc, 4sc, 1dec = (12)
Row 11: 1 dec 3 sc, 2 inc, 3 sc, 1 dec = (12)
Row 12: 1dec 1sc, insert an additional marker (leg), 7sc, 1dec = (10) 13 row: 1dec 6 sc, 1dec = (8)
Row 14: (1dec 2 sc) * 2 = (6)
Secure.
RIGHT FOOT
Row 1: 3sc little finger, 2sc middle finger, 8sc thumb, 4sc middle finger, 3sc small finger = (20)
Row 2: 2 sc, 6 inc, 12 sc = (26)
3-4. Rows: 26sc
Row 5 :: 2sc, 6dec, 12 sc = (20)
Row 6: 7 sc, 1 dec 2 sc, 1 dec 7 sc = (18)
Row 7: 6 sc, 1 dec 2 sc, 1 dec 6 sc = (16)
Row 8: 4sc, 1dec 2 sc, 1dec 6 sc = (14)
Row 9: 3 sc, 1 dec 1 sc, 1 dec 6 sc = (12)
Row 10: 1dec 4sc, 1dec 5 sc = (12)
Row 11: 1 dec 3 sc, 2 inc, 3 sc, 1 dec = (12)
Row 12: 1dec 7 sc, place an additional marker (leg), 1sc, 1dec = (10)
Row 13: 1dec 6 sc, 1dec = (8)
Row 14: (1dec 2 sc) * 2 = (6) finished.
LEFT LEG
We will change color to add charm to the ceiling. (optional)
C: WHITE W: COLOR (any color you want)
Left leg: CCC-WW-CC-WWW-CWC-WW-CCC-WC-WWW-CCC-WW-CC-WCW-CCCWW-CC. Right leg: CCCCCC-WWW-CC-WW-CC-WC-W-CC-W-CC-WWW-CW-CC-WW-CC-WW-CCC LEFT LEG
We start knitting from the place shown in the picture.
Although it looks like the continuation of the foot in the picture, the feet are finished in 6sc.
We will collect 12sc in a round shape from where it is crooked.
Rows 1-2: 12sc
Row 3: 1 dec 10 sc = (11)
Row 4: 11sc
Row 5: 1 dec 9 sc = (10)
Row 6: 10sc
Row 7: 1 dec 8 sc = (9)
Rows 8-9: 9sc
Row 10: 1 dec 7 sc = (8)
Rows 11 – 13: 8sc
14th row: 1dec 6sc = (7)
15-18. rows: 7sc
19th row: 1dec 5 sc = (6)
Rows 20 – 39: 6sc, fill in 1sl-st = 6sc.
Knit in the same way on the right leg, but do not 1sl-heat in the 39th row. We will continue to knit the body.
BODY
We continue with the color you want from the right leg.
Row 1: pull 1 sc in the right leg, 10 chains and tie in the left leg. : 2sc, 2inc, 2sc, 10sc on the chain, right leg: 2 sc, 2inc, 1 sc = (36)
To complete the tour:
On the 1sc, 5sc chain, put a marker here. This place will get new start data
Row 2-4: 36sc with white rope
5th row: 36sc
Row 6: 34sc, 2 sc to tail and body = (36)
Row 7: 2 sc to tail and body, 32sc to 2 sc tail = (36) Change color.
Row 8: 2 sc in tail, 34 sc = (36)
With white rope
Row 9: 6 sc, 1 dec 3 sc, 1 dec 10 sc, 1 dec 3 sc, 1 dec 6 sc = (32)
Change the color.
Row 10: 5 sc, 1 dec 2 sc, 1 dec 10 sc, 1 dec 2 sc, 1 dec 5 sc = (28)
With white rope
Row 11: 6 sc, 1 dec 12 sc, 1 dec 6 sc = (26)
Row 12: 6 sc, 1 dec 10 sc, 1 dec 6 sc = (24)
Change color
Row 13: 5 sc, 1 dec 10 sc, 1 dec 5 sc = (22)
Row 14: 5 sc, 1 dec 8 sc, 1 dec 5 sc = (20)
With white rope
NOTE: If you are going to make a sailor rabbit
15th row: 20sc
1st place, 9th Change the rope to black color
use color.
Rows 16 – 17: 20sc with White rope
After the 9th row to knit blue and white
Row 18: 4sc, 1dec 8 sc, 1dec 4 sc = (18)
19th row: 18sc
Change color
20th row: 18sc
With white rope
21st – 22nd lines: 18sc
Change color
23rd order: 4sc, 1dec 6 sc, 1dec 4sc = (16)
24-25th lines: 16sc
With white rope
Row 26: 3 sc, 1 dec 6 sc, 1 dec 3 sc = 14
Change color
27th row: 14sc
Row 28: 3 sc 2 sc left arm to the body, 4 sc, 2 sc right arm to the body, 3 sc = (14)
With white rope
Row 29: 1dec 1sc, 3sc left sleeve, 4 sc, 3 sc right sleeve, 1sc, 1dec = (14)
REDUCE THE CLOCK !!!
30th row: 14sc
Change color
31st order: 3 sc, 1dec 4sc, 1dec 3sc = (12)
Row 32: 2 sc, 1dec 4sc, 1dec 2 sc = (10)
Row 33: 2 sc, 1 dec 2 sc, 1 dec 2 sc = (8)
Row 34: (1 sc, 1 inc) * 4,1sl-st = (12)
secure, leave a long tail for sewing.
Language
With pink rope
Row 1: 7 chains, starting with the 2nd link of the chain, 2 double-rails, 2 sc, 3sc in the same hole. 2 double bricks, 2sc, return = 11sc
Row 2: Chain 1, 3 sc 2 sl-st, 1 inc, 2 sl-st, 3sc = (12)
EARS
With white color yarn
Row 1: Magic ring into 6 sc = (6)
Row 2: 6 inc = (12)
Rows 3-6: 12sc Change color
7th row: 1dec 10 sc = (11) White color rope
8th row: 11sc
9th row: 1dec 9 sc = (10) Change color
10th row: 10sc
11th row: 1dec 8 sc = (9) Switch to the yarn of white color.
Row 12: 9sc Change color
Row 13: 1dec 7sc = (8) White color rope
14th row: 8sc
Order 15: 1dec 6sc = (7)
16.row: 7sc Change color
17.row: 1dec 5sc = (6)
18 – 19.rows: 6sc
Change color
With white rope
20-21. rows: 6sc
Change color
22nd row: 6sc
With white rope
23rd row: 6sc
Change color
24th row: 6sc
With white rope
Rows 25 – 27: 6sc
Change color
28-29. rows: 6sc
With white rope
30-32. rows: 6sc
Change color
33rd row: 6sc
With white rope
34-35. rows: 6sc
Change color
Rows 36 – 37: 6sc
With white rope
Row 38: 6sc
If you prefer shorter ears, yellow and white followed by skip the 9 rounds below and continue to section 48 in writing.
39-40th rows: 6sc with White rope
Rank 41: 6sc
Change color
Row 42: 6sc
With white rope
Rows 43-45: 6sc
Change color
Rows 46-47: 6sc
With white rope
48th row: 6sc as FLO
With white rope
49-50. rows: 6sc
Knit the other ear in the same way.
HEAD
We will make a head by combining 2 ears
With white rope
1sc to 1sl-st of 1st ear, 1sc to 1sl-st of 2nd ear
Row 1: 1sc to 2nd ear, 2 inc, 1 sc, to 1st ear: 1sc, 2 inc, 1sc = (12)
Row 2: 2 sc, 2 inc, 4sc, 2 inc, 2 sc = (16)
Row 3: 3sc, 1inc, 8 sc, 1inc, 3sc = (18)
Rows 4-5: 18sc
Change color
Row 6: 4sc, 1inc, 8sc, 1inc, 4sc = (20)
Row 7: 3 sc, 1 inc, 2 sc, 1 inc, 6 sc, 1 inc, 2 sc, 1 inc, 3 sc = (24)
With white rope
Row 8: 24sc Row 9: 1inc, 2 sc, insert additional marker, (1inc, 2 sc) * 2, 1inc, 4sc, (1inc, 2sc) * 2, 1inc, insert additional marker, 2 sc, 1inc = (32)
Row 10: insert additional marker, (1sc, 1inc) * 6.8 sc, (1inc, 1 sc) * 6 = (44)
Row 11: (1inc, 2 sc) * 2, insert additional marker, 1sc, 1inc, 3 sc, 1inc, 20 sc, 1inc, 3 sc, 1inc, 1sc, insert additional marker, (2 sc, 1inc) * 2 = (52)
Row 12: 1sc, 1inc, 10 sc, 1inc, 26 sc, 1inc, 10 sc, 1inc, 1 sc = (56)
Row 13: 1 sc, 1inc, 52 sc, 1inc, 1sc = (58)
Row 14: 1 sc, 1inc, 12 sc, 1inc, 28 sc, 1inc, 12 sc, 1inc, 1sc = (62)
Row 15: 1 sc, 1inc, 58 sc, 1inc, 1sc = (64)
Row 16: 1 sc, 1inc, 30 sc, insert additional marker, 30 sc, 1inc, 1sc = (66)
17th – 20th lines: 66sc
Row 21: 12 sc, 1dec 2sc, insert additional marker, 1dec 5 sc, 1dec 16 sc, 1dec 5 sc, 1dec insert additional marker, 2 sc, 1dec 12 sc = (60)
Row 22: 11 sc, 1dec 2 sc, 1dec 4sc, 1dec 2 sc, 1dec 6sc, 1dec 2 sc, 1dec 4sc, 1dec 2 sc, 1dec 11 sc = (52)
Row 23: 10 sc, (1 dec 2 sc) * 3, 1 dec 4 sc, 1 dec (2 sc, 1 dec) * 3, 10 sc = (44)
Row 24: 9 sc, 1dec insert additional marker, (1sc, 1dec) * 3, 4sc, (1dec 1sc) * 3, insert additional marker, 1dec 9 sc = (36)
Row 25: (1 sc, 1dec) * 2,4sc, 1dec 1 sc, 1dec 6 sc, 1dec 1sc, 1dec 4sc, (1dec 1 sc) * 2 = (28)
26th order: 1dec 1sc, 1dec 3 sc, 1dec 1 sc, 1dec 2 sc, 1dec 1sc, 1dec 3 sc, 1dec 1 sc, 1dec = (20)
Row 27: 2dec, 3sc, 2 inc, 2sc, 2 inc, 3sc, 2 dec = (20)
4sc to complete the round, attach an additional marker, 12 sc, attach an additional marker. We will add the tongue by knitting counterclockwise.
Adding the Language.
28th row: 12 sc to tongue and head, 4dec to head only = (16)
Row 29: 12 sc, 4sc tongue and head = (16)
NOSE
With pink rope
1.Row: 5 chains, starting with the second link of the chain
1.Row: 3 sc, 1inc, 3sc in kind hole, 1inc = (10)
2-3.Rows: 10sc =
4.Row: 3 sc, 3sc take together, 2sc, 1dec = (7)
If the toy is big, stuff the nose very softly
Fix the head, cover the opening and hide the tip
EYES
With white rope
1.Row: Magic ring into 6sc = (6)
2-5.Rows: Fix 6sc.
Do not fill Secure a long thread in the middle of the eyes. Wrap the floss tightly in the middle of the eyes several times and secure. (Thread thread: nylon bobbin thread) Leave thread to sew the eyelids.
EYELIDS
With colored rope
1.Row: Magic ring into 6sc
2.Row: 6 inc = (12) insert a marker here.
3-4.Rows: 12sc = (12)
If the toy is large, fill the eyelid very gently! For a miniature toy, do not fill the eyelid.
5.Row: 6e = 6 as BLO
6.Row: to 4th Rownin FLO loops (2 sc, 1inc) * 4 = (16)
7.Row: 16sc
Return floss to needle, needle. Get out of the place that says the additional sign. Wrap the length of floss around the eyelid, to divide them in half as shown in the picture, remove the needle (from the middle), through the eyes, the upper part of the eyelid as shown in the picture, squeeze a little to form the appearance of the 2 eyelids, fasten the thread and cut.
Teeth
With the white thread Place the eyes as shown in the picture, go down a needle from the additional marker, exit from the middle front as shown in the picture.
1.Row: 4 chains, 3sc starting from the 2nd link of the chain
2.Row: 4 chains, leave rope to sew 3sc, 1sl-stilk loop starting from the 2nd link of the chain.
FACE SHAPING
Pull the thread quite tightly to tighten in between, follow the steps to make it look like the next pictures
With floss, fix the thread at the 1 point, insert the needle at the 1 point, come out from the 2 point, insert the needle at the 3 point, come out at the 4 point, put the needle at the 1st point. Exit at point 3, insert needle at point 1, come out at point 4, insert needle at point 1, come out at point 3, fix thread, do not cut! insert the needle at point 1, exit at point 5.
insert the needle into the 5th point, exit the 3rd point, insert the needle into the 1st point, exit the 5th point, insert the needle at the 1st point, exit the 6th point, insert the needle at the 6.1 point, exit from the 5th point.
put the needle at the 1st point, exit the point 3.1, put the needle on the 1st point, exit the 5th point, put the needle in the 1st point, exit point 3.1, fix the thread, do not cut.
put the needle in the 1st point, get out from the point 3.1, put the needle on the 1st point, get out from the 5th point, put the needle on the 1st point, come out at the point 3.1, cut the thread.
Sew the nose at the 5th additional point.
Sew the teeth
Eyes black bead
Put the needle at point 1, get out of point 4.1,
put the needle in point 1, get out of point 3.1,
put the needle in the 1st point, get out of the 4.1 point,
put the needle in the 1st point, come out of 3.1, put the needle in the point 2.1, come off at the 1.1 point, stretch the thread quite tightly, fix the thread and save it finished. Fix the thread at point 5 with floss, place the needle in the right middle of the nose, upper lip, come out from point 5, pull the thread quite tightly. Repeat one more time. Pull the thread, let it be pretty firm.
Don’t forget to stare
NECK AND HEAD ASSEMBLY
The neck is sewn from the neck marker on the head. Towards the back of the head is 3-4 sc. Stretch the last turn of the neck to form a circle, fix it on the head, thread the thread into a long needle, sew it over the head.Fill it before making the finale. The neck should be filled very tightly. Place a ball needle in the middle of the back of the neck. Secure a thread. Line in front of the neck. Place the needle at this point, just below it. The front of the nose should be at the mouth line. Put the needle 4-5 stitches away, come off. Pull the thread through the pin at the back of the neck and hang it tightly. Repeat the tightening with the reverse Row: Neck in the back – nose-neck in the front. Repeat the procedure several times if necessary. When looking at the jaw, the shoulders from the van should be in line with the avni.
Your rabbit is over. Until this page, you can make any rabbit you want by changing the colors. They all have the same recipe. We will knit clothes because we will make sailors.
MARINE CLOTHES
SWEATER
While knitting the rabbit, we knit his arms in blue and white. We knit the torso in blue and white. We will not knit sweaters for that.
PANTS WAIST
While joining the feet, we knit the body up to the 9th row in black. TROUSERS
With black rope
1.Row: 26 chains, tie 1sl-style in the first loop. Make a ring. (26)
2.Row: 26sc into the ring = (26)
3.Row: (1dec 11 sc) * 2 = (24)
4.Row: 5 sc, 1dec 10 sc, 1dec 5 sc = (22)
5.Row: (1dec 9 sc) * 2 = (20)
6.Row: 4sc, 1dec 8 sc, 1dec 4sc = (18)
7.Row: (1dec 7 sc) * 2 = (16)
8.Row: 16sc
9.Row: 3 sc, 1dec 6 sc, 1dec 3 sc = (14)
Try the leg of the pants on the leg. The lower trouser edge should match the heel. 10. Row: (1 sc, skip the next loop of the leg, skip 1sc through the pants and into the next front loop of the leg, 1sc into the pants and the front loop of the leg) * 4, 1 sc trousers and the next front loop of the leg, 1sc pants and the leg to the next front loop to front ring = 14
11.Row: 1dec 12 sc = (13)
12.Row: 1dec 11 sc = (12)
13.Row: 1dec 10 sc = (11)
14.Row: 1dec 9 sc = (10)
15.Row: 10sc
TROUSERS CONTINUED
16.Row: 1dec 8 sc = (9)
17.Row: 9sc
18.Row: 1dec 7sc = (8)
19.Row: 8
20.Row: 1dec 6sc = (7)
21. Row: 7sc
22.Row: 1dec 5 sc = (6)
23-39.Row: 6sc = (6)
You can continue as much as you need. You should come to the middle of the back of the left leg. Finish left leg in 1sl-style. Knit in the same way on the other leg and sew it to the body.
MARINE SHOES
With blue color rope
1st Row: 16 chains, starting from the 2nd link of the chain 15sc, 1 chain return = 15
2-8.Rows: 15sc, return 1 chain = 15
Right side
9-10.Rows: 5sc, return 1 chain = 5
11.Row: 1dec 3sc, 1 chain return = 4
12.Row: 4sc, return 1 chain = 4
13.Row: 1dec 2sc, 1 chain return = 3
14.Row: 3sc, return 1 chain = 3
15.Row: 1dec 1sc, return 1 chain = 2
16.Row: 2sc, return 1 chain = 2
17.Row: 1dec return 1 chain = 1
18.Row: 1sc
left side
Skip 5sc, starting at 6th loop
9-10.Rows: 5sc, return 1 chain
11.Row: 3 sc, 1 dec 1 chain turn back
12.Row: 4sc, return 1 chain
13.Row: 2sc, 1dec, 1 chain return
14.Row: 3 sc, return 1 chain
15.Row: 1sc, 1dec 1 chain return
16.Row: 2 sc, return 1 chain
17.Row: 1dec return 1 chain
18.Row: 1sc
Make 1sc around the scarf with the white rope. Place the collar on the body, over the shoulders. Sew the 5sc where we jumped to the end of the 8th Rown. Overlap the points of the collar, stitch the place in front with one or two fix and hide the rope
MARINE HAT
With white rope
1.Row: Magic ring into 6sc = (6)
2.Row: 6 inc = (12)
3.Row: (1sc, 1inc) * 6 = (18)
4.Row: (2sc, 1inc) * 6 = (24)
5.Row: (3 sc, 1 inc) * 6 = (30)
6.Row: 2 sc, 1 inc, (4 sc, 1 inc) * 5, 2 sc = (36)
7.Row: as FLO (4sc, 1dec) * 6 = (30)
8.Row: (3 sc, 1dec) * 6 = (24) With black rope
9.Row: 24sc as BLO
10.Row: 22sc, 1st band: 20 chains, starting from the 2nd link of the chain 19sc, 1sl-st, 2nd band 20 chains, starting from the 2nd link of the chain 19sc, 1sl-st. over.