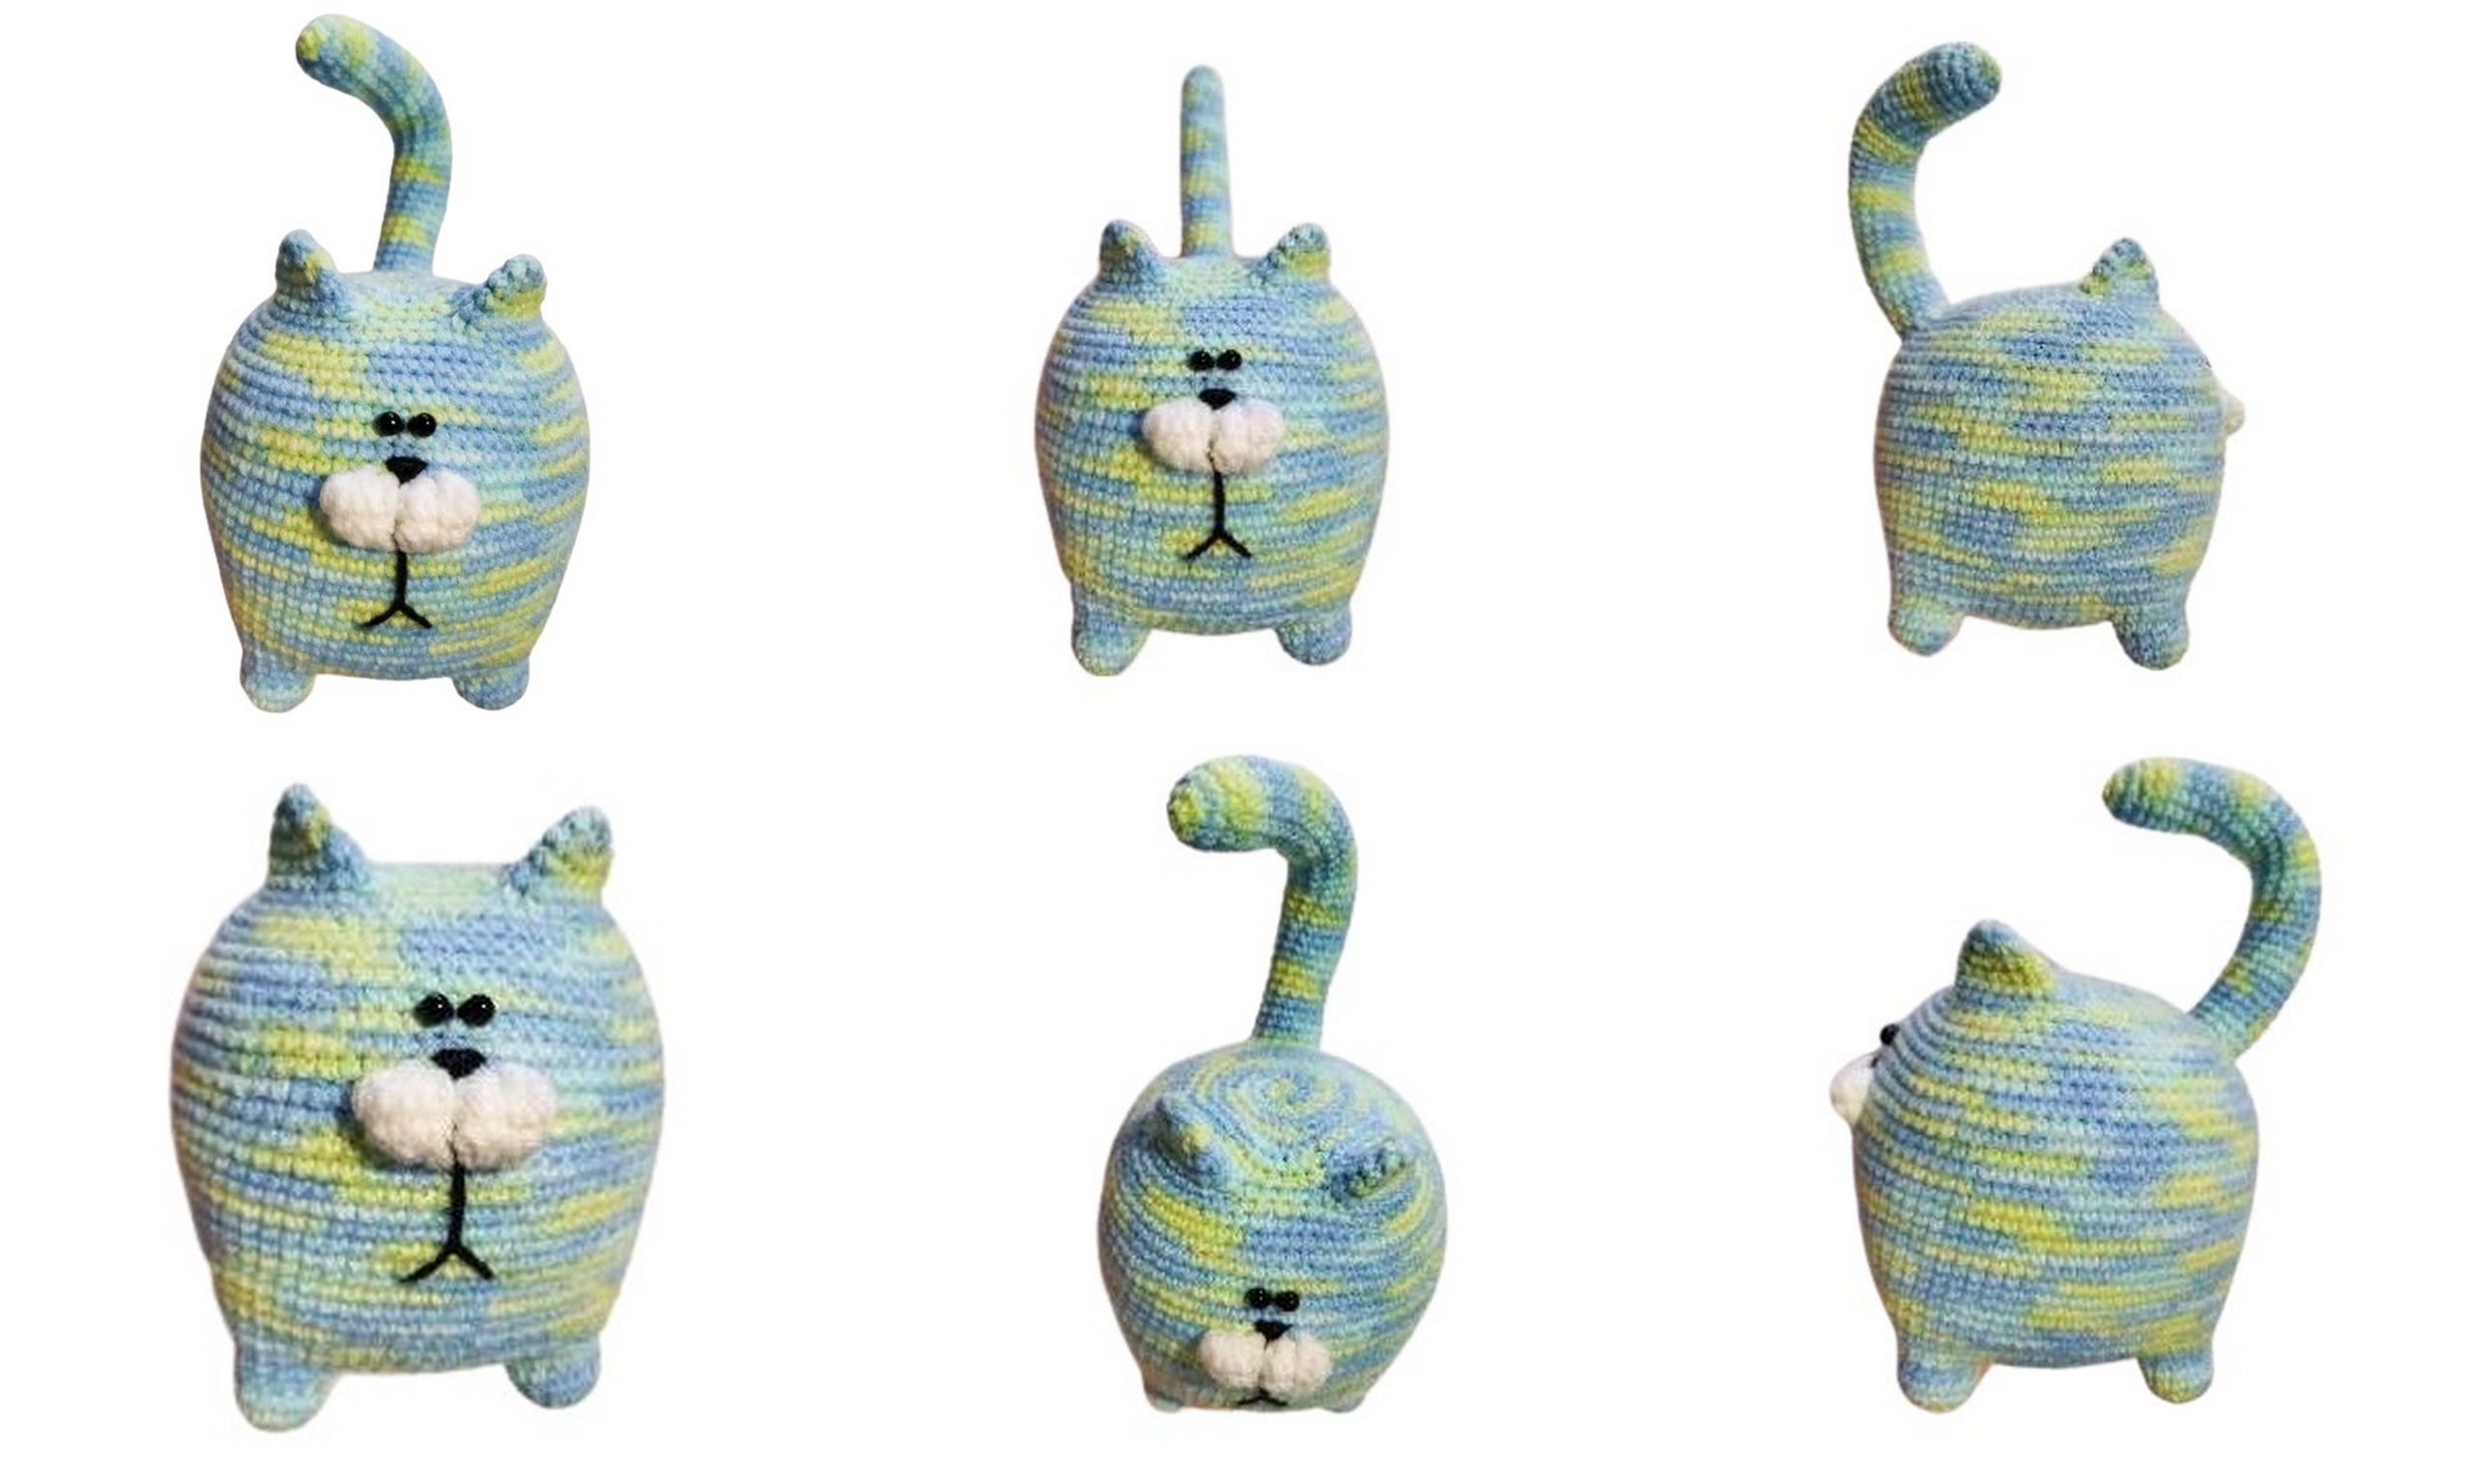
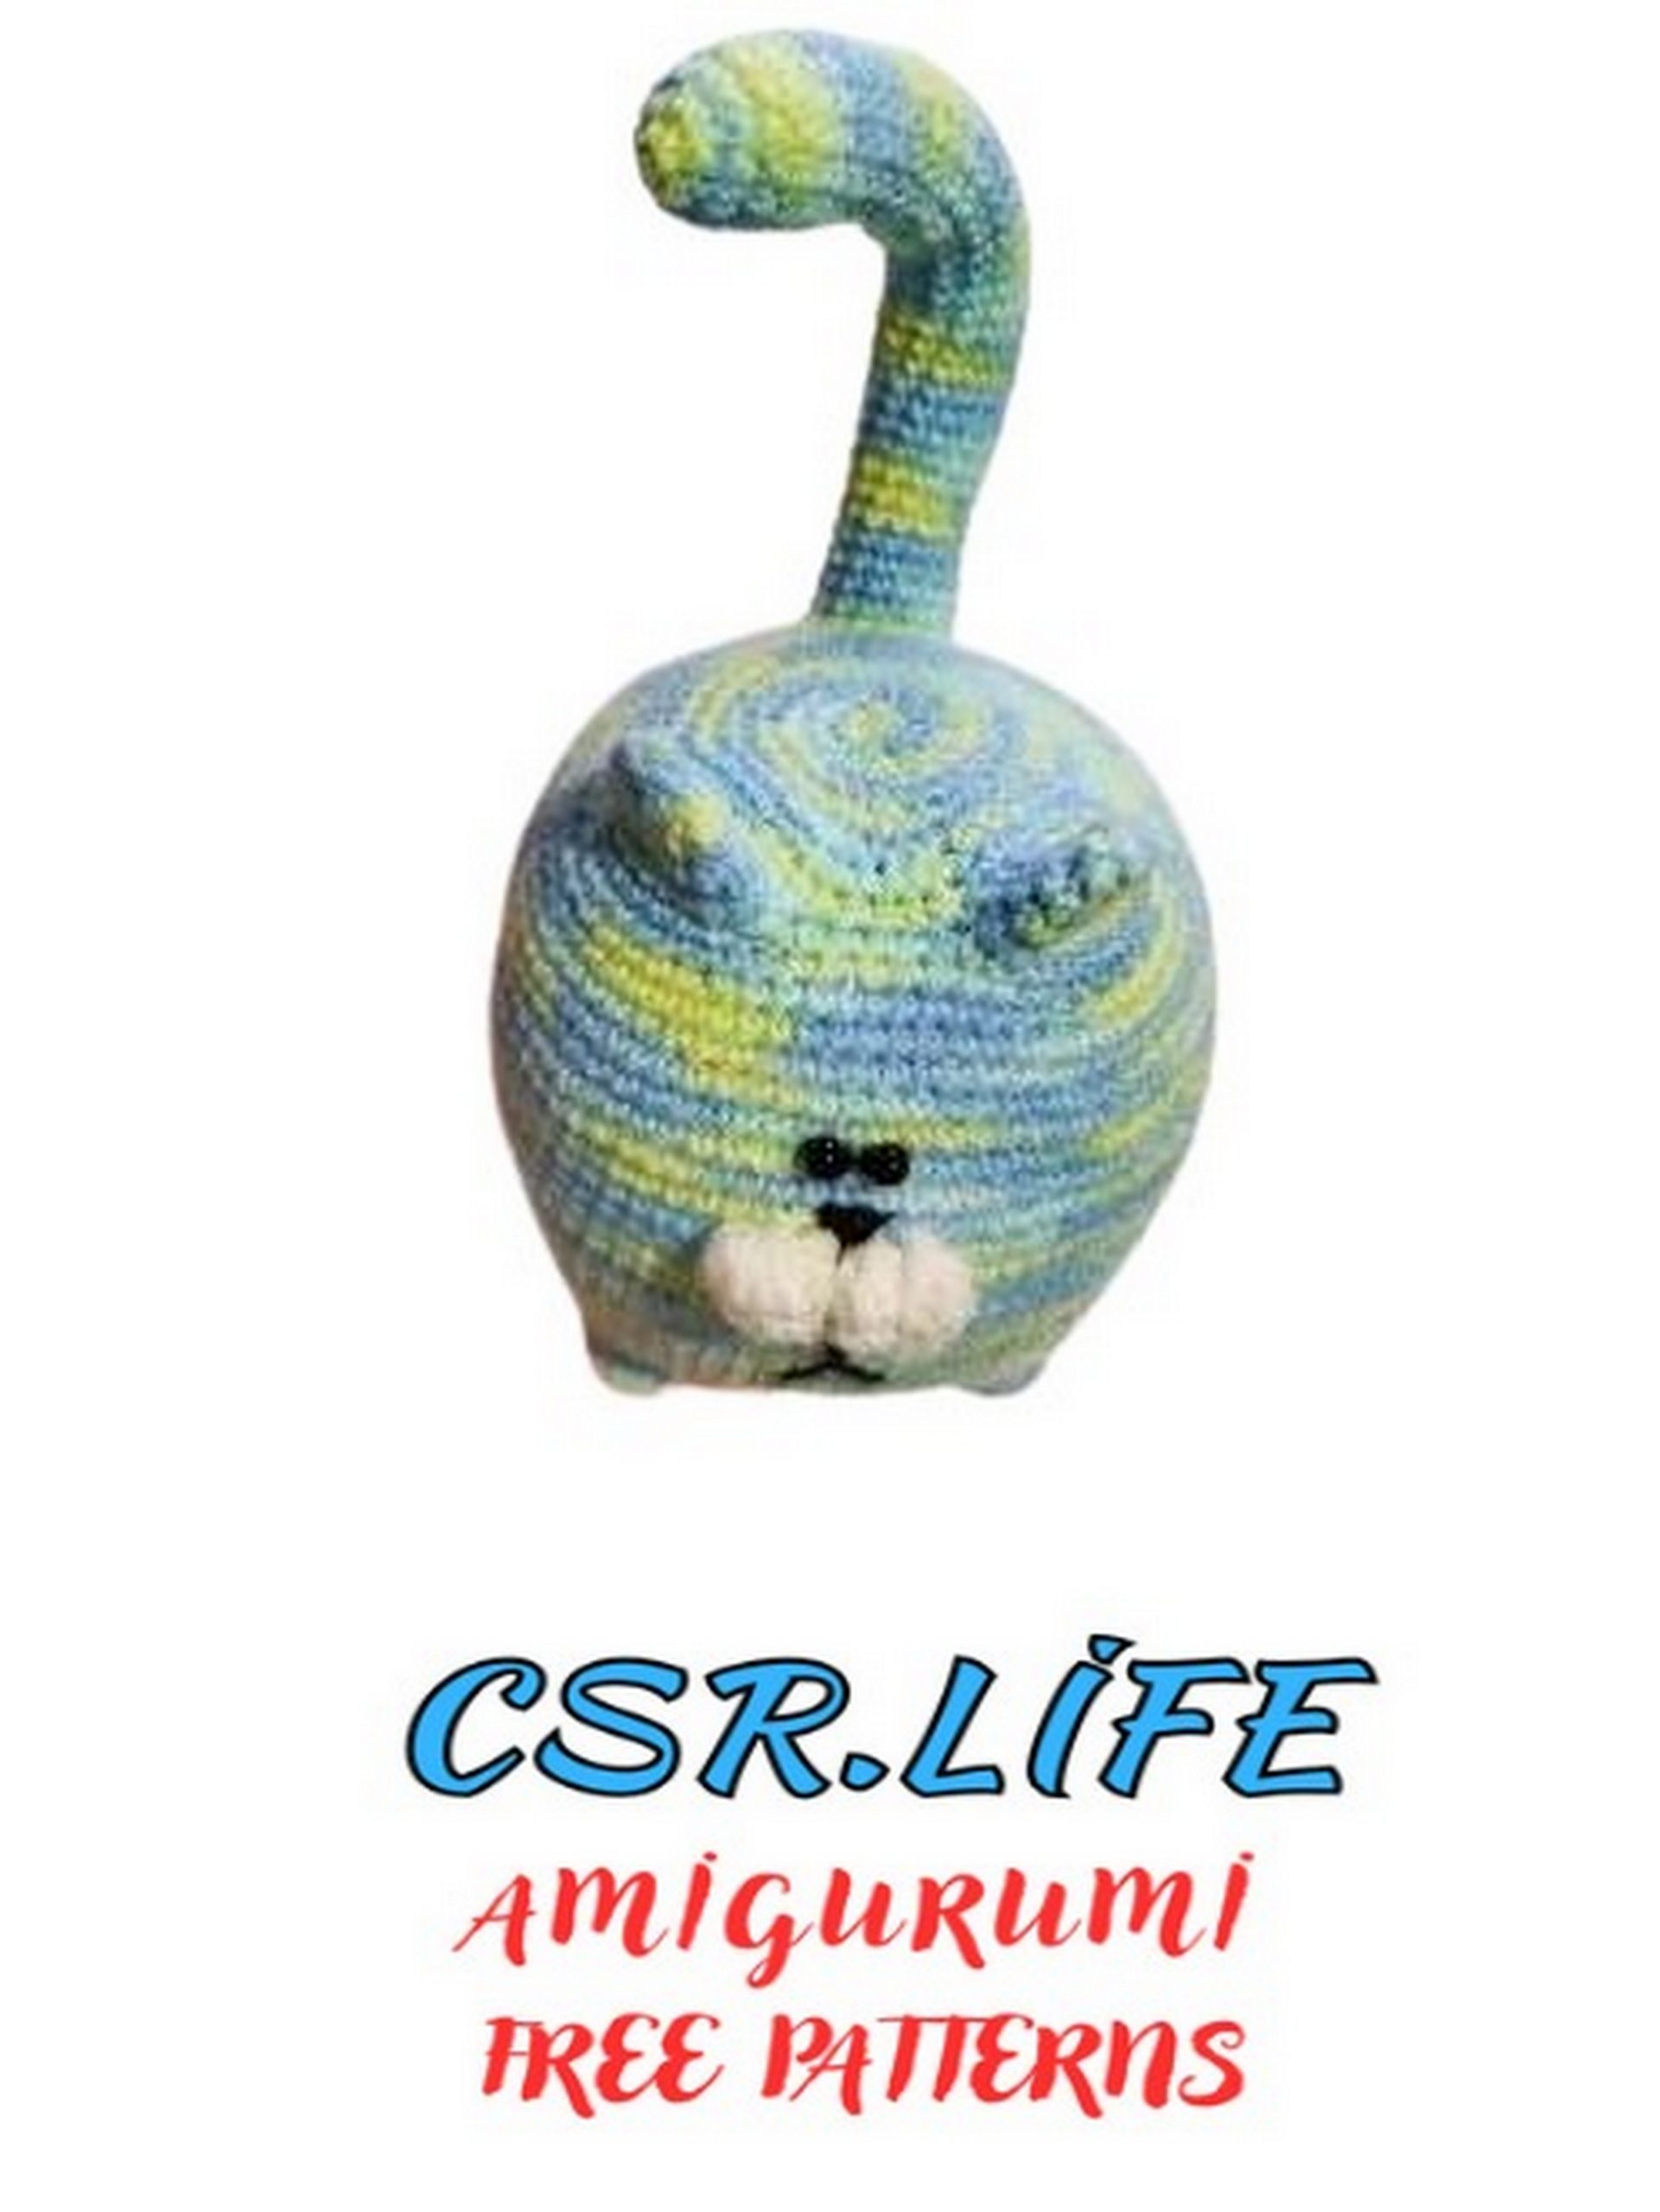
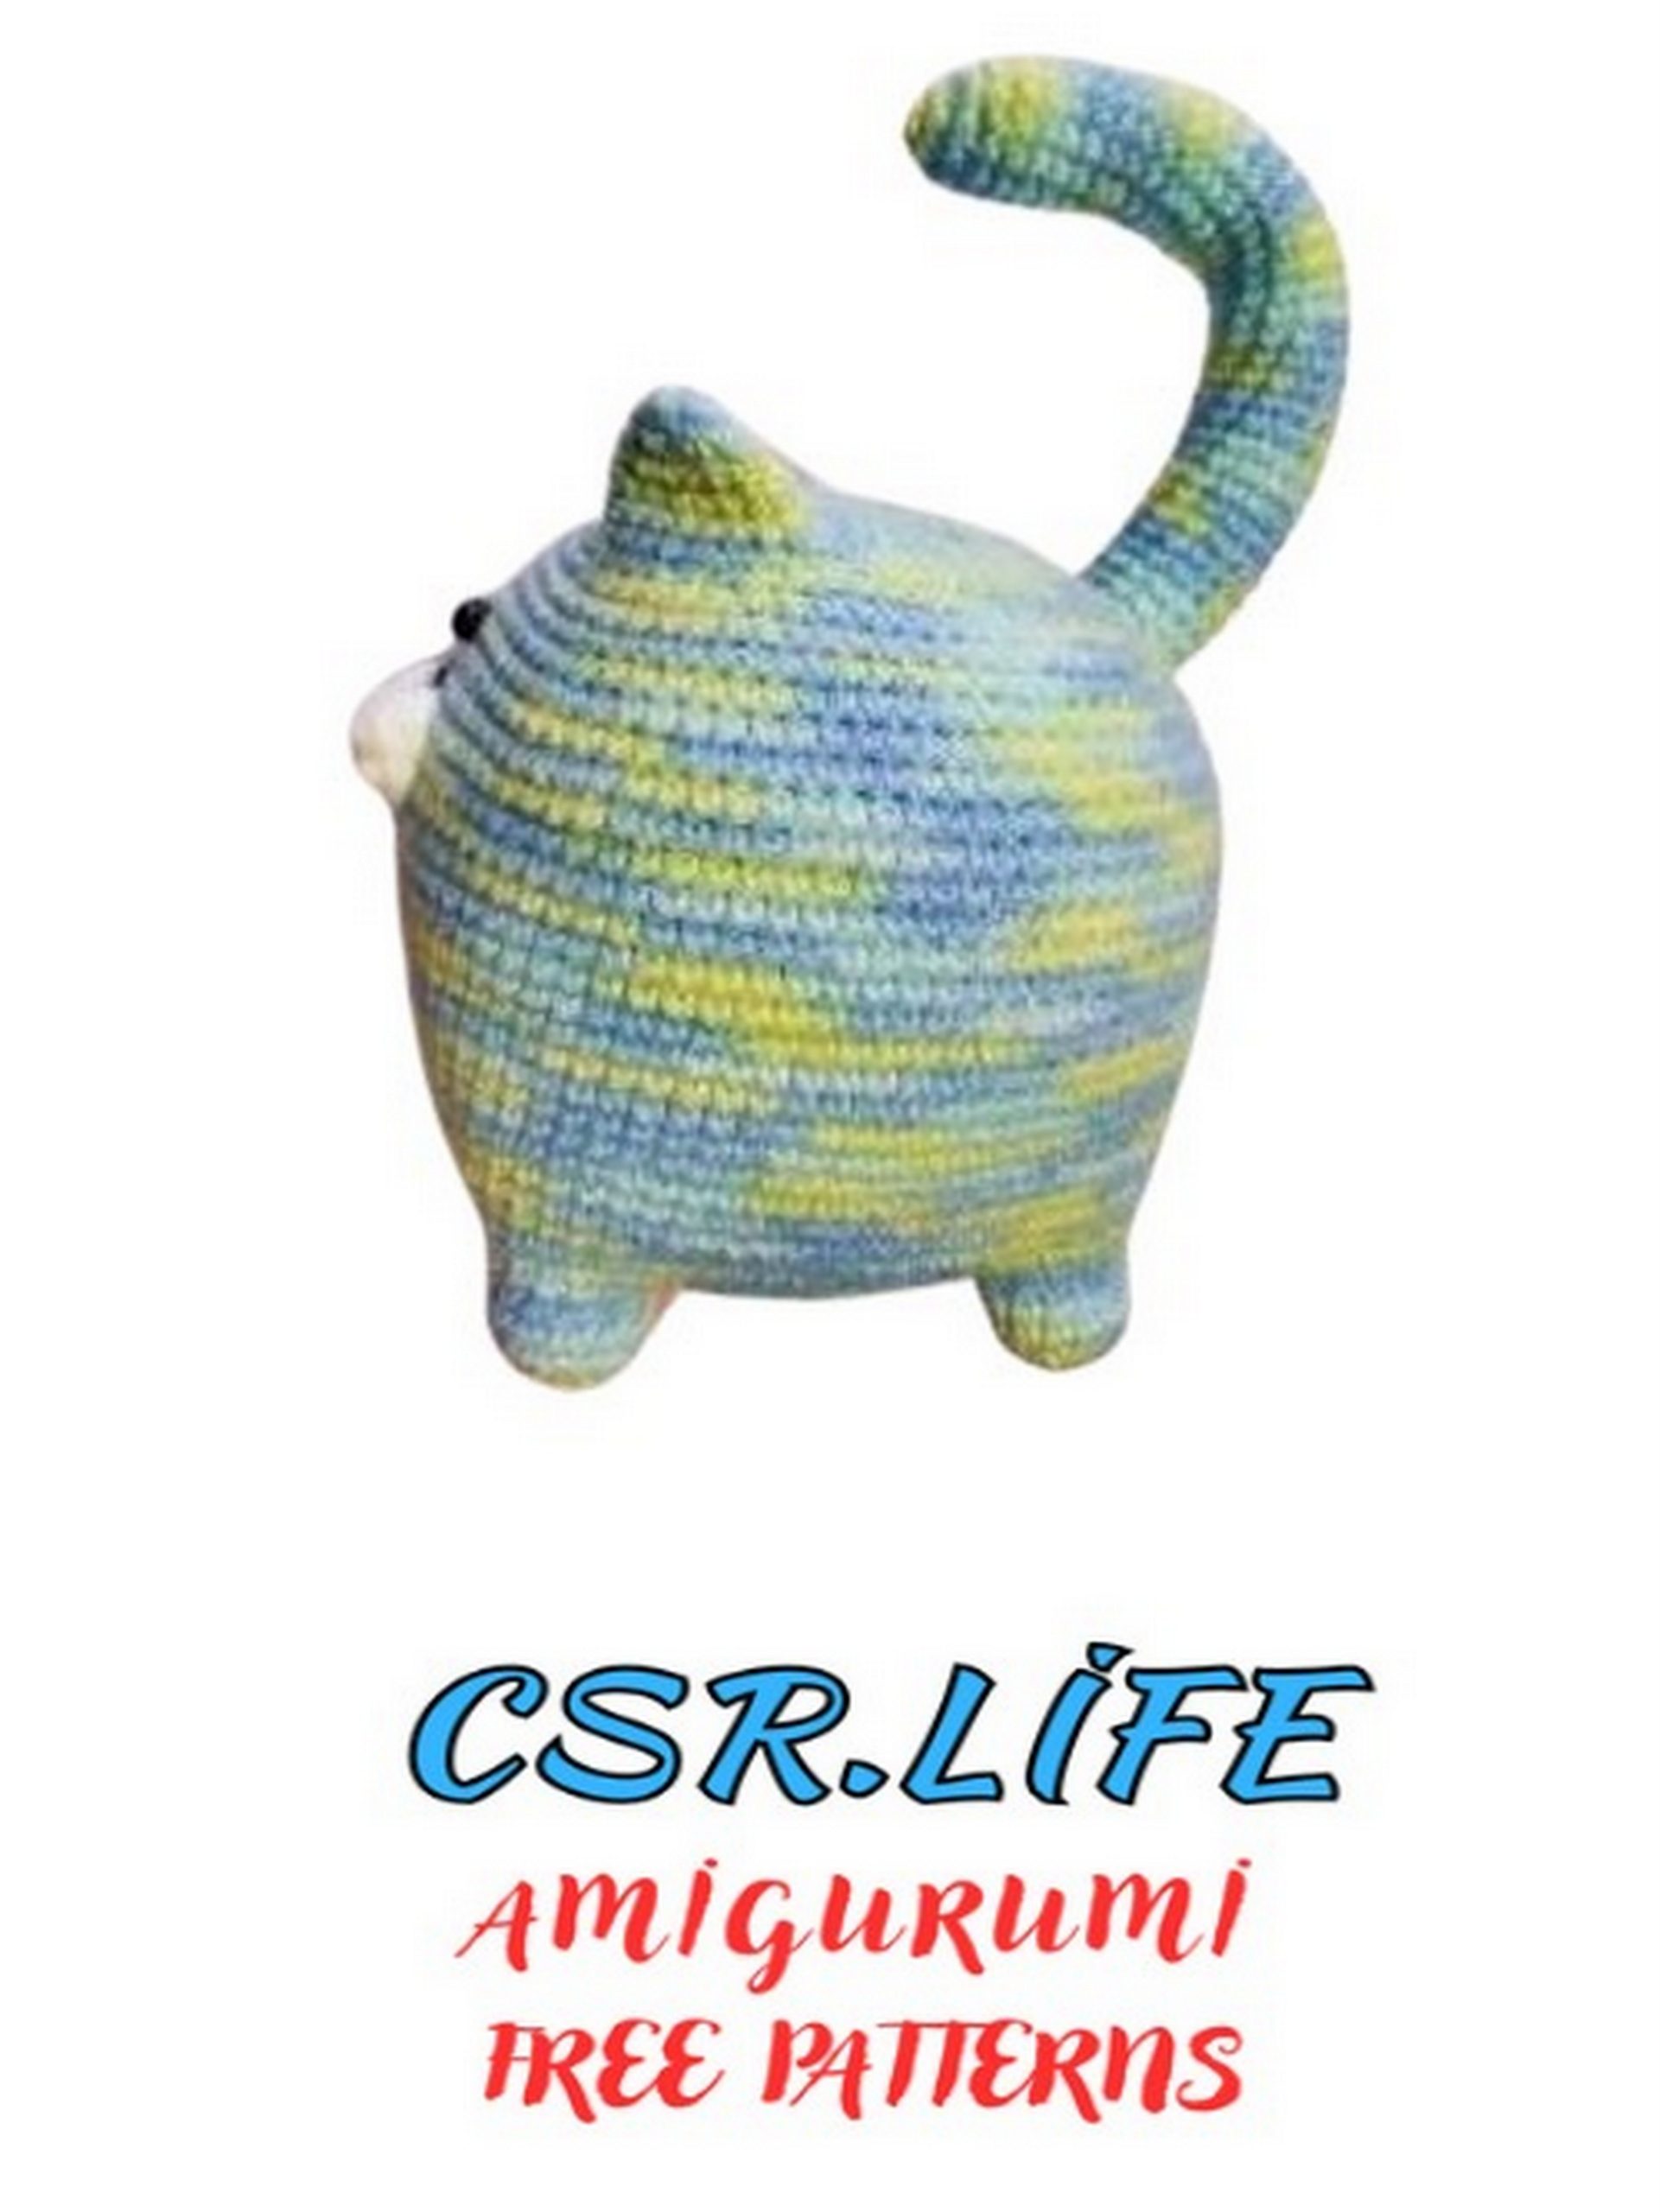
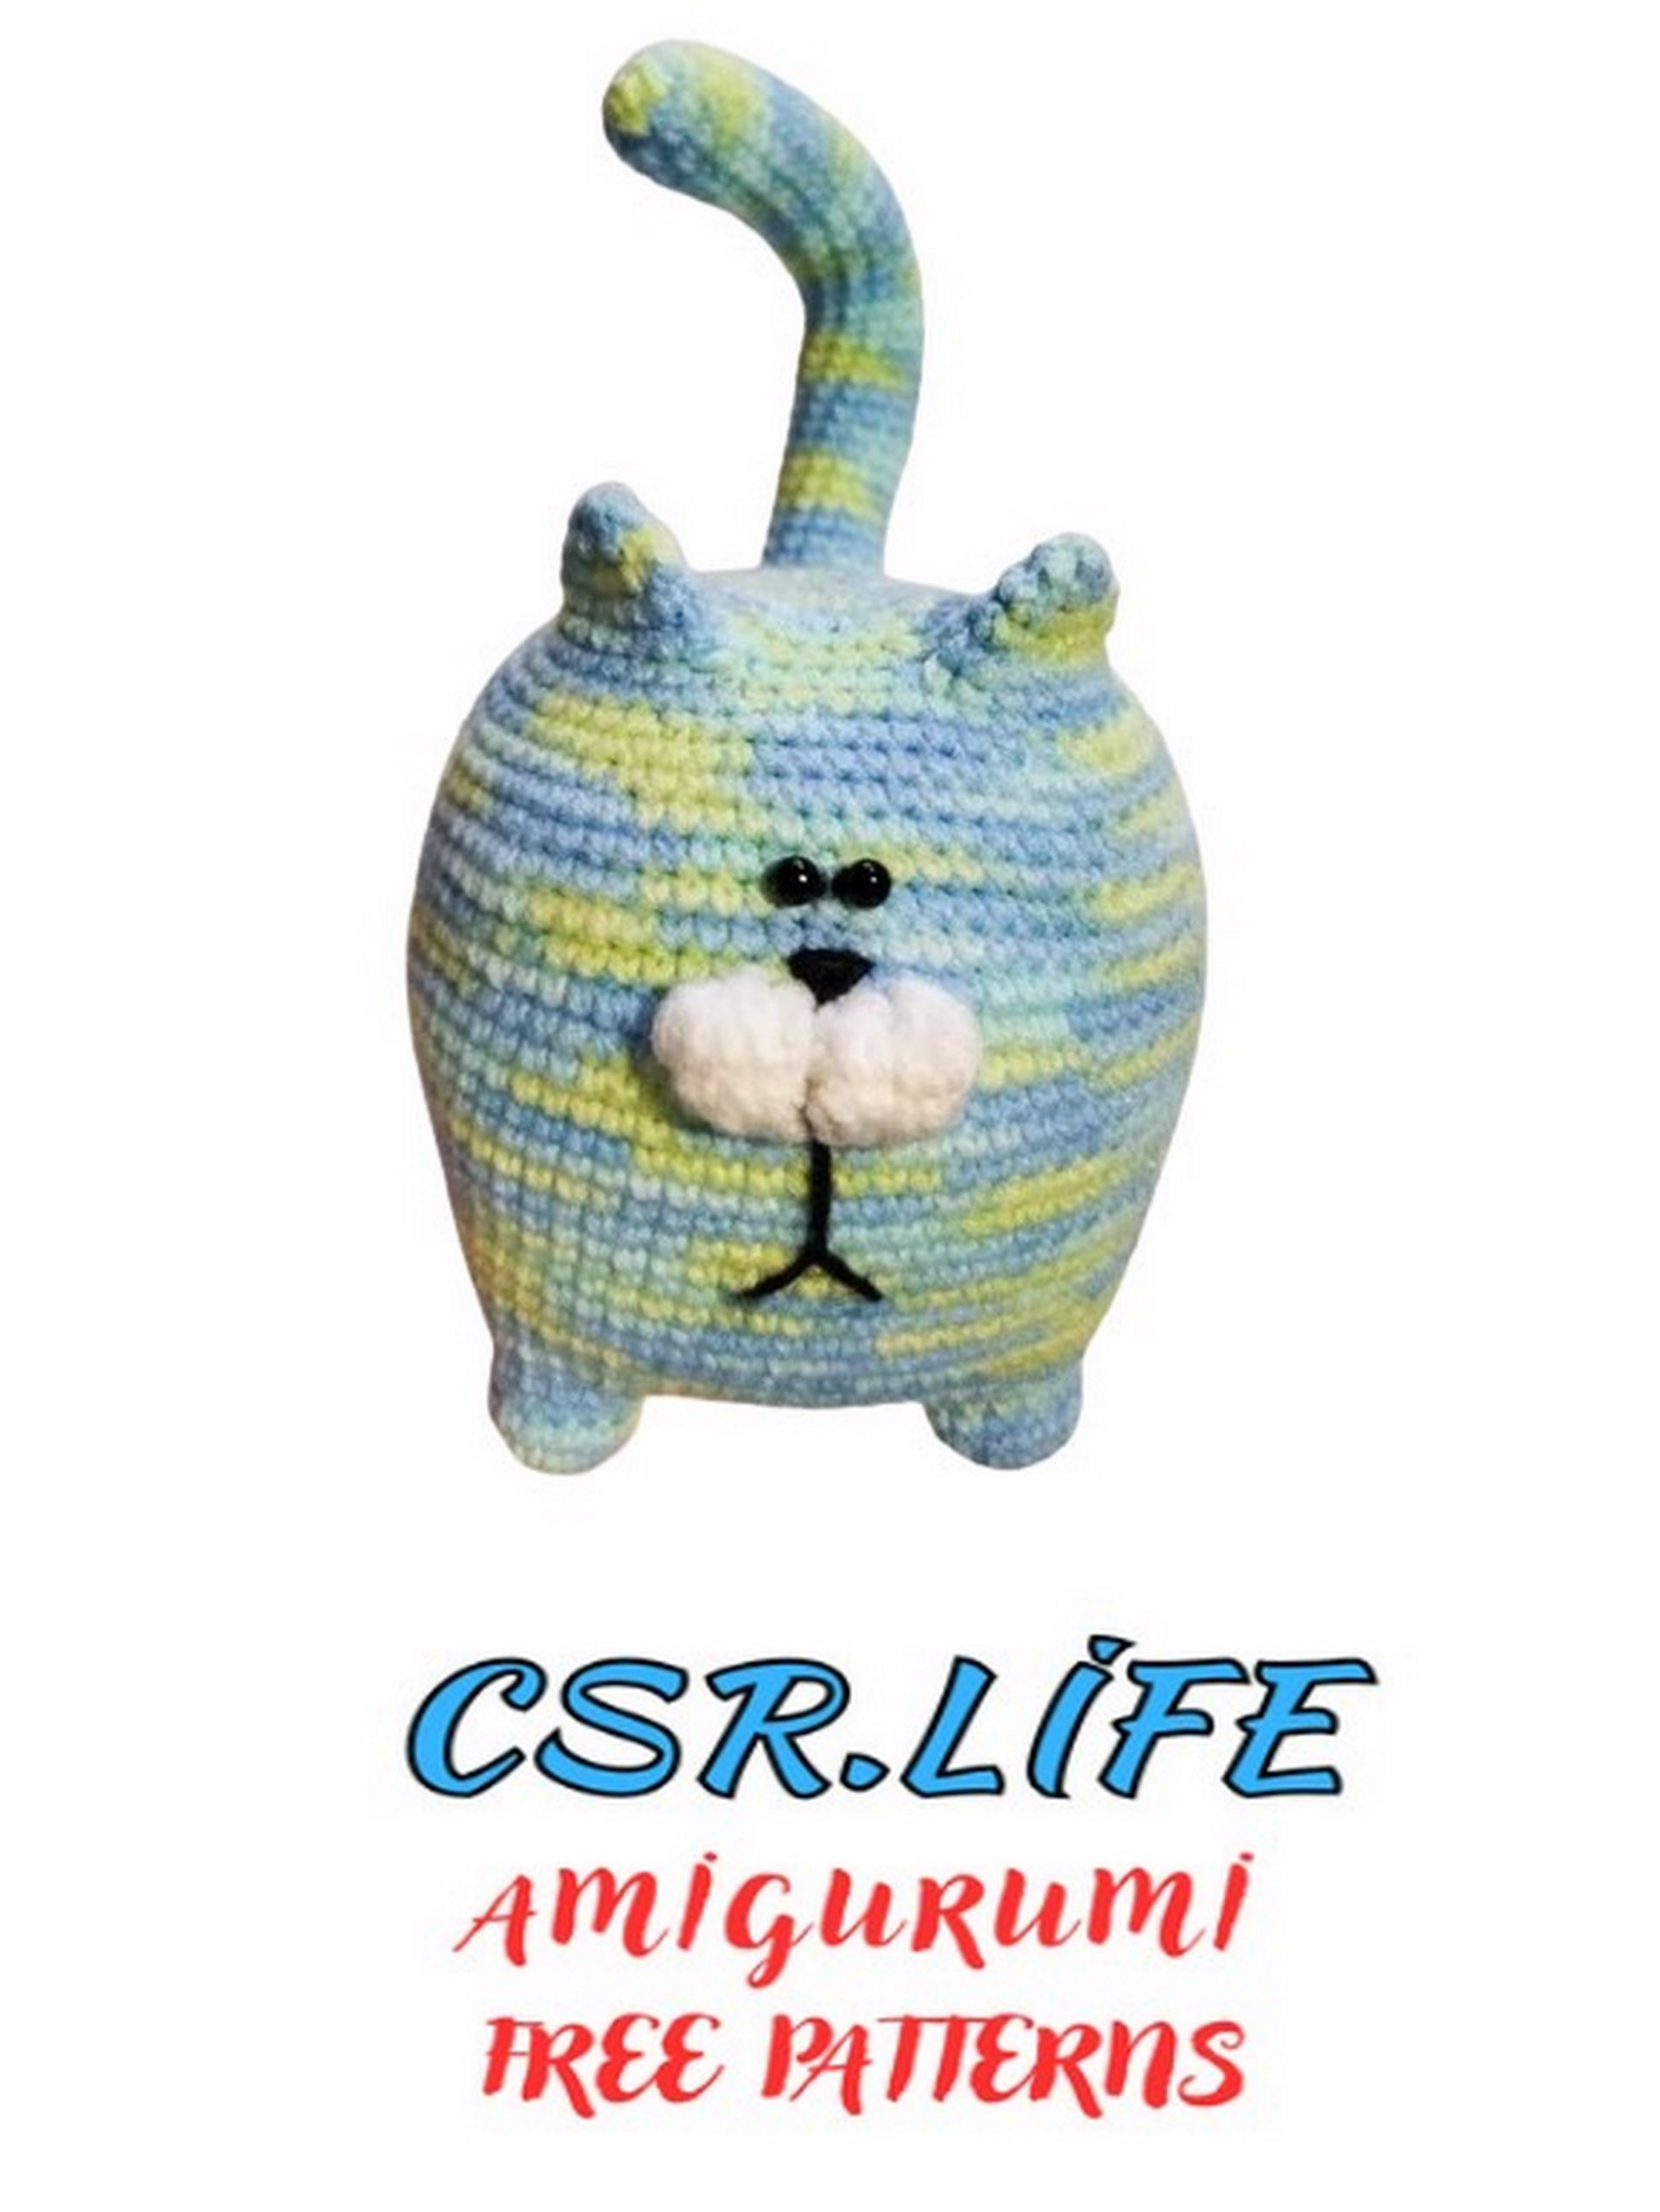
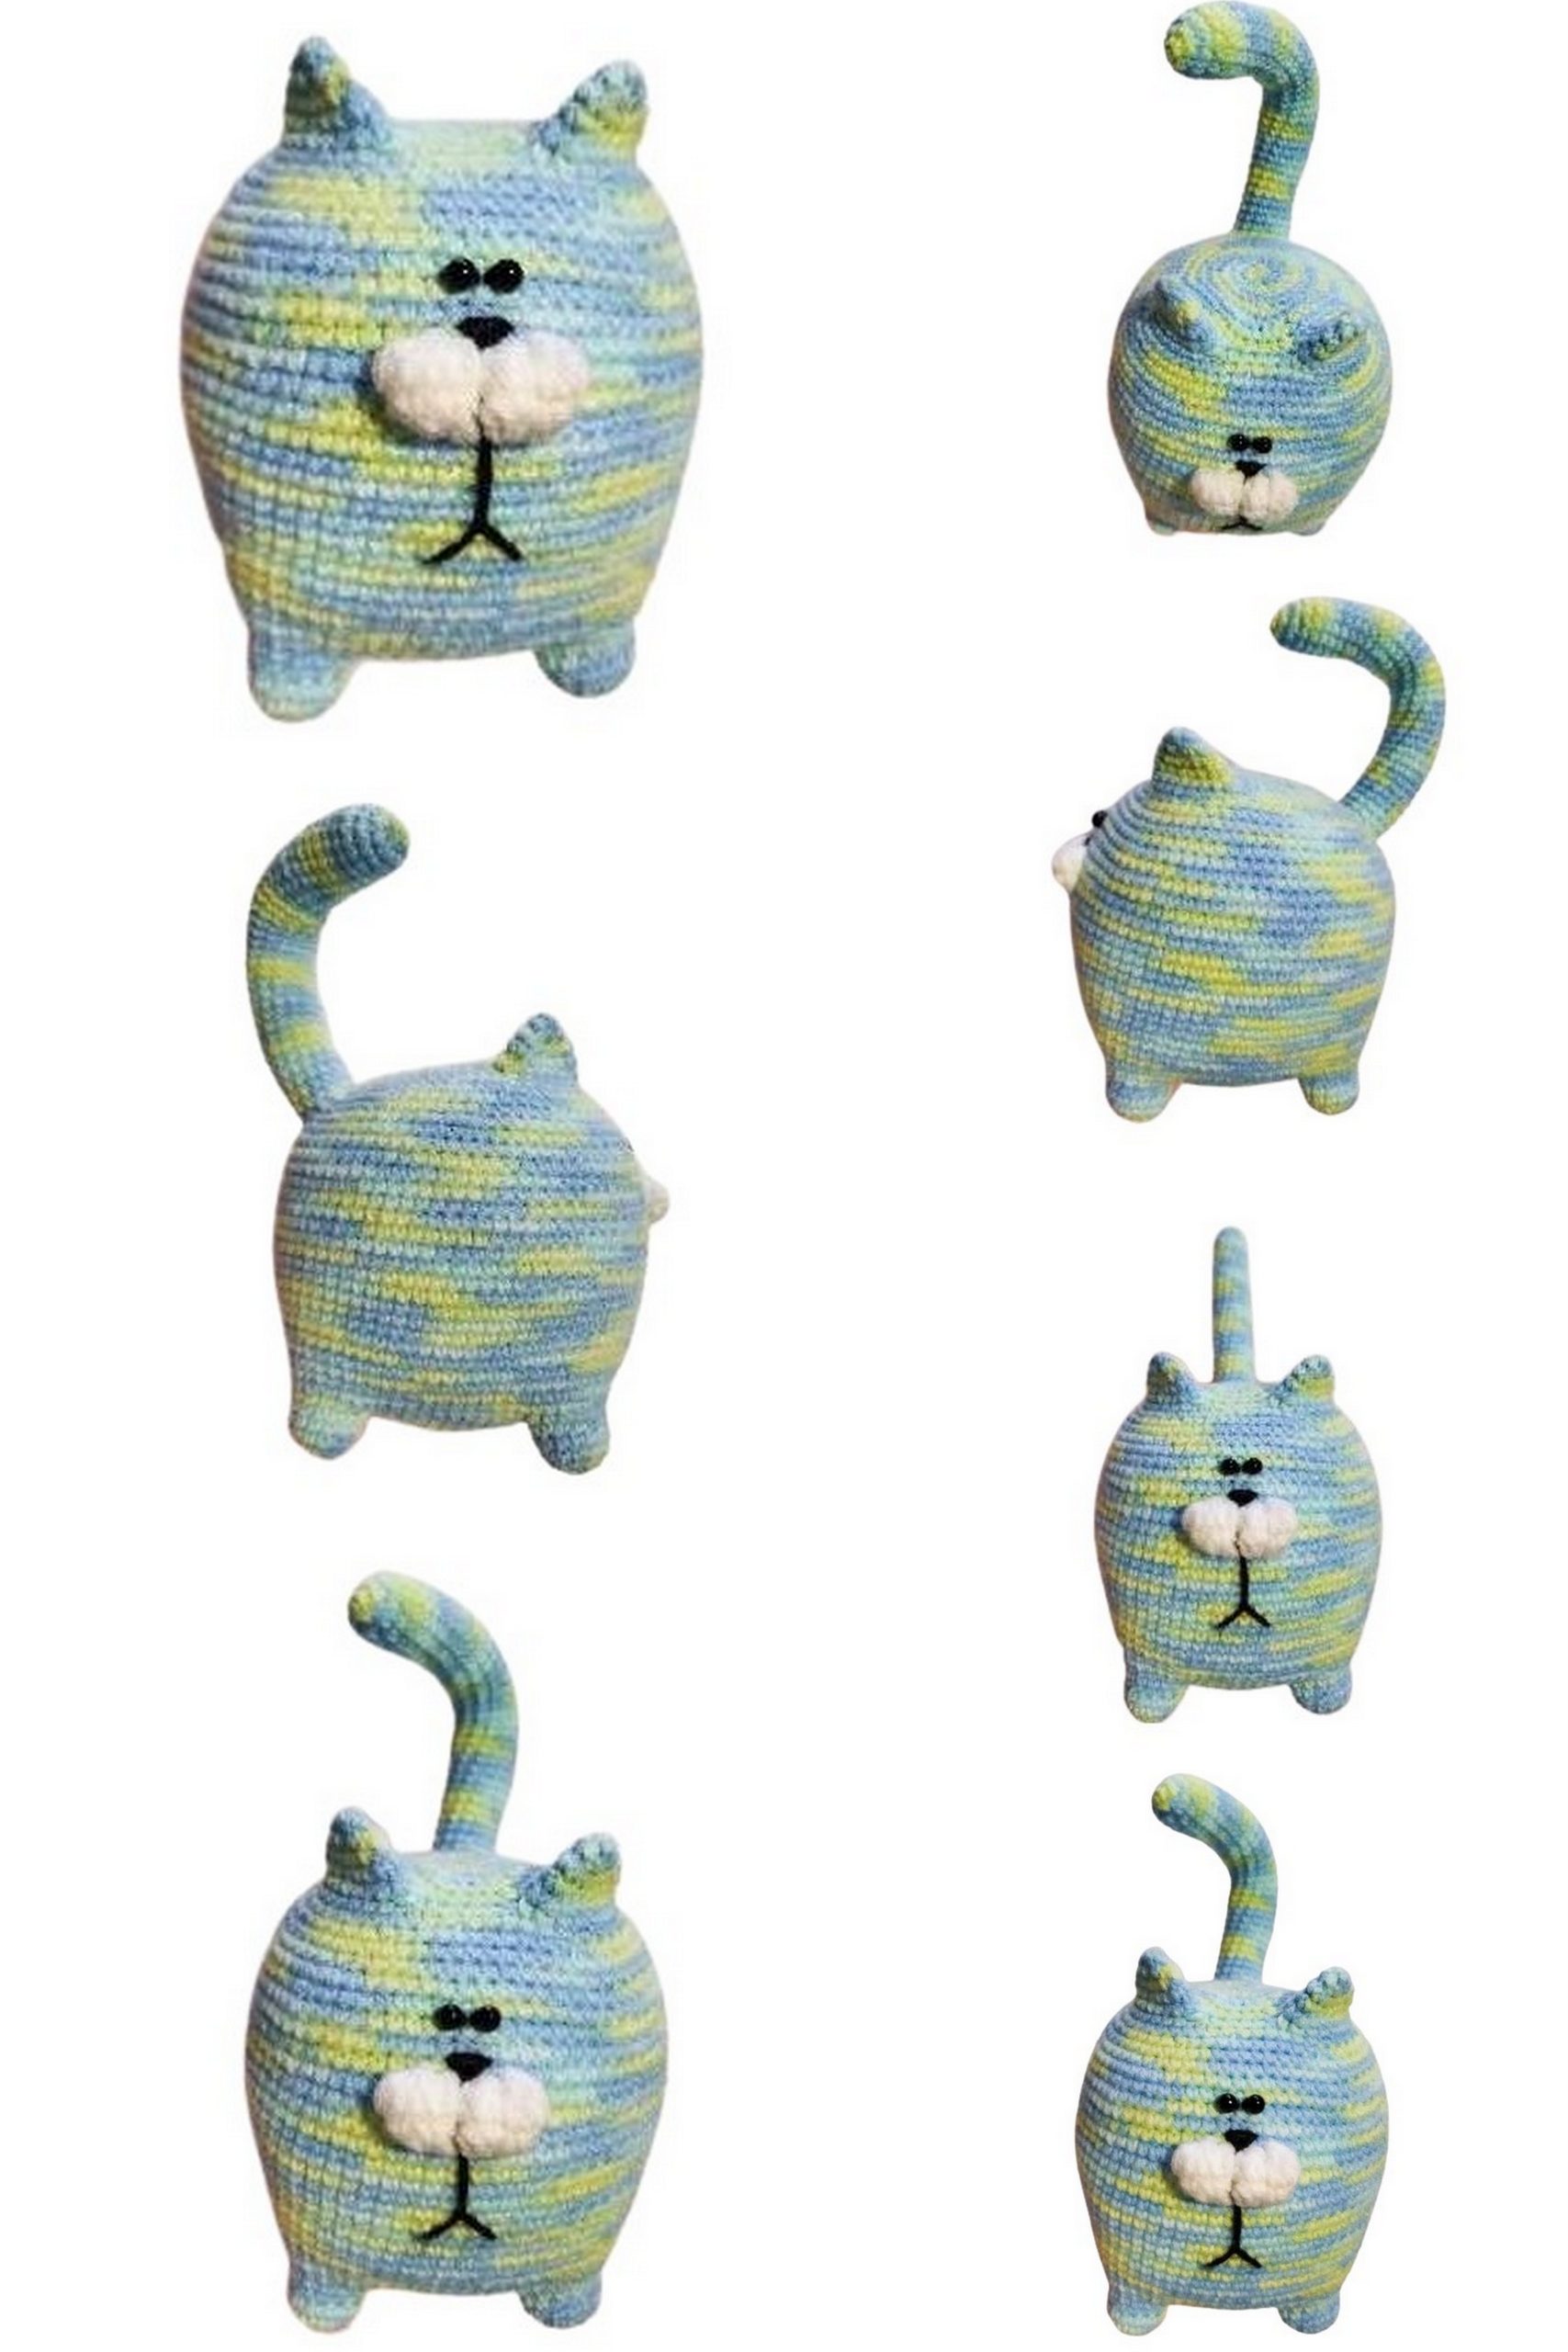
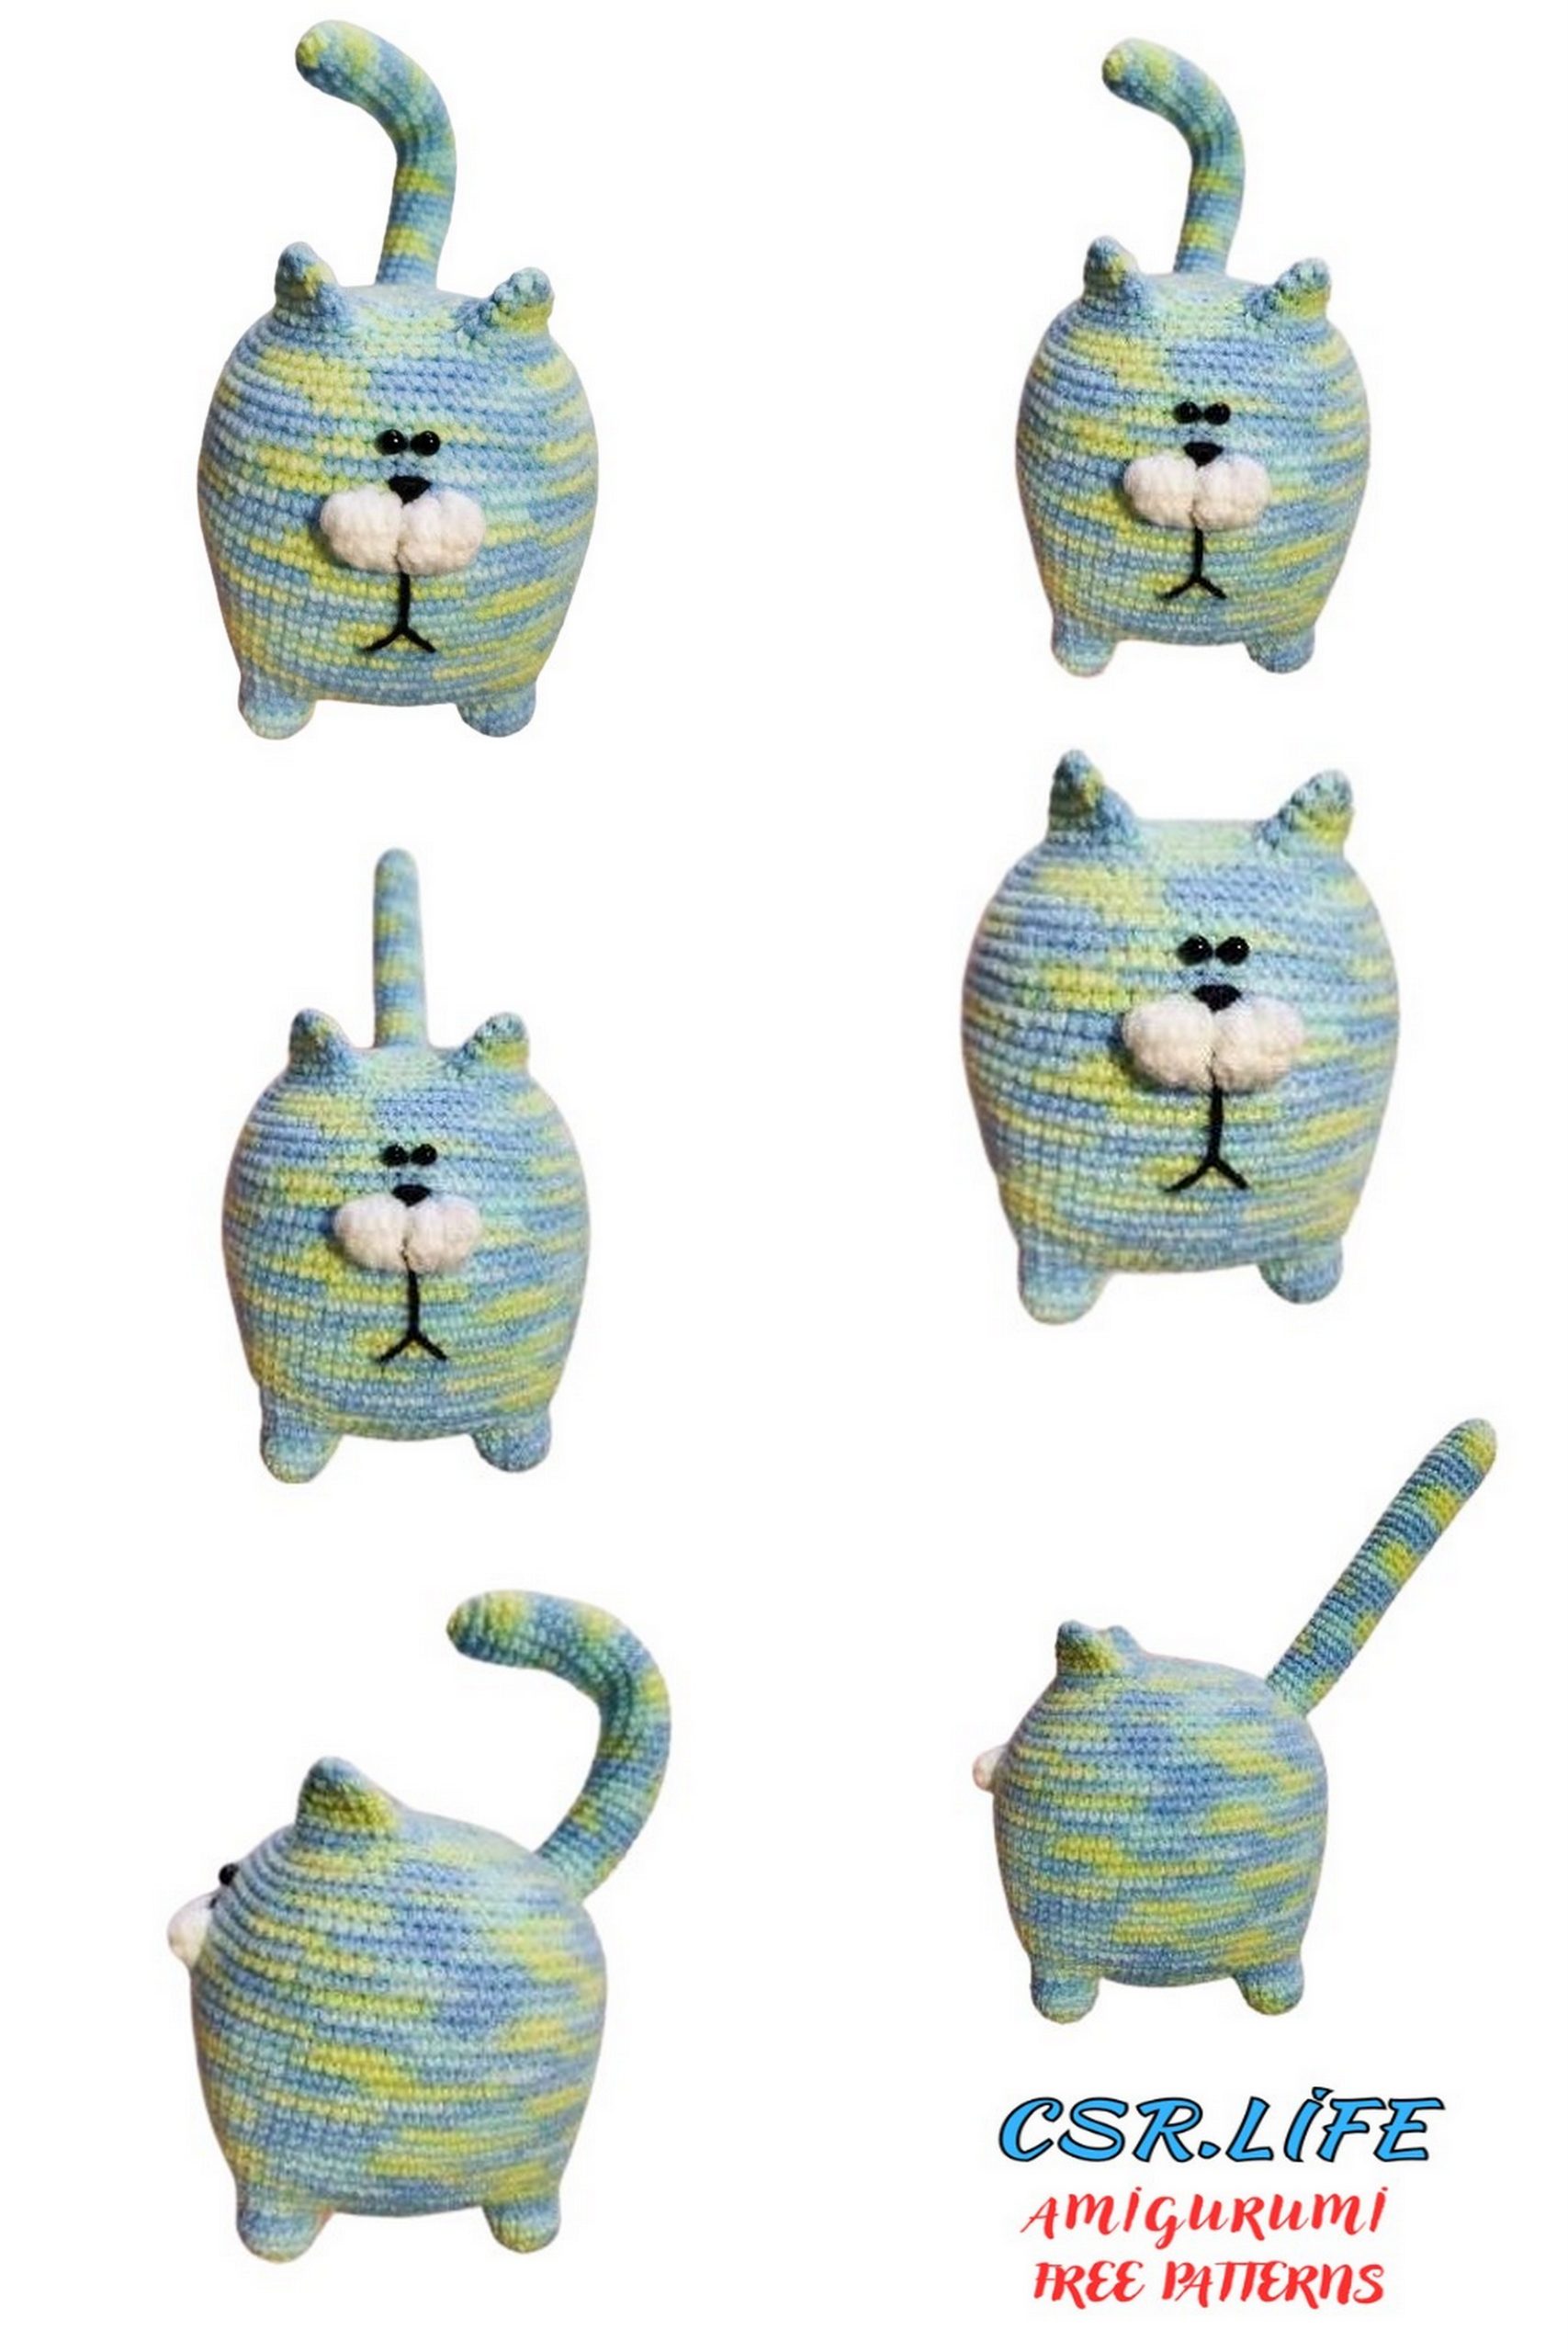
Plump and Playful: Fat Cat Amigurumi Free Crochet Pattern!
Indulge in some adorable crochet fun with our amigurumi free pattern for a chubby and lovable fat cat amigurumi! This delightful project is perfect for cat lovers of all ages who appreciate the charm of a plump feline friend. Whether you’re a crochet novice or an experienced enthusiast, you’ll find joy in creating this cuddly companion with our easy-to-follow instructions and helpful photos. Crochet your own chubby kitty to adorn your home decor, gift to a friend, or simply to bring a smile to your face every day!
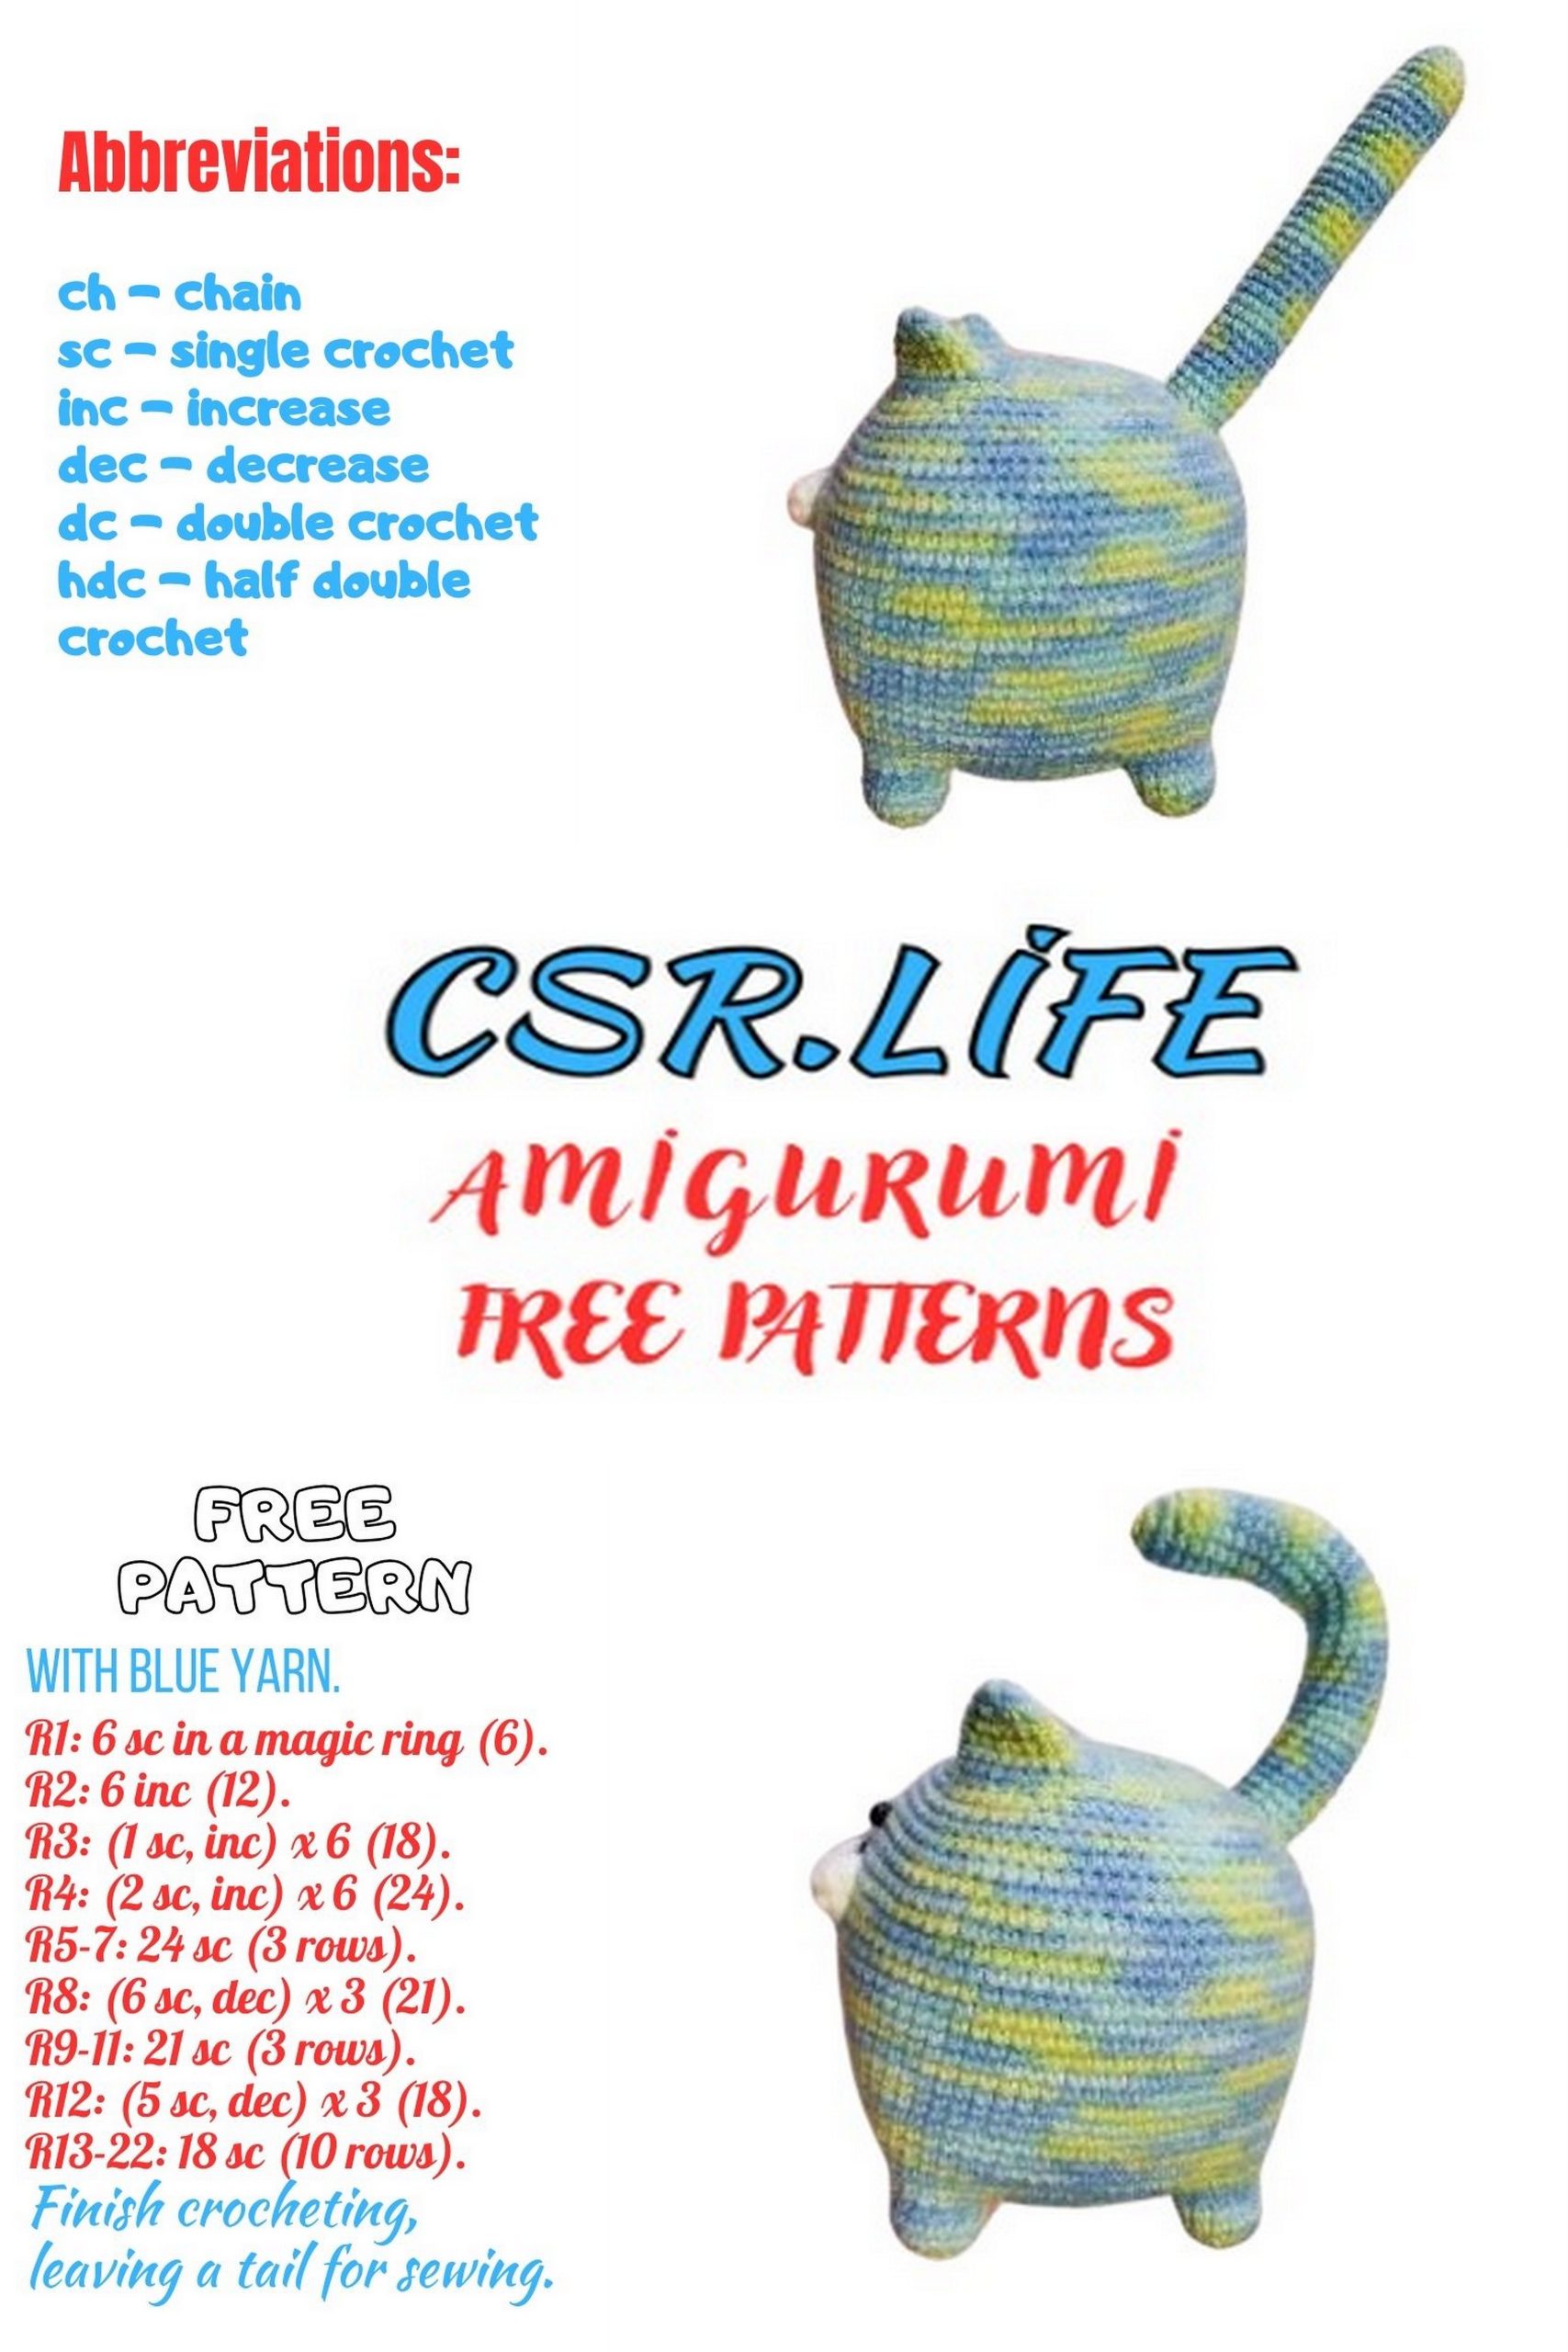
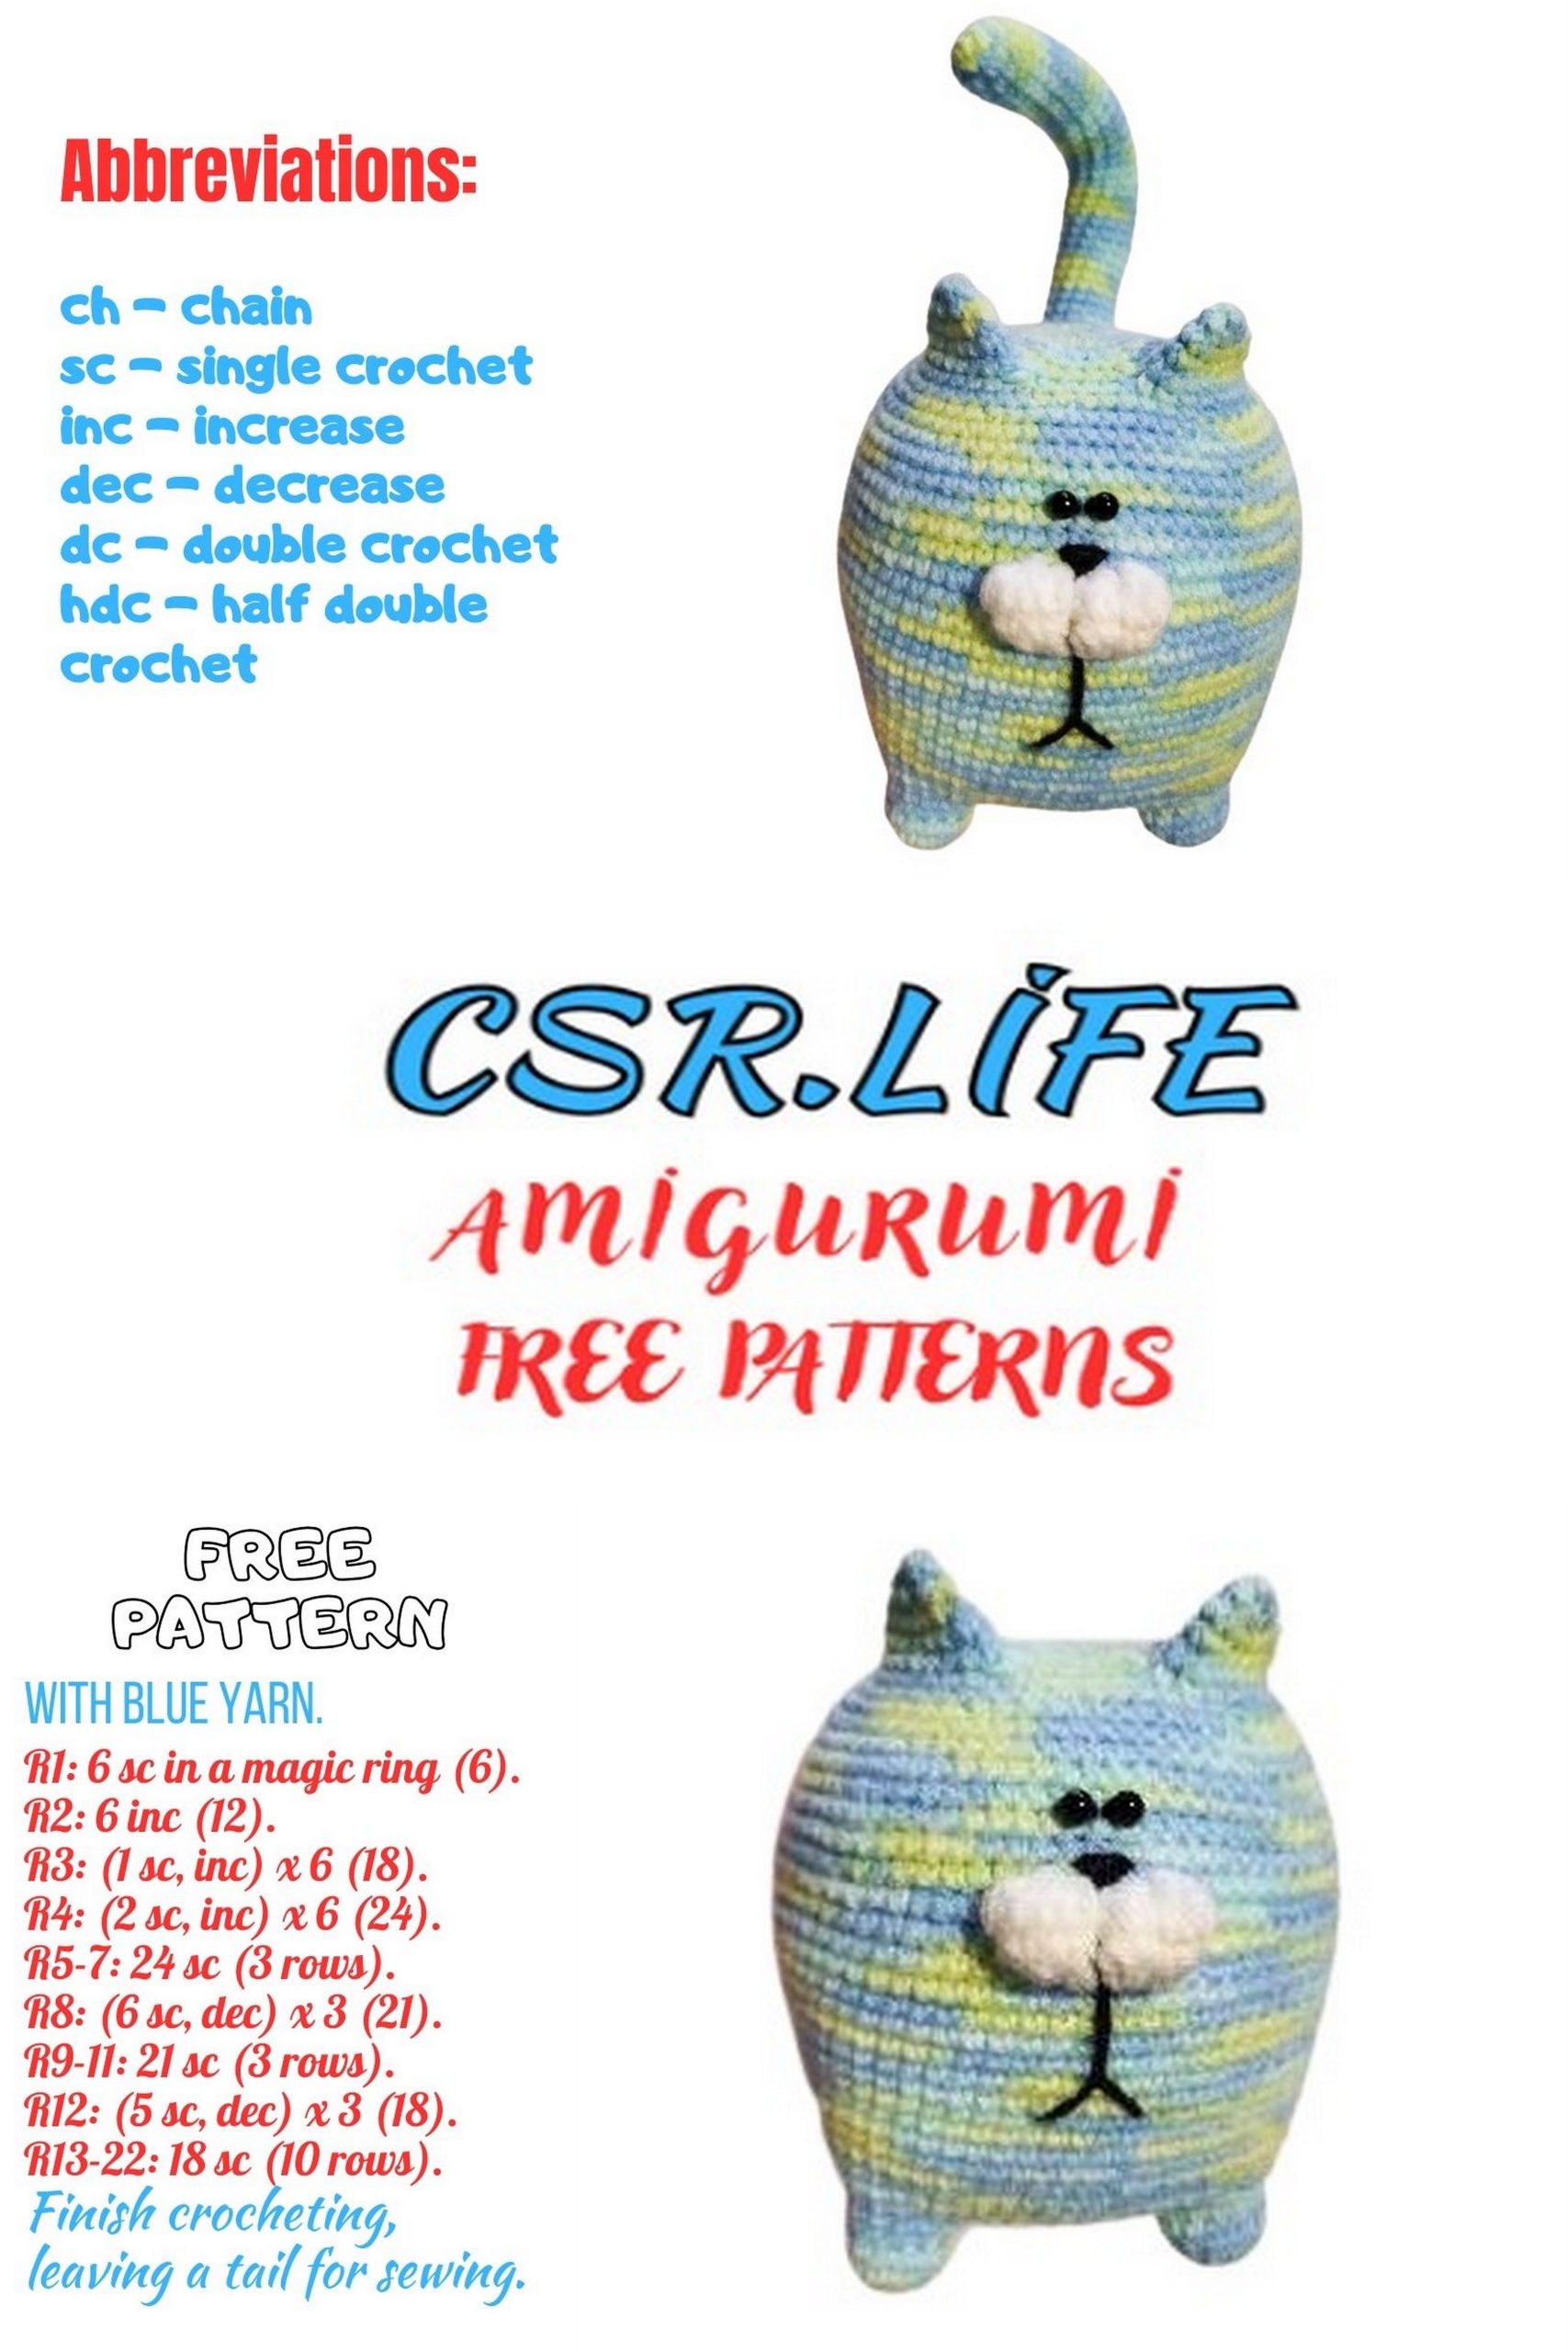
When using the specified materials, you will get a toy that is 9 cm long, 9 cm tall, and 8 cm wide at the front.
Materials used:
“Children’s novelty” yarn 50 g / 200 m (100% high-volume acrylic)
* I have a yellow-blue melange – 25 g
* a little white – for cheeks
* a little black – for weighting and nose
Crochet hook 1.25 mm (I have the most ordinary hook)
2 black beads with a diameter of 3 mm
Hollowfiber
Copper wire with a diameter of 1.5-2 mm for the tail – a piece of 13.5 cm
Long needle with a wide eye, through which your main yarn passes
Scissors
Tailor’s pins
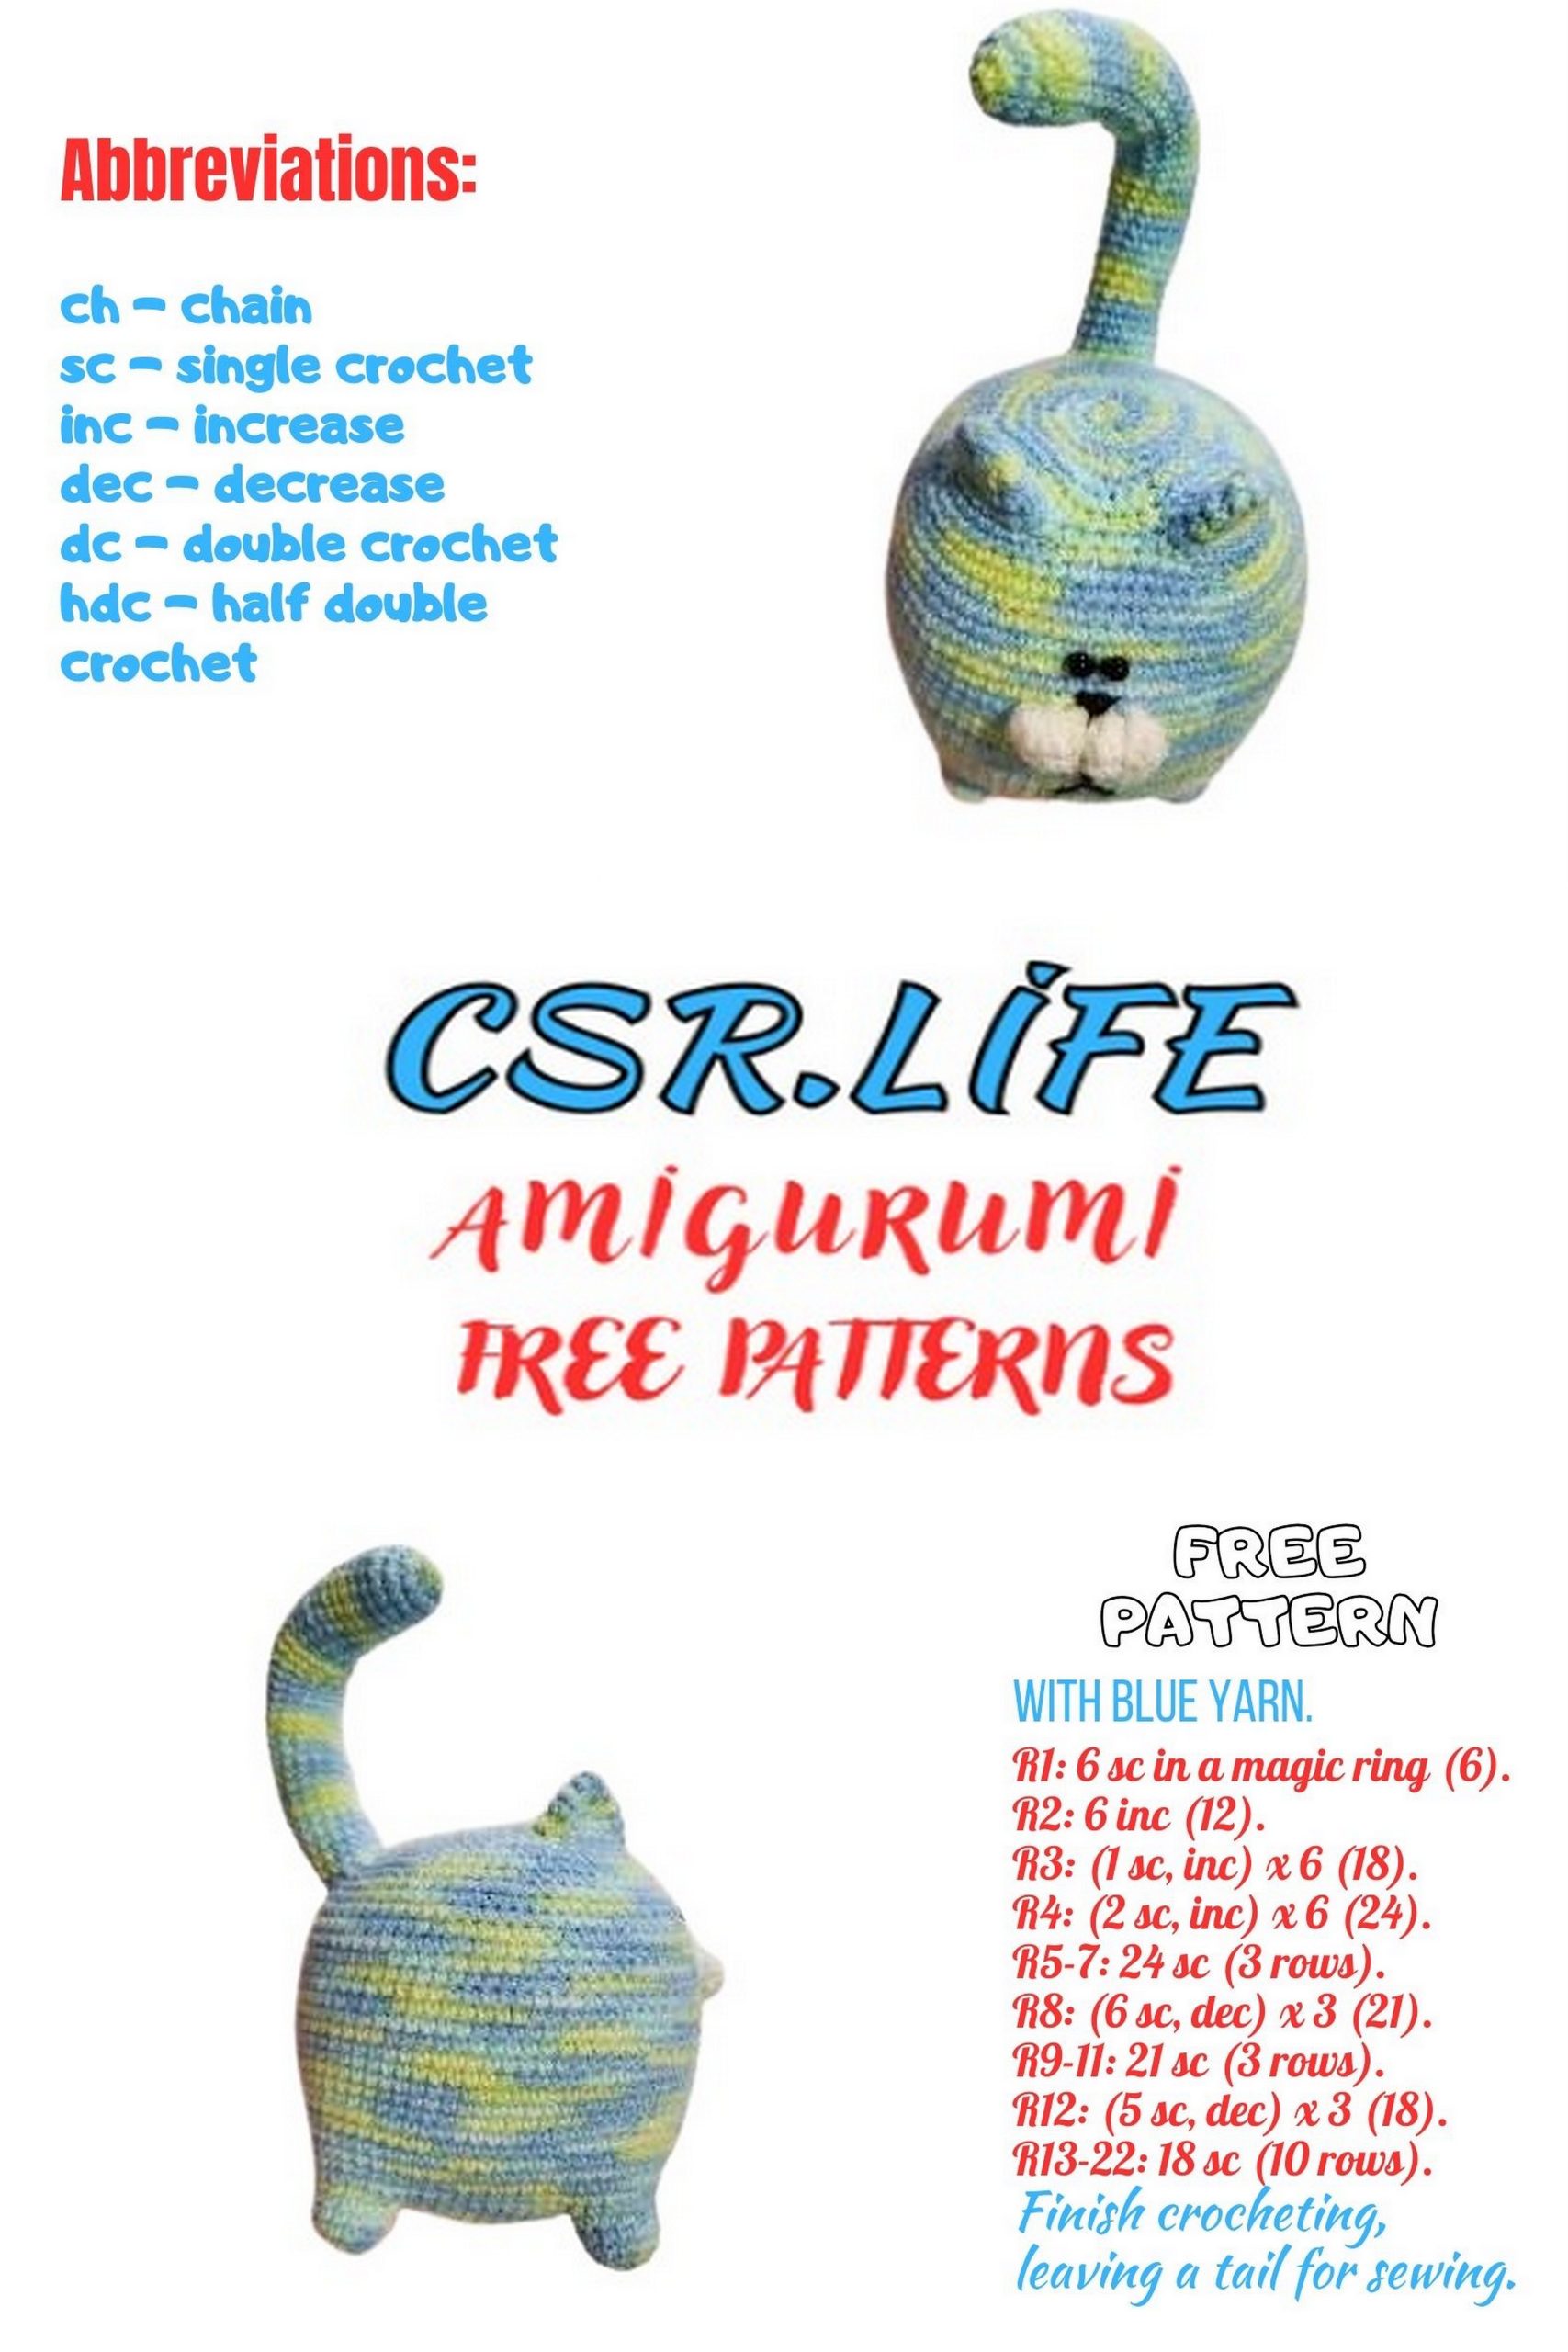
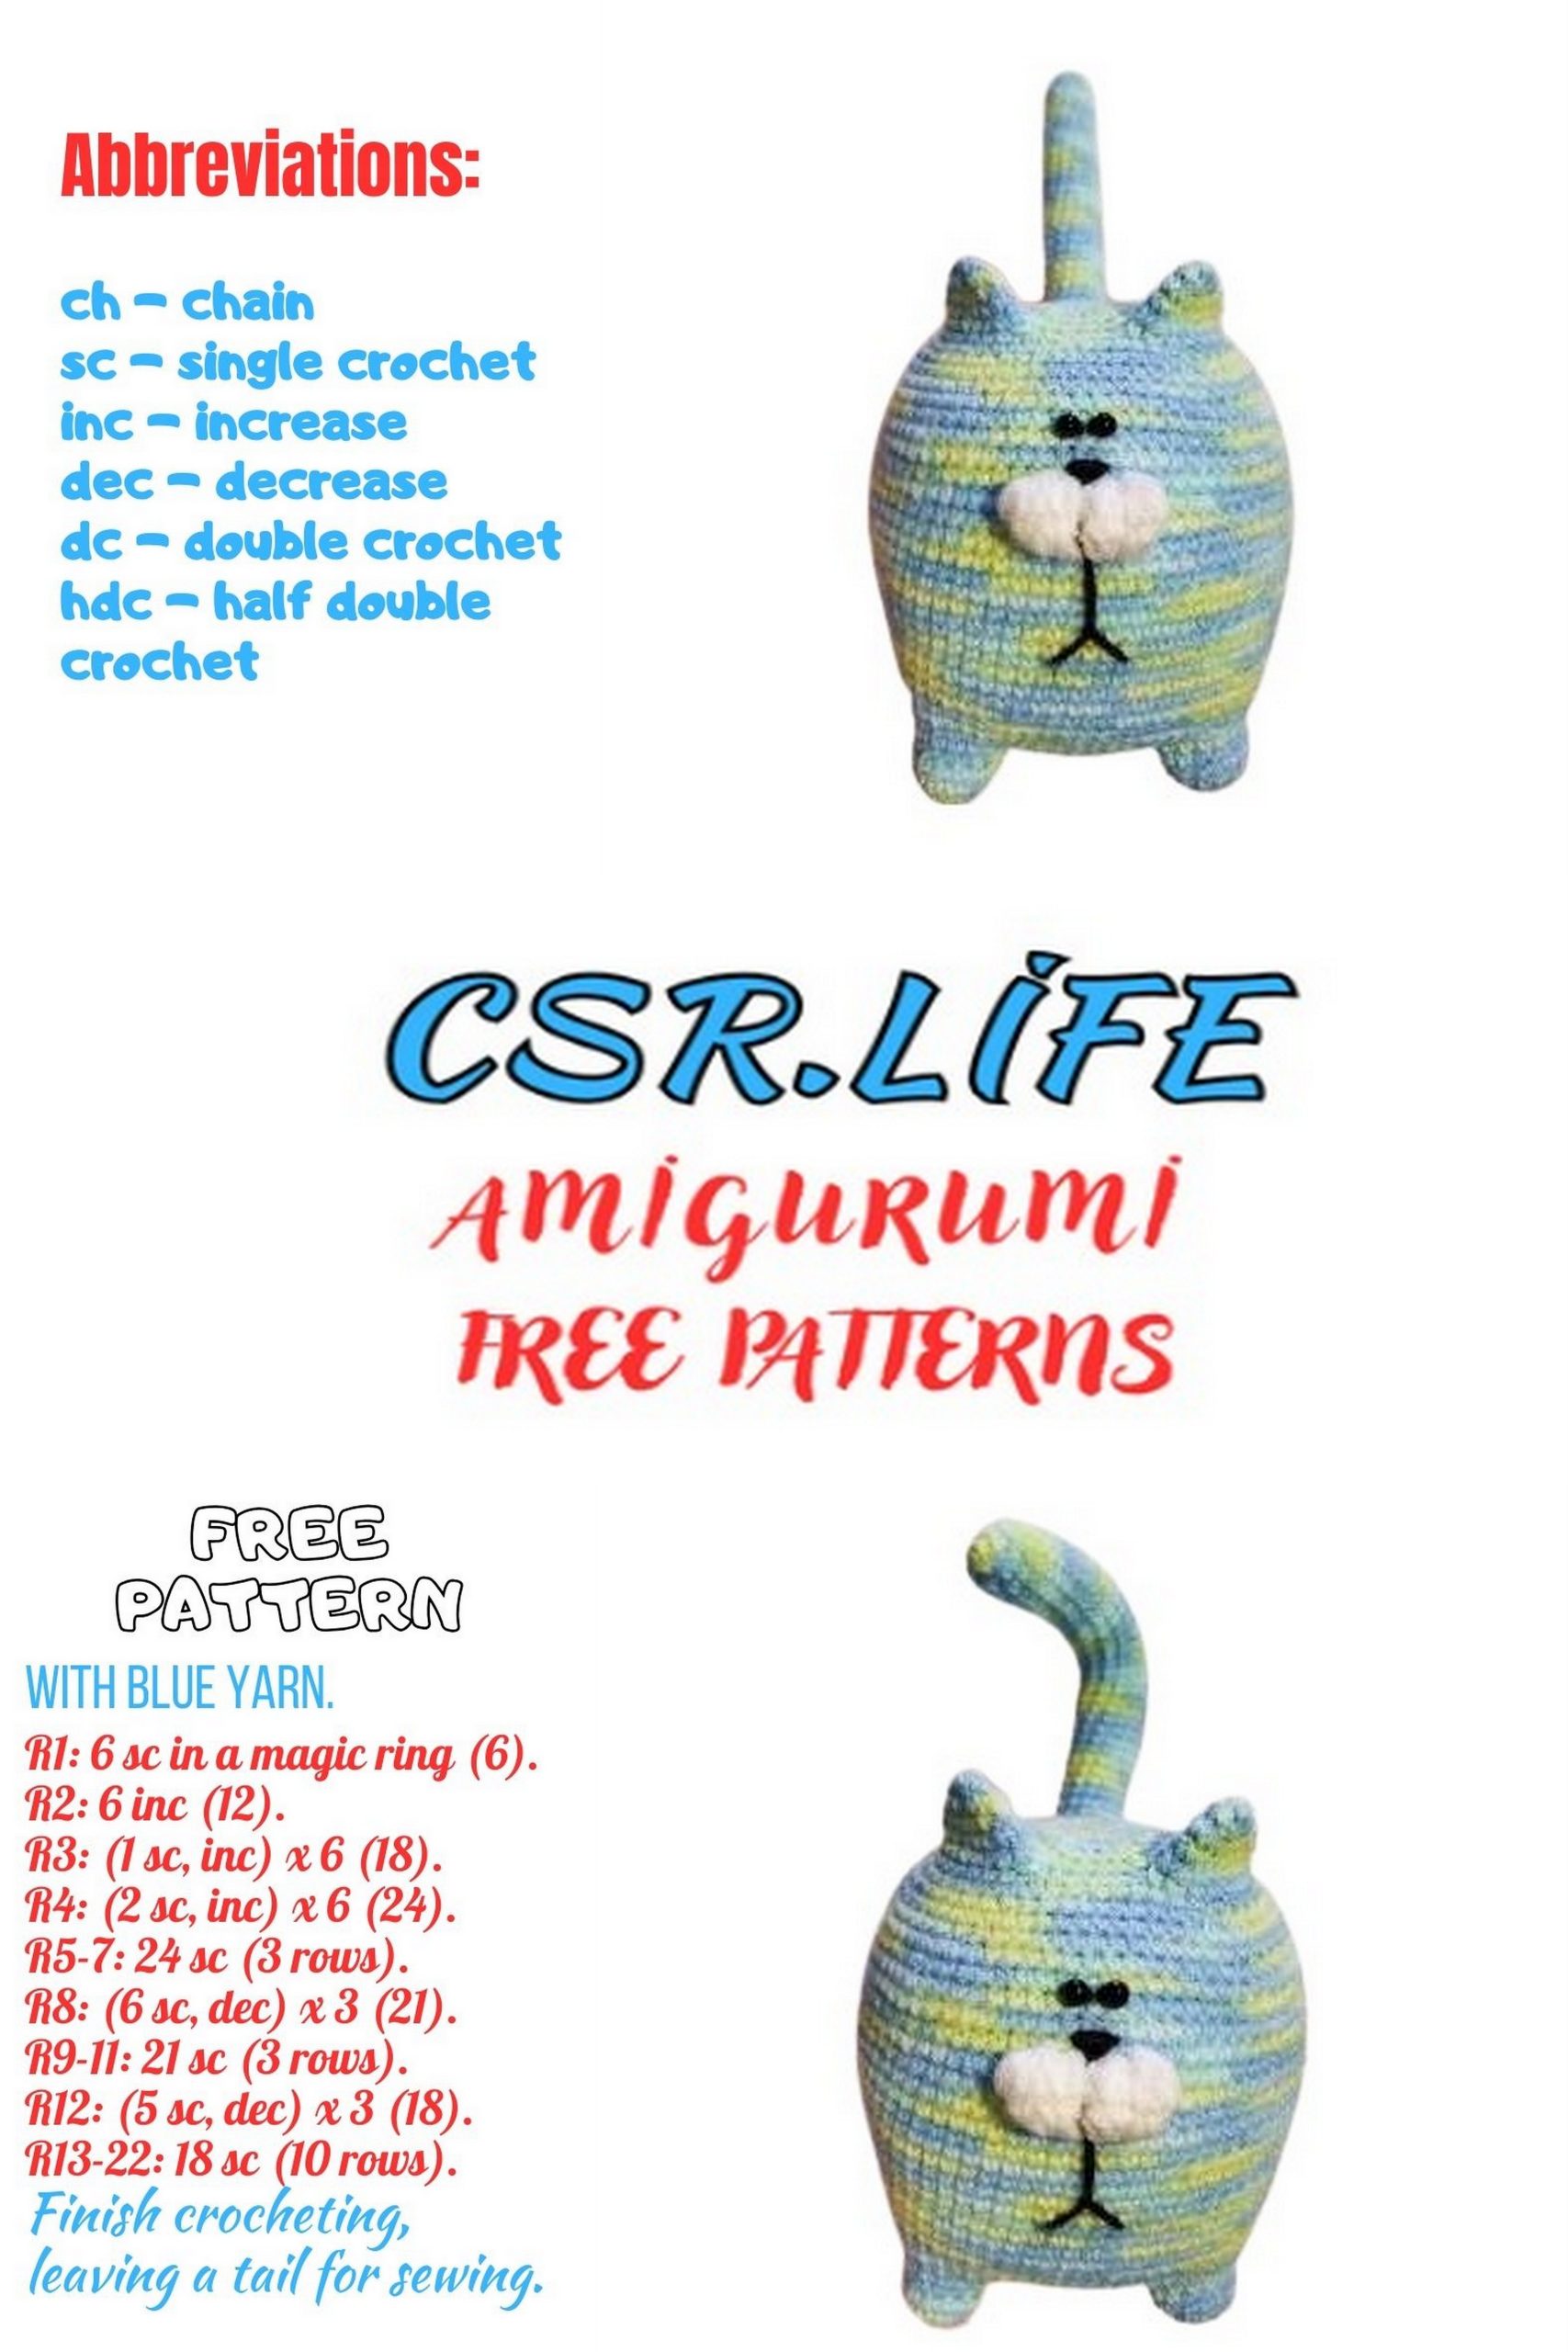
Abbreviations:
When crocheting, decreases will occur, they should be crocheted invisibly, i.e., insert the hook under two front loops, pull the working yarn through them, and crochet two loops together on the hook (this is with regular facial knitting).
MR – magic ring (or 2 ch and in the 2nd from the hook loop, start crocheting)
sc – single crochet
hdc – half double crochet
dc – double crochet
ch – chain stitch
dec – decrease (crochet two loops of the previous row together invisibly)
inc – increase (crochet 2 stitches in 1 stitch of the previous row)
sl st – slip stitch
*2 times, *3 times – number of repetitions of what is in parentheses
at the end of the row after the equal sign = shows the total number of stitches in the row
Note:
The toy does not have sewn details (except for the eyes), the entire toy is crocheted as one piece.
All parts are crocheted in a spiral without lifting chains, unless otherwise indicated.
Crochet tightly, but not too tightly.
In the description, I indicate turning chains (ch) where I made them myself. You should follow your marker.
PATTERN
Paws (4 pieces the same):
1: 6 sc in MR = 6
2: 6 inc = 12, sl st
3: (3 sc, inc) * 3 = 15
4-5: 15 sc each = 15, after the 5th row – sl st, fasten off
Body
Crochet from bottom to top, place marker at the back in the middle.
1: 4 ch, hdc in 2nd ch from hook, sc, 3 sc in one ch, sc, 2 sc in the last ch = 8
2: 2 inc, sc, 3 inc, sc, inc = 14, sl st
3: (sc, inc) * 2, sc, (sc, inc) * 3, 2 sc, inc = 20, sl st
4: (sc, 2 inc, 4 sc, 2 inc, sc) * 2 = 28
5: sc, inc, 8 sc, (sc, inc) * 3, 8 sc, (sc, inc) * 2 = 34
6: (sc, inc) * 2, 11 sc, (sc, inc) * 3, 12 sc, inc = 40
7: (2 sc, inc, sc, inc, 10 sc, inc, sc, inc, 2 sc) * 2 = 48
8: (3 sc, inc, 2 sc, inc, 10 sc, inc, 2 sc, inc, 3 sc) * 2 = 56
9: (4 sc, inc, 18 sc, inc, 4 sc) * 2 = 60, sl st, align marker, attach legs in the next row
10: (4 sc, 6 sc with leg (place leg on top of crochet, insert hook from inside the leg), 10 sc, 6 sc with leg, 4 sc) * 2 = 60: Marker at the back in the center
11: (3 sc, inc, on leg – 9 sc, inc, 8 sc, inc, on leg – 9 sc, inc, 3 sc) * 2 = 80
12: 10 sc, inc, 17 sc, inc, 3 sc, inc, 14 sc, inc, 3 sc, inc, 17 sc, inc, 10 sc = 86
13-26: (14 rows) each 86 sc = 86, after the 26th row – 3 sl st. Align marker.
In the next row, crochet cheeks with white yarn.
27: 41 sc, switch to white yarn, don’t cut the main one, but crochet from behind, (5 sl st in 1 stitch) * 4, switch to main yarn, cut white, 41 sc = 102
28: 41 sc, switch to white yarn, don’t cut the main one, but crochet from behind, (dec from 5 sl st with a common vertex) * 4, switch to main yarn, cut white, 41 sc = 86
29-31: (3 rows) each 86 sc = 86
32: Dec, 6 sc, dec, 23 sc, (dec, 8 sc) * 2, dec, 23 sc, dec, 6 sc = 80
33: 80 sc = 80, align marker. Make a hole for the tail in the next row
34: 7 sc, dec, (10 sc, dec) * 2, 14 sc, (dec, 10 sc) * 2, dec, 4 sc, 3 ch, skip 3 stitches = 74
35: 3 ch, skip 3 stitches, 68 sc, 3 sc in ch for back loops = 74, move marker
36: 3 sc in ch for back loops, sc, dec, 4 sc, dec, 11 sc, dec, 6 sc, dec, 8 sc, dec, 6 sc, dec, 11 sc, (dec, 4 sc) * 2 = 66, sl st
37: (dec, 9 sc) * 6 = 60, make ear holes in the next row
38: (7 sc, dec) * 2, 8 ch, skip 8 stitches, dec, 4 sc, dec, 8 ch, skip 8 stitches, (dec, 7 sc) * 2 = 54
Stuff each paw tightly. Then stuff the entire body tightly.
39: (6 sc, dec) * 2, 7 sc in ch for back loops, dec (1 stitch from ch + 1 stitch from base), 4 sc, dec (1 stitch from base + 1 stitch from ch), 7 sc in ch for back loops, on base – (dec, 6 sc) * 2 = 48
40: 3 sc, dec, (6 sc, dec) * 5, 3 sc = 42
41: (5 sc, dec) * 6 = 36
42: 2 sc, dec, (4 sc, dec) * 5, 2 sc = 30, stuff tightly
43: (dec, 3 sc) * 6 = 24
44: (dec, sc) * 8 = 16, stuff tightly
45: 8 dec = 8, remove loop from marker, cut thread 20 cm long.
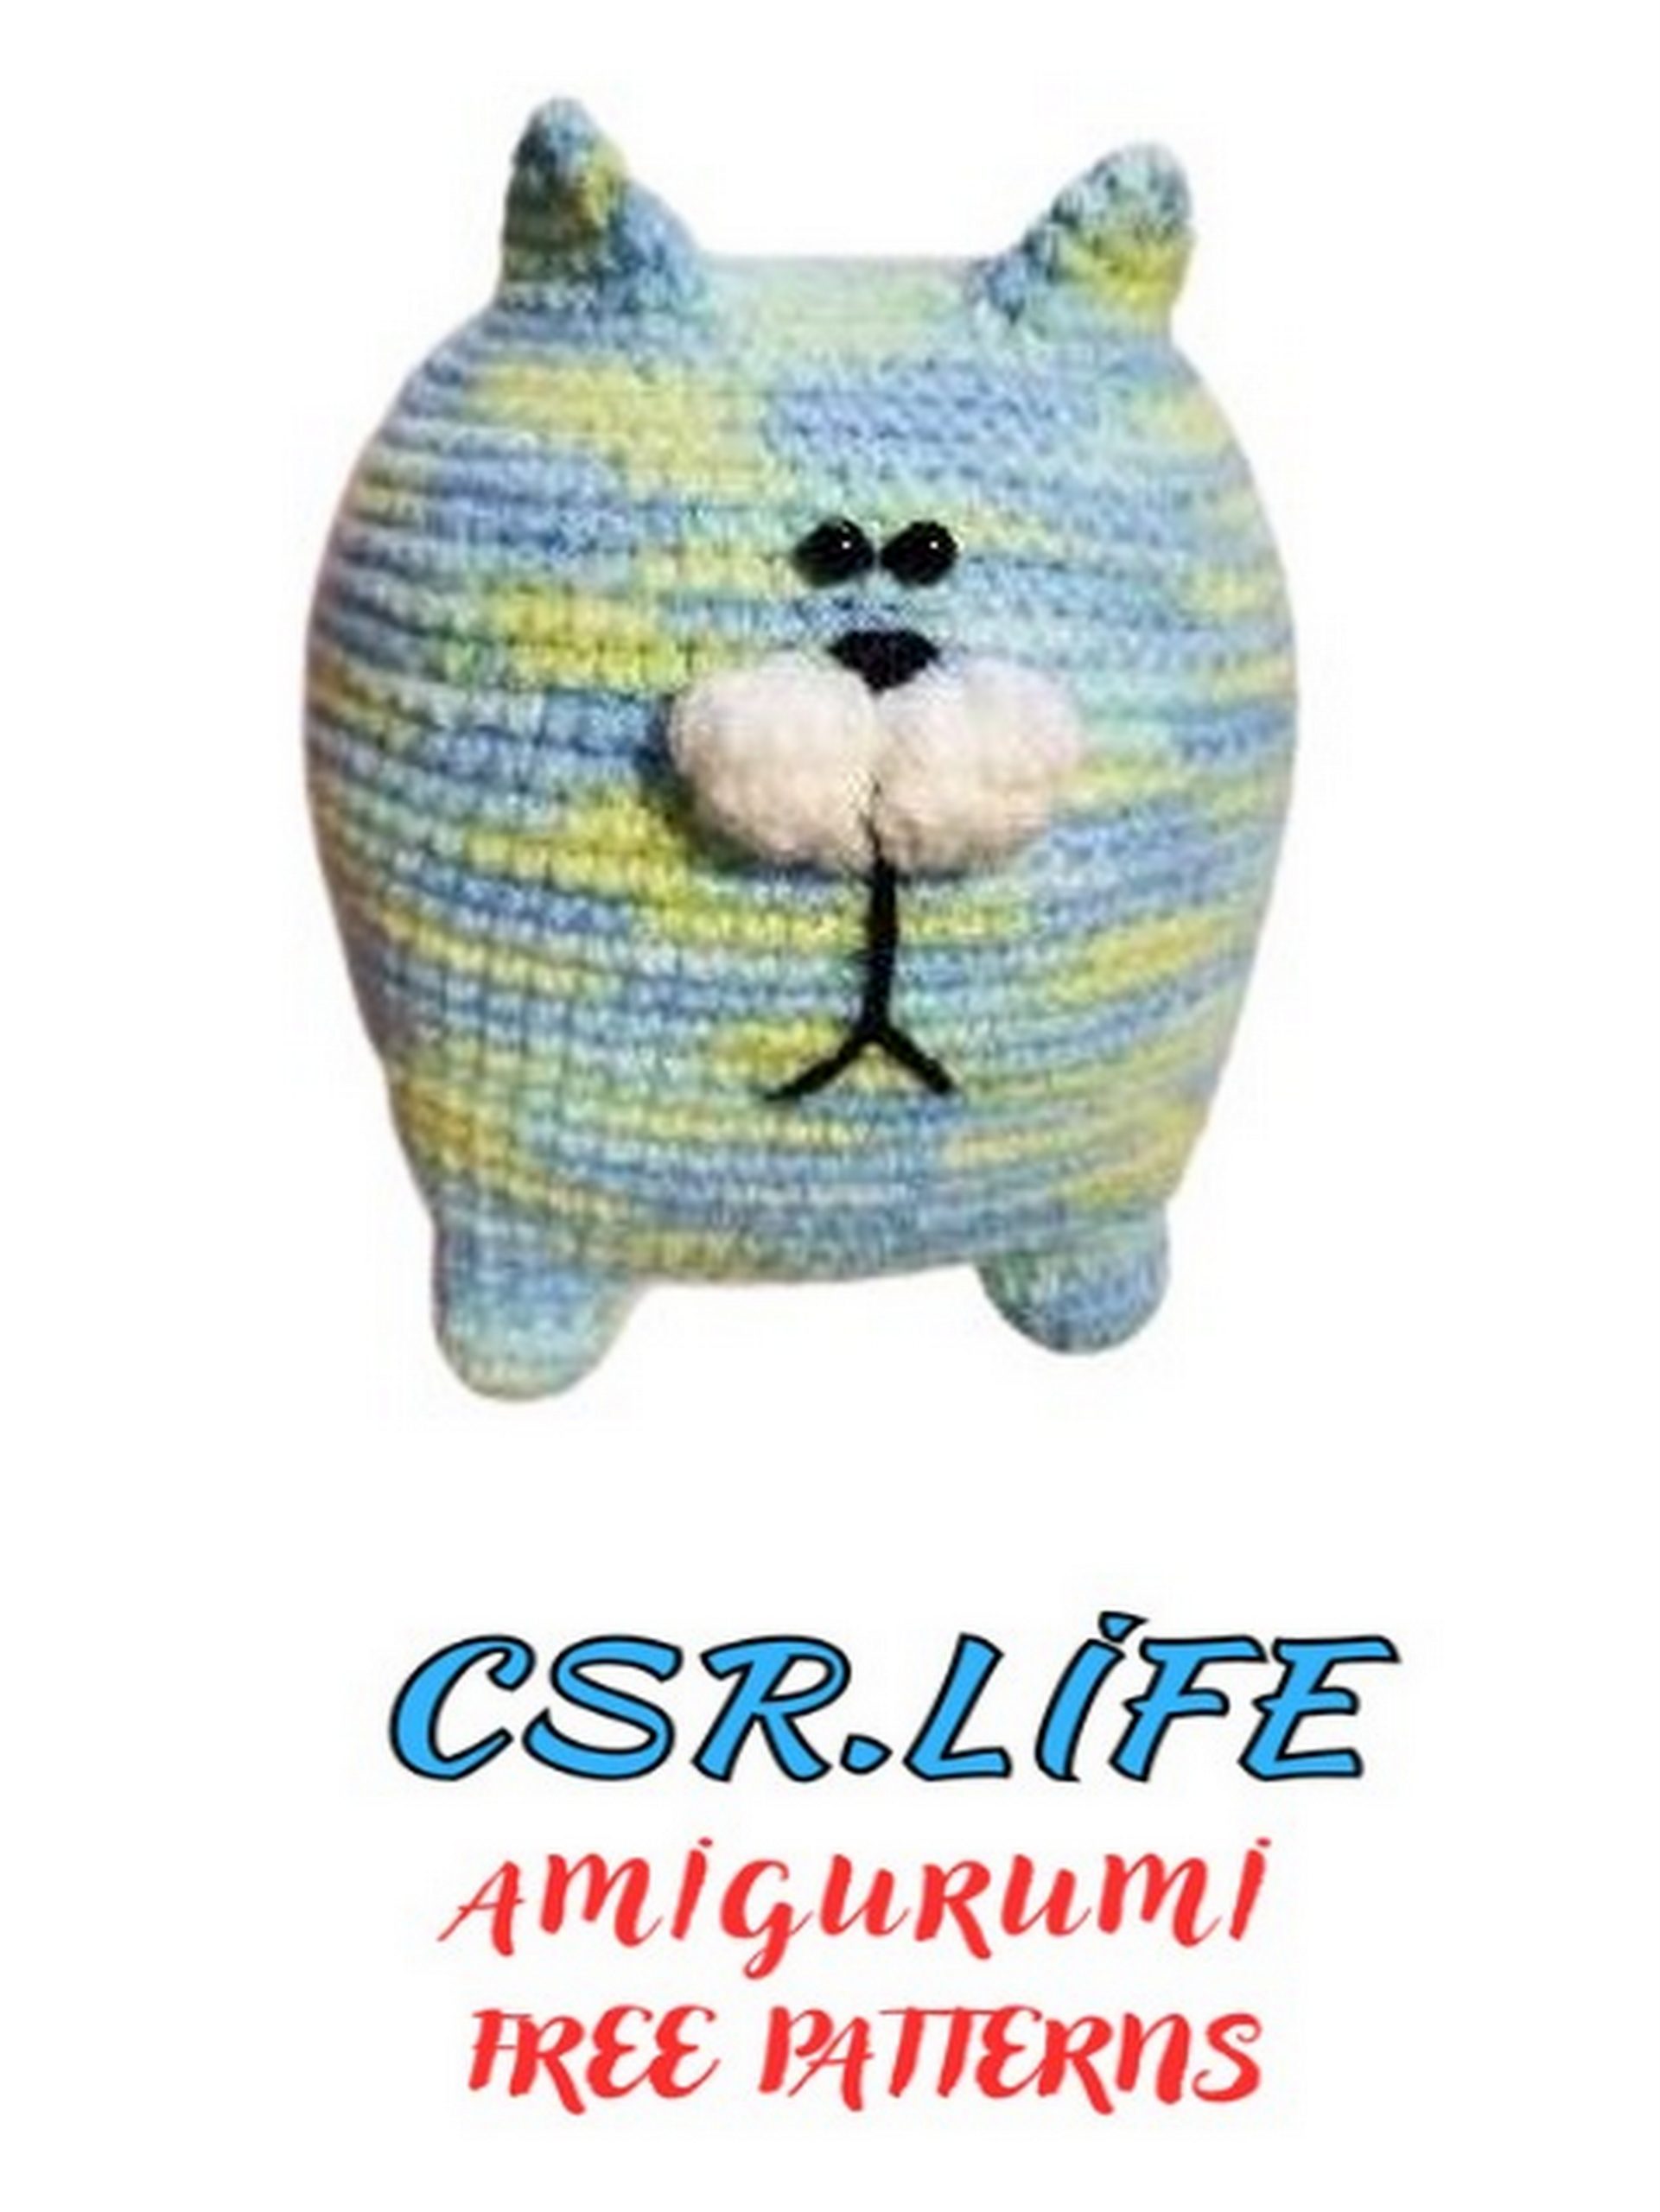
Make the face.
Take black acrylic yarn 60 cm long.
1: Leave a tail of yarn 10 cm long at the beginning. Insert the needle into the hole on the back, pull it out from the bottom middle of the face.
2: Insert the needle from the top of the face in the middle (the yarn is on top), pull it out again from the bottom. Tighten the yarn. The white detail should be divided in half.
3: Repeat steps 1 and 2 two more times, each time pulling the yarn. Leave the yarn at the bottom.
4: Mark 3 points at the bottom with pins. From the bottom middle of the white detail, count down 5 rows, put a pin. From this pin, count down 2 rows and to the sides by 2 stitches, put pins.
5: Insert the needle into the top point, pull it out to the left bottom point. Pass the needle under the stitch, insert the needle into the right point.
6: Pull the needle out to the top middle of the white detail. Tighten the yarn.
7: Embroider the nose on 1-2 stitches on the main fabric close to the white detail.
8: When the nose is embroidered, pull the needle to the bottom middle of the white detail. Insert the needle into the top middle and pull it out of the hole on the back.
9: Pull the yarn tails so that the white detail is slightly tightened. Tie a few knots. Cut the threads.
*** If your yarn passes through the bead, do not cut it, but sew on the bead eyes. Tie the tails in the hole on the back, then cut them.
*** If your yarn is not suitable, sew on the beads with another thread.
I like it when the eyes are close to each other. Do not glue eyes with movable pupils, it cheapens your work!
10: Stuff tightly from the top. Remove the loop from the marker, tighten the hole, hide the thread in the crochet.
Crochet ears (2 pieces the same):
1: Attach the thread from behind in the middle – ch + sc here; 3 sc; between rows – 1 sc; on the front side – 8 sc; between rows – 1 sc; from behind – 4 sc = 18
2: 18 sc = 18
3: 4 sc, dec, (2 sc, dec) * 2, 4 sc = 15
4: (3 sc, dec) * 3 = 12: Stuff the detail through the ear, do not stuff the ear.
5: 6 dec = 6, tighten the hole, hide the thread.
Repeat for the other ear.
Stuff another detail through the tail hole.
Crochet the tail.
Bend a loop 0.5 mm on one end of the wire, wrap the entire wire with tape.
1: Attach the thread from behind in the middle – ch + sc here; 2 sc; between rows – 1 sc; in front – 6 sc; between rows – 1 sc; from behind – 2 sc, hdc = 15
2-3: Each 15 sc = 15, stuff the body.
4-6: (3 rows) each 15 sc = 15: Insert the wire with the loop up, leave a tail of 8 cm outside. Stuff the tail tightly. Then stuff tightly to the end of crochet.
7-33: (27 rows) each 15 sc = 15
34: (dec, 3 sc) * 3 = 12
35: 6 dec = 6, tighten the hole, hide the thread.
Congratulations, your cat is ready!