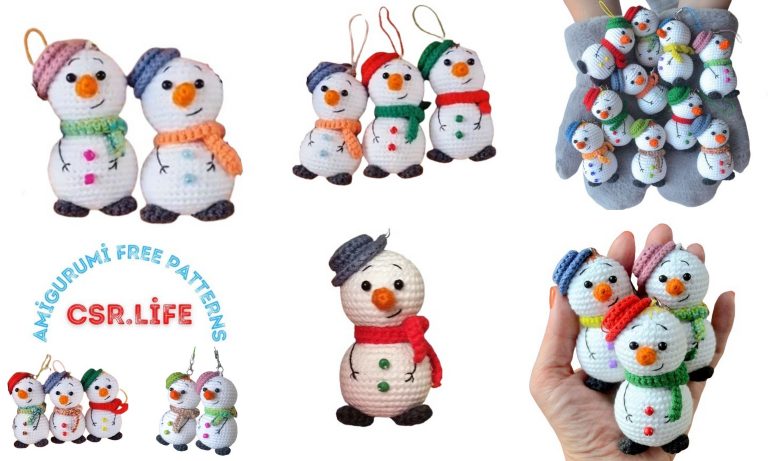
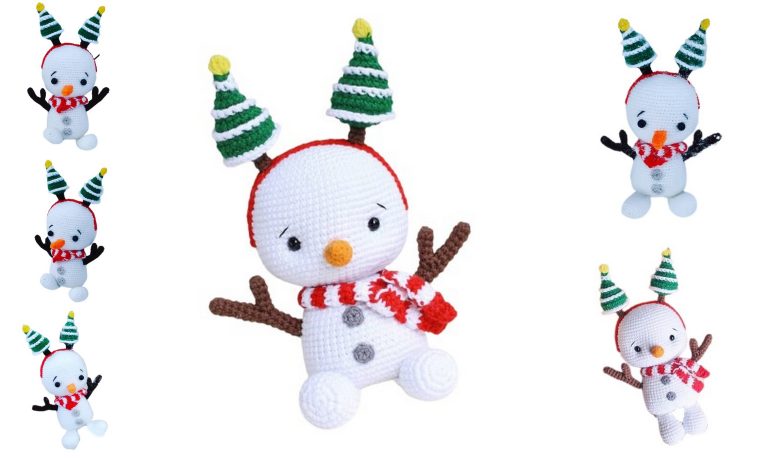
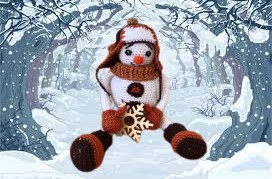
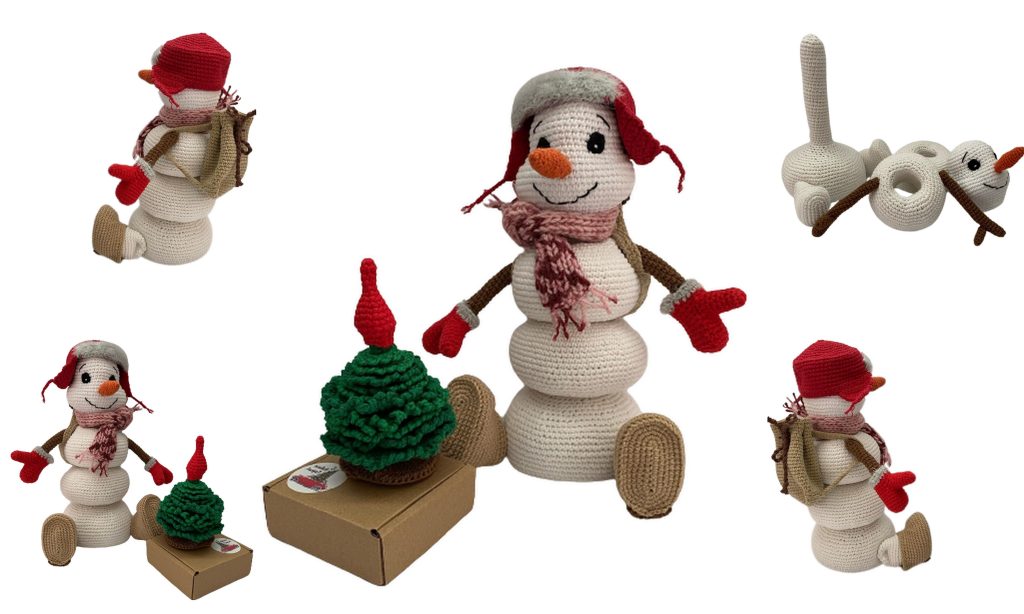
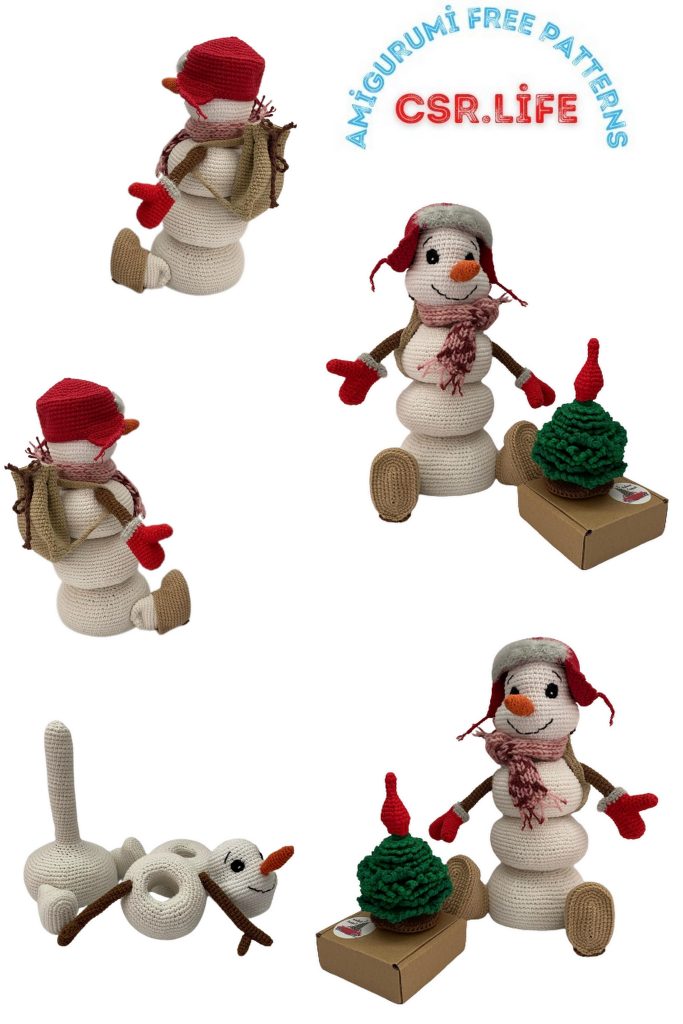
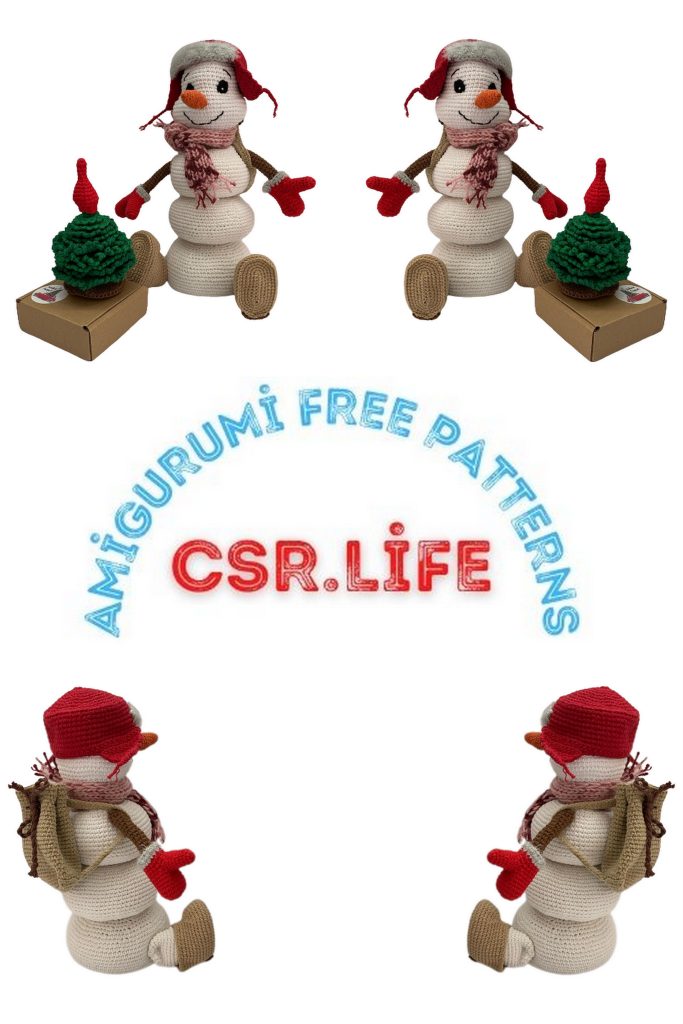
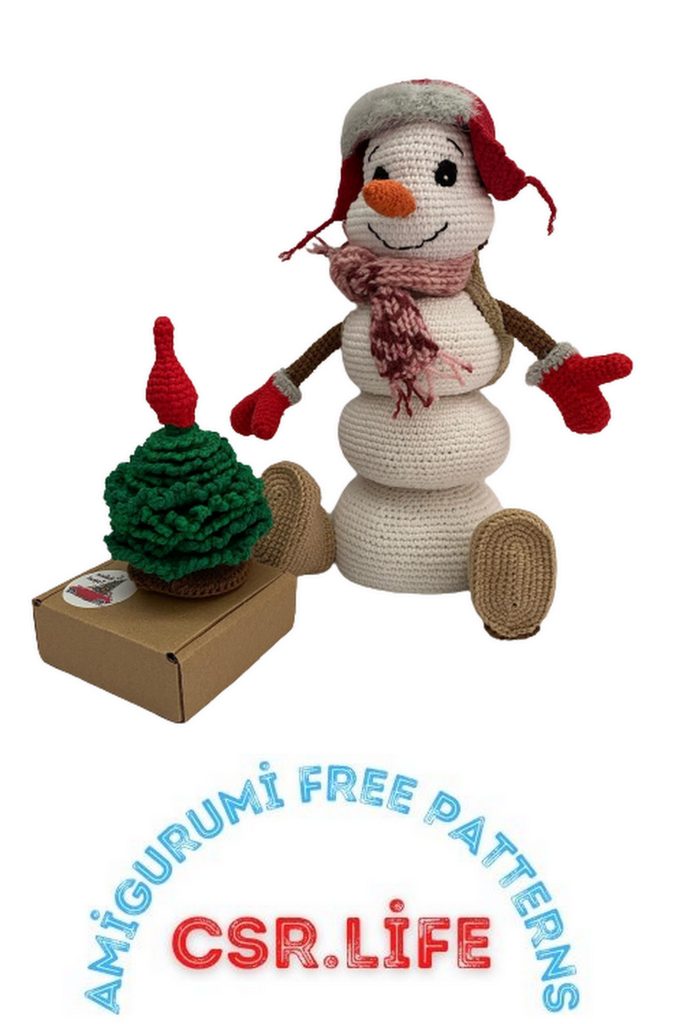
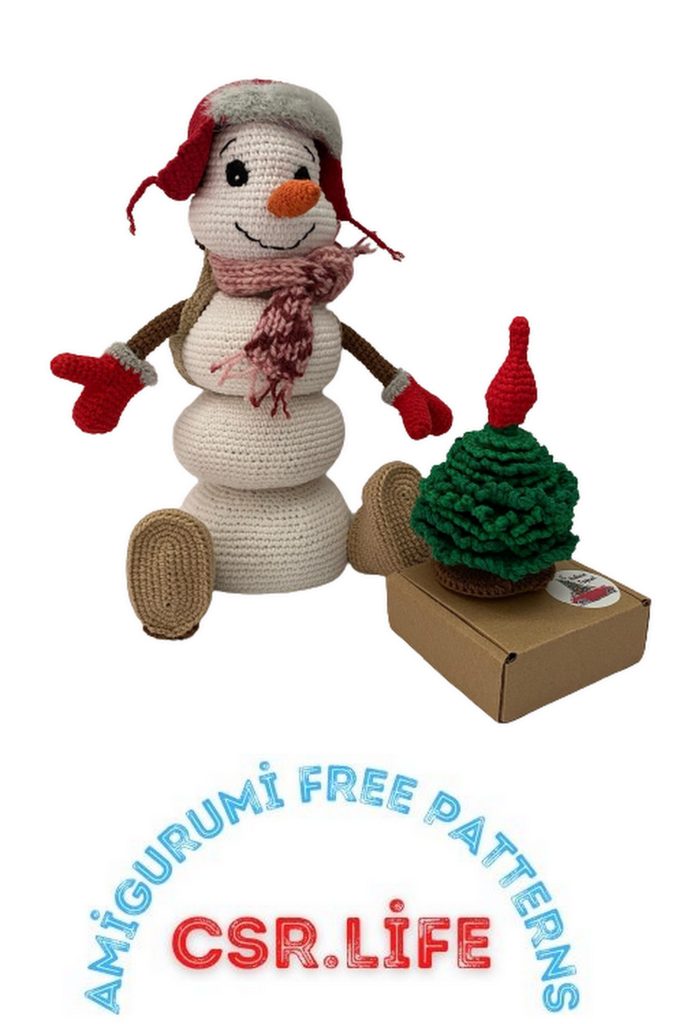
Pyramid Snowman Amigurumi Free Pattern
Welcome to our delightful Pyramid Snowman Amigurumi free pattern! If you’re looking to add a touch of winter charm to your crochet creations, you’ve come to the right place. This easy-to-follow pattern will guide you through creating an adorable snowman amigurumi that’s perfect for holiday decorations or as a handmade gift. Get your crochet hooks ready and let’s dive into the world of crafting this festive little friend!
Materials List
YarnArt Jeans yarn (50 g/160m) in white for making the snowman – slightly more than two skeins.
YarnArt Jeans yarn (50 g/160m) in brown for making flower petals, Christmas tree base, and backpack cord.
YarnArt Jeans yarn (50 g/160m) in red for making the hat and mittens.
YarnArt Jeans yarn (50 g/160m) in orange for making the carrot nose.
Vita Coco yarn for making the eyes and mouth embroidery.
YarnArt Jeans yarn (50 g/160m) in beige for making the backpack purse.
YarnArt Jeans yarn (50 g/160m) in beige for making the felt boots. The felt boots and backpack can be made from yarn of the same color.
Some Kamtex grassy or any fluffy yarn for making the hat brim and mittens cuffs in gray.
YarnArt Jeans yarn (50 g/160m) in green for making the Christmas tree.
A small amount of YarnArt Jeans yarn in red, yellow, or any other color for decorating the Christmas tree top.
Any yarn of your choice for making a scarf and needles suitable for that yarn.
Crochet hooks size 1.25 and 1.5.
Toy stuffing material (holofiber, polyester fiberfill).
A stick and tweezers for stuffing.
A long needle for sewing.
Scissors.
Stitch marker (or contrasting yarn).
A plastic lid from a container for the pyramid base (optional).
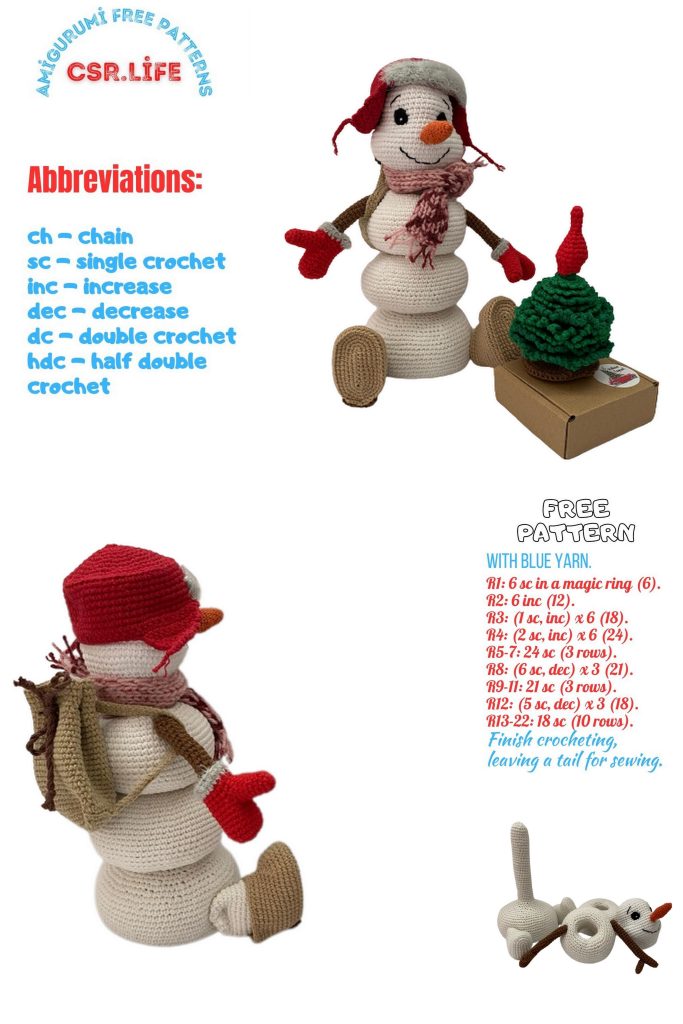
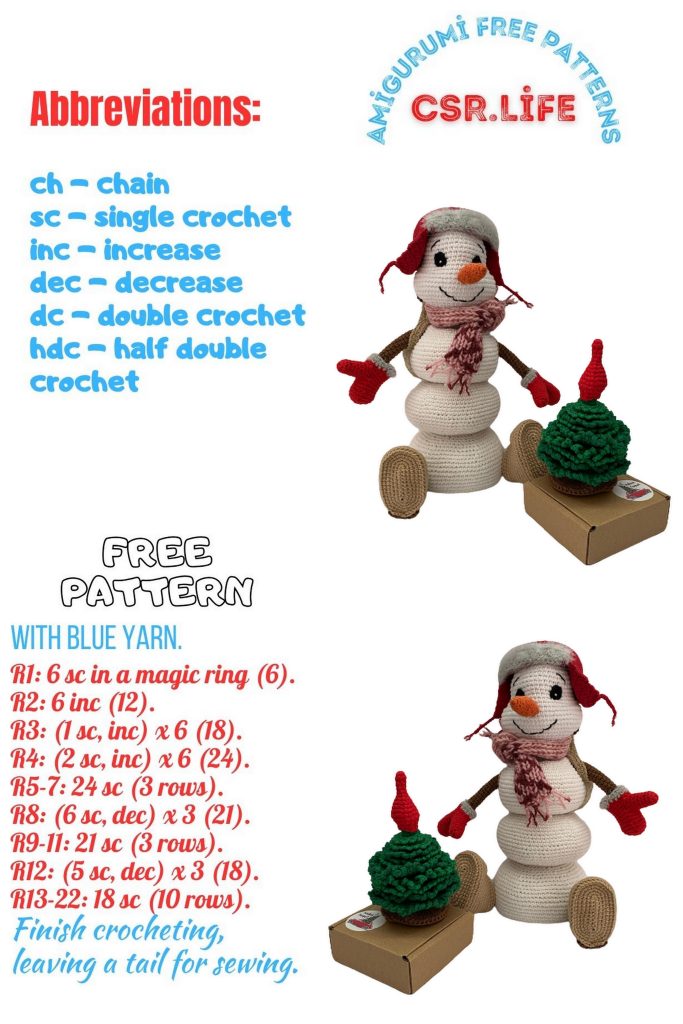
Abbreviations
ch – chain
dec – decrease (work a single crochet decrease)
inc – increase (work 2 single crochets in the same stitch)
MR – magic ring
sc – single crochet
sl st – slip stitch
st – stitch
repeat the instructions following the asterisk as directed
() – work the instructions within parentheses as directed
[] – work the instructions within brackets as directed
PATTERN
Snowman Base (Bottom Ball)
Work with white yarn, crochet hook 1.5 mm
Row 1: MR, 6 sc (6)
Row 2: inc in each st (12)
Row 3: sc, inc around (18)
Row 4: sc, inc, 2 sc, inc around, sc (24)
Row 5: 3 sc, inc around (30)
Row 6: 2 sc, inc, 4 sc, inc around, 2 sc (36)
Row 7: 5 sc, inc around (42)
Row 8: 3 sc, inc, 6 sc, inc around, 3 sc (48)
Row 9: 7 sc, inc around (54)
Row 10: 4 sc, inc, 8 sc, inc around, 4 sc (60)
Row 11: 9 sc, inc around (66)
Row 12: 5 sc, inc, 10 sc, inc around, 5 sc (72)
Row 13: 11 sc, inc around (78)
Row 14: 6 sc, inc, 12 sc, inc around, 6 sc (84)
Row 15: 84 sc in the back loop only (84)
Row 16-23: 84 sc (8 rows) (84)
Cut out a plastic base for the pyramid and place it at the bottom. This step is optional but adds stability to the pyramid.
Row 24: 6 sc, dec, 12 sc, dec around, 6 sc (78)
Row 25: 11 sc, dec around (72)
Row 26: 5 sc, dec, 10 sc, dec around, 5 sc (66)
Row 27: 9 sc, dec around (60)
Row 28: 4 sc, dec, 8 sc, dec around (54)
Begin stuffing the base of the pyramid firmly to maintain its shape. Pay attention to even stuffing; do not overstretch the crochet or the main rings (spheres) of the snowman will fit too tightly.
Row 29: 7 sc, dec around (48)
Row 30: 3 sc, dec, 6 sc, dec around, 3 sc (42)
Row 31: 5 sc, dec around (36)
Row 32: 2 sc, dec, 4 sc, dec around, 2 sc (30)
Row 33: 3 sc, dec around (24)
Row 34: sc, dec, 2 sc, dec around, sc (18)
Row 35: 2 sc, dec around (12)
Row 36: dec around (6)
Fasten off, leaving a long end for closing the hole with a needle and hiding the thread.
Larger Ring
Work with white yarn, crochet hook 1.5 mm
Chain 30, join to form a ring, and continue working in the round.
Row 1: 30 sc (30)
Row 2: 2 sc, inc, 4 sc, inc around, 2 sc (36)
Row 3: 5 sc, inc around (42)
Row 4: 3 sc, inc, 6 sc, inc around, 3 sc (48)
Row 5: 7 sc, inc around (54)
Row 6: 4 sc, inc, 8 sc, inc around, 4 sc (60)
Row 7: 9 sc, inc around (66)
Row 8-15: 8 rows of 78 sc (78)
Row 16: 11 sc, dec around (72)
Row 17: 5 sc, dec, 10 sc, dec around, 5 sc (66)
Row 18: 9 sc, dec around (60)
Row 19: 4 sc, dec, 8 sc, dec around (54)
Row 20: 7 sc, dec around (48)
Row 21: 3 sc, dec, 6 sc, dec around, 3 sc (42)
Row 22: 5 sc, dec around (36)
Row 23: 2 sc, dec, 4 sc, dec around, 2 sc (30)
Row 24: 30 sc in the back loop only (30)
Row 25-35: 11 rows of 30 sc (30)
Finish off with a slip stitch, fasten off, and cut the yarn. Secure the thread and leave a long end for sewing the ring closed. To sew the smaller ring shut, thread the resulting tube (rows 27-37) inside the ring, stuff the ring evenly, and sew the piece together, picking up the loops from the first and last rows.
Smaller Ring
Work with white yarn, crochet hook 1.5 mm
Chain 30, join to form a ring, and continue working in the round.
Row 1: 30 sc (30)
Row 2: 2 sc, inc, 4 sc, inc around, 2 sc (36)
Row 3: 5 sc, inc around (42)
Row 4: 3 sc, inc, 6 sc, inc around, 3 sc (48)
Row 5: 7 sc, inc around (54)
Row 6: 4 sc, inc, 8 sc, inc around, 4 sc (60)
Row 7: 9 sc, inc around (66)
Row 8-15: 8 rows of 78 sc (78)
Row 16: 9 sc, dec around (60)
Row 17: 4 sc, dec, 8 sc, dec around (54)
Row 18: 7 sc, dec around (48)
Row 19: 3 sc, dec, 6 sc, dec around, 3 sc (42)
Row 20: 5 sc, dec around (36)
Row 21: 2 sc, dec, 4 sc, dec around, 2 sc (30)
Row 22: 30 sc in the back loop only (30)
Row 23-37: 11 rows of 30 sc (30)
Finish off with a slip stitch, fasten off, and cut the yarn. Secure the thread and leave a long end for sewing the ring closed.
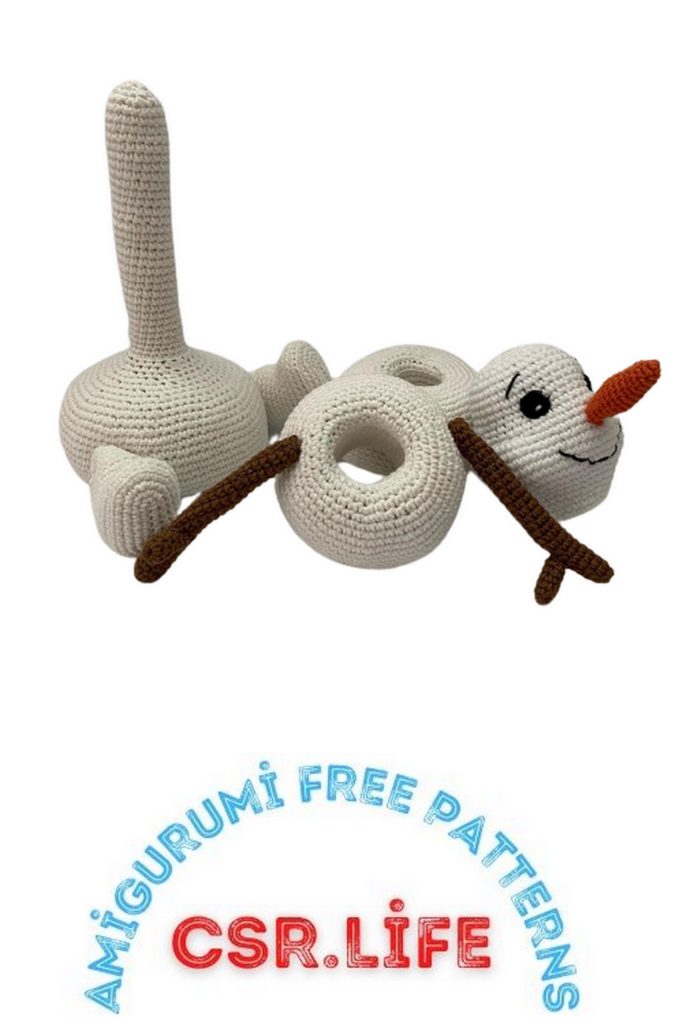
Snowman Head
Work with white yarn, crochet hook 1.5 mm
Row 1: MR, 6 sc (6)
Row 2: inc in each st (12)
Row 3: sc, inc around (18)
Row 4: sc, inc, 2 sc, inc around, sc (24)
Row 5: 24 sc in the front loop only (24)
Row 6-13: 24 sc (8 rows) (24)
Row 14: 3 sc, inc around (30)
Row 8: 30 sc (30)
Row 9: 2 sc, inc, 4 sc, inc around, 2 sc (36)
Row 10: 36 sc (36)
Row 11: 5 sc, inc around (42)
Row 12: 42 sc (42)
Row 13: 7 sc, 8 inc, sc, inc around, 8 inc, 7 sc (64)
Row 14-18: 64 sc (5 rows) (64)
Row 19: 7 sc, 8 dec, 18 sc, 8 dec, 7 sc (48)
Row 22: 3 sc, dec, 6 sc, dec around, 3 sc (42)
Row 23-29: 42 sc (7 rows) (42)
Row 30: 5 sc, dec around (36)
Row 31: 2 sc, dec, 4 sc, dec around, 2 sc (30)
Row 32: 3 sc, dec around (24)
Row 33: sc, dec, 2 sc, dec around, sc (18)
Row 34: sc, dec around (12)
Row 35: 6 dec (6)
Fasten off, close the hole, and hide the thread.
Carrot Nose
Work with orange yarn, crochet hook 1.5 mm
Row 1: MR, 4 sc (4)
Row 2: sc, inc around (6)
Row 3: sc, inc around (9)
Row 4: 9 sc (9)
Row 5: 2 sc, inc around (12)
Row 6: 12 sc (12)
Row 7: 3 sc, inc around (15)
Row 8: 15 sc (15)
Row 9: 3 sc, dec around (12)
Row 10: 12 sc (12)
Row 11: 2 sc, dec around (9)
Row 12-13: 9 sc (2 rows) (9)
Fasten off, close the hole, and hide the thread.
Legs (2 parts)
Crochet with white yarn using a 1.5mm hook, stuffing moderately firmly. Stuff the upper part of the legs lightly so they won’t stick out when sewn.
Row 1: Start with a chain of 8. In the second chain from the hook, make 6 single crochets (sc), 3 sc in one stitch, 5 sc, join (16).
Row 2: Chain 1 (counts as the first single crochet), 5 sc, 3 increases (3 sc in one stitch), 5 sc, 2 increases (22).
Row 3: 1 sc, increase, 5 sc, repeat (1 sc, increase) three times, 5 sc, repeat (1 sc, increase) twice (28).
Row 4: 2 sc, increase, 5 sc, repeat (2 sc, increase) three times, 5 sc, repeat (2 sc, increase) twice (34).
Row 5: 34 sc through the back loops (34).
Row 6-7: 34 sc (2 rows) (34).
Row 8: 9 sc, (2 sc, decrease) three times, 13 sc (34).
Row 9: 9 sc, (1 sc, decrease) three times, 13 sc (28).
Row 10: 9 sc, 3 decreases, 11 sc, 1 double crochet (take one loop from the next row) (23).
Row 11: 23 sc (23).
Row 12: 10 sc, 1 double crochet decrease, 11 sc, 1 double crochet decrease (27).
Row 13-14: 27 sc (2 rows) (27).
Row 15: 10 sc, 1 double crochet decrease, 11 sc, 1 double crochet decrease (23).
Row 16-17: 23 sc (23).
Row 18: 10 sc, decrease, 9 sc, decrease (21).
Row 19: (5 sc, decrease) three times (18).
Row 20: (1 sc, decrease) six times (12).
Row 21: 6 decreases (6).
Fasten off, close the hole, and hide the end.
Branch-Like Arms (2 parts)
Use brown yarn and a 1.5mm hook. First, crochet the main branch (2 parts).
Row 1: Make a chain of 9 (9).
Row 2-24: 9 sc (23 rows). Stuff as you go, firmly (9).
Fasten off, tighten the opening, and hide the yarn tail.
Small branch extension (2 parts):
Row 1: Make a chain of 6 (6).
Row 2-6: 6 sc (5 rows). Stuff firmly (6).
Fasten off, tighten the opening, and leave the yarn tail for attaching it to the main branch at the 19th-20th row.
Eyes (2 parts)
Use Vita Coco black yarn and a 1.25mm hook.
Row 1: Make a magic ring (MR), then crochet 6 single crochets (sc) into the ring (6).
Row 2: 6 increases (12).
Create a connecting stitch, fasten off, and leave a long tail for sewing. Use the main white yarn to add a small stitch that represents a gleam in the eye.
Christmas Tree-Pyramid
Base for the Christmas Tree-Pyramid
Use brown yarn with a 1.5mm hook.
Base:
Row 1: Make a magic ring (MR) (6).
Row 2: 6 increases (12).
Row 3: (1 sc, increase) around (18).
Row 4: 1 sc, increase, (2 sc, increase) five times, 1 sc (24).
Row 5: (3 sc, increase) around (30).
Row 6: 2 sc, increase, (4 sc, increase) five times, 2 sc (36).
Row 7: (5 sc, increase) around (42).
Row 8: 3 sc, increase, (6 sc, increase) five times, 3 sc (48).
Fasten off, cut the yarn.
Stem and Base:
Use green yarn with a 1.5mm hook, stuffing tightly as you crochet.
Stem:
Row 1: MR (6).
Row 2-23: 6 sc (22 rows) (6). Stuff as you go.
Attach brown yarn, continue crocheting.
Base:
Row 1: 6 increases (12).
Row 2: 12 sc (12).
Row 3: (1 sc, increase) six times (18).
Row 4: 1 sc, increase, (2 sc, increase) five times, 1 sc (24).
Row 5: (3 sc, increase) around (30).
Row 6: 2 sc, increase, (4 sc, increase) five times, 2 sc (36).
Row 7: (5 sc, increase) around (42).
Row 8: 3 sc, increase, (6 sc, increase) five times, 3 sc (48).
Fasten off, cut the yarn.
Decorative Branch Rings
Use green yarn with a 1.5mm hook. Begin with 10 chain stitches, connect them in a ring. Continue in a spiral. You should add 6 stitches in each row, making the rings wider.
Start of Each Decorative Ring:
Row 1: Chain 10, join in a ring (10).
Row 2: 12 sc in the ring made by the chains (12).
Each subsequent ring follows the pattern of a classic crochet circle, adding 6 stitches in each row.
End of Each Decorative Ring: Slip stitch to join, fasten off. You can leave a yarn tail for sewing. Thread the ring onto the tree stem, placing it around rows 3-4 from the base.
Snowman’s Accessories
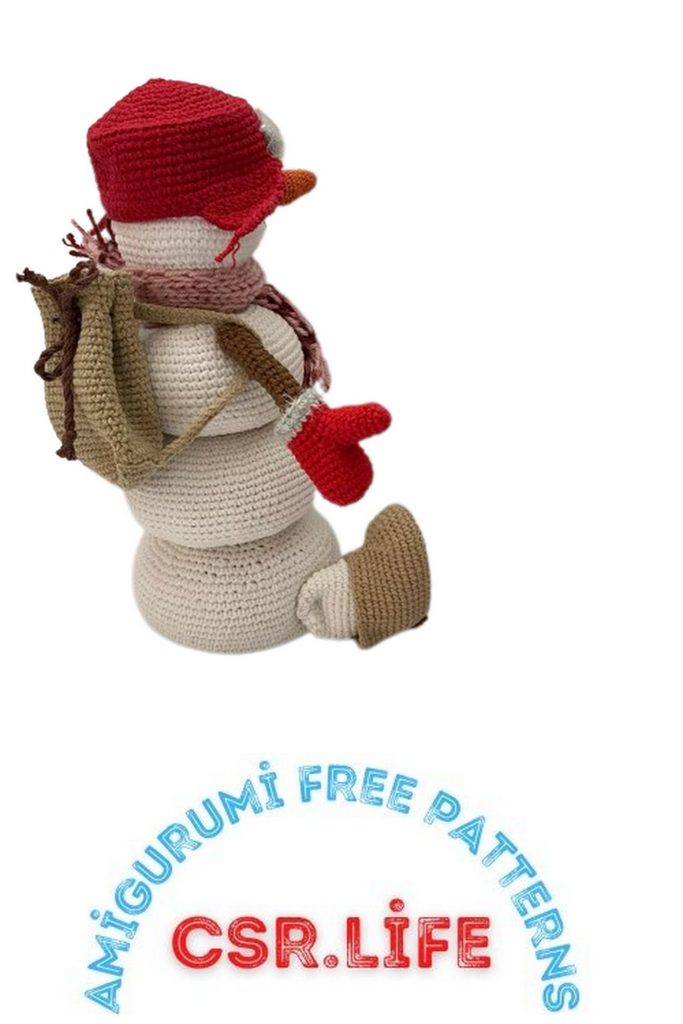
Backpack Purse
Use brown yarn and a 1.5mm hook.
Base:
Row 1: Chain 15, in the second chain from the hook, make 13 single crochets, 3 single crochets in one, 12 single crochets, join (30).
Row 2: Chain 1, 12 single crochets, 3 increases, 12 single crochets, 2 increases (36).
Row 3: 1 single crochet, increase, 12 single crochets, repeat (1 single crochet, increase) three times, 12 single crochets, repeat (1 single crochet, increase) twice (42).
Row 4: 2 single crochets, increase, 12 single crochets, repeat (2 single crochets, increase) three times, 12 single crochets, repeat (2 single crochets, increase) twice (48).
Row 5: 48 single crochets in the back loop (48).
Row 6-22: 48 single crochets (18 rows) (48).
Row 23: (4 single crochets, 2 chains) eight times to make holes for the drawstring (48).
Row 24: 48 single crochets (2 single crochets in each chain hole) (48).
Row 25-27: 48 single crochets (48).
Fasten off, cut the yarn, leaving a tail to sew.
Straps for the Backpack Purse (2 parts)
Crochet with the brown yarn.
Strap Base:
Row 1: Chain 41, in the second chain from the hook, make 40 slip stitches (ss), turn (40).
Row 2: 40 ss (40).
Fasten off, cut the yarn, leaving a tail for sewing.
Sew the straps onto the backpack. Thread a string through the holes in the backpack.
Your backpack purse is ready!
Ushanka Hat
Crochet with red yarn using a 1.5mm hook.
Hat:
Row 1: Make a magic ring (MR), then crochet 6 single crochets (sc) into the ring (6).
Row 2: 6 increases (12).
Row 3: (1 sc, increase) six times (18).
Row 4: 1 sc, increase, (2 sc, increase) five times, 1 sc (24).
Row 5: (3 sc, increase) six times (30).
Row 6: 2 sc, increase, (4 sc, increase) five times, 2 sc (36).
Row 7: (5 sc, increase) six times (42).
Row 8: 3 sc, increase, (6 sc, increase) five times, 3 sc (48).
Row 9: (7 sc, increase) six times (54).
Row 10: 4 sc, increase, (8 sc, increase) five times, 4 sc (60).
Row 11: 60 sc through the back loops (60).
Row 12-17: 60 sc (6 rows) (60).
Fasten off, cut the yarn, and leave a tail for sewing.
Ear Flaps (2 parts):
Ear Flap 1:
Row 1: Chain 6 (6).
Row 2: 1 chain for the turning chain, 1 sc, 5 increases (12).
Row 3: 1 chain, sc, (1 sc, increase) five times, sc (18).
Fasten off, cut the yarn, and hide the end.
Ear Flap 2:
Row 1: Chain 6 (6).
Row 2: 1 chain, decrease, 5 sc (12).
Row 3: 1 chain, decrease, (1 sc, decrease) five times, 1 sc (18).
Fasten off, cut the yarn, and leave a tail for attaching the ear flap to the hat.
Attach the ear flaps to the hat and crochet an edging.
Hat Edging:
Attach grey yarn (like Kamtex straw) to the hat (front side).
Hat Edging:
Row 1: Chain 1, 19 sc (20).
Row 2: Chain 1, 19 sc (20).
Fasten off, cut the yarn, and hide the end.
Sew the edges of the ear flaps to the hat.
Mittens (2 parts)
Crochet with red yarn using a 1.5mm hook.
Finger Part (2 parts):
Mitten Finger Part:
Row 1: 9 sc in MR (9).
Row 2-3: 9 sc (2 rows) (9).
Row 4: (2 sc, decrease) three times (12).
Row 5-8: 12 sc (4 rows) (12).
Fasten off, cut the yarn, and hide the end.
Main Mitten Part:
Row 1: 9 sc in MR (9).
Row 2: 9 increases (18).
Row 3-8: 18 sc (6 rows) (18).
Row 9: 1 sc, 6 sc around the stitches of the finger part, stitches on the backside of the finger part, 11 sc (43).
Row 10: 1 sc, 6 sc around the remaining stitches on the finger, 11 sc (18).
Row 11-12: 18 sc (2 rows) (18).
Row 13: Change to grey yarn (Kamtex straw) and make 18 sc (18).
Row 14: 18 sc (18).
Fasten off, cut the yarn, and hide the end.
Make a patch on the back of the mitten using brown yarn.
Mitten Patch:
Row 1: 6 sc in MR, but don’t close the ring, the work is turned (6).
Row 2: 1 chain for the turning chain, 1 sc, 5 increases (12).
Row 3: 1 chain, sc, (1 sc, increase) five times (18).
Fasten off, cut the yarn, and hide the end. Sew the patch with visible stitches.
Valenki Boots (2 parts)
Crochet with red yarn using a 1.5mm hook.
Boot Base:
Row 1: Chain 11, in the second chain from the hook, make 9 sc, 3 sc in one, 8 sc, increase (22).
Row 2: Increase, 8 sc, 3 increases, 8 sc, 2 increases (28).
Row 3: 1 sc, increase, 8 sc, (1 sc, increase) three times, 8 sc, (1 sc, increase) twice (34).
Row 4: 2 sc, increase, 8 sc, (2 sc, increase) three times, 8 sc, (2 sc, increase) twice (40).
Row 5: 3 sc, increase, 8 sc, (3 sc, increase) three times, 8 sc, (3 sc, increase) twice (46).
Row 6: 46 sc through the back loops (46).
Row 7-9: 46 sc (3 rows) (46).
Row 10: 13 sc, (3 sc, decrease) three times, 18 sc (43).
Row 11: 13 sc, (2 sc, decrease) three times, 18 sc (40).
Row 12: 13 sc, (1 sc, decrease) three times, 18 sc (37).
Row 13: 13 sc, 3 decreases, 18 sc (34).
Row 14-16: 34 sc (3 rows) (34).
Fasten off, cut the yarn, and hide the end. Add a brown patch to the back of the boots.
Boot Patch:
Row 1: 6 sc in MR, but don’t close the ring, the work is turned (6).
Row 2: 1 chain for the turning chain, 1 sc, 5 increases (12).
Row 3: 1 chain, sc, (1 sc, increase) five times (18).
Fasten off, cut the yarn, and hide the end. Sew the patch with visible stitches.
Scarf
Crochet a chain of 10 stitches and work in a 1×1 rib pattern (1 single crochet, 1 single crochet in the back loop only). The length of the scarf should fit your snowman. Add some tassels or other decorations to the scarf as desired.
Snowman Assembly
Sew the legs to the base or body of the snowman. You can attach the legs normally or with string joints for better mobility.
Attach the branch arms to the smaller rings of the pyramid. Position the arms so that they match up with the legs (slide all the rings except the head onto the base).
Create eyelids by sewing the straps over the eyes. This step will help give your snowman a more lifelike appearance.
Sew on the carrot nose. Make sure to stuff it tightly so it doesn’t droop.
Embroider the eyebrows and mouth.
Dress your snowman. The branch sticking out of the boots should fit into the fingers of the mittens.
Your snowman is complete! Gift it to your child, and let it become their new friend. Enjoy crafting!