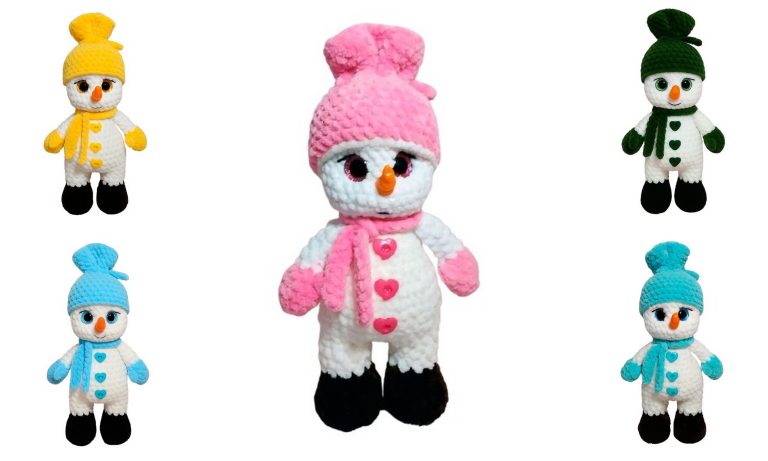
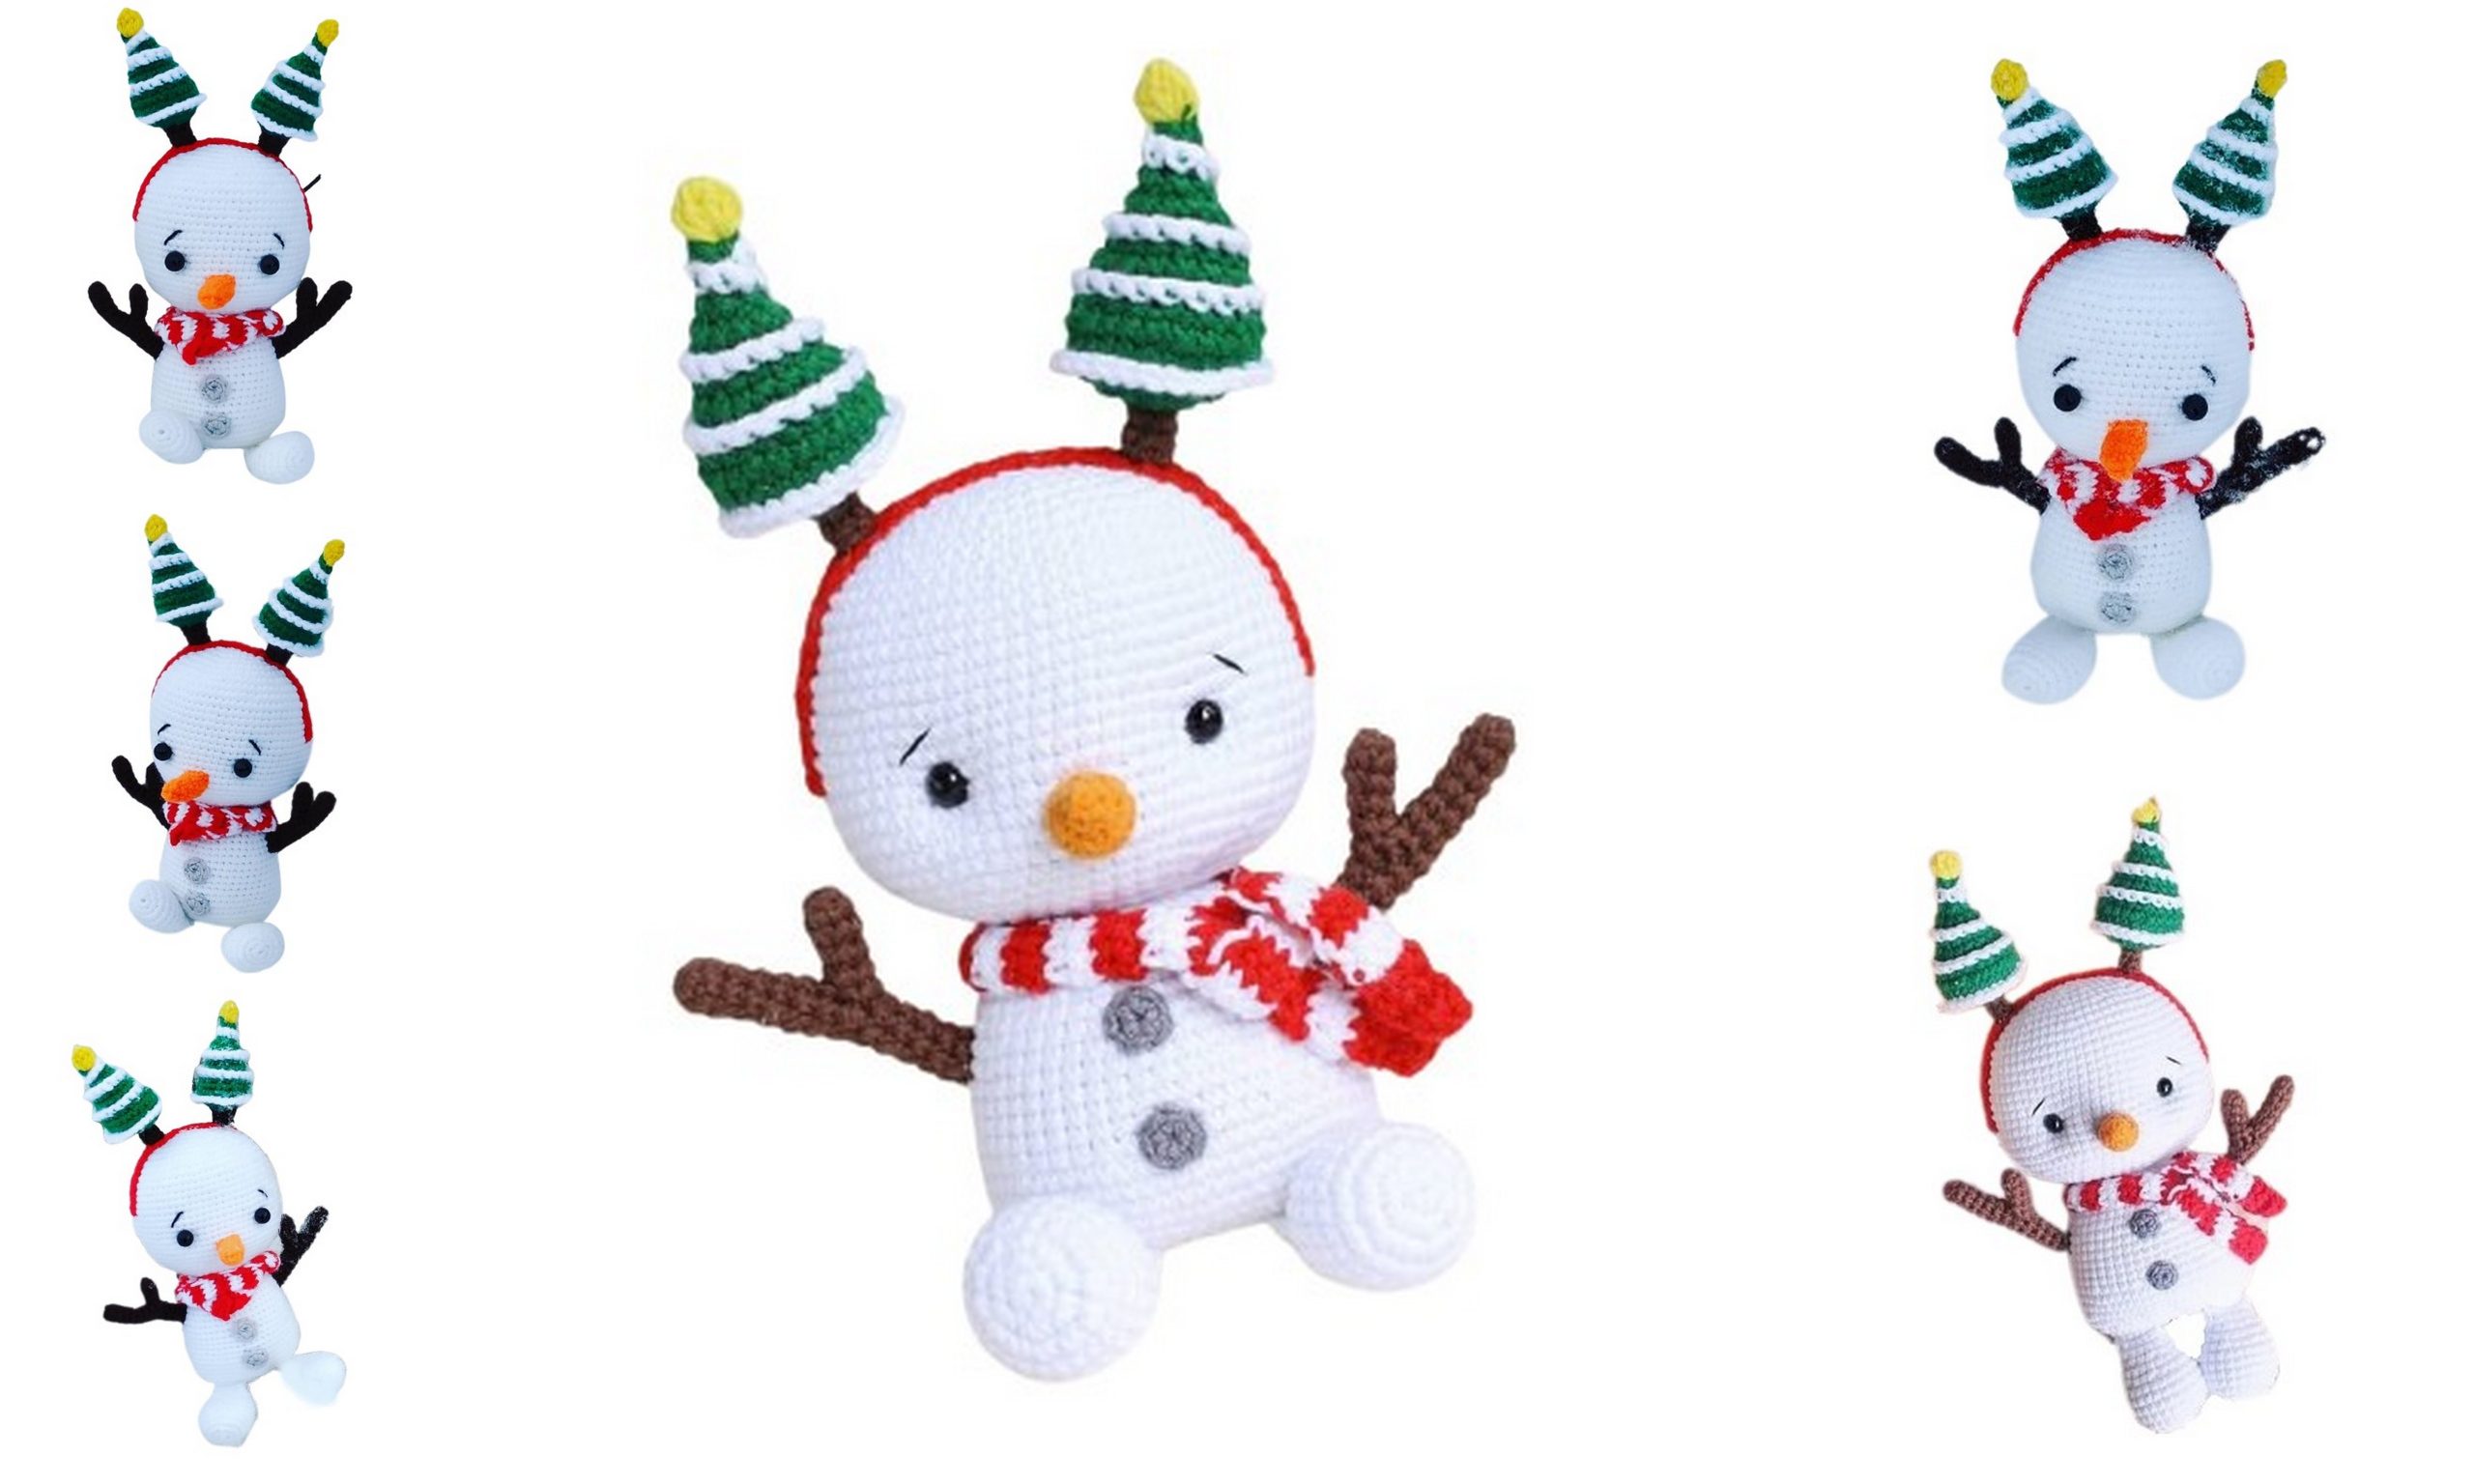
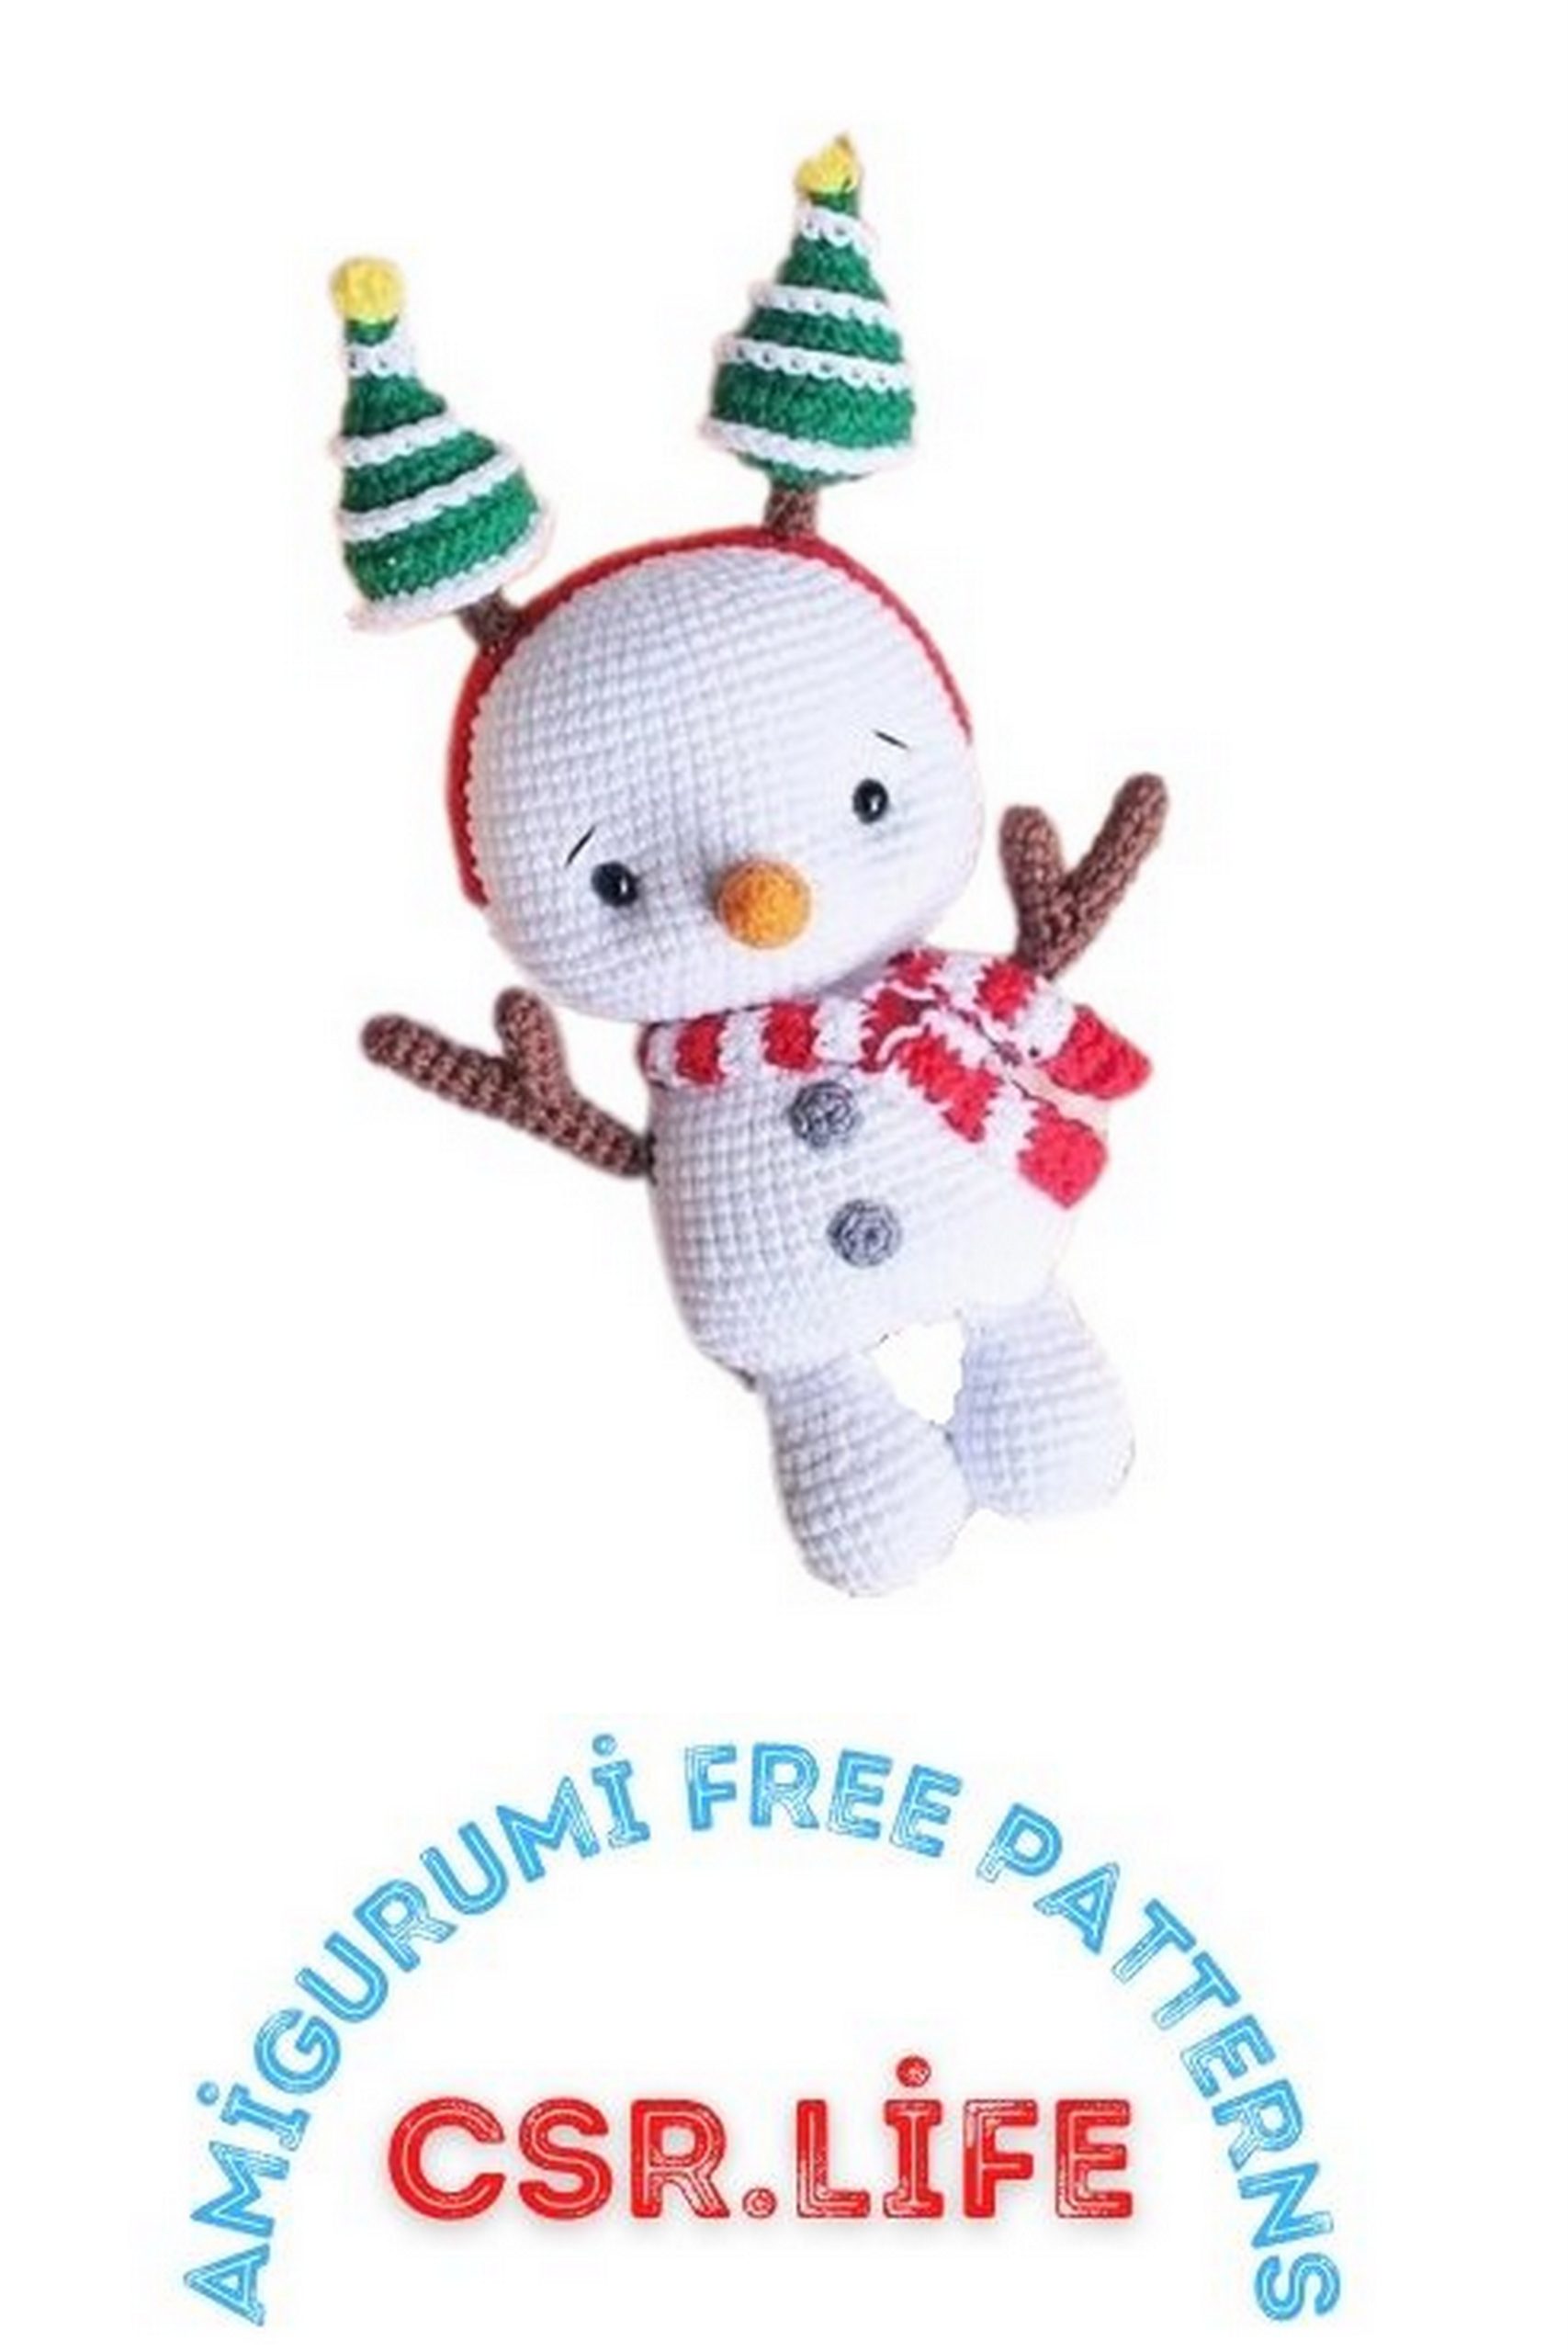
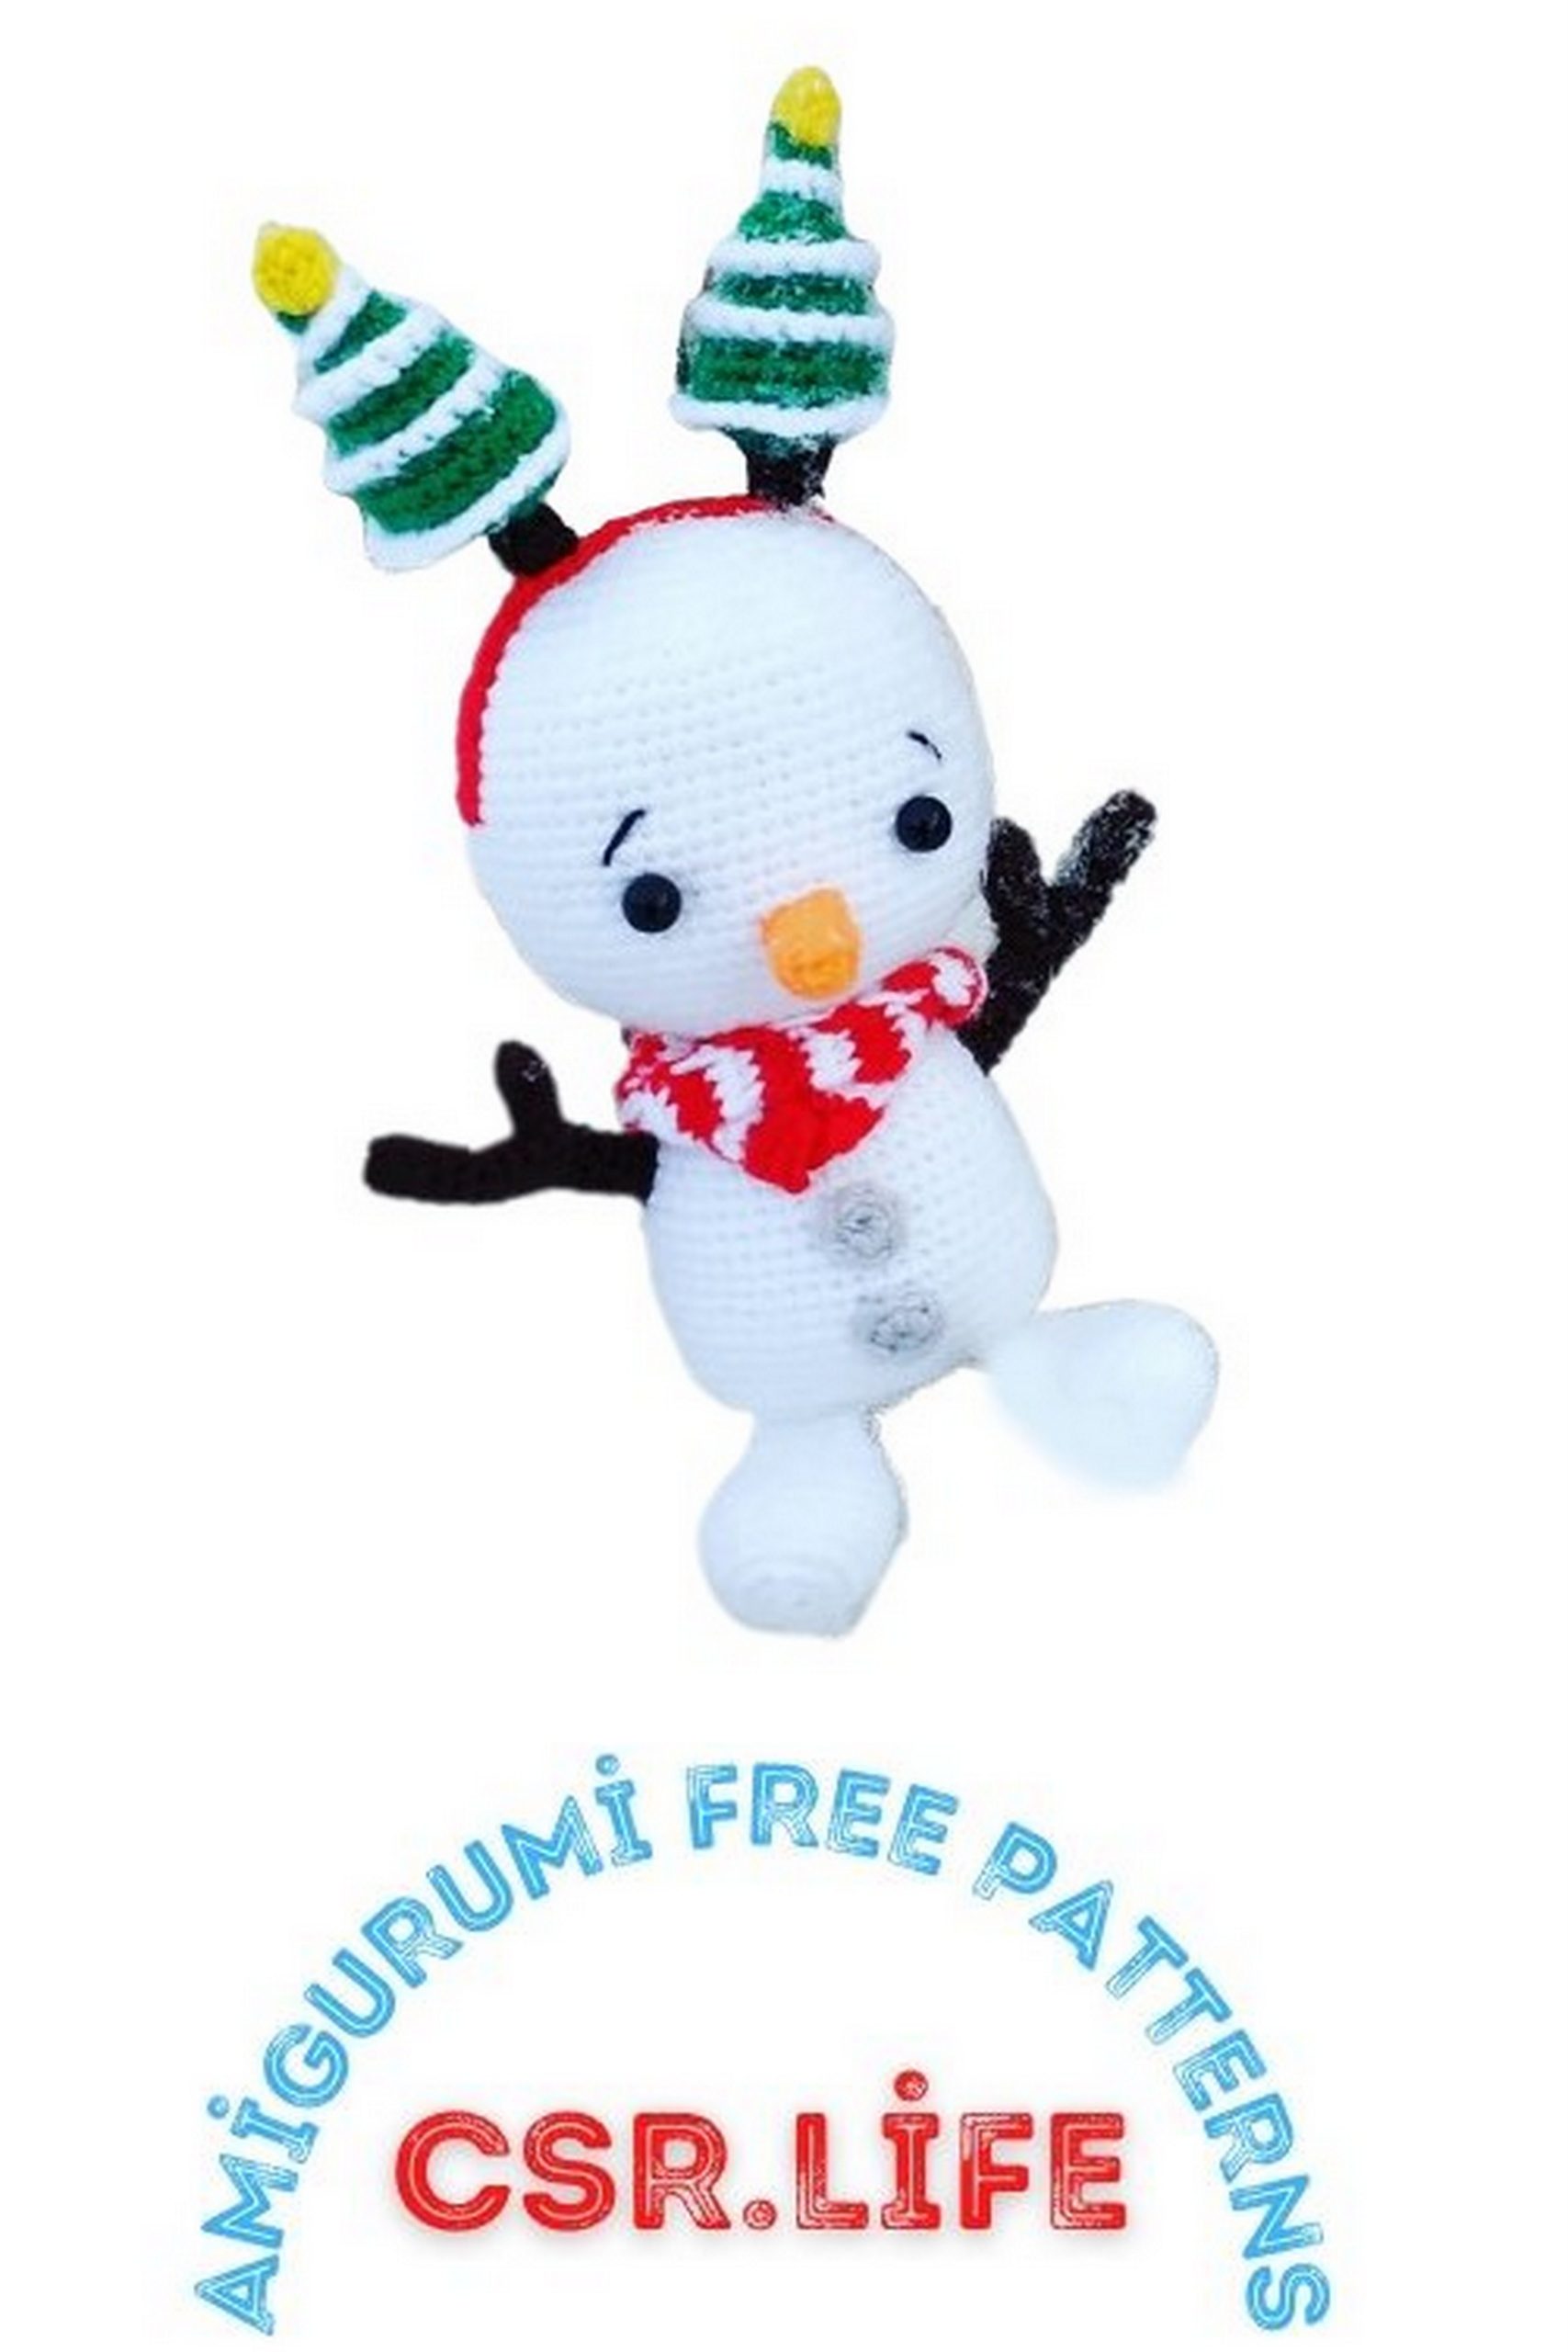
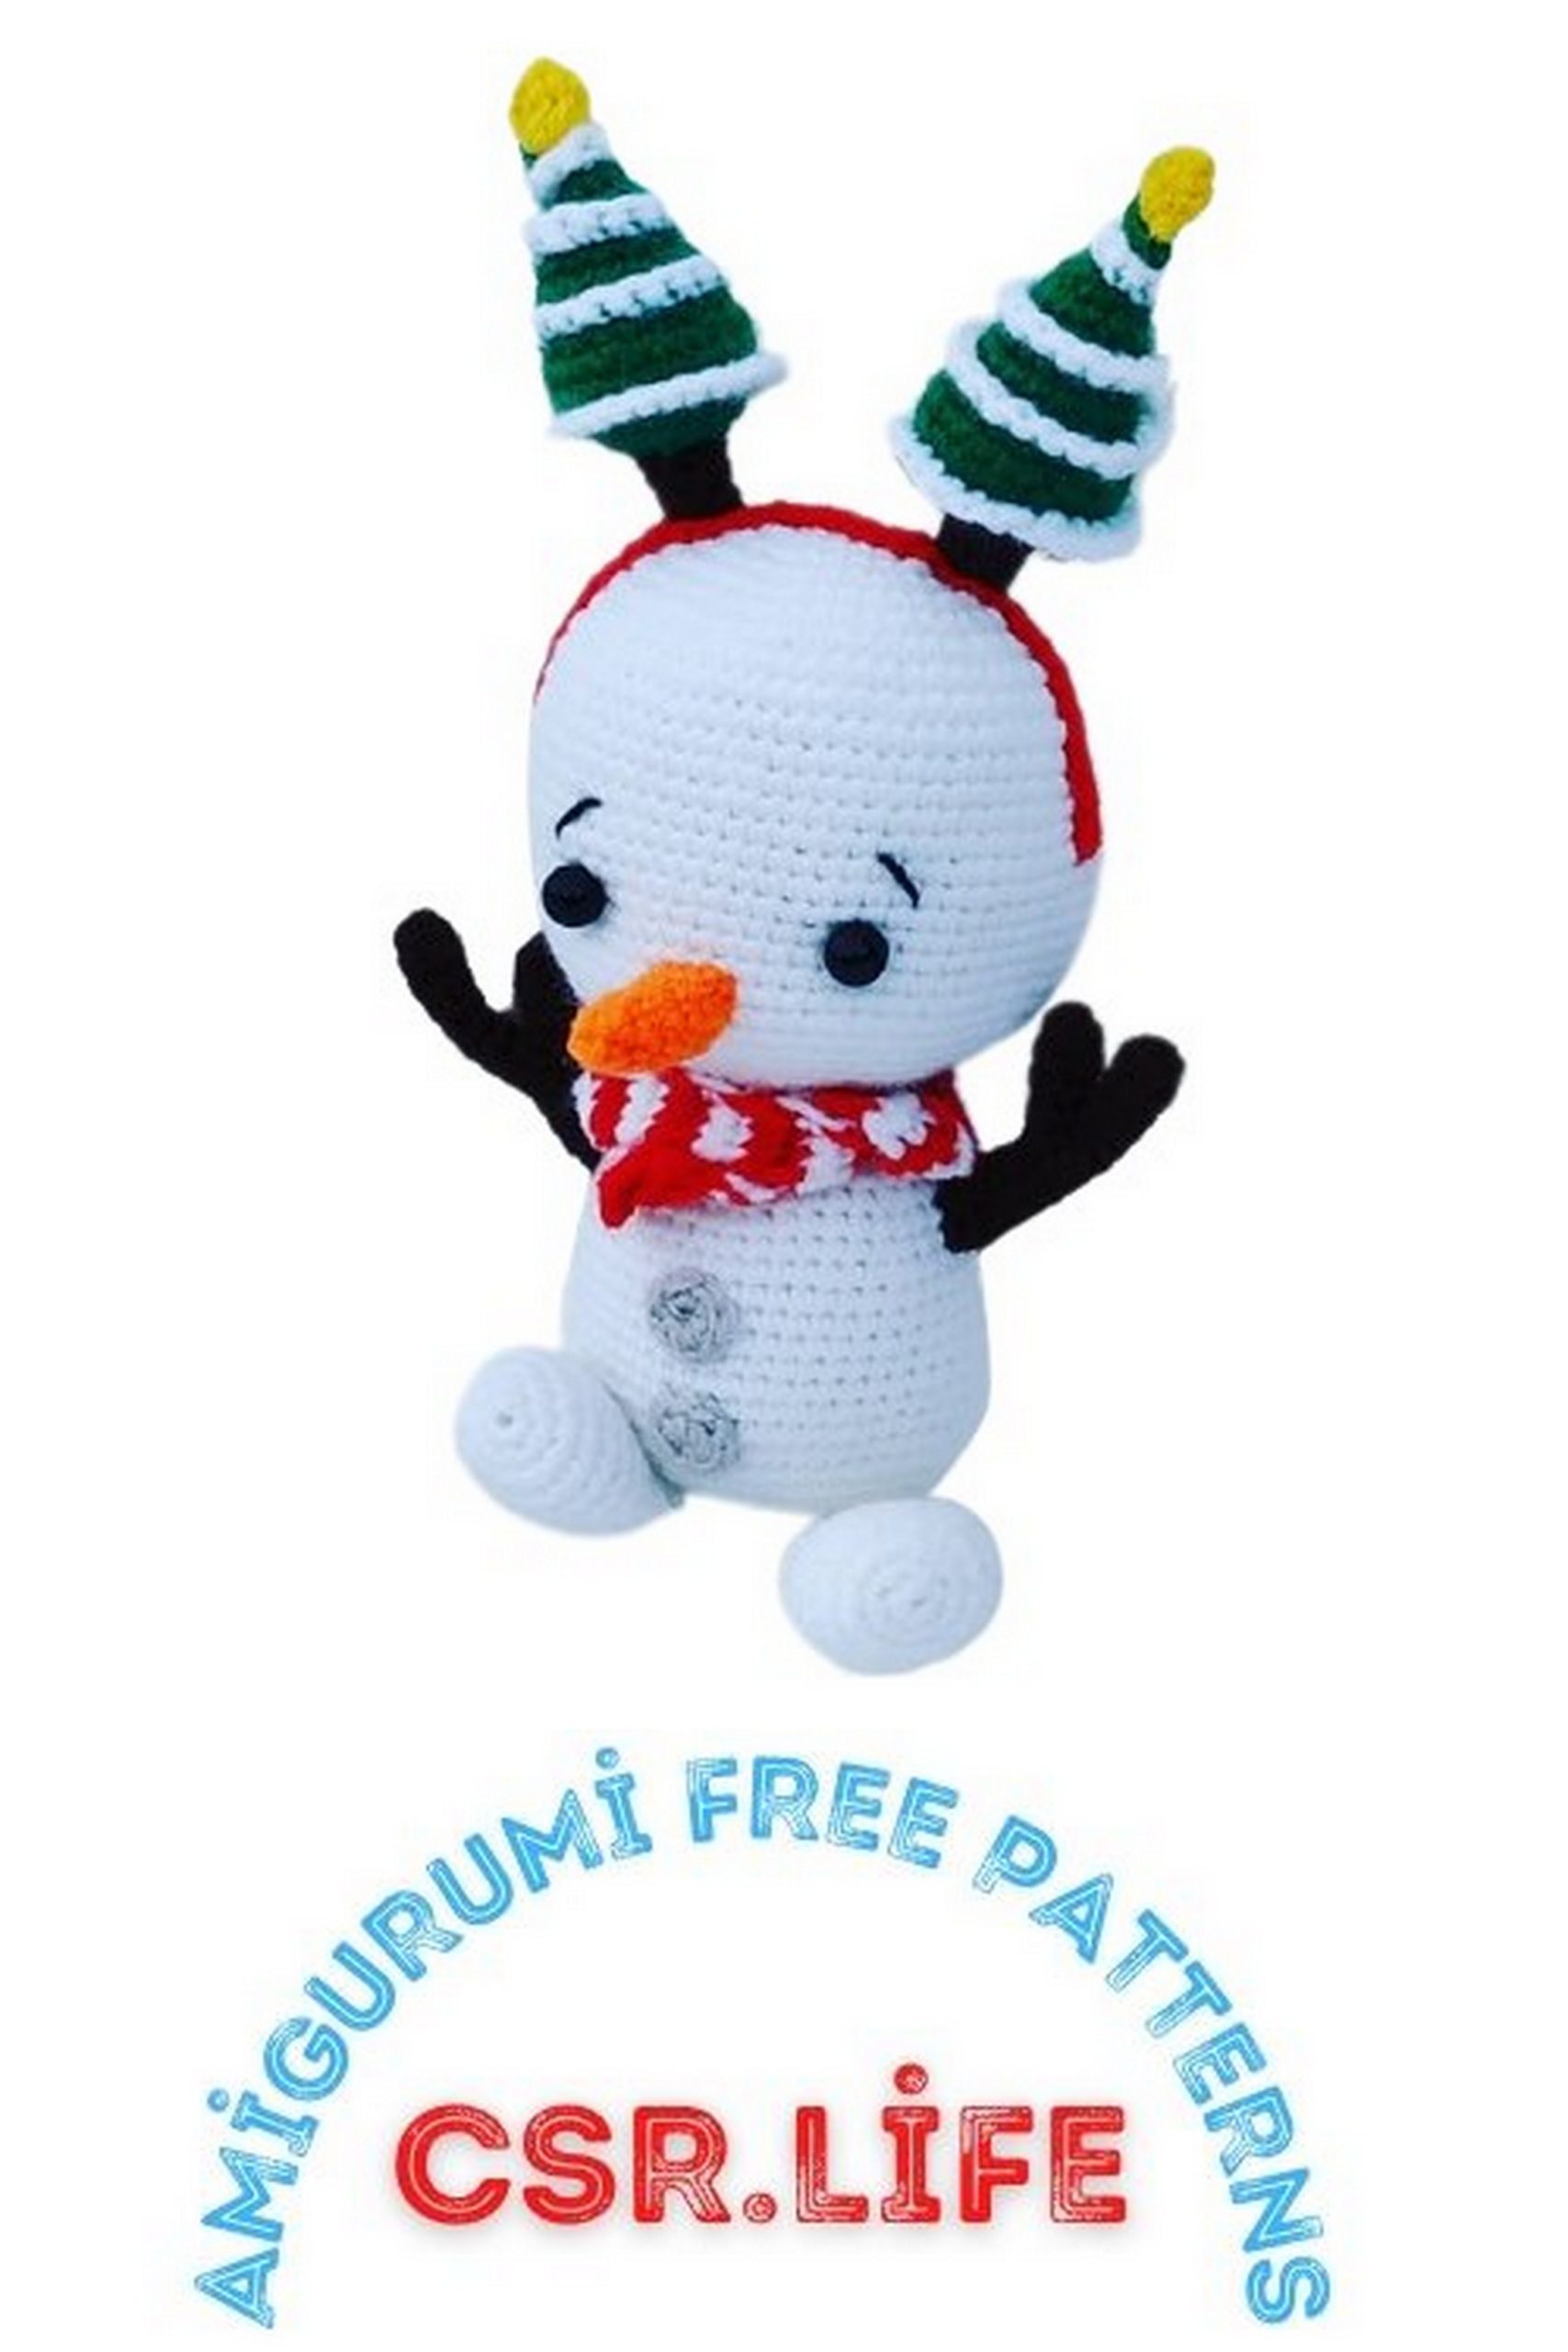
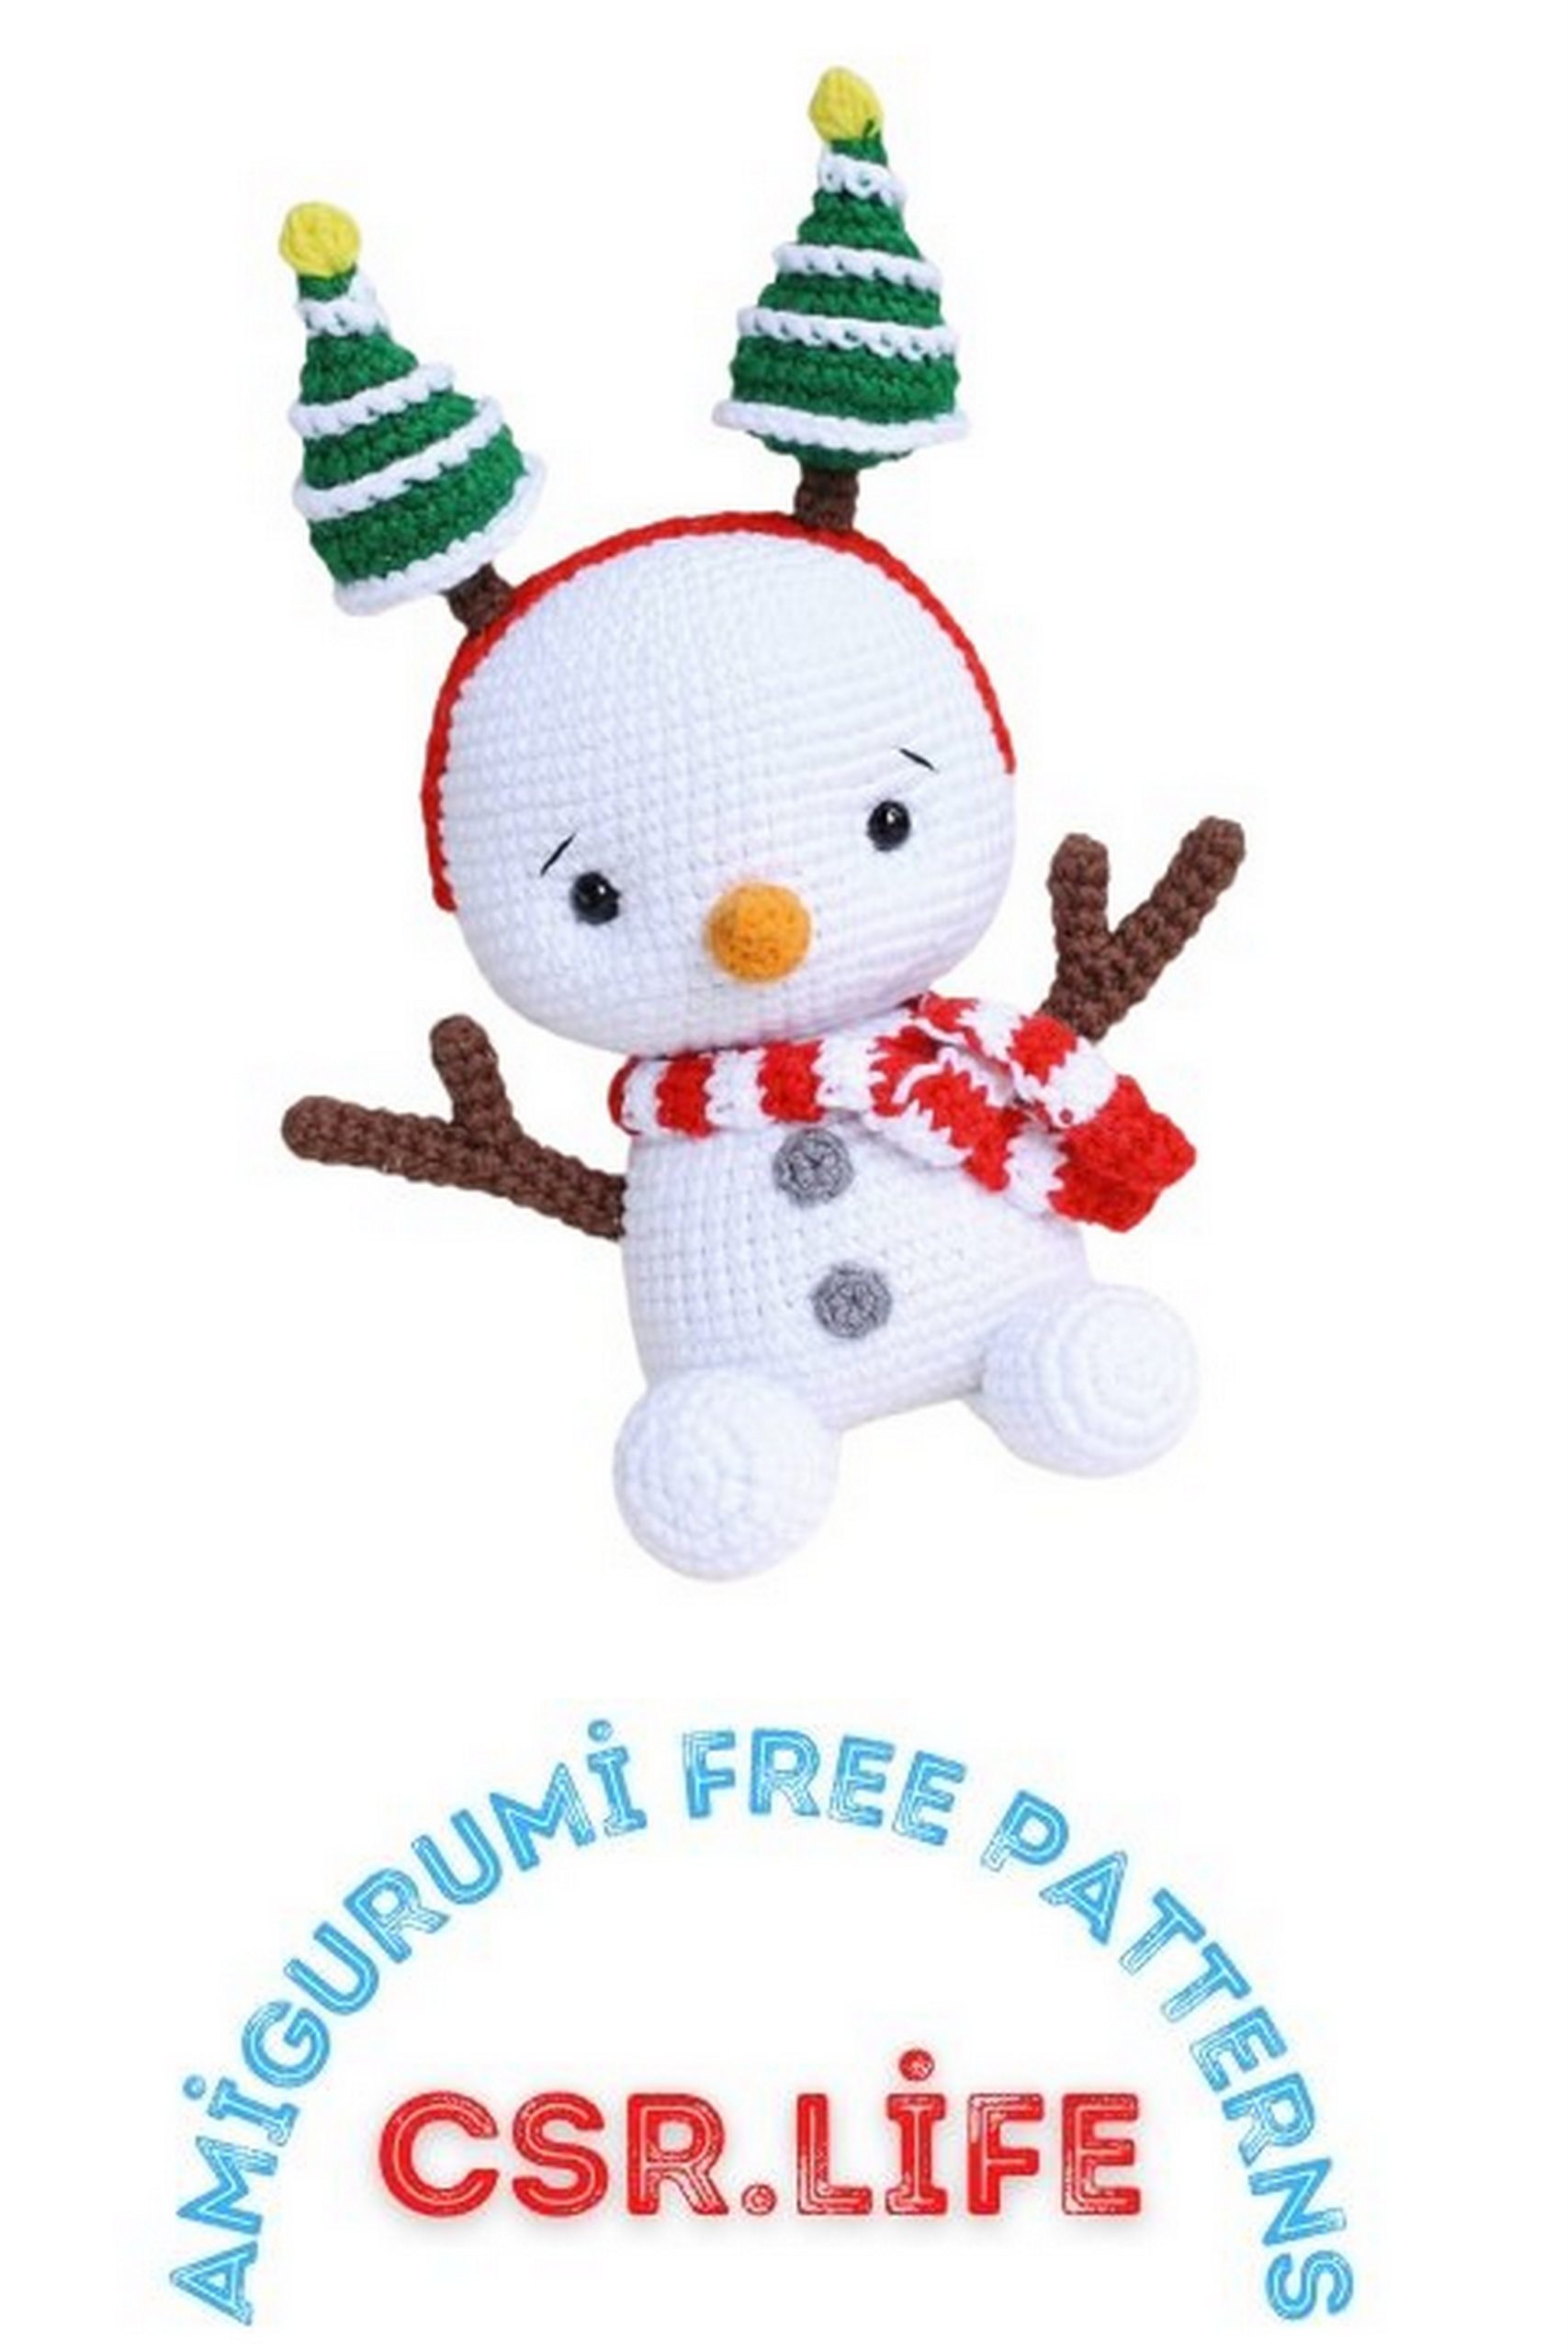
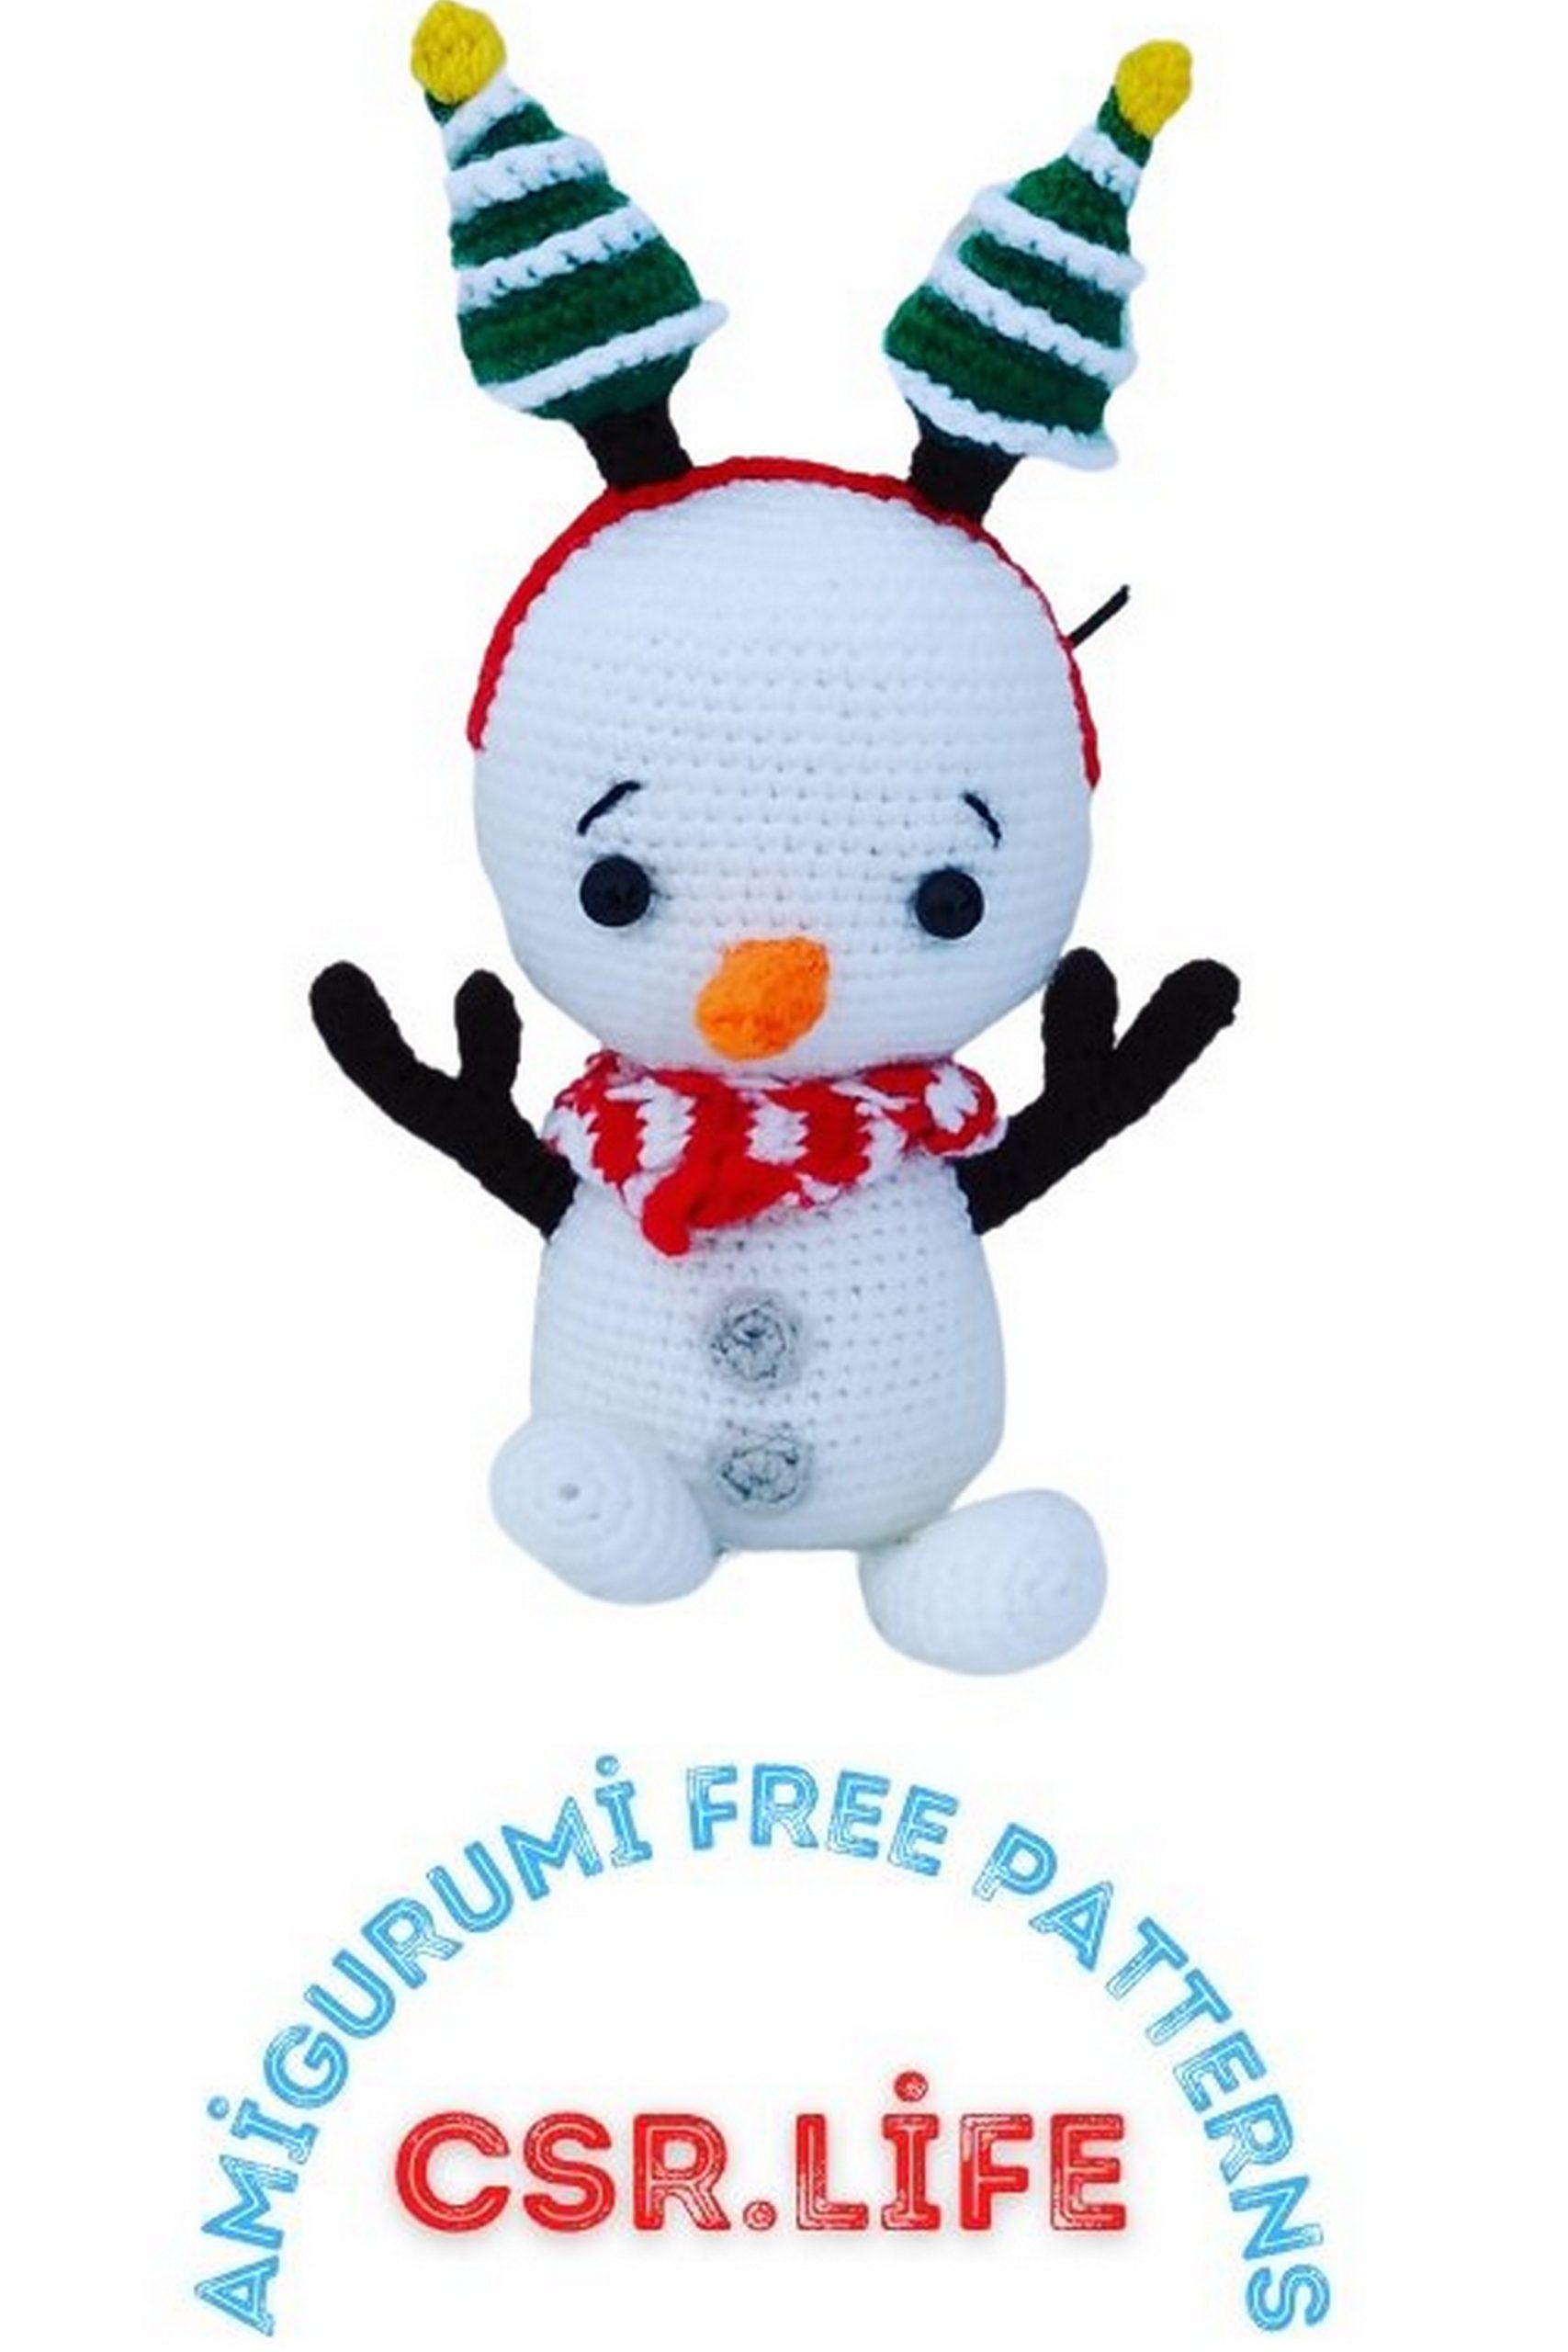
Free Little Snowman Amigurumi Pattern – Create Your Winter Wonderland!
Are you ready for a heartwarming crafting project to brighten up your winter days? Welcome to the world of amigurumi! Today, we’re delighted to share a charming amigurumi pattern that will remind you of a snug snowman wrapped in a cozy scarf. What’s even better? We’re offering this fantastic pattern for free! Are you prepared to create your own plush snowballs by following our easy-to-follow instructions for making this cute snowman amigurumi?
This adorable snowman amigurumi is perfect for decorating your home during the winter season or for gifting to your loved ones.
Abbreviations:
sc – single crochet
inc – increase
dec – decrease
ch – chain
sl st – slip stitch
hdc – half-double crochet
Snowman is made from Alize Cotton Gold yarn with a 2.00 mm crochet hook.
Toy height: 16 cm (including hat, 21 cm).
PATTERN
Snowman Head:
Stuff the head as you go.
1st Row: 7 sc in amigurumi ring (7)
2nd Row: (inc) x 7 (14)
3rd Row: (1 sc, inc) x 7 (21)
4th Row: (2 sc, inc) x 7 (28)
5th Row: (3 sc, inc) x 7 (35)
6th Row: 2 sc, inc, (4 sc, inc) x 6, 2 sc (42)
7th Row: (5 sc, inc) x 7 (49)
8th Row: 3 sc, inc, (6 sc, inc) x 6, 3 sc (56)
9th Row: (7 sc, inc) x 7 (63)
10th Row: 63 sc
11th Row: 4 sc, inc, (8 sc, inc) x 6, 4 sc (70)
Insert and secure safety eyes (7-8 mm) between Rows 20 and 21 of the head. The distance between the eyes is 12 stitches.
12th-25th Row: 70 sc (14 rows)
26th Row: (5 sc, dec) x 10 (60)
27th Row: (8 sc, dec) x 6 (54)
28th Row: (7 sc, dec) x 6 (48)
29th Row: (6 sc, dec) x 6 (42)
30th Row: (5 sc, dec) x 6 (36)
31st Row: (4 sc, dec) x 6 (30)
32nd Row: (3 sc, dec) x 6 (24)
Sl st, cut the yarn and hide the end.
Legs (2 pieces):
Stuff lightly to give shape, approximately up to Row 10.
1st Row: 6 sc in amigurumi ring (6)
2nd Row: (inc) x 6 (12)
3rd Row: (inc) x 12 (24)
4th-8th Row: 24 sc (5 rows)
9th Row: (2 sc, dec) x 6 (18)
10th Row: 18 sc
11th Row: (sc, dec) x 6 (12)
12th Row: 12 sc
13th Row: Fold the piece in half, sc 6 stitches, capturing loops from both sides (6)
Cut the yarn, leaving a tail of about 3-4 cm.

Body:
Stuff the piece as you go.
1st Row: Chain 11, start crocheting from the 2nd chain from the hook – inc, 8 sc, 4 sc in the last chain, on the other side of the chain – 8 sc, inc (24)
2nd Row: (1 sc, inc) x 12 (36)
3rd Row: 6 sc, simultaneously capturing loops from the legs and body, 6 sc on the body loops, 6 sc, simultaneously capturing loops from the legs and body, 18 sc (36)
4th Row: (5 sc, inc) x 6 (42)
5th Row: (1 sc, inc) x 21 (63)
6th-7th Row: 63 sc (2 rows)
8th Row: (dec) x 2, 26 sc, (dec) x 2, 2 sc, dec, (4 sc, dec) x 4, 1 sc (54)
9th Row: 54 sc
10th Row: (3 sc, dec), 7 sc, (dec, 3 sc) x 2, 27 sc (50)
11th Row: 27 sc, dec, 16 sc, dec, 3 sc (48)
12th-16th Row: 48 sc (5 rows)
17th Row: (6 sc, dec) x 6 (42)
18th Row: 42 sc
19th Row: (5 sc, dec) x 6 (36)
20th Row: 36 sc
21st Row: (4 sc, dec) x 6 (30)
22nd Row: 30 sc
23rd Row: (3 sc, dec) x 6 (24)
Sl st, cut the yarn.
At this stage, you can sew the head to the body.
Carrot Nose:
Create a chain of 9 ch, join the chain into a ring using a slip stitch. Continue crocheting in the round.
1st-4th Row: 9 sc (4 rows)
5th Row: (1 sc, dec) x 3 (6)
6th Row: (dec) x 3 (3)
Stuff the nose lightly, giving it shape.
Sew the nose between Rows 21 and 26 of the head.
Eye Shaping (optional):
Attach a thread for shaping in Row 31 of the head, on the side (see photo). Insert the needle in the same spot, bring it out under the eye. Move 1 stitch up from this point (under the eye), insert the needle there, and bring it out at the very first point. Slightly tighten the thread. Repeat shaping for the other eye. Embroider eyebrows.
Buttons:
1st Row: 7 sc in amigurumi ring (7)
Sl st, cut the yarn. Sew buttons to the body.
Branch-Like Arms:
Stuff as desired.
Small Part:
1st Row: 6 sc in amigurumi ring (6)
2nd-5th Row: 6 sc (4 rows)
Sl st, cut the yarn.
Main Part:
1st Row: 7 sc in amigurumi ring (7)
2nd-7th Row: 7 sc (6 rows)
8th Row: 3 sc, simultaneously crocheting through loops of the small and main parts, 4 sc on the main part (7)
9th Row: 3 sc, crocheting through loops of the small part, 4 sc on the main part (7)
10th-14th Row: 7 sc (5 rows)
Sl st, cut the yarn. Sew arms, leaving a gap of 6-7 stitches below the neck.
Hat:
Start with brown yarn.
1st Row: 6 sc in amigurumi ring (6)
2nd-4th Row: 6 sc (3 rows)
Switch to green yarn.
5th Row: (inc) x 6 (12)
6th Row: (inc) x 12 (24)
7th Row: (3 sc, inc) x 6 (30)
8th Row: Work 30 sc through the back loops of the previous row.
9th Row: (3 sc, dec) x 6 (24)
10th Row: (2 sc, dec) x 6 (18)
11th Row: Work 18 sc through the back loops of the previous row.
12th Row: (7 sc, dec) x 2 (16)
13th Row: (6 sc, dec) x 2 (14)
14th Row: Work (5 sc, dec) x 2 (12)
At this stage, it’s convenient to fill the piece with stuffing.
15th Row: 12 sc
16th Row: (dec) x 6 (6)
17th Row: Work 6 sc through the back loops of the previous row.
18th Row: (dec) x 3, sl st, cut the yarn. Hide the end.
Hat Top:
Join yellow yarn to the top of the hat (capturing loops from both sides), crochet 5 hdc with a common top.
Snowflakes on the Hat:
Join white yarn to the last front loop of the 16th row of the hat. Crochet a row of sc. Repeat for the 13th, 10th, and 7th rows of the hat.
Scarf:
Change colors every 2 rows. Crochet in rows.
1st Row: Chain 4, start crocheting from the 2nd chain from the hook – 3 sc, ch, turn.
2nd Row: 3 sc, ch, turn.
3rd Row: 3 sc, ch, turn.
Continue in this pattern for the length of the scarf. For reference, the scarf for my snowman is 28 cm long.