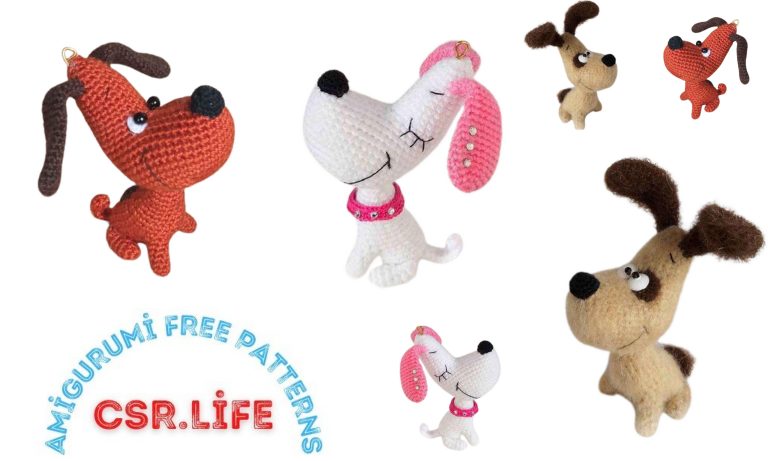
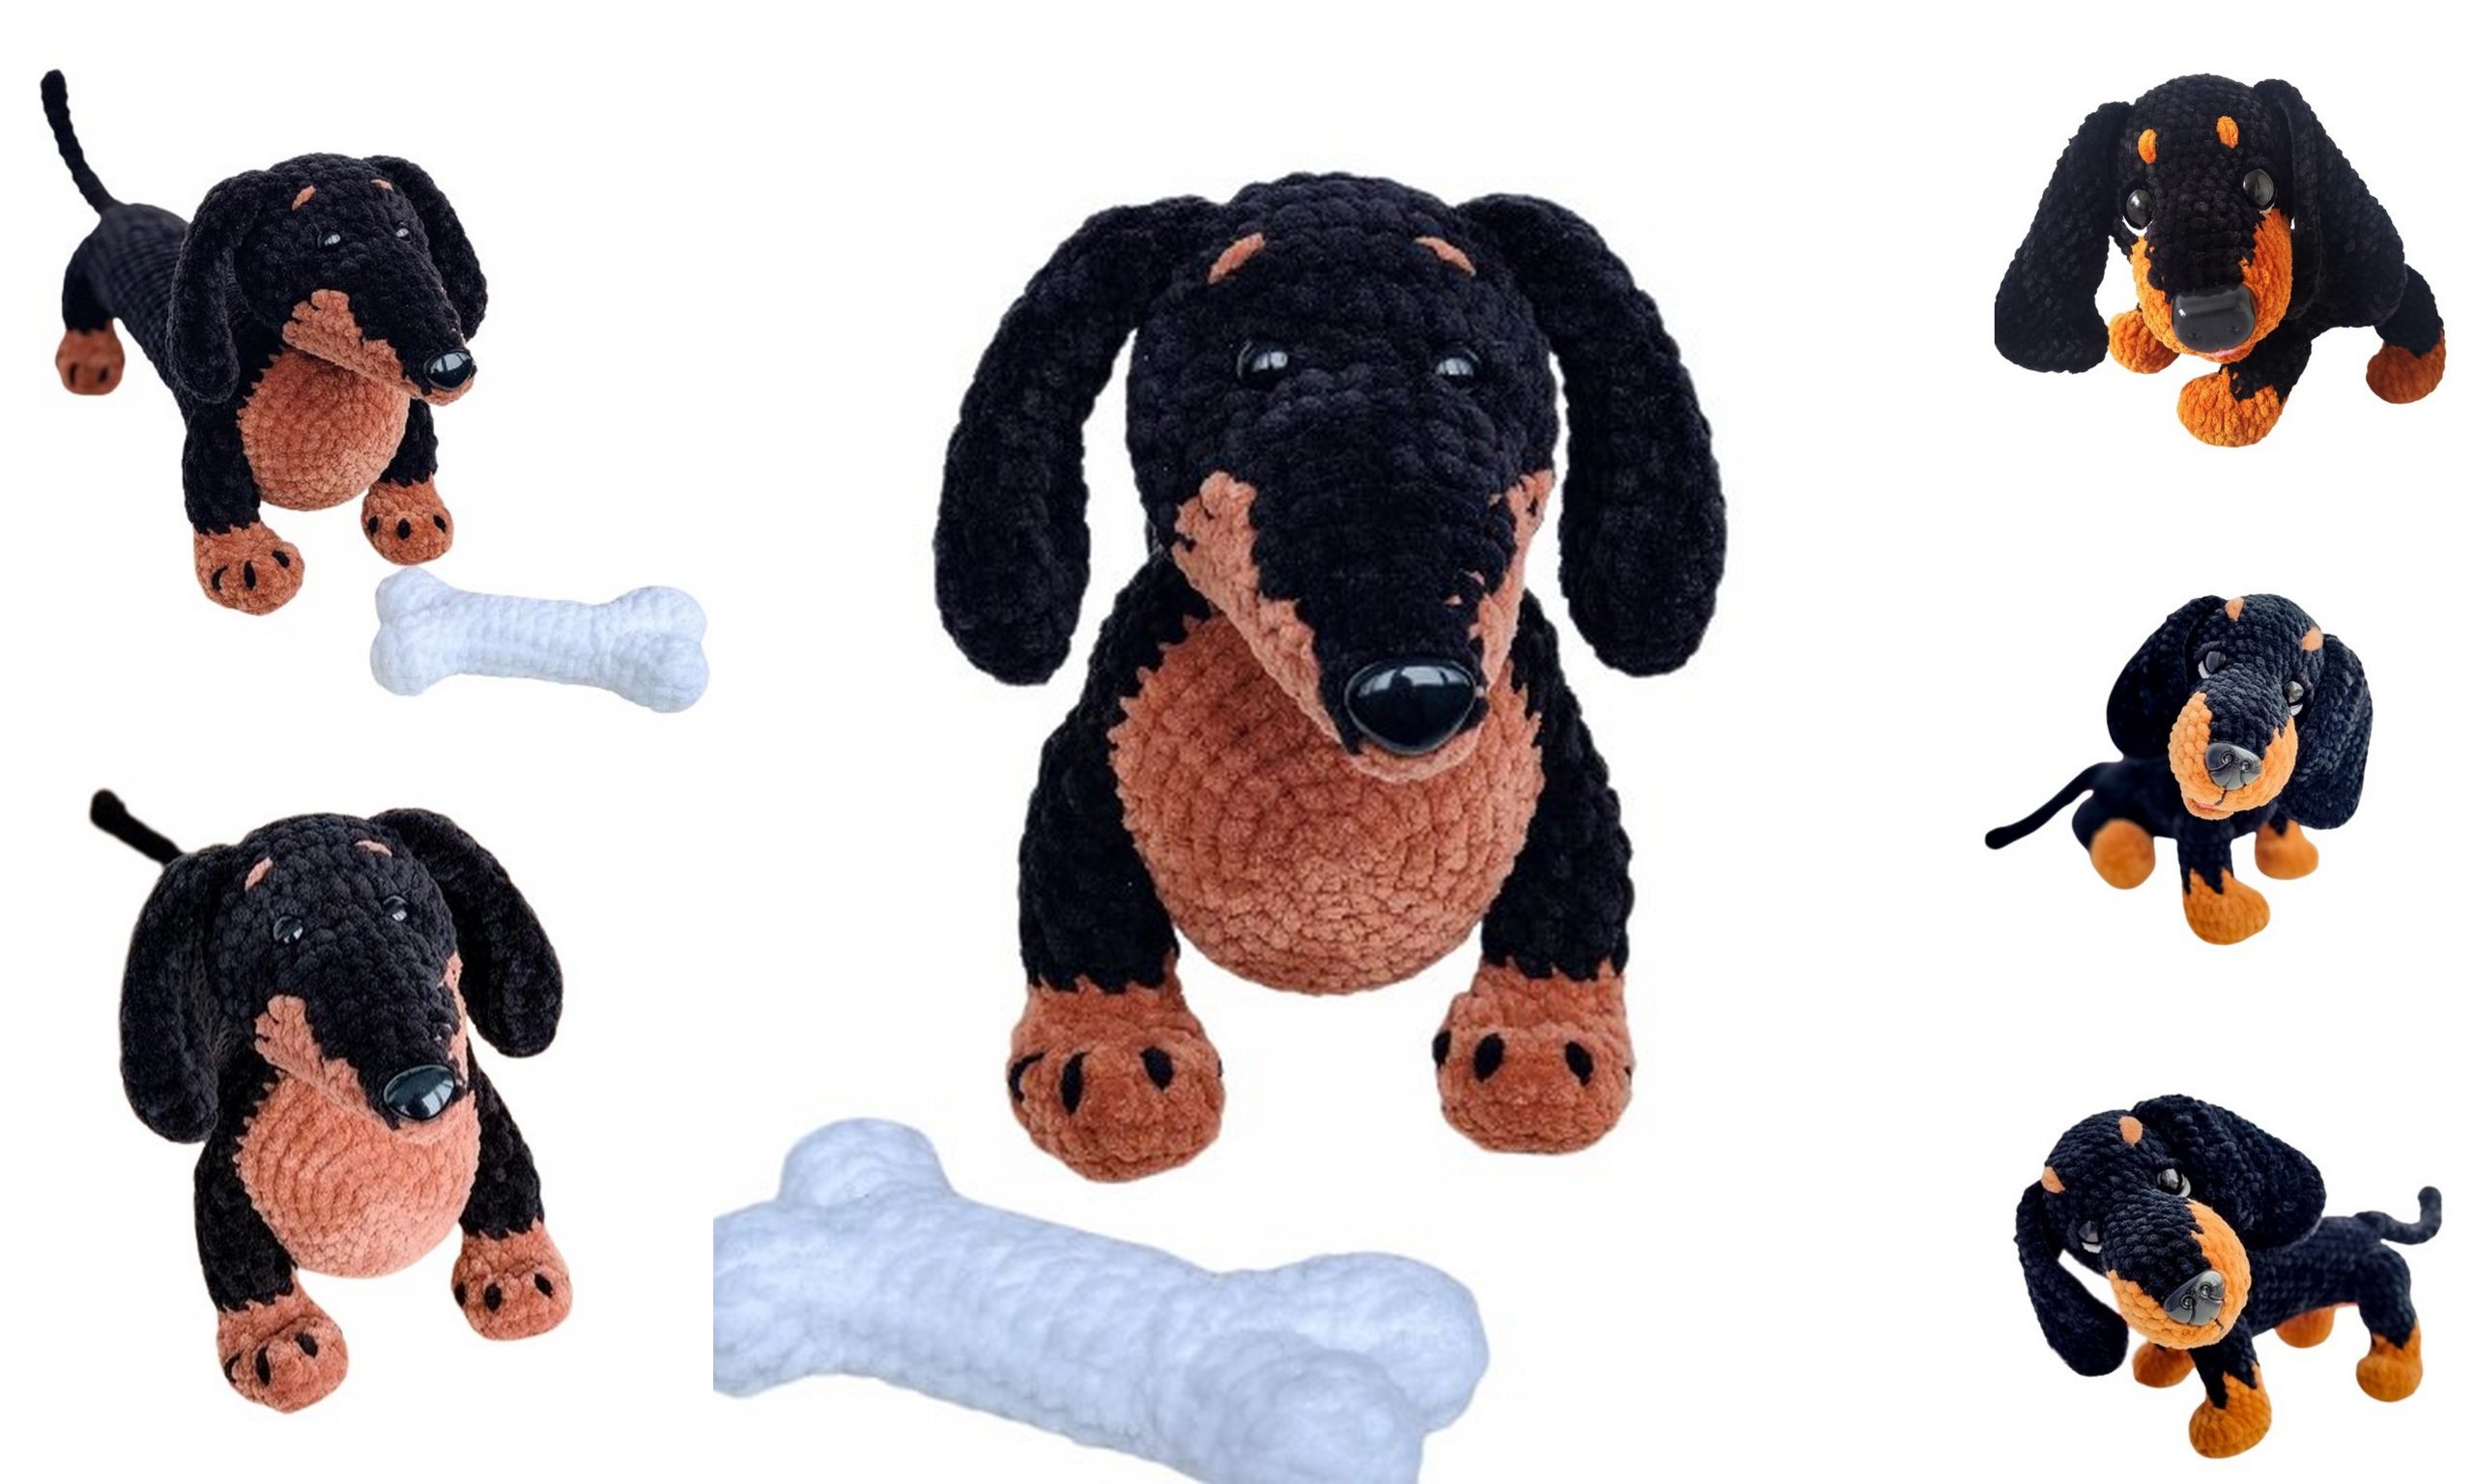
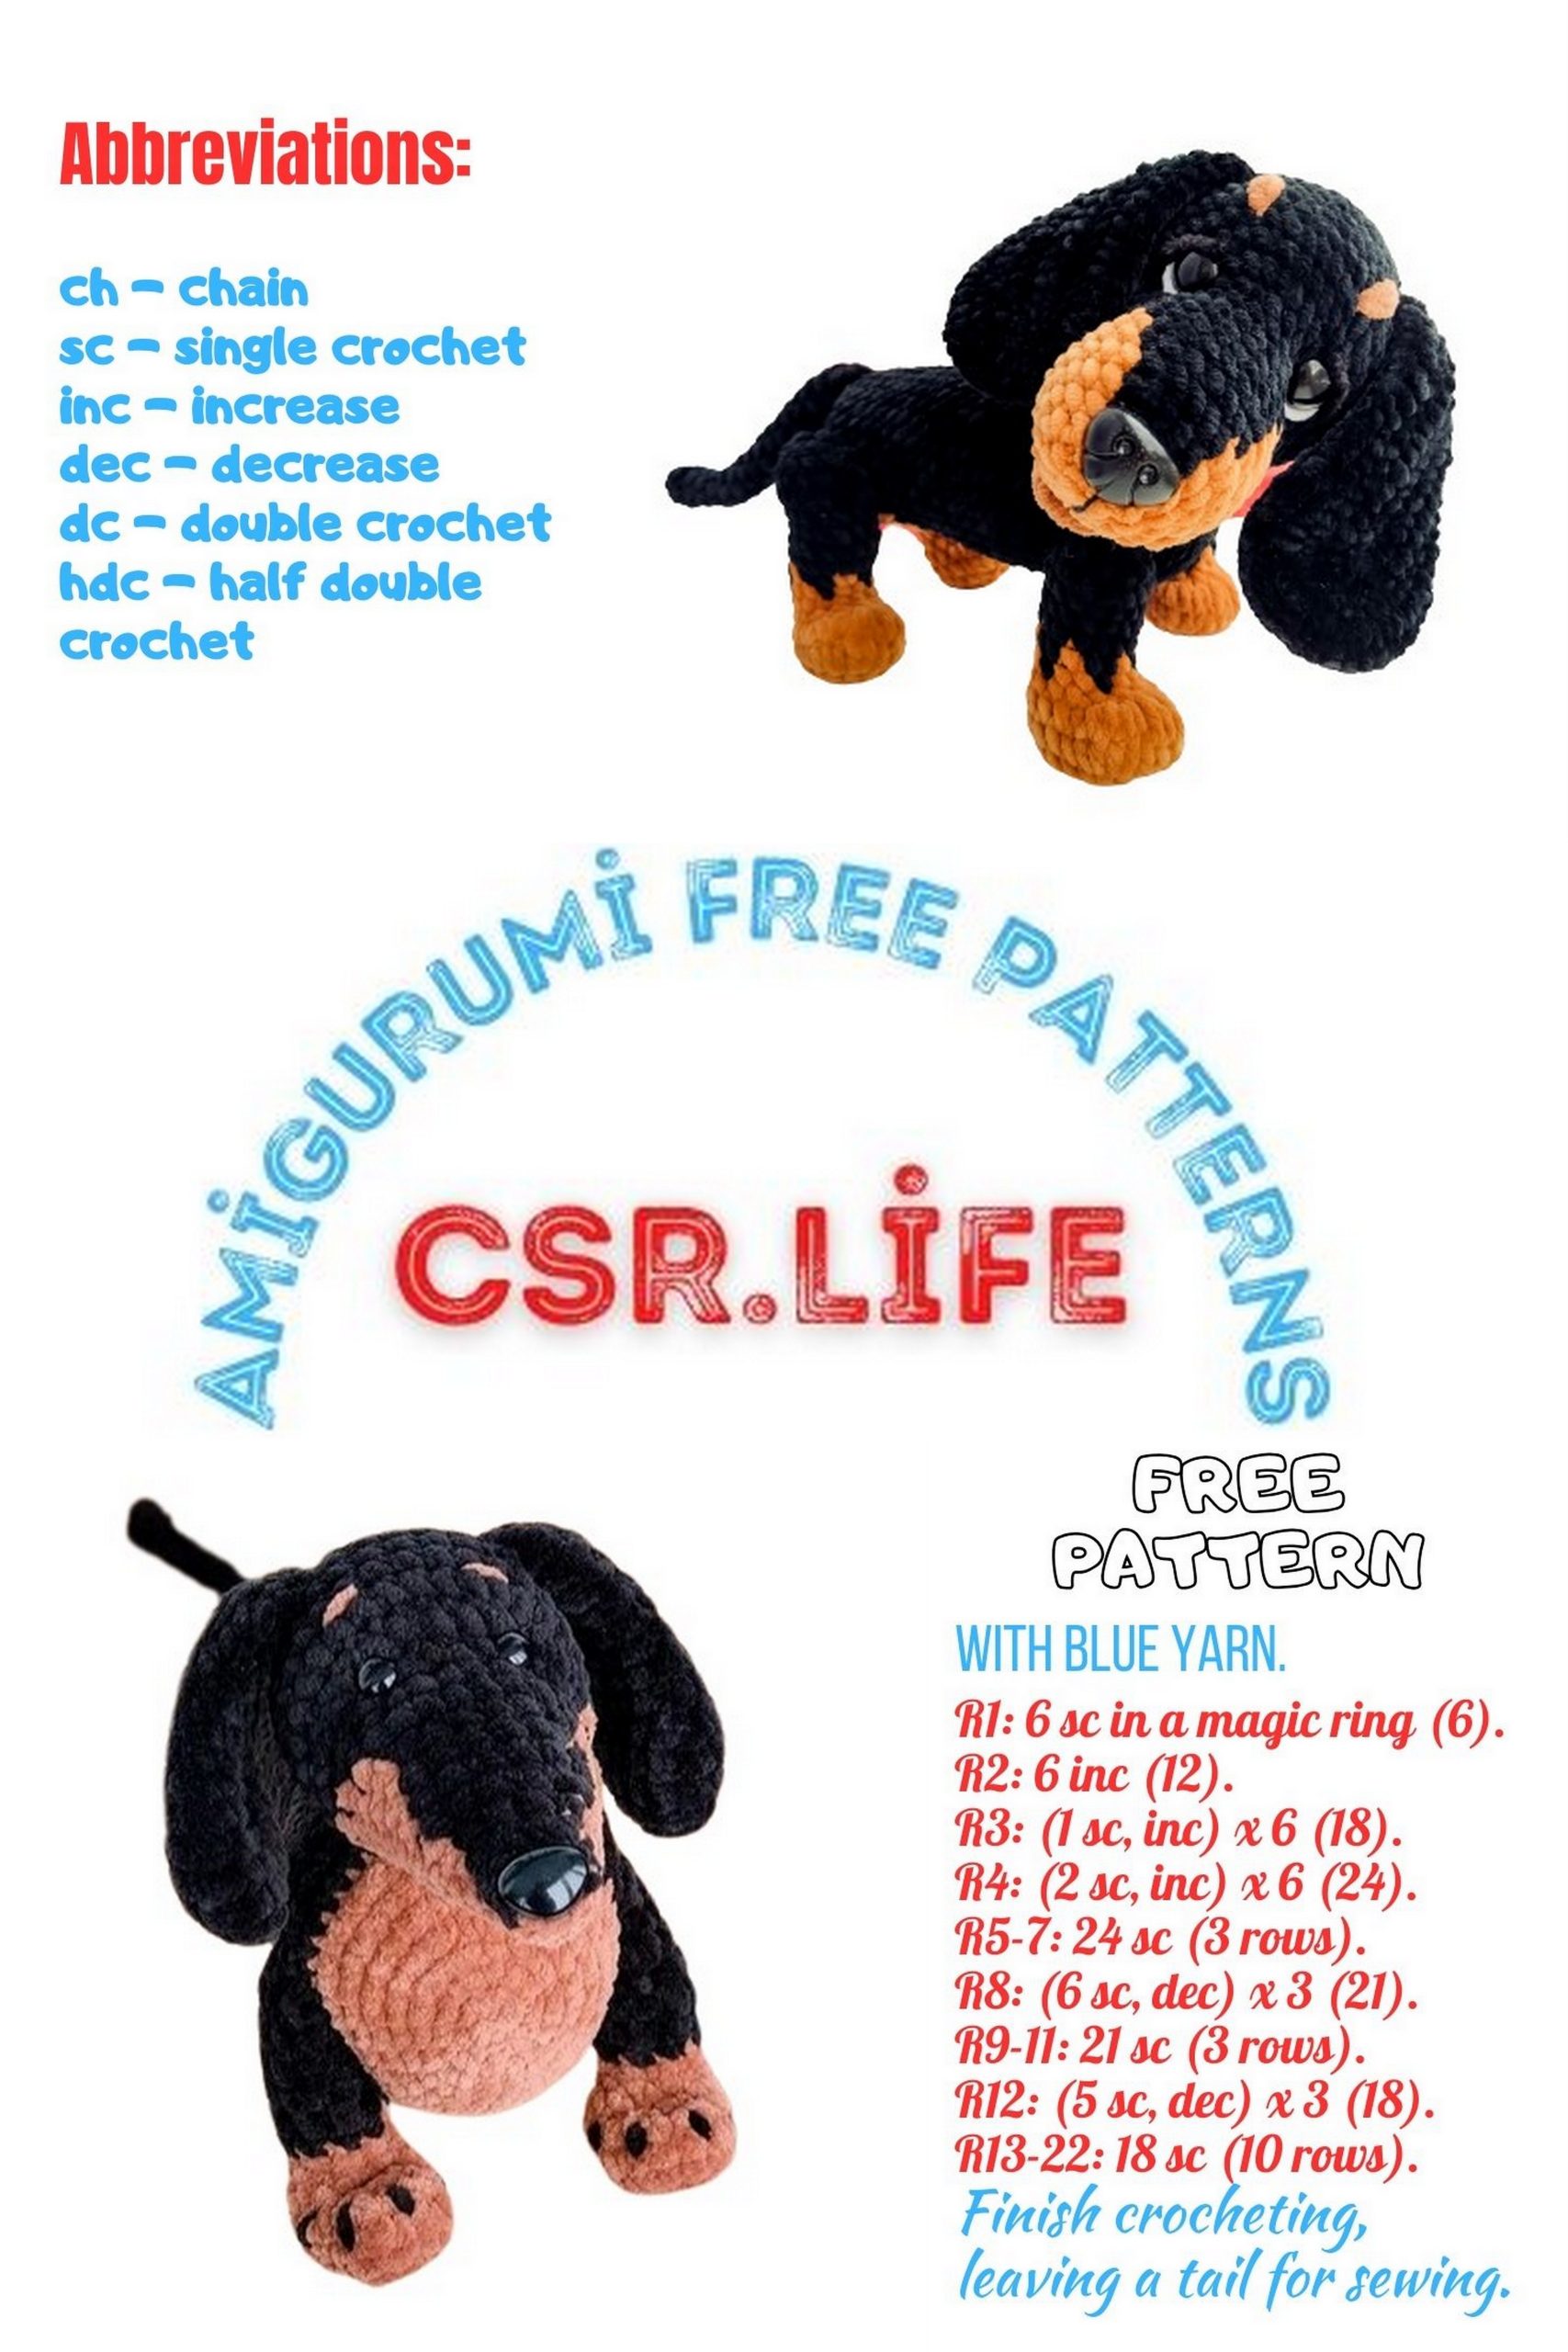
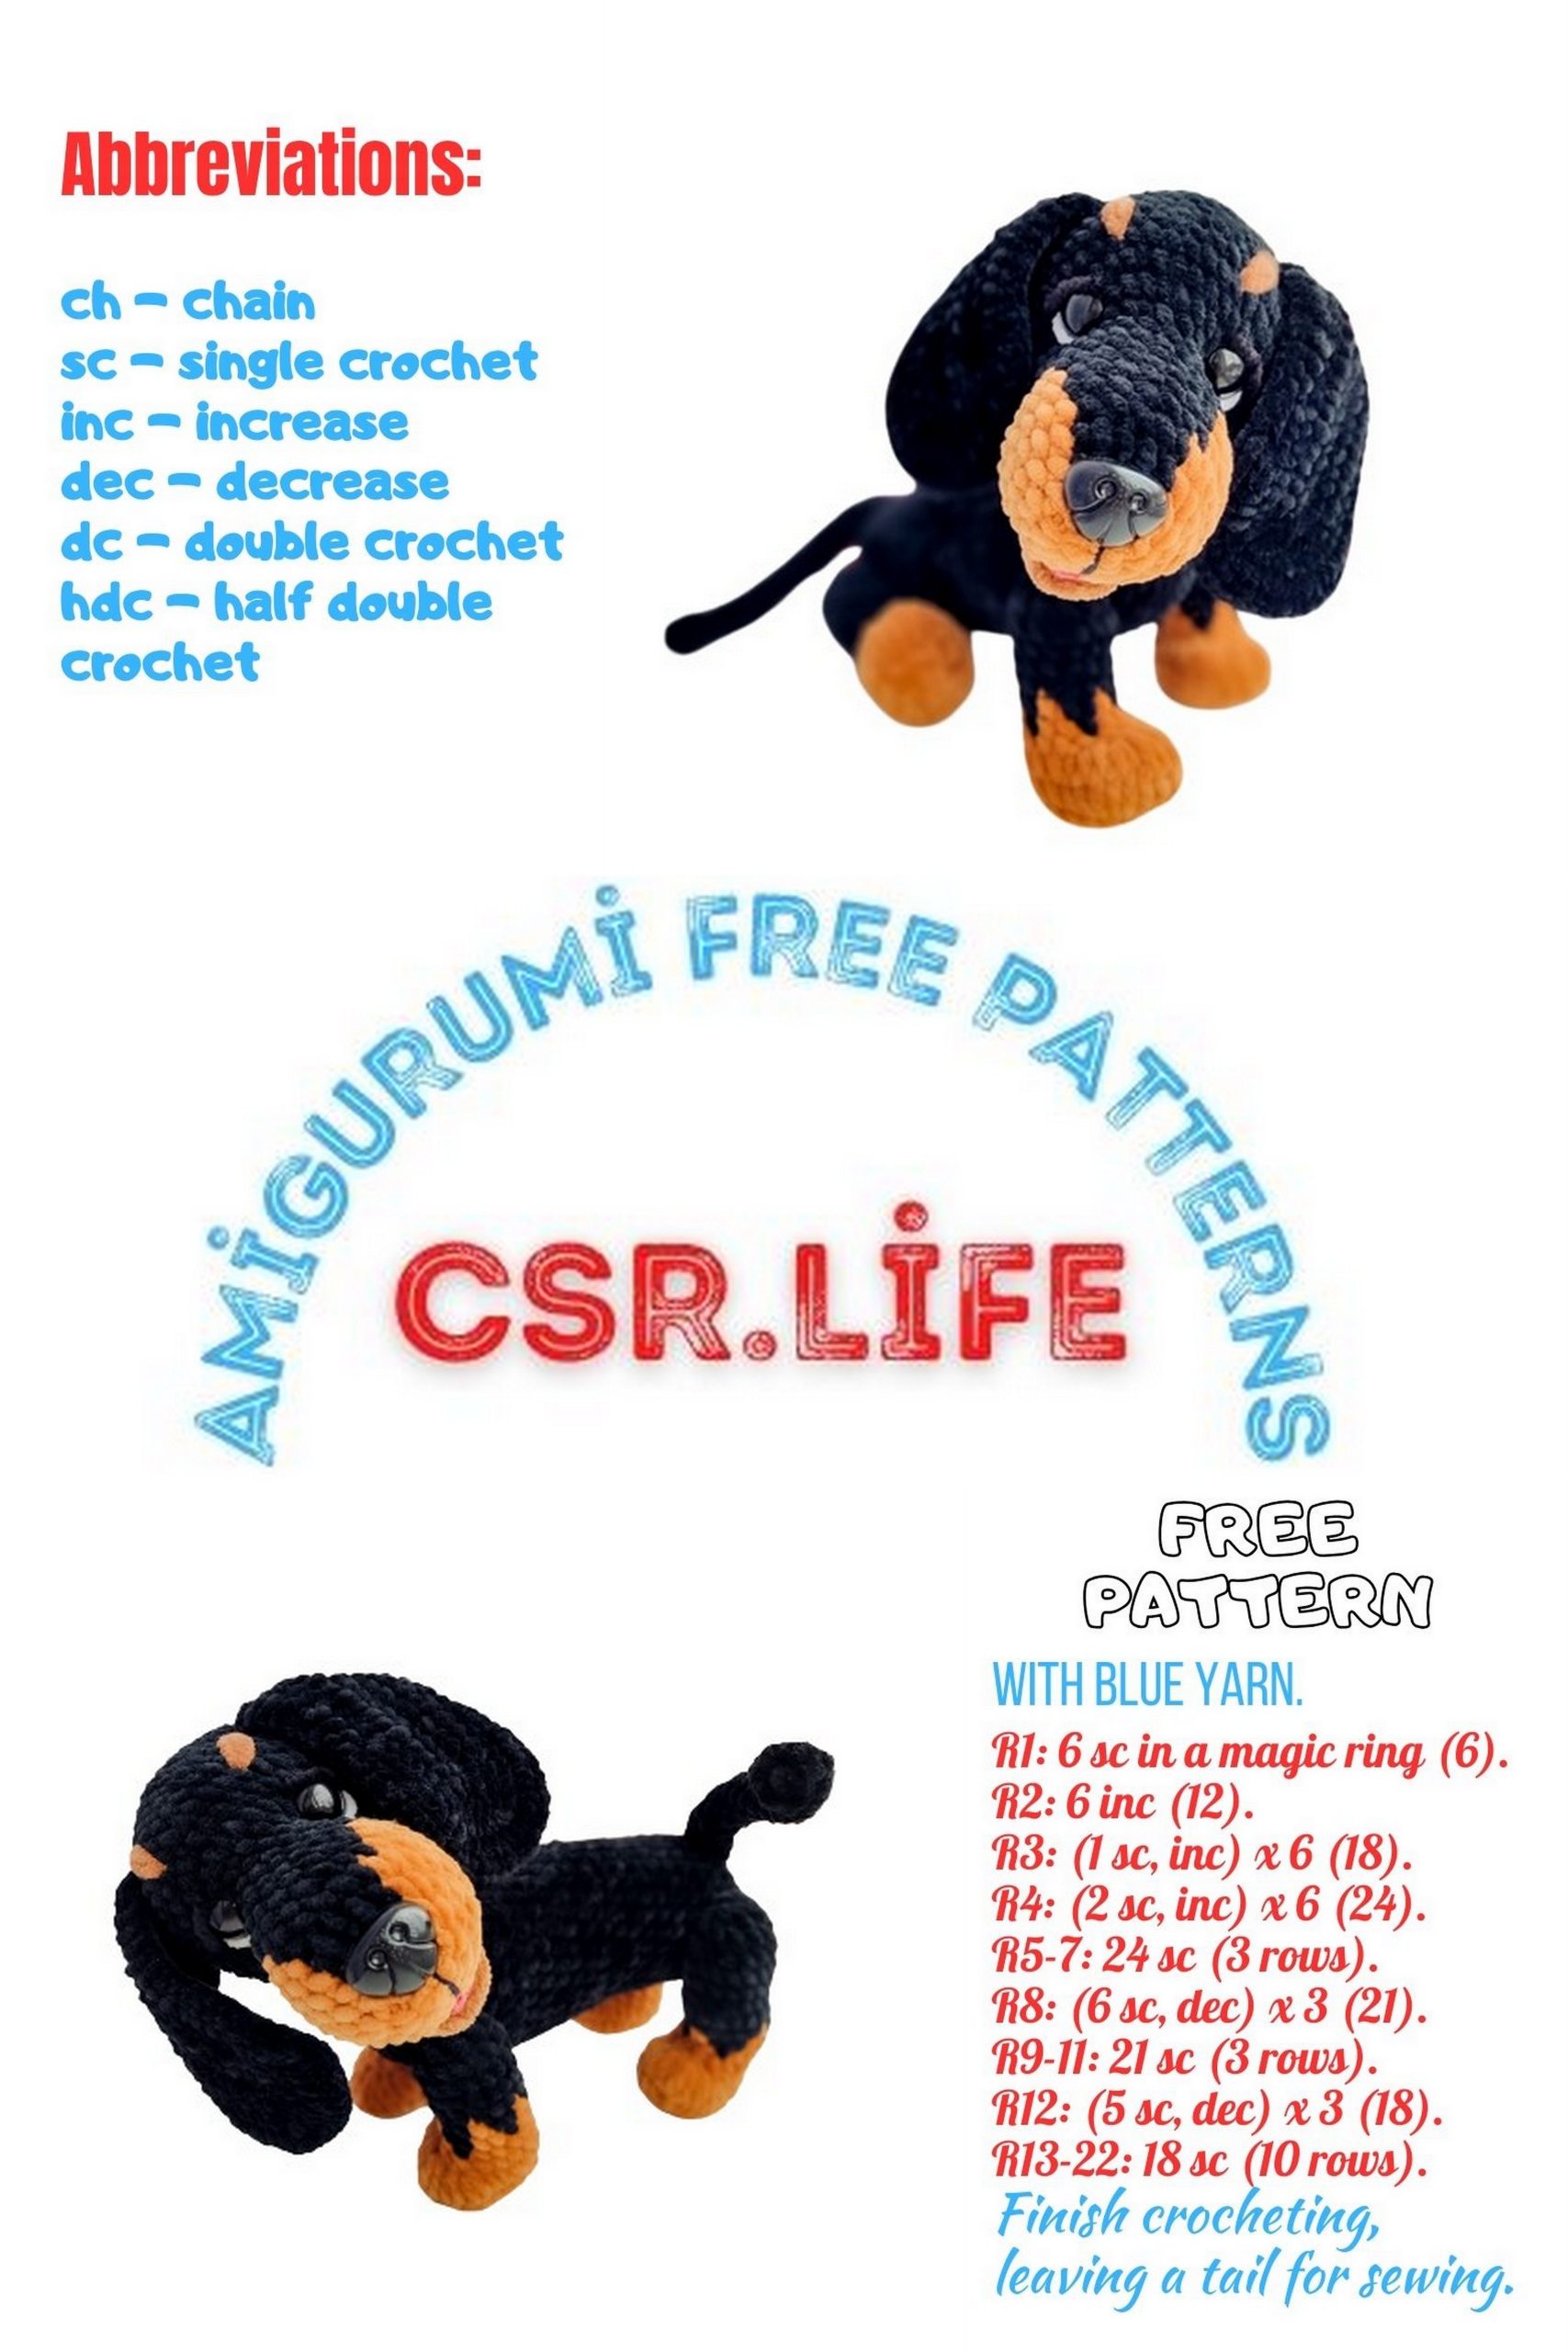
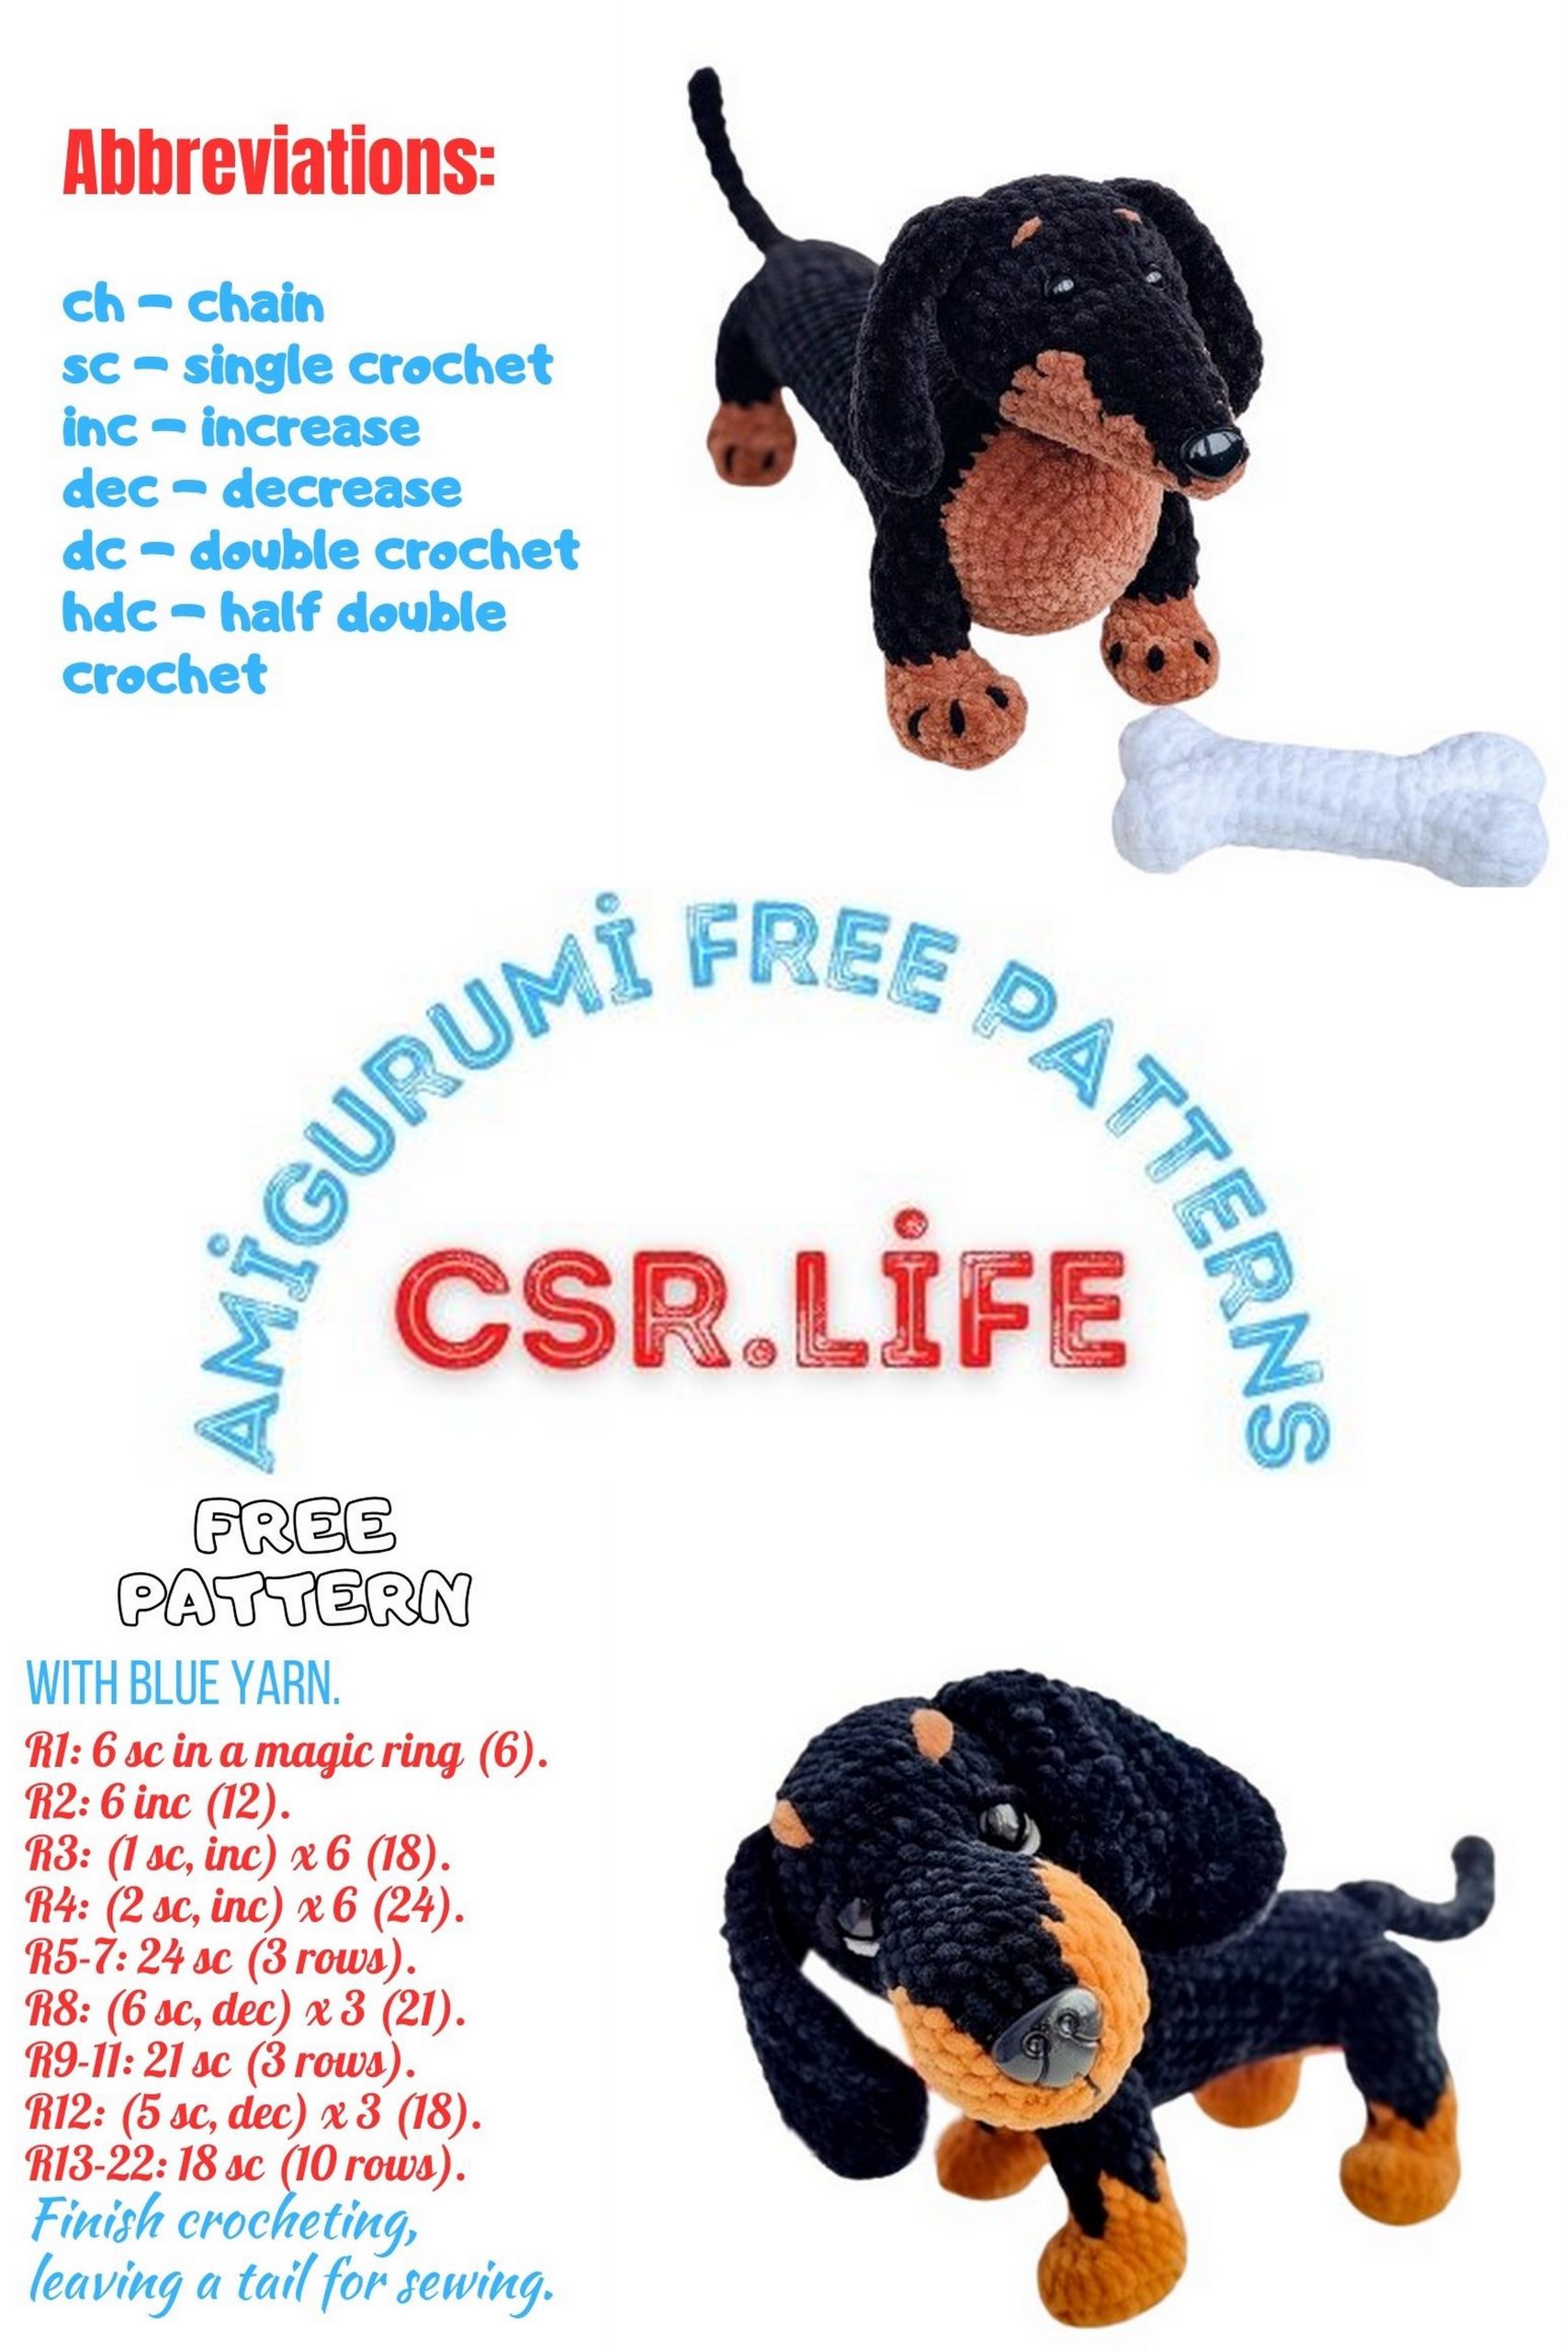
Dachshund Dog Amigurumi Free Pattern
Welcome to an exciting project for amigurumi dog enthusiasts! This free knitting pattern allows you to craft a charming Dachshund dog amigurumi. Dachshunds, known for their short legs and long bodies, make for an endearing and playful subject. With our step-by-step instructions and helpful diagrams, you’ll find it a breeze to complete this enjoyable project.
Materials and Tools
Plush yarn Himalaya Dolphin Baby or YarnArt Dolche – 1 skein of black and 1 skein of brown color.
Crochet hook size 4.
Safety eyes and nose with secure fastening or sew-on (or black cotton yarn, for example, YarnArt Jeans, if you’ll be embroidering the eyes and nose).
Needle and strong, thin thread in brown and black colors.
Crochet markers.
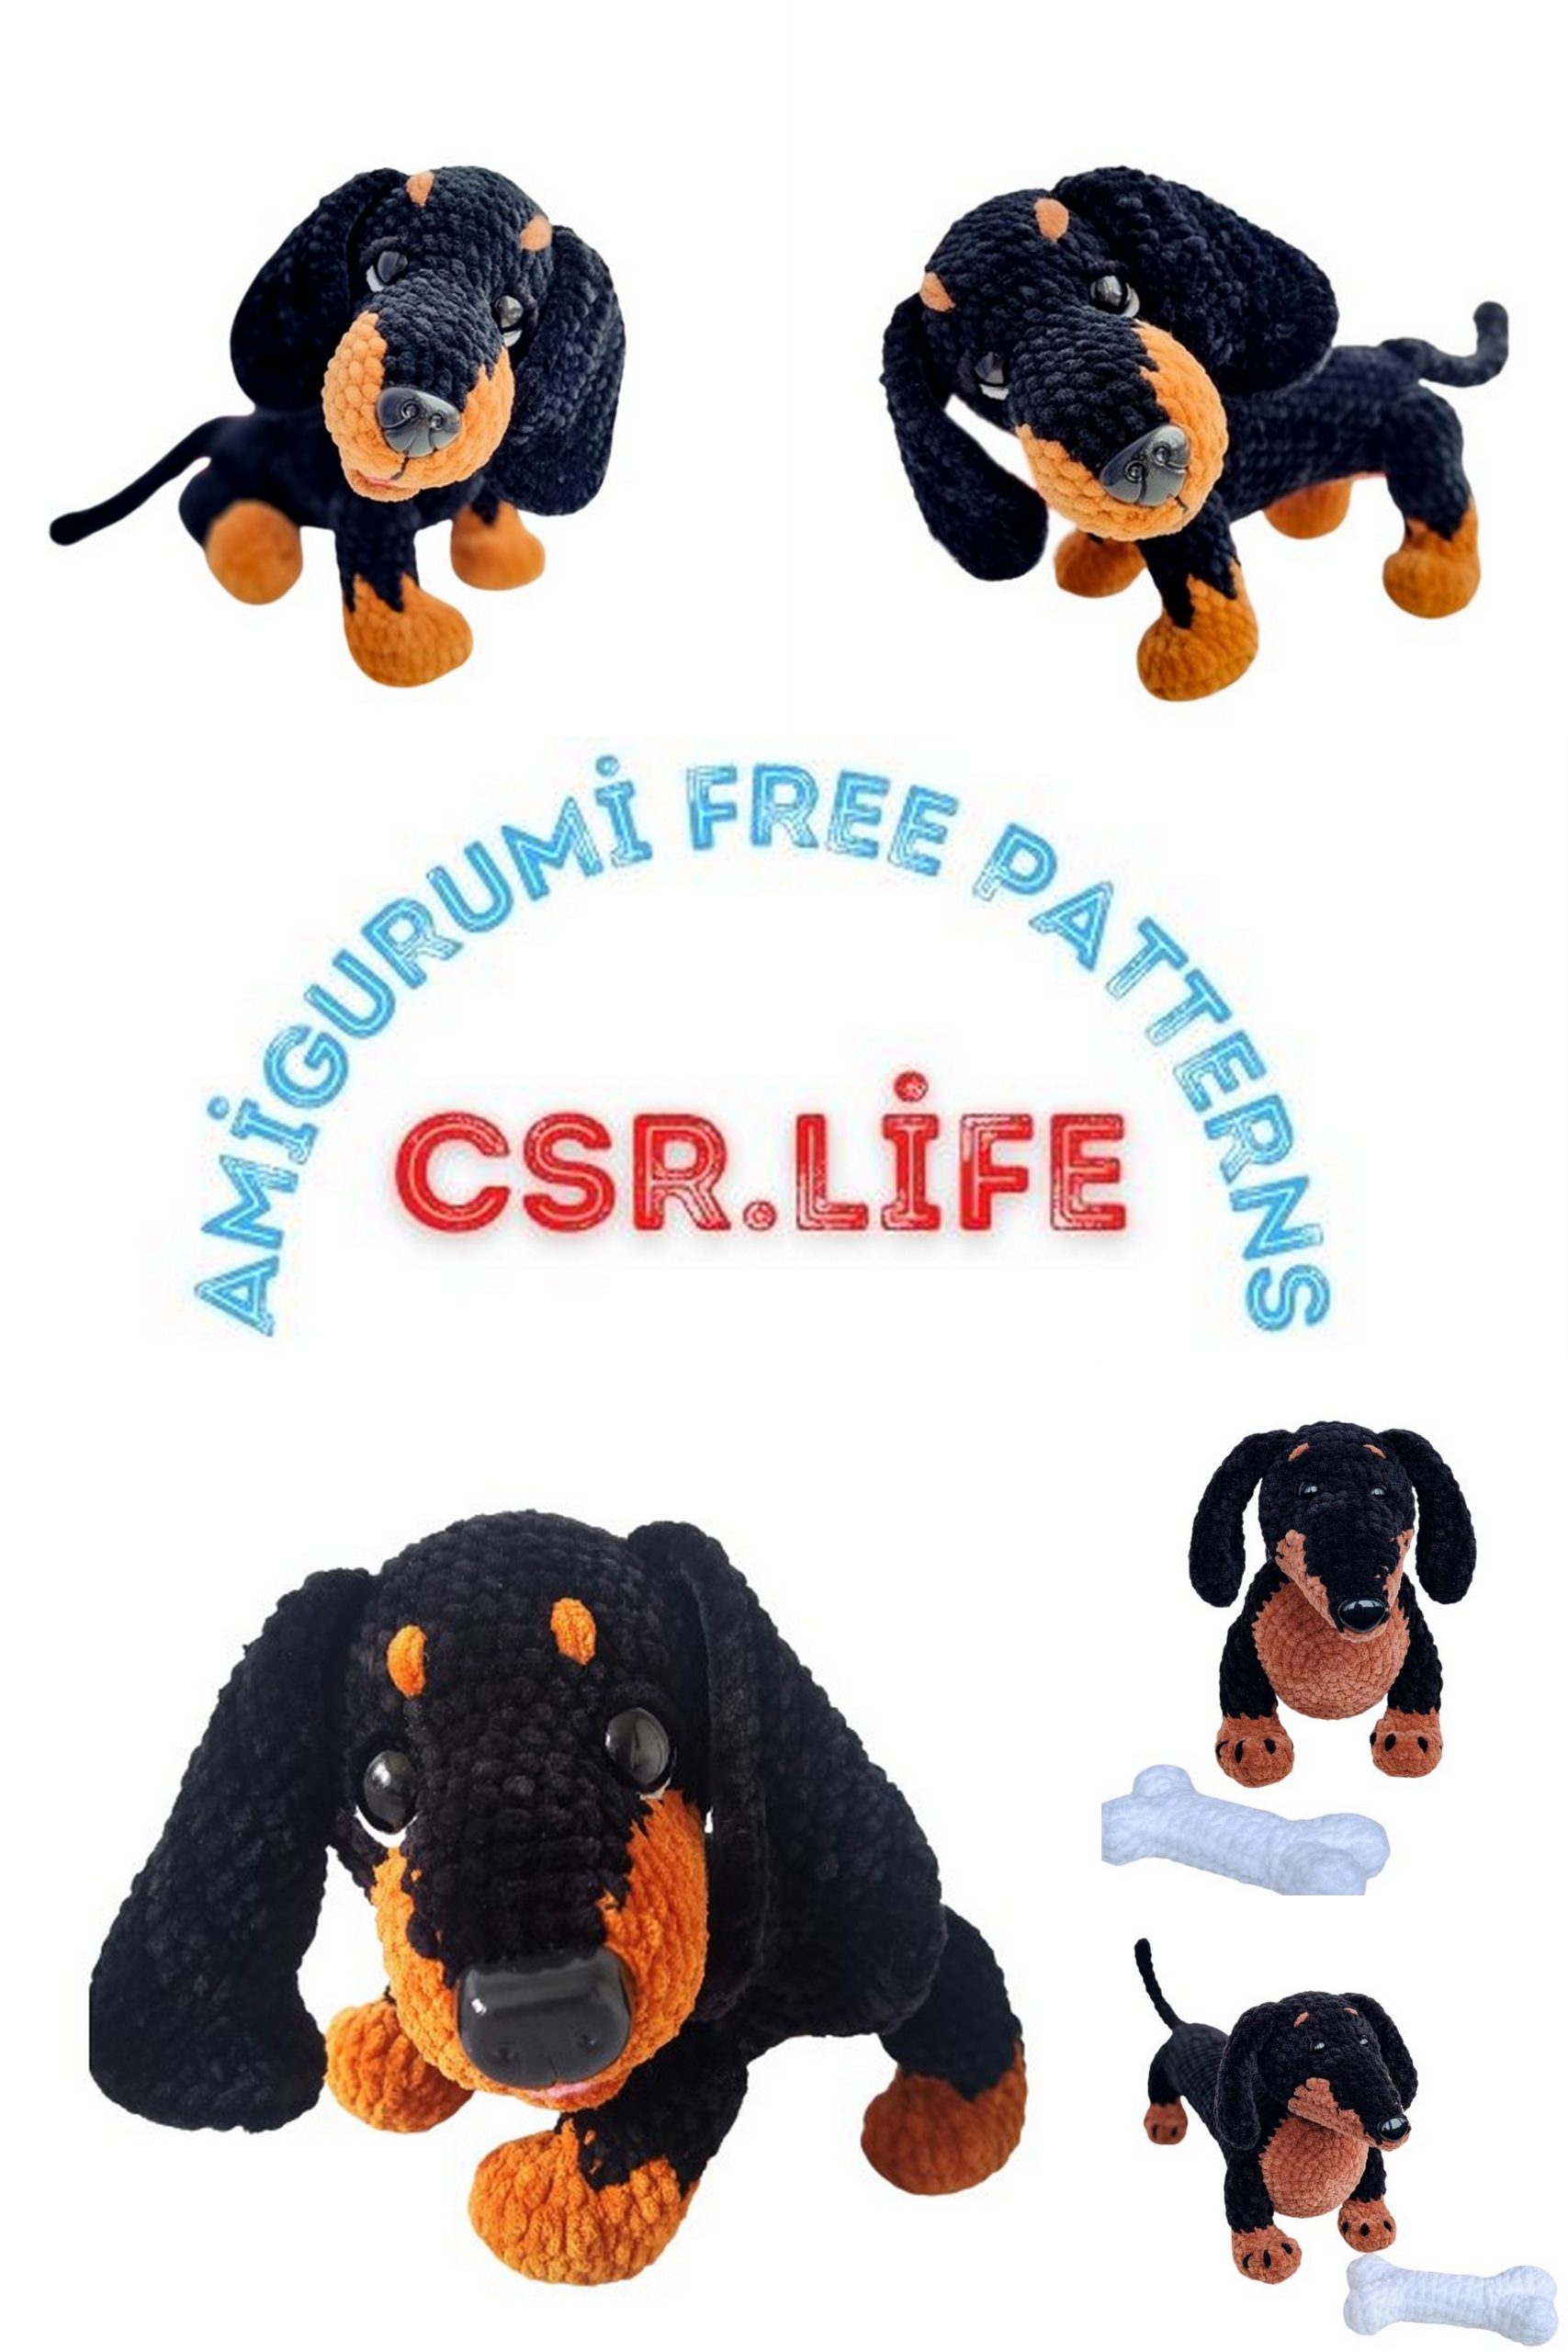
I crochet quite tightly, and with a crochet hook size 4, the plush toy measures approximately 35 cm (from nose to the end of the body, not including the tail, which is up).
Abbreviations
CA – Amigurumi ring
sc – single crochet
inc – increase
dec – decrease
ss – slip stitch
(…) *6 – repeat the action in parentheses 6 times
blk. – crochet with black color
brwn. – crochet with brown color
Difficulty Level: Intermediate
PATTERN
Head
Starting with black color, begin from the back of the head.
1 Row: 6 sc in CA
2 Row: 6 inc = 12 sc
3 Row: (1 sc, inc) * 6 = 18 sc [place a marker in the last stitch of this row to keep track of the stitch count in the following rows]
4 Row: (2 sc, inc) * 6 = 24 sc
5 Row: (3 sc, inc) * 6 = 30 sc
6 Row: 30 sc
7 Row: 28 blk. sc, 2 brwn. sc = 30 sc
8 Row: 27 blk. sc, 3 brwn. sc = 30 sc
9 Row: 1 brwn. sc, 25 blk. sc, 4 brwn. sc = 30 sc
10 Row: 2 brwn. sc, 23 blk. sc, 5 brwn. sc = 30 sc
11 Row: 3 brwn. sc, 21 blk. sc, 6 brwn. sc = 30 sc
12 Row: 4 brwn. sc, 2 blk. sc, (1 sc, dec) * 6 – blk., 1 blk. sc, 5 brwn. sc = 24 sc
13 Row: 5 brwn. sc, 1 blk. sc, 6 dec blk., 6 brwn. sc = 18 sc
14 Row: 5 brwn. sc, 2 blk. sc, 3 inc blk., 2 blk. sc, 6 brwn. sc = 21 sc
15 Row: 6 brwn. sc, 8 blk. sc, 7 brwn. sc = 21 sc
16 Row: (5 sc, dec) * 3 = 18 sc – change color so that the black yarn remains at approximately the same level as in the previous row, in the middle of the face. Do not aim to crochet the black stitches exactly above the previous black ones; a little unevenness adds to the natural look.
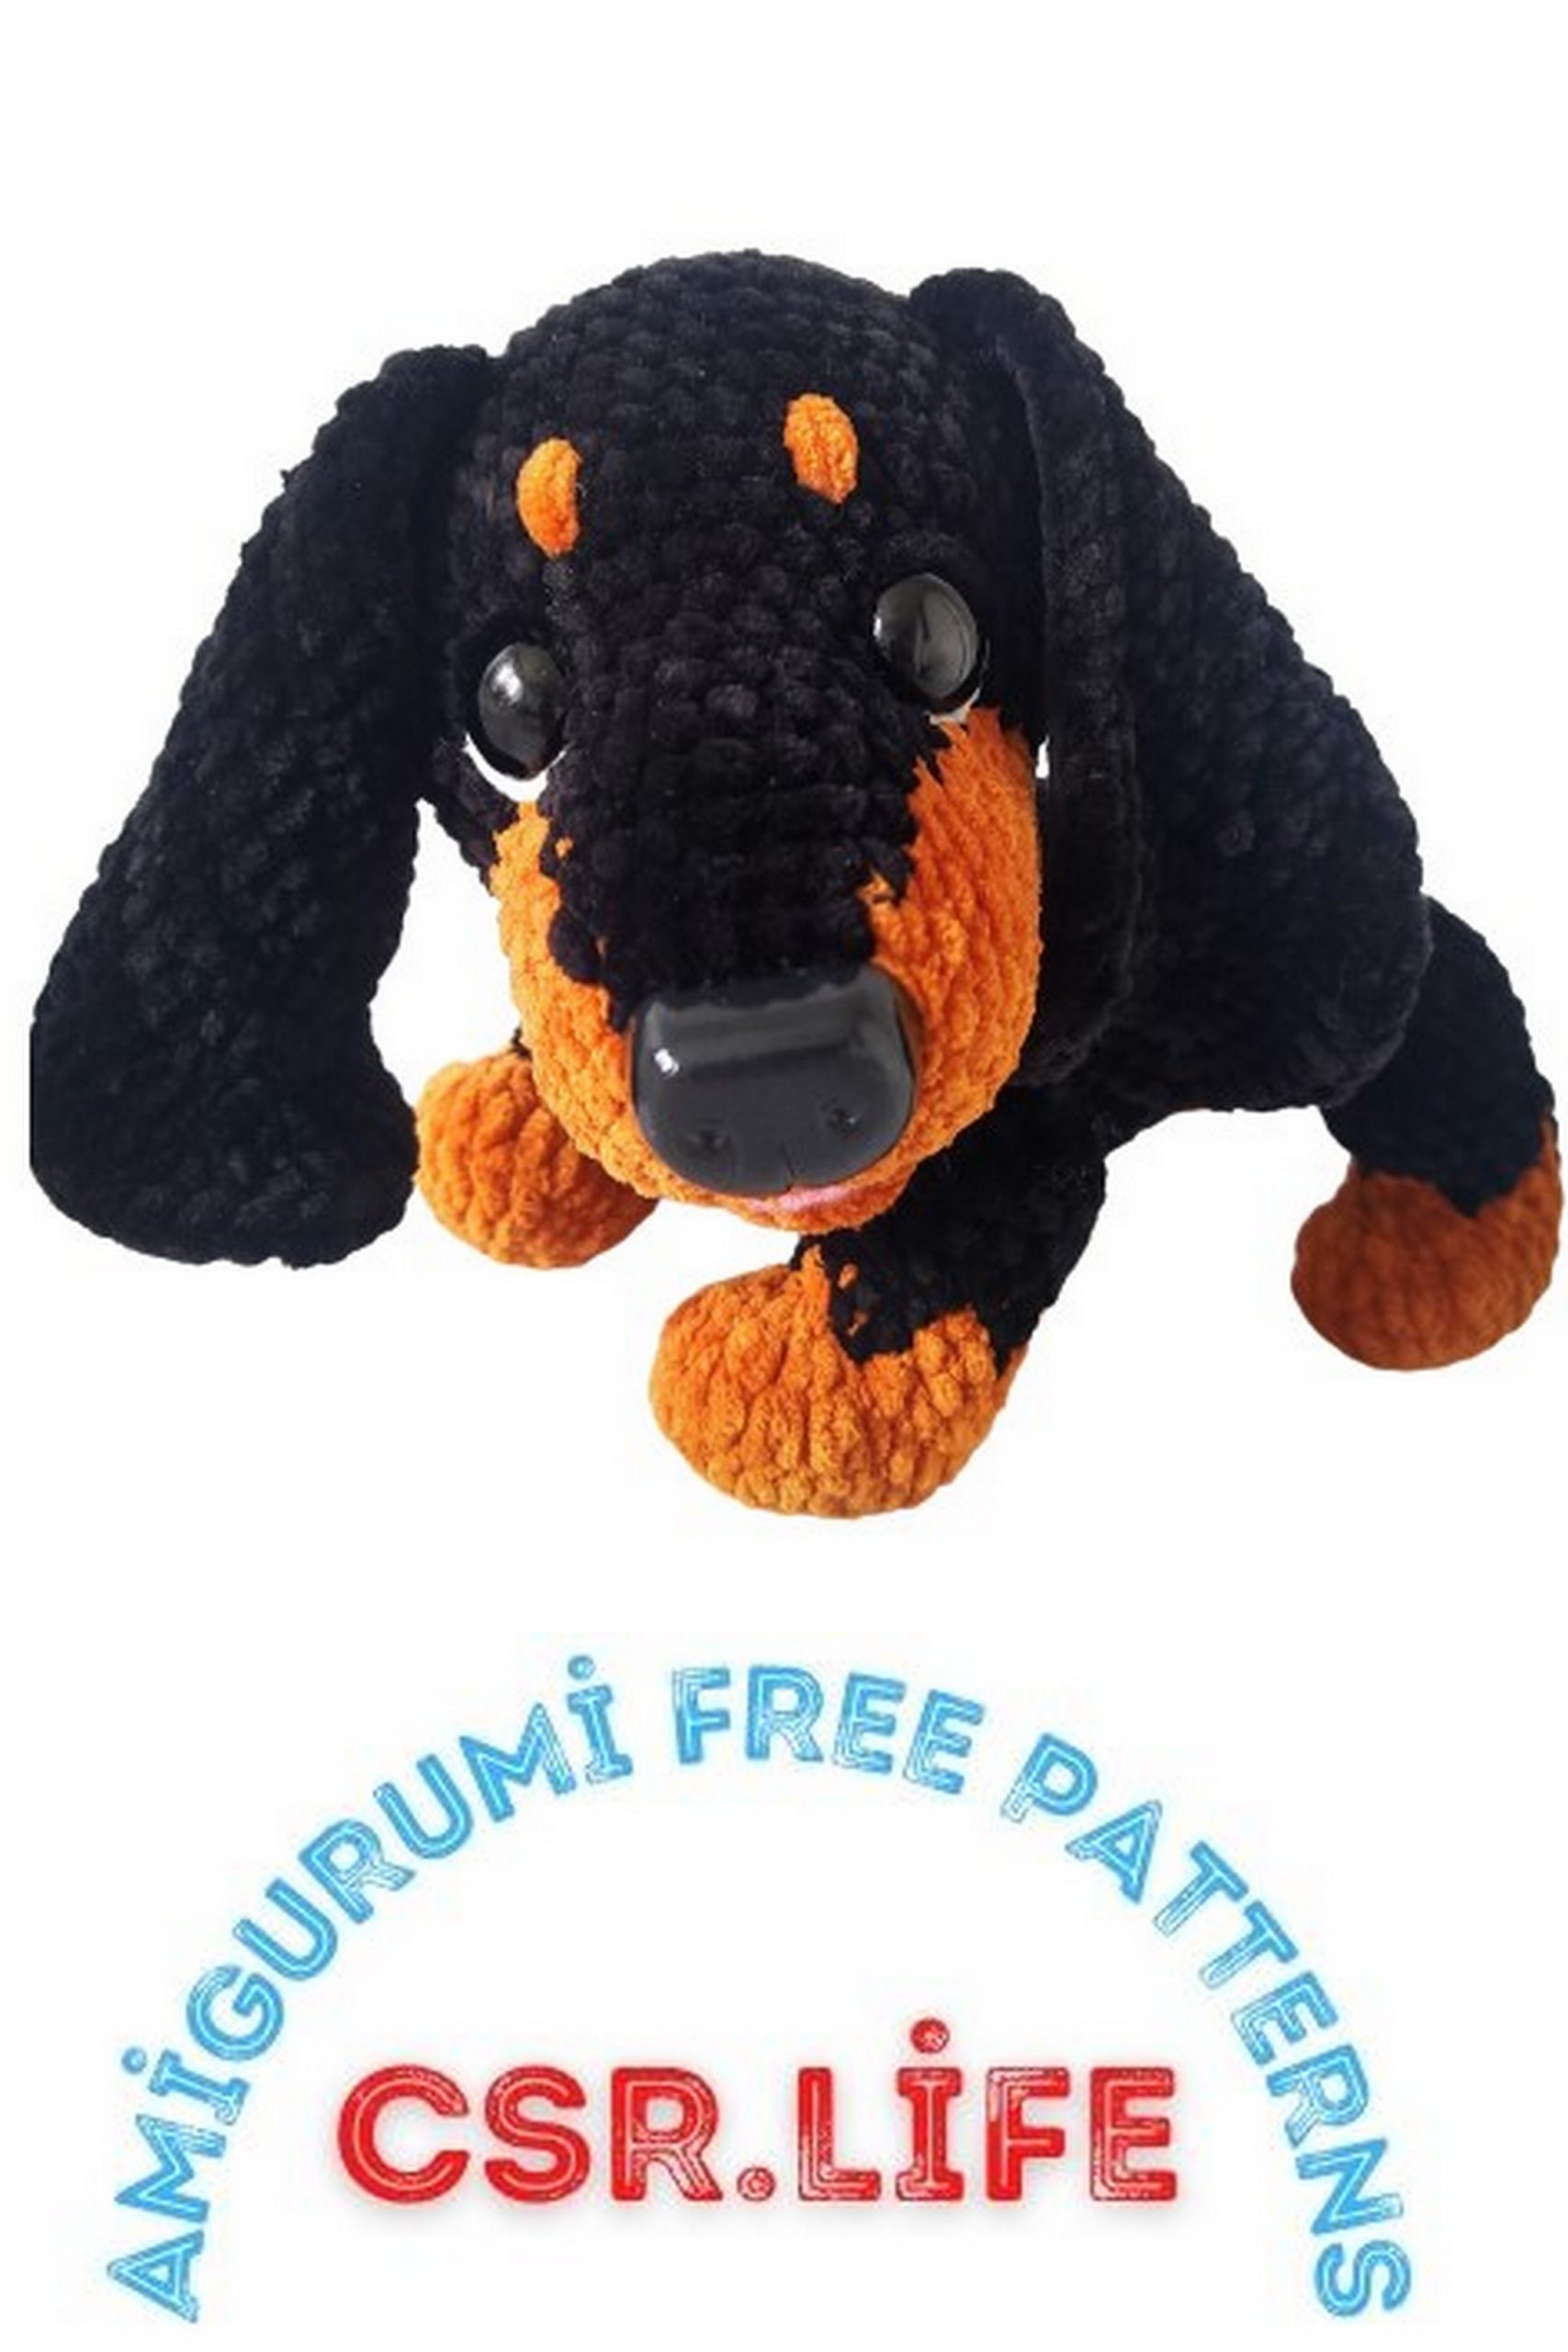
If using safety eyes, insert them right in front of the face, as shown in the photo.
17 Row: (4 sc, dec) * 3 = 15 sc, change color as in the previous row.
18 Row: 15 sc
19 Row: (3 sc, dec) * 3 = 12 sc
20 Row: 12 sc
21 Row: (2 sc, dec) * 3 = 9 sc
22 Row: Start with brown – 1 sc, 1 dec, switch to black – 4 sc. Continue decreasing until closing. Attach a plastic nose or embroider it with threads.
Ears
1 Row: 6 sc in CA
2 Row: 6 inc = 12 sc
3 Row: (3 sc, inc) * 3 = 15 sc
4 Row: 15 sc
5 Row: (3 sc, dec) * 3 = 12 sc
6 Row: 12 sc
7 Row: (2 sc, dec) * 3 = 9 sc
8-12 Row: 9 sc (5 rows)
13 Row: (1 sc, dec) * 3 = 6 sc
Fold the ear in half and crochet the halves together with slip stitches. Secure the thread and leave a tail for sewing to the head.
Body
Start with brown color.
1 Row: 6 sc in CA
2 Row: 6 inc = 12 sc
3 Row: (1 sc, inc) * 6 = 18 sc
4 Row: (2 sc, inc) * 6 = 24 sc
5 Row: (3 sc, inc) * 6 = 30 sc
6 Row: (4 sc, inc) * 6 = 36 sc
7 Row: (5 sc, inc) * 6 = 42 sc
8 Row: 21 brwn. sc, 21 blk. sc = 42 sc
9 Row: 1 blk. sc, 19 brwn. sc, 22 blk. sc = 42 sc
10 Row: 2 blk. sc, 17 brwn. sc, 23 blk. sc = 42 sc
11 Row: 3 blk. sc, 15 brwn. sc, 24 blk. sc = 42 sc
12 Row: 4 blk. sc, switch to brwn. 4 sc, 1 inc, 3 sc, 1 inc, 4 sc, switch to blk. 5 sc, 1 dec, 3 sc, 1 dec, 3 sc, 1 dec, 3 sc, 1 dec, 3 sc = 40 sc
13 Row: 5 blk. sc, 13 brwn. sc, continue with blk. 10 sc, 1 dec, 4 sc, 1 dec, 4 sc = 38 sc
14 Row: 6 blk. sc, 11 brwn. sc, 21 blk. sc = 38 sc
15 Row: 7 blk. sc, continue with brwn. – 4 sc, 1 dec., 3 sc, switch to blk. – 22 sc = 37 sc
16 Row: 7 blk. sc, 3 brwn. sc, 1 dec blk., 3 brwn. sc, 22 blk. sc = 36 sc
17 Row: (4 sc, dec) * 6 = 30 sc
18-21 Row: 6 blk. sc, 6 brwn. sc, 18 blk. sc = 30 sc (4 rows)
22-25 Row: 7 blk. sc, 6 brwn. sc, 17 blk. sc = 30 sc (4 rows)
26 Row: 6 blk. sc, 1 dec blk., 5 brwn. sc, 1 dec brwn., 15 blk. sc = 28 sc
27-29 Row: 7 blk. sc, 6 brwn. sc, 15 blk. sc = 28 sc (3 rows)
30 Row: 8 blk. sc, 3 brwn. sc, 1 dec brwn., 1 brwn. sc, 14 blk. sc = 27 sc
31-33 Row: 8 blk. sc, 5 brwn. sc, 14 blk. sc = 27 sc (3 rows)
34 Row: (7 blk. sc, dec) * 3 = 24 sc. Change color as follows: 7 blk. sc, 1 dec blk., 4 brwn. sc, then continue according to the pattern with black yarn to finish the row.
35 Row: 8 blk. sc, 4 brwn. sc, 12 blk. sc = 24 sc
36-40 Row: 9 blk. sc, 4 brwn. sc, 11 blk. sc = 24 sc (5 rows)
41-42 Row: 10 blk. sc, 3 brwn. sc, 11 blk. sc = 24 sc (2 rows)
43 Row: (2 sc, dec) * 6 = 18 sc
44 Row: (1 sc, dec) * 6 = 12 sc
45 Row: 6 dec and close the opening.

Legs
Start with brown color.
1 Row: 6 sc in CA
2 Row: 6 inc = 12 sc
3 Row: (1 sc, inc) = 18 sc
4-5 Row: 18 sc (2 rows)
6 Row: 6 dec, 6 sc = 12 sc
7 Row: 3 dec, 6 sc = 9 sc
8 Row: 9 sc. At the end, change to black.
9-13 Row: 9 blk. sc (5 rows)
14 Row: (1 blk. sc, dec) * 3 = 6 sc
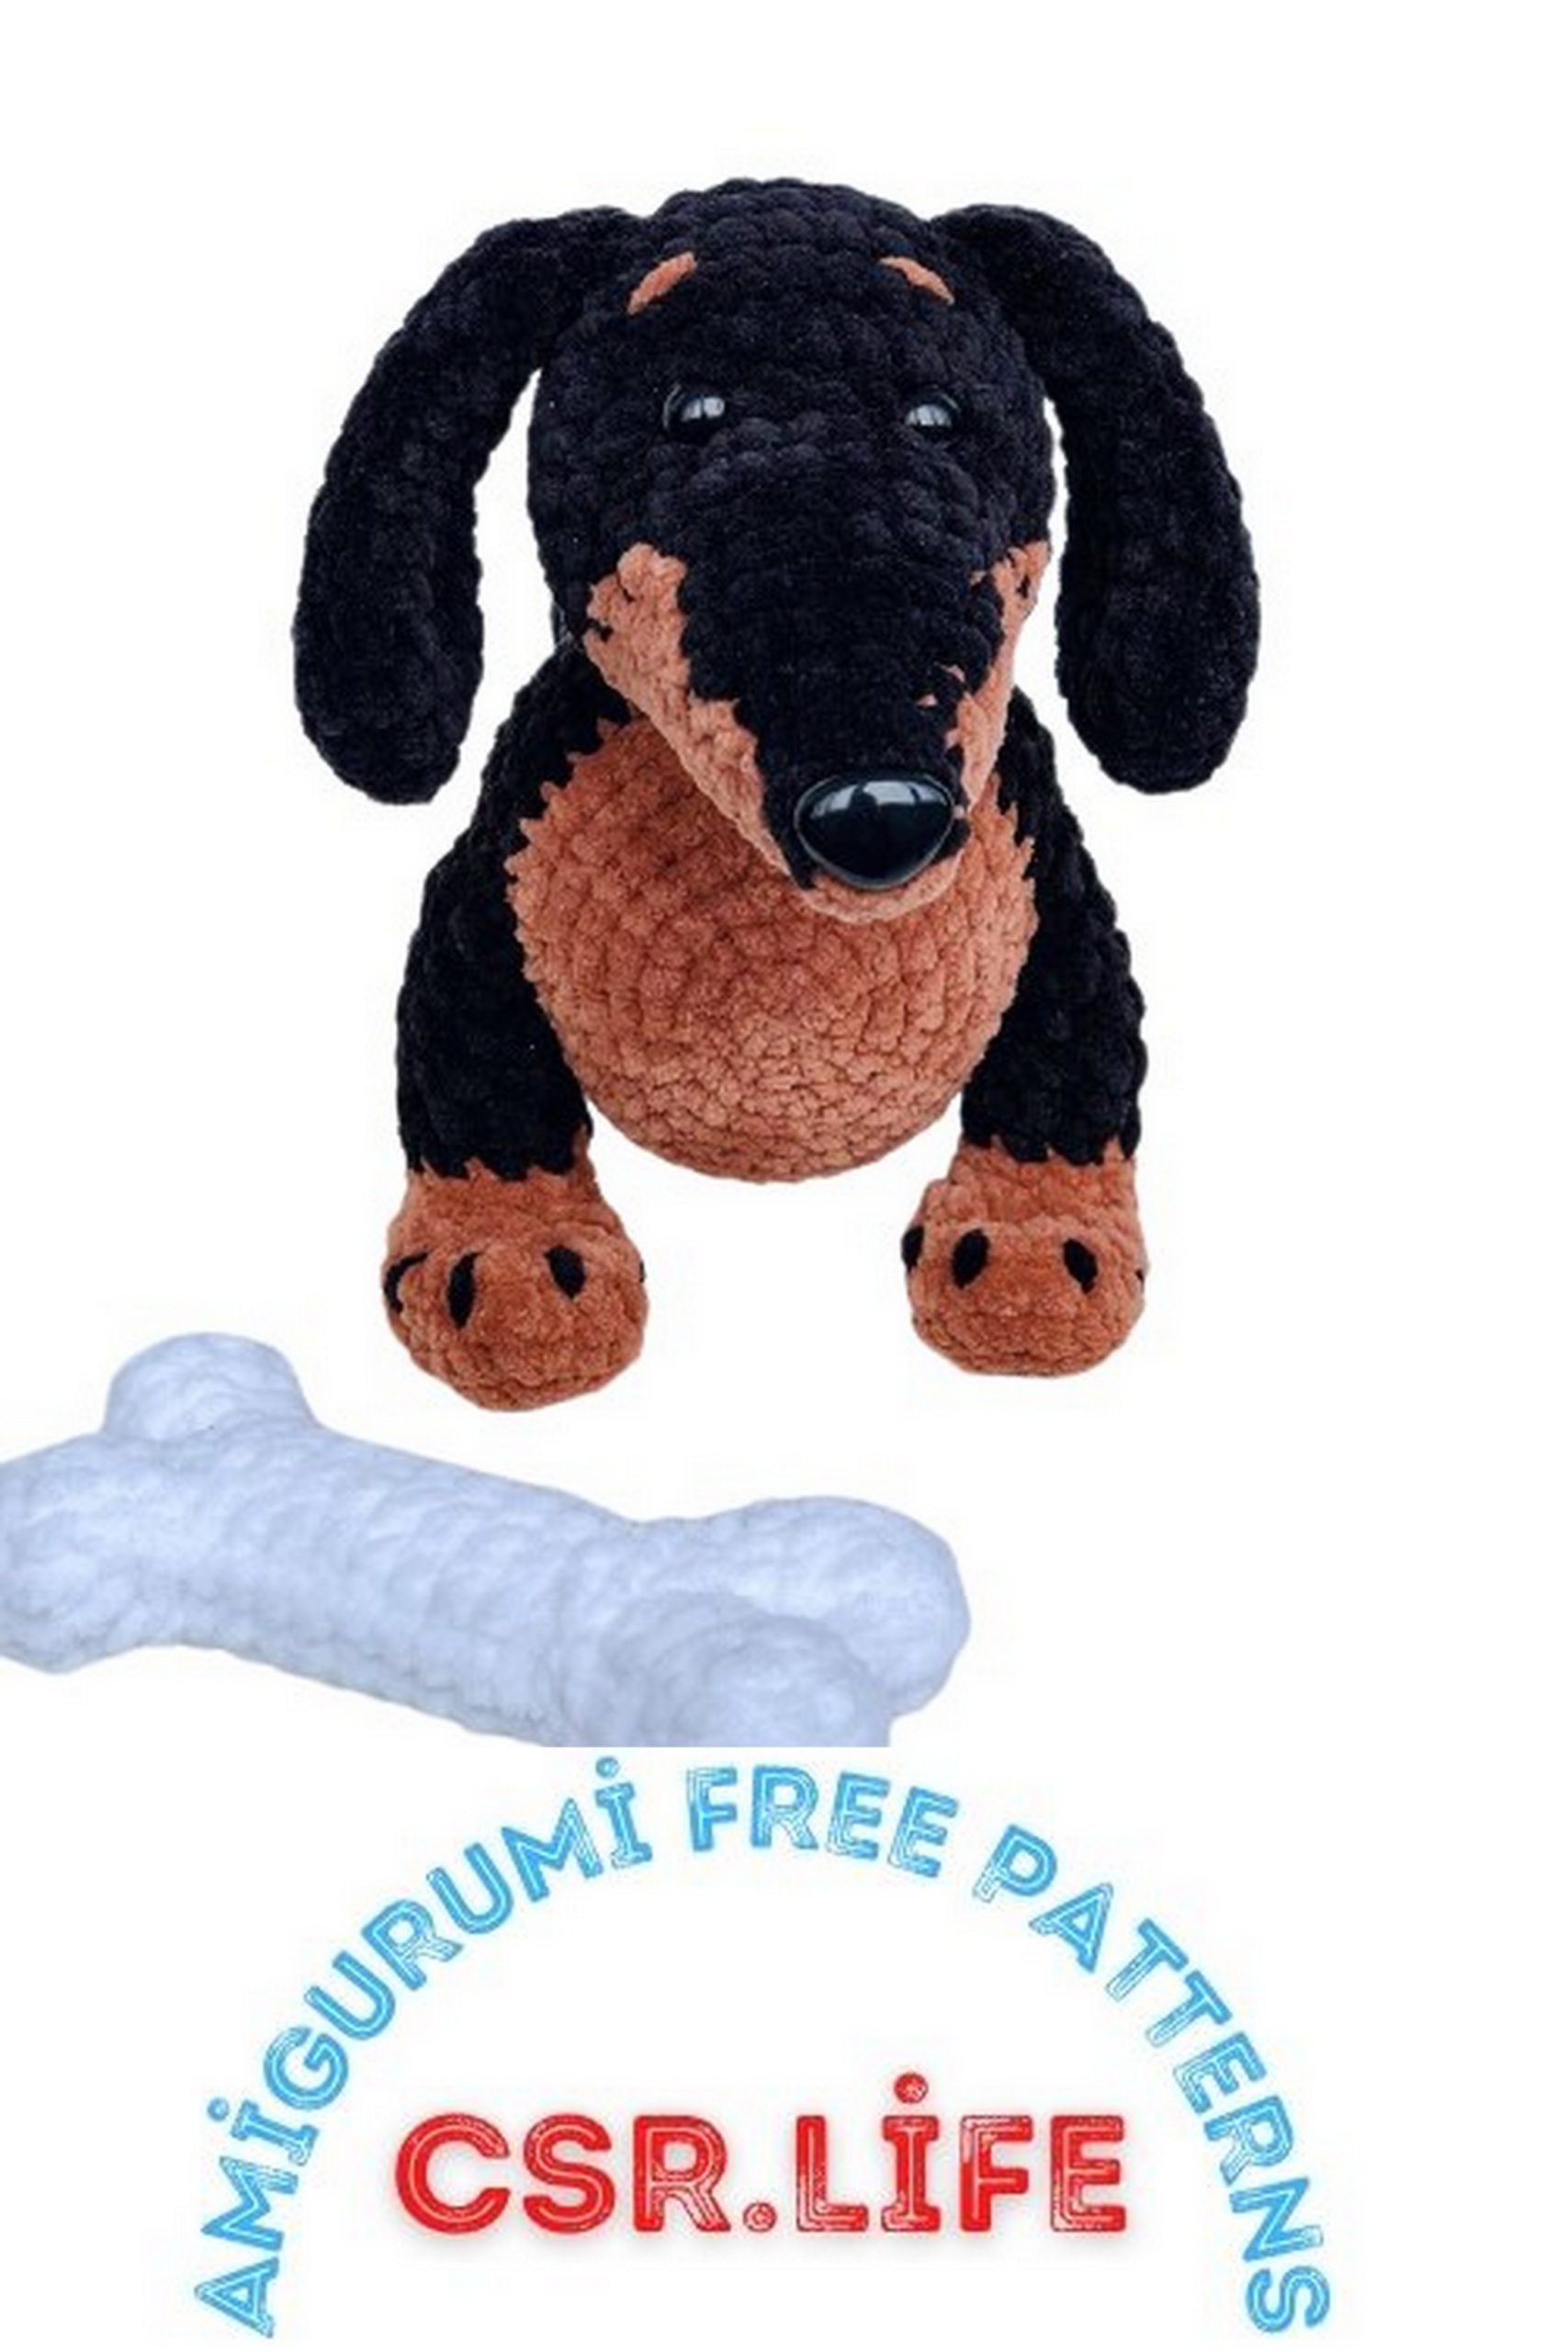
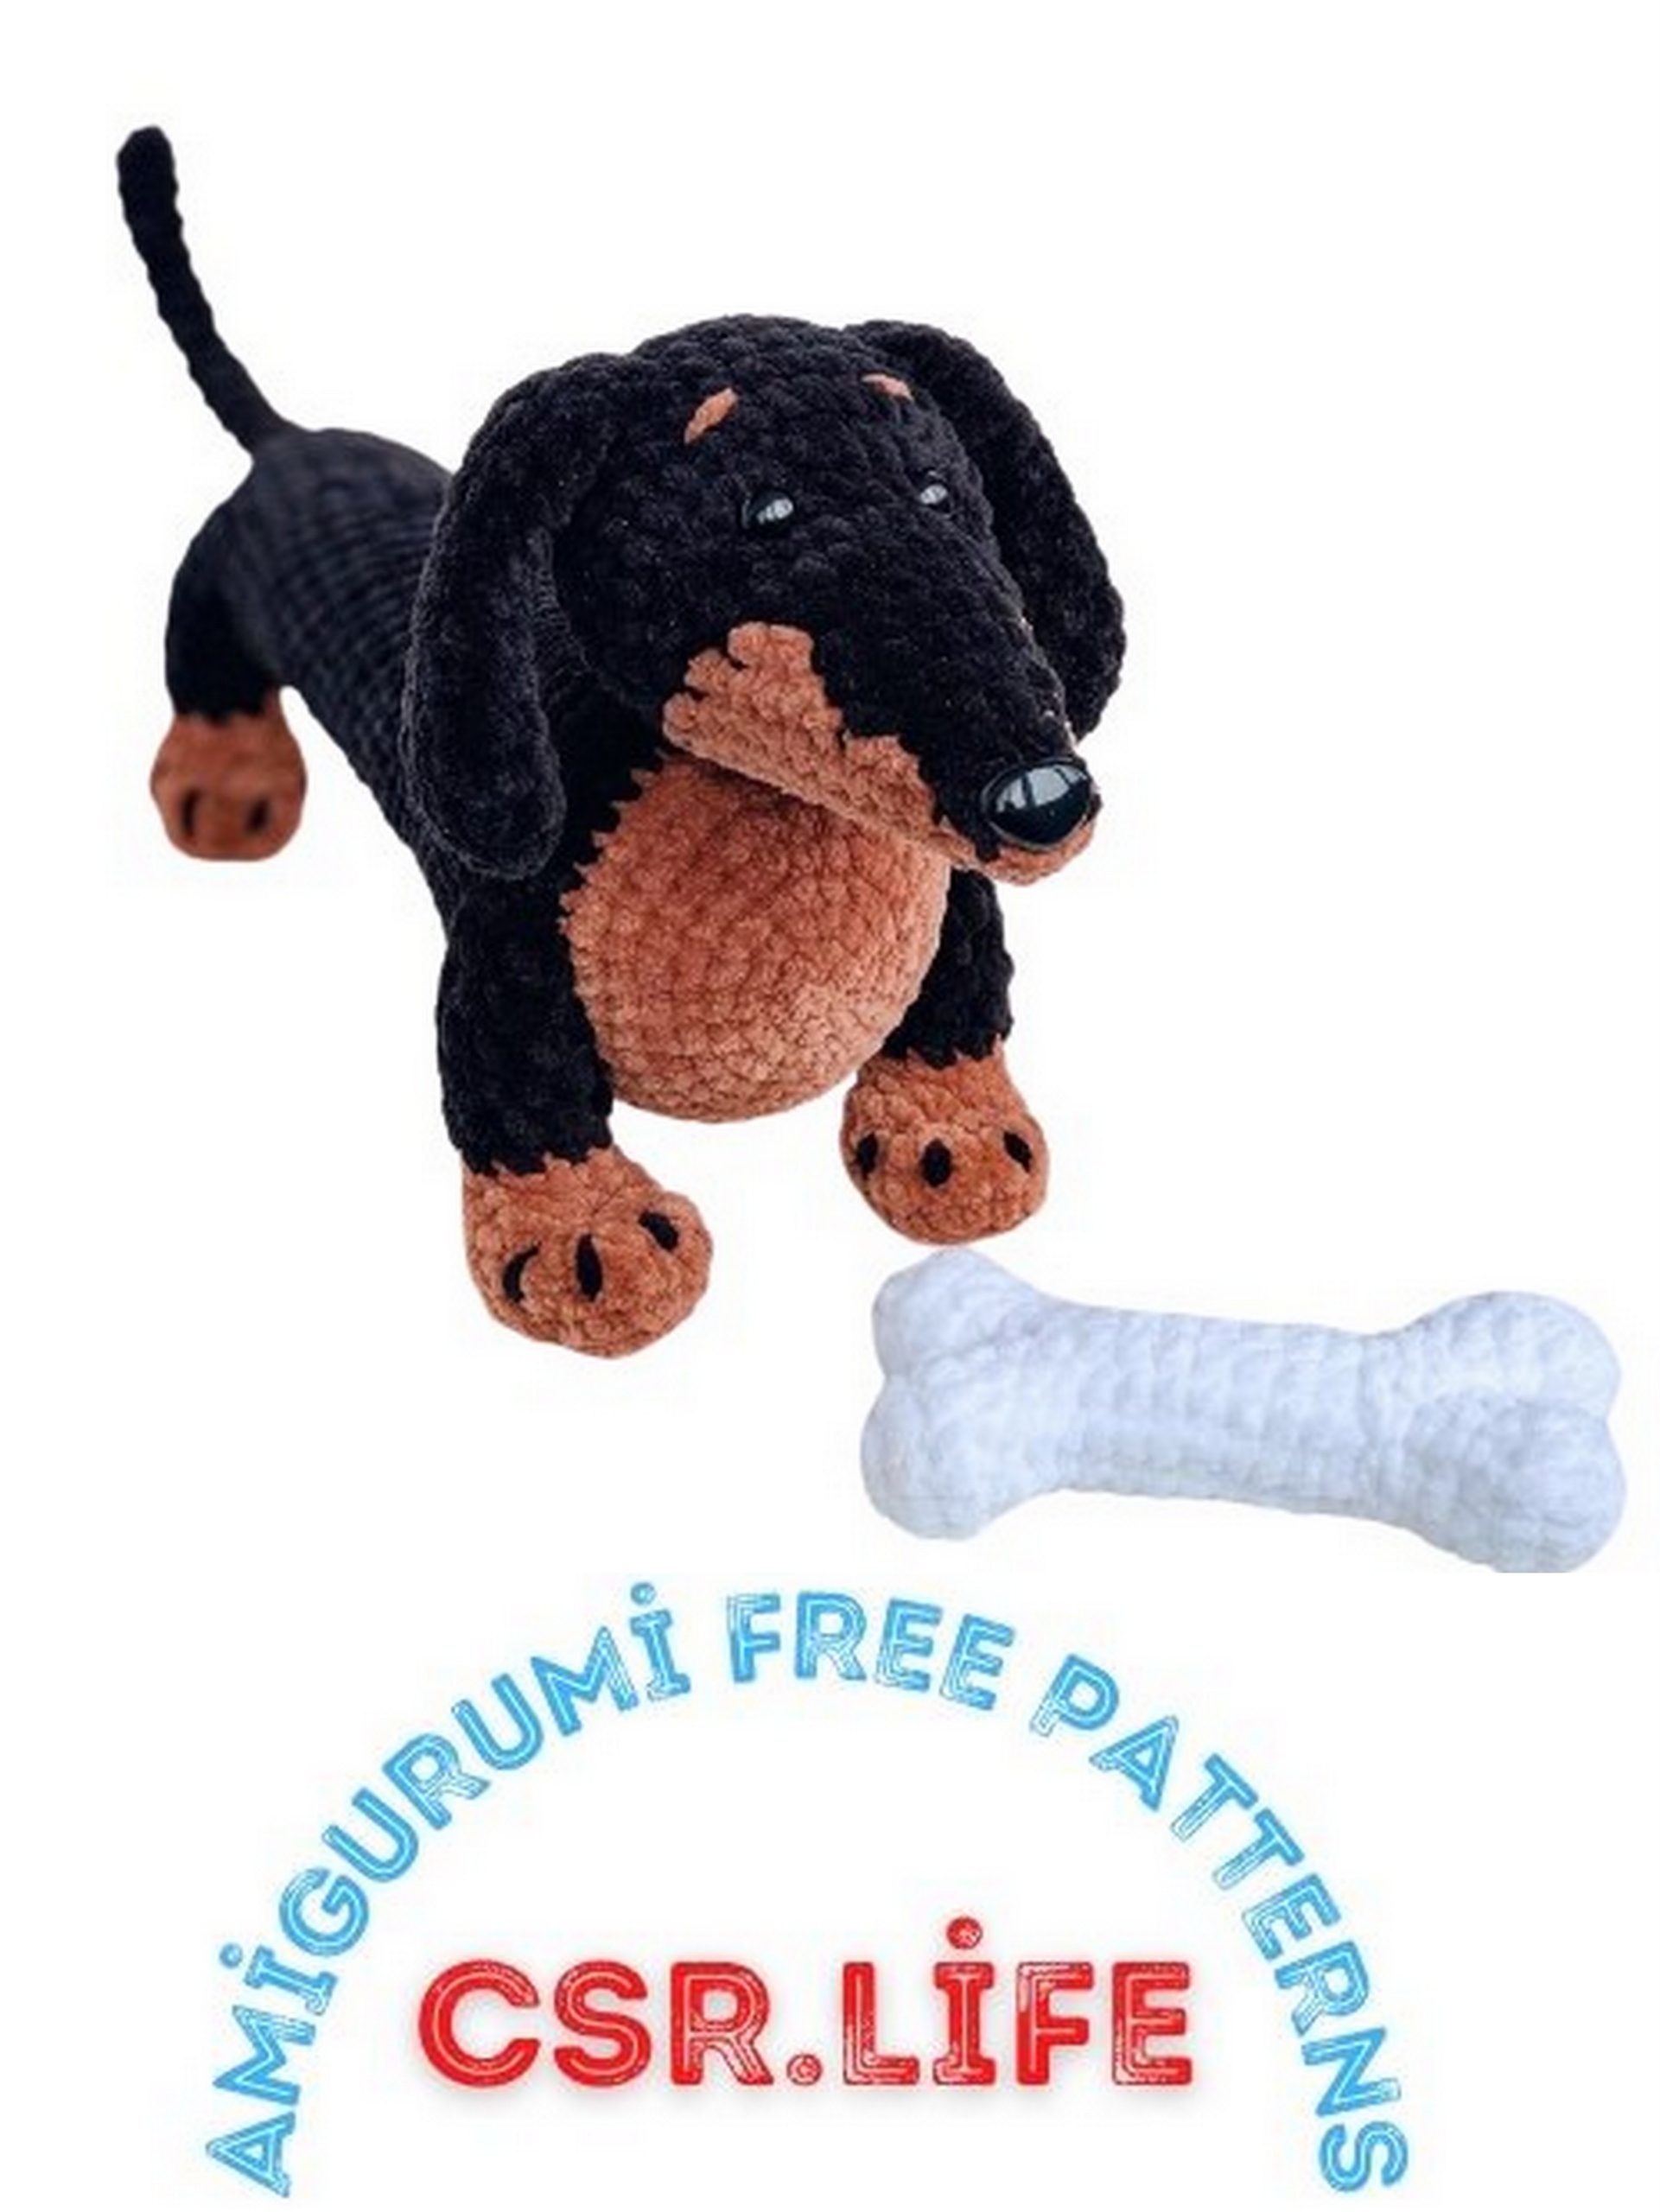
Stuff the tip of the leg a bit more densely, not too much on top. Fold the leg in half and crochet the halves together with single crochets. Using a thin, strong thread in the same color, create toe indentations on top, forming the toes. Embroider claws with black yarn.
Tail
1 Row: 4 sc in CA
2-13 Row: 4 sc (12 rows), ss. Secure the thread, leaving a tail for sewing.

Finishing and Assembly
First, sew the ears to the head using a thin, strong black thread. Use the photo as a reference for their placement.
Above the eyes, after every 2 rows, embroider eyebrows in brown color.
Sew the head to the body using a strong thread, making sure that the brown color of the face aligns approximately with the brown color on the chest.
Attach the front legs tightly to the body with strong black thread, approximately under the ears. They should be immovable.
Attach the hind legs at the very end of the body. Attach the tail in the same area where you closed the body.