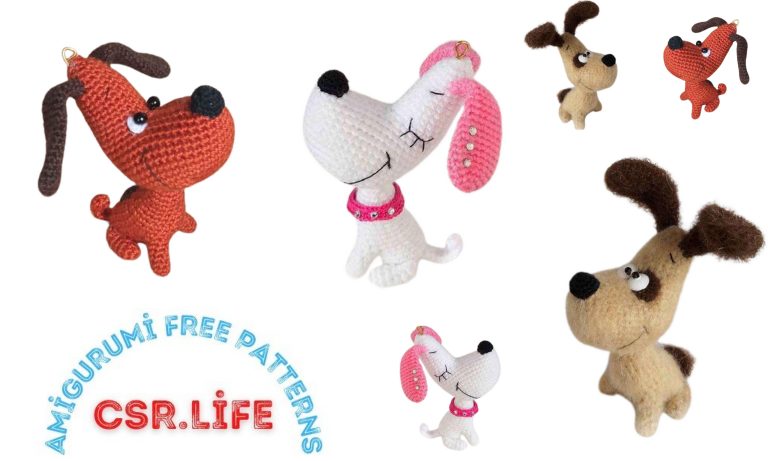
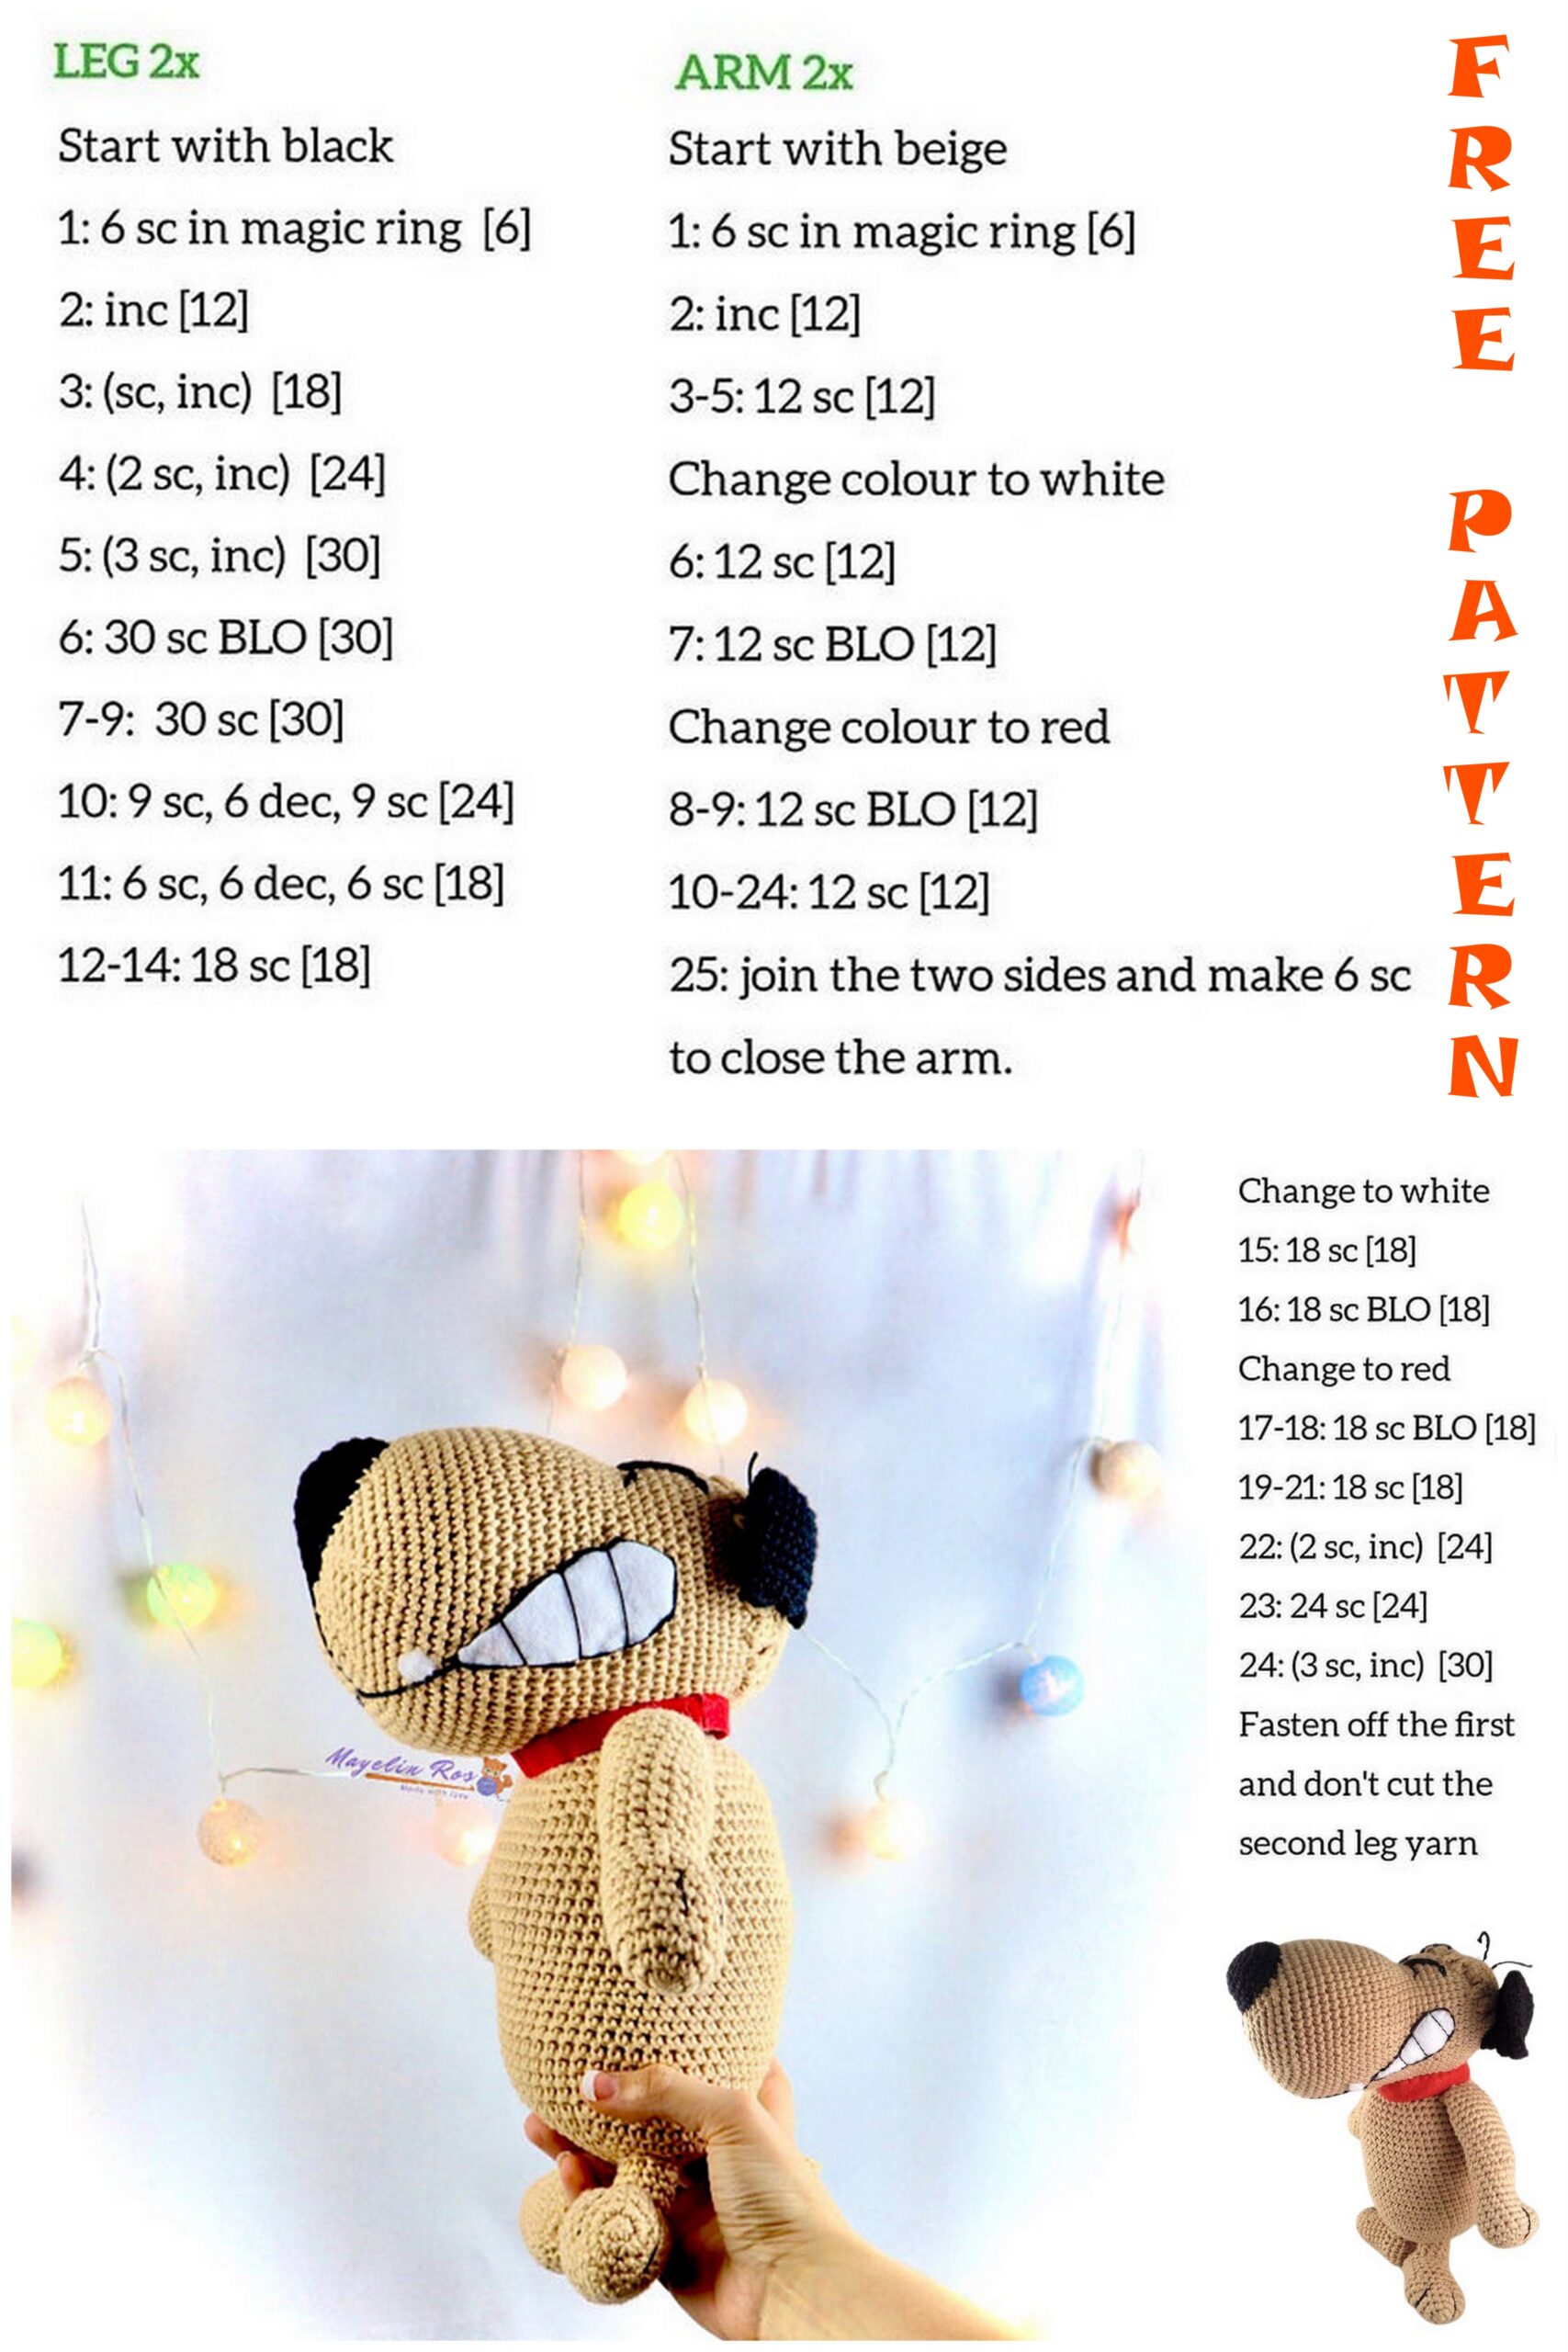
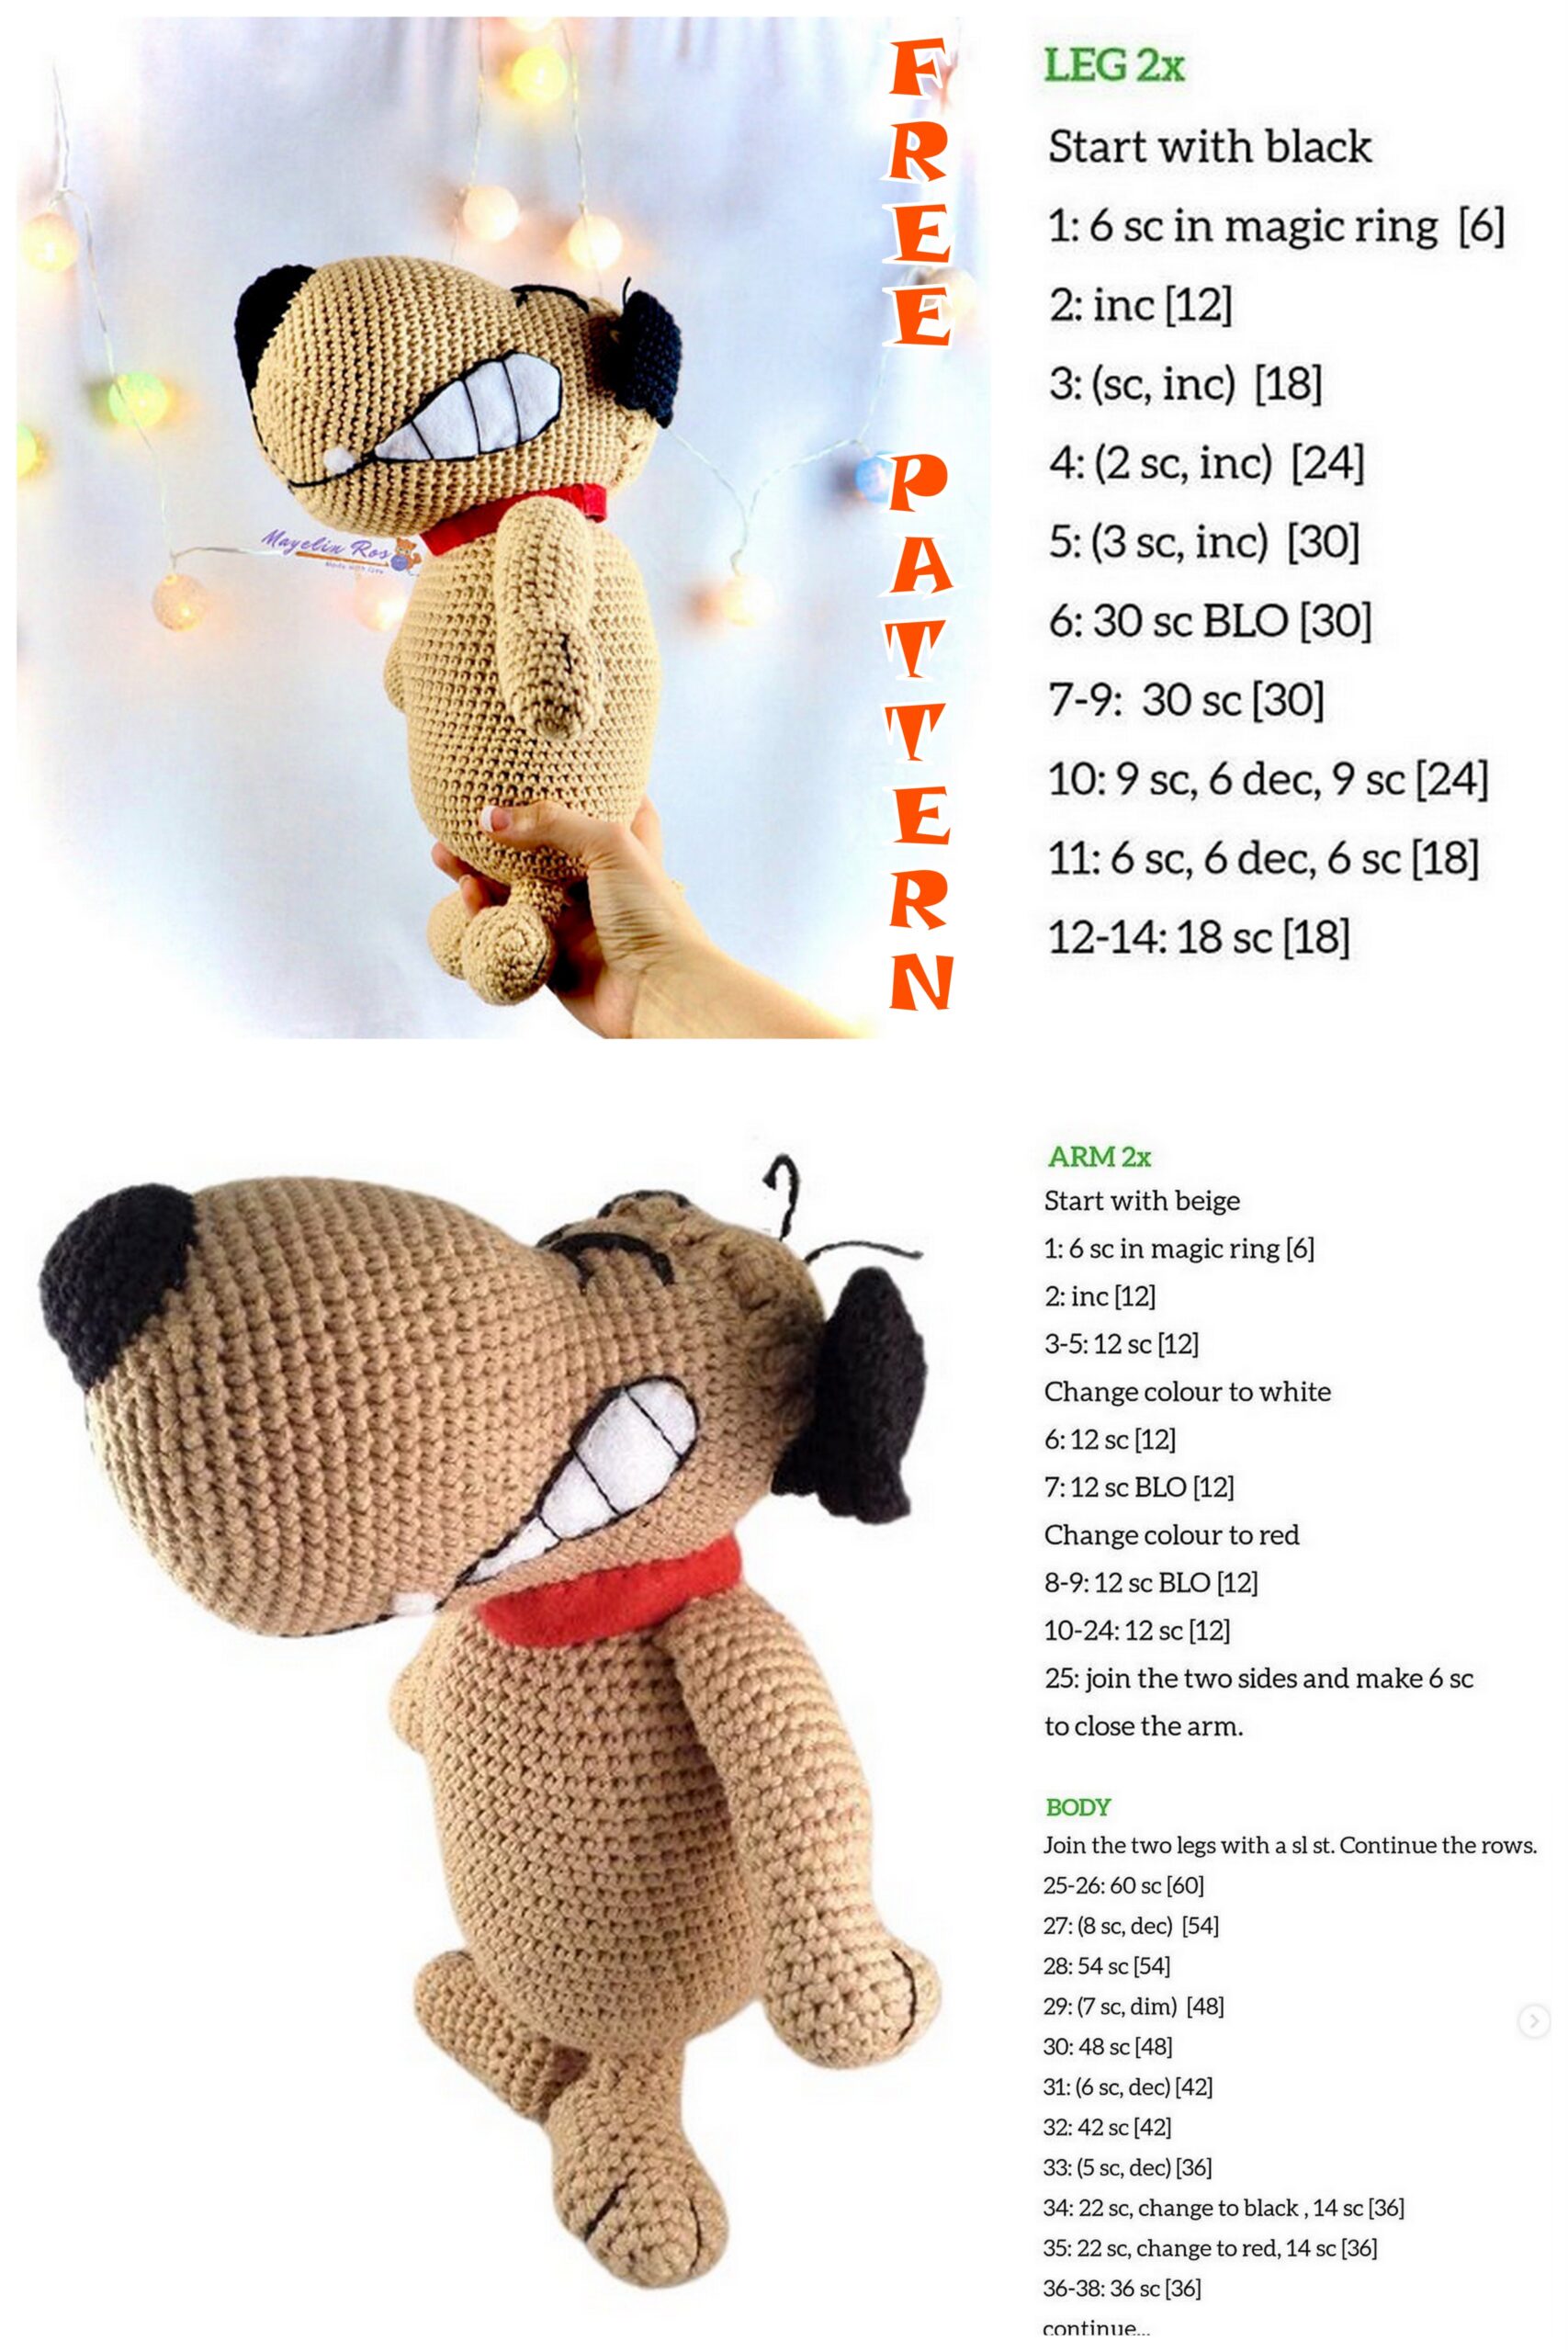
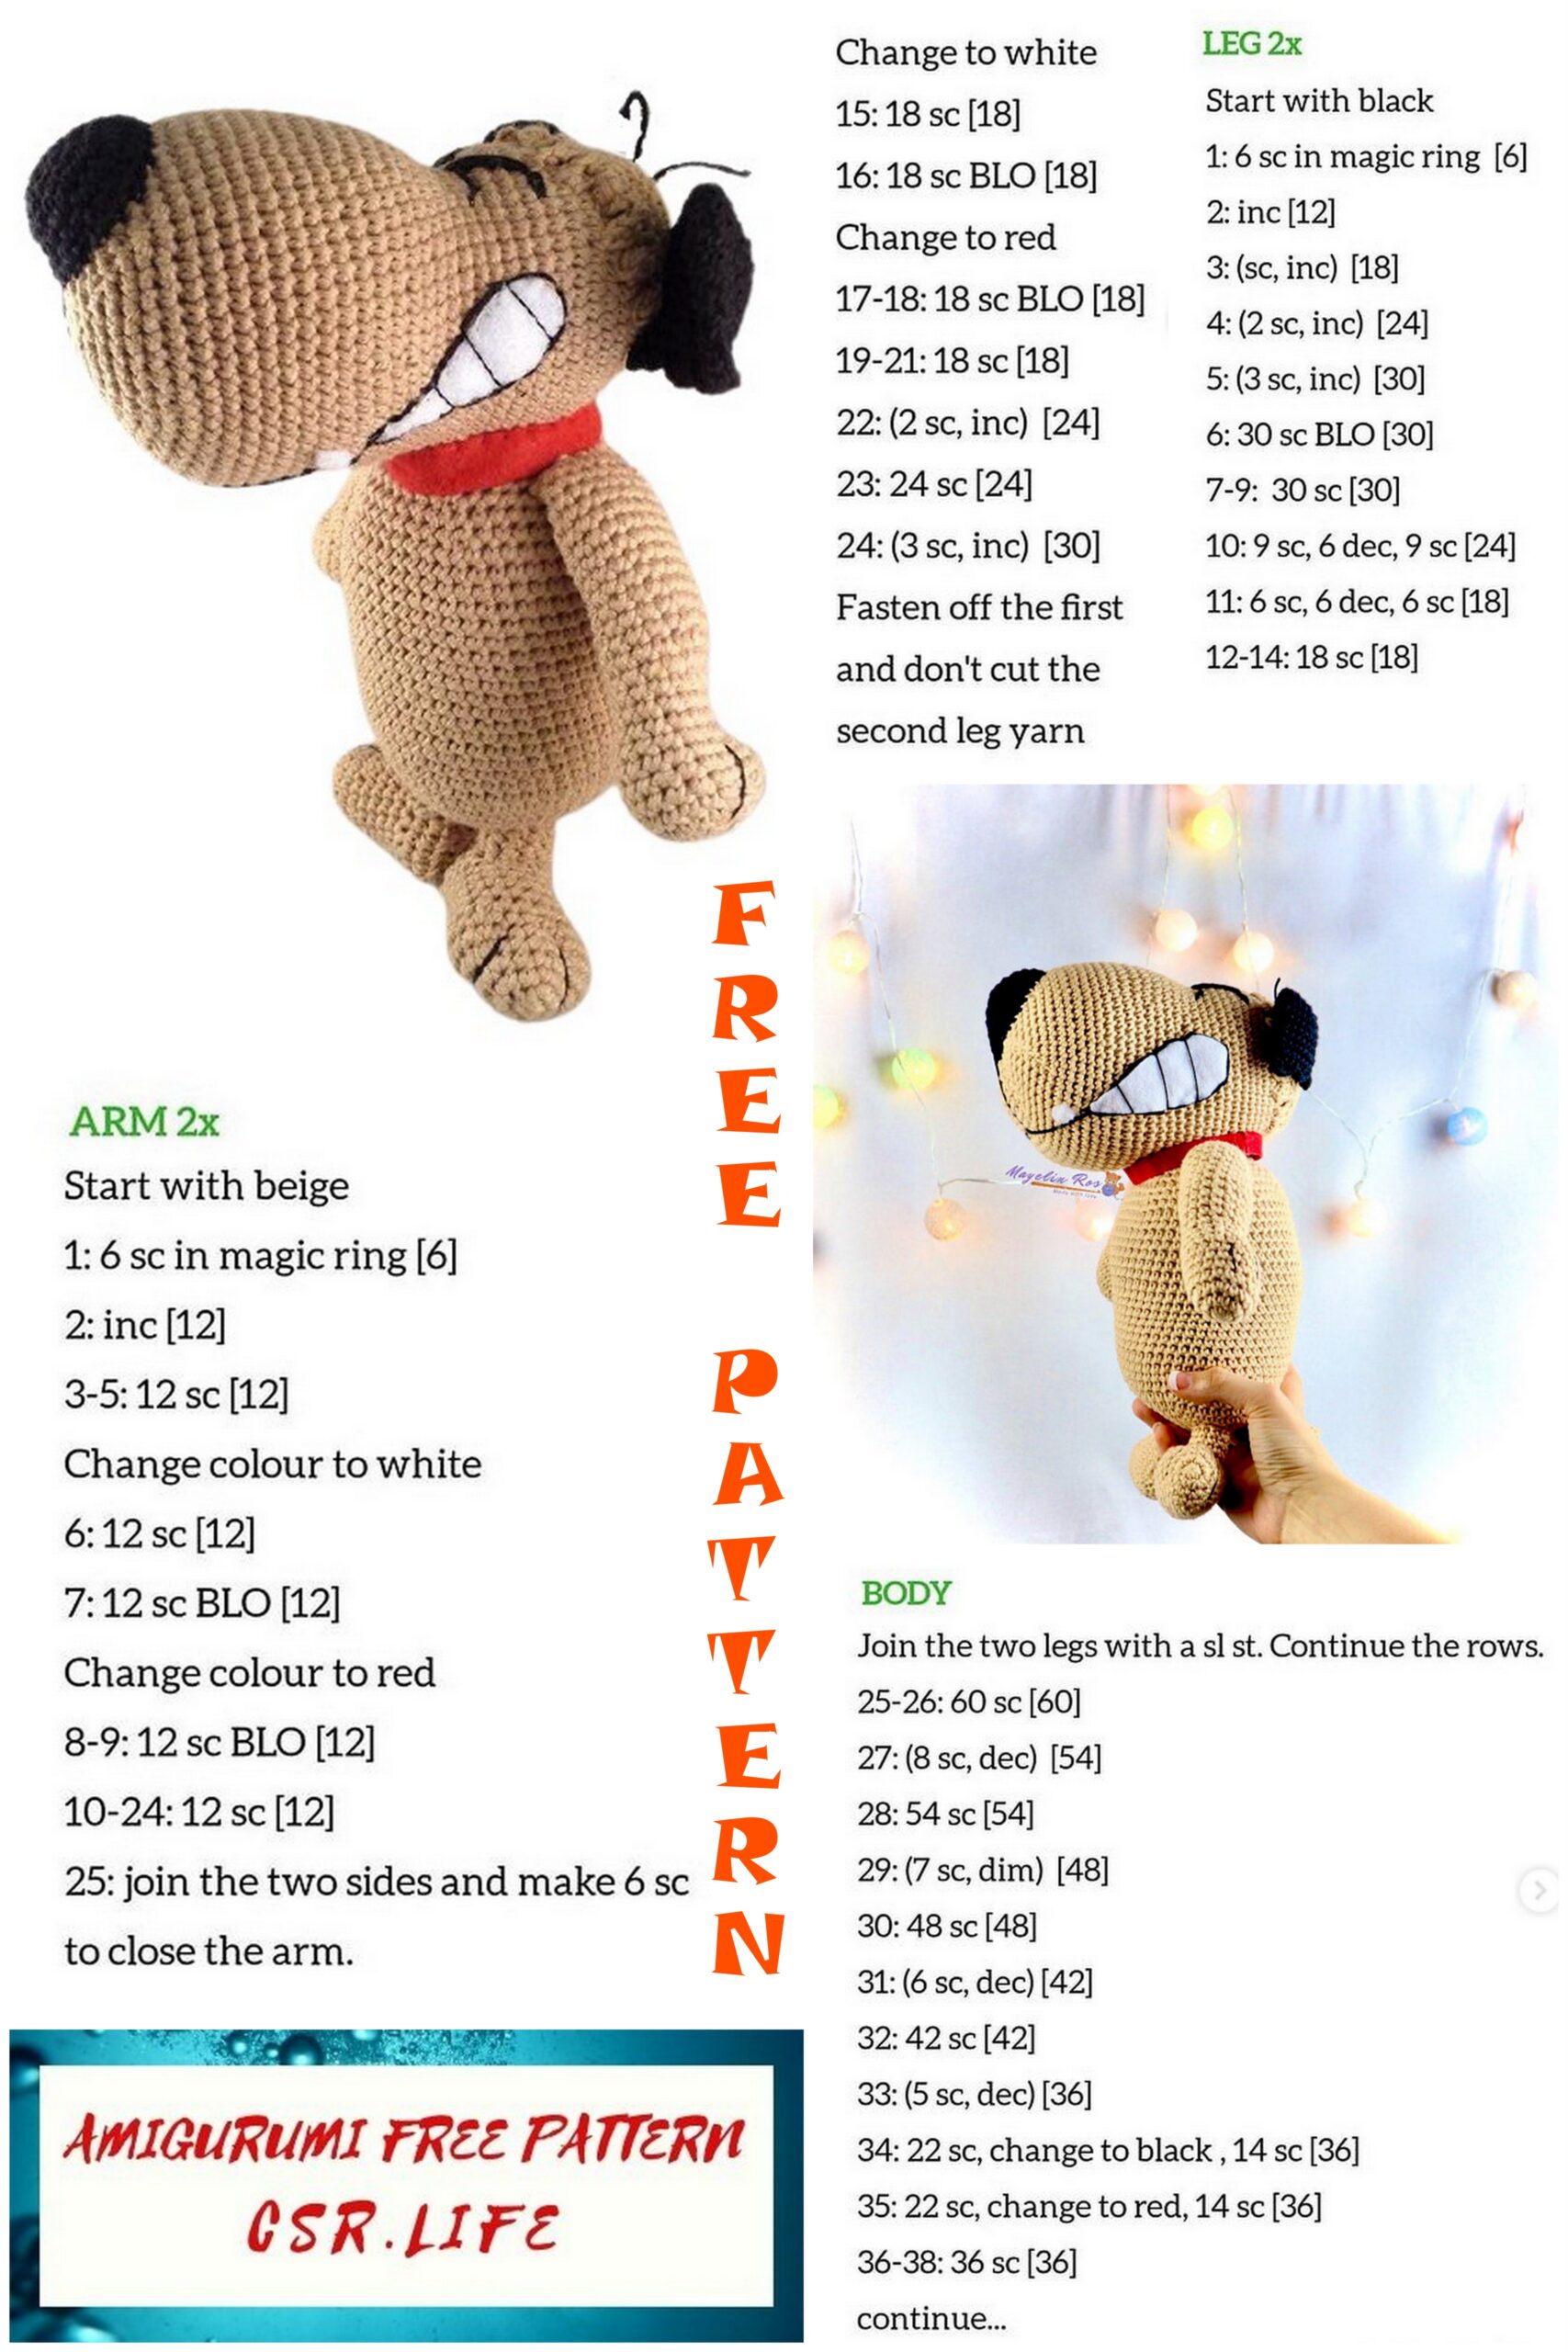
Dog Muttley Amigurumi Free Crochet Pattern
Amigurumi dog patterns are available on this site for free with their quality images. I shared the amigurumi dog muttley pattern in this article.
Materials
– Beige and black thread
– Crochet 3.5
– Black embroidery thread
– Score marker
– Red and white felt or cloth
– Needle of wool and thread
– Synthetic cotton to fill
– Pins
Abbreviations:
Sc = single crochet
inc = increase
dec = decrease
sl-st = slip stitch
hdc = half double crochet
ch = chain
Instructions: All pieces are worked in a spiral (or by rounds), except when another instruction is indicated (for example: ch and turn, which means that it will be worked in rows). Mark the start of each round by placing the stitch marker on the first stitch made.
Head: (beige)
1) INTO MAGIC RING 6 sc (6)
2) 6inc (12)
3) (1sc, 1inc) x6 (18)
4) (2sc, 1inc) x6 (24)
5) (3sc, 1inc) x6 (30)
6) (4sc, 1inc) x6 (36)
7) (5sc, 1inc) x6 (42)
8) (6sc, 1inc) x6 (48)
9-15) 48 sc
16) 30sc, 6dec, 6sc (42)
17-18) 42sc
19) 30sc, 6inc, 6sc (48)
20-21) 48sc
22) (7sc, 1inc) x6 (54)
23) 54sc
24) (8sc, 1inc) x6 (60). Start filling.
25-34) 60sc
35) (8sc, 1dec) x6 (54)
36) (7sc, 1dec) x6 (48)
37) (6sc, 1dec) x6 (42)
38) (5sc, 1dec) x6 (36)
39) (4sc, 1dec) x6 (30)
40) (3sc, 1dec) x6 (24)
41) 12dec (12)
42) 6dec (6). Fill firmly and close.
Body: (Beige color)
1) INTO MAGIC RING 6 sc (6)
2) 6inc (12)
3) (1sc, 1inc) x6 (18)
4) (2sc, 1inc) x6 (24)
5) (3sc, 1inc) x6 (30)
6) (4sc, 1inc) x6 (36)
7) (5sc, 1inc) x6 (42)
8) 42sc
9) (6sc, 1inc) x6 (48)
10) 48sc
11) (7sc, 1inc) x6 (54)
12) 54sc
13-30) 54sc. Start filling.
31) (7sc, 1dec) x6 (48)
32) 48sc
33) (6sc, 1dec) x6 (42)
34) 42sc
35) (5sc, 1dec) x6 (36)
36) (4sc, 1dec) x6 (30)
37) (3sc, 1dec) x6 (24)
38) (2sc, 1dec) x6 (18)
39) (1sc, 1dec) x6 (12)
40) 6dec (6). Fill firmly and close. Leave a long piece of thread to sew to the head later.
Nose: (black color)
1) INTO MAGIC RING 6 sc (6)
2) 6inc (12)
3) (1sc, 1inc) x6 (18)
4) (2sc, 1inc) x6 (24)
5) 1inc, 8sc, 2inc, 13sc (27)
6) 1inc, 11sc, 1inc. Stop the knitting here without finishing the round to form an oval shape.
Leave a long piece of thread to sew to the muzzle later.
Ears x 2: (black color)
1) INTO MAGIC RING 6 sc (6)
2) 6inc (12)
3) (1sc, 1inc) x6 (18)
4) (2sc, 1inc) x6 (24)
5) (3sc, 1inc) x6 (30)
6) 30sc
7) (3sc, 1dec) x6 (24)
8-10) 24sc
11) Join the circle and join both sides with 11 sc.
12) Turn and knit over the previous 11 stitches: Starting from the 2nd sc, make 1hdc, 2hdc, 1sl-st, 1sl-st, 2hdc, 1sl-st, 1sl-st, 2hdc, 1sl-st, 1sl-st. Leave thread to sew to the head later.
Hair: (beige color)
1) INTO MAGIC RING 6 sc (6)
2) 6inc (12)
3) (1sc, 1inc) x6 (18)
4) (2sc, 1inc) x6 (24)
5) (3sc, 1inc) x6 (30)
6) (4sc, 1inc) x6 (36)
7) 36sc
8) 1sc, 3ch, 2sc in the chain (starting from the 2nd chain), 1sc in the next stitch (repeat the sequence until the end and close with sl-st. Leave thread to sew later.
Hands x2: (beige color)
1) INTO MAGIC RING 6 sc (6)
2) 6inc (12)
3) (1sc, 1inc) x6 (18)
4-8) 18sc.
9) 3sc, 4dec, 7sc (14)
10) 4sc, 2dec, 6sc (12)
11) 4sc, 2inc, 6sc (14)
12) 1sc, 1inc, 12sc (15)
13) 6sc, 1inc, 8sc (16)
14) 1sc, 1inc, 14sc (17)
15) 8sc, 1inc, 8sc (18)
16-22) 18sc
23) 15sc, 1dec, 1sc (17)
24) 13sc, 1dec, 2sc (16)
25) 5sc, 1dec, 5sc, 1dec, 2sc (14)
26) 5sc, 1dec (12). Fill lightly, leaving the top unfilled to sew to the body. Leave thread to sew to the body.
Legs x2: (beige color)
1) INTO MAGIC RING 6 sc (6)
2) 6inc (12)
3) (1sc, 1inc) x6 (18)
4) (2sc, 1inc) x6 (24)
5-6) 24sc
7) (2sc, 1dec) x6 (18)
8-11) 18sc, ch and rotate
12) 11sc, ch, turn
13) 11sc
14) 11hdc, ch, now weave around
15) 3dec on one side, 3p, 2dec, (take a score marker), 3sc, join the end of the other side with a sl-st.
16) Now work in the upper circle from the outer side of chain 11sc, then work 3 runs of 11 sc taking the complete stitches. Fill and then close the hole in the heel with a wool needle and the same thread.
Tail: (Beige)
1) INTO MAGIC RING 4sc
2) 1sc, 1inc, 1sc, 1inc (6)
3) 3sc, 1inc, 1sc, 1inc (8)
4) 5sc, 1inc, 1sc, 1inc (10)
5) 6sc, 1inc, 1sc, 1inc, 1sc (12)
6) 7sc, 1inc, 1sc, 1inc, 1sc, 1inc (15)
7) 2sc, 2dec, 9sc (13)
8) 13sc
9) 8sc, 1inc, 1sc, 1inc, 1sc, 1inc (16)
10) 16sc
11) 9sc, 1inc, 1sc, 1inc, 1sc, 1inc, 1sc, 1inc (20)
12) 20sc. Leave thread to sew to the body.
Armed:
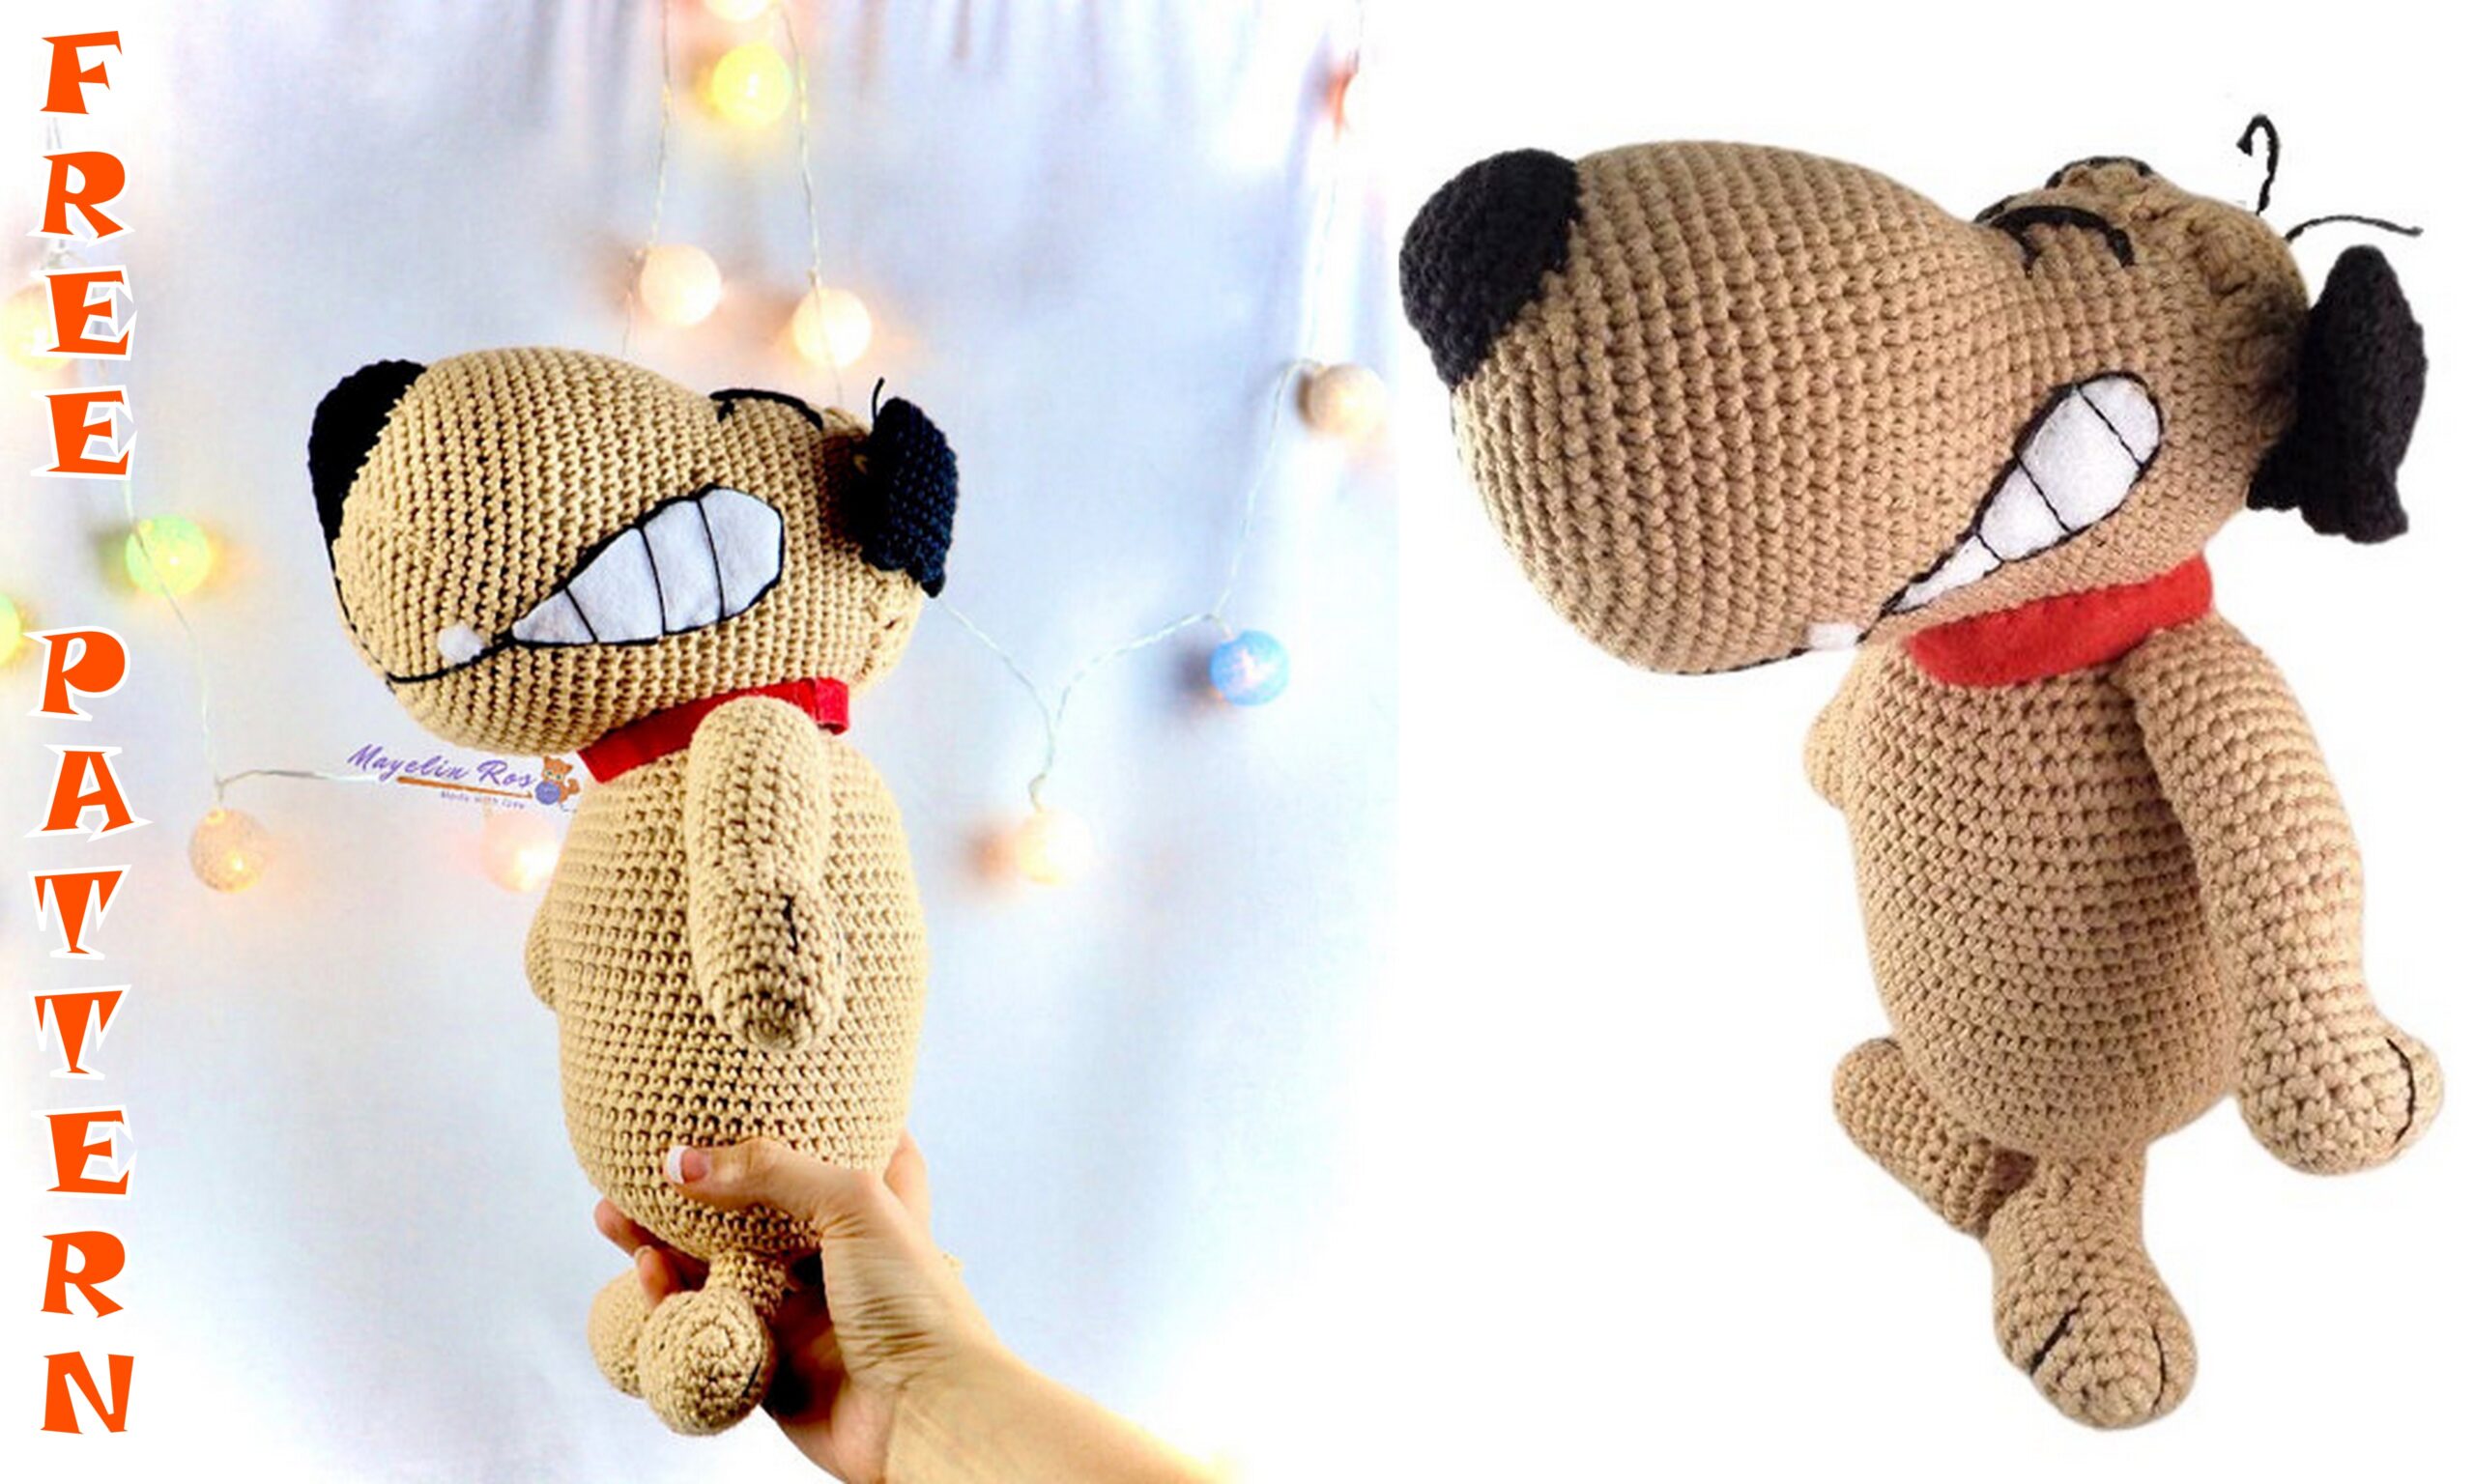
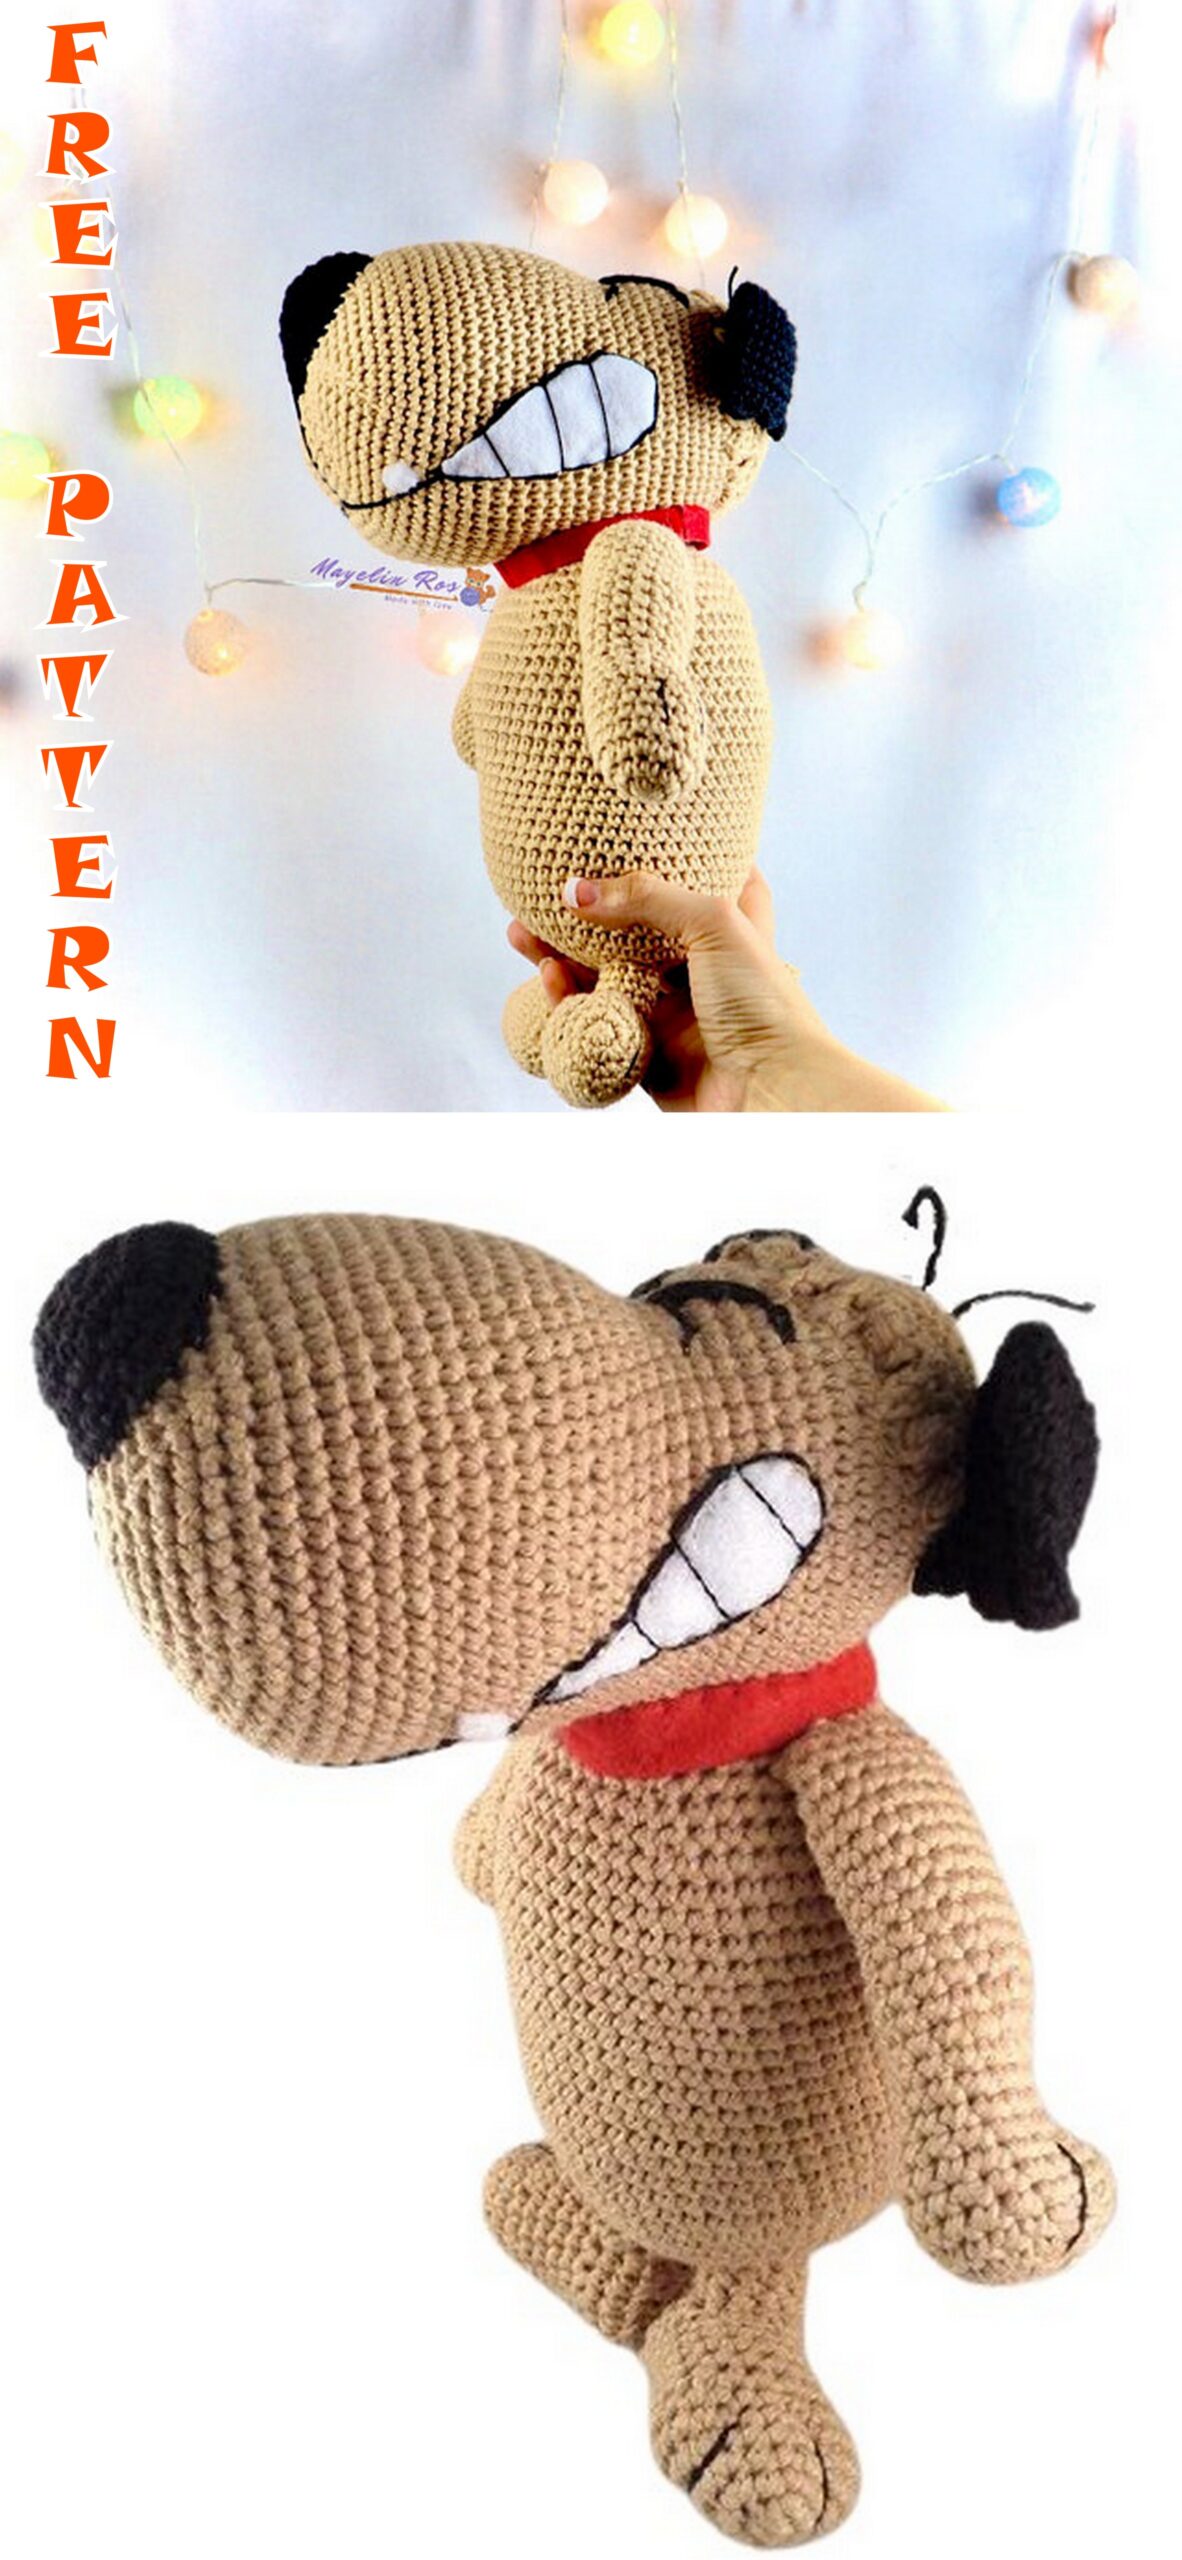
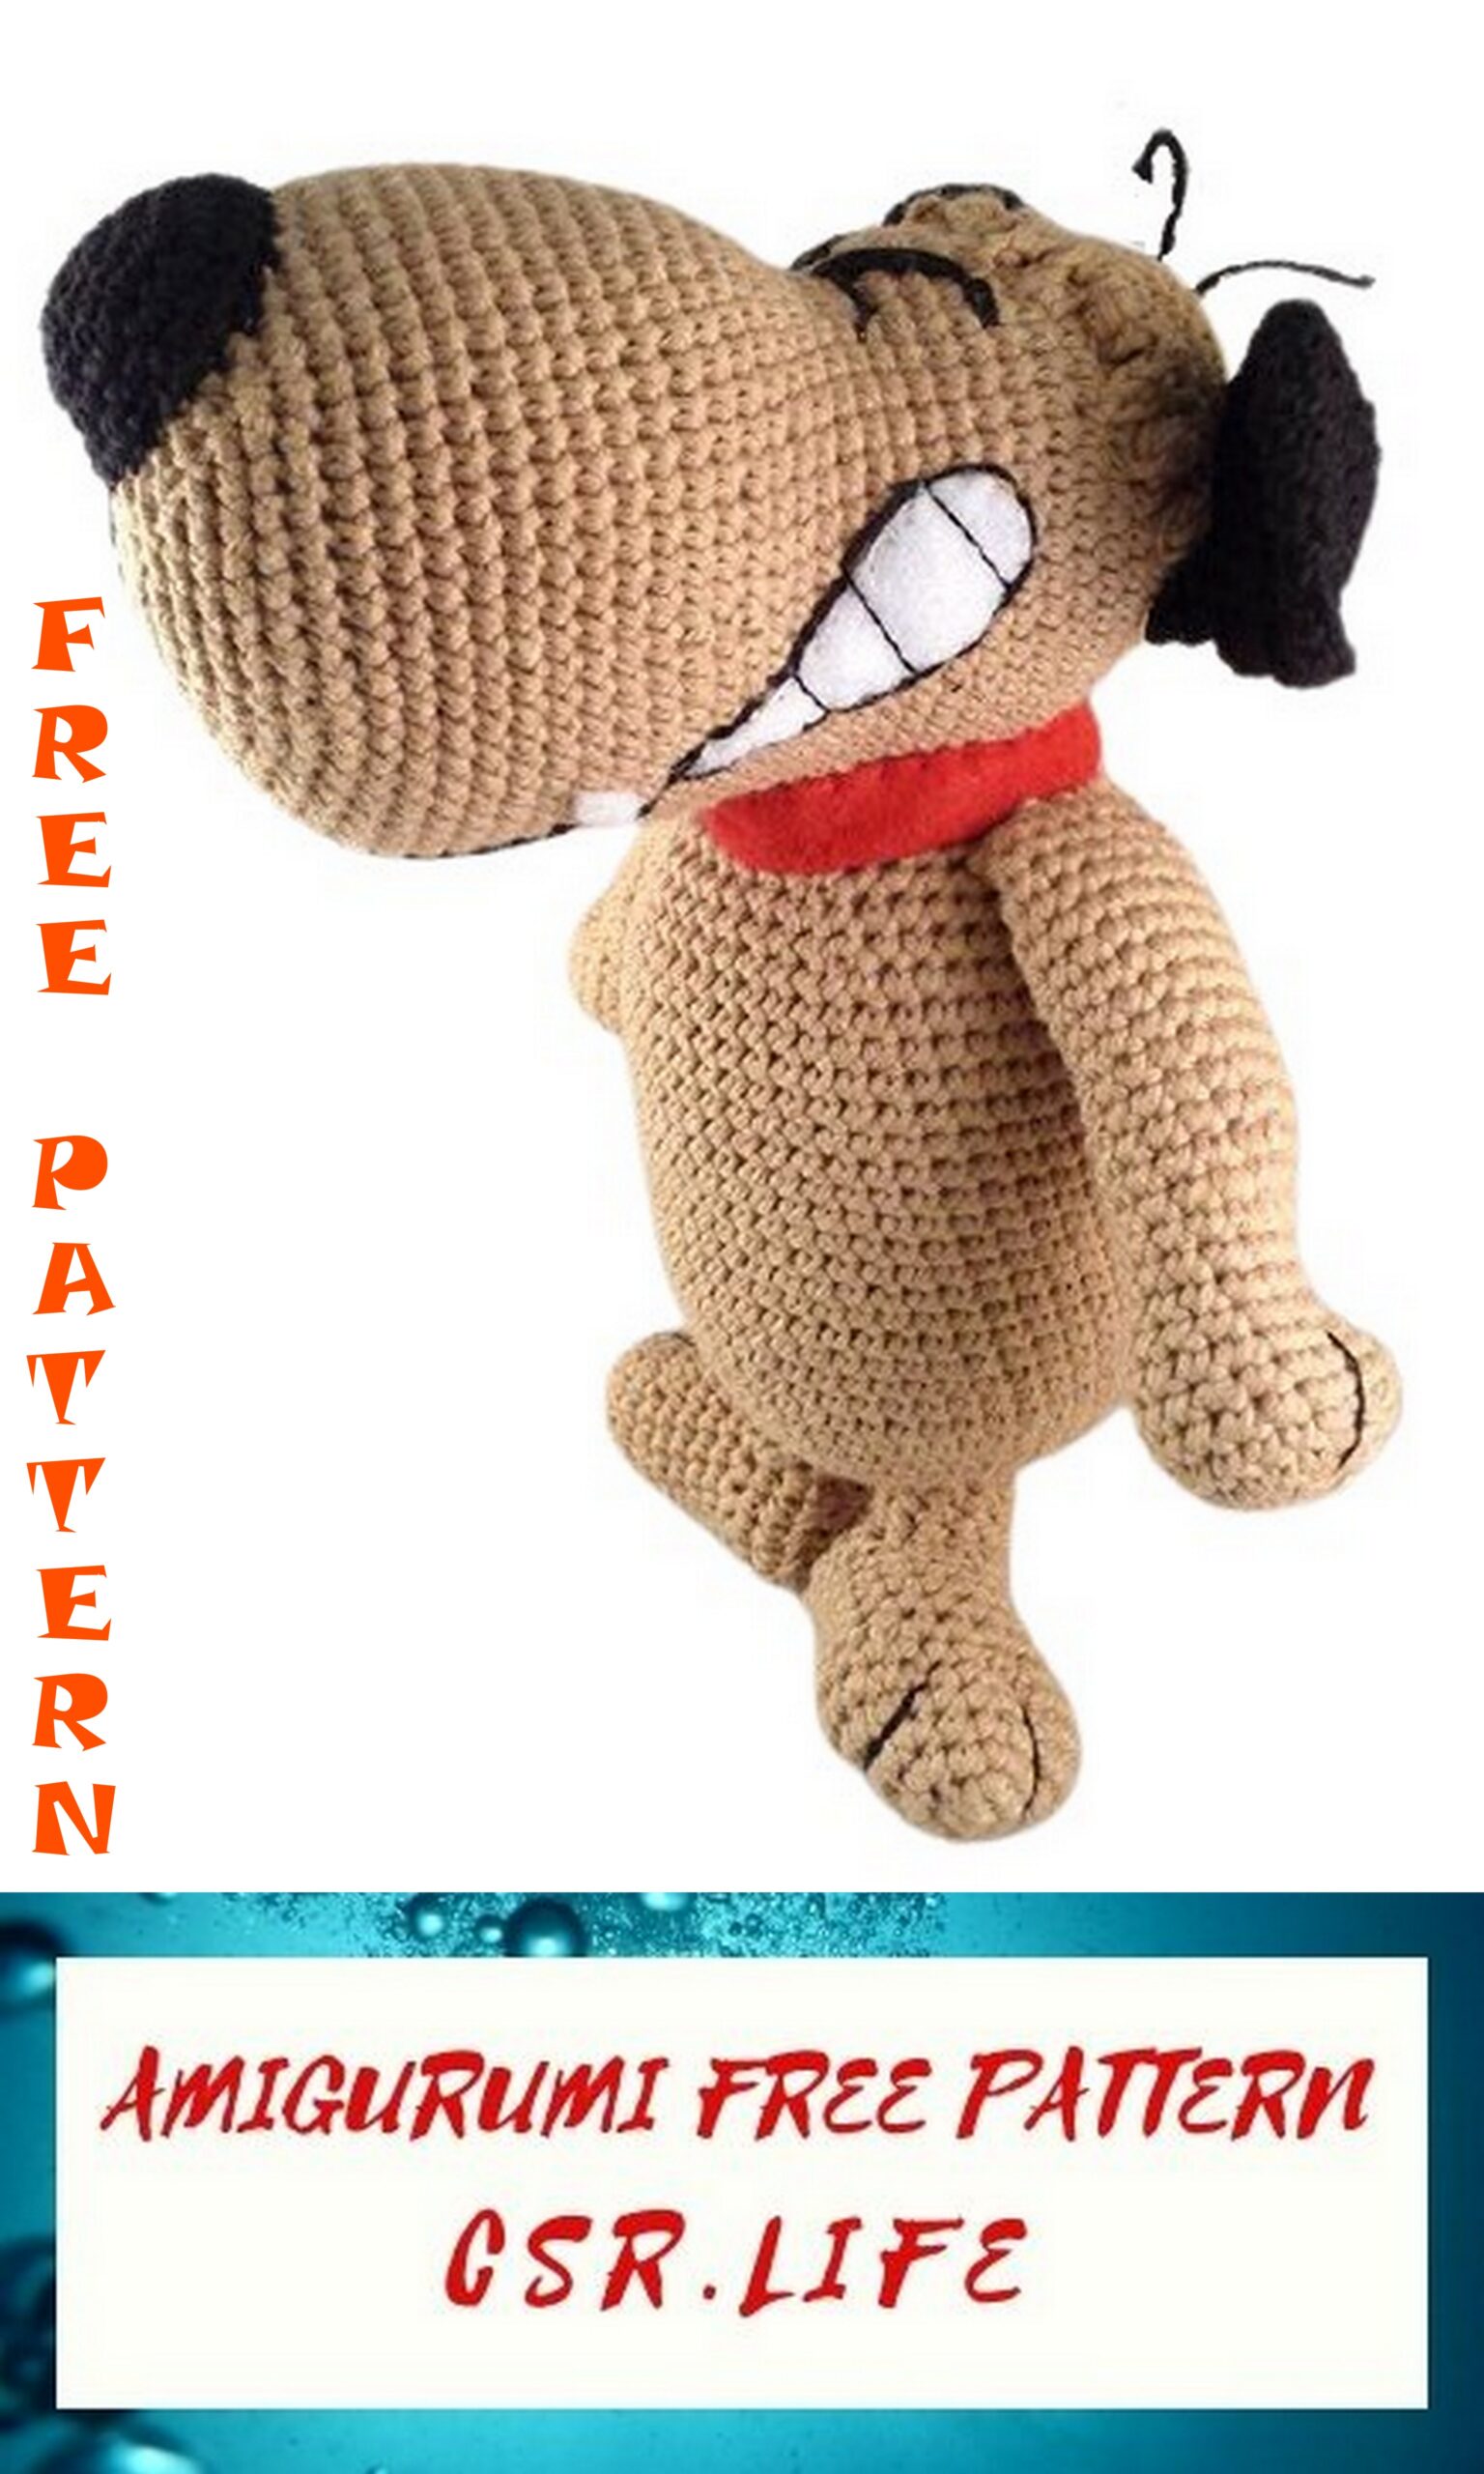
Start with the head. The widest part is the muzzle. The area where the decreases were left goes up and is where the eyes will be embroidered later.
Place the nose on the upper part of the muzzle as shown in the image (the lower edge of the nose should be on the magic ring of the muzzle). Secure with pins and sew.
At the other end of the head, place the hair and secure with pins. Sew to the head (also sew the fringes) while introducing a little filling to give it a somewhat pointed shape.
The ears are sewn on the side, thus leaving the fringes down. Add two black strands in the hair.
Embroider the eyes with the same black thread that was woven, at the height of the decreases. For the line of the eyes use one strand and instead the lines of the eyebrows mark them by going over with several strands.
To make the mouth and fangs, cut a piece of felt or white cloth in the shape of the image. Place it in the correct position and sew with white sewing thread. Then, embroider the contour lines with the same black thread used for knitting. To do this, start from the middle of the base of the nose and embroider the entire mouth. The fang should be under the teeth but the black line should go under the fang. The vertical lines of the teeth should be embroidered with embroidery floss or other thread thinner than that used to make the border.
Now sew the head to the body. Then sew arms to the body with the protrusion of the hands to the back. With black thread, embroider 3 lines to mark the fingers.
Finish filling the legs firmly and sew them tightly together facing the sides and with black thread embroider the 2 lines, pressing a little when sewing. Sew the tail with the curve up, filling tight to shape. Make the strap with red felt.