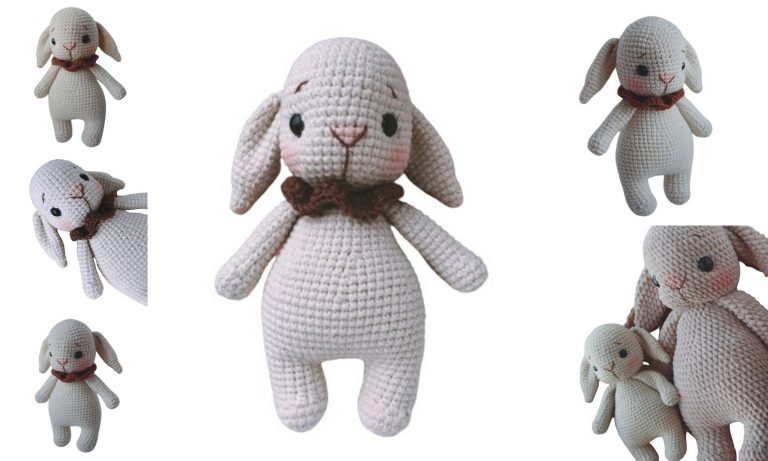
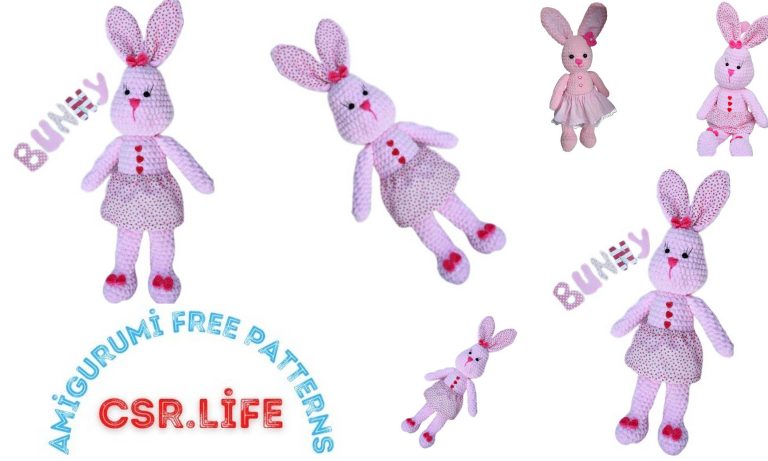
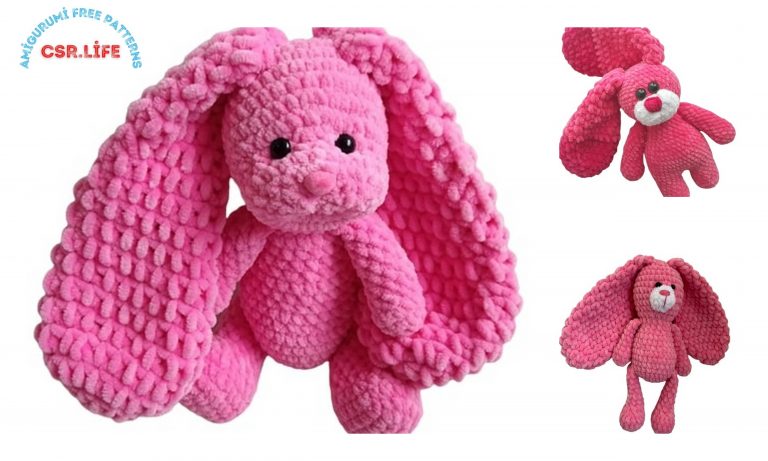
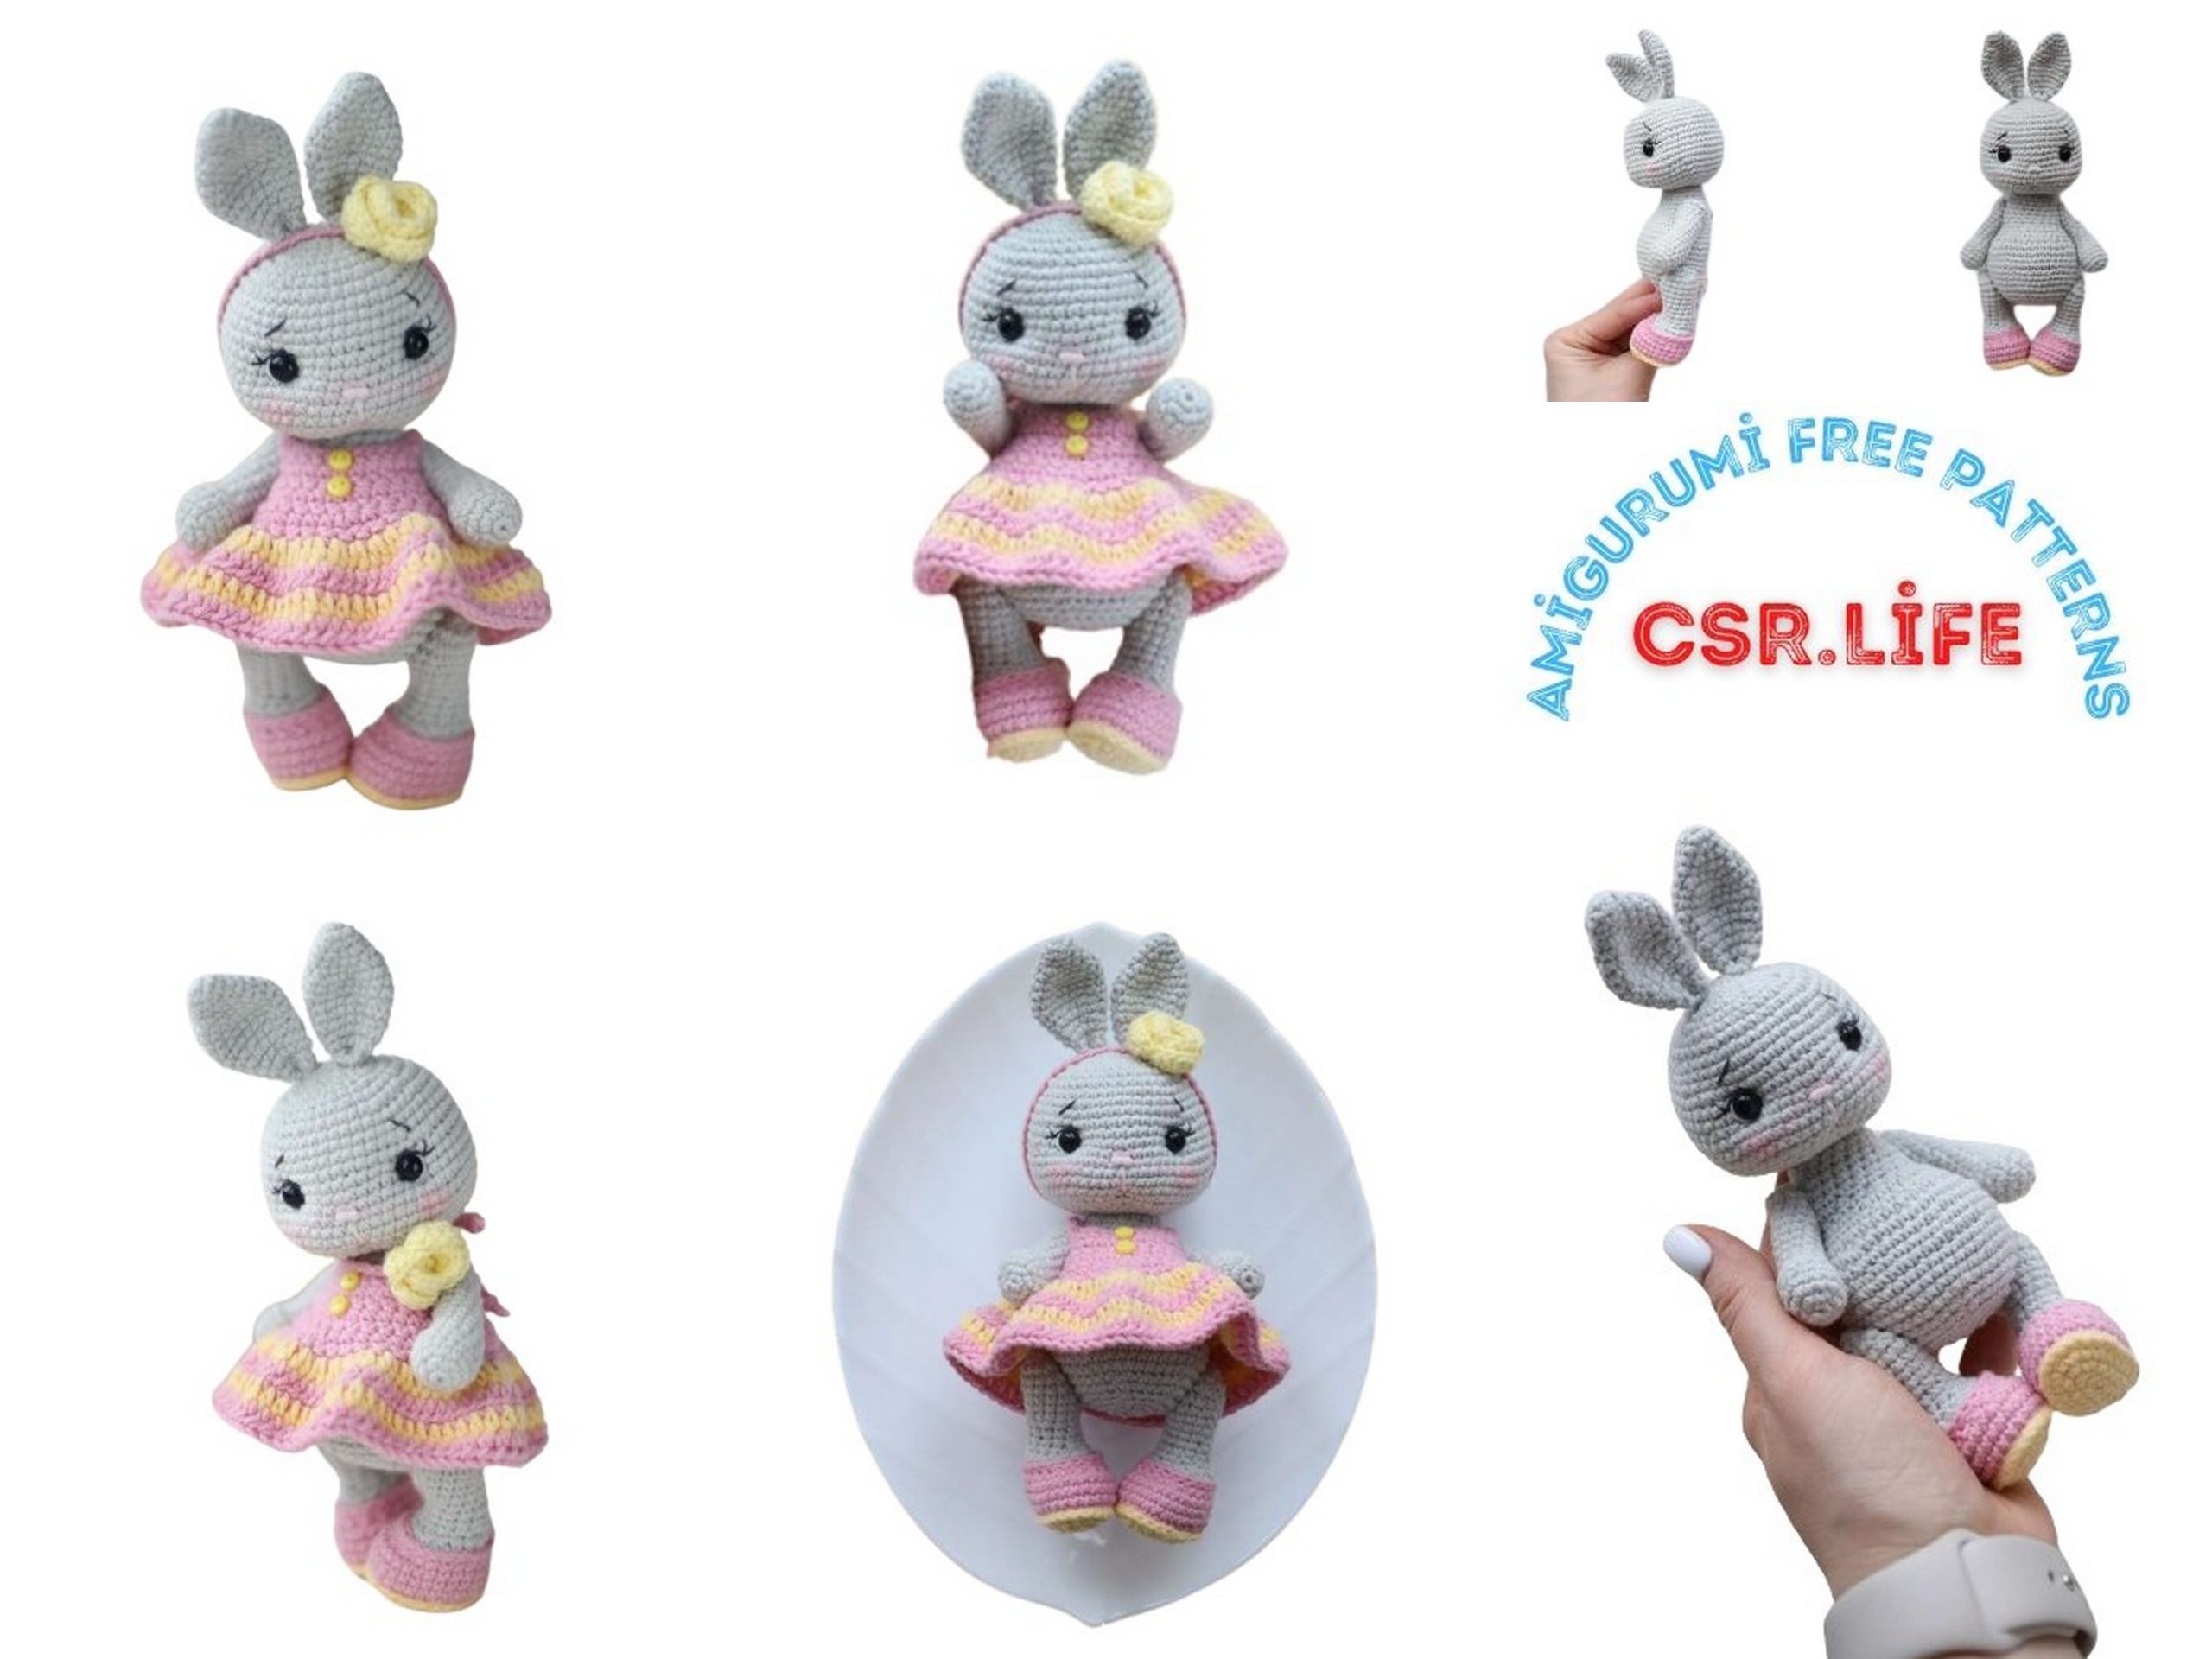
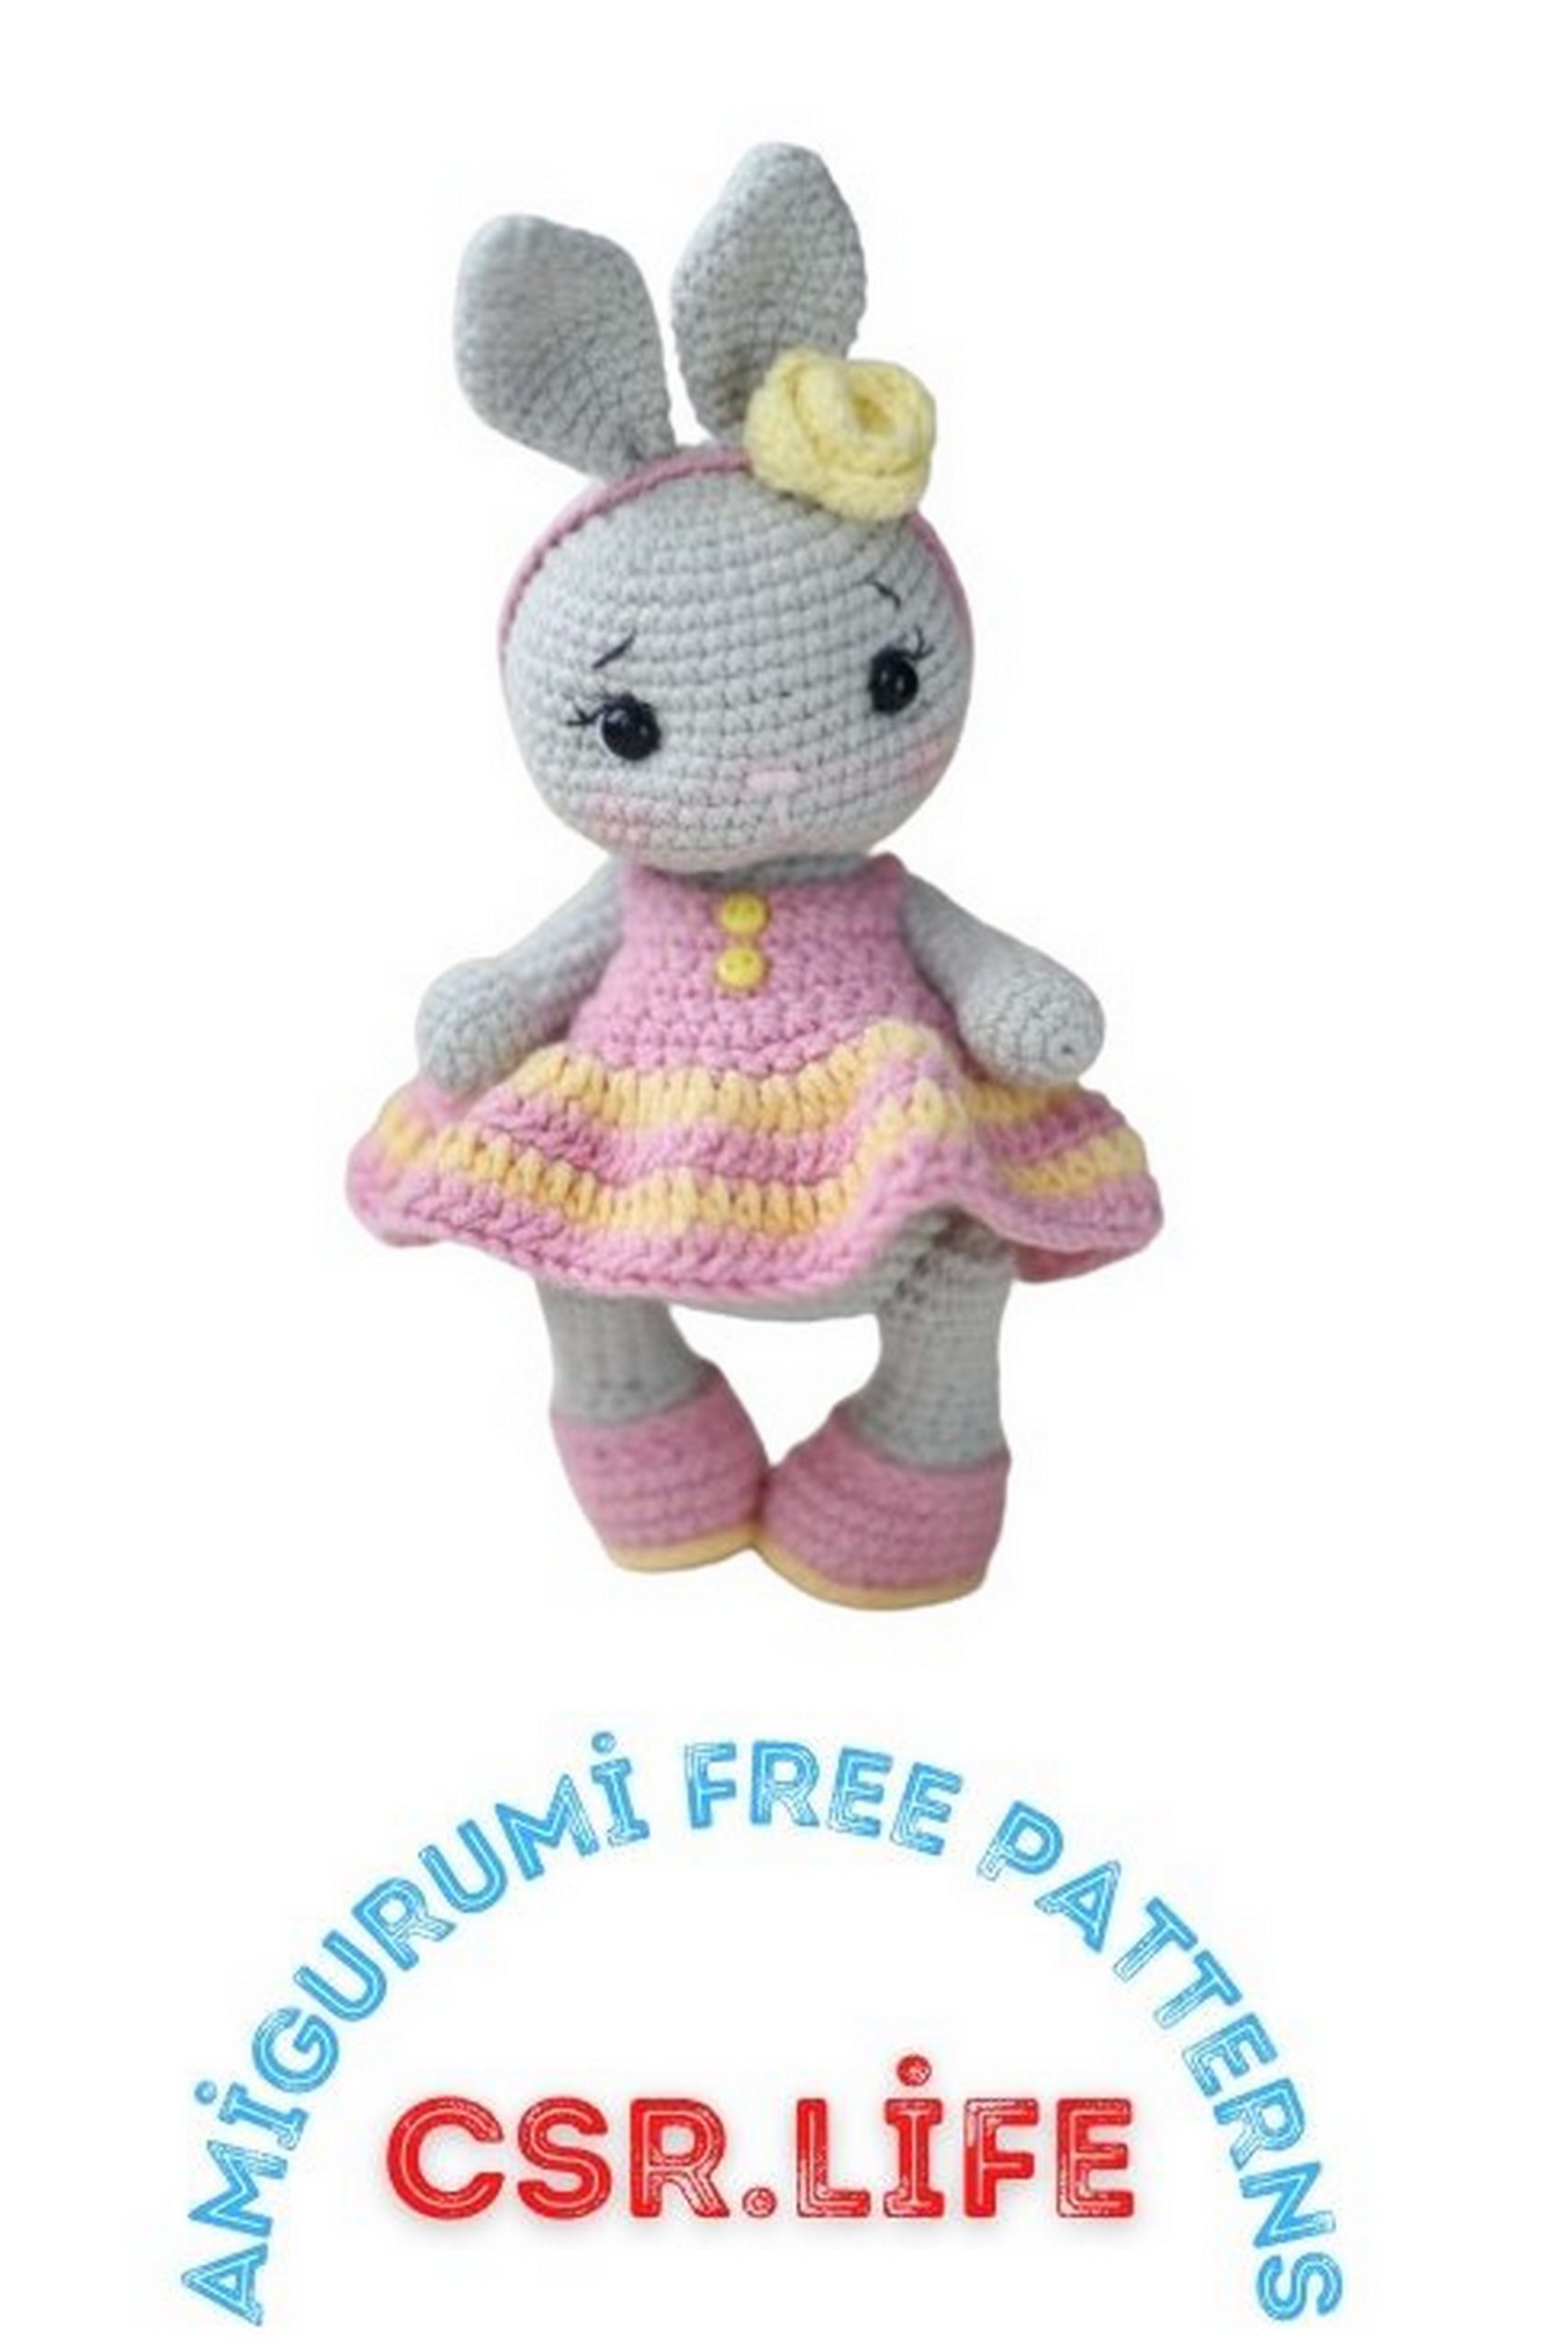
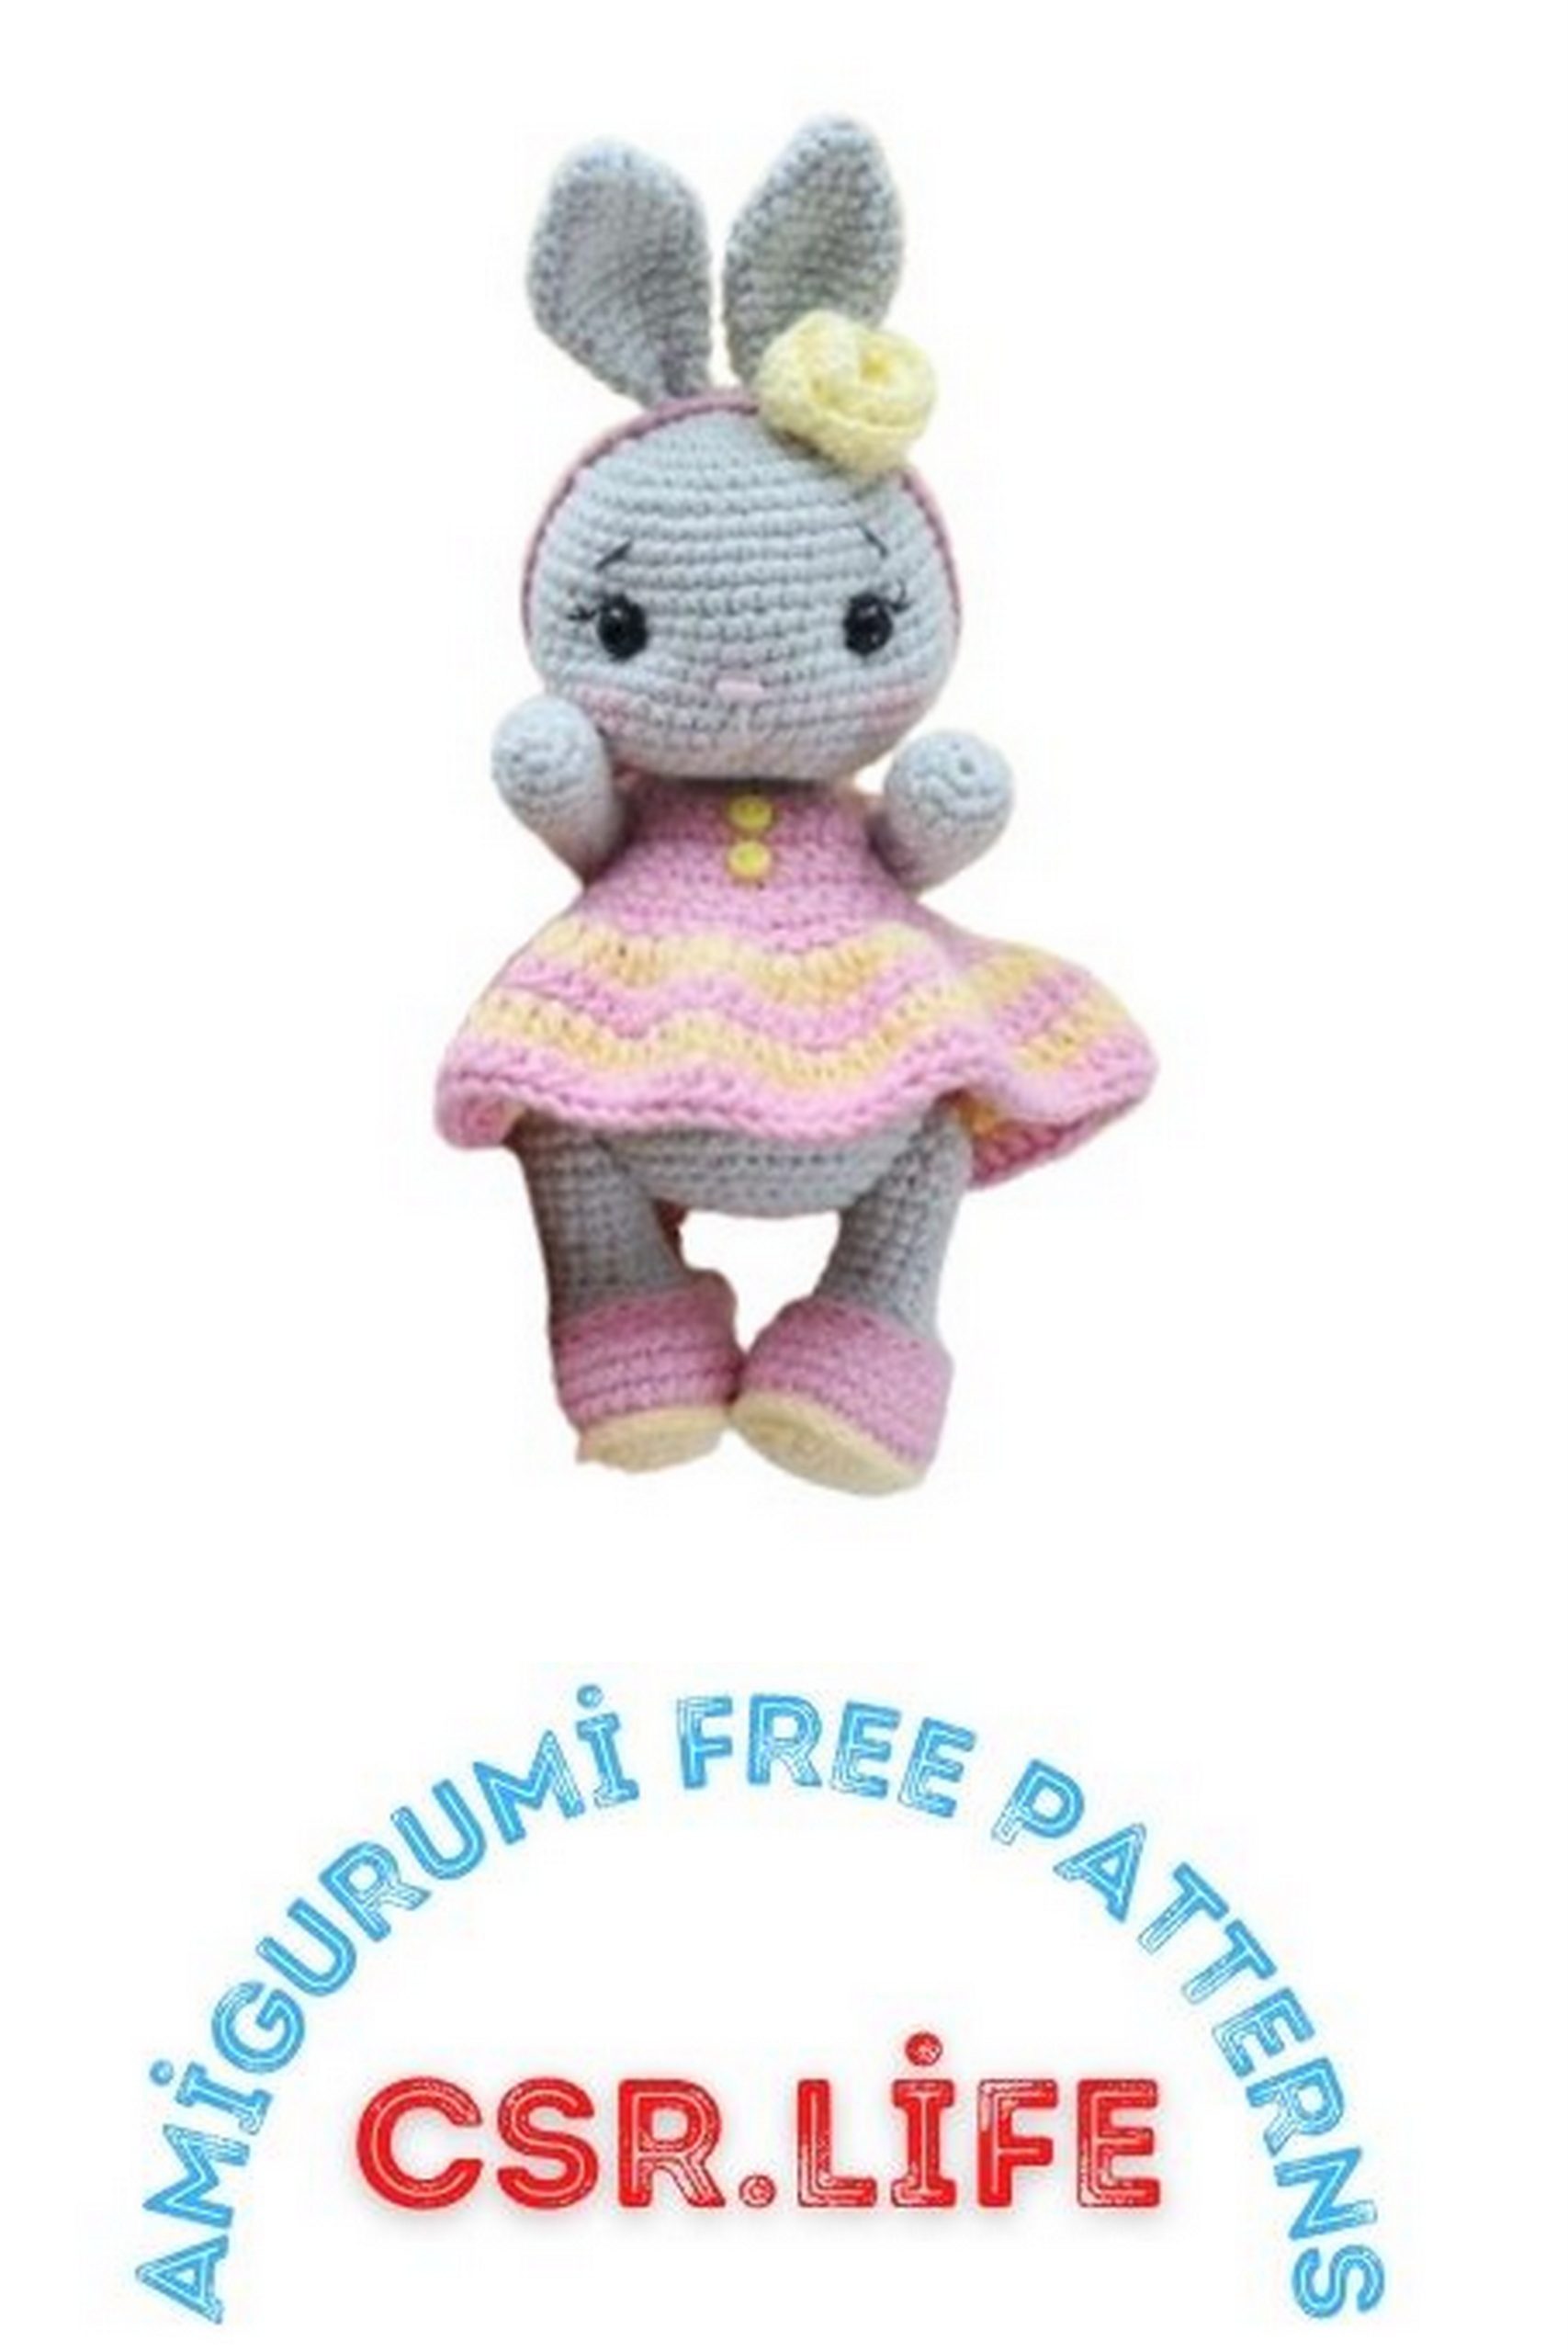
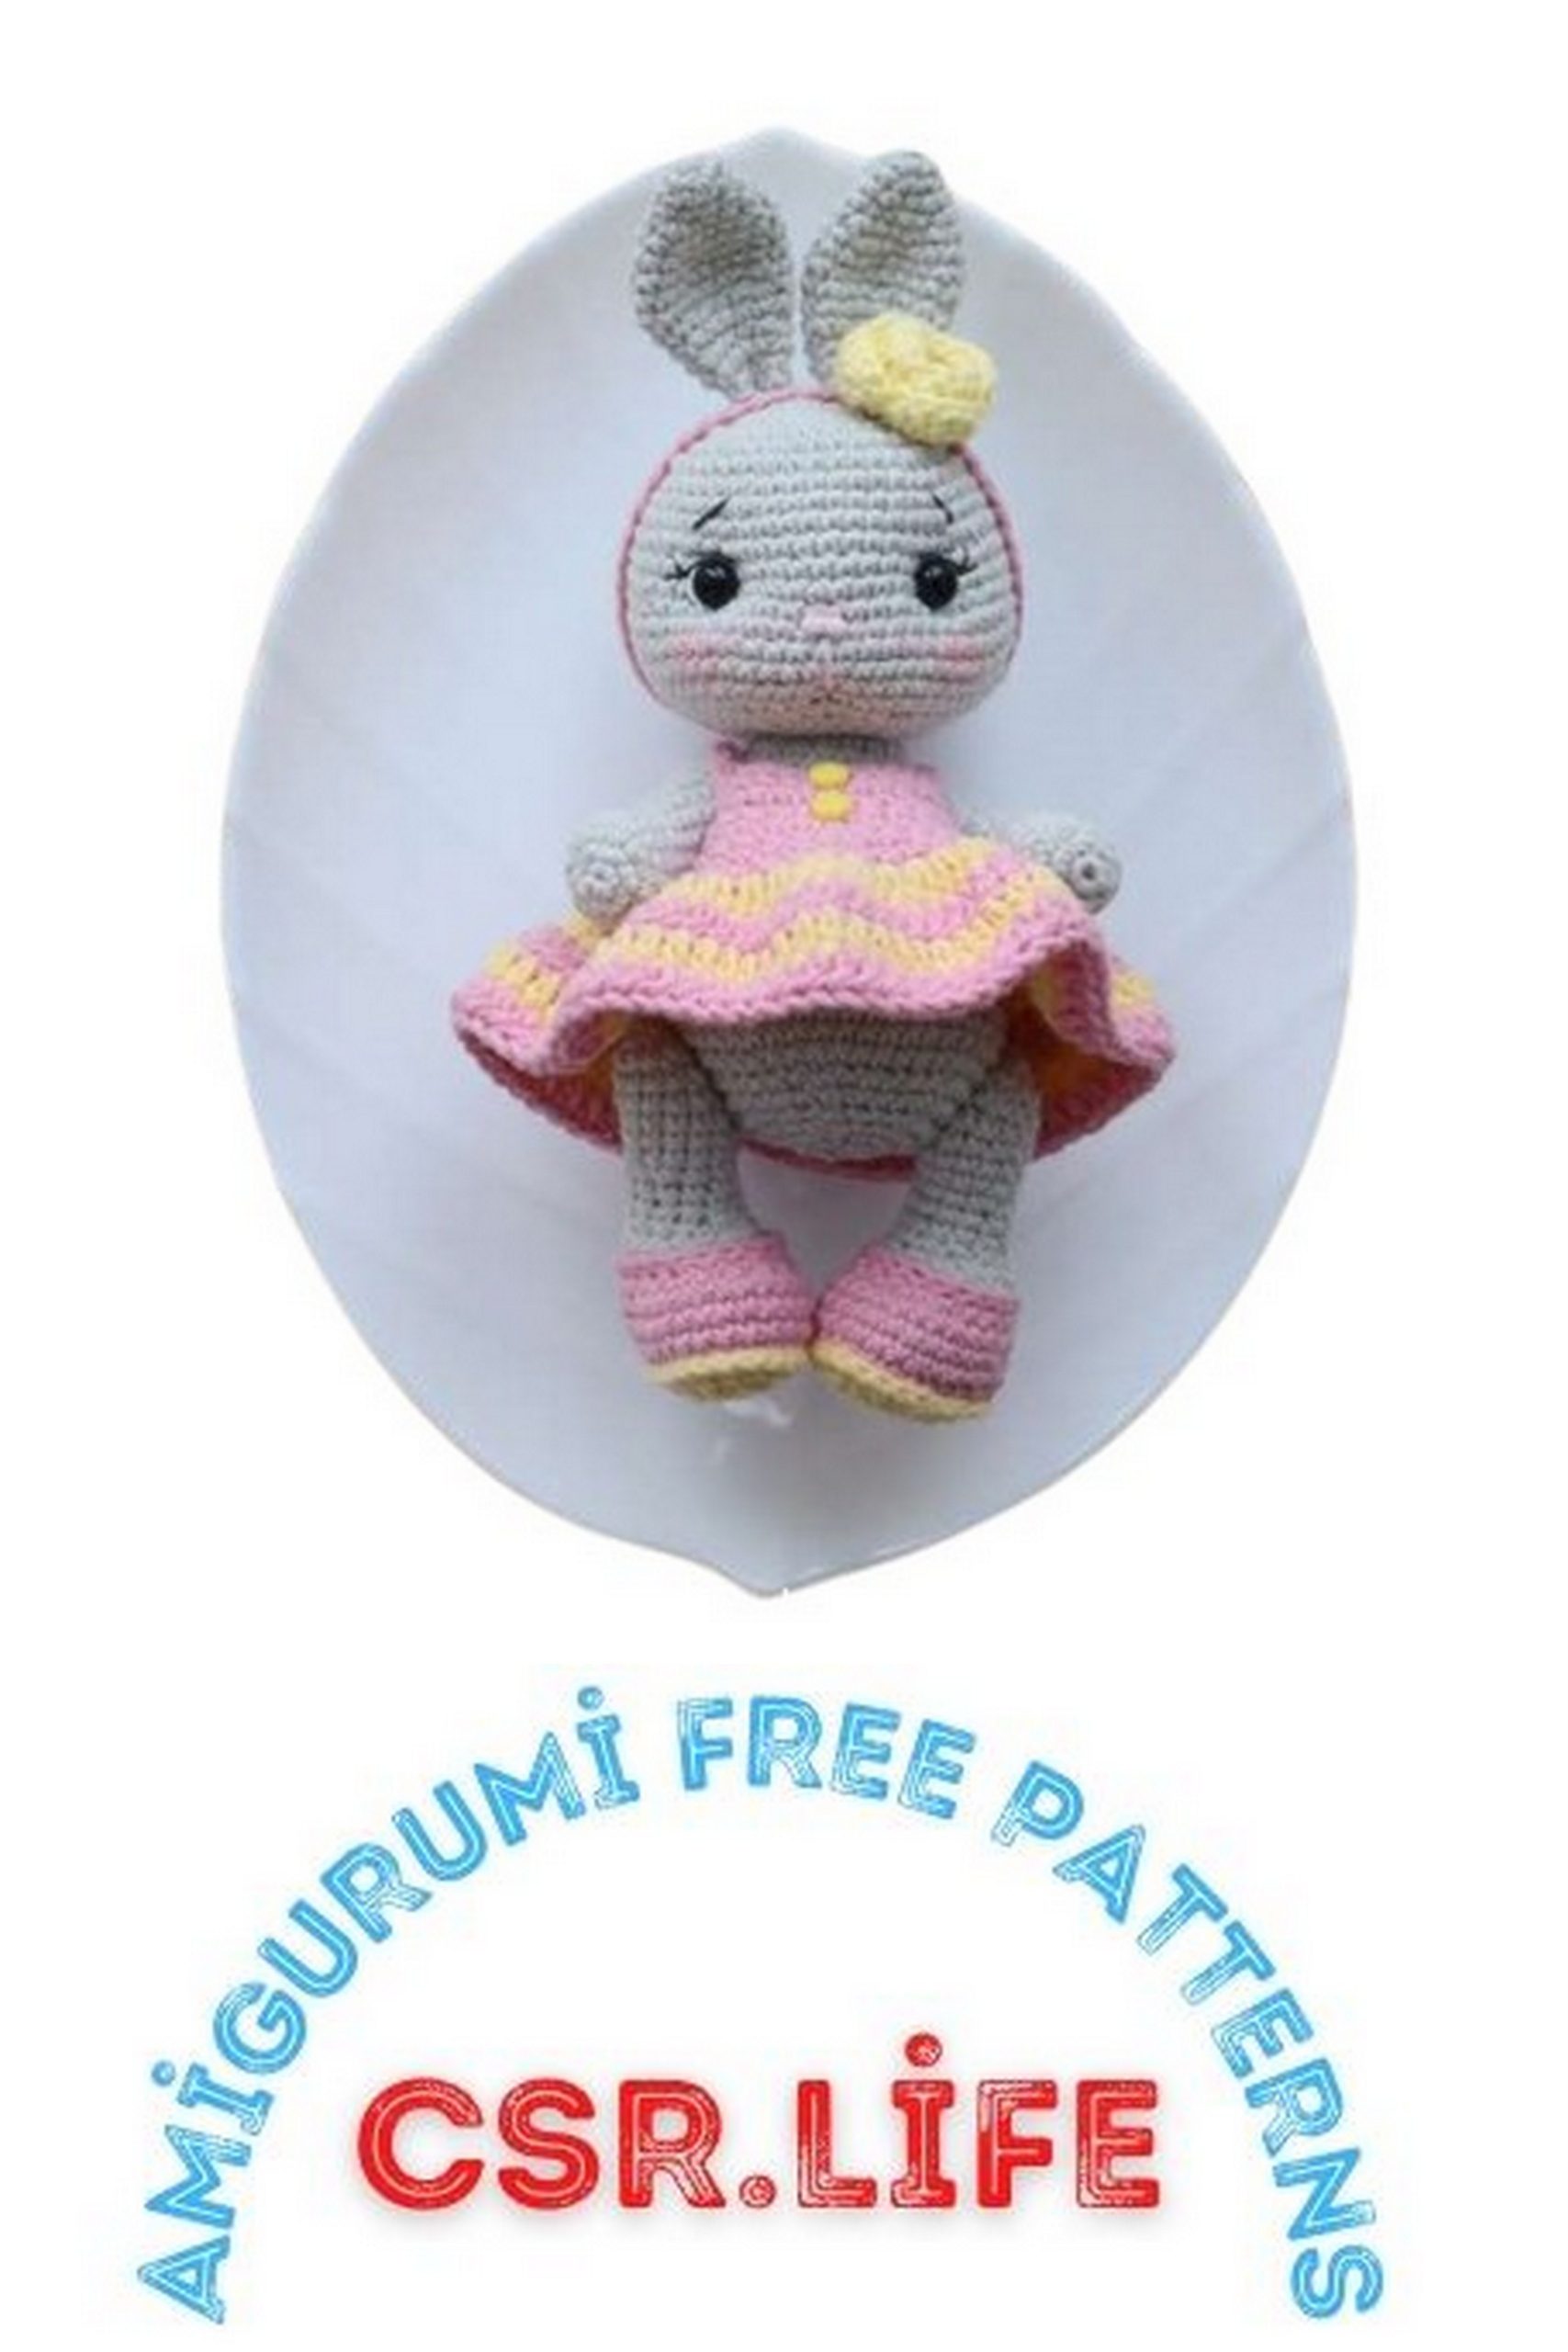
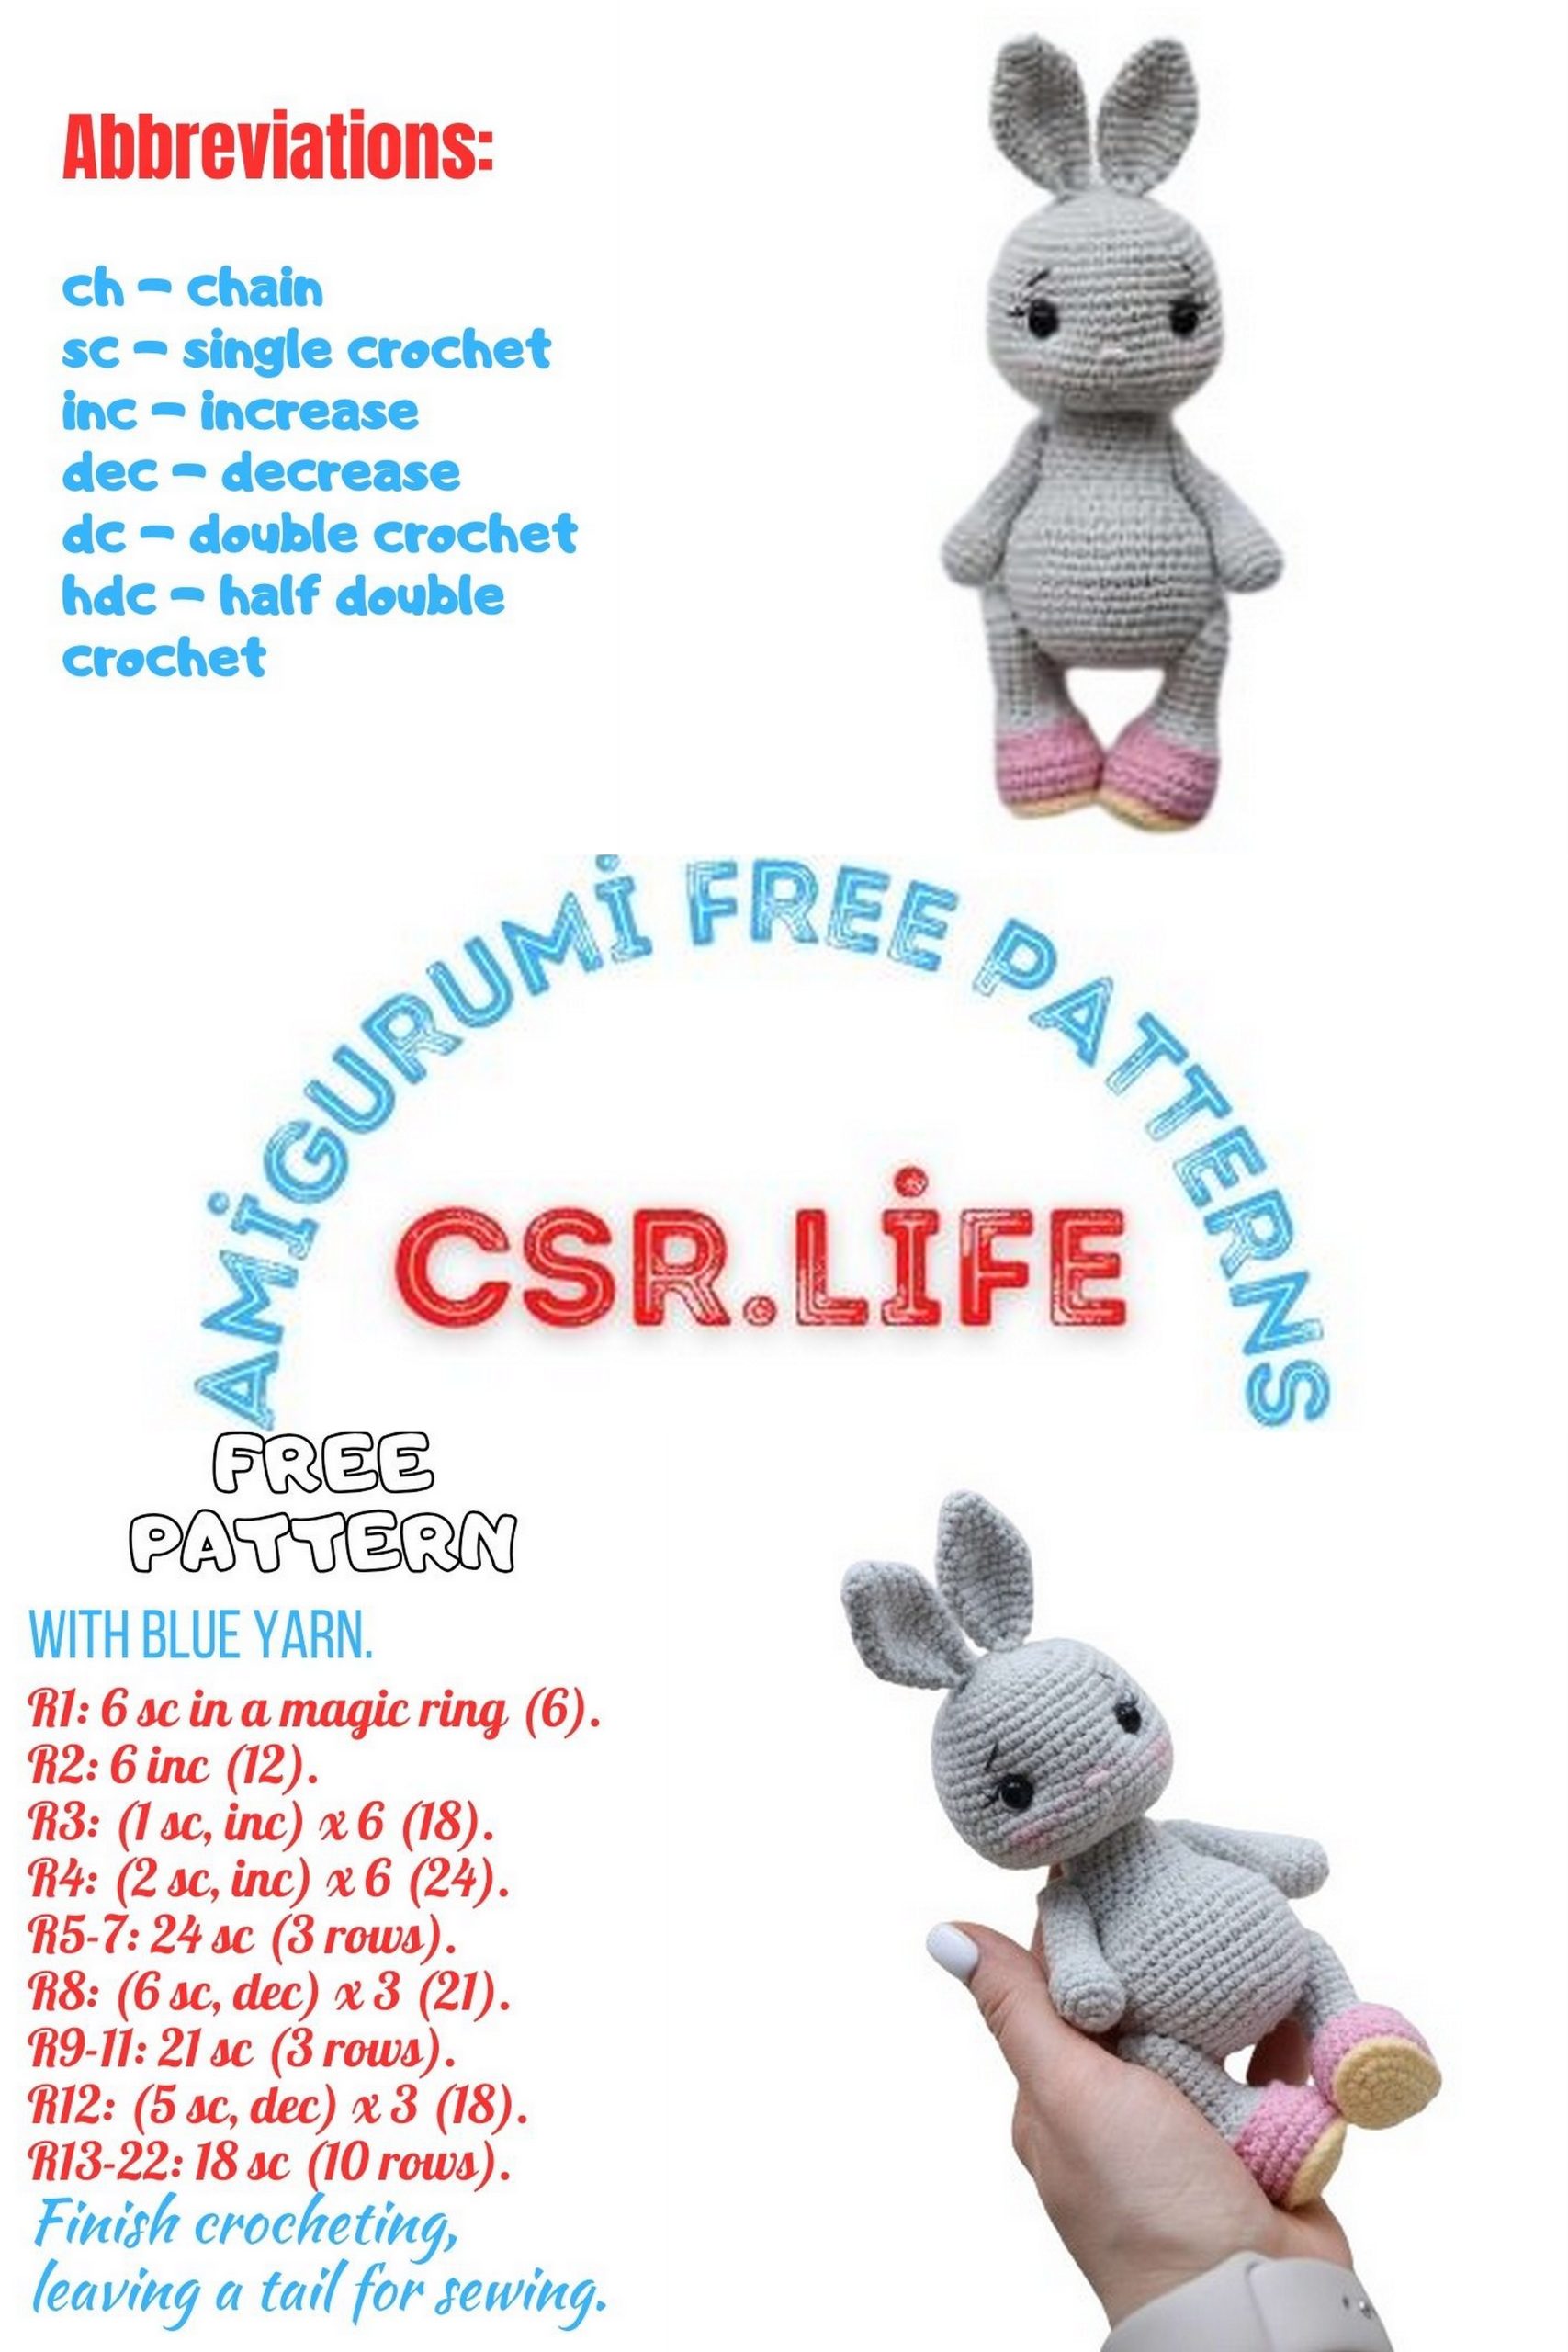
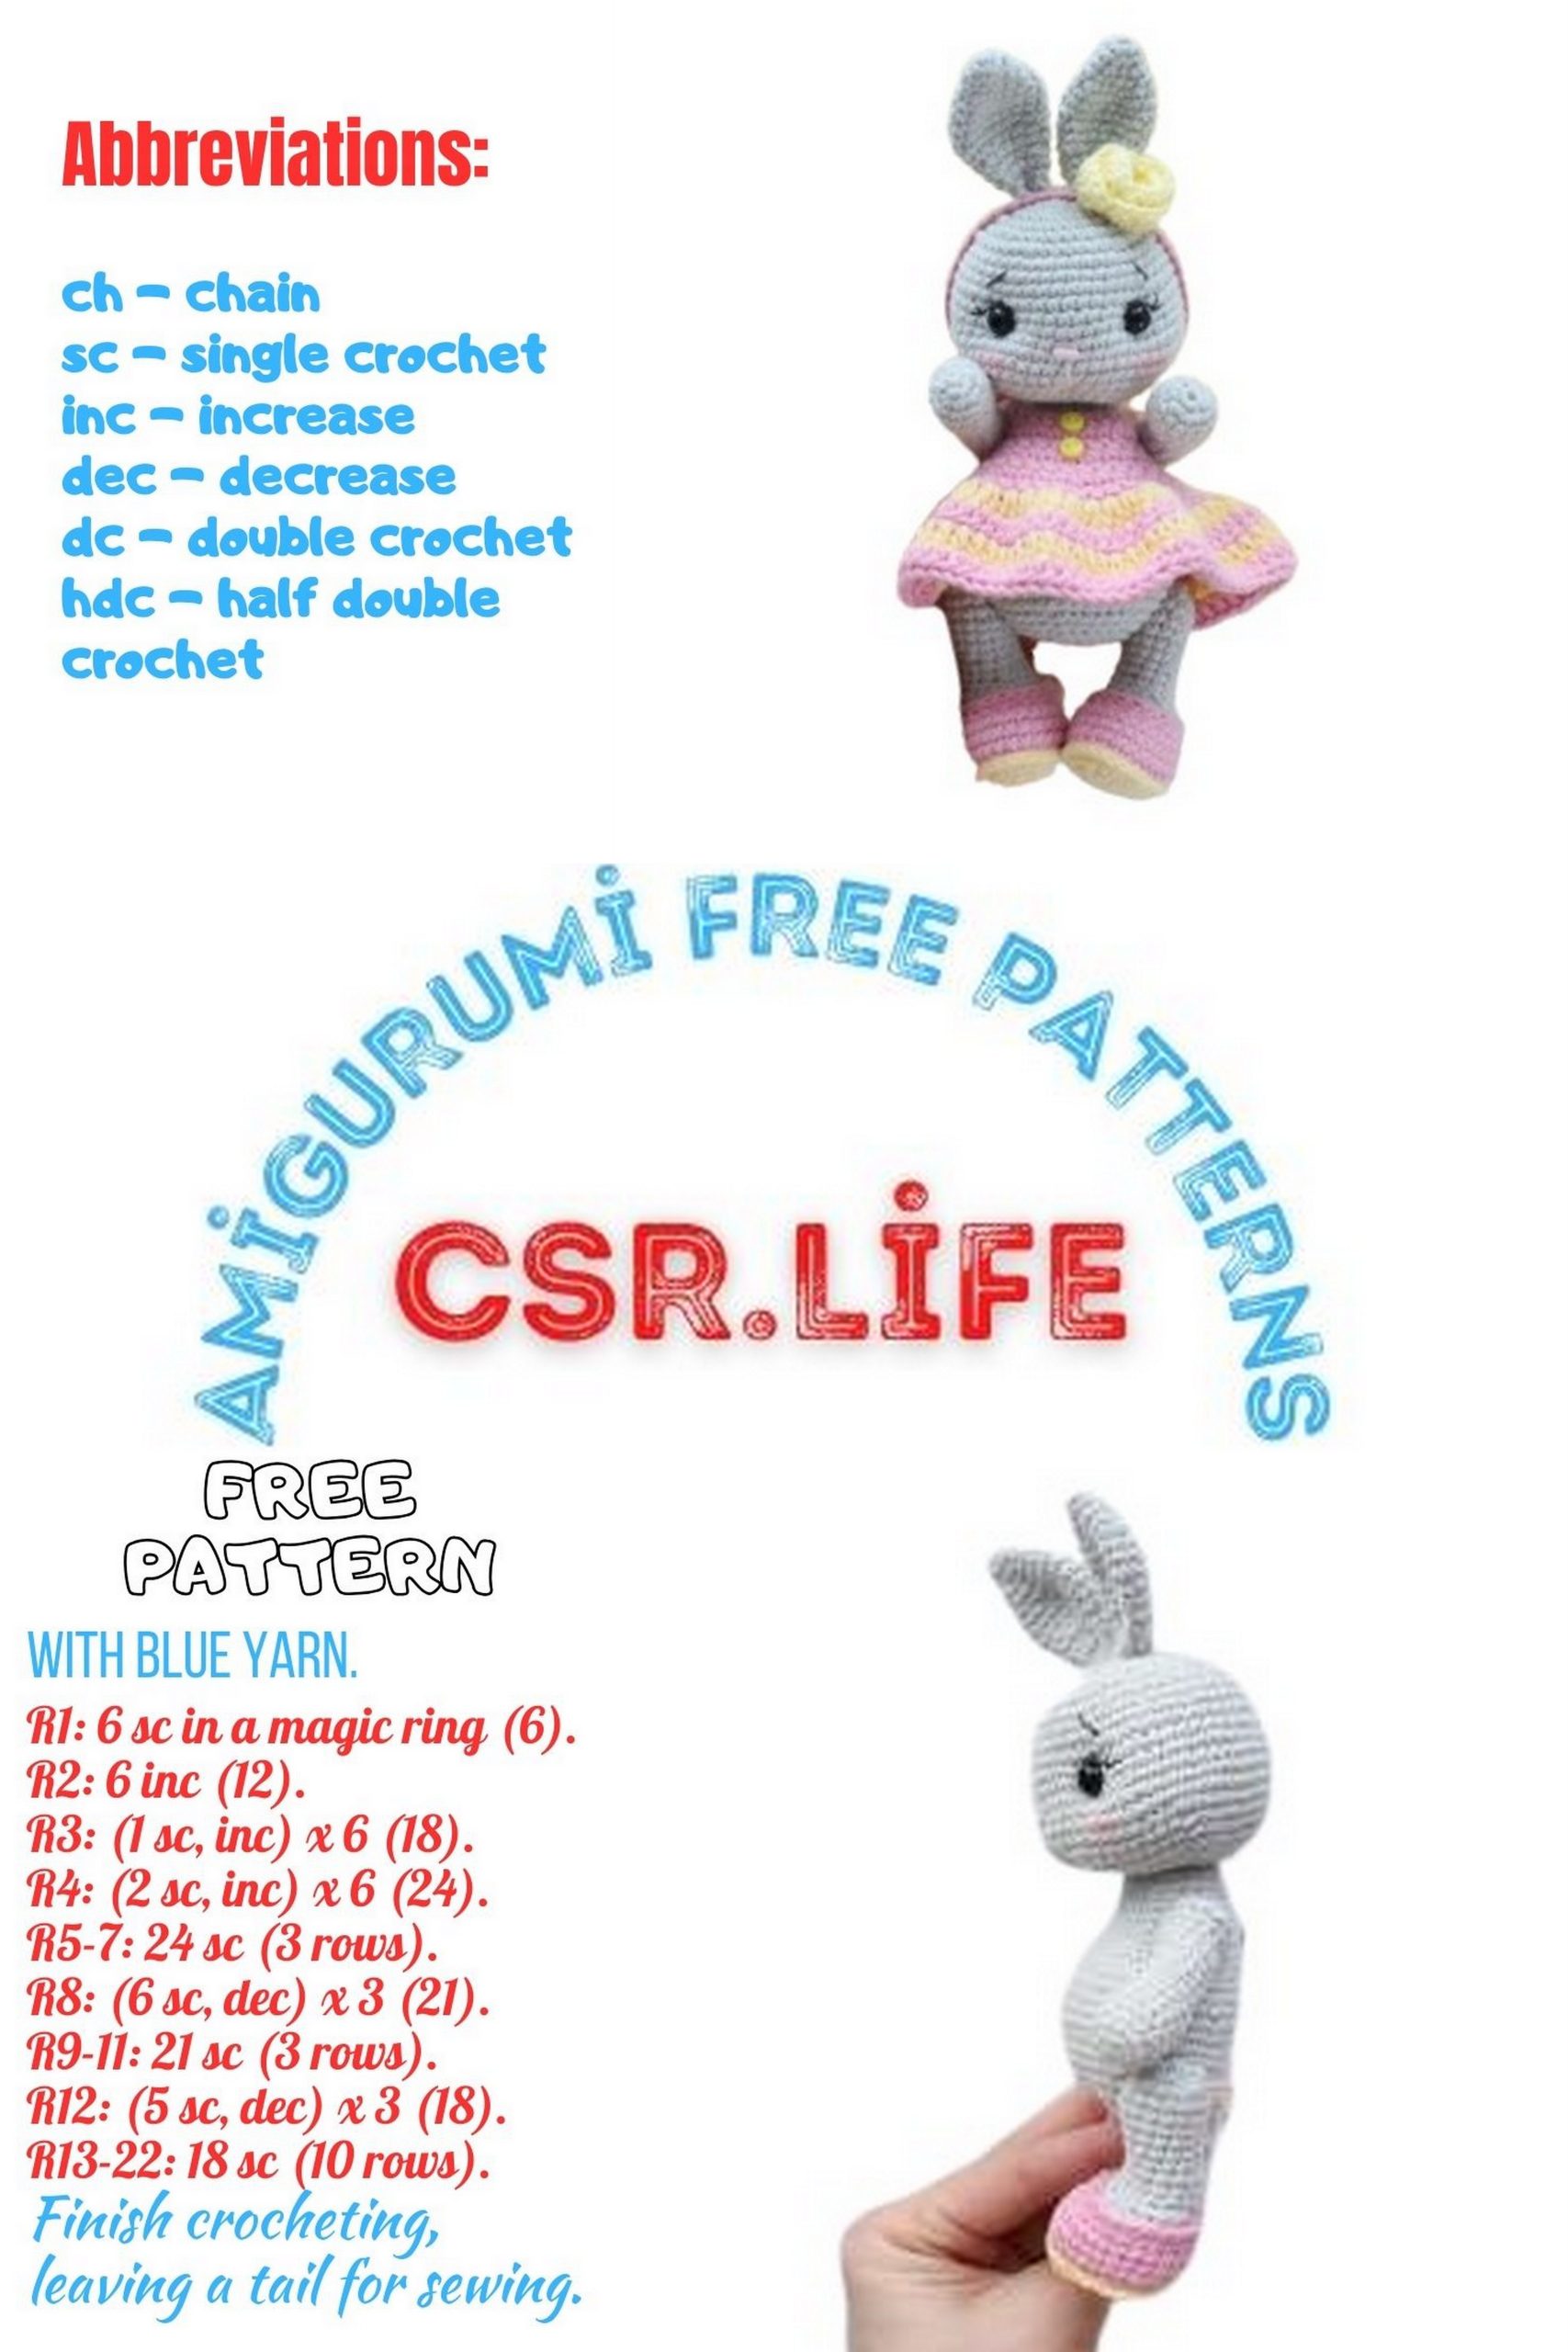
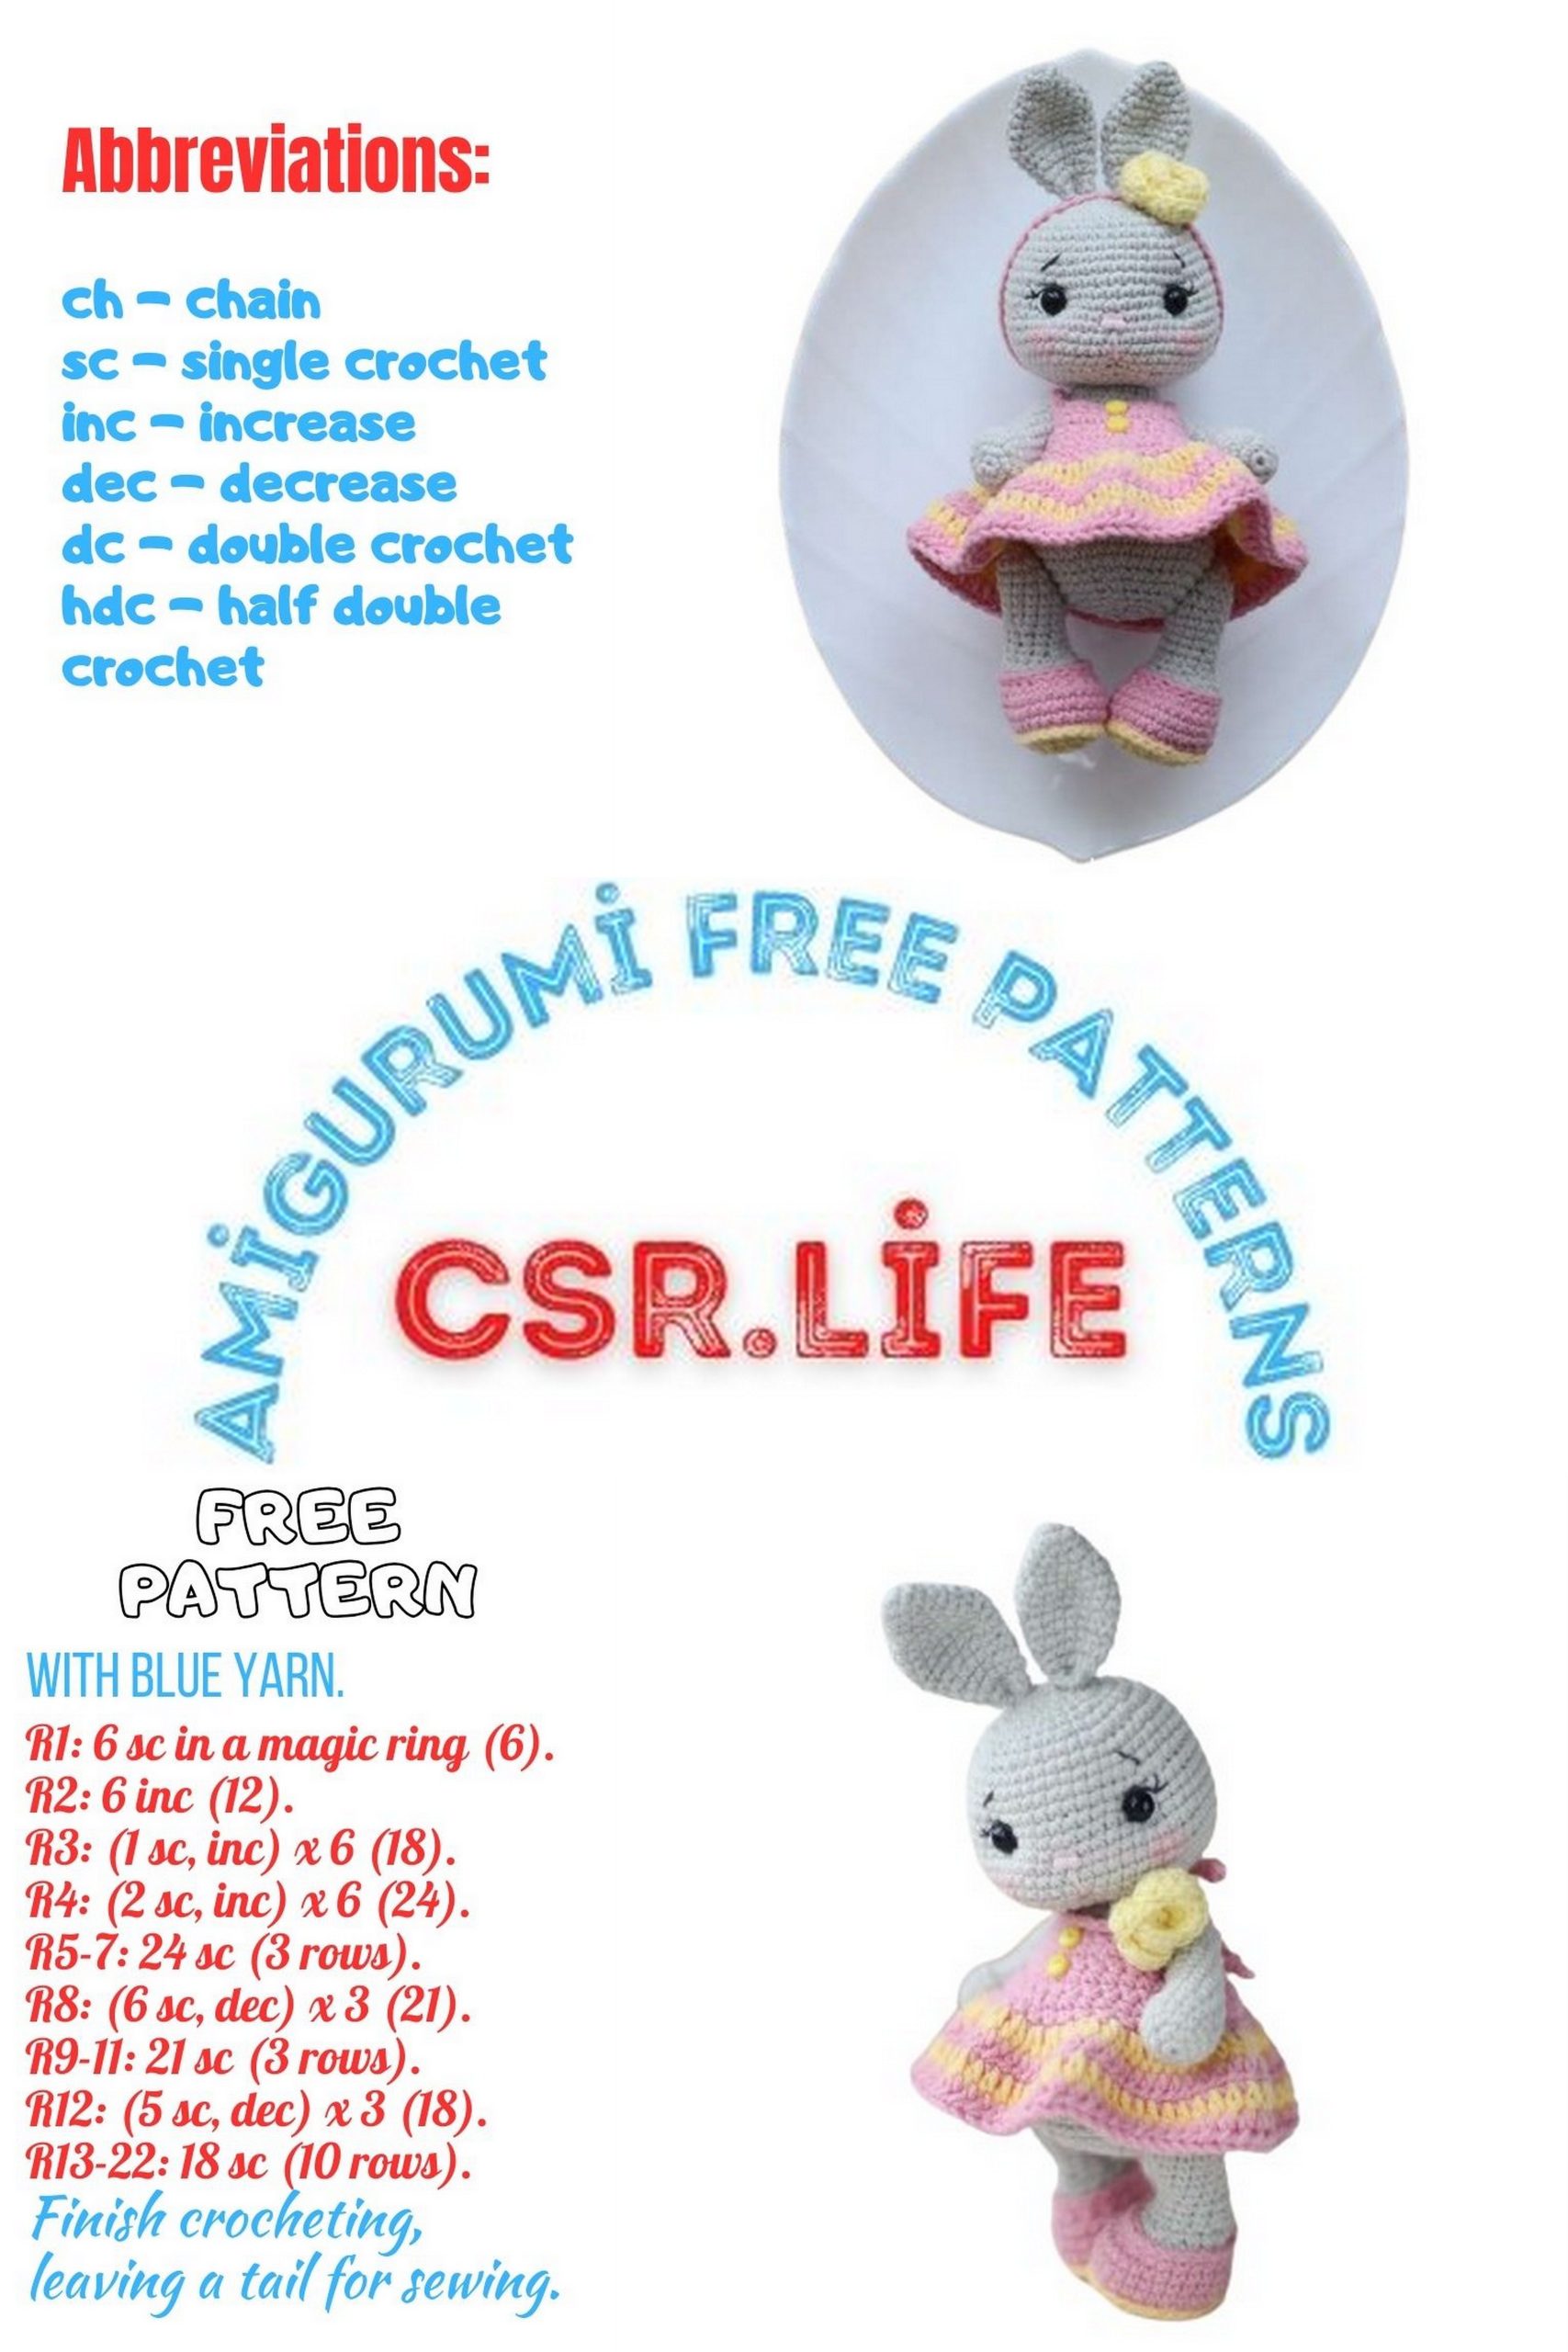
Dressed Bunny Amigurumi Free Pattern: Craft Your Cute and Fashionable Friend!
Step into the world of adorable amigurumi with our amigurumi free pattern to create your very own Dressed amigurumi Bunny! Whether you’re an experienced crocheter or just starting out, this pattern offers a delightful project to bring a fashionable twist to the classic bunny design. Stitch by stitch, craft your own cute bunny companion dressed in stylish attire, perfect for imaginative play or as a charming addition to your decor. Join us on this crafting adventure and let’s crochet our way to creating a lovable and trendy bunny friend!
List of materials used:
For the bunny:
Yarn: YarnArt Jeans (55% cotton, 45% acrylic, 50 g/160 m) colors: No. 49 for the toy (1 skein), No. 20 for the slippers, No. 88 for the sole
Split pins: T-shaped, size 2*20 mm – 5 pieces
Disks: diameter 12 mm (for upper paws) – 4 pieces, diameter 18 mm (for lower paws) – 4 pieces, diameter 20 mm (for the body) – 1 piece, diameter 22 mm (for the head) – 1 piece
Eyes with a diameter of 6 mm.
Hook 1.5 mm.
Round-nose pliers for twisting split pins.
Strong thread for weighting (I use waxed thread).
Black or dark gray embroidery floss for eye decoration, pink for the nose, and thin white yarn for embroidering whiskers.
Long needle for weighting.
Toy stuffing (polyester fiberfill or swan’s down).
Dry pastel and synthetic brushes for decoration (optional).
For the dress:
Yarn: YarnArt Jeans (55% cotton, 45% acrylic, 50 g/160 m) color No. 20 (main) and No. 88 (for stripes).
Hook 2 mm.
For the flower, you can use the main yarn or a thinner one.
Buttons, beads, and any decorations.
All the mentioned materials are solely my personal preference.
For your toys, you can always choose any other materials, in colors that you prefer.
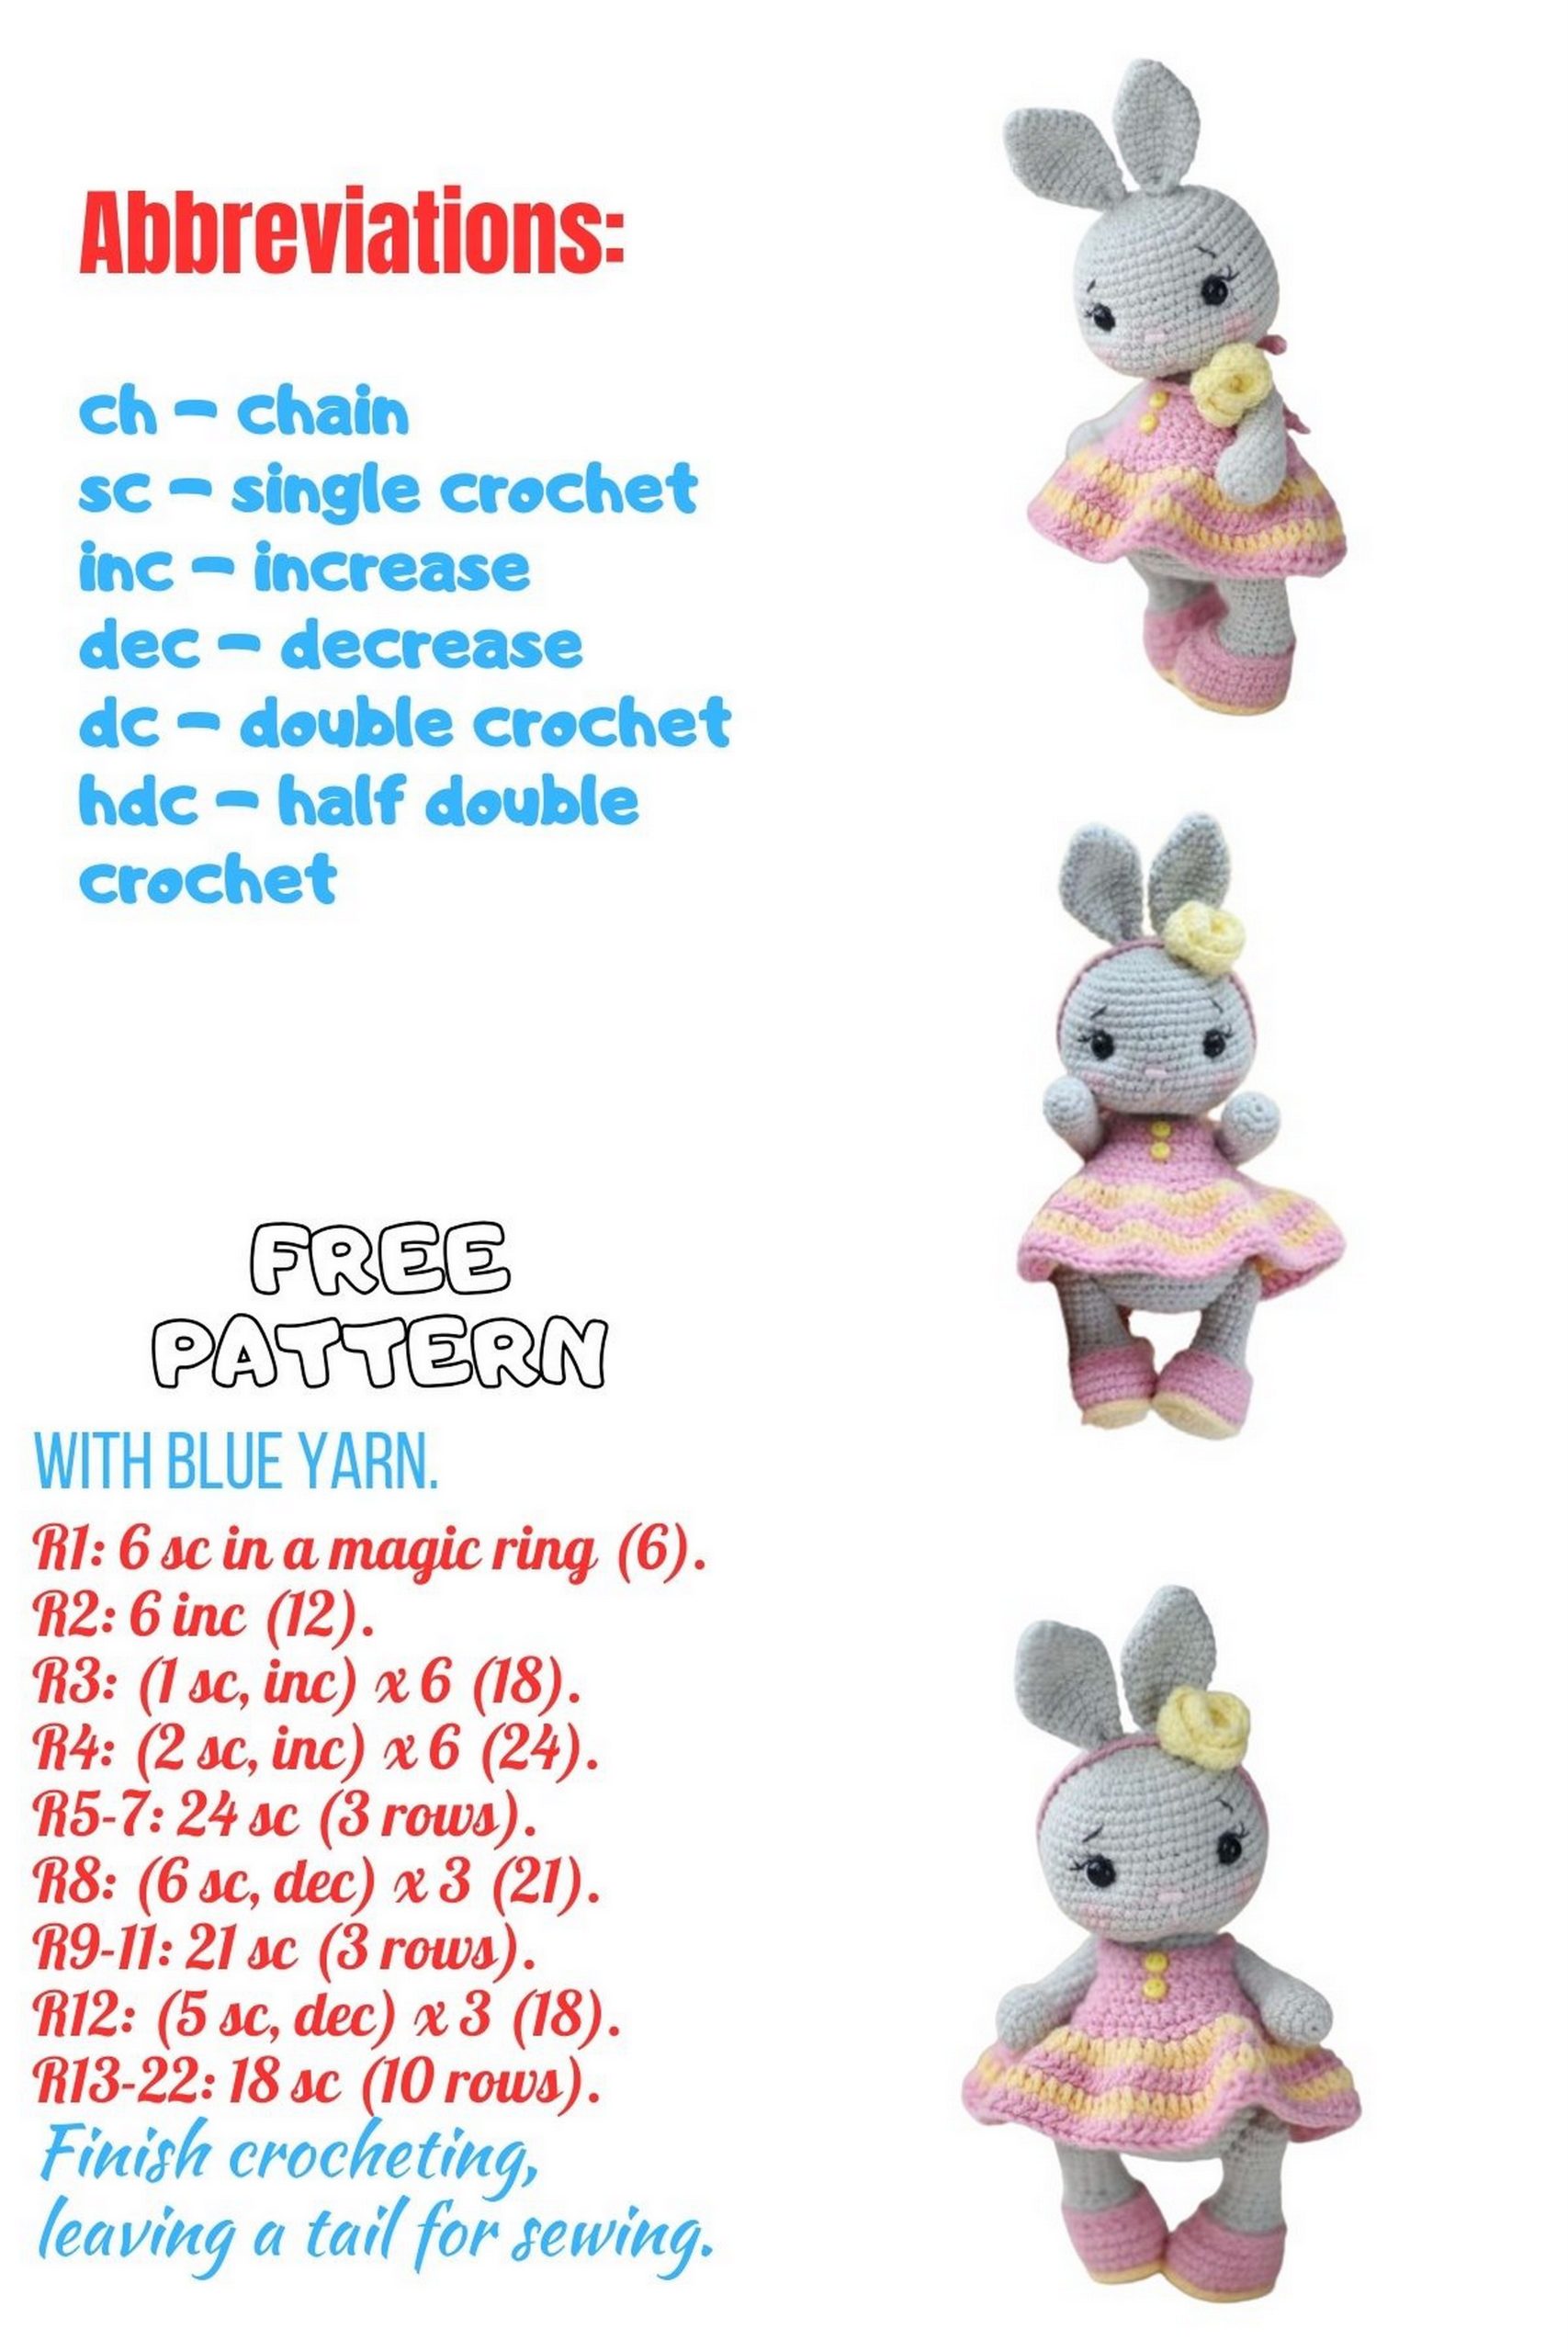
Abbreviations:
MR – magic ring
CH – chain
SC – single crochet
SS – slip stitch
INC – increase
DEC – decrease
HDC – half double crochet
DC – double crochet
( )*6 – repeat the sequence in brackets 6 times
BLO – back loop only
In brackets, the final stitch count for the row is indicated.
Crochet details in a spiral, without a turning chain, unless stated otherwise in the pattern.
Use a marker (thread or pin) to mark the last stitch of the row and the first stitch of the next row.
To ensure the marker is in the designated position, align the row by working the offset stitches.
Offset stitches are additional SC stitches not mentioned in the pattern and not included in the final stitch count of the row.
Split pin attachment for paws:
Place a disk under the split pin head. Insert the pin into the limb. There should be no stuffing between the knitted fabric and the disk.
To attach the paws to the body, insert the split pin into the toy’s body, place a disk onto the split pin prongs, and twist the prongs in different directions.
Twist the prongs as tightly as possible. They should be parallel to the disk; use needle-nose pliers to adjust if necessary.
PATTERN
Upper paws:
Row 1: 6 SC into MR
Place a marker at the end of the row; align subsequent rows to it during crocheting. The marker goes through the back in the center.
Row 2: 6 INC (12 SC)
Row 3: (2 SC, INC)*4 (16 SC)
Rows 4-6: 16 SC
Row 7: 4 SC, 4 DEC, 4 SC (12 SC)
Rows 8-17: 12 SC
Attach the split pin between rows 16 and 17.
Stuff the paw.
Row 20: 6 DEC
Secure and cut the yarn. Make the second paw in the same way.
Lower paws:
Start crocheting with yellow yarn.
Chain 7.
Row 1 (starting from the second chain from the hook): 1 SC, 4 SC, 3 SC in the last chain stitch. Continue crocheting on the opposite side of the chain with 5 SC (14 SC).
Place a marker at the end of the row; align subsequent rows to it during crocheting. The marker goes through the back in the center of the paw.
Row 2: 2 INC, 4 SC, 3 INC, 4 SC, INC (20 SC)
Row 3: (SC, INC)*2, 4 SC, (INC, SC)*3, 4 SC, INC, SC (26 SC)
Do not cut the yarn.
Join pink yarn and crochet in the BLO.
Row 4: 26 SC in BLO
Work 26 SS over the remaining loops of row 4. Secure and cut the yellow yarn.
Rows 5-7: 26 SC
Row 8: 7 SC, 6 DEC, 7 SC (20 SC)
Row 9: 20 SS in FLO
Secure and cut the pink yarn.
Join the main color yarn to the remaining FLO of row 9.
Row 10: 20 SC in BLO
Row 11: 6 SC, 4 DEC, 6 SC (16 SC)
Row 12-13: 12 SC
Row 14: 4 SC, (SC, INC)*2, 4 SC (14 SC)
Rows 15-19: 14 SC
Attach the split pin between rows 18 and 19.
Stuff the paw.
Row 20: (5 SC, DEC)*2 (12 SC)
Secure and cut the yarn. Make the second paw in the same way.
Row 21: 6 DEC

Head:
Row 1: 6 SC into MR
Row 2: 6 INC (12 SC)
Row 3: (SC, INC)*6 (18 SC)
Row 4: (INC, 2 SC)*6 (24 SC)
Row 5: (3 SC, INC)*6 (30 SC)
Row 6: (INC, 4 SC)*6 (36 SC)
Row 7: (5 SC, INC)*6 (42 SC)
Row 8: (INC, 6 SC)*6 (48 SC)
Rows 9-10: 48 SC
Row 11: (15 SC, INC)*3 (51 SC)
Row 12: (INC, 16 SC)*3 (54 SC)
Rows 13-18: 54 SC
If using safety eyes, place them between rows 13 and 14, about 10-12 SC apart.
Row 19: (16 SC, DEC)*3 (51 SC)
Row 20: (15 SC, DEC)*3 (48 SC)
Row 21: (6 SC, DEC)*6 (42 SC)
Stuff the head, distributing the stuffing evenly. Continue stuffing as you crochet.
Row 22: (5 SC, DEC)*6 (36 SC)
Row 23: (4 SC, DEC)*6 (30 SC)
Row 24: (3 SC, DEC)*6 (24 SC)
Row 25: (2 SC, DEC)*6 (18 SC)
Row 26: (SC, DEC)*6 (12 SC)
Leave the remaining hole open for now. It will be used for weighting.
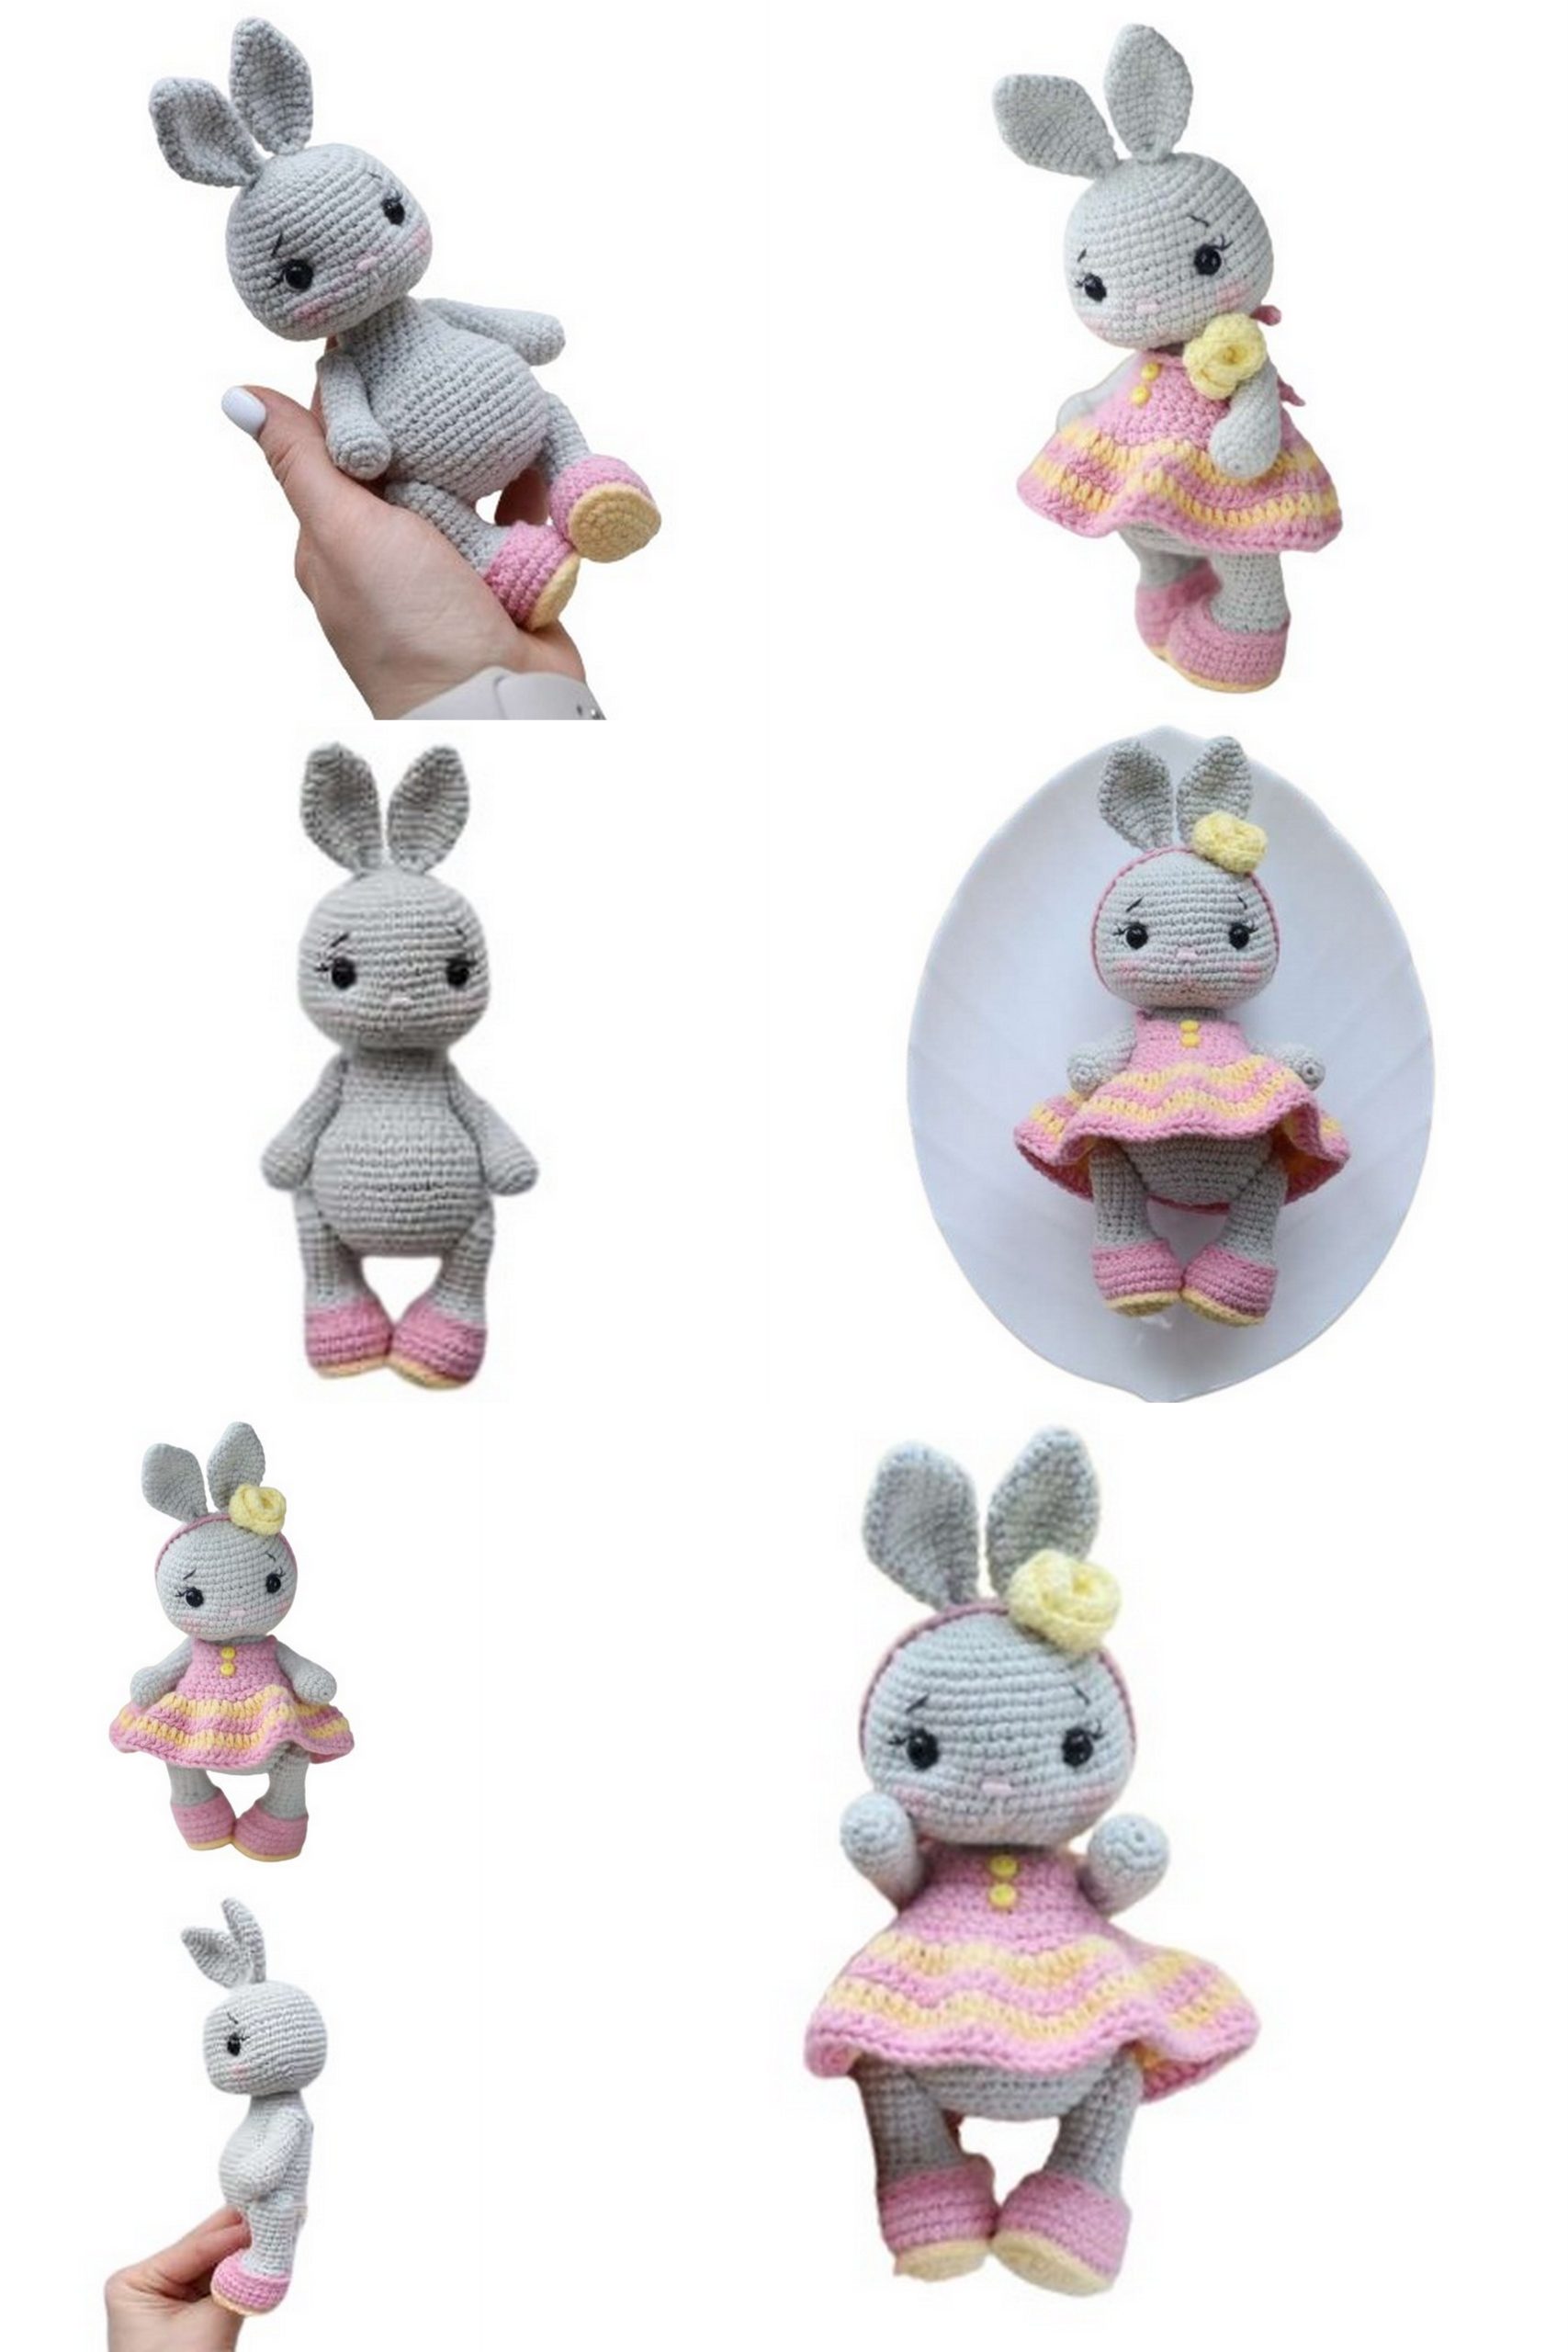
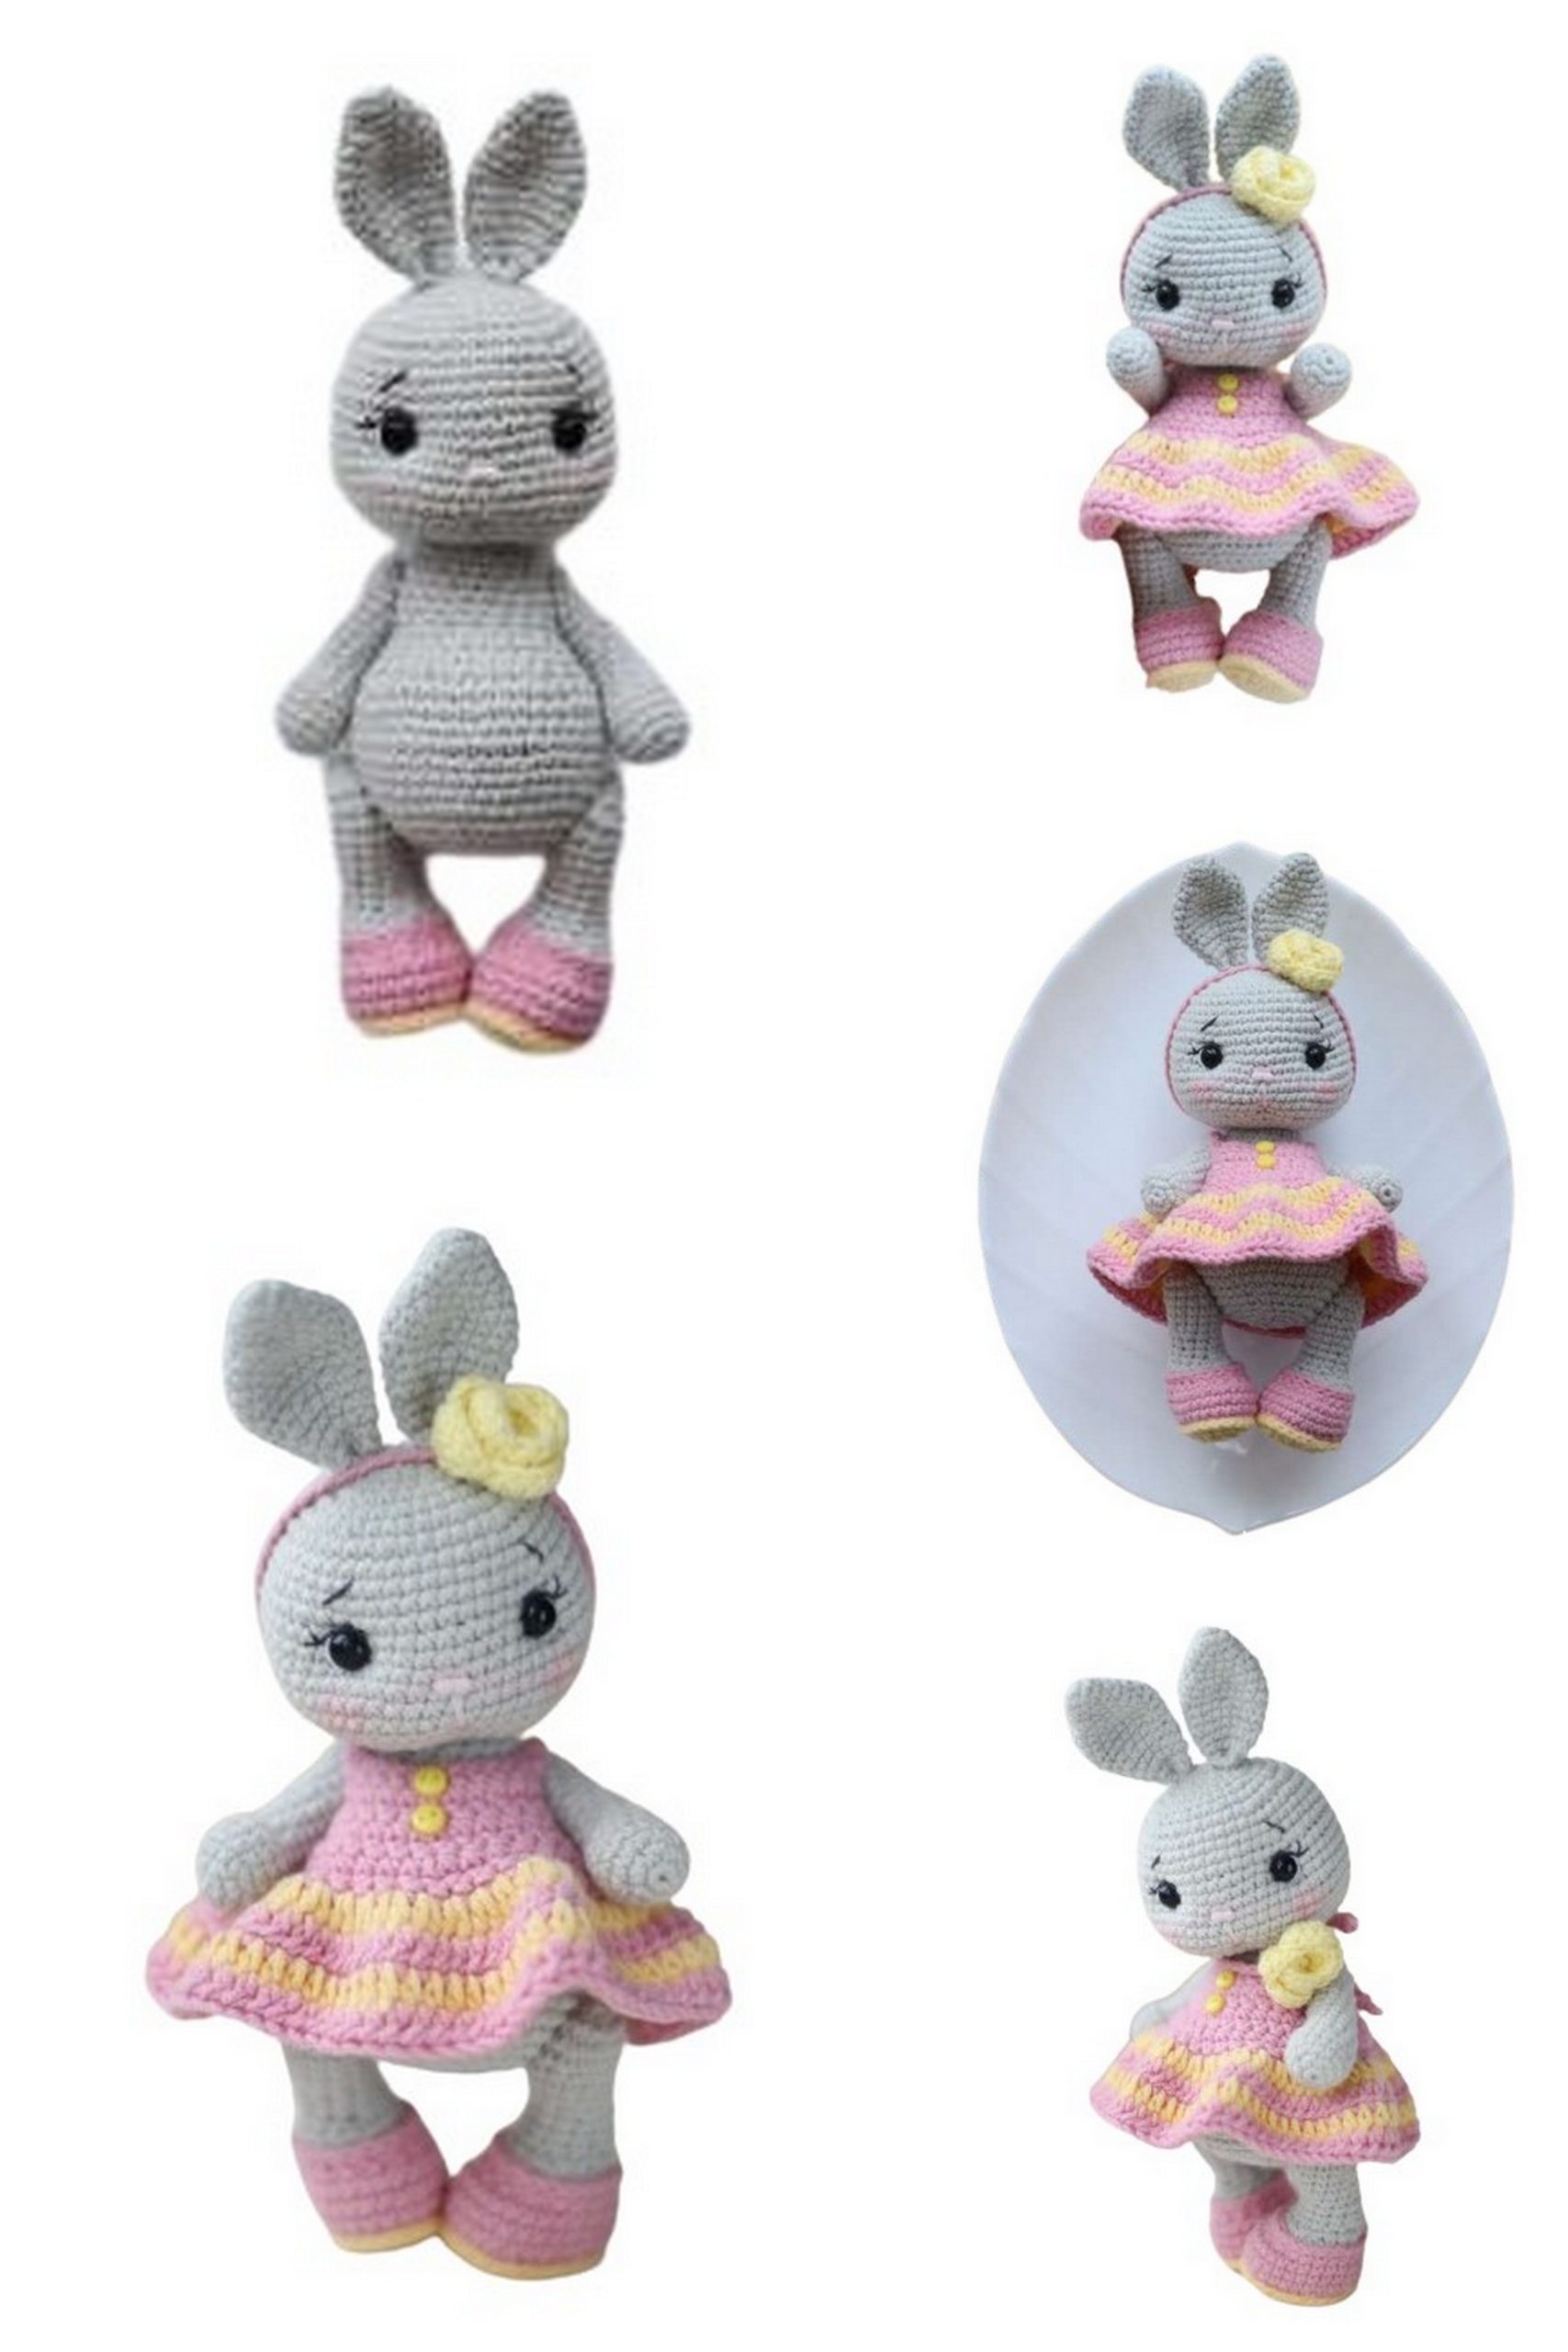
Tail:
Row 1: 5 SC into MR
Row 2: 5 INC (10 SC)
Row 3: 10 SC
Row 4: (SC, INC)*5 (15 SC)
Row 5: 15 SC
Row 6: (2 SC, INC)*5 (20 SC)
Rows 7-9: 20 SC
Row 10: (2 SC, DEC)*5 (15 SC)
Row 11: 15 SC
Row 12: (3 SC, DEC)*3 (12 SC)
Row 13: 12 SC
Row 14: (SC, DEC)*4 (8 SC)
Row 15: Fold the ear in half and crochet 4 SC simultaneously through both edges.
Secure and cut the yarn, leaving a long tail for sewing.
Make the second ear in the same way.
Ears:
Row 1: 6 SC into MR
Row 2: 6 INC (12 SC)
Rows 3-4: 12 SC
Cut and secure the yarn. Leave a tail for sewing.
Decoration:
I mark the center of the head with thread for convenience.
Mark the weighting points on the head:
Points 1, 2, 3, 4 – between rows 14 and 15
Distance between points 1 and 3 is 12 SC
Between points 1-2 and 3-4 – distance of 2 SC
Insert a needle with a long thread from the bottom of the head and bring it out at point 1. Insert it at point 2 and bring it out from below.
Again, insert the needle from the bottom of the head and bring it out at point 1. Insert the needle 1 stitch above point 1 and bring it out from below the head. Tighten and secure the thread. Repeat the weighting if necessary.
For the second eye, make a similar weighting.
If necessary, add more stuffing and close the hole at the bottom of the head, installing split pin attachments (similar to those installed in the paws).
Decoration of the muzzle and eyes:
Install the eyes at the weighting points.
Using white yarn, embroider whites around the eyes. Embroider eyelashes with dark embroidery floss.
Step down 1-2 rows from the eyes and embroider the nose with pink yarn.
Mark the locations of the eyebrows and embroider them.
Sew on the ears.
Cheeks can be shaded with dry pastels.
Row 1: 6 SC into MR
Place a marker at the end of the row; align subsequent rows to it during crocheting. The marker goes through the back in the center.
Row 2: 6 INC (12 SC)
Row 3: (SC, INC)*6 (18 SC)
Row 4: (8 SC, INC)*2 (20 SC)
Rows 5-6: 20 SC
Row 7: (4 SC, INC)*4 (24 SC)
Row 8: 6 SC, place an additional marker, 12 SC, place an additional marker, 6 SC (24 SC)
Place the head in the center of the crocheting.
Rows 9-10: 24 SC
Row 11: 8 SC, (SC, INC)*4, 8 SC (28 SC)
Row 12: 8 SC, (2 SC, INC)*4, 8 SC (32 SC)
Row 13: 32 SC
At the locations of the additional markers from row 8, attach the upper paws.
Row 14: 8 SC, (3 SC, INC)*4, 8 SC (36 SC)
Row 15: 36 SC
Row 16: (5 SC, INC)*6 (42 SC)
Rows 17-20: 42 SC
Row 21: 10 SC, place an additional marker, 22 SC, place an additional marker, 10 SC (42 SC)
Row 22: 42 SC
Row 23: (5 SC, DEC)*6 (36 SC)
Row 24: (4 SC, DEC)*6 (30 SC)
At the locations of the additional markers from row 21, attach the hind legs. Stuff the torso and continue stuffing as you crochet.
Row 25: (3 SC, DEC)*6 (24 SC)
Row 26: (2 SC, DEC)*6 (18 SC)
Row 27: (SC, DEC)*6 (12 SC)
Row 28: 6 DEC
Sew the tail to the center of the back from below. Stuff as you sew.
Body:
Your bunny is ready. Now let’s make her a dress.
Dress:
Crochet the dress in turning rows, making a CH for turning in each row.
Try the dress on your toy to adjust the number of rows.
Chain 28 + 1 CH for turning.
Row 1: 28 SC
Mark the locations for the arms with pins.
Row 2: 4 SC, CH 6 (skip 4 SC from the previous row), 12 SC, CH 6 (skip 4 SC from the previous row)
Row 3: 32 SC
Row 4: (7 SC, INC)*4 (36 SC)
Row 5: 36 SC
Row 6: (8 SC, INC)*4 (40 SC)
Row 7: 40 SC
Change colors every row starting with yellow:
Row 8: 40 HDC, CH (80 HDC)
Rows 9-11: 80 HDC
Edge two back halves with SC, make a loop for the button on one half using a CH.
Sew on the button and decorate the dress.
Headband:
For the base, chain a length equal to the head circumference + 40 CH to tie it.
Flower:
Chain 21.
Row 1: Start in the 5th CH from the hook: HDC, CH, [(HDC, 2 CH, HDC) in one CH, CH 1, skip 2 CH]. Alternate the sequence in [] to the end of the row.
Row 2: In the arch of 2 CH from the previous row – 6 HDC, SC under 1 CH from the previous row. Repeat the sequence to the end of the row.
Secure and cut the yarn. Roll the resulting piece into a flower bud shape and fix it with thread. Sew the resulting flower to the base.
Congratulations! Your bunny is ready!
I hope you enjoyed the crocheting process, and the finished product meets your expectations.
Thank you for crocheting with me!