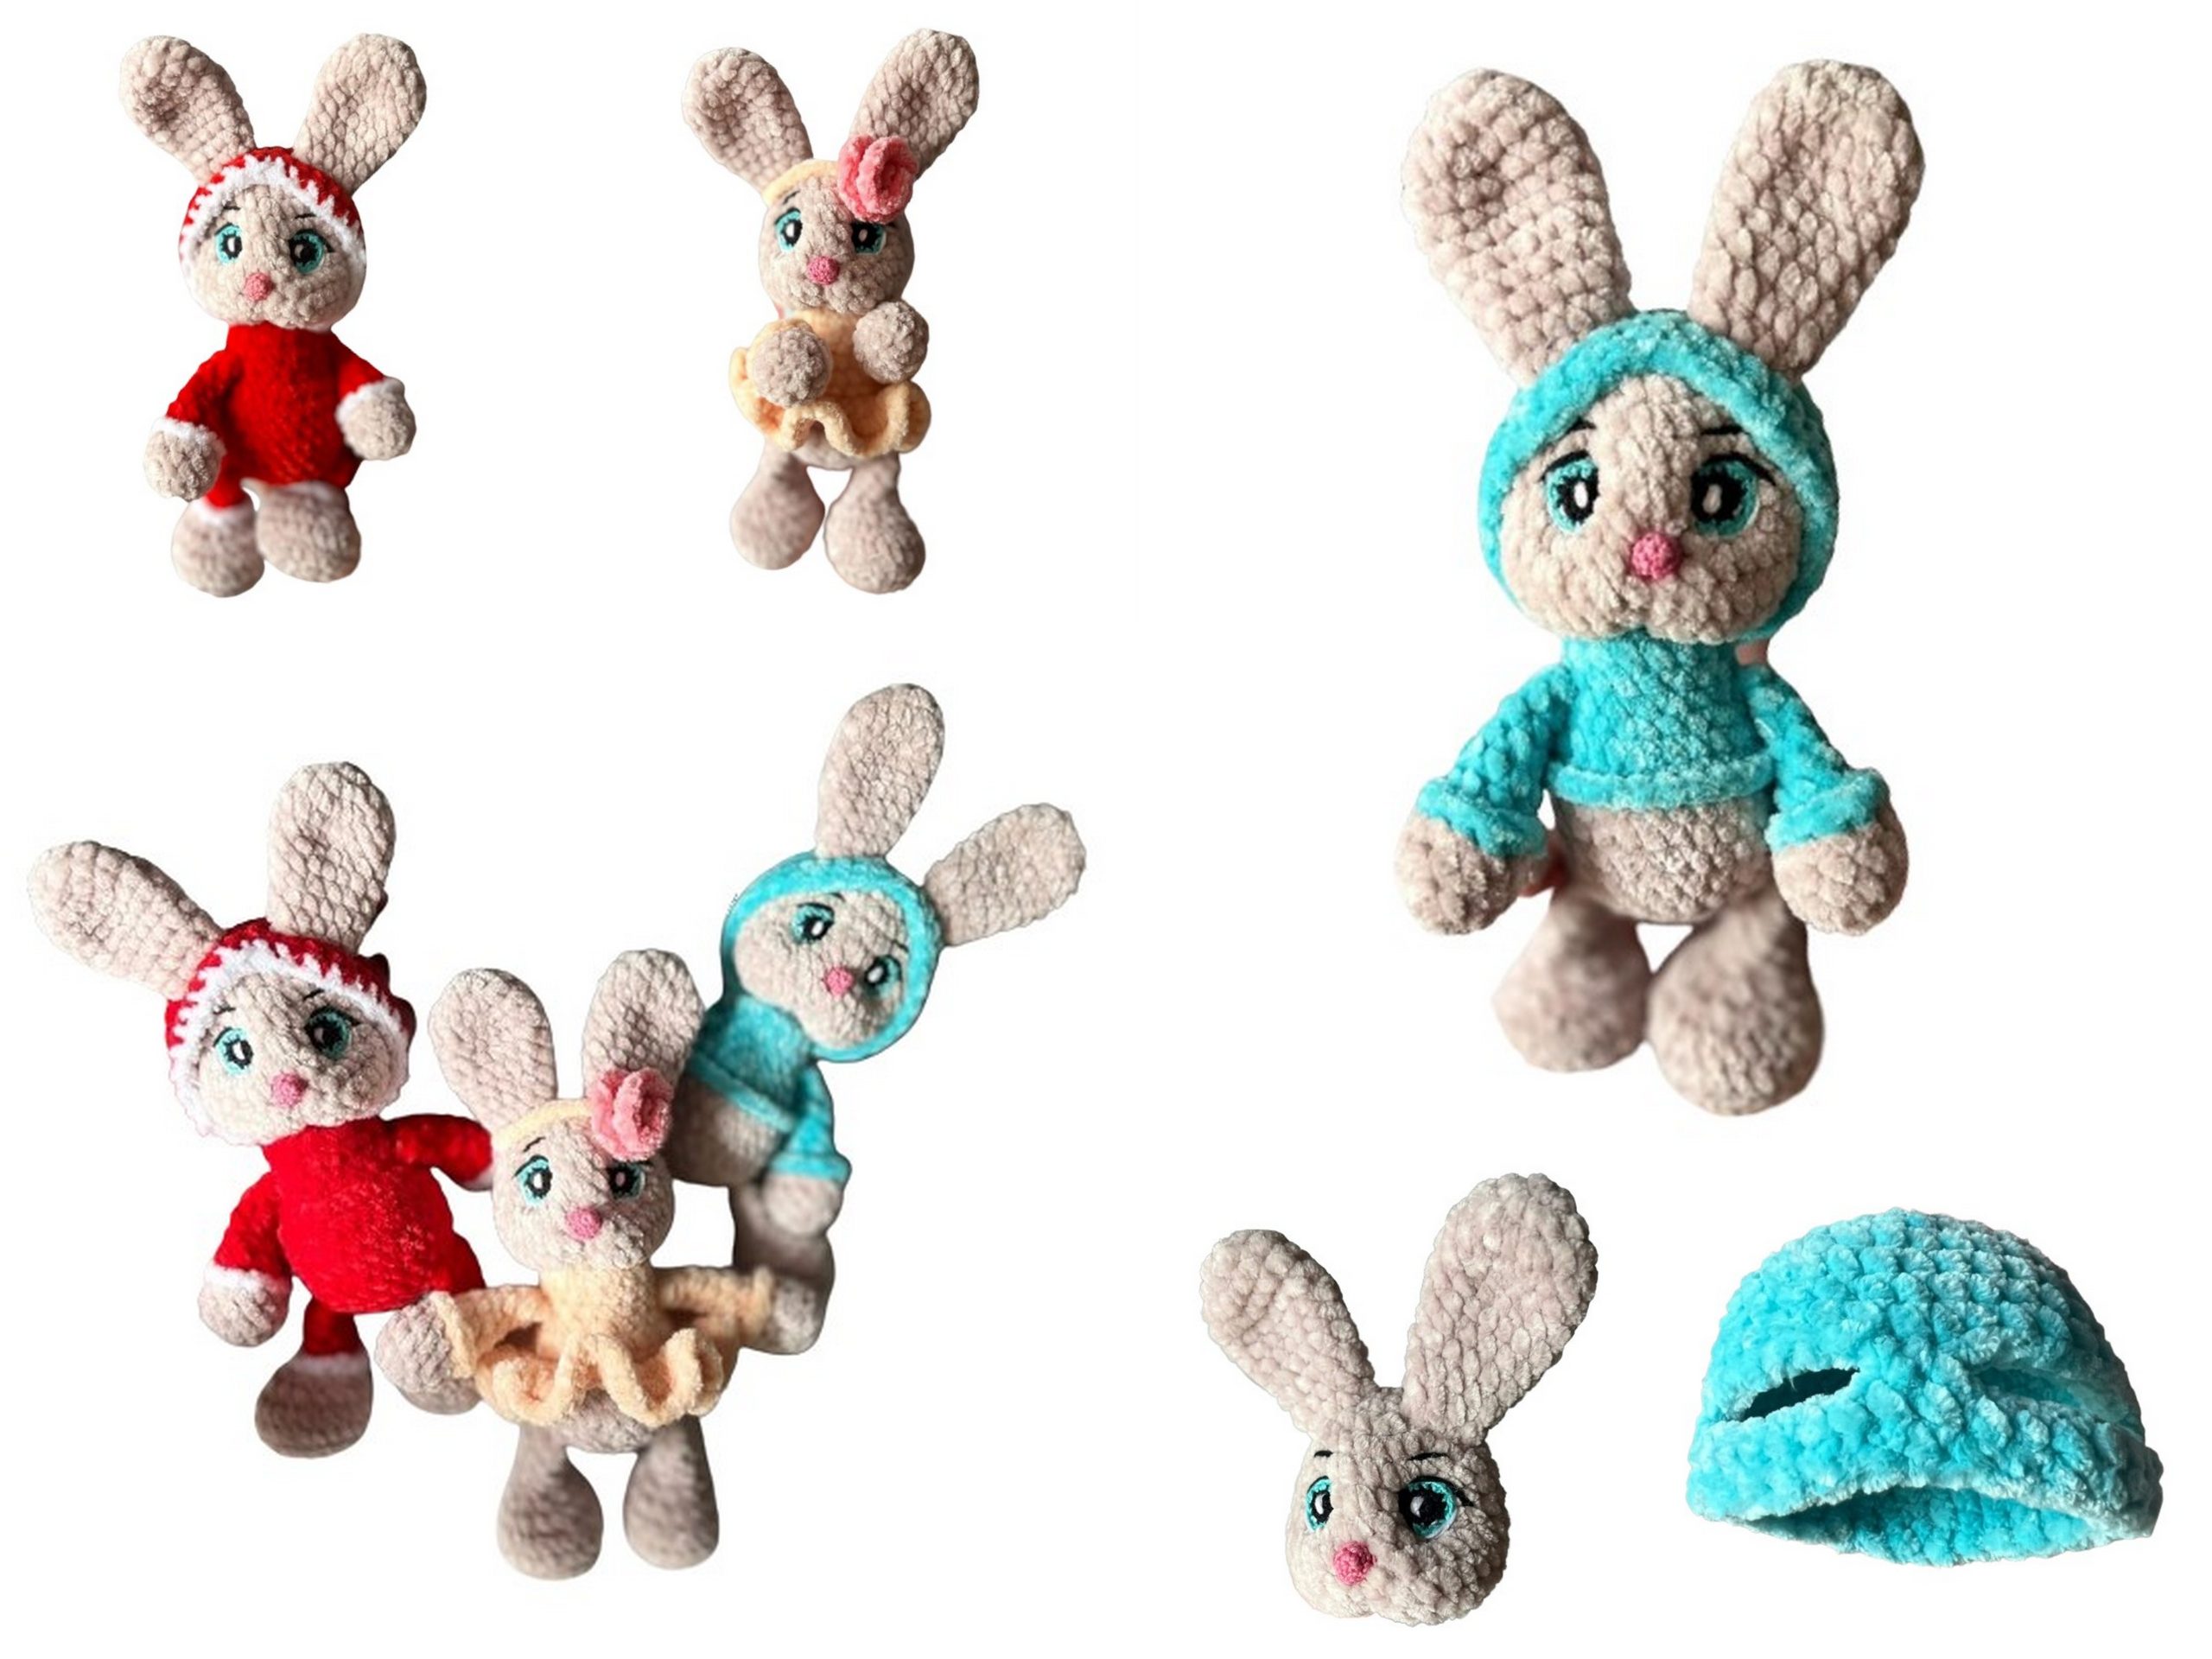
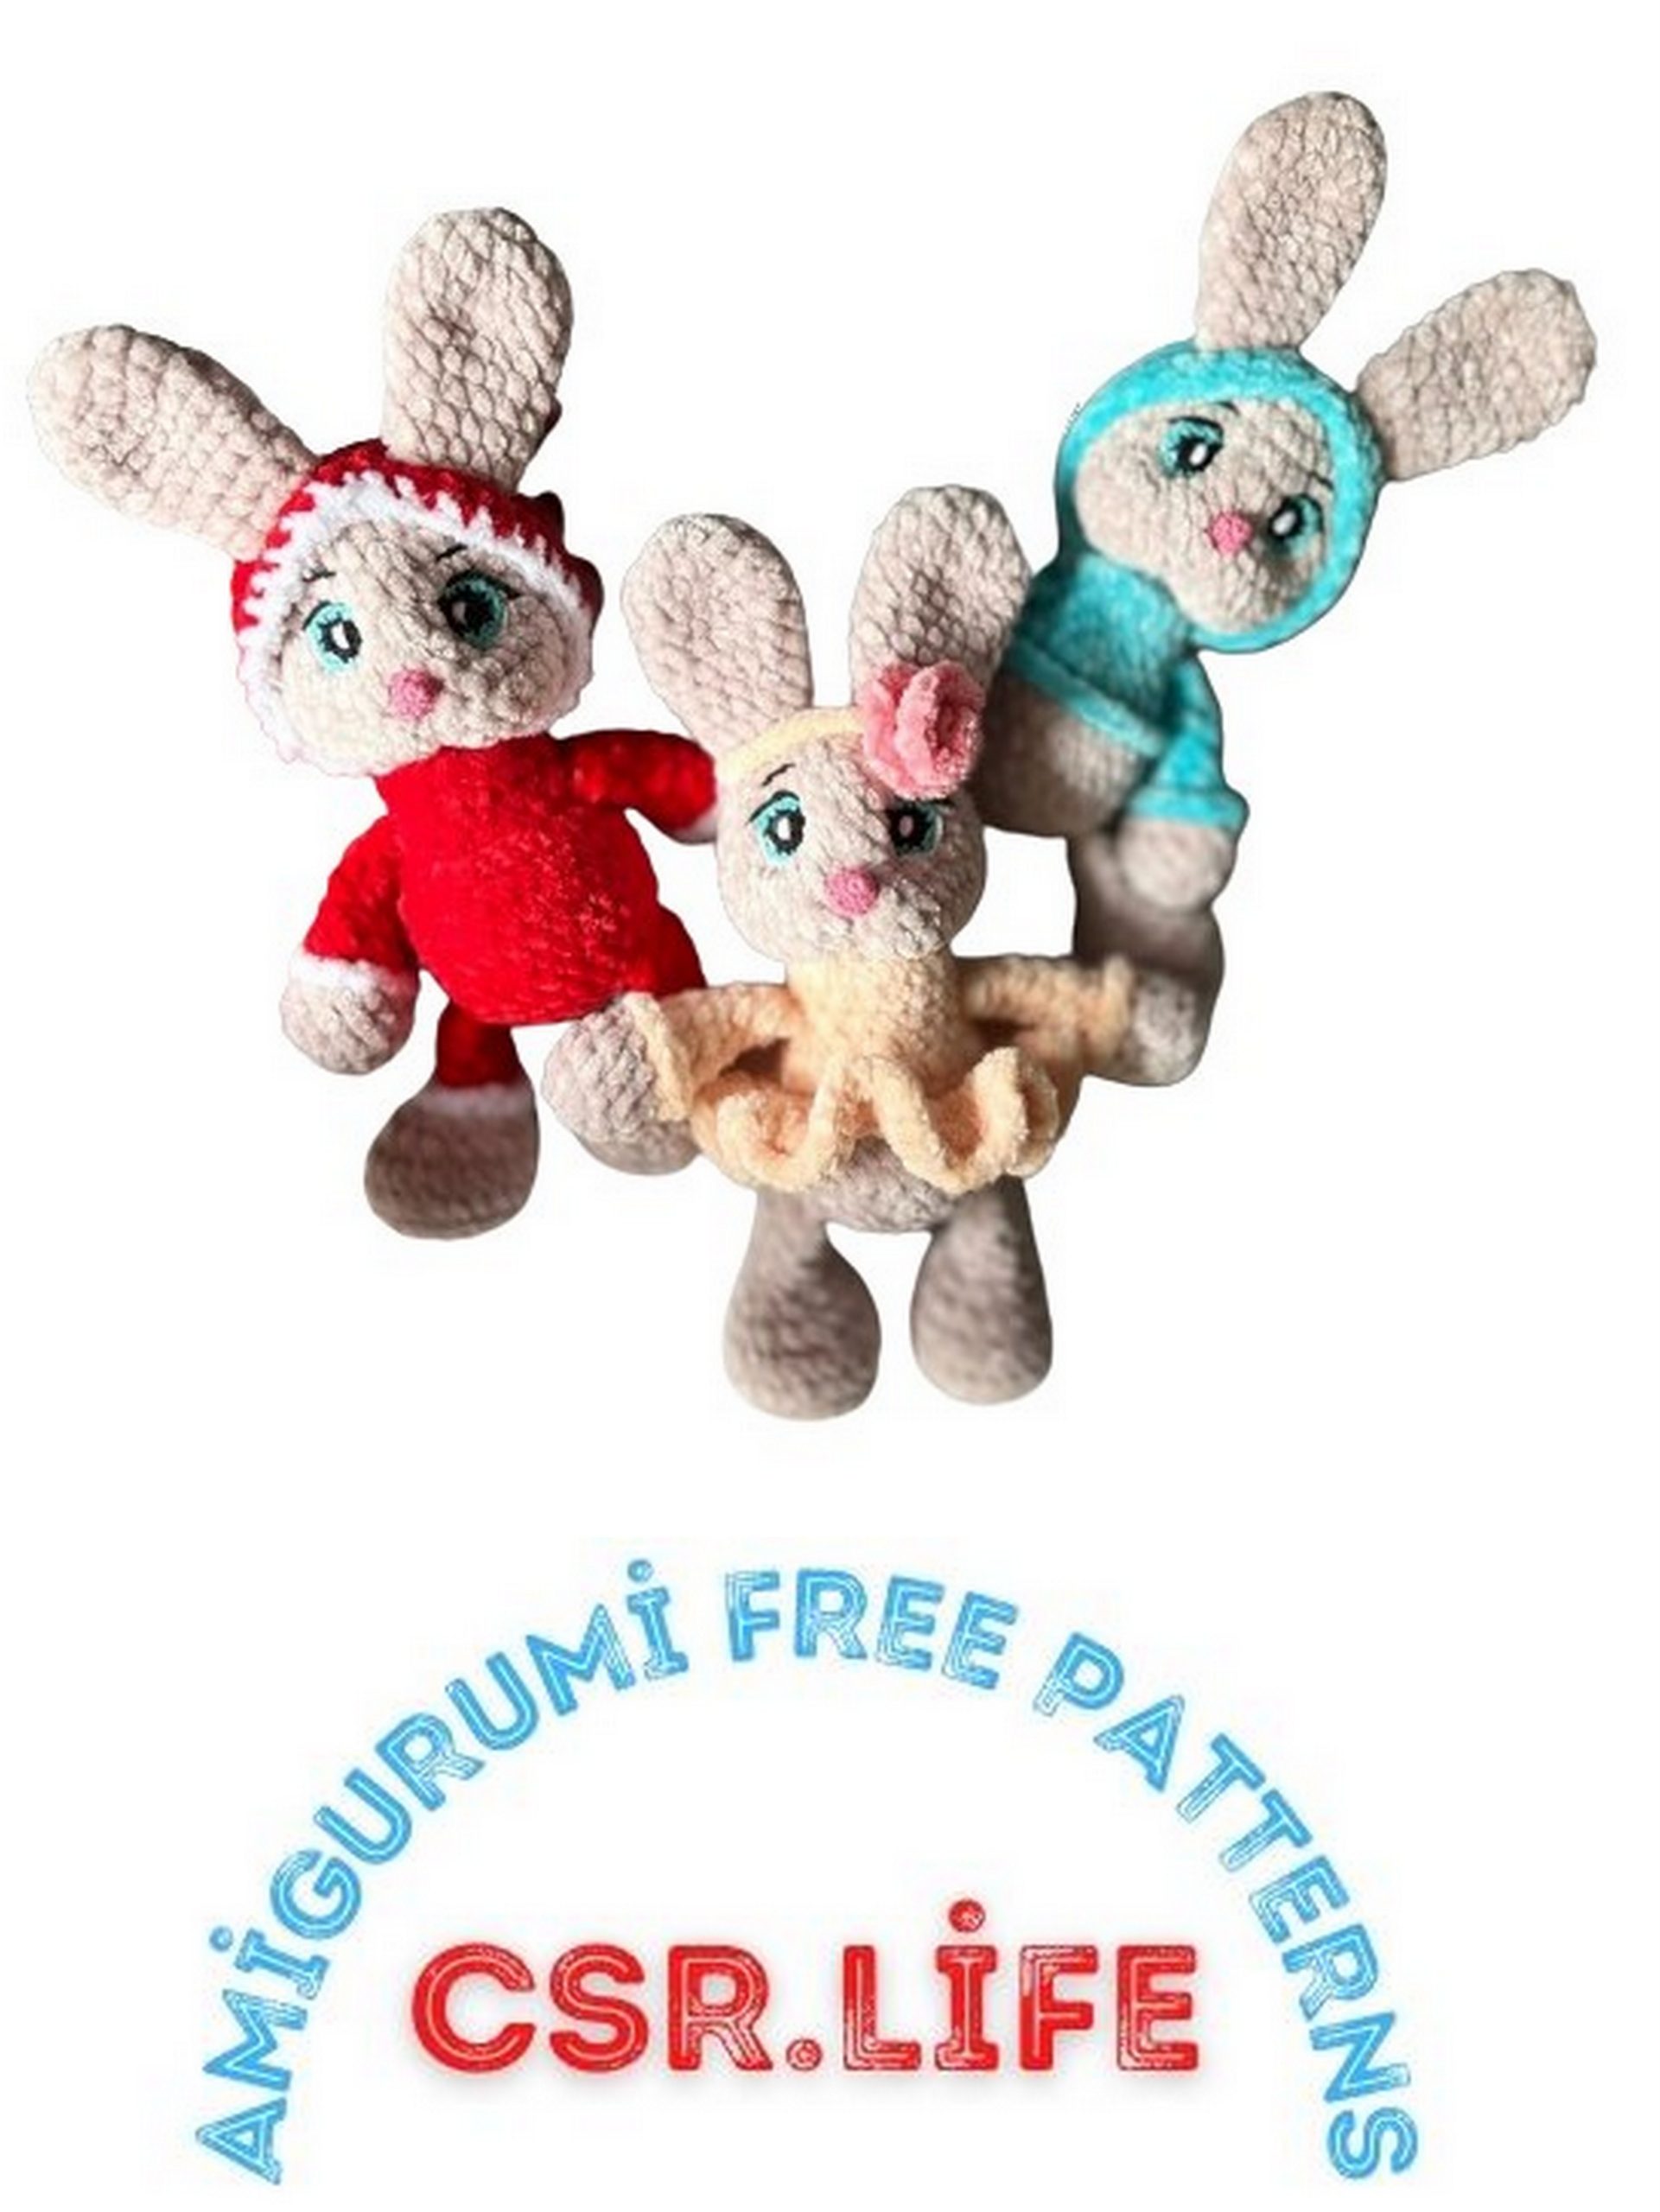
Velvet Cute Bunny Amigurumi Free Pattern: Craft Your Adorable Fluffy Friend!
Indulge in the softness of velvet with our amigurumi free pattern to create your very own Velvet Cute Bunny amigurumi! Whether you’re a crochet enthusiast or new to the craft, this pattern offers a delightful project to bring a touch of coziness to your crafting experience. Stitch by stitch, craft your own adorable bunny companion with fluffy velvet yarn, perfect for snuggling or as a charming addition to your decor. Join us on this crafting adventure and let’s crochet our way to creating a lovable velvet bunny friend!
Main Materials:
1: Yarn “Himalaya Velvet” in main color 90042, approximately half a skein per bunny. Additional colors: white, black, blue, and pink in “Vita Coco” yarn.
2: Crochet hook size 3 for the toy, 1.25 for small details.
4: Hollowfiber, needle, scissors.
5: If you want the head to rotate, take a 32 mm cotter pin, 2 discs 25-30 mm. (or 1 joint)
Abbreviations:
MR – magic ring
CH – chain
SC – single crochet
INC – increase
DEC – decrease
SL ST – slip stitch
PATTERN
Head:
1: 6 SC in MR.
2: INC in each stitch around (12).
3: (1 SC, INC) repeat 6 times (18).
4: 1 SC, INC, (2 SC, INC) repeat 5 times, 1 SC (24).
5: (3 SC, INC) repeat 6 times (30).
6: 2 SC, INC, (4 SC, INC) repeat 5 times, 2 SC (36).
7-11: 36 SC (5 rounds).
12: 2 SC, DEC, (4 SC, DEC) repeat 5 times, 2 SC (30).
13: (3 SC, DEC) repeat 6 times (24).
14: 1 SC, DEC, (2 SC, DEC) repeat 5 times, 1 SC (18).
Stuff the head. If using a cotter pin and disc, insert them into the head.
15: (1 SC, DEC) repeat 6 times (12).
16: 6 DEC, cut yarn, pull the hole closed.
Upper Legs:
1: 6 SC in MR.
2: INC in each stitch around (12).
3-5: 12 SC (3 rounds).
Switch to additional color.
6: (2 SC, DEC) repeat 3 times (9). Stuff the bottom of the leg.
7-8: 9 SC (2 rounds).
9: (1 SC, DEC) repeat 3 times (6).
10-11: 6 SC.
Fold in half and sew across both sides with 3 SC. SL ST around in contrasting color at the fold.
Lower Legs:
1: 6 SC in MR.
2: INC in each stitch around (12).
3: (sc,inc)*6 (18)
4: (2sc,inc)*6 (24)
5: Work 24 SC in back loops only.
6: 24 SC.
7: 6 SC, 6 DEC, 6 SC (18).
8: 3 SC, 6 DEC, 6 SC (12).
If you have overalls, switch yarn color here.
9: 3 SC, 3 DEC, 3 SC (9). Stuff.
10-12: 9 SC (3 rounds).
Crochet 1 chain loop, then sew across both sides with 4 SC. SL ST around in soft SC at the fold in contrasting colors.
Ears:
1: 6 SC in MR.
2: INC in each stitch around (12).
3: (1 SC, INC) repeat 6 times (18).
4: 18 SC.
5: (4 SC, DEC) repeat 3 times (15).
6-7: 15 SC (2 rounds).
8: (3 SC, DEC) repeat 3 times (12).
9-10: 12 SC (2 rounds).
11: (2 SC, DEC) repeat 3 times (9).
12: 9 SC, cut yarn, pull the hole closed.

Eyes:
Begin with black yarn.
1: 6 SC in MR.
2: INC in each stitch around (12).
Switch to blue yarn.
3: Change color to blue, crochet (1 SC, INC) 3 times, 2 SC, SL ST.
Embroider white highlights on the eyes.
Nose (pink):
1: 6 SC in MR.
2: (1 SC, INC) repeat 3 times (9).
3: 9 SC.
Tail:
1: 6 SC in MR.
2: INC in each stitch around (12).
3: 2 SC, stuff.
4: 6 DEC, cut yarn, pull the hole closed.
Assembly:
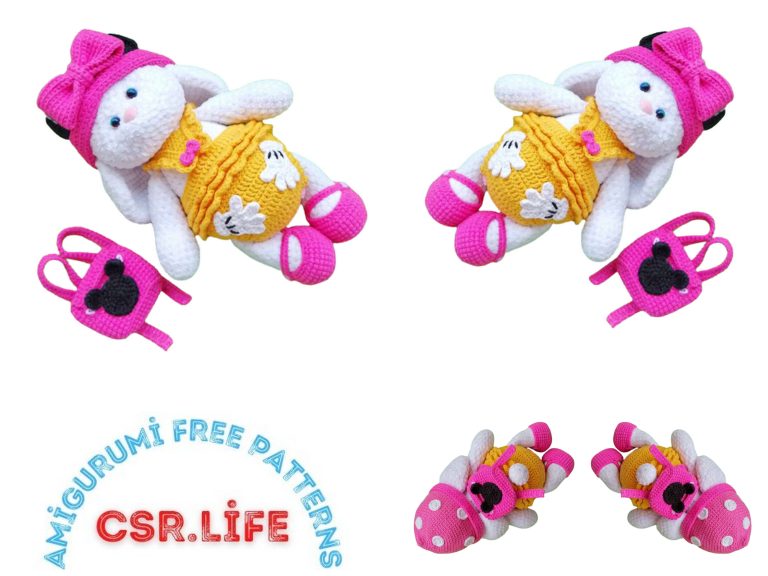
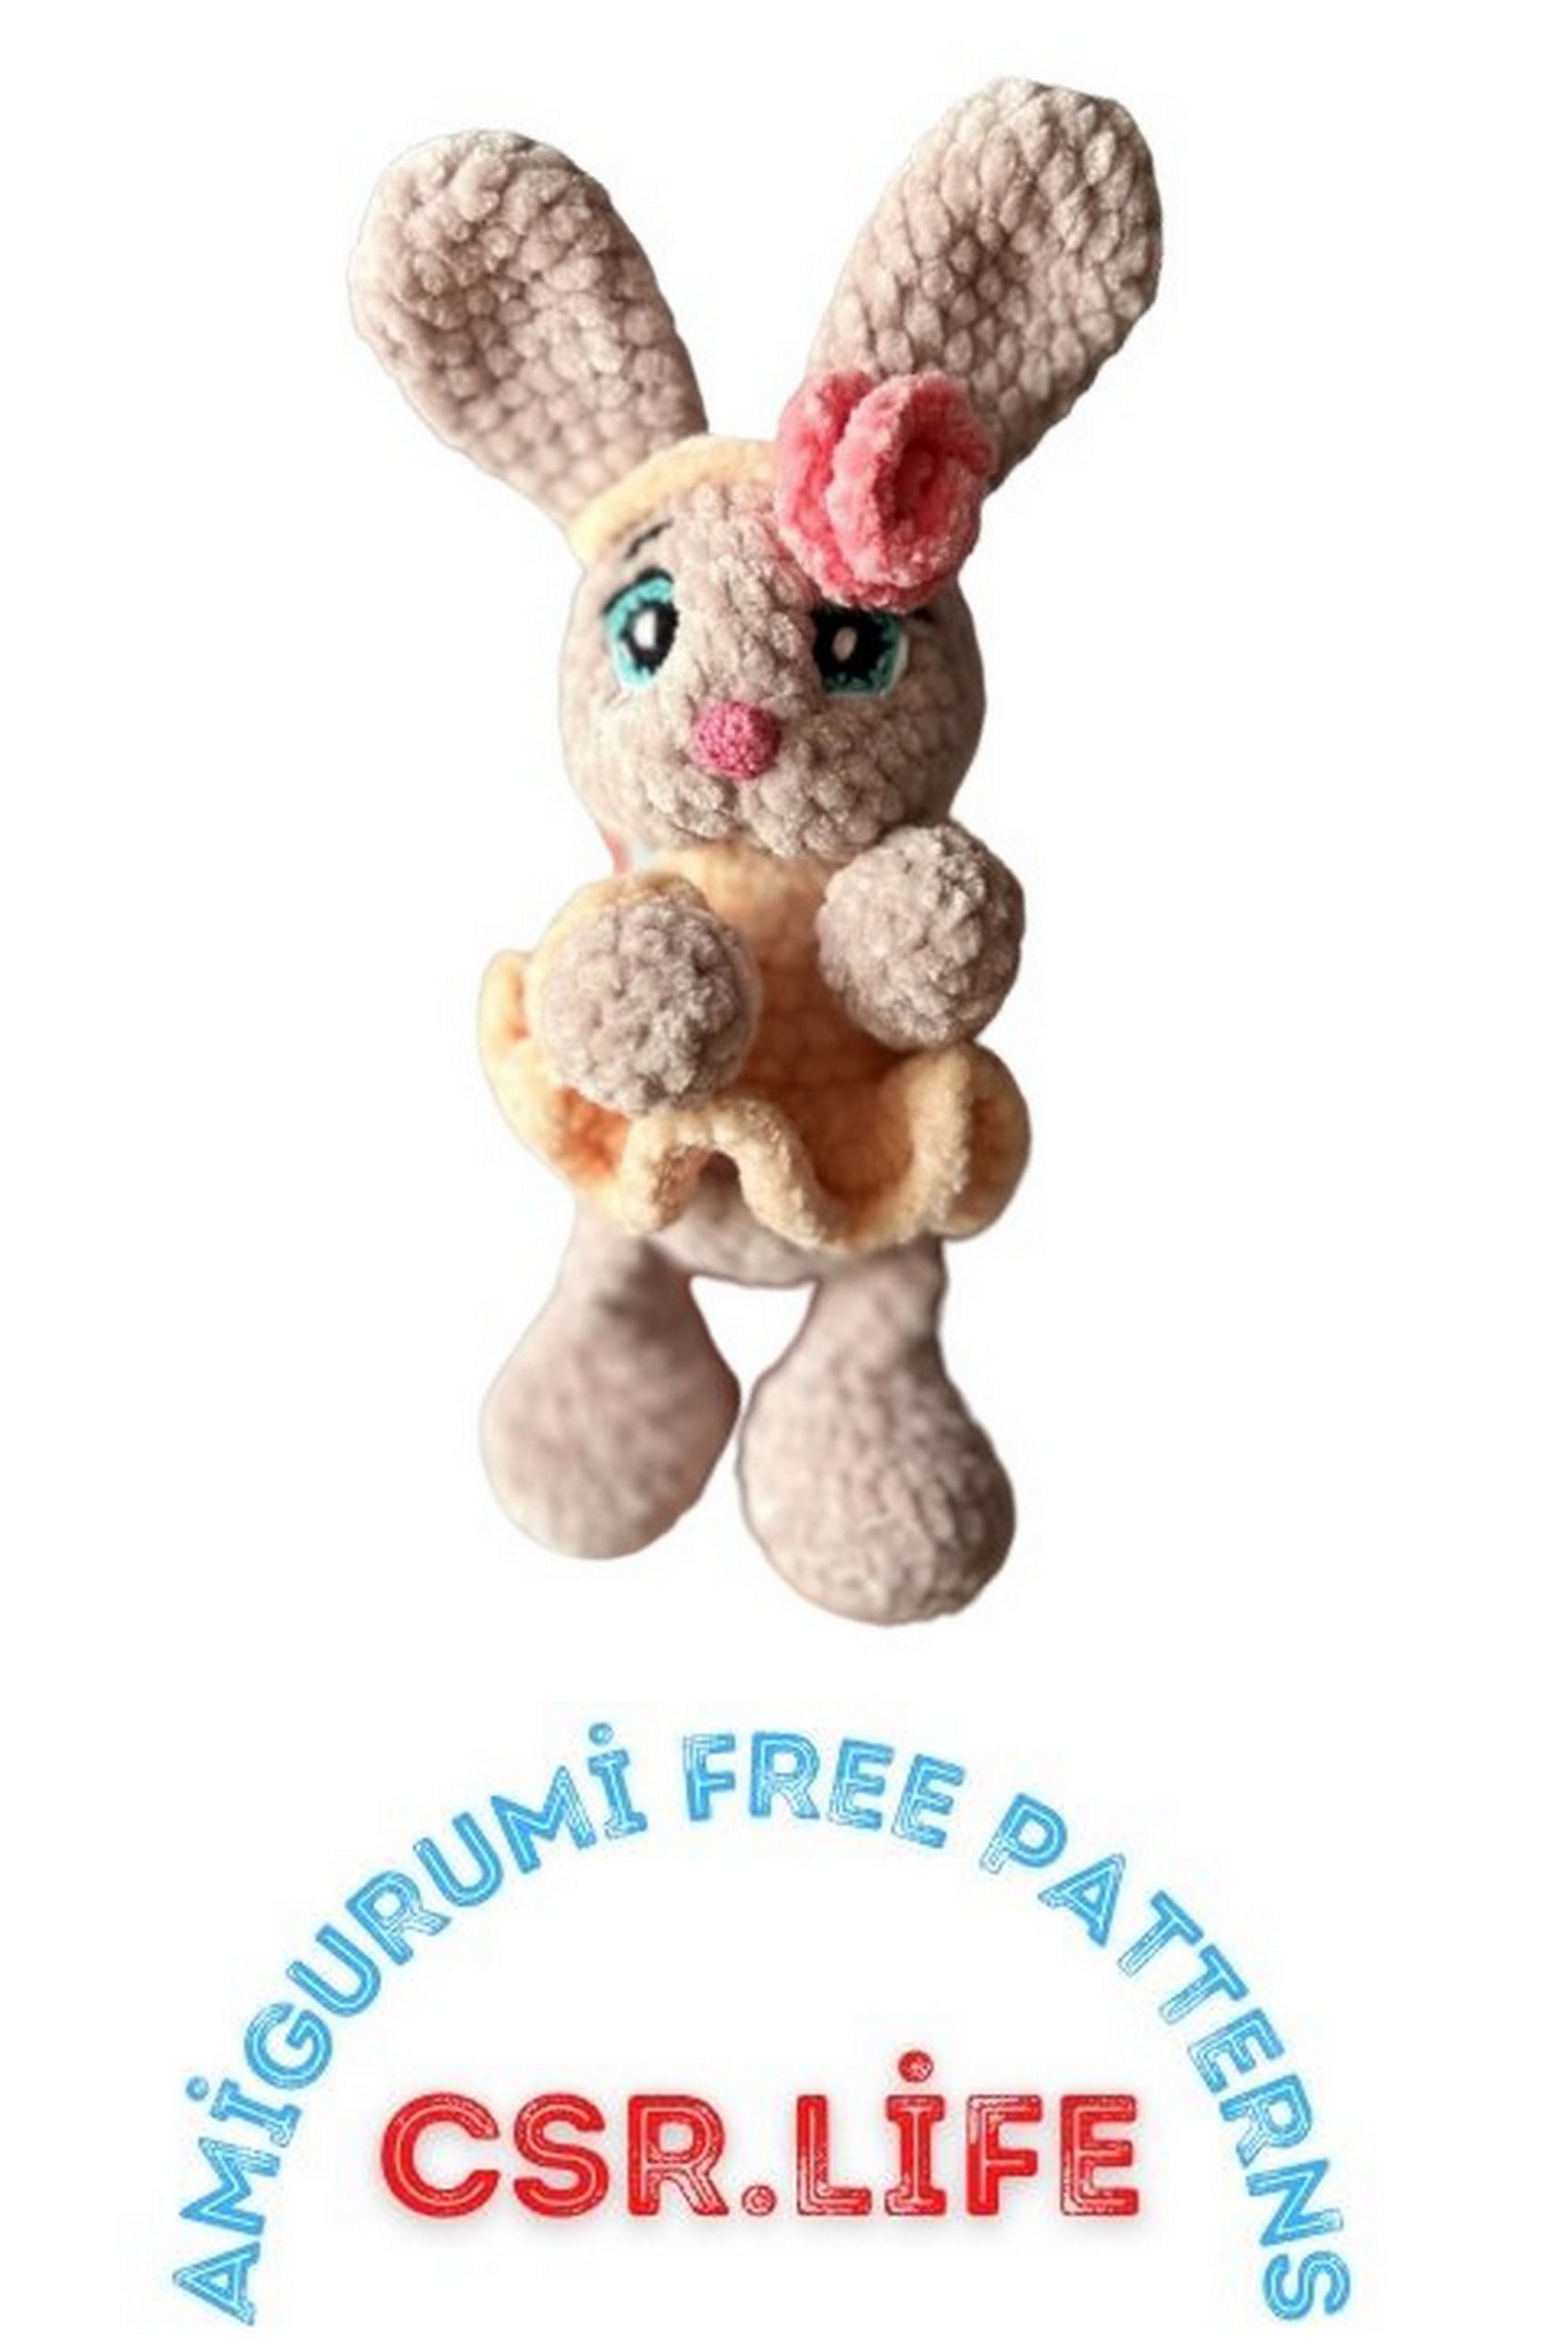
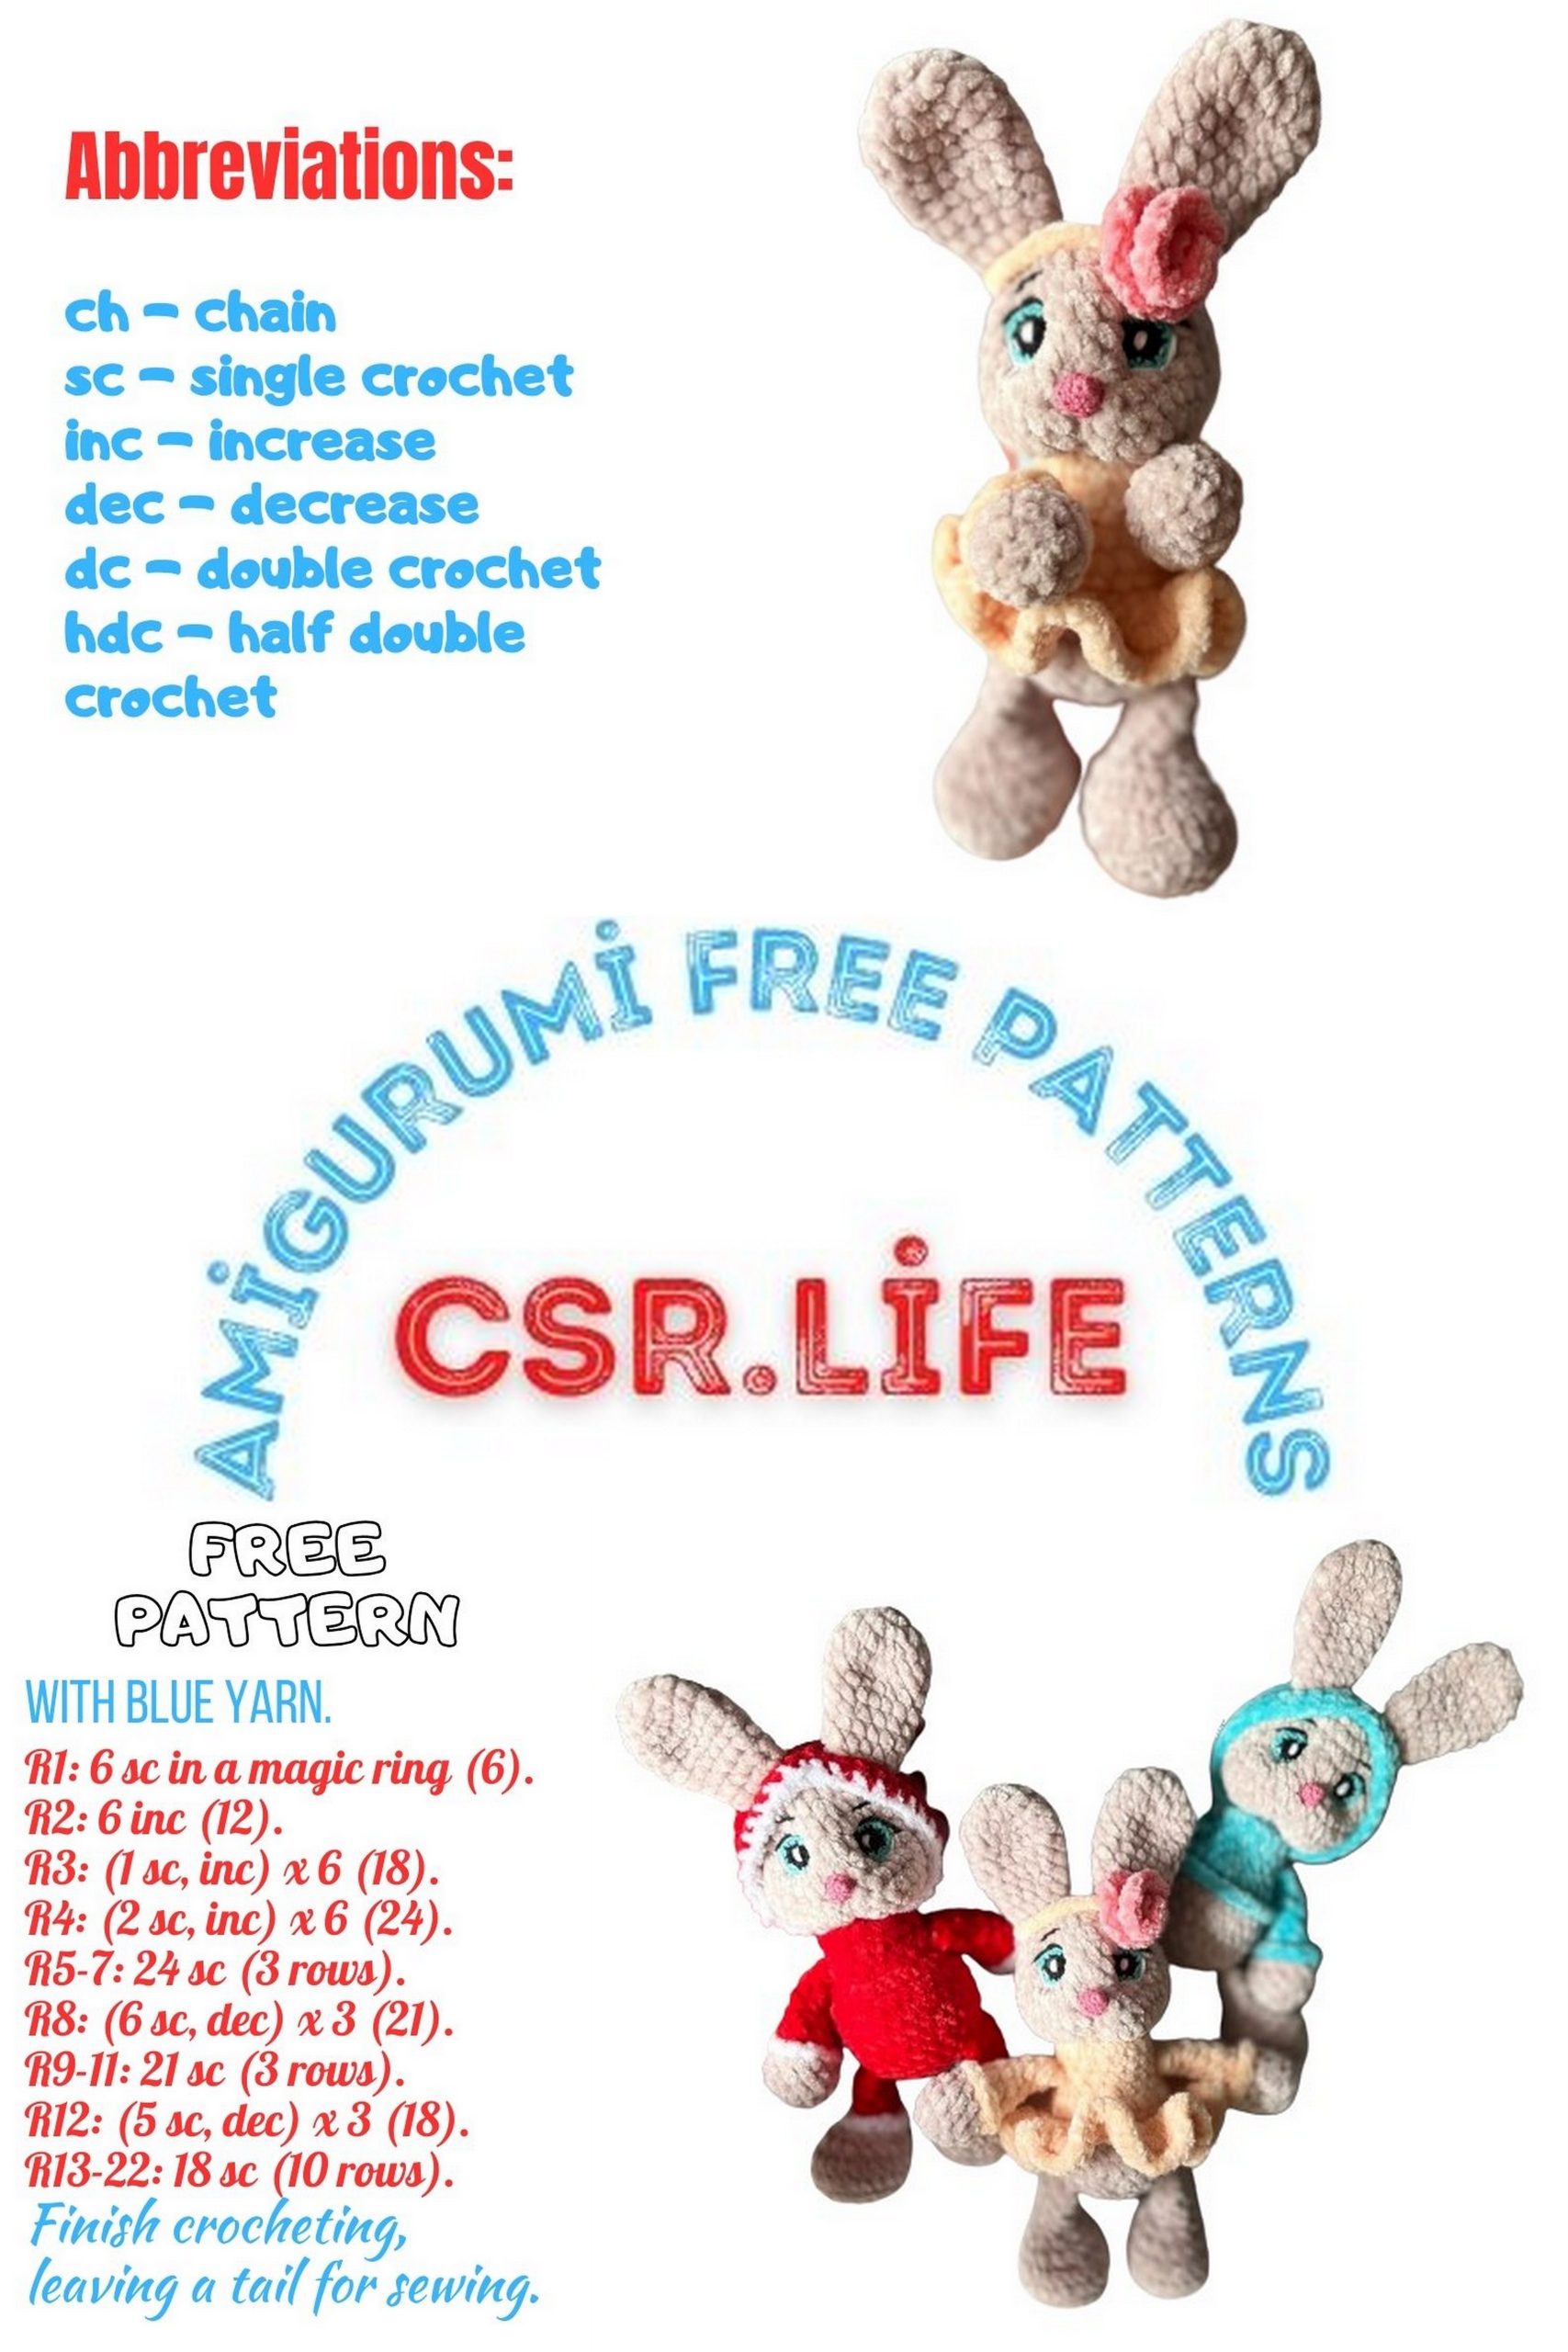
Sew ears onto the head (see photo).
Weighting:
Place a pin between rows 7 and 8 in the center of the face. The weighting is done in 3 stages.
First stage: Move down 7 rows from the pin, insert the needle, then move it upward, skipping 5 stitches from the pin, then move to the side 2 stitches, and bring the needle back down. Repeat on the opposite side, tightening the threads.
Second stage: Create cheeks by laying the thread on top, inserting the needle 6 rows up, and pulling it back through. Tighten.
Third stage: Bring the needle out at the eye, then pull it through the opposite side, move up 1 stitch, bring the needle back through slightly higher, tighten (this should form a nose).
Sew on the eyes and nose.
Embroider eyelashes, eyebrows, and stitch under the eyes with white yarn.

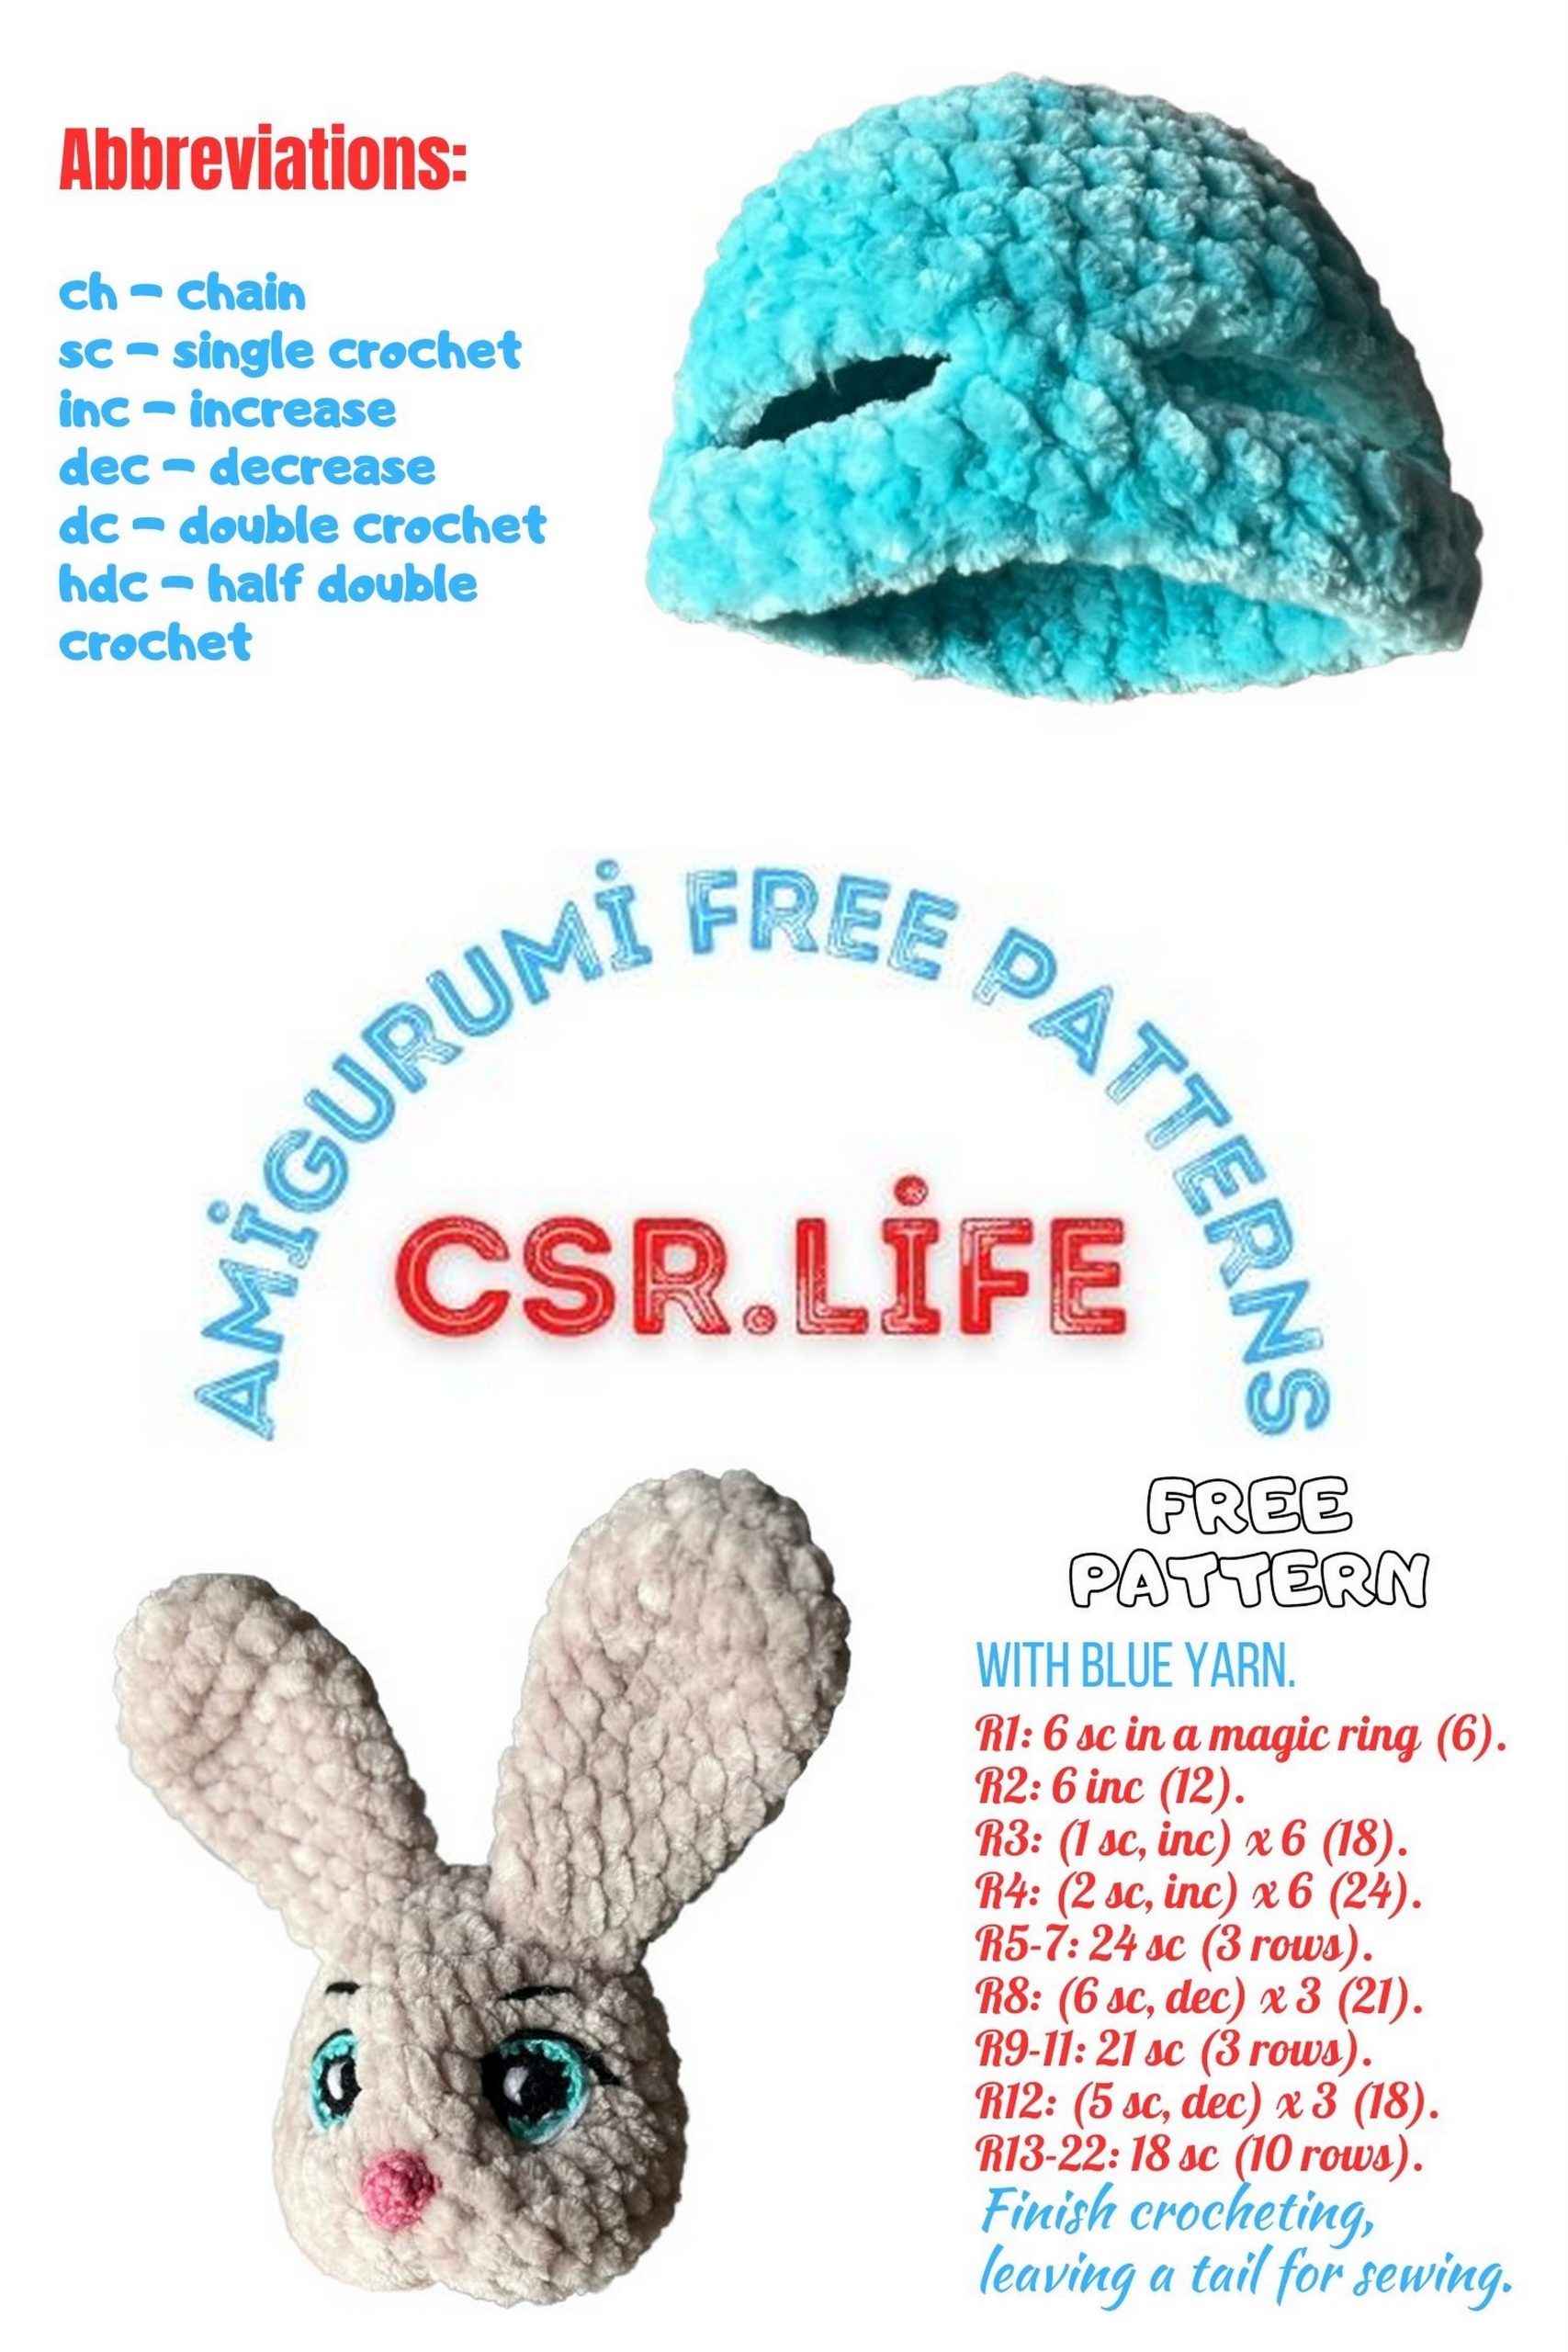
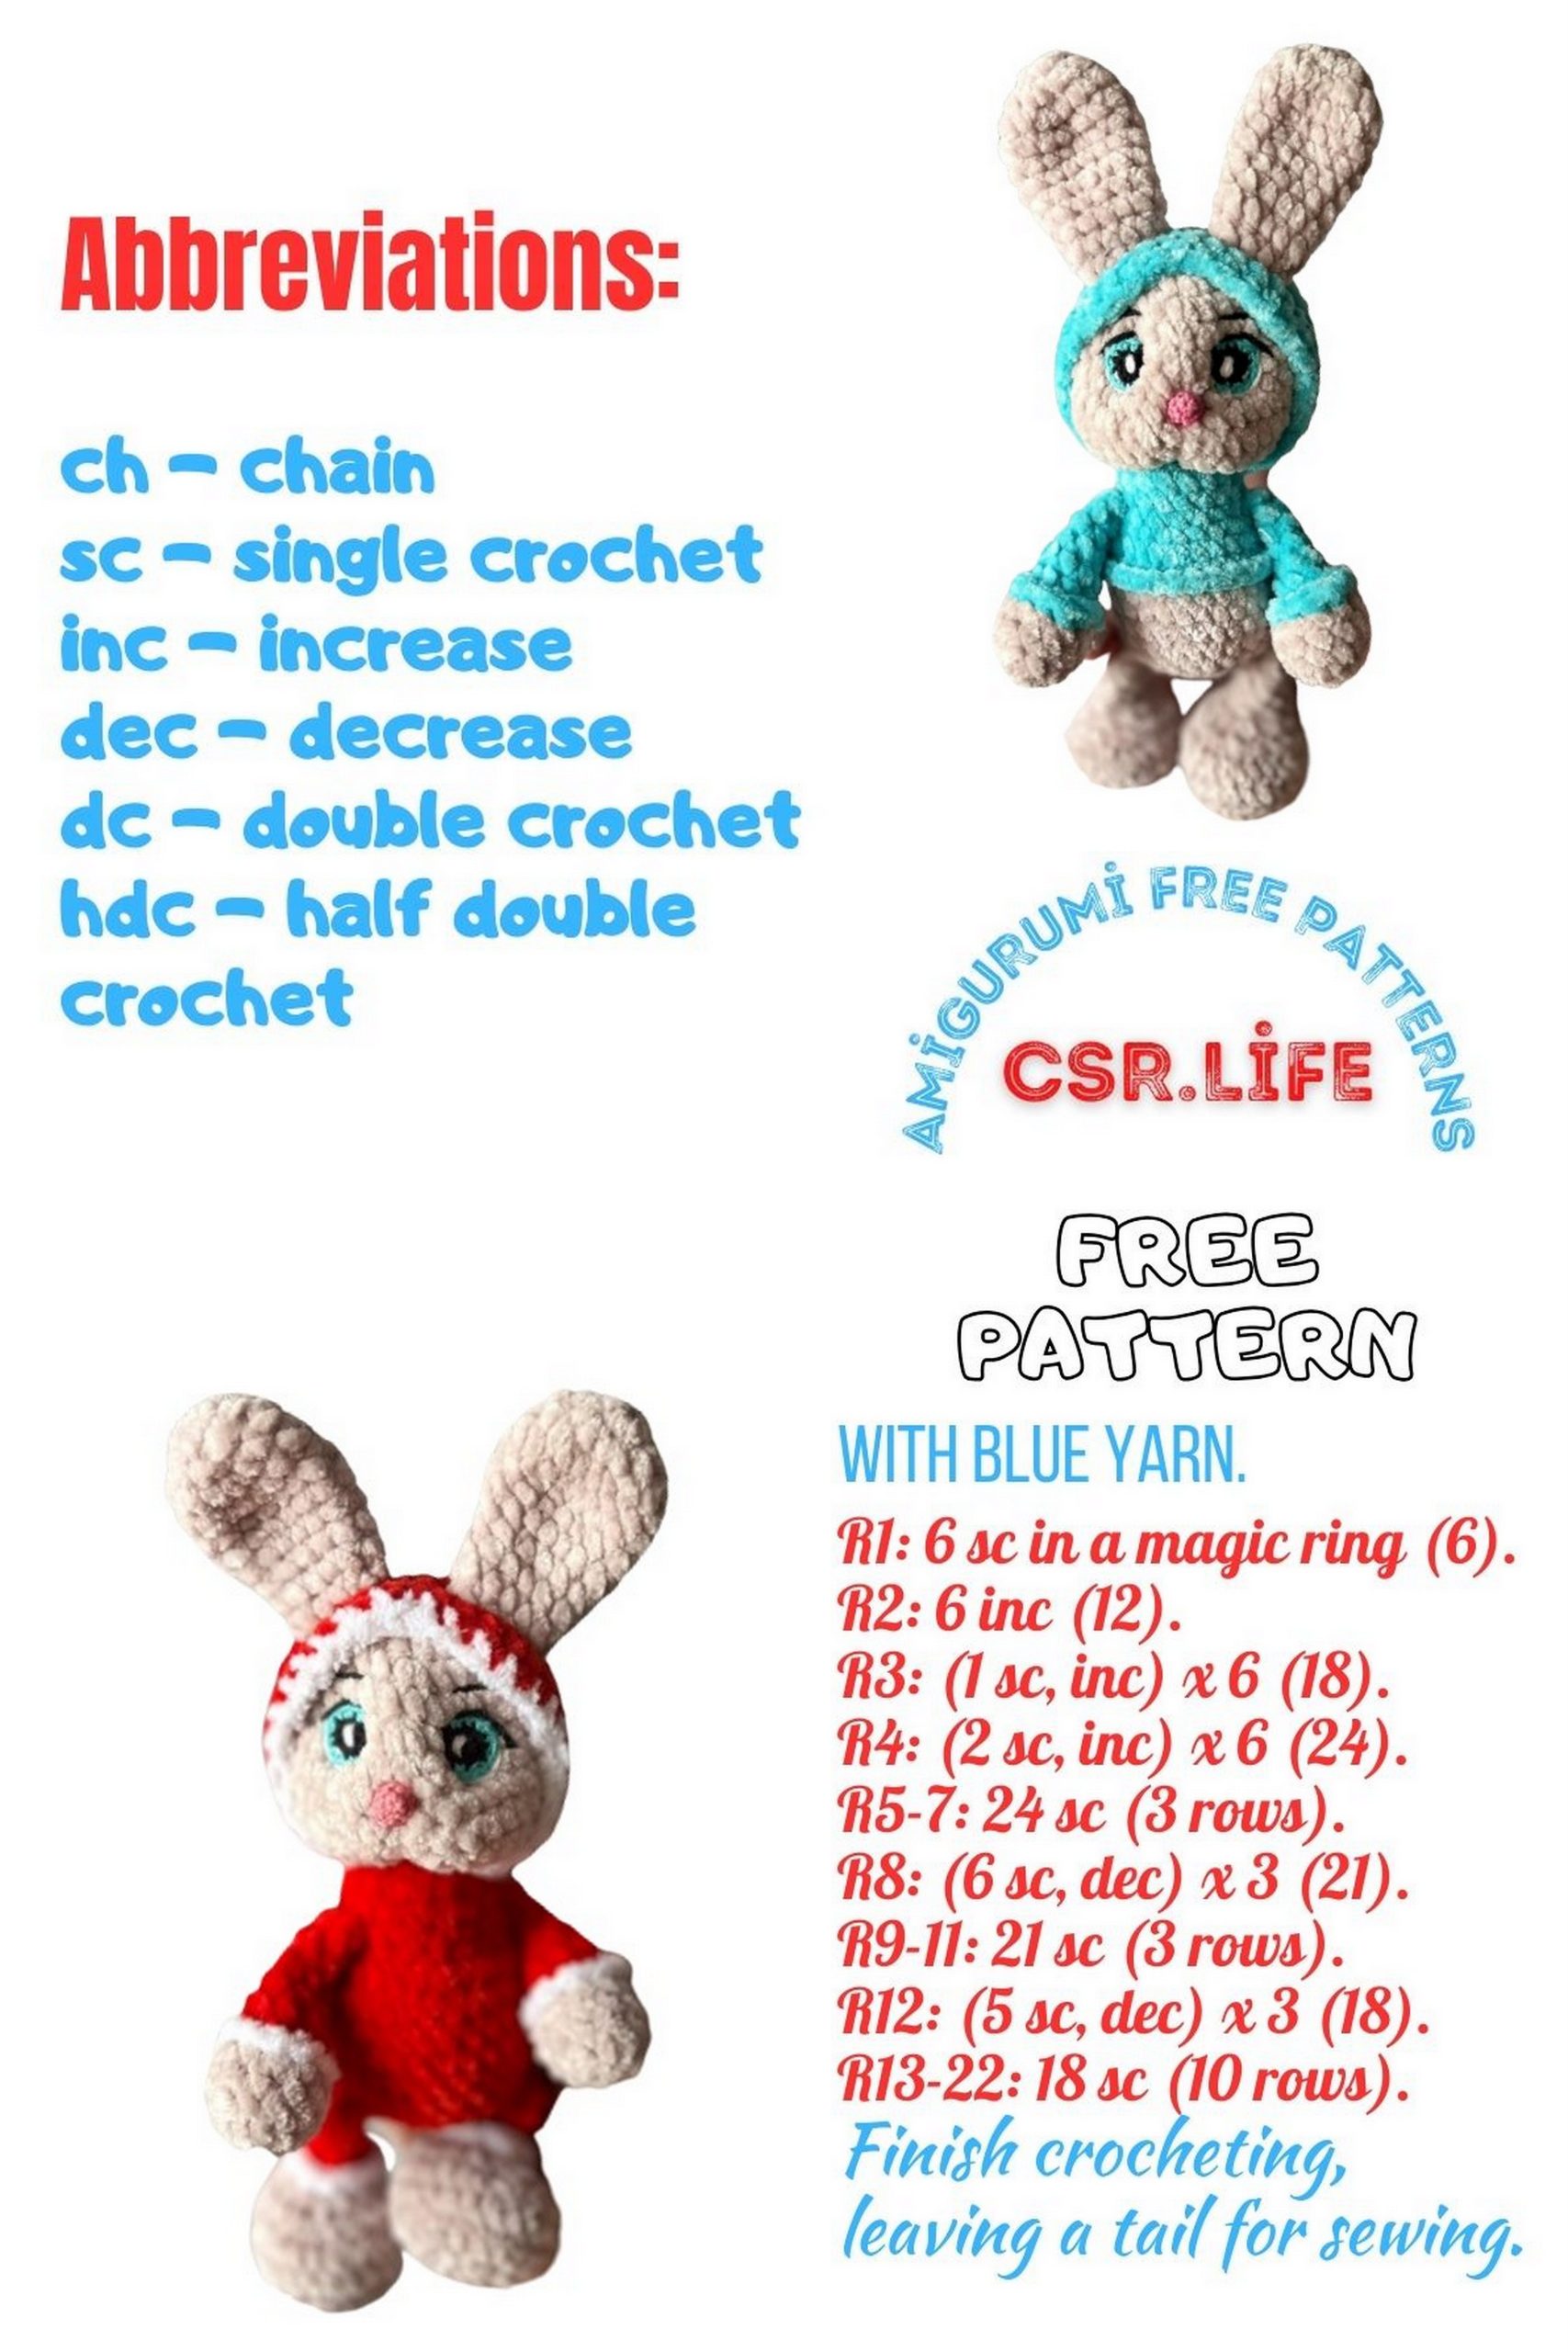
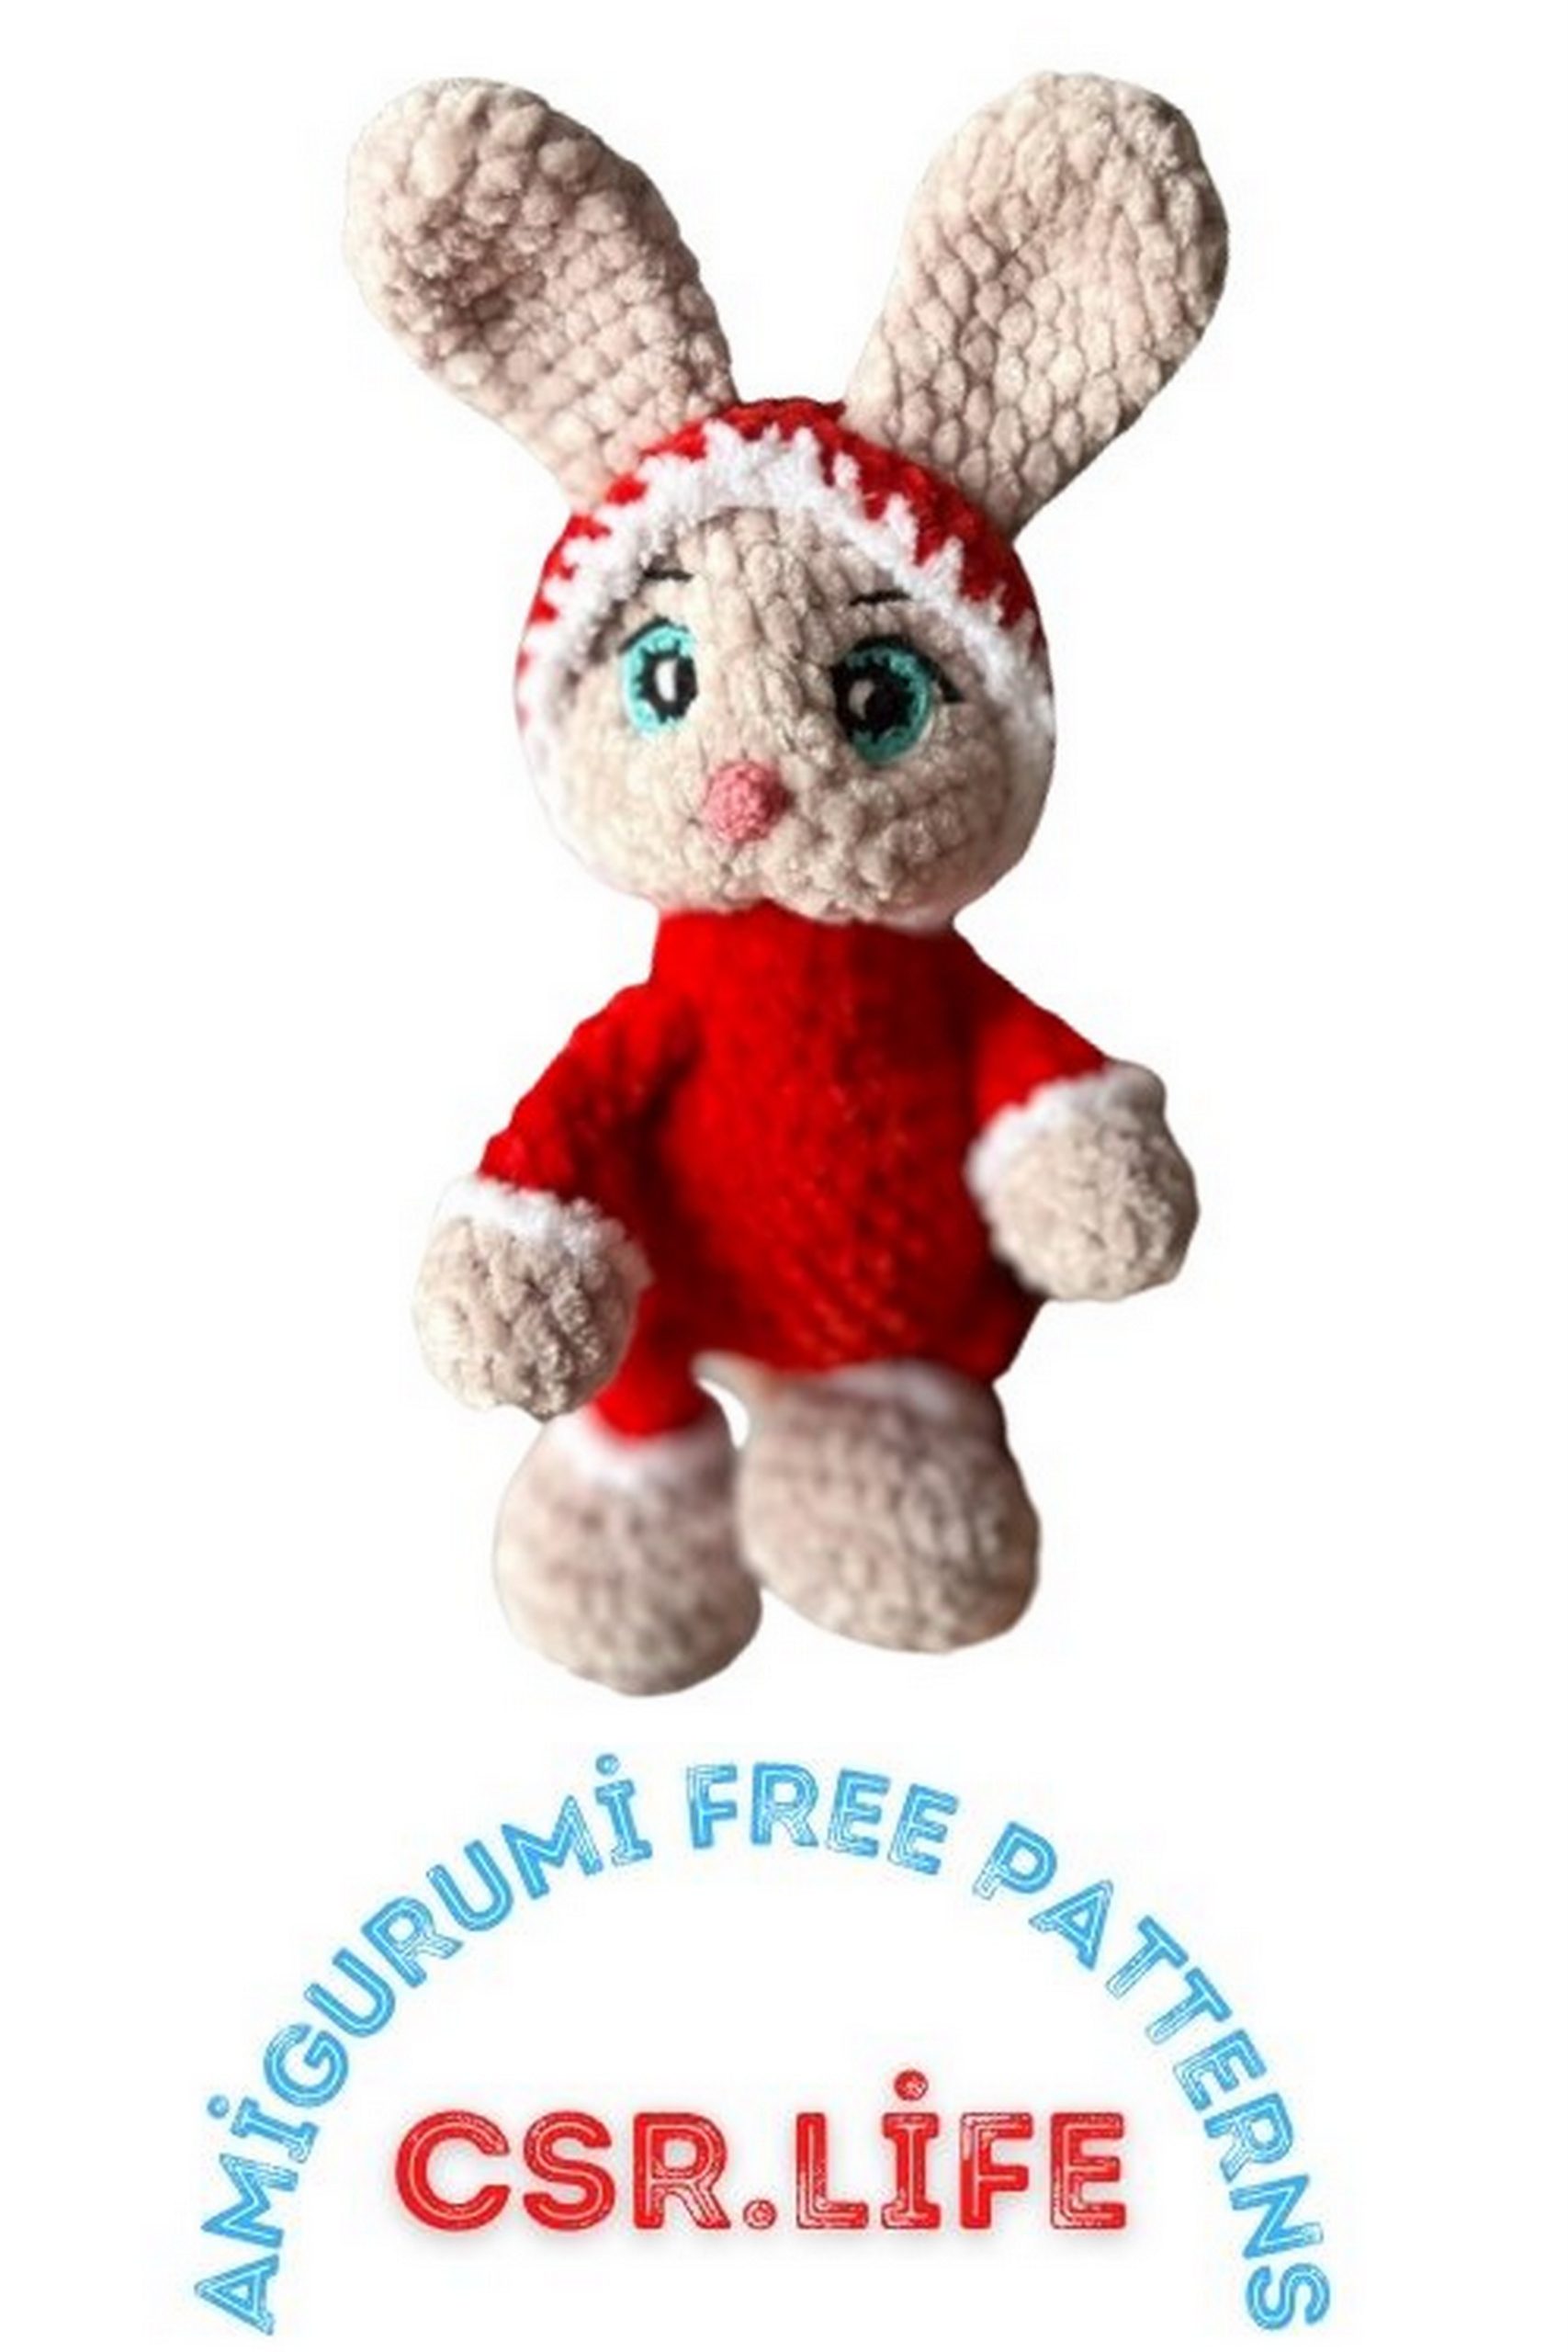
Hood:
1: 6 SC in MR.
2: INC in each stitch around (12).
3: (1 SC, INC) repeat 6 times (18).
4: 1 SC, INC, (2 SC, INC) repeat 5 times, 1 SC (24).
5: (3 SC, INC) repeat 6 times (30).
6: 2 SC, INC, (4 SC, INC) repeat 5 times, 2 SC (36).
7-10: 36 SC (4 rounds).
11: 10 SC, 7 CH, skip 7 stitches from the bottom, SC 2, 7 CH, skip 7 stitches from the bottom, SC to end (36).
12: 36 SC.
13: 2 SC, DEC, (4 SC, DEC) repeat 5 times, 2 SC (30).
Insert the head into the hood, with the cotter pin coming out below, skipping 2 rows of the hood.
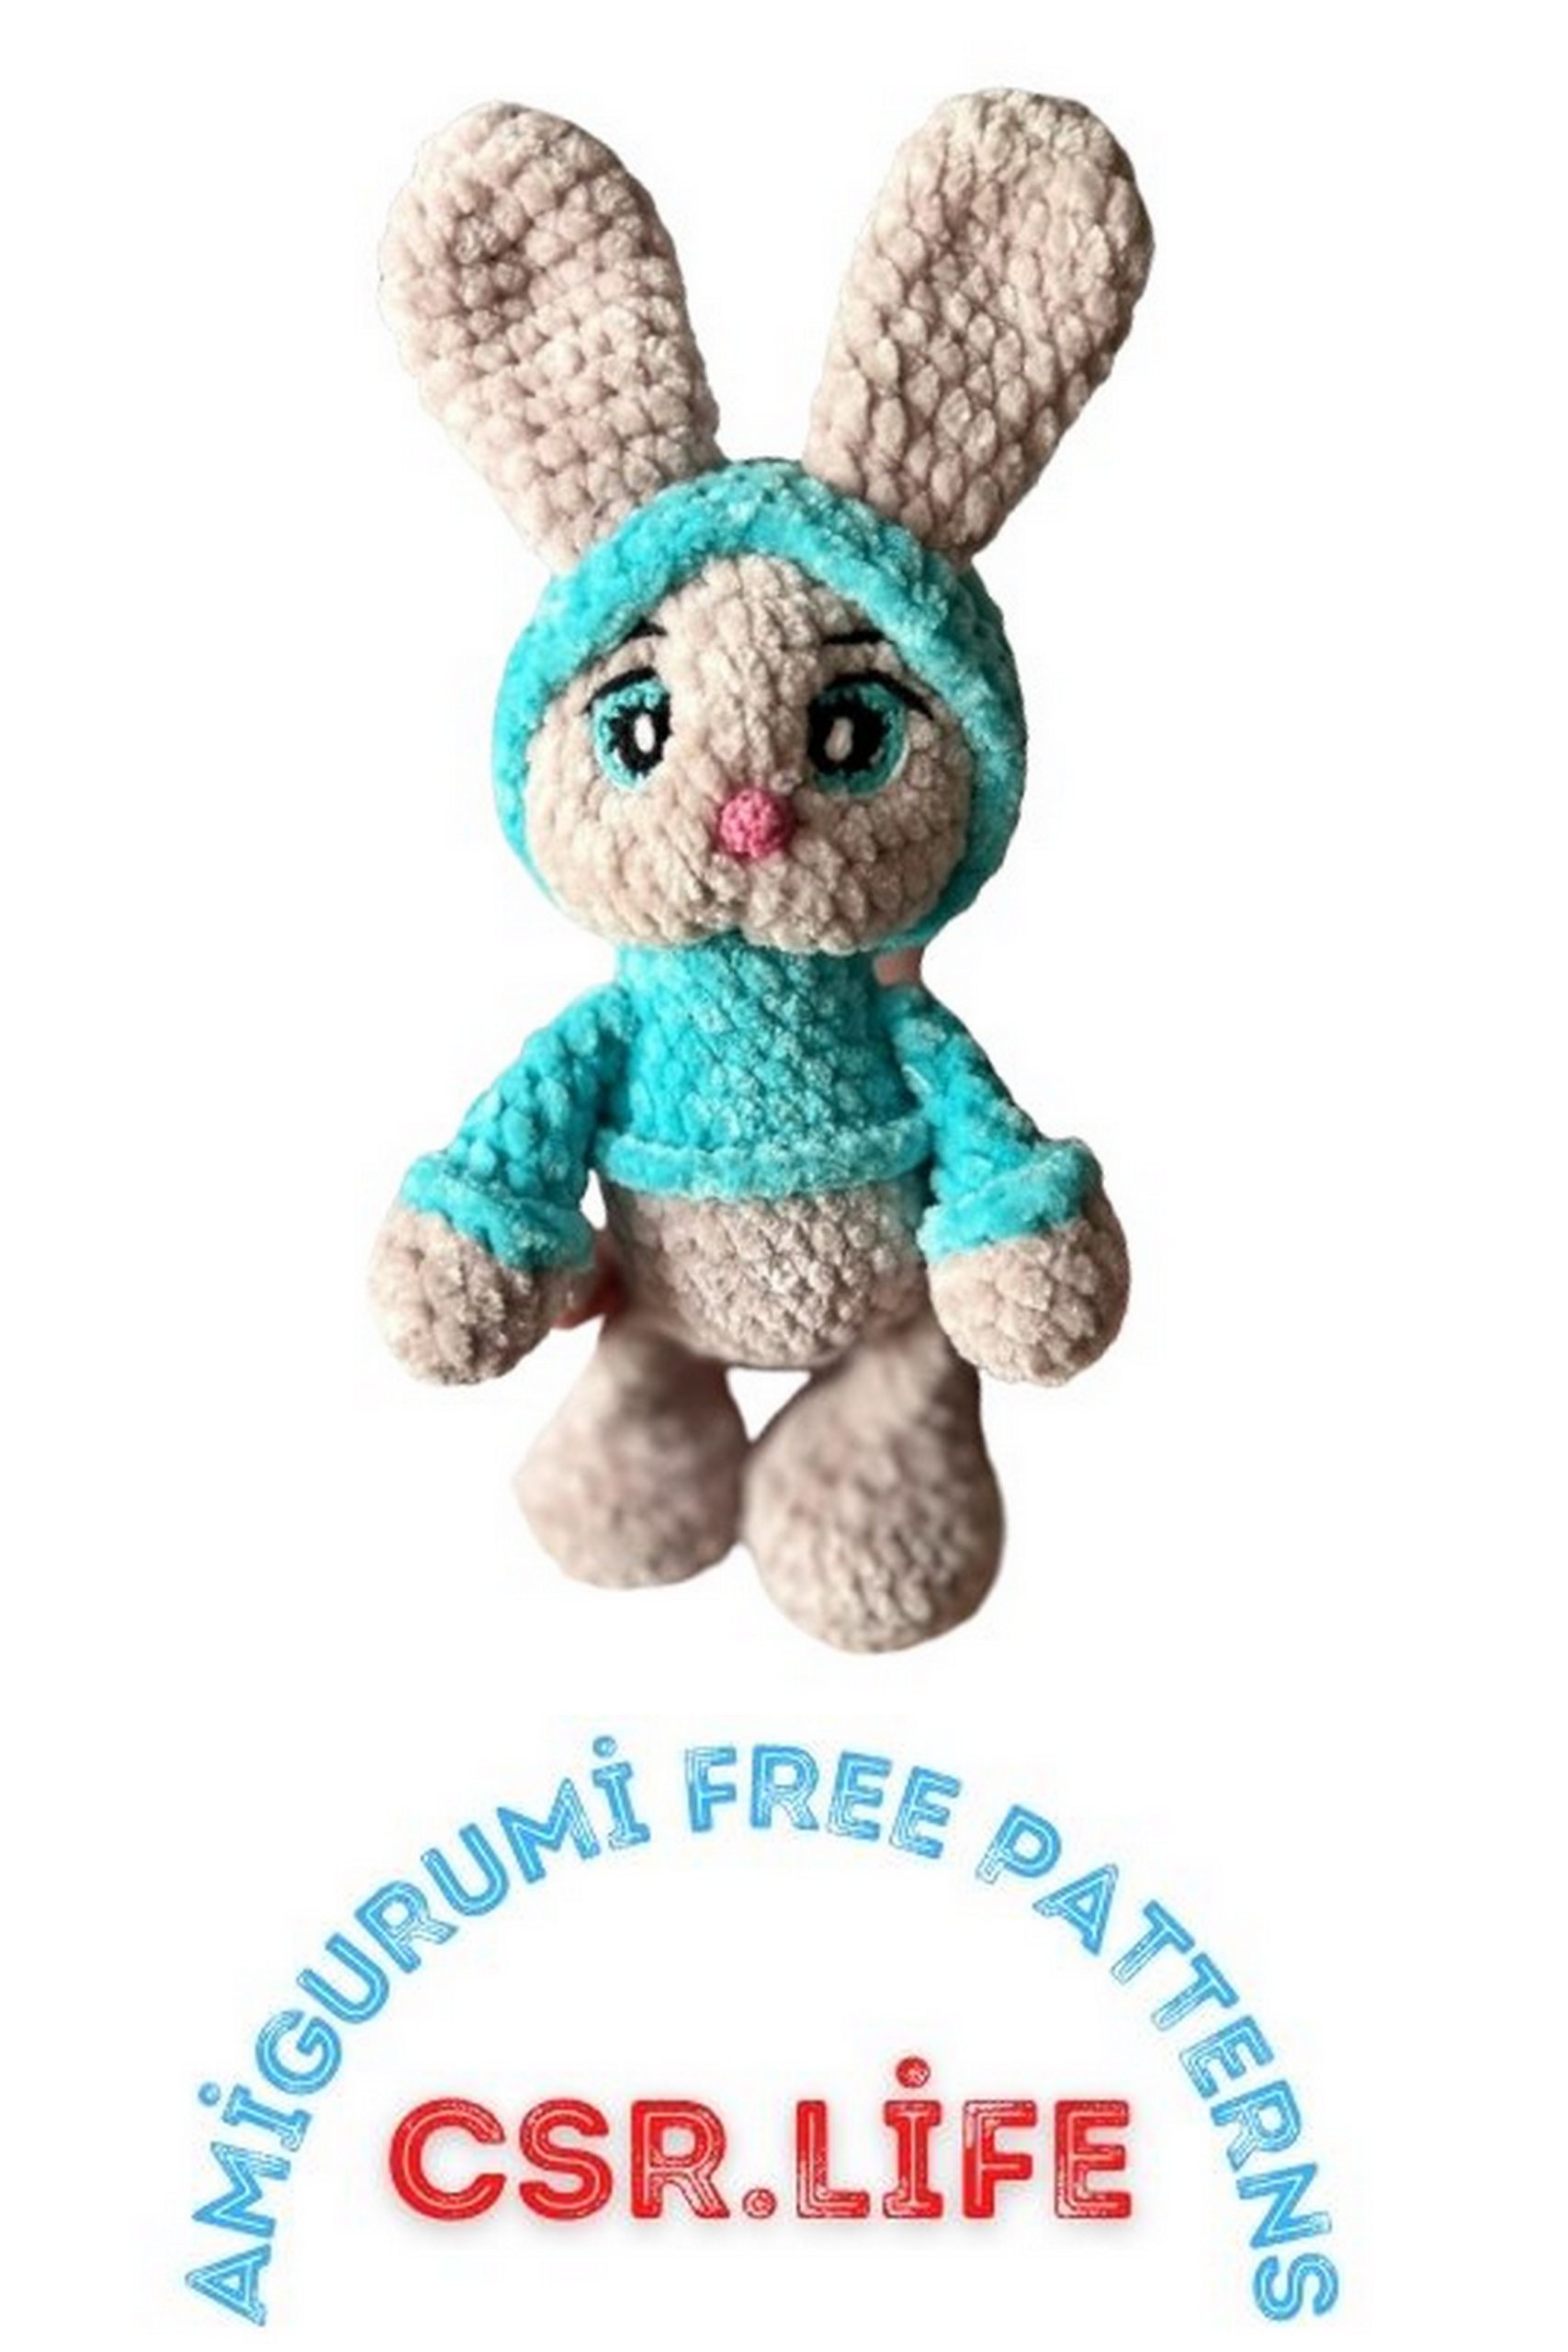
Body:
Begin with additional color.
1: 6 SC in MR.
2: INC in each stitch around (12).
3: (1 SC, INC) repeat 6 times (18).
4-5: 18 SC (2 rounds). Insert the head.
Insert the legs.
6: 3 SC, 3 SC with leg, 6 SC, 3 SC with leg, 3 SC (18).
7: 1 SC, INC, (2 SC, INC) repeat 5 times, 1 SC (24).
8-9: (3 SC, INC) repeat 6 times (30).
If you have a dress or a hoodie, switch yarn colors here. If it’s overalls, continue with the additional color.
10: Work 30 SC in back loops only.
11-12: 30 SC (2 rounds).
13: (3 SC, DEC) repeat 6 times (24).
Stuff.
14: Insert the legs. Work 5 SC, 4 SC with leg,8 SC, 4 SC with leg, 3 SC.
15: 1 SC, DEC, (2 SC, DEC) repeat 5 times, 1 SC (18).
16: (1 SC, DEC) repeat 6 times (12).
17: 6 DEC, cut yarn, pull the hole closed.
For the hoodie, work a round of SC around the intersection of colors.
If it’s a skirt, continue as follows:
Second round: Increase throughout the round.
Third round: Increase throughout the round.
Fourth round: SC as many stitches as you have.
Headband:
Chain 28.
Join to form a circle.
Immediately attach additional color yarn and work 18 stitches, then turn and work increases to the end of the row.
From the piece made with the additional color, create a small rose. Hide and trim any unnecessary threads.